When the Timex Global Trainer was announced earlier this year, most folks were quite excited to see a new entrant into the triathlon watch/device scene. With the watches ANT+ capabilities and full waterproofing it would make ideal training partner for any triathlete, as well as runner or cyclist. And because it was GPS based, it would also work with the myriad of other activities that people like you and I dream up. Finally, it actually looked like a normal Timex watch – a huge plus in many triathletes minds.
I went out and purchased the Timex Ironman GPS Global Trainer (just like any other athlete) in early June and after writing my First Look Review then, I’ve been using it constantly since. During this time I’ve quite simply beat the crap out of it, and picked every little detail apart.
I’m also had the opportunity to sit down with the full Global Trainer development team at Timex, as well as the folks at Training Peaks. During my discussion with them I grilled them for over an hour on everything and anything I could think of, and their answers in turn made there way into this in depth review. As a result, I’m fairly confident that if you have a question about the device…the answer is probably in here. ;)
Lastly, before we get to the grand un-boxing, note that I’m just an athlete like you. I look for the best device for my money, and this review is simply a way to detail out what I think of what I’ve purchased. If you’ve read my in depth reviews before, you’ll know that I’m pretty in depth – perhaps overly so. But that’s just my way of doing things. Think of them more like a reference manual than a simple ‘Should I buy this’ type of review. If you find something that doesn’t quite jive – feel free to let me know and I’ll double-check and get it all sorted out. Thanks again for reading!
Un-boxing/Components:
When you first get the unit, it’ll look something like this:

After you go ahead and unwrap all the components, you’ll be left with the following pile of goodies:

Let me go ahead and label them:

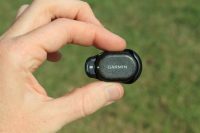
And let’s go step by step through each one. First up, is the watch itself:

Next, we have the USB charging and data sync cable:

Then, we have the USB wall charger adapter, so you can charge using a wall outlet instead. It comes with just the American plug type.


Then, if you bought the package with the heart rate strap, you’ll have that:


Tucked away as a clever piece of packing, is actually the bike mount – which I missed when I first took the initial unboxing pictures, but thankfully didn’t throw away:

And finally, last but not least, is the nifty paper quick start guide:

Size Comparisons:
When the watch was first announced, most (like myself) were pretty excited to see a GPS watch in a semi-normal looking wrist form factor. However, when I finally got a hold of my Global Trainer, I realized that while it looked normal…it was actually just about the same size as all the other large GPS watches out there today.

But…you probably wouldn’t notice that unless you put it next to a normal wrist watch:

Of course – in order to compare it against something in the same class of features and functionality…there’s only one solution: The kitchen rolling pin. This technological advancement has allowed me to easily compare half a dozen GPS watches at a time. And thus – I present my masterpiece:

(Left to right: Garmin Forerunner 110, Garmin Forerunner 405, Garmin Forerunner 305, Garmin Forerunner 310XT, Timex Global Trainer)

As you can see, the Forerunner 310XT and Timex Global Trainer are virtually identical in both thickness, and in size. It’s only when you compare it against less capable GPS watches (such as the Forerunner 110 or Forerunner 405) that you’d notice the larger size.

However, like all GPS watches I use – in general I find that you just simply don’t notice the size beyond the first few seconds of running with it. Yes, it looks funny at first, but realistically, if you want four data fields that are actually human readable, that’s pretty much the size the screen will have to be.
That said – the most common question I usually get regarding size is ‘I have small wrists…’. So I present you with my girlfriend, who at just over 5’, also has small wrists. While we had to ratchet down the strap all the way, it does fit.

Basic Operation/Modes:
Before we get into all the detail on all the different modes, let’s get into a basic primer of the watch. First up – turning it on.
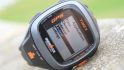
To turn it on, you’ll simply hold down the left center ‘Pwr’ button for a few seconds, which will change it from standby mode (which has the time shown) to full blown sports watch. Once you do that, you’ll be in the default Performance mode:

This is the mode where you’ll do most of your activities. The watch has the following modes:
– Performance Mode (default activity mode)
– Multisport Mode (for triathlons)
– Navigate Mode (to use for basic GPS/compass navigation)
– Review Mode (to review historical data)
– Configure Mode (to change configuration options)
– PC Sync Mode (when you want to download activities & settings to computer)
So with that, let’s get into using the watch…
On the run:
The first activity you’ll probably partake in with the TGT is running, mostly because that’s the easiest to get up and start with. As noted above, after turning on the watch, you’ll be put into ‘Performance’ mode, which is simply a fancy word for ‘Go mode’.
Performance mode is one of a number of the modes I listed earlier that the TGT uses, and is the primary mode that you’ll use for most training and racing activities (save for multisport mode). Performance mode has five screens (called views) that you can customize with up to four data fields you’d like to display – such as ‘Time’, ‘Distance’, ‘Speed’, etc… I’ll talk more about that later on in the software configuration piece.
But first…let’s get running. Assuming you’ve powered the watch on, and satellites have been acquired, simply press the big button on the bottom to start.

Now that we’ve started the watch – we should start running too.

As you run you’ll notice that the screens continuously update with the information you’ve selected. You’ll see the pace fluctuate gradually while you run, though much less pronounced than on many other GPS watches. The folks at Timex have brilliantly put a smoothing factor in the run paces of about 5-7 seconds averaging, which removes much of the highly erratic paces folks sometimes see with GPS watches, by simply averaging the pace over the last 5-7 seconds.
You can switch to any of the other screens (views) that you’ve defined if you want to see other information. You’re able to configure up to four pieces of information per screen (though you can have less and make the size larger like below). To rotate through the screens, simply press the up/down buttons on the left side.

The side buttons are pretty sensitive, and as such, I find it useful in certain situations to lock them (such as if you were wearing a heavy jacket in the winter, or if you just tend to bump into stuff). To lock the buttons, just hold down the Enter key for a few seconds, and the screen will lock. Do the same again, to unlock.

Probably the most common item that folks want to know is how fast they just ran that ‘last mile’ (or ‘last kilometer’ for all you non-US folk). You can of course just do the simple math via distance divided by time…but it’s much easier if you use Auto-Split. This feature will automatically demark a lap at any interval you choose. For example, every 1 mile, or even every 1.87 miles (seriously, anything).

On top of that, you can also auto-split at any time interval as well. This is useful if you’re doing workouts based on time sets (such as 5 minutes easy, 5 minute shard). You can change the auto-lap settings directly on the watch (like above), or also using the Training Peaks software (like below).

While running, once a lap has been triggered, it will automatically display summary information for that lap, such as heart rate, pace and speed.

Laps are a useful way to record smaller groups of information, as they then show up within Training Peaks online, allowing you to analyze just that lap – as well as the run/ride in whole. I use laps to break apart my workouts, for example, if I’m doing a 10 minute warm up first, I’ll press lap at the end of that, and then again at the end of me next set. This allows me to easily analyze the important parts of the workout, without having warm-up (or cool-down) data skew the results.
Another popular feature is the ability to create alerts. Alerts are different from laps in that they don’t actually demark anything in your activity file. Instead, they simply alert you to information while using the device. Basically, it’s like someone screaming a reminder at you.
You can configure alerts for many different areas, such as Distance, Heart Rate, Power, Speed/Pace, Cadence, and Altitude. Though interestingly missing is ‘time’. For example, the ability to create a recurring time alert every 10 minutes reminding you to drink water.
That said, I use alerts quite a bit during races – to help me focus on staying within a given heart rate or power zone. By using this same functionality on the Timex Global Trainer, I can be reminded if I stray out of zone – helping me to better pace a race. Alerts can be both visual, as well as audible. There are no vibrating alerts in the Timex Global Trainer. When I asked the engineering team why – they explained it helped to keep the cost down, and thus one of the reasons why it’s $50 cheaper than its primary competitor.

You can configure alerts both on the watch, as well as within the software. Trust me, it’s a heck of a lot easier to do in the software:

The watch itself is super-easy to handle while running. Unlike some running watches where you have to press really hard to get the buttons to press (or have to use a touch-bezel), the TGT buttons easily depress. This won’t be a hard watch to operate once winter rolls around and you have thick gloves on.
Also, the watch is water-proof, so it’s resistant to sweat – and I find it’s super easy to wipe any sweat off the display if you sweat like a sprinkler system. I’ll talk more about waterproofing in the swim section though.
Finally, I want to cover the ‘Performance Pacer’ functionality – which is similar to what the competition calls their ‘Virtual Partner’. The Performance Pacer functionality allows you to set a defined target distance and time, and it’ll automatically help pace you during that effort. Think of it as having a computerized friend. It’ll tell you how far ahead/behind you are on that goal. This is great for races where you want to hit an exact time, but don’t want to go out too hard (or too slow).
You configure the feature via the watch or the software:

So, with running out of the the way…let’s get onto the bike.
On the bike:
The Timex Global Trainer includes a bike mount, so the first think you’ll want to decide is whether or not to wear the watch on your wrist, or use the included bike mount:

Once you make that decision – it’s time to get it (or you) on the bike. The watch simply wraps around the mount, which in turn wraps around your handlebar:

If you have a tri-bike (aka Time Trial bike), then you’ll need to decide where exactly you want to put it. On my bike, it only fit on the side of the aeropads. Functional, yes. Ideal, no. Ideally they would have included some sort of quick-mount system so I could put it wherever I’d like (such as up on the bars). Nonetheless, here ya go:


Ok, so with all the mountage out of the way, let’s get to using the device. Like run mode, you can customize any of the give views to be bike-specific. In fact, there’s nothing stopping you from making five bike views if all you want to do is bike.
Specific to the bike views are fields such as cadence, power, and speed (instead of pace).

Once you get started on the bike, you can change views just as you would with running, by pressing the up/down buttons. This is probably a good point to mention that the TGT doesn’t have a specific ‘Bike mode’, or ‘Run mode’, but rather just ‘Performance mode’ – and everything you view data wise is just controlled by the display views you’re using at that time.


If you have an ANT+ speed/cadence sensor, you’re able to scan for those ANT+ sensors and add the data being streamed from them. The ANT+ speed/cadence sensors allow you to pickup cadence – how many times per minute you rotate the crank (where your pedal attaches), and the speed portion of the sensor allows you to get speed while indoors on a bike trainer, or if in a location where satellite coverage is spotty. Also, some folks explicitly use the speed sensor to get a very exact speed (since it’s simply wheel circumference calculations).

Regardless of why you use the sensor, to configure it, you’ll switch over to Configure Mode, via the mode button, and then scroll down to sensors.

From there you’ll tell it to scan for the sensor type you have. Note that Timex has only in the last few days made the Timex Speed/Cadence sensor available and only via calling customer service. For most everyone else out there, you’ll probably be using any ANT+ compliant sensor, and most likely just using the Garmin GSC-10 speed/cadence sensor (sorta the mainstay of cyclists everywhere). This $35 speed/cadence accessory is money well spent, and it’s what I use on all my bikes. Since Timex didn’t have the speed/cadence sensor available yet, I’m using the GSC-10 instead in this review.

Once paired, you’ll see the sensor display cadence information on the screen using the data fields I’ve chosen.
We’ll talk about some of the other ANT+ sensor types in a moment, specifically, power meters.
But first, let’s cover auto-resume.
I’m sure you know the feeling of city riding where you’re constantly pressing stop or start as you hit stop lights…only to realize about 2 miles later that you forgot to hit resume/start at one of the lights.
Well, auto-resume is here to solve that. This feature allows you to configure a trigger speed where if you go below it, it will automatically pause the watch. And once you go above that speed, it will automatically resume it.
You can configure this view on the watch itself, or via the software settings.

Once configured and you’ve started your ride it’ll automatically pause and resume when you cross the threshold. Note that this function works not only in cycling, but also running (or anything else you happen to use the watch for).
The watch also supports the ability to show ascent/descent using the GPS-based altimeter that’s included within it. You can configure these settings on the watch or via the software, and display them in your data fields.
Finally, you can customize up to five bikes on your Global Trainer. Each bike includes separate weights, as well as wheel sizes (used to compute distance indoors), and also can have unique names:

With the basics on the bike set – let’s get onto more advanced topics – like Power Meter support.
Power Meter Support:
The Timex Global Trainer includes basic power meter support for ANT+ power meters. If you’re unfamiliar with Power Meters, I’d suggest checking out my Power Meter Primer Post. In short, power meters measure how much energy or effort you’re putting into your bike ride. Unlike metrics pace or speed, which can vary based on terrain – power is an absolute. Many competitive cyclists and triathletes use power to help pace based on a known threshold.
The Timex Global Trainer supports any ANT+ Power Meter, such as the PowerTap, Quarq Cinqo or SRM.

To pair the power meter, you’ll go back into the same menu system that you configured the speed/cadence sensors within:

Once the power meter is scanned, it will automatically display the power information on your Global Trainer.
The Global Trainer displays four power related fields: Power, Power (Avg), Power (Peak), and Power (Zone). Power is the current power, albeit slightly smoothed at about 6-8s. This makes it a bit easier to pace by power. Power (Avg) is actually Lap Average Power, and not ride average power. This topic came up during my call with the engineering team, where I was a bit confused as to why average wasn’t correctly correlating with my average. Once they explained that anywhere the watch says ‘avg’, it actually means ‘Lap avg’, then things made sense. Though, I still maintained they should simply say ‘Lap avg’.
The one piece of functionality that advanced users will note is missing is the ability to calibrate their power meter from the Global Trainer. When I asked why, the engineering team explained that they felt it was a slippery slope of having potentially having customers believe a given calibration issue lie in Timex’s camp to resolve, versus the manufacturer. I’d point out that that doesn’t seem to stop any other head unit (actually, all of them), from offering calibration options. I’d also point out that without said calibration option, it effectively renders the power meter functionality unreliable, as power meter calibration easily fluctuates with something as simple as bringing it outside or indoors.
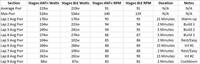
Finally, I asked about recording interval. If you look at the Timex Global Trainer files today, you’ll notice that they record at 2-second intervals (listed under Timeoffset, 3rd column from right):

However, the default/gold standard for any power meter device is 1-second intervals, which is due to the amount of data lost if you use any higher interval, which in turn creates incorrect numbers for functions like normalized power. To understand all the implications, read this post by the godfather of power meter analysis (may require joining Wattage Google Group), thus here’s the snippet from Dr. Coggan himself.

The Timex folks responded by saying the limiter to 1s recording was storage space on the unit, which was roughly 20-hours with 2s recording, and thus with 1s recording wouldn’t be enough to finish an Ironman. This is unfortunate, though not a huge deal killer as you can see above.
On the bright side, during my engineering call, they noted that they are currently planning on adding something akin to TSS to the device, which will be useful.
On the swim:
The Timex Global Trainer is fully waterproofed to 50 meters. And while I didn’t have any scuba trips planned, I instead went to the bottom of the pool and validated it didn’t die. It didn’t (nor did I). Though, I’d suggest that you not routinely go to the bottom of the deep end in races, as it probably won’t help your time any.

The Global Trainer will record your time information, but if worn on your wrist, will not record your distance during the swim. This is because like virtually all other GPS devices on the market today, the GPS signal will drop out about 2” below the surface. As such, it makes tracking rather difficult.

Of course, you might point out that there’s time during the stroke recovery that the watch is above the surface. But, the accuracy of those data points is in question, as the watch hasn’t yet re-established, thus no track points are made. Unlike the Garmin 310XT, Timex has not yet introduced any form of openwater swim mode (which was just recently added in June for the 310XT), though Timex notes they are evaluating their options.
Also note that because it uses 2.4Ghz ANT+ signals between the heart rate strap and the watch, those too don’t work underwater (just like all Garmin Fitness units), only the Polar T-31 coded straps with Polar units will work underwater. You lose HR signal on the Global Trainer less than 1” away from the HR strap, roughly in line with the Garmin units.

Now, there’s no reason why you still can’t get swim data…if you simply put it in your swim cap. This is what I do to get good distance data about my swims, and it works great. Just see my detailed post on where to position it.

Once there, simply hit the start button (big and easy to find), and then be sure to lock the watch (via the enter button for a few seconds). This will ensure that the cap won’t start pressing buttons. After which, just swim.
When back on dry land, you’ll find the Global Trainer will make some very nice pretty pictures:

And finally, as a sport watch or timer, it works just fine too in the water, so you can use it to record splits if need be in any wet environment. Also, one positive aspect to having no quick release system, is there is no fear at all that the watch will fall off. Once strapped to your wrist, the single-molded-unit is not going to go anywhere.

Multi-sport mode:
Multisport mode is utilized when you want to string a series of sports together – such as in a triathlon, where you start in the swim, and then move to bike and run. This enables you to record each sport individually, but without having to actually stop and reset the watch in between each sport.

To get into multisport mode, simply press mode until you see Multisport mode. It’s easiest to setup multisport mode though via the Computer, which allows you to configure the different views up front, as well as how exactly you want to parse the different activities:

Once in multisport mode, you utilize the Stop button to advance to the next sport. This is actually really cool, as it allows you to still utilize the Lap button if you want to mark laps – something the 310XT doesn’t allow.
Once in multisport mode and actually…well..sporting, it will show you the title of the sport on the upper portion of the screen.
After the workout, it’ll automatically splice the three different sports apart (if you choose that way), and display them individually in Training Peaks.
The only challenge with multisport mode is that physically speaking, the watch isn’t designed to easily transition from sport to sport. Because there is no quick release kit, you have to actually wrap the watch around the bike in transition (or while riding), just like you would around your wrist. Just something to be aware of. If you plan to wear it on your wrist the entire event, than this isn’t an issue of course.

Review Mode:
Review mode enables you to look back at your history holistically, as well as on a per activity basis.

You can drill down into each individual activity you’ve completed, and get a lap summary, as well as a ride summary:

Even cooler is that you can then go through four pages of summary and average information about either each lap/split – or each activity.


Pretty cool on-device historical information, especially if you’ve just finished a ride or run and want to know how things went.
Navigation mode:
Navigation mode allows you to utilize the Global Trainer for basic navigational functions. I say ‘basic’, because this isn’t your little car-based Tom-Tom here. This is pretty much just a digital compass, with a memory on where you’ve been, and where you should be going…all done via Etcha-a-sketch style (like all other competitor devices I should point out).

What is cool is that you can drill down into the map view to see exactly where you’ve been:

And if you’re really lost you can break out the digital compass as well:

You can also use the ‘Back track’ functionality to retrace your steps back to the start. And, if you set given waypoints, you can have the device get you back to those as well.

The Global Trainer also supports the ability to create courses using a string of GPS coordinates, but it’s honestly a bit of a pain in the butt to do right now…so I’d wait for that function to get refined a bit more.
Indoors:
When training indoors with the Timex Global Trainer, I’d recommend turning the satellite off. You can do this via the configure menu.
The reason for this is that while the default Training Peaks software easily handles the fact that you’re actually stationary, some 3rd party suites don’t. This means that while you may be using a speed sensor on a trainer, your actual GPS speed is still zero – and thus some 3rd party software will incorrectly parse it.
That said, the Global Trainer works great while on a trainer and indoors. There were some earlier kinks that caused me some data issues in the First Look Review, but those have been resolved with new software updates.
I use the TGT indoors when on a trainer, and combined with the ANT+ speed/cadence sensor, it’ll automatically tell me my distance, speed and cadence.

Note though that the Global Trainer does NOT support a running footpod – nor any of the ANT+ foot pods available today. When I asked why (given this is a pretty big item for the winter, or just folks wanting to track running cadence like myself), they explained that when the project first started there were some legal issues with accessing the footpod data stream, and those were only resolved recently. Unfortunately they were resolved after launch, and thus the following:
“At the time the Global Trainer development began, there were licensing issues that prohibited the use of the foot pod by Timex. In the last two years, those issues have been resolved, but we could not change the scope of the GT’s sensor capability for launch.”
I still don’t have a good concrete answer as to whether or not this means it’ll never support the sensors. I’ve traded a bunch of e-mails on the topic with them, and at the moment they’re saying they don’t plan to support foot pods going forward. Personally, if they don’t have this on the radar to support, this a deal-killer for me and treadmill running.
 (Here’s an ANT+ foot pod sensor)
Given the entire point of ANT+ sensors is the ability to pickup data types exactly like this, this seems like a pretty big ‘oops’.
Night Use:
The watch includes a basic backlight, the same Indiglo backlight found on all other Timex branded watches. While I understand this is the staple of Timex’s watch lineup, it’s also nowhere near as crisp or clear as many of the device high contrast backlights found in other GPS watches today:

Thus, I’d recommend they look at either ‘refreshing’ the Indiglo…or ditching it.
Using it for other things:
Of course, because it’s a GPS device, it can pretty much record anything, and therefore you can use it for just about everything. Making it even better is that it’s a simple wrist watch (though slightly large), and completely waterproof.
But sometimes, it is just as simple taking it for a hike, or a wander around the block. The Global Trainer will happily create maps and routes showing how long, how fast, and how far – as well as wear.
But…it’s always more fun if you go somewhere far away. Take for example, a few recent flights I did. In this case, I let it stay on and just record my flight path:

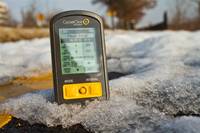
Pretty cool, ehh? And, on the unit itself, you’ll see the actual speed:

Of course, you’re imagination at activities is really the limiter here. In the past, I’ve used GPS devices for Kayaking in the South Pacific, trekking across Egypt, and wandering through Africa.
Battery Life & GPS Reception:
Two areas that have been heavily commented on since my initial First Look review were battery life, and GPS satellite reception.
First up – battery life. Getting a clear handle on battery life is an incredibly complex subject. Why? Well, everything from how many sensors are feeding data into the watch, to how much data is being recorded, to how long it’s been on. Finally, unless you go out and do a 15-hour activity, you’re likely downloading data in between, thus resulting in at a minimum a small charge.
In my testing I found that the battery charging indicator itself was very inconsistent. Meaning, one second it would tell me it was at 20%, and then I charge it for 5-10 seconds and now it’s at 40%. I also found that when using a USB charger, it would never go beyond 90%, whereas with a wall charge it would go to 100%.
Also, the watch supports two ‘standby’ modes, one which displays time – and one which displays nothing. I generally kept it on display time, because it also displayed battery status.
However, I could never got a solid handle on battery. Even when I thought it was fully charged, I had it die out on some flights that were just 5 hours. Yet other times, I was able to leave it recording significantly longer. I’ve been told that the latest firmware about to be released does include some corrections to the battery meter, so I’ll update this section once I get more detail on that.
Next – Satellite reception and dropouts. In my initial review, both myself and many others commented on continued satellite reception issues such as inability to get an initial lock on satellites, as well as dropouts during the middle of an activity.

Given the GPS chip in the Timex Global Trainer is the exact same GPS chip as in the Forerunner 310XT – I was curious why the huge difference in reception. I asked Timex where the chip is located, and they noted directly below the split/start button – which seems like a good location.
I went back to the engineering team on these issues and over the last week they sent over an updated firmware file for the watch, which, based on all my testing thus far – seems to have completely resolved my satellite lock/reception issues. The satellites lock almost instantly upon turning it on, and they stay locked for my entire activity.
I’ve been told by Timex this updated firmware will be released within the next 3 weeks.
Finally, one last item that continues to be ‘interesting’ is that the Timex Global Trainer seems to be registering about 2.5% ‘short’ for all activities I do, in comparison to the Garmin. I don’t have a good explanation here – but it’s happening for a number of folks, and in both my case, and theirs, it’s occurring on well measured courses/routes. As a result, this means that my paces/speeds are actually reporting slower than they really are, which is sorta a bummer.
Timex Engineering doesn’t really have a good answer here yet on this one. They’ve noted that this is within the ‘acceptable range’ of GPS accuracy – which is indeed true. But what doesn’t quite jive is how precise it is on every activity I get with being 2.5% short. Typical GPS inaccuracies would see some activities long, some short, and by varying amounts. 2.5% is too ‘computerized’ a number to be just due to occasional drift. Hopefully, like the other earlier satellite issues – they’ll work this one out too.
Accessories:
The Timex Global Trainer doesn’t have a wide number of accessories developed by Timex itself for it. However, because it’s part of the ANT+ ecosystem, there are tons of 3rd party accessories – some ironically enough developed by it’s primary competitor: Garmin.
Timex ANT+ Speed/Cadence Sensor:
As of this writing, this speed/cadence sensor wasn’t available. It’s apparently just come out in the past few days, and can be bought via customer service for $59.95. Sorry, I don’t have any further information on it at this time, but I’ve been told it should start trickling out into the normal retail channel over the coming weeks.
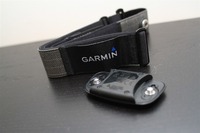
Timex ANT+ Heart Rate Strap:
Depending on which bundle you’ve selected, the package will either come with a heart rate strap – or it will require separate purchase. No worries though, any of the numerous ANT+ heart rate straps on the market today work just fine with the Timex Global Trainer. Or, you can pickup the Timex branded one (which is identical to others).

This is in theory available from Timex Customer Service also, for $50.
ANT+ Speed/Cadence Sensor:
You can instead (or in the meantime) pickup the standard Garmin GSC-10 Speed/Cadence sensor, which works just fine with it, and is what I used with the bike and Global Trainer.

Instead of costing $60, this is available on Amazon for $35…a much better deal in my opinion.
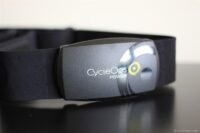
ANT+ Heart Rate Strap:
In addition to the Timex ANT+ heart rate strap, you can also pickup cheaper variants from Garmin.

The two pictured above are the soft-strap (upper) and classic heart rate straps (lower), available for $40 and $60 from Amazon respectively.
ANT+ Power Meter:
Lastly, for serious cyclists/triathletes, you can purchase an ANT+ power meter from any one of the different power meter vendors out there today, they are:
Software:
The Timex Global Trainer leverages Training Peaks as the core backbone of the analysis software. This is split into two key different components:
– The device agent installed on your PC
– The website based on Training Peaks
First up though is signing up for an account. This is completely free, and allows you upload data from your watch to a site for both storage and analysis. Sign-up only takes a second and is easy and painless.

Once signed up, you’ll go ahead and install the device agent. At the moment, it’s only available for PC – but the folks at Training Peaks are very close to getting a version for the Mac as well. I’m told by the September launch it should be there for general consumption.

Once you’ve got the device agent installed, it’s time to get syncing…
Uploading/Syncing Data (device agent):
In order to get data to/from the watch, you’ll need to press mode and change it to PC Sync mode:

From there, the watch is ready to both receive and transmit data. So, we’ll want to open the device agent:

At this point, you need only to select ‘Download from device’ in order to start the sync process. Once it’s completed downloading the files, it’ll automatically list each activity in the list below:

Note that it doesn’t erase the files from the device unless you press the erase button. This is important because if you fill up the watch (about 20 hours worth of data), then you may get into a situation where you can’t record a new activity. Though, you can always delete data while on the watch itself in review mode.
The last step is selecting to ‘Save’ the files to the Training Peaks website, which uploads them to your Training Peaks account. Note that if you already have a Training Peaks account (like I do), you can simply select which account you want from the dropdown, and upload to that account.
Also, it’s from the device agent where you can drill into and change any of the settings pages I’ve discussed throughout the review. I’ve covered many of them earlier in the post, but for those that I didn’t cover, I’ve created a gallery with every single settings page screenshoted – which you can view here, separated out by tabs and pages in order:

Now that we’ve got the data in Training Peaks, let’s dig into that a bit:
Training Peaks Overview
Training Peaks has long been the standard for online management of sports activity files, in particular, for cycling and running. Over the past few years they’ve expanded out the number of sports, devices and baseline fitness functions they support. Thus, when you look at all the options Timex had, leveraging an existing company to provide the underpinnings of the services not only makes a lot of sense for them, but also for us users as well.
Finally, Training Peaks is a great way to collaborate with a coach or team. This is the primary mechanism I use to upload and receive feedback on workouts that I complete, to my coach.
I’ll walk through each of the main TrainingPeaks.com areas that you’re likely to use. First up, is the Dashboard. The Dashboard is where you monitor and manage your day to day existence in Training Peaks. You can customize any of the different ‘pods’, to best fit what you want to see when you login:

The only slight bummer here is that many of the cooler pods are only available in the Premium version, which has a cost associated with it. For example, I normally use the Premium version – and you can see the pretty big difference:
")
Next up is the calendar tab. This is the area I actually use most, as it helps me to track all the workouts I complete. I can customize how each workout appears in the calendar. Below it the default view:

And here’s the view I use in my primary Training Peaks account that I’ve had for years:

Now we’ll drill into a given activity, such as a recent bike ride I had. As you can see, on the main page I have information that’s summary in nature, with the again customizable pods to easily change and breakout information dependent on what I want to see:

Next, if you click on the Maps and Graphs area, you can see a map of the activity, as well as a graph of my actual workout with the different ANT+ data streams charted (Power, Cadence, Heart Rate and then GPS provided Speed/Distance/Elevation). Also, you’re able to hide any metrics you’d like along the top bar:

Now, Training Peaks uses MayQuest maps by default…which..aren’t necessarily the best out on there whole wide internets. So they’ve handily provided the ability to simply view your track in Google Maps as well via a quick dropdown menu:


Finally – my favorite feature in Training Peaks is the ability to see ‘Bests’ divided up by different time chunks. For example, my best power output, or my best pace:

But Training Peaks isn’t just about looking at any given activity – it’s also about analyzing how you as an individual may be fairing. For example, via the Withings WiFi Scale I can automatically import weight measurements straight into Training Peaks. You can also modify these values, along with the others in the box below, manually.

Also, I can go ahead manage a daily food log with a pretty big database of foods, occasionally I do this if I want to lose a few pounds…

Recently (just last week) they added TSS/IF and PMC functionality. TSS is Training Stress Score, and is a way to visualize and manage your training load, and is a great way to try and nail the perfect taper before a big race. You can read in depth about these functions here. Though this isn’t available in the free Timex version, you can see some of the options available in the subscription Training Peaks version.


Finally, some folks will note that Training Peaks is freely accessible to any user – without buying a Global Trainer – and that’s absolutely correct. In fact, there are two levels of Training Peaks access. The first is the free level, which includes basic functionality. And the second level is the Premium version, which includes advanced functionality primarily targeted at more advanced users. Here’s a little chart showing the differences. The Timex variant fits in the middle a bit, which contains specific enhancements not available in the basic version.
Also, note that if you already have a Training Peaks account, you can just download the updated device agent software and link it to your existing Training Peaks account – which is what I do for my day to day training log. Works great!
And same goes if you have other training devices from other vendors – they all seamlessly integrate into TP. For me, it’s my one-stop-shop training log.
If you’d like to look around at exactly what’s offered – I’ve shared a few workouts from within Training Peaks for you to play with. Which…reminds me – that’s yet another cool feature of TP – the ability to share workouts!
Here’s how you can share them across a variety of mediums:

Updating the Firmware
Through the Training Peaks device agent software, you can fairly easily update the firmware on the Timex Global Trainer. This is important as new updates come out and you want to get either new functionality, or bug fixes for the TGT.


The whole firmware update process only takes a minute or two at most, and best of all – you can export and save all of your configuration settings, so you’ll be quickly back up and running – something that Garmin doesn’t provide for with their watches during some firmware updates.
3rd Party Software:
At this time, there are no 3rd parties that support the Timex Global Trainer. The good news though is that the Timex Global Trainer creates simple XML-based files within the Training Peaks folder structure, which could easily be parsed by 3rd parties:

For fun though, here’s a quick look inside the file structure:

I’ve talked with the founder and lead developer of Sport Tracks and he’s looking into what it will take to add Global Trainer support to Sport Tracks 3.0 (which is just entering beta). If you’re interested in having Global Trainer support, please let him/them know via their forums.
Summary:
In summary, I think the Timex Global Trainer is a great new entrant to the market. Even though the product is a first generation device for Timex, I think they’ve hit the mark in almost every category. Based on my in depth discussions with the development/engineering team – I think they understand the areas they need to address – and can largely do so with simple firmware updates. Between the Timex team and the Training Peaks team they are one of the most receptive athletic watch companies I’ve talked about new features with.
Further, based on the private firmware updates I was provided over the previous weekend, I think they are indeed making good on fixing some of the issues that were outstanding, and those updates should be making their way to your hot little hands in the next three weeks – just in time for the full retail availability launch in September.
Here’s a quick breakdown of what I see as the Pro’s and Con’s of the Global Trainer are:
Things I like:
– Highly customizable, everything is tweakable…everything.
– Leverages TrainingPeaks.com as data repository
– Ability to export/import all settings to a simple savable file on your computer
– Fully waterproof to 50 meters
– Multisport mode allows one to still utilize ‘Lap’ functionality (small, I know, but really nice!)
– Smoothing of run paces helps to minimize typical GPS speed fluctuations
– Same form and size as all other multisport GPS watches
– Only one unit – no separate GPS dongle/attachment required
Things that could use some improvement:
– No footpod support is a huge bummer for treadmill users
– Lack of power meter calibration makes it less than ideal for power meter users
– Backlight isn’t as bright as most competitors
– Some of the user interface could be smoothed out a bit
Below is a dynamic comparison chart with details compared against other units in the same category. Note that you can customize your own comparison chart against any unit I’ve reviewed using the “Comparison Calculator” on the right sidebar. Remember to click ‘expand results’ at the bottom to see all the data rows.
| Function/Feature | Timex Global Trainer | Polar Ignite 3 | Garmin Forerunner 55 | Polar Ignite 2 | Polar Unite | |
|---|---|---|---|---|---|---|
| Copyright DC Rainmaker - Updated November 23rd, 2025 @ 5:49 pm New Window | ||||||
| Price | $150.00 | $329 | $199 | $229 | $149 | |
| Product Announcement Date | JAN 25, 2010 | Nov 8th, 2022 | June 2nd, 2021 | Mar 24th, 2021 | June 30th, 2020 | |
| Actual Availability/Shipping Date | JUN 23, 2010 | Nov 8th, 2022 | June 2nd, 2021 | Mar 2021 | July 2020 | |
| Display Type | AMOLED | |||||
| GPS Recording Functionality | Yes | Yes | Yes | Yes | Only via Phone Connected GPS | |
| Data Transfer | USB | USB, BLUETOOTH SMART | USB, Bluetooth Smart | USB, BLUETOOTH SMART | USB, BLUETOOTH SMART | |
| Waterproofing | 50 Meters | Yes - 30m | 50 meters | Yes - 30m | Yes - 30m | |
| Dive/Snorkel Feature | No | |||||
| Battery Life (GPS) | 15 hours | Up to 30 hours | 20 hours | Up to 20 hours | Up to 50hrs with phone GPS (4 days standby) | |
| Solar Charging | No | |||||
| Recording Interval | 2-Second | 1s | 1s/Smart | 1s | 1s | |
| Dual-Frequency GNSS | Yes | |||||
| Alerts | Sound/Visual | Vibrate/Visual | Sound/Visual/Vibrate | Vibrate/Visual | Vibrate/Visual | |
| Ability to download custom apps to unit/device | No | No | Yes (all Connect IQ Apps) | No | No | Voice Integration | Timex Global Trainer | Polar Ignite 3 | Garmin Forerunner 55 | Polar Ignite 2 | Polar Unite |
| Has Mic/Speaker | No | |||||
| Can make/receive calls | No | |||||
| Voice Assistant | No | Music | Timex Global Trainer | Polar Ignite 3 | Garmin Forerunner 55 | Polar Ignite 2 | Polar Unite |
| Can control phone music | Yes | Yes | Yes | No | ||
| Has offline music storage and playback | No | No | No | No | ||
| Streaming Services | No | No | No | No | Payments | Timex Global Trainer | Polar Ignite 3 | Garmin Forerunner 55 | Polar Ignite 2 | Polar Unite |
| Contactless-NFC Payments | No | No | No | No | Connectivity | Timex Global Trainer | Polar Ignite 3 | Garmin Forerunner 55 | Polar Ignite 2 | Polar Unite |
| Bluetooth Smart to Phone Uploading | No | Yes | Yes | Yes | Yes | |
| Phone Notifications to unit (i.e. texts/calls/etc...) | No | Yes | Yes | Yes | Yes | |
| Live Tracking (streaming location to website) | No | No | Yes | No | No | |
| Group tracking | No | No | No | No | ||
| Emergency/SOS Message Notification (from watch to contacts) | No | No | Yes (via phone) | No | No | |
| Built-in cellular chip (no phone required) | No | No | No | No | No | Cycling | Timex Global Trainer | Polar Ignite 3 | Garmin Forerunner 55 | Polar Ignite 2 | Polar Unite |
| Designed for cycling | Yes | Yes | Yes | Yes | Yes | |
| Power Meter Capable | Yes | No | No | No | No | |
| Power Meter Configuration/Calibration Options | No | N/A | N/A | N/A | N/A | |
| Power Meter TSS/NP/IF | No | N/A | N/A | N/A | N/A | |
| Speed/Cadence Sensor Capable | Yes | No | Yes | No | No | |
| Strava segments live on device | No | No | No | No | ||
| Crash detection | No | Yes | No | No | Running | Timex Global Trainer | Polar Ignite 3 | Garmin Forerunner 55 | Polar Ignite 2 | Polar Unite |
| Designed for running | Yes | Yes | Yes | Yes | Yes | |
| Footpod Capable (For treadmills) | Yes | No | YES (ALSO HAS INTERNAL ACCELEROMETER) | No | No (but has accelerometer for indoor running) | |
| Running Dynamics (vertical oscillation, ground contact time, etc...) | No | No | No | No | No | |
| Running Power | No | No | No | No | ||
| VO2Max Estimation | No | Yes | Yes | Yes | Yes | |
| Race Predictor | No | No | Yes | No | No | |
| Recovery Advisor | No | No | Yes | No | No | |
| Run/Walk Mode | No | No | Yes | No | No | |
| Track Recognition Mode | No | Yes | No | Swimming | Timex Global Trainer | Polar Ignite 3 | Garmin Forerunner 55 | Polar Ignite 2 | Polar Unite |
| Designed for swimming | No | Yes | Yes | Yes | Sorta (waterproof but HR only tracking) | |
| Openwater swimming mode | N/A | Yes | N/A | Yes | No | |
| Lap/Indoor Distance Tracking | N/A | Yes | Yes | Yes | No | |
| Record HR underwater | N/A | Yes | Yes | Yes | Yes | |
| Openwater Metrics (Stroke/etc.) | N/A | Yes | N/A | Yes | No | |
| Indoor Metrics (Stroke/etc.) | N/A | Yes | Yes | Yes | No | |
| Indoor Drill Mode | N/A | No | No | No | ||
| Indoor auto-pause feature | N/A | Yes | Yes | No | ||
| Change pool size | N/A | Yes | Yes | Yes | No | |
| Indoor Min/Max Pool Lengths | N/A | 20M/Y to 250 m/y | 20M/Y to 250 m/y | N/A | ||
| Ability to customize data fields | N/A | Yes | Yes | Yes | Yes | |
| Captures per length data - indoors | N/A | Yes | Yes | Yes | No | Triathlon | Timex Global Trainer | Polar Ignite 3 | Garmin Forerunner 55 | Polar Ignite 2 | Polar Unite |
| Designed for triathlon | Yes | No | No | No | No | |
| Multisport mode | Yes | No | No | No | No | Workouts | Timex Global Trainer | Polar Ignite 3 | Garmin Forerunner 55 | Polar Ignite 2 | Polar Unite |
| Create/Follow custom workouts | Yes | Yes | Yes | Yes | Yes | |
| On-unit interval Feature | Yes | Sorta (offers structured workouts) | Yes | Sorta (offers structured workouts) | Sorta (offers structured workouts) | |
| Training Calendar Functionality | No | Has daily suggested workouts | Yes | Has daily suggested workouts | Sorta (offers daily workouts) | Functions | Timex Global Trainer | Polar Ignite 3 | Garmin Forerunner 55 | Polar Ignite 2 | Polar Unite |
| Auto Start/Stop | Yes | No | Yes | |||
| Virtual Partner Feature | Yes | No (but can give out of zone information) | Virtual Pacer | No (but can give out of zone information) | No (but can give out of zone information) | |
| Virtual Racer Feature | No | Yes (Race Pace) | No | No | No | |
| Records PR's - Personal Records (diff than history) | No | No | Yes | No | No | |
| Tidal Tables (Tide Information) | No | No | No | No | No | |
| Weather Display (live data) | No | Yes | Yes | Yes | No | Navigate | Timex Global Trainer | Polar Ignite 3 | Garmin Forerunner 55 | Polar Ignite 2 | Polar Unite |
| Follow GPS Track (Courses/Waypoints) | Yes (Barely) | No | No | No | No | |
| Markers/Waypoint Direction | Yes | No | No | No | No | |
| Offline Maps | No | No | No | No | No | |
| Back to start | Yes | No | No | No | No | |
| Impromptu Round Trip Route Creation | No | No | No | No | No | |
| Download courses/routes from phone to unit | No | No | No | No | No | Sensors | Timex Global Trainer | Polar Ignite 3 | Garmin Forerunner 55 | Polar Ignite 2 | Polar Unite |
| Altimeter Type | GPS | GPS | No | GPS | None | |
| Compass Type | GPS | N/A | None | N/A | N/A | |
| Optical Heart Rate Sensor internally | Yes | Yes | Yes | Yes | ||
| SpO2 (aka Pulse Oximetry) | No | No | No | No | ||
| ECG Functionality | NO | No | NO | |||
| Heart Rate Strap Compatible | Yes | Yes | Yes | Yes | Yes | |
| ANT+ Heart Rate Strap Capable | Yes | No | Yes | No | No | |
| ANT+ Speed/Cadence Capable | Yes | No | Yes | No | No | |
| ANT+ Footpod Capable | Yes | No | Yes | No | No | |
| ANT+ Power Meter Capable | Yes | No | No | No | No | |
| ANT+ Lighting Control | No | No | No | No | ||
| ANT+ Bike Radar Integration | No | No | No | No | ||
| ANT+ Trainer Control (FE-C) | No | No | No | No | ||
| ANT+ Remote Control | No | No | No | No | No | |
| ANT+ eBike Compatibility | No | No | No | No | No | |
| ANT+ Gear Shifting (i.e. SRAM ETAP) | No | No | No | No | ||
| Shimano Di2 Shifting | No | No | No | No | ||
| Bluetooth Smart HR Strap Capable | No | Yes | No | Yes | Yes | |
| Bluetooth Smart Speed/Cadence Capable | No | No | No | No | No | |
| Bluetooth Smart Footpod Capable | No | No | No | No | No | |
| Bluetooth Smart Power Meter Capable | No | No | No | No | No | |
| Temp Recording (internal sensor) | No | No | No | No | No | |
| Temp Recording (external sensor) | No | No | No | No | No | Software | Timex Global Trainer | Polar Ignite 3 | Garmin Forerunner 55 | Polar Ignite 2 | Polar Unite |
| Desktop Application | Training Peaks Agent | Polar Flowsync - Windows/Mac | Garmin Express (PC/Mac) | Polar Flowsync - Windows/Mac | Polar Flowsync - Windows/Mac | |
| Web Application | Training Peaks | Polar Flow | Garmin Connect | Polar Flow | Polar Flow | |
| Phone App | Training Peaks | iOS/Android | iOS/Android | iOS/Android | iOS/Android | |
| Ability to Export Settings | Yes | No | No | No | No | Purchase | Timex Global Trainer | Polar Ignite 3 | Garmin Forerunner 55 | Polar Ignite 2 | Polar Unite |
| Amazon | Link | Link | Link | Link | Link | |
| Backcountry.com | Link | |||||
| REI | Link | Link | DCRainmaker | Timex Global Trainer | Polar Ignite 3 | Garmin Forerunner 55 | Polar Ignite 2 | Polar Unite |
| Review Link | Link | Link | Link | Link | Link | |
Finally…I take a lot of pictures during the review process. I took over 500 pictures for this review. It seems to me it’d be a shame to let them sit forever on my little home server, thus, I’ve picked out a fair ton of them and put them all in an album for you to browse through.

One last thing…if you’re looking for all the official information links – here they are (all PDF files):
Quick Start Guide
Full Manual (Other languages here)
Marketing Leaflet
Spec Sheet
FAQ Sheet
Bike Sensor Manual (actual product not available yet)
Found this review useful? Support the site:
Finally, if you found this review useful – you can support future reviews by simply using the links below to pickup the Global Trainer. Given pretty much everything is cheapest on Amazon or one of their sub-vendors anyway, it’s what I usually use. By doing so, I get a small credit back for anything ya pickup there – which helps find purchasing new devices and device giveaways.
The reviews generally take 20-40 hours to put together, so it’s a fair bit of work (and labor of love). Also, as you probably noticed by looking below, I take time to answer all the questions posted in the comments – and there’s a lot of details in there as well. So if you found this review helpful in your purchasing decision, you can support future reviews like this by using any of the Amazon links (accessories or the units themselves). As noted earlier, there are two versions available of the Timex Global Trainer– one without the HR strap, and one with the Premium HR strap.
As you’ve seen throughout the review there are numerous compatible accessories for the unit. I’ve consolidated them all into the below chart, with additional information (full posts) available on some of the accessories to the far right. Also, everything here is verified by me – so if it’s on the list, you’ll know it’ll work. And as you can see, I mix and match accessories based on compatibility – so if a compatible accessory is available at a lower price below, you can grab that instead.


Thanks for reading! And as always, feel free to post comments or questions in the comments section below, I’ll be happy to try and answer them as quickly as possible. Further, you can always e-mail me at the address on the sidebar. And lastly, if you felt this review was useful – I always appreciate that feedback in the comments below too! Thanks!