It’s been just over a year and a half since the first Timex Run Trainer came out, and Timex is back at it releasing a slimmed down version of the unit with a cleaned up user interface. This new unit adds in features such as nutrition alerts, while at the same time simplifying general operation of the watch.
In running 3-4 times a week over the last month plus, I’ve got a pretty good grasp on how the unit works, as well as all the details inside and out. Because I want to be transparent about my reviews, once my evaluation period with the Timex Run Trainer 2.0 has elapsed, I send it back to Timex in Middlebury, Connecticut. Simple as that. Sorta like hiking in wilderness trails – leave only footprints.
Lastly, at the end of the day keep in mind I’m just like any other regular triathlete out there. I write these reviews because I’m inherently a curious person with a technology background (my day job), and thus I try and be as complete as I can. But, if I’ve missed something or if you spot something that doesn’t quite jive – just let me know and I’ll be happy to get it all sorted out. Also, because the technology world constantly changes, I try and go back and update these reviews as new features and functionality are added – or if bugs are fixed.
Unboxing:
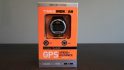
Below is the box for the Timex Run Trainer 2.0. Depending on which variant you’re looking at, you’ll either have a heart rate strap or won’t. Or, more importantly, yours will be the same color or some other color. In this case, I’ve backfilled in the box shots with the unit I own (green), versus the test unit from Timex that went back (orange/black). Originally the test unit from Timex had no box. Just in case you’re trying to figure out where the random green box came from…


The box holding the watch pulls out, revealing inside it the manual and the charger hanging out.


The watch is zip-tied to the box. In my case, the final unit I received in the box was not charged, so it had to be charged up.

Here it is, in all its [uncharged] glory. After this photo I’ll switch back to the the orange version. Variety is the spice of life, right?

Ignoring the watch, you’ve got the charging cable. The charging cable is identical to that of the original Timex Run Trainer unit, and either unit is compatible with either cable.

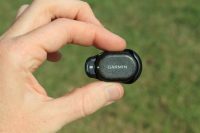
Here’s the watch itself. In this particular instance, it was displaying the need for juice. Battery juice that is (very different than beetle juice).

Here’s a look at the back of the unit. The strap is nearly identical to that of the original TRT.

Here’s the charging clip. It’s USB powered and the box does not come with a wall adapter. Timex figures (and I pretty much agree) that just about any person buying this watch has a spare USB outlet or thirty. I’ve charged it with everything from my laptop to iPhone wall adapters. They all work just fine.

The clip simply snaps onto the little contacts on the unit. The fit is snug and won’t easily get dislodged. This is due to extra plastic pins that form a lock with the unit itself. Works great.

In the event you purchased a unit with the ANT+ heart rate strap, you’ll have that in the box as well. Note that if you already have any ANT+ heart rate strap it’ll work just fine with the Timex Run Trainer 2.0 (that’s sorta the beauty of standardized protocols).
Of course, the final box will likely also come with some small papery junk. By the time you’ll have read this, you’ll have no need for the official manual – which you can also download here.
Size Comparisons:
Perhaps the most noticeable aspect of the new Run Trainer is simply the size. It has similar visual styling as it’s older brother, but this one decided to go on a diet. Here’s a look at the two units side by side:

You can see just how much more ‘girthy’ the older unit is (left).

Of course, to really appreciate how much smaller it is, you need to add grandpa to the mix: The Timex Global Trainer. Yes, that beast towers over them all – figuratively and literally.

Next up is size comparisons to other units in the same general market, or units that are commonly asked about as to which one should an individual choose. Here’s the usual lineup:

From left to right: Timex Global Trainer, Garmin FR910XT, Timex Run Trainer 1.0, Magellan Switch, Timex Run Trainer 2.0 (this review), Polar RC3 GPS, Garmin FR610, Garmin FR410, Garmin FR210.
As you can see, it sits roughly in the middle from a size standpoint. It’s not the largest, nor is it the smallest. But it’s fairly normal. Perhaps a hair bit bigger than others, but more than fine.
From a thickness standpoint, the Run Trainer is also about average for running watches. In the picture below, the Run Trainer is smack in the middle (orange dot). The watches to the right are mostly triathlon watches. And the watches to the left are running-only watches. You can see it’s not as slim as something like the FR110 or Polar RC3, but it’s about the same as the FR405/FR410 series, and only a touch bit thicker than the FR610.

If I elevate the whole thing, you can better see the thickness. Again, Run Trainer is in the middle with the dot. Tri watches to the left this time, and running watches to the right.

And in case you’re curious – yes, the rolling pin is exactly level. :)

Last but not least, for those ladies with small wrists – I brought in my wife. Her wrist size is 14cm (or 5.5 inches), meanwhile my wrist size is 17cm (or about 6.5 inches). There’s plenty of shots of my wrist throughout this review, but the couple below are of her wrist.

A few close ups:


So with the smaller size they’ve removed one of my major complaints about the original Timex Run Trainer. It’s now roughly the same as the other units out there. Size isn’t really a consideration in selecting between most of these units (FR10 excluded, which is much smaller in every dimension, but also far more limited in functionality).
Day to Day Use:
Now that we’ve gone through all the overview stuff, let’s actually start using it. First up is heading outside and turning it on. To do so you’ll hit the orange button, and then choose one of the workout times (Chrono or Interval Mode), which I’ll talk about in a moment.
When you do so it’ll ask you if you want to connect to sensors. In this context, it means ‘GPS’, ‘Heart Rate’, and ‘Footpod’. Choosing ‘No’ is a workout-limiting choice.

I’ve been pretty happy with how quickly it’ll find satellites. Like most modern GPS units these days, it’ll remember your previous location and as long as you head back out to roughly the same spot it’ll pickup signal incredibly quickly. Oftentimes, in front of my home (despite being 6-7 story buildings), I’ll get signal in less than 7 seconds. Seriously.

Once it’s got signal, it’ll bring you to this page (or, whatever page you’ve customized).

We’ll dive into the data pages in a bit, but you can iterate through the data pages by pressing the display button in the lower left corner. It’ll briefly show you what the fields are, and then show you the actual values.

When you’re ready to start, you’ll simply tap the lower right button. This same button is used for creating a lap (split). To stop, you’ll press the upper right button, which is also used for saving (once stopped).

With that super-quick primer covered, let’s dive into the two main workout modes.
Chrono Mode:

Chrono mode is the default workout recording mode. They use the term ‘Chrono’ because Timex has always used it since dinosaurs roamed the earth. The rest of the universe these days just doesn’t call this mode anything and instead just records stuff.
Nonetheless, this is the mode you want for recording the goods. I just walked through starting a run in the previous section. So the key item to know here is some of your customization options. I’ll go through many of them in the following sections, but one that’s worthy of discussion here is the ‘Hands Free’ options. This allows you to configure automatic laps (Auto Split), as well as automatic starting and stopping (Auto Start/Auto Stop) of the timer based on whether or not you’re running.

First up is Auto Split. This creates laps on a preset schedule. I prefer to have mine set for every mile if doing a long run, but turn it off for other workout types. When it creates the lap marker, it’ll beep/vibrate/display each time you cross that lap threshold.

You can also utilize time instead of distance, if you want it to automatically lap after – say 5 minutes – as opposed to 1 mile.

In addition to automatic laps, you can have the unit automatically start and stop recording (well, technically start and pause recording) based on whether or not you’re running. This can be useful in city running where you want the unit to just start/pause as you deal with crosswalks/stop signs.

You’ll simply set a threshold pace (or speed), depending on which configuration setting you’re in. Generally I’d set this at just above my walking speed.

Everything else I talk about in this review is still applicable to Chrono mode as well. So with that, let’s dive into interval mode.
Interval Mode:

Interval mode enables the watch to walk you through a complete interval workout – from start to finish, and all the sets in between. You’ll want to configure the intervals beforehand, and since it can be a bit tedious, you may want to allocate some time to setting it up. First, I’ll go through the watch-based version, and then the software side as well.
You’ll start by configuring the different intervals that makeup the workout.

For each particular chunk, you’ll set whether it’s time or distance based:

Then you’ll specify how long that interval is:

You’ll repeat your way through the workout.

At the end, you can set how many reps of the workout, as well as the alert types (such as vibration and audible alarms).

With that, you’re set and almost ready to roll. You’ll want to configure zones for intervals – but I talk about that later.
Within a given workout, it’ll countdown how much time is left. You can see it starts off with 10 minutes, and then counts down to 9:57…etc…


At any time if you’d like to skip to the next interval, you can just hold the ‘Lap/Split’ button to move along.

As I noted above, in addition to configuring the intervals on the watch itself, you can also do so from within the Training Peaks device agent. This is far quicker!

Now the key is to then define a given target (via Zones) for each interval. So you can then specify HR/Pace/Speed/Cadence and the target for that interval (#1-6). So you’re sorta building pieces of the end solution in different areas.

The feature works well, though the implementation can be a bit confusing as typically in intervals you define a warm-up and cool-down, and then a work target and number of repeats of the work set – all in one place. Whereas in this case, you’re sorta defining entire chunks of the workout to repeat, and doing it in different places. Still, I can make it work.
Update: Timex has added in a firmware update the ability to specify the warm-up and cool-down features.
Time Mode:

Time mode is simply your average time of day like a normal watch mode. Now, it’s sorta important that you remember this mode because when you’re done working out the unit won’t just default back to the time mode, instead, it’ll just sit there in the workout mode…forever.
So when you’re done with the workout, remember to tap the back button and switch the mode (or ‘Applications’ as Timex calls them) to ‘Time’:

Within Time mode it’ll display the date as well as time (including seconds). You can change the display formats within the settings. For example, swapping to Day/Month/Year for most of the world, or a 24hr clock instead.

Also note that while the TRT2 will set your GMT time correctly, it won’t actually correctly set your time relative to where you are. In other words, it knows the right minutes and seconds, but has no idea whether your in Paris or Palau. So you’ll need to set the date and time:

That ‘GPS Time’ setting merely means it’ll keep the unit time accurate within the context of you keeping the hour accurate. If that sorta makes sense.

As one who travels every week, it’s a bit annoying that I have to remember to set the time correctly before each run (otherwise the run start time in history will be off, which admittedly isn’t that big of a deal). I suspect the reason they may not have added the ability to set the watch time based on location is that requires a ‘Time Zone Map’ file, which in turn requires space. And as I’ll talk about in a little bit – this unit has virtually no space.
The time mode also has a single alarm that you can specify. You can do this on the watch, or via software:

And on the watch, you can turn on or off an hourly chime if you’d like (as well as button beeps).
Zones and Configuration Options:

I just want to briefly hit up on a few configuration items that you can set. First up, is various zones – for heart rate, pace, speed, and cadence. While you can set these on the watch itself, it’s somewhat tedious. So, I use the Device Agent instead. Note that you can only configure one zone per type though. So it’s more of a ‘target’ than it is ‘zones’.

You can then specify how to alert you for each zone that you stray out of:

Along that same vein, you can also configure recovery notifications – to alert you have a specified time:

You can change all of of the major unit types, for example from miles to kilometers, or pace from Min/Mi to Min/Km, as well as speed metrics within the ‘Units’ section. Again, all these can be done either on the unit itself, or on your computer. It’s nice that if you want altitude shown in one format (i.e. feet), you can have distance shown in another (i.e. kilometers). It’s not all tied together.

And it’s within here that you can change the language between English, Spanish, French, German, Portuguese, Italian, and Dutch.
Date Fields and Data Pages:

The TRT2 allows you to customize up to three data pages, with either two or three data fields per page. There are three pages for Chrono Mode (normal workout mode), and three for Interval Mode. Again, each subject to either two or three data fields per page.


After selecting a page, and deciding on how many data fields it’ll have – you’ll then choose the fields for the Top/Middle/Bottom lines:


Here’s the difference between a two-line display, and a three-line display. Sorry, I was running at the time, so a touch bit of glare.


And finally, here’s all the data fields you can select from:
Split Time [Total workout time]
Lap Time
Previous Lap Time
Pace [Current]
Avg Pace
Lap Pace
Prev Lap Pace
Speed
Avg Speed
Lap Speed
Prev Lap Speed
Heart Rate
Avg HR
Lap HR
Prev Lap HR
Cadence
Cadence HR
Prev Lap Cadence
Distance
Lap Distance
Prev Lap Distance
Altitude
Total Ascent
Total Descent
Note that you can change from kilometers to miles (and associated fields for pace/speed) within the settings menu of the watch. Or, like all options within the Timex Run Trainer, you can use the device agent to quickly and easily set these from your computer:

It’s MUCH easier this way.

And in general, it’s much quicker to do all setup through this interface.
History Options:

The unit includes a fairly comprehensive history capability, on par with any other unit on the market today. The unit allows you to look at any given activity (run) and dive into the summary and detailed lap information.

For example, here’s the Paris Half-Marathon that I ran a few weeks back. You can see the total time and distance on the first screen. And I can iterate up/down to see other summary information.

For example, my average heart rate, and maximum heart rate during the run:

Or my average pace and best pace:

Or my average and maximum cadence:

I can then go down to the lap level, and see all the same information for each recorded lap:


The only fatal flaw here is the memory (which I dive into later) limits me significantly. So for example when I was putting together this section I kept on having to delete out other runs in order to keep this particular workout to use for photos. Once deleted, no history is available. It’s a constant game of deleting workouts.

Nutrition Alerts:

This is probably my favorite feature on the TRT2. Nutrition alerts you to specify vibration or audible alerts that remind you to eat or drink at specified intervals. Since most endurance athletes tend to hose up nutrition and thus tend to impact their racing and training because of it, it’s a wonder more companies don’t include this on their watches (only Polar does on some units today).
You’re able to configure separate drink alerts, and eating alerts. Each alert is configured based on a repeating specified time (you can’t use distance).
First up is specifying the ‘Drink Alerts’. You’ll configure the ‘Drink Alerts’ to ‘On’. Then you’ll highlight the ‘Drink Time’.

Here you can specify it to remind you based on whatever schedule you want:

Then you’ll repeat the same for ‘Eat Alerts’:


Finally, I’ve enabled ‘Vibrate’ mode, and you can also change the tones (just a few are offered), so that you clearly know it’s a Drink/Eat alert and not just an Auto Lap or other alert. Sorta like changing your ring-tone on your phone for when your boss calls.

Once that time is triggered, the watch will beep/vibrate and display a visible message on the watch itself telling you that it’s now time to eat or drink.

The whole system works perfectly, and I’ve been using it lately on my long runs to keep me in check (since I really suck at remembering to take nutrition).
Note that the original TRT1 had nutrition alerts, but no vibration motor.
Indoor Treadmill/Footpod Support:

The TRT2 supports the ANT+ footpod, which allows you to measure speed indoors via the footpod, or cadence both indoors and outdoors. Additionally, it can be used in place of GPS outdoors (though I wouldn’t generally recommend that).
To pair the footpod, you’ll navigate down into the Settings and then Sensors menu, where you can search for nearby footpods:

It usually only takes a second to find the footpod.

Once that’s done, you have two options for how to utilize the footpod:
The first option is simply the word ‘Yes’, which means that it’ll use the footpod for both speed/distance as well as running cadence information (how many times your foot strikes the ground each minute, generally represented as Steps Per Minute – SPM).
The second option is ‘Cadence Only’ – which means that it’ll just use it for Cadence, and then use GPS for speed/distance.
I generally recommend the second option, as otherwise you have to be very careful about ensuring calibration is spot-on when running outside. The unit will not automatically failback to footpod while in a tunnel or due to loss of GPS signal if in ‘Cadence Mode’, but by the same token, it doesn’t really failback to footpod in the other mode – it’s just simply always footpod.

Speaking of calibration…
If using the footpod, you’ll need/want to calibrate the unit. This doesn’t take too long and ensures that the footpod is able to accurately gather speed/distance data. In my experience, when properly calibrated, current generation footpods will give astonishingly accurate speed/distance data (as in, spot-on exact). This is even in varying pacing intervals and conditions such as snow or ice.
However, calibration must be done anytime you move placement of the footpod.

Within calibration you have two options (seen above). You can either specify a manual calibration value if you know it, or you can just go to a track or a treadmill to calibrate the footpod.
You’ll run a known distance (inside lane on a 400m track is best, or a treadmill failing that). And then from there the unit will estimate your distance. At the end, you’ll correct it with the actual distance you ran.


Here’s the manual calibration. These values are the same whether used on a Timex unit or a Garmin unit, so you can manually enter in your calibration value if you know it (for example, if you were just switching watches but hadn’t moved the footpod). The calibration values will remain saved on the unit.

As noted, using the footpod is perfect for treadmill usage – as it allows pace and distance data to be both displayed and recorded indoors while on a treadmill. And while that may sound somewhat silly since the same data is displayed on the treadmill, this allows you to capture it to your training log (along with HR data).
Plus, if you run on treadmills enough at the gym (especially with gym’s that enforce strict time limits on a per-treadmill basis), you’ll eventually notice that not all treadmills are created equal, and certainly rarely calibrated correctly. It’s fun to switch treadmills mid-workout and specify the same pace, but notice slightly different actual paces.

In addition to the pace/distance recording, you’ll also get your running cadence both during the run, as well as afterwards. You can see the SPM displayed on the middle line below:

And then afterwards, you can see the graph on Training Peaks. Those ‘drops’ are normally when I stop at a stoplight/crossing for a second.

Finally, the footpod sells for about $45, and you can use any ANT+ footpod on the market today (Timex, Garmin, Suunto, 4iiii’s and countless others), they’re all compatible. Polar footpods and Nike+ will NOT work with the Timex Run Trainer however, as they are not ANT+. You can read everything you ever wanted to know about footpods here in this post.
ANT+ Heart Rate Strap Utilization:

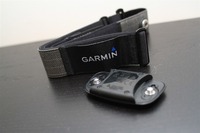
Note: The strap I’ve included above is slightly different than the strap that Timex has included with the Timex Run Trainer 2.0 final units, which instead is much more similar to other straps on the market, where the transmitter pod sits on top of the strap, rather than being the interconnect point between the two ends of the strap.
The Timex Run Trainer 2.0 utilizes ANT+ to communicate with any ANT+ heart rate strap. If you have an existing ANT+ heart rate strap, then you can utilize that strap in place of having to pickup a new strap. Just be sure it has the tiny little ‘ANT+’ logo hanging out on the back of it.

The heart rate strap enables you to both monitor your heart rate (updated every second), as well as to record the data from it. All data is recorded as part of the file with your other GPS (or non-GPS) metrics from the unit. Once uploaded, you can view your heart rate data on TrainingPeaks (or any other site which supports the Timex Run Trainer).
It’ll look like this (this was just a standard long run):

While the ANT+ heart rate strap can be finicky from time to time (such as random spikes or dropouts), there’s a number of things you can do to try and address some of these problems. Here’s the low-down:
Annual Public Service Announcement: How to fix heart rate strap dropouts/spikes
Troubleshooting your HR strap issues Part I
In general, start with the HR gel, and then go from there. It usually solves it for 99% of folks.
Cycling Support:

The Timex Run Trainer enables you to switch data fields to a ‘Speed’ mode. So when you build data pages and specify which fields you want, you can include ‘Speed’ labeled metrics instead of ‘Pace’ focused metrics. Whether you get MPH or KPH depends on the settings you have configured in options. So while there’s not a ‘Cycling Mode’ per se, you’re just changing your display fields to pretend to be cycling.

I didn’t have any problems on any of my rides using the TRT and having it keep up from a calculation or recording standpoint. In fact, on my Sydney ride, it happily beeped pretty close to in-sync each mile with the handful of other GPS devices I had on me.
If you want to mount it to your bike, I’d recommend picking up one of the rubber mounts that are made by a few different companies (including Timex). These usually cost under $10 and make it easy to mount any watch to just about any bar on your bike:

Once you’re ready to upload to TrainingPeaks, you’ll simply go ahead and ensure the dropdown says cycling. After that, TP will treat everything as a bike ride.
Note that the TRT has no support for ANT+ Speed/Cadence sensors, or ANT+ Power Meters.
Swimming Support (via swim cap method):

Officially the Timex Run Trainer doesn’t support any form of swimming mode. But of course I know many of you will be curious as to how well it works. So while down in Perth a few weeks ago I took the chance to try it out briefly…very briefly. I wasn’t really in a good spot for sustained swimming on the days I was trying it, so I was mostly curious how it would react and how straight the line would be.
First up is if it can be worn on your wrist while swimming. The unit is more than waterproofed enough to do so, with its 50-meter rating*.

However, while it’s waterproofed, it’s GPS signal just doesn’t work underwater by even the slimmest of margins. We’re talking near-instant notification of lack of satellite signal within just an inch or so of water:

Now loss of GPS signal is normal across all units (including the openwater swim friendly FR910XT). What matters however is algorithms to adjust for this while determining distance, which the TRT doesn’t have.
So, it was off to the swim cap method. This well outlined method simply has you putting the unit in your swim cap. Which, will have you look roughly like this:

And technically, it works, I got a roughly straight line between the two points I swam:

There was one challenge though. The buttons on the TRT are incredibly sensitive. Like breathe on them the wrong way and they’ll beep-boop-bop. Which means putting it in your swim cap requires the utmost care so you don’t press the wrong button and start/stop/etc…
So while it does work, it’s not quite as good as most other units in the swim cap method because of the button sensitivity.
*Side rant on ratings: There’s a tremendous amount of misinformation on waterproof ratings out there on the interwebs, and even in Wikipedia. Some watches follow the IP/IPX system for ratings (i.e. IPX7), which means there are specific tests that companies can have labs run their watches through. Other ratings – such as 50-meters have less formalized tests. That said, watches with ratings of 50-meters are MORE than fine for swimming. There’s this bizarre small pocket of professional scuba divers (I dive too!) that seems obsessed with spreading gospel that watches not rated for 200m deep aren’t sufficient for swimming laps/etc. Quite frankly, that’s just dumb – and doesn’t match any data I’ve seen, nor a single comment I’ve seen from anyone here in 5 years of product reviews and reader comments. If we’re talking typical Garmin IPX7 watches – sure, those suck in water. But Timex and Polar devices certified for 50m, no, they’re just fine. Ok, rant complete.
GPS Accuracy & Altitude Notes:

Timex GPS units have had somewhat of a checkered history when it comes to GPS accuracy, so this was one area I’ve been pretty keen about looking at carefully. As is always the case though, GPS accuracy is actually fairly difficult to measure in normal day to day activities. It’s one thing to create premeasured short-distance courses with certification-grade rolling wheels (as I have done many times in the past), but it’s another thing to measure out a 20-mile course and ensure you run exactly what the wheel measured (virtually impossible).
So instead, I tend to focus on variance between units. Over time I’ve developed a pretty solid understanding of which units have the highest accuracy levels, and which units have lesser accuracy levels. Further, when I go out and run or ride, I take multiple units. Along the way I’m looking for one of two things. Either a pattern of difference between the two units (i.e. from the onset being short .02 per mile), or a conditional difference (i.e. going under bridges causes units troubles).
Keep in mind that most consumer-grade GPS units are only rated for accuracy of about 97-99%, thus .01 to .03 per mile. Thus even comparing two identical units worn at the same time on the same wrist, you’re bound to get differences.
I’ve talked a LOT about GPS accuracy in these posts here:
Racing the line – understanding how courses are measured
Sport Device GPS Accuracy In Depth: Part I (Part II is linked at end of Part I)
Why the New York Times GPS accuracy running article missed the boat
With that brief background/primer, let’s talk about the TRT2. In general, it’s in the same ballpark as other units. Though, not quite always perfect. By perfect, I’m talking within a 1-2%. Beyond that and I start to worry. In the case of the TRT2, it’s never shown as higher than other units testing (be it the FR610 shown below, or my wife’s FR910XT unit). It’s always ‘equal to’ or less than. Meaning, if there’s a difference between the two units, the TRT2 always shows a shorter run.
Here’s a few pictures of watches showing the differences. I don’t always have my camera on runs, so this is just the ones I happened to have handy.


As you can see, in many cases the Timex Run Trainer 2.0 was either identical or virtually indistinguishable from the reference unit. In those cases it was different, it becomes more complicated to determine which is right and which is right. However, the only pattern I see emerging is in the cases where the Timex Run Trainer doesn’t match, the TRT2 is usually slightly less than the FR610. Within the GPS accuracy levels – and as long as you don’t commit the cardinal sin (over-measuring, which makes you believe you are faster than you are) – you’re good to go.
I wouldn’t have any issues using this watch day to day from a GPS accuracy standpoint.
Looking next at elevation data, the unit uses a GPS altimeter (not barometric), so the altimeter data doesn’t tend to be as accurate as units with a barometric altimeter inside. Now, the good news is that TrainingPeaks has an elevation correction feature. The bad news is that it’s not included in the free version of Training Peaks that you get with the Timex unit. Here’s a few runs to see the differences though:

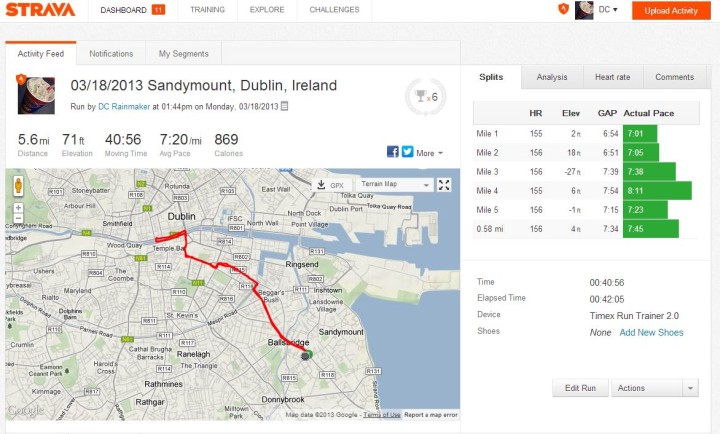
You can see above that the results are more cleaner post-processing. This was a relatively flat run around Dublin.
Below, a long run. In this case, I’d actually put things generally closer to the TRT than the corrected elevation data – likely because the correct elevation data may be incorrectly parsing some bridge crossings. Still, the ability as an end-user to choose which data set is handy, and I just wish it were offered on the base platform (like Garmin does).

Historically, I’d say this is roughly ‘on par’ with other units that use GPS altimeters (which btw, is most running-specific units these days).
Battery and Memory Space:

The Timex Run Trainer has an 8 hour battery life (with GPS enabled), but will last quite a bit longer when just hanging out in non-GPS mode. I haven’t quite figured out exactly how much longer (days/weeks I presume), as I’m using it every other day, so I’m always recharging it.
I haven’t had any battery issues, nor any issues where the battery burns at a rate higher than I would have expected. So all is good there.
What I do have issues with is the memory. Back when I first started using the unit, a few folks asked what the memory looked like, and as I started poking at it, I realized it wasn’t so hot at all. I did some quick back of the napkin math based on file sizes and realized that with GPS enabled and HR/Footpod data I was only getting about 9-12 hours of record time before I had to offload to a computer.
Not good.
The unit only has about 900KB of space on it, and run sizes are roughly about 80-110KB per hour (with GPS/HR/Footpod data). My problem here is twofold. First is that it’s an insanely small amount of storage. I look at other running watches, and I don’t even remember the last time I was warned about running out of space, despite running 3-4 runs a week with some runs upwards of 3 hours. Yet with the TRT2, I’m constantly deleting runs – on pretty much a near weekly basis.
Second, by deleting runs I’m no longer able to view them in the history on the unit. For some people (like myself) who do upload data, it’s not a huge long-term deal. But I know other people who use the history function on the watch to regularly look at past runs. For them, it’s basically a non-starter.
In talking with the Timex Run Trainer engineering team about the issue, they believe that due to the fact that they didn’t bundle a wall adapter with the unit, folks would be frequently using their computers to charge (and thus upload) data. They did however say that they are working on ways to shrink the data sizes a bit more, and may be targeting that for a future firmware update.
The problem they’ll have though is that there is only so much they’ll be able to do there. The standardized file format means their options are limited on the software front (perhaps they’ll make minor gains). The real focus should be on getting a bigger memory module in the unit.
Backlight:
Finally. Just finally.

The TRT2 contains a far better backlight, doing away with the hideously underpowered backlights of most Timex watches. This one shines nice and bright, and has more than enough light for you to easily see in the dark (or, in the bathroom where I took the above photo).
Since almost all of my runs at home are at night (usually once The Girl finishes up work), me and the backlight are BFF’s.
You can tap the upper left button once to turn the backlight on, or hold it down for about 4-5 seconds and it’ll beep a bunch of times, which means it’ll stay on permanently. You can tap it again to turn it off (the light).
Software Platform & Uploading:

The Timex Run Trainer utilizes the USB charging cable it came with to download workouts to your computer via USB. Unlike the 1.0 edition, the 2.0 edition does not require any special drivers, as it instead utilizes the USB Mass Storage device profile – just like a USB thumb drive would.
Further, unlike the 1.0 edition, the 2.0 edition utilizes the .FIT file format standard for all files. This means that you can not only pluck the file directly off of the device using Windows Explorer (or similar on other platforms), but you can utilize it with some 3rd party programs as well (Garmin and Magellan both utilize the .FIT file format as well).
But first, let’s look at the default way to upload. Obviously, you’ll connect the device to your computer. You do not need to put the device into any special mode (as you did with the Timex Global Trainer), just connect and you’re ready within a few seconds:

Then, you’ll want to install the Training Peaks Device Agent (available for Mac and PC). This isn’t required per se to get the data off, but it makes it quicker to get the data to the Training Peaks platform. Timex has partnered with Training Peaks to provide Timex device users a free Training Peaks account for logging and analyzing your workout.
Note that you can install either the default TP branded device agent, or the Timex branded one – I prefer the TP branded one since it includes all the other device types (i.e. Polar/Garmin/etc…).
With that all installed and the Run Trainer plugged in, you’ll simply select the Timex Run Trainer 2.0 from the dropdown list:

This will in turn enumerate the correct location within the ‘Browse’ dialog box on the right side:

From here, you’ll simply pick the files (they have the date/timestamps in them) of your workouts. Once that’s done, the files will appear in the list:

Then, just click Save.

Once uploaded, you’ll be within the Dashboard or Calendar views:

From there, you can click on a given run to dive into it:

This main page will show you summary information about the workout. But I typically click ‘Maps and Graphs’ to get to the good stuff.

Within this page you’ll see your route on the map (you can choose from Google Maps or Openstreet Maps). Along the bottom you’ll see the elevation profile with your speed/heart rate/cadence overlaid on it. And then on the right side you’ll see each lap listed (and entire workout).
If I click a given lap, it’ll highlight that section on the map, as well as on the graphs below. Additionally, the right side will now show just that lap information. I can also do this in reverse and just highlight a section on the graph and get stats for just that section.

If I click on ‘Reports’ up top, I can go ahead and and see detailed laps and splits, as well as add pods to my dashboard.

Along the top I can share out a link to a workout. This allows me to give you a direct link to my run (here), and you can poke around and check things out.

Everything I’ve shown above is the free version of Training Peaks, included within the Timex Run Trainer.
Updating Firmware:
The Timex Run Trainer 2.0 supports device firmware updates, which means that as Timex fixes bugs or adds features, you’ll be able to quickly and easily update your device to the latest firmware.
To do so, you’ll open up the TrainingPeaks Device agent, then select: File > Update Device.

You’ll then be prompted to select the update file (a BIN file provided by Timex and usually posted on the TrainingPeaks site). Once that’s done, the watch will do some magic.

See, magic happening here:

The watch itself won’t look any different while magic is happening initially, but eventually, once you get the completion message, then the watch will give a new icon:


Additionally, a quick self-test is done.

Once that’s done all your data is saved, but you’ll need to reset the time and date.

With that, you’re all set!
3rd Party Compatibility:
With the move to the .FIT file format, Timex has joined the ranks of Garmin, Magellan, 4iiii’s, and others sport technology companies that have switched over to the standardized sport file format. This is great news for consumers, as it opens up more places you can utilize your data with (i.e. more training logs and tools).
The only challenge here is that while Timex has adopted the .FIT file format, it ended up with a slightly different variation of it. And as a result, compatibility with various apps from what I’ve seen is limited at best.

[Update on Sport Tracks, seen above, it now supports the Timex Run Trainer 2.0. Both the desktop and online versions. Screenshot pre-update from them.]
I’ve talked at length with Timex about this behind the scenes and they note that the issue stems from exactly how they adopted the standard. They note that they followed the implementation to the exact letter of the law, whereas Garmin has slightly tweaked their implementation of it. As a result, 3rd party developers have shifted to ensure compliance with Garmin’s implementation rather than the strict standard – and other device companies (like Magellan) have done the same.
In some ways, this puts Timex in a ‘no-win’ situation. Damned if you do, and damned if you don’t. As I noted to them, at the end of the day the reason you go with standardized platforms (i.e. .FIT format) is for broad 3rd party compatibility, thus increasing your platform accessibility without increasing your platform costs. However, since their adoption of the standard doesn’t achieve this goal, in some ways they are no better off than before.
I think over time, either Timex will adjust, or other platforms will adjust. But at the end of the day – Timex is a much smaller player in this field, and thus when the hundreds (thousands?) of 3rd party apps out there add in data file compatibility, they always start with Garmin. Match Garmin compatibility, and you win.
[Update March 23, 2013]
In the last couple of days, Strava has now added support for the Timex Run Trainer 2.0 FIT Files, so I was able to successfully upload a run just by choosing the file from the unit and uploading it. Great to see Strava able to quickly add this in (as I tested it just about a week or so ago and no luck). Here’s one of my uploaded runs to Strava.
Product Comparison Tables:
You can utilize the below comparison table that’s dynamically updated over time (as features change via firmware) to compare the different units that I’ve reviewed. Note the key part being ‘I’ve reviewed’. There are no doubt other watches on the market, it’s just that if I haven’t reviewed it, I don’t feel right including it based on some marketing fluff. I would however say that within the context of GPS sport watches, if I haven’t reviewed it…it’s probably not a realistic contender in the marketplace today.
If you’re looking for general guidance on watches in the marketplace, I’ve put together a GPS recommendations post just a couple of months ago. It outlines many different user scenarios.
| Function/Feature | Timex Run Trainer GPS 2.0 | Timex Run Trainer GPS 1.0 | Polar RC3 | Garmin Forerunner 210 | Nike+ GPS Sportwatch | Garmin Forerunner 310XT |
|---|---|---|---|---|---|---|
| Copyright DC Rainmaker - Updated April 9th, 2021 @ 10:20 am New Window | ||||||
| Price | $225 | $150.00 | $215.00 | $179.00 | $165.00 | $170 |
| Product Announcement Date | Mar 18, 2013 | AUG 16, 2011 | AUG 13, 2012 | OCT 4, 2010 | JAN 7, 2011 | APR 2, 2009 |
| Actual Availability/Shipping Date | Apr 2013 | SEP 2011/Discontinued | SEPT 2012 | OCT 2010 | APR 2011 | JUN 2009 |
| GPS Recording Functionality | Yes | Yes | Yes | Yes | Yes | Yes |
| Data Transfer | USB | USB | USB | USB | USB | ANT+ Wireless |
| Waterproofing | 50m | 50 Meters | IPX7 | IPX7 | 50 Meters | Yes |
| Battery Life (GPS) | GPS: 8HRS | GPS: 8hrs, Non-GPS 100+ hrs | 12 Hours | 10 hours | 9 hours | 20 Hours |
| Recording Interval | 1-second | Configurable: 1s, 2s, 4s, 8s | 1-Second | Smart | 1-second | 1s or Smart |
| Alerts | SOUND/VISUAL/VIBRATE | Sound/Visual | Sound/Visual | Audio/Visual | Audio/Visual | Vibrate/Sound/Visual |
| Ability to download custom apps to unit/device | No | No | No | No | No | No | Connectivity | Timex Run Trainer GPS 2.0 | Timex Run Trainer GPS 1.0 | Polar RC3 | Garmin Forerunner 210 | Nike+ GPS Sportwatch | Garmin Forerunner 310XT |
| Bluetooth Smart to Phone Uploading | No | No | No | No | No | Via Wahoo Fitness Adapter |
| Phone Notifications to unit (i.e. texts/calls/etc...) | No | No | No | No | No | No |
| Live Tracking (streaming location to website) | No | No | No | No | No | No |
| Emergency/SOS Message Notification (from watch to contacts) | No | No | No | No | No | No |
| Built-in cellular chip (no phone required) | No | No | No | No | No | No | Cycling | Timex Run Trainer GPS 2.0 | Timex Run Trainer GPS 1.0 | Polar RC3 | Garmin Forerunner 210 | Nike+ GPS Sportwatch | Garmin Forerunner 310XT |
| Designed for cycling | No | No | Yes | Barely (Speed mode only) | No (Speed only mode) | Yes |
| Power Meter Capable | N/A | No | No | No | No | Yes |
| Power Meter Configuration/Calibration Options | N/A | N/A | N/A | N/A | No | Yes |
| Power Meter TSS/NP/IF | N/A | N/A | N/A | N/A | No | No |
| Speed/Cadence Sensor Capable | N/A | No | Yes | No | No | Yes | Running | Timex Run Trainer GPS 2.0 | Timex Run Trainer GPS 1.0 | Polar RC3 | Garmin Forerunner 210 | Nike+ GPS Sportwatch | Garmin Forerunner 310XT |
| Designed for running | Yes | Yes | Yes | Yes | Yes | Yes |
| Footpod Capable (For treadmills) | Yes | Yes | Yes | Yes | Yes | Yes |
| Running Dynamics (vertical oscillation, ground contact time, etc...) | No | No | No | No | No | No |
| VO2Max Estimation | No | No | Yes | No | No | No |
| Race Predictor | No | No | No | No | No | No |
| Recovery Advisor | No | No | Yes | No | No | No |
| Run/Walk Mode | No | Sorta | No | No | No | No | Swimming | Timex Run Trainer GPS 2.0 | Timex Run Trainer GPS 1.0 | Polar RC3 | Garmin Forerunner 210 | Nike+ GPS Sportwatch | Garmin Forerunner 310XT |
| Designed for swimming | No | No | No | No | No | Partial |
| Openwater swimming mode | N/A | N/A | N/A | N/A | N/A | Yes |
| Lap/Indoor Distance Tracking | N/A | N/A | N/A | N/A | N/A | No |
| Record HR underwater | N/A | N/A | No | No | No | No |
| Openwater Metrics (Stroke/etc.) | N/A | N/A | N/A | N/A | N/A | Distance, no stroke |
| Indoor Metrics (Stroke/etc.) | N/A | N/A | N/A | N/A | N/A | No |
| Indoor Drill Mode | N/A | N/A | N/A | N/A | N/A | No |
| Indoor auto-pause feature | N/A | N/A | N/A | N/A | N/A | No |
| Change pool size | N/A | N/A | N/A | N/A | N/A | No |
| Indoor Min/Max Pool Lengths | N/A | N/A | N/A | N/A | N/A | No |
| Ability to customize data fields | N/A | N/A | N/A | N/A | N/A | No |
| Captures per length data - indoors | N/A | N/A | N/A | N/A | N/A | No |
| Indoor Alerts | N/A | N/A | N/A | N/A | N/A | No | Triathlon | Timex Run Trainer GPS 2.0 | Timex Run Trainer GPS 1.0 | Polar RC3 | Garmin Forerunner 210 | Nike+ GPS Sportwatch | Garmin Forerunner 310XT |
| Designed for triathlon | No | No | No | No | No | Yes |
| Multisport mode | N/A | N/A | No | No | N/A | Yes | Workouts | Timex Run Trainer GPS 2.0 | Timex Run Trainer GPS 1.0 | Polar RC3 | Garmin Forerunner 210 | Nike+ GPS Sportwatch | Garmin Forerunner 310XT |
| Create/Follow custom workouts | No | Yes | No | No | No | Yes |
| On-unit interval Feature | Yes | Yes | Yes with firmware upate | Yes | Yes | Yes |
| Training Calendar Functionality | No | No | No | No | No | No | Functions | Timex Run Trainer GPS 2.0 | Timex Run Trainer GPS 1.0 | Polar RC3 | Garmin Forerunner 210 | Nike+ GPS Sportwatch | Garmin Forerunner 310XT |
| Auto Start/Stop | Yes | Yes | No | No | No | Yes |
| Virtual Partner Feature | No | Yes | No | No | No | Yes |
| Virtual Racer Feature | No | No | No | No | No | No |
| Records PR's - Personal Records (diff than history) | No | No | No | No | Yes | No |
| Tidal Tables (Tide Information) | No | No | No | No | No | No |
| Weather Display (live data) | No | No | No | No | No | No | Navigate | Timex Run Trainer GPS 2.0 | Timex Run Trainer GPS 1.0 | Polar RC3 | Garmin Forerunner 210 | Nike+ GPS Sportwatch | Garmin Forerunner 310XT |
| Follow GPS Track (Courses/Waypoints) | No | No | No | No | No | Yes |
| Markers/Waypoint Direction | No | No | No | No | No | No |
| Offline Maps | No | No | No | No | No | No |
| Back to start | No | No | Yes | No | No | Yes |
| Impromptu Round Trip Route Creation | No | No | No | No | No | No |
| Download courses/routes from phone to unit | No | No | No | No | No | No | Sensors | Timex Run Trainer GPS 2.0 | Timex Run Trainer GPS 1.0 | Polar RC3 | Garmin Forerunner 210 | Nike+ GPS Sportwatch | Garmin Forerunner 310XT |
| Altimeter Type | GPS | GPS | GPS | GPS | GPS | GPS |
| Compass Type | N/A | N/A | GPS | N/A | N/A | GPS |
| Heart Rate Strap Compatible | Yes | Yes | Yes | Yes | Yes | Yes |
| ANT+ Heart Rate Strap Capable | Yes | Yes | No | Yes | No | Yes |
| ANT+ Speed/Cadence Capable | No | No | No | No | No | Yes |
| ANT+ Footpod Capable | Yes | Yes | No | Yes | No | Yes |
| ANT+ Power Meter Capable | No | No | No | No | No | Yes |
| ANT+ Remote Control | No | No | No | No | No | No |
| ANT+ eBike Compatibility | No | No | No | No | NO | No |
| Shimano Di2 Shifting | No | |||||
| Bluetooth Smart HR Strap Capable | No | No | No | No | No | No |
| Bluetooth Smart Speed/Cadence Capable | No | No | No | No | No | No |
| Bluetooth Smart Footpod Capable | No | No | No | No | No | No |
| Bluetooth Smart Power Meter Capable | No | No | No | No | No | No |
| Temp Recording (internal sensor) | No | No | No | No | No | No |
| Temp Recording (external sensor) | No | No | No | No | No | No | Software | Timex Run Trainer GPS 2.0 | Timex Run Trainer GPS 1.0 | Polar RC3 | Garmin Forerunner 210 | Nike+ GPS Sportwatch | Garmin Forerunner 310XT |
| Desktop Application | Training Peaks Agent | Training Peaks Agent | PPT/Websync | GTC | Nike+ Connect | GTC/ANT Agent |
| Web Application | Training Peaks | Training Peaks | PPT.com | Garmin Connect | Nike+ Site | Garmin Connect |
| Phone App | Training Peaks (iOS/Android) | Training Peaks | Polar Beats | Garmin Fit | Nike+ App | Garmin Fit |
| Ability to Export Settings | Yes | Yes | No | No | No | No | Purchase | Timex Run Trainer GPS 2.0 | Timex Run Trainer GPS 1.0 | Polar RC3 | Garmin Forerunner 210 | Nike+ GPS Sportwatch | Garmin Forerunner 310XT |
| Amazon | Link | Discontinued | Link | Link | Link | Link | DCRainmaker | Timex Run Trainer GPS 2.0 | Timex Run Trainer GPS 1.0 | Polar RC3 | Garmin Forerunner 210 | Nike+ GPS Sportwatch | Garmin Forerunner 310XT |
| Review Link | Link | Link | Link | Link | Link | Link |
Remember to click the ‘Expand Results’ button as it’ll show a gazillion more rows than the quick preview above.
Summary:
The Timex Run Trainer 2.0 makes good progress over the initial Timex Run Trainer. While I wouldn’t call it revolutionary, I would say they made significant evolutionary steps. Simply put: A lot of fine tuning and tweaking. And that’s what tends to differentiate most products in the market – can they clean-up all the little items and make it a more compelling product. In this case, the answer is yes. The addition of the nutrition alerts puts in more in a ‘leading’ category than a following one. And the size is now in the same ballpark as other units on the market. The switch to a device that requires no computer drivers to connect the device and read workouts is greatly appreciated – and the move towards the .FIT file format standard is also a major step in the right direction (even if the compatibility isn’t perfect).
While the unit still has some quirks around intervals and what things are called, they aren’t blockers in my opinion. The only real concern I have about the unit is the limited storage space – which may or may not be an issue for all folks. For me, it’s frustrating, but if you download frequently and delete frequently, it’s not too bad.
I wouldn’t have any problems recommending this unit for the majority of runners out there. No, it doesn’t have the advanced workout or course features of some of the $300+ units on the market, but it does have roughly the same functionality as those units in the ~$200 range (+/- $25-30US), which is the price range the unit is in ($225).
Pros:
– New menu system is much cleaner/easier to use
– New size is on par with other units in the market
– New backlight is actually usable – well done
– Nutrition (food/water) alerts are awesome
– Connects to computer without any drivers required, cross-platform
Cons:
– Very small amount of memory (space)
– Their implementation of .FIT files aren’t as compatible as I’d hoped
– Doesn’t automatically update time zone based on where you are (time yes, time zone no)
Found this review useful? Here’s how you can help support future reviews with just a single click! Read on…
Hopefully you found this review useful. At the end of the day, I’m an athlete just like you looking for the most detail possible on a new purchase – so my review is written from the standpoint of how I used the device. The reviews generally take a lot of hours to put together, so it’s a fair bit of work (and labor of love). As you probably noticed by looking below, I also take time to answer all the questions posted in the comments – and there’s quite a bit of detail in there as well.
I’ve partnered with Clever Training to offer all DC Rainmaker readers an exclusive 10% discount across the board on all products (except clearance items). You can pickup the Timex Run Trainer 2.0 below. Then receive 10% off of everything in your cart by adding code DCR10BTF at checkout. By doing so, you not only support the site (and all the work I do here) – but you also get a sweet discount. And, since this item is more than $75, you get free US shipping as well.
– Timex Ironman Run Trainer 2.0 GPS Speed and Distance Black-Orange
– Timex Ironman Run Trainer 2.0 GPS Speed and Distance Silver-Green
– Timex Ironman Run Trainer 2.0 GPS HRM Black-Orange
– Timex Ironman Run Trainer 2.0 GPS HRM Silver-Green
Additionally, you can also use Amazon to purchase the unit or accessories (though, no discount on either from Amazon). Or, anything else you pickup on Amazon helps support the site as well (socks, laundry detergent, cowbells). If you’re outside the US, I’ve got links to all of the major individual country Amazon stores on the sidebar towards the top. Though, Clever Training also ships most places too and you get the 10% discount. Thanks for reading!
As you’ve seen throughout the review there are numerous compatible accessories for the unit. I’ve consolidated them all into the below chart, with additional information (full posts) available on some of the accessories to the far right. Also, everything here is verified by me – so if it’s on the list, you’ll know it’ll work. And as you can see, I mix and match accessories based on compatibility – so if a compatible accessory is available at a lower price below, you can grab that instead.
| Product | Street Price | Amazon | |
|---|---|---|---|
| Garmin ANT+ Heart Rate Strap (Classic Plastic Strap) - HRM1 $37.00 | $37.00 | Amazon | |
| Garmin ANT+ Heart Rate Strap (Premium Soft-Strap) - HRM2 $69.00 | $69.00 | Amazon | |
 | Garmin ANT+ Heart Rate Strap (Premium Soft-Strap) - HRM3 $50 | $50 | Amazon |
 | Garmin ANT+ Running Footpod (Mini) $45 | $45 | Amazon |
| Suunto ANT/ANT+ Running Footpod (good for both ANT types) $70.00 | $70.00 | Amazon |
| Timex ANT+ Heart Rate Strap (Premium Soft-Strap) $48.00 | $48.00 | Amazon | |
| Timex ANT+ Running Footpod (Mini) $51.00 | $51.00 | N/A |
| Timex Bike Mount Kit (for mounting any watch onto handlebars) $9.00 | $9.00 | Amazon |
And as always, feel free to post comments or questions in the comments section below, I’ll be happy to try and answer them as quickly as possible. And lastly, if you felt this review was useful – I always appreciate feedback in the comments below. Finally, I’ve written up a ton of helpful guides around using most of the major fitness devices, which you may find useful in getting started with the devices. These guides are all listed on this page here.