It’s been about 6 weeks since Garmin first announced the new Vivoactive 3 GPS watch. This watch builds upon the Vivoactive HR by adding in more features including things like contactless payments with Garmin Pay, as well as structured workouts. It, of course, retains the sports-focused features of previous models as well as the Garmin Connect IQ app platform.
Over these last 6 weeks I’ve been pounding the pavement and trails with it. From cycling to running on both surfaces, and even a bit of swimming tossed in. All while doing so in the busiest travel season of the year. And the best part? For half that time I wore the Fitbit Ionic on the other wrist, before then switching in the last three weeks to wearing the Apple Watch Series 3 LTE concurrently (other wrist). Which rounds out the three top competitors for fitness-focused smart watches in the mid-range market.
In the case of the Vivoactive 3, Garmin sent over a loaner to check out. I’ll be sending that back to them shortly, and going to go out and get my own through normal retail channels. If you find this review useful – hit up the links at the bottom to save some dough and support the site. I appreciate it.
With that – let’s get cooking!
What’s in the box:
At this juncture, I actually don’t have a final box to share with ya. Instead, I’ve got the box contents – which is essentially just the watch and the charging cable. Down the road, once I get my own from retail, I’ll stick some box shots in here. They’ll be sexy shots…at least as sexy as cardboard can be anyway.

Note that the charger cable is the same as almost all of the existing Garmin watches released in 2017 – their new ‘Garmin universal’ charger.

This is used in the Fenix 5/5S/5X/FR935/Vivosport, and probably a few others I’m forgetting. About the only units it’s not used on are re-incarnations of other older watches (like the ‘new’ FR30, which is really just FR35 hardware from last year with different software), as well as the Vivomove HR, which was too slim for the new connector (fashion focused).
The band meanwhile, is a 20mm standard watch style band – so you can swap it with whatever you fancy, be it Garmin or otherwise.

And finally, I’m sure the box will have some paper junk in there like a three line quick-start guide. Obviously, after this post it’s unlikely you’ll need to consult with such documentation.
Weights and Sizes:
Taking a quick detour to look at the sizes and weights of the watches, I’ve lined up the Apple Watch Series 3 LTE with the Fitbit Ionic and Garmin Vivoactive 3. Essentially, what are likely to be the three most popular fitness/sports focused watches this fall for the mid-range market (the Samsung Gear Sport hasn’t started shipping yet).
Here’s how the three look side by side:

As you can see, they’re all fairly similar in sizes. The Garmin is a bit more rounded than the Apple Watch, while the Fitbit is a touch bit bigger in terms of face. Ultimately though, they’re all fairly similar.

Here’s a look at them from a slightly different angle:

Then to take a crack at the weights, I put all three on the scale. I used the sport band in the case of the Fitbit Ionic, merely because I hate the regular stock band. You can check out that in-depth review though for weights of all the band types.


All the weights are in grams, with the Fitbit and Garmin units being identical at 43g, and the Apple Watch sitting in at 63g. Keep in mind this is the 42mm Apple Watch, so it’d be slightly heavier than the 38mm variant.
The Basics:

I’m going to start off with the basics, and then we’ll jump into the sport aspects in a section further down. With the Vivoactive 3 being part of the Vivo family, it means that a core piece of that is related to just day to day activity tracking such as steps and sleep. Before that though, let’s talk about how to interact with the thing.
The unit has a touchscreen display, as well as one button on the right side (unless you flip it over, in which case it’s on the left side), as well as a touch-sensitive swipe area on the left side (again, unless you flip it over). The touch-sensitive area allows you to swipe up and down through pages or menus.


What is interesting is the ability to invert the unit so that the button is on your left. This is done via the Garmin Connect app, which simply flips over the screen. You’ll also probably want to flip the bands as well, so that the clasps are ‘proper’. All of which takes about 3 seconds.


Next, by default you have the default watch face shown. Like most Garmin wearables, you can download watch faces from the Connect IQ store – as well as create your own with photos and such. If you left it the way you got it, you’ll see your step, stair, and intensity minutes targets listed on the screen behind the watch face:

Each of these goals can be tweaked, or left dynamic as is the case of steps, which will automatically shift each day depending on what you’ve done recently. Walk more, it raises the goal. Fall off the walking boat, and it lowers it.
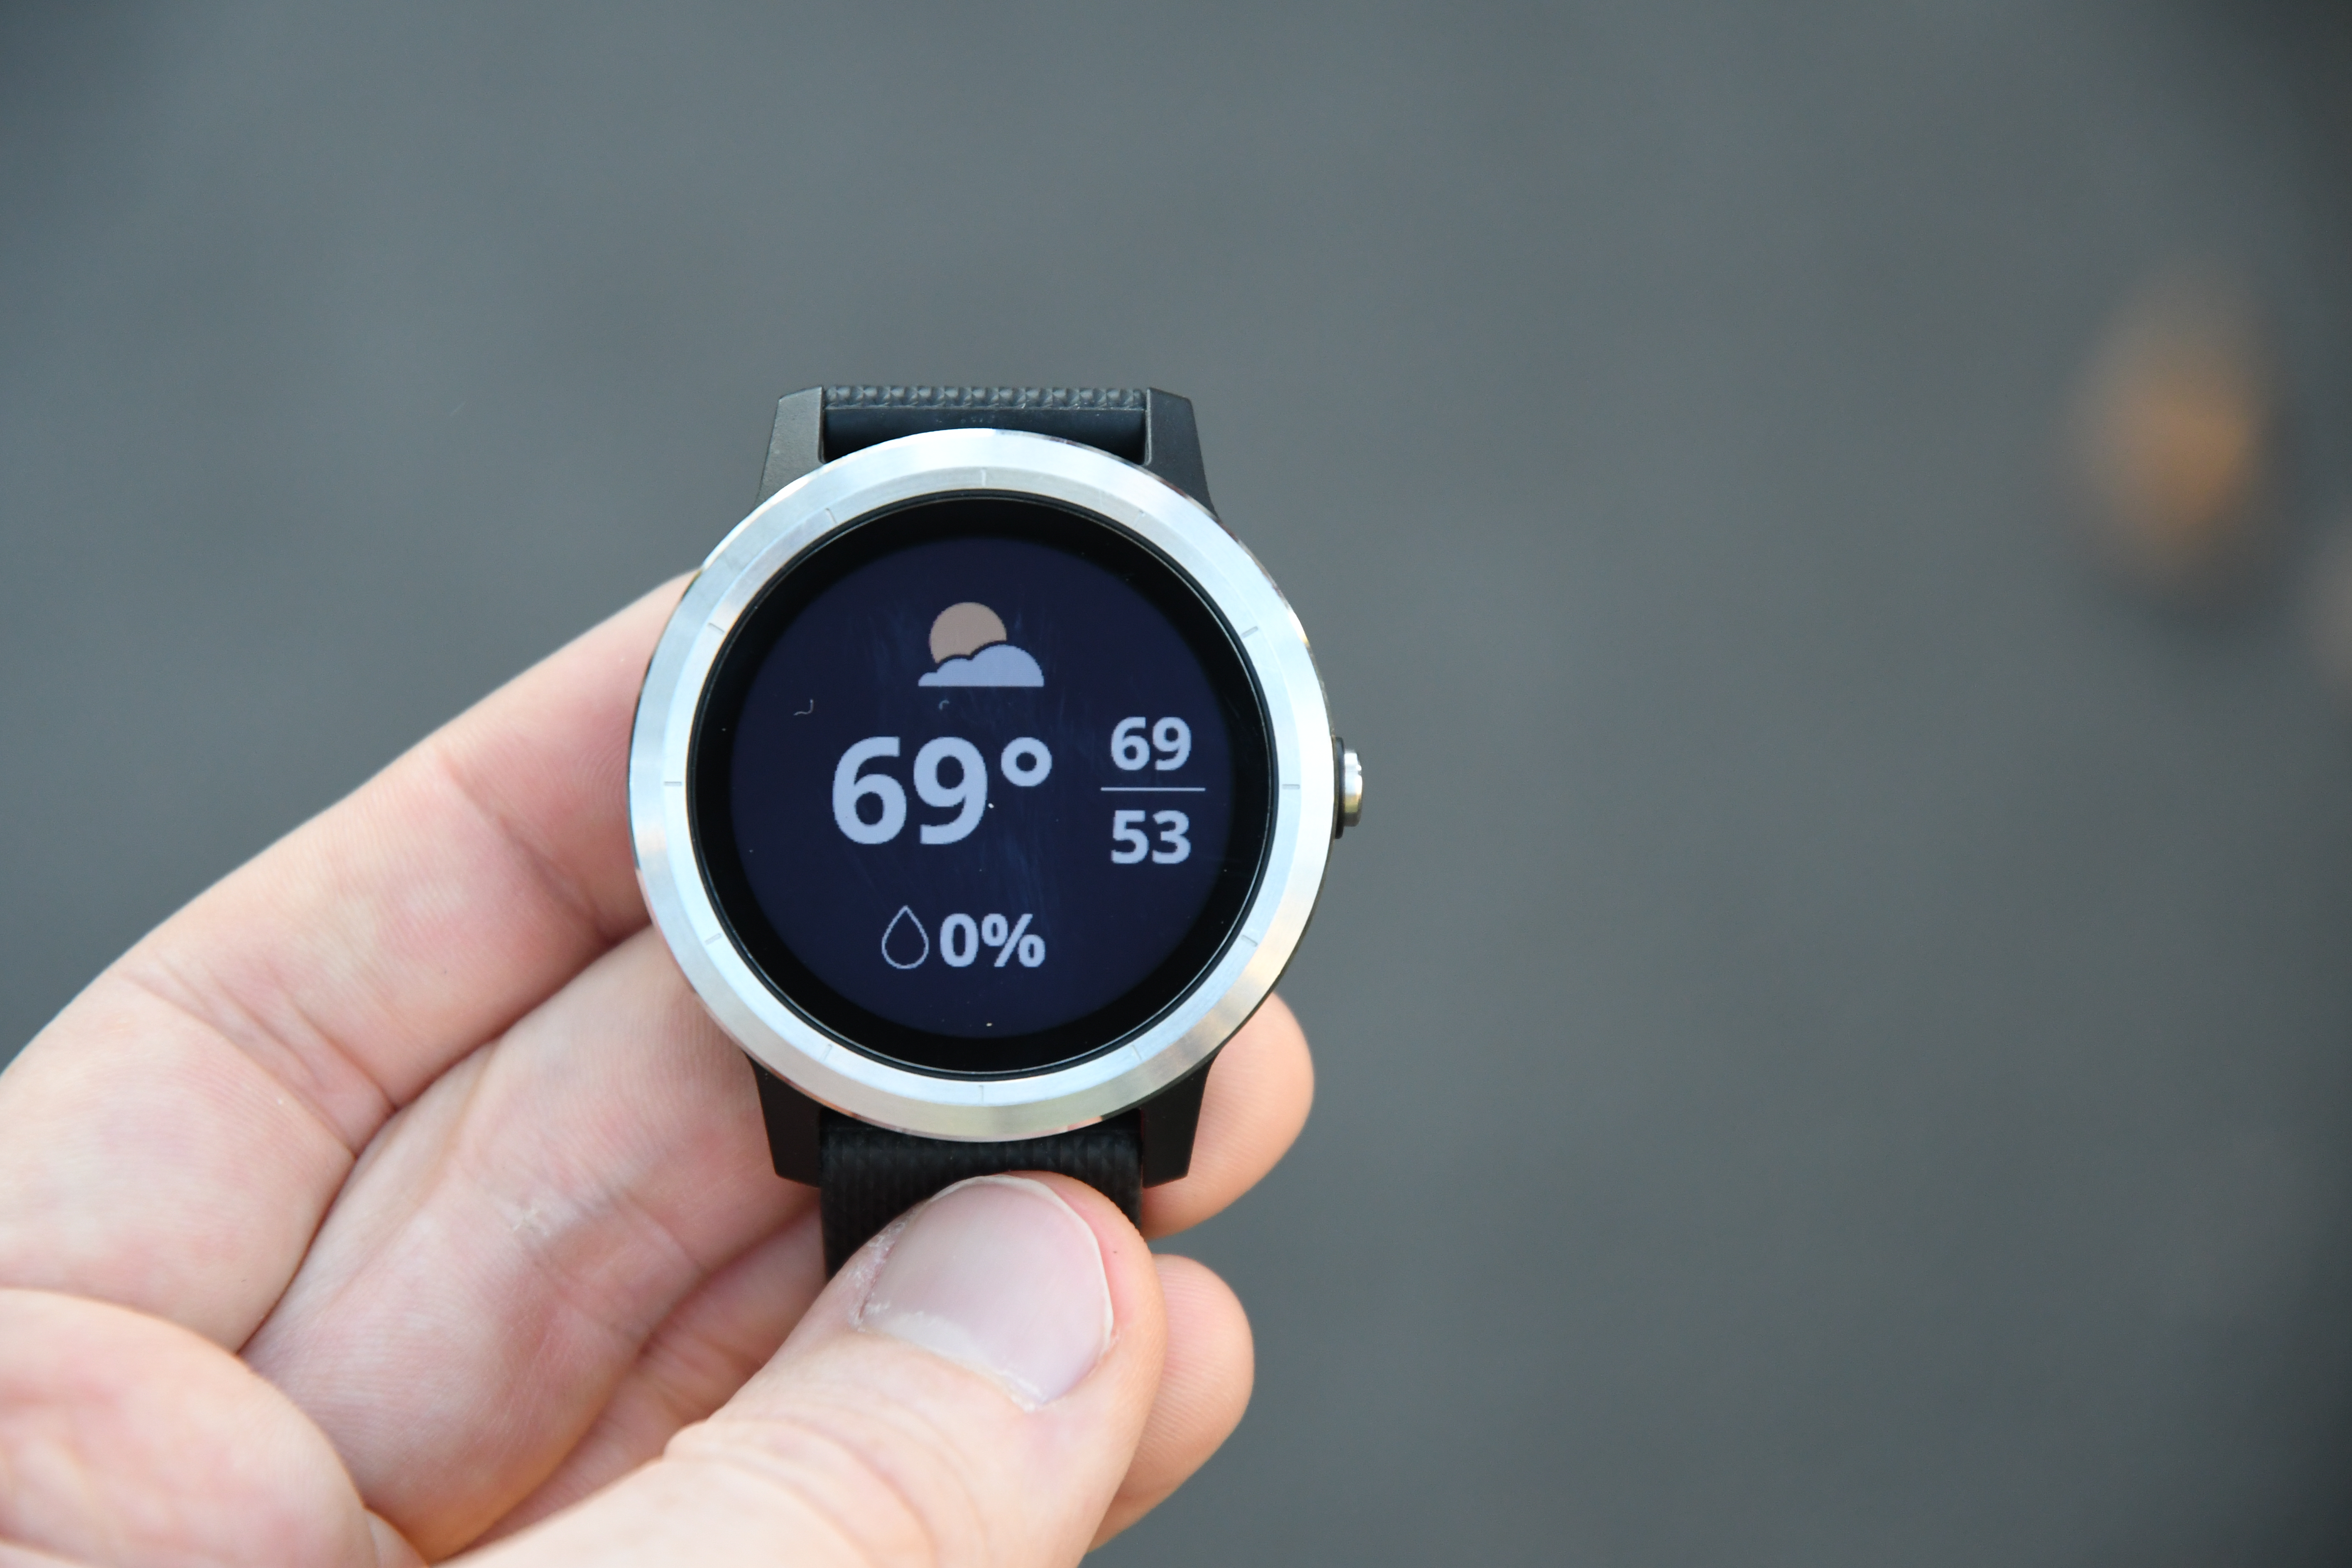
You can swipe up/down through the widget pages at any time to see core stats like steps, stairs, weather, and so on. Here’s a quick gallery of a few of the default widget pages, though you can certainly add more Garmin and 3rd party ones:
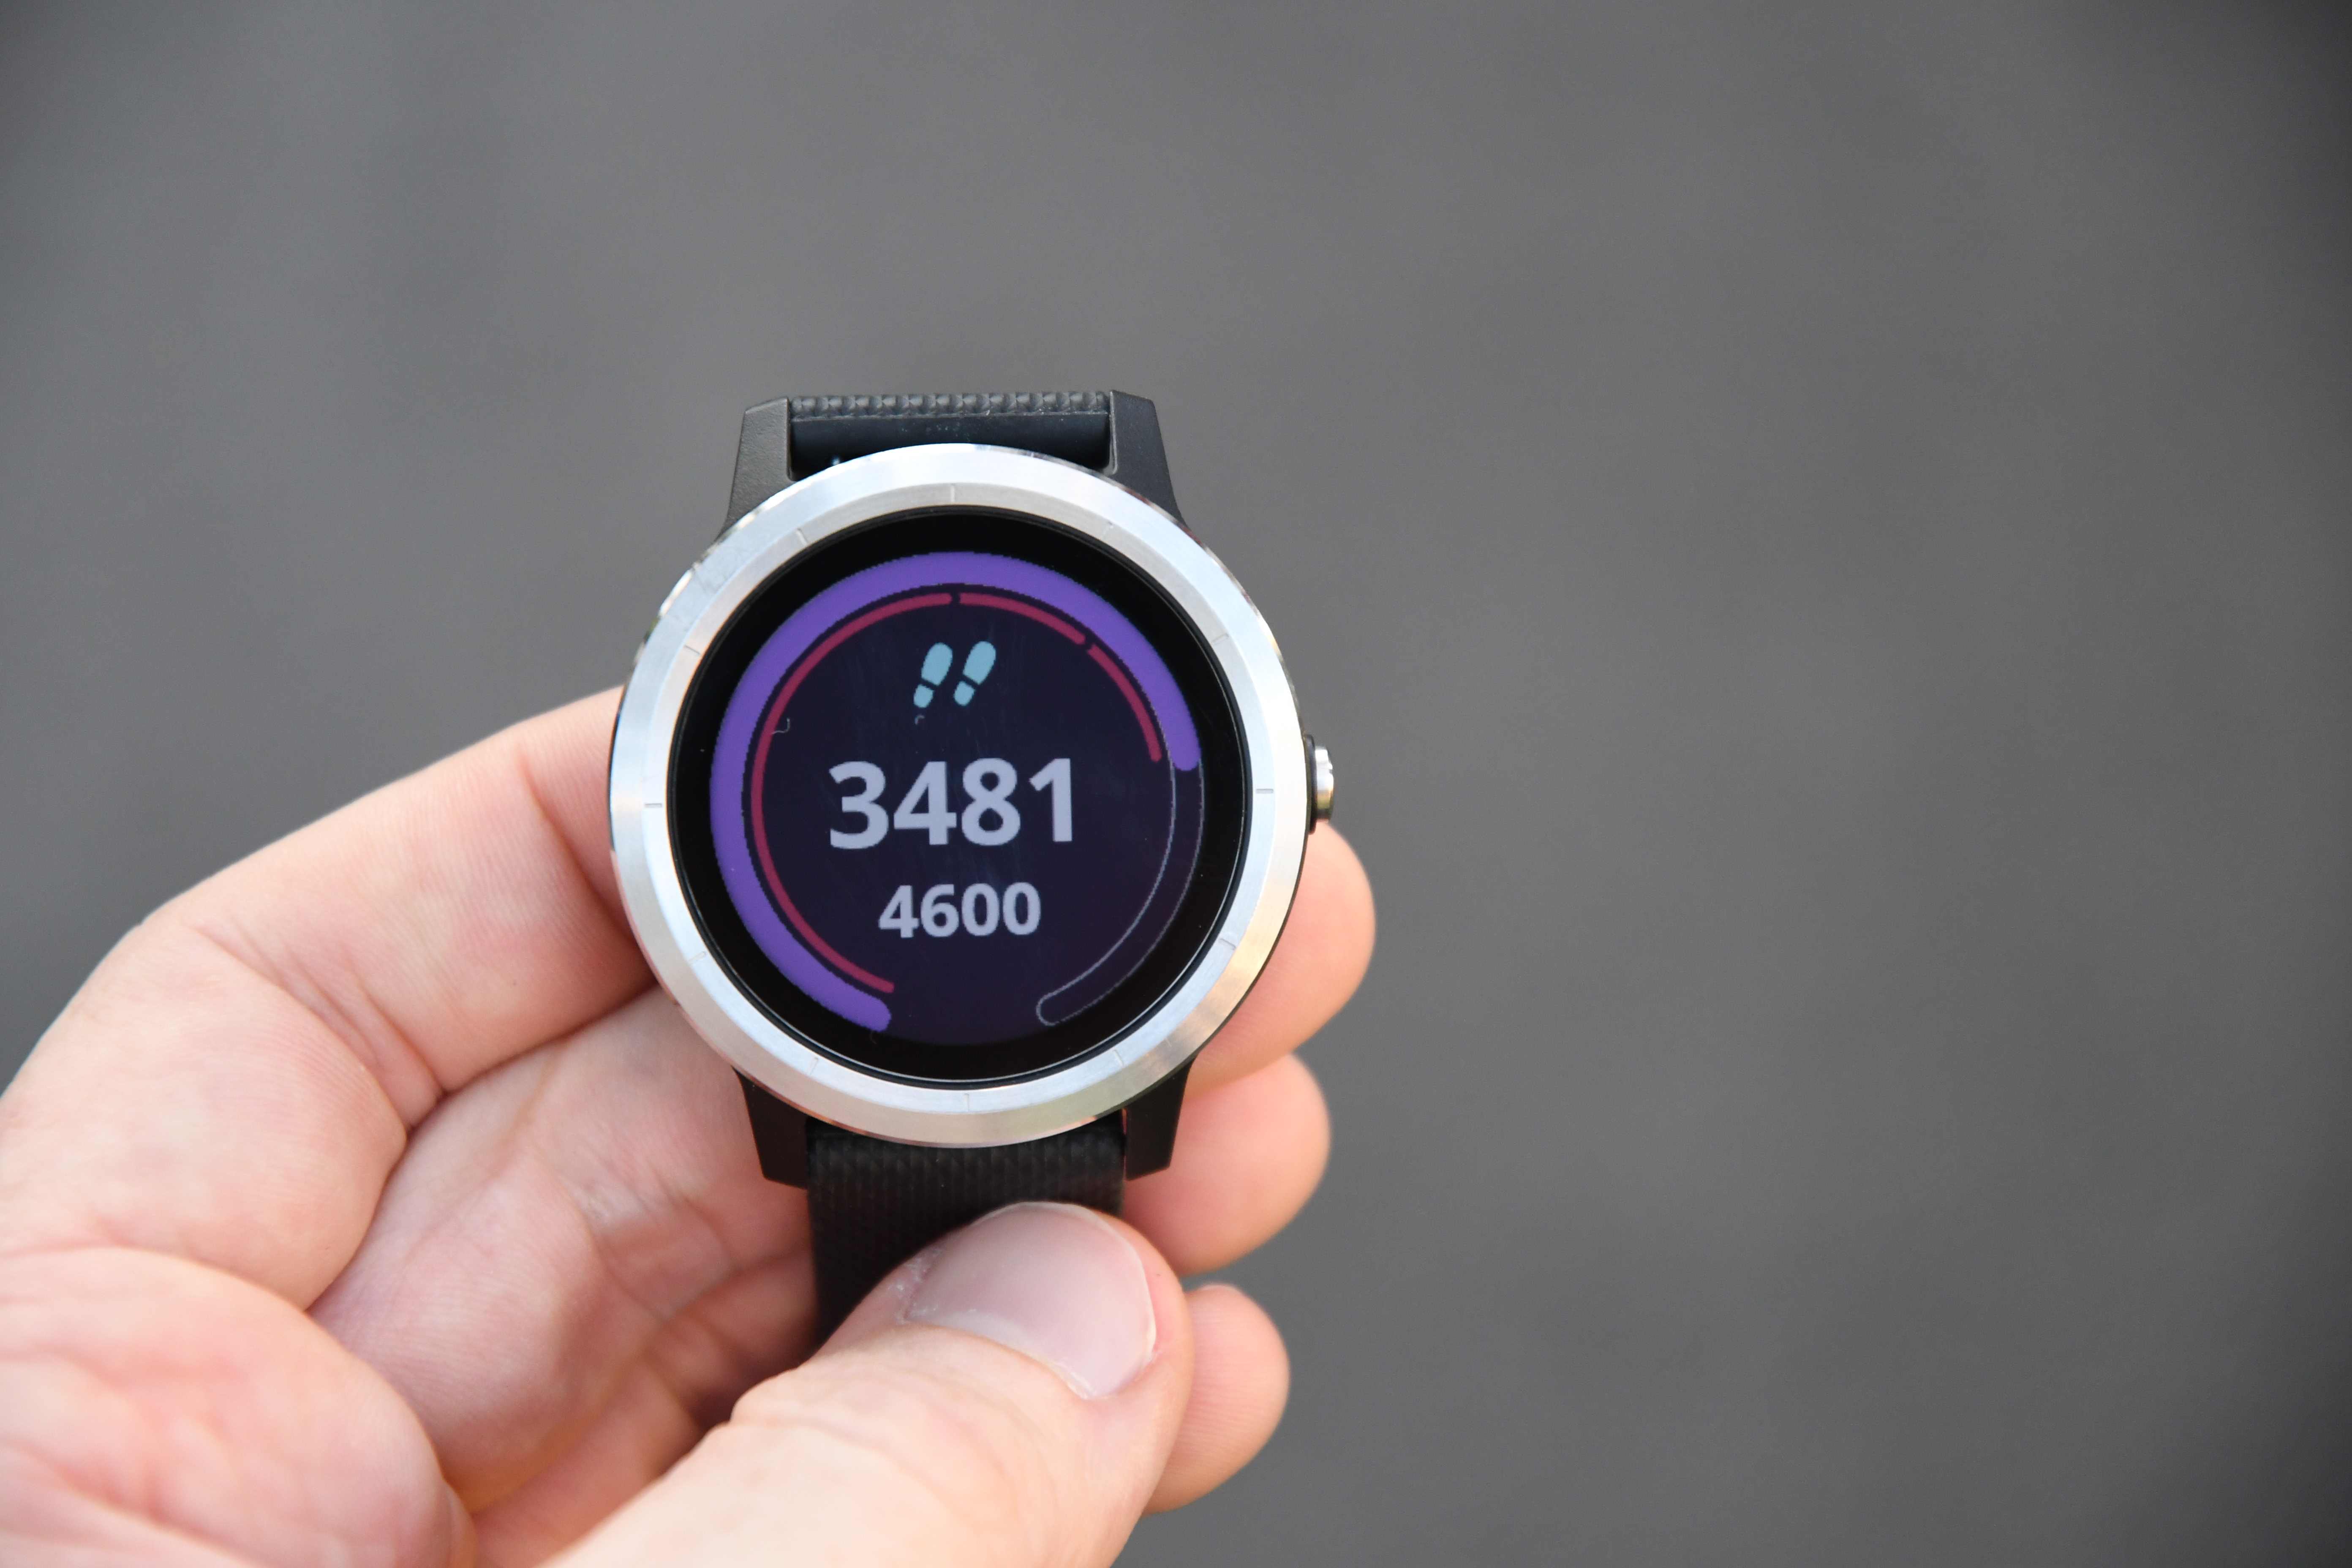
You’ll notice up above ones like steps, which you can then tap on to get a bit more historical detail on. In the case of steps you’ll see your progress towards your goal steps along the edge (4600 goal steps for today), and then in the inside of that you’ll see the slight red inactivity bar as well (meaning I haven’t walked enough steps lately).


Similarly, we’ve got the 24×7 HR graph, which by default shows the last four hours:

But you can tap that and look at aspects like resting heart rate (RHR). This is useful for tracking excess fatigue, as well as impending sickness (in my case anyway). I wrote a super-detailed post on resting HR and 24×7 HR monitoring here.

The heart rate sensor on the Vivoactive 3 follows that of the Fenix 5 and other 2017 watches, which records your heart rate at 1-second intervals constantly. This is a change from 2016 and previous watches, which were far less frequent (up to gaps of hours sometimes).
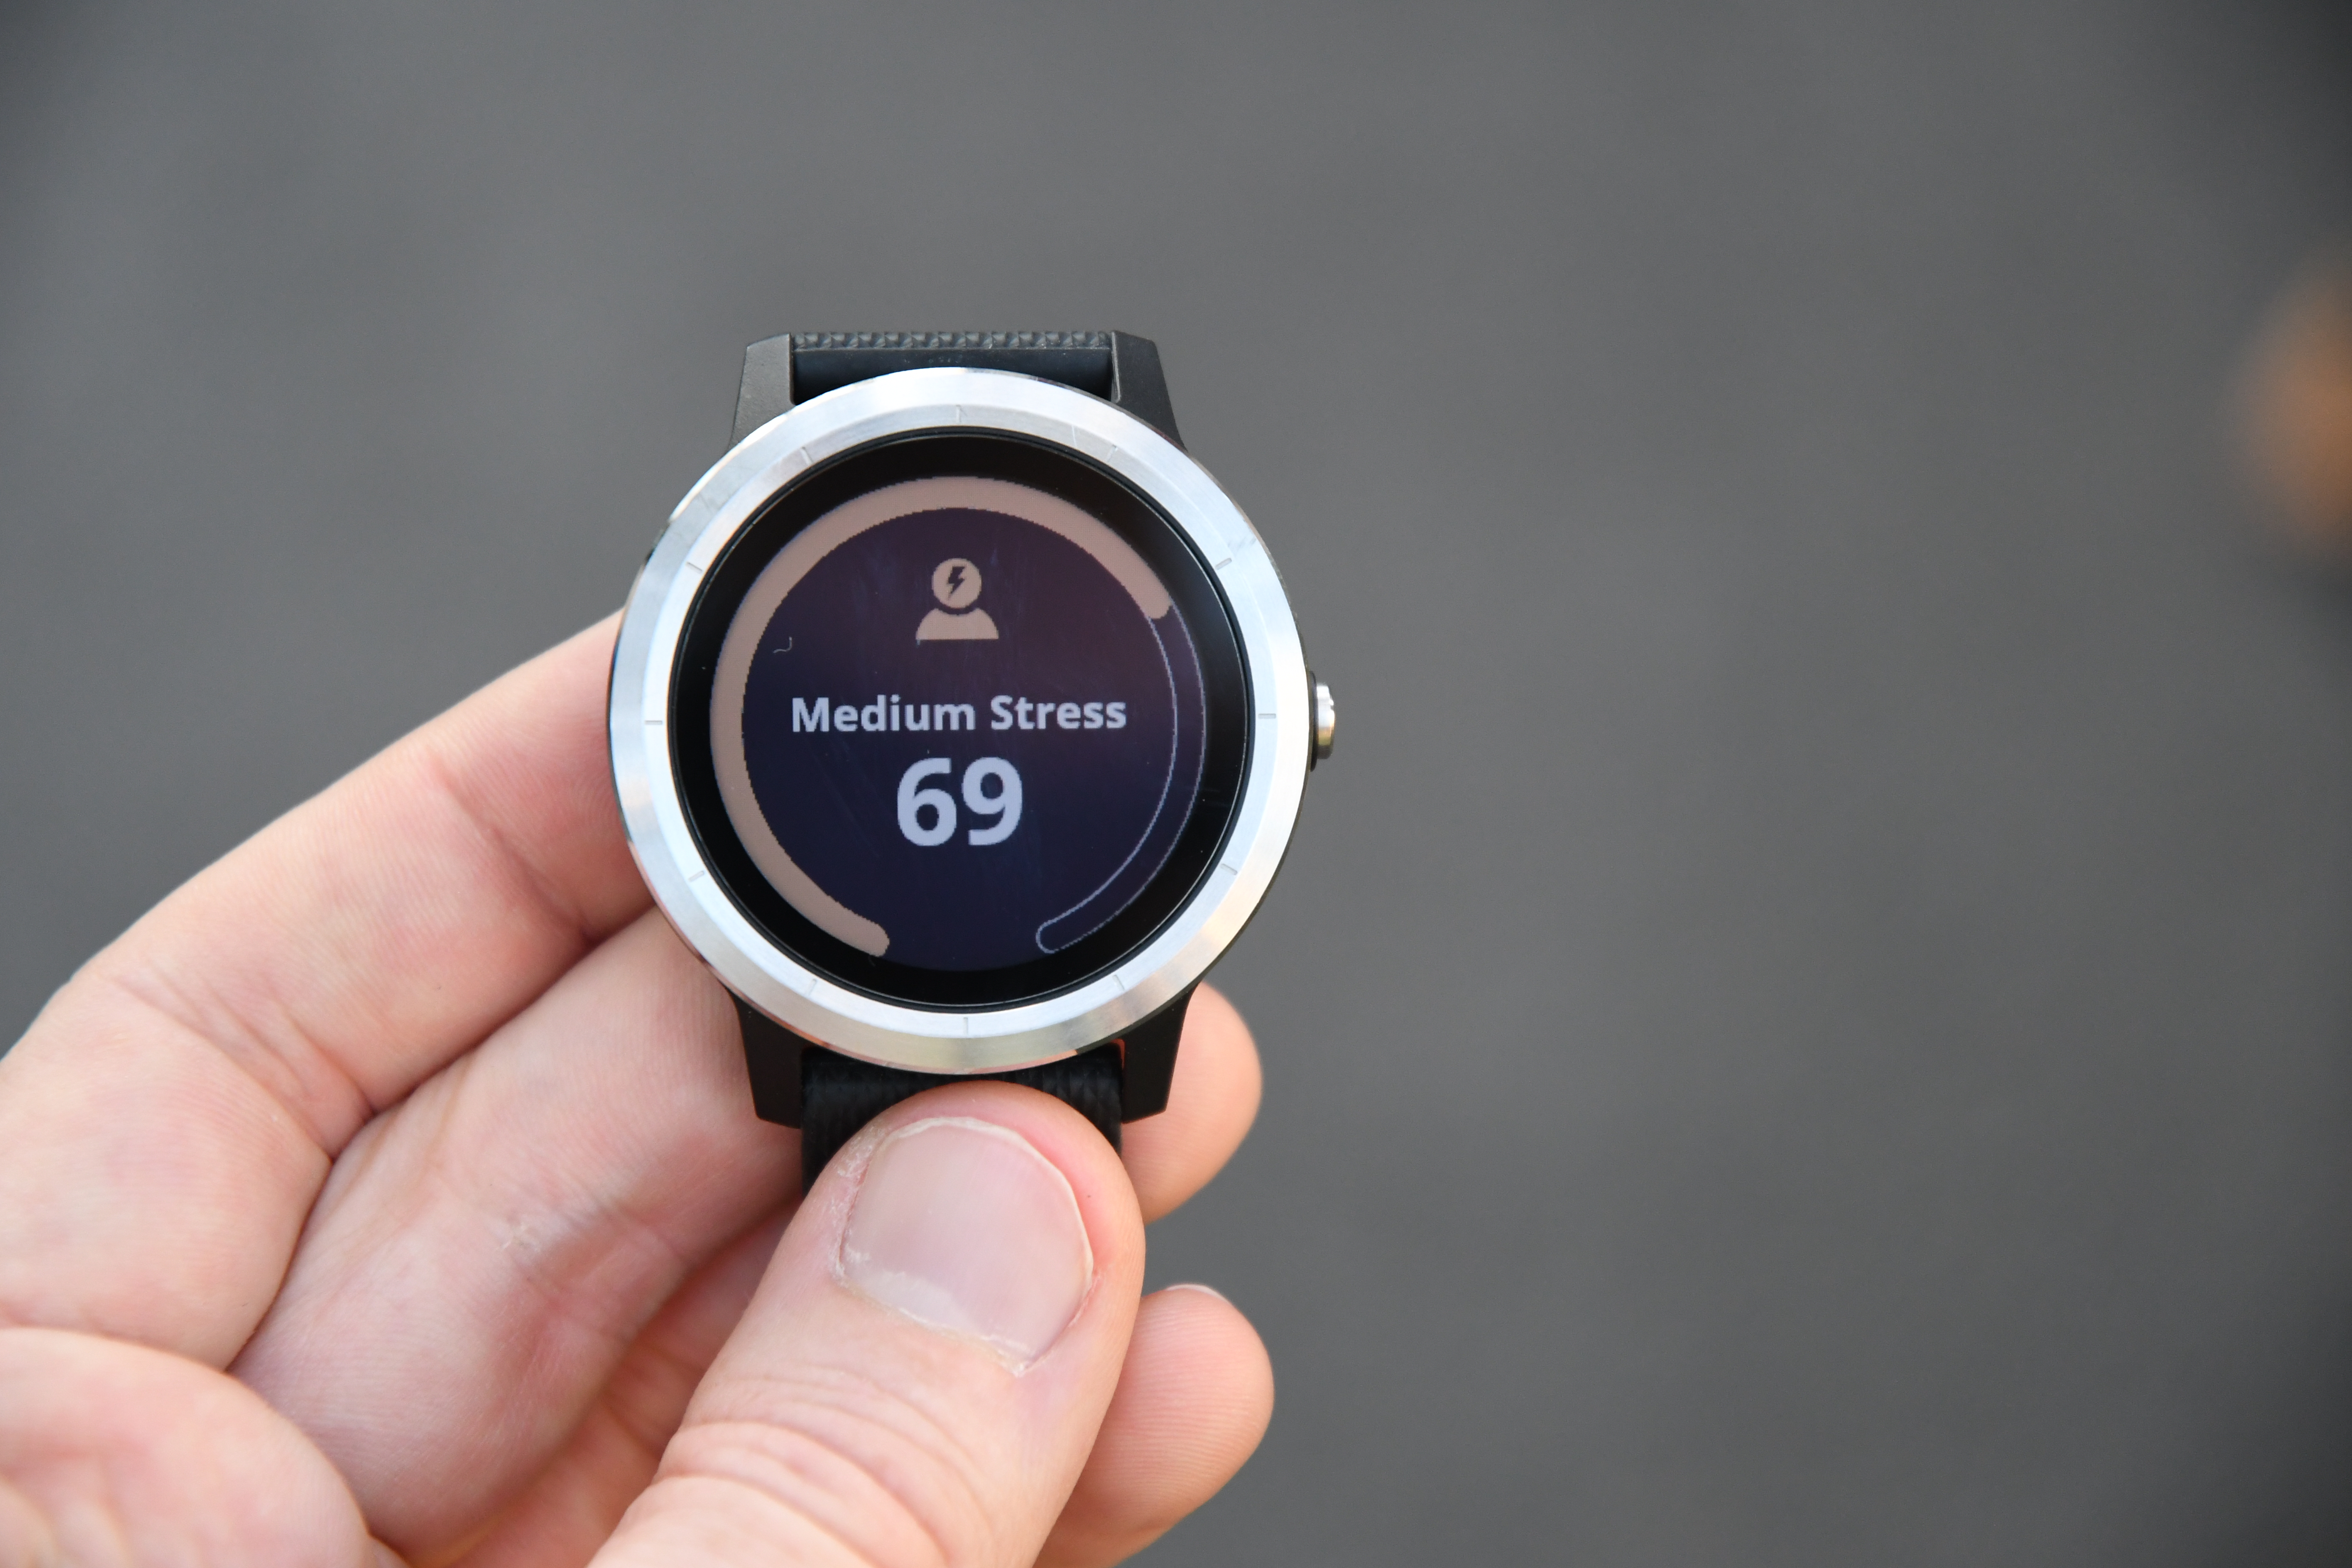
Along the same lines of heart rate, we’ve got the new stress stats. These were added this past spring with the Vivosmart 3, and have now been carried over into almost all other Garmin wearable devices released this year. These stats monitor how miserable your day has been, and report that back on a numerical scale. The higher the stress value, the more sucky things have gone for you.


All of this is then viewable on Garmin Connect Mobile later on as well, so you can track stress over time and across multiple days:


And that’s really the case across all stats, be it walking or calories or stairs:


Finally, we’ve got the sleep side of things, which the unit tracks automatically. You simply fall asleep each night, and it tracks it for ya. Note that it doesn’t track naps though. If you sleep multiple times in the day, you won’t get ‘credit’ for that.


(Minor note: The sleep times on these screenshots are offset by 8 hours due to an interesting quirk with when you don’t update the preferred tracker to a new time zone, and your old tracker isn’t used after your transatlantic flight. Totally my fault, but figured I’d note in case people wonder.)
The sleep times (start/end) seem to be pretty accurate within a couple minutes, but I have no tangible way to determine accuracy on the other claims in terms of sleep phases/portions. I am glad to see that, generally speaking, it doesn’t false trigger me as asleep if I’m just reading on my phone or watching YouTube videos before bed.
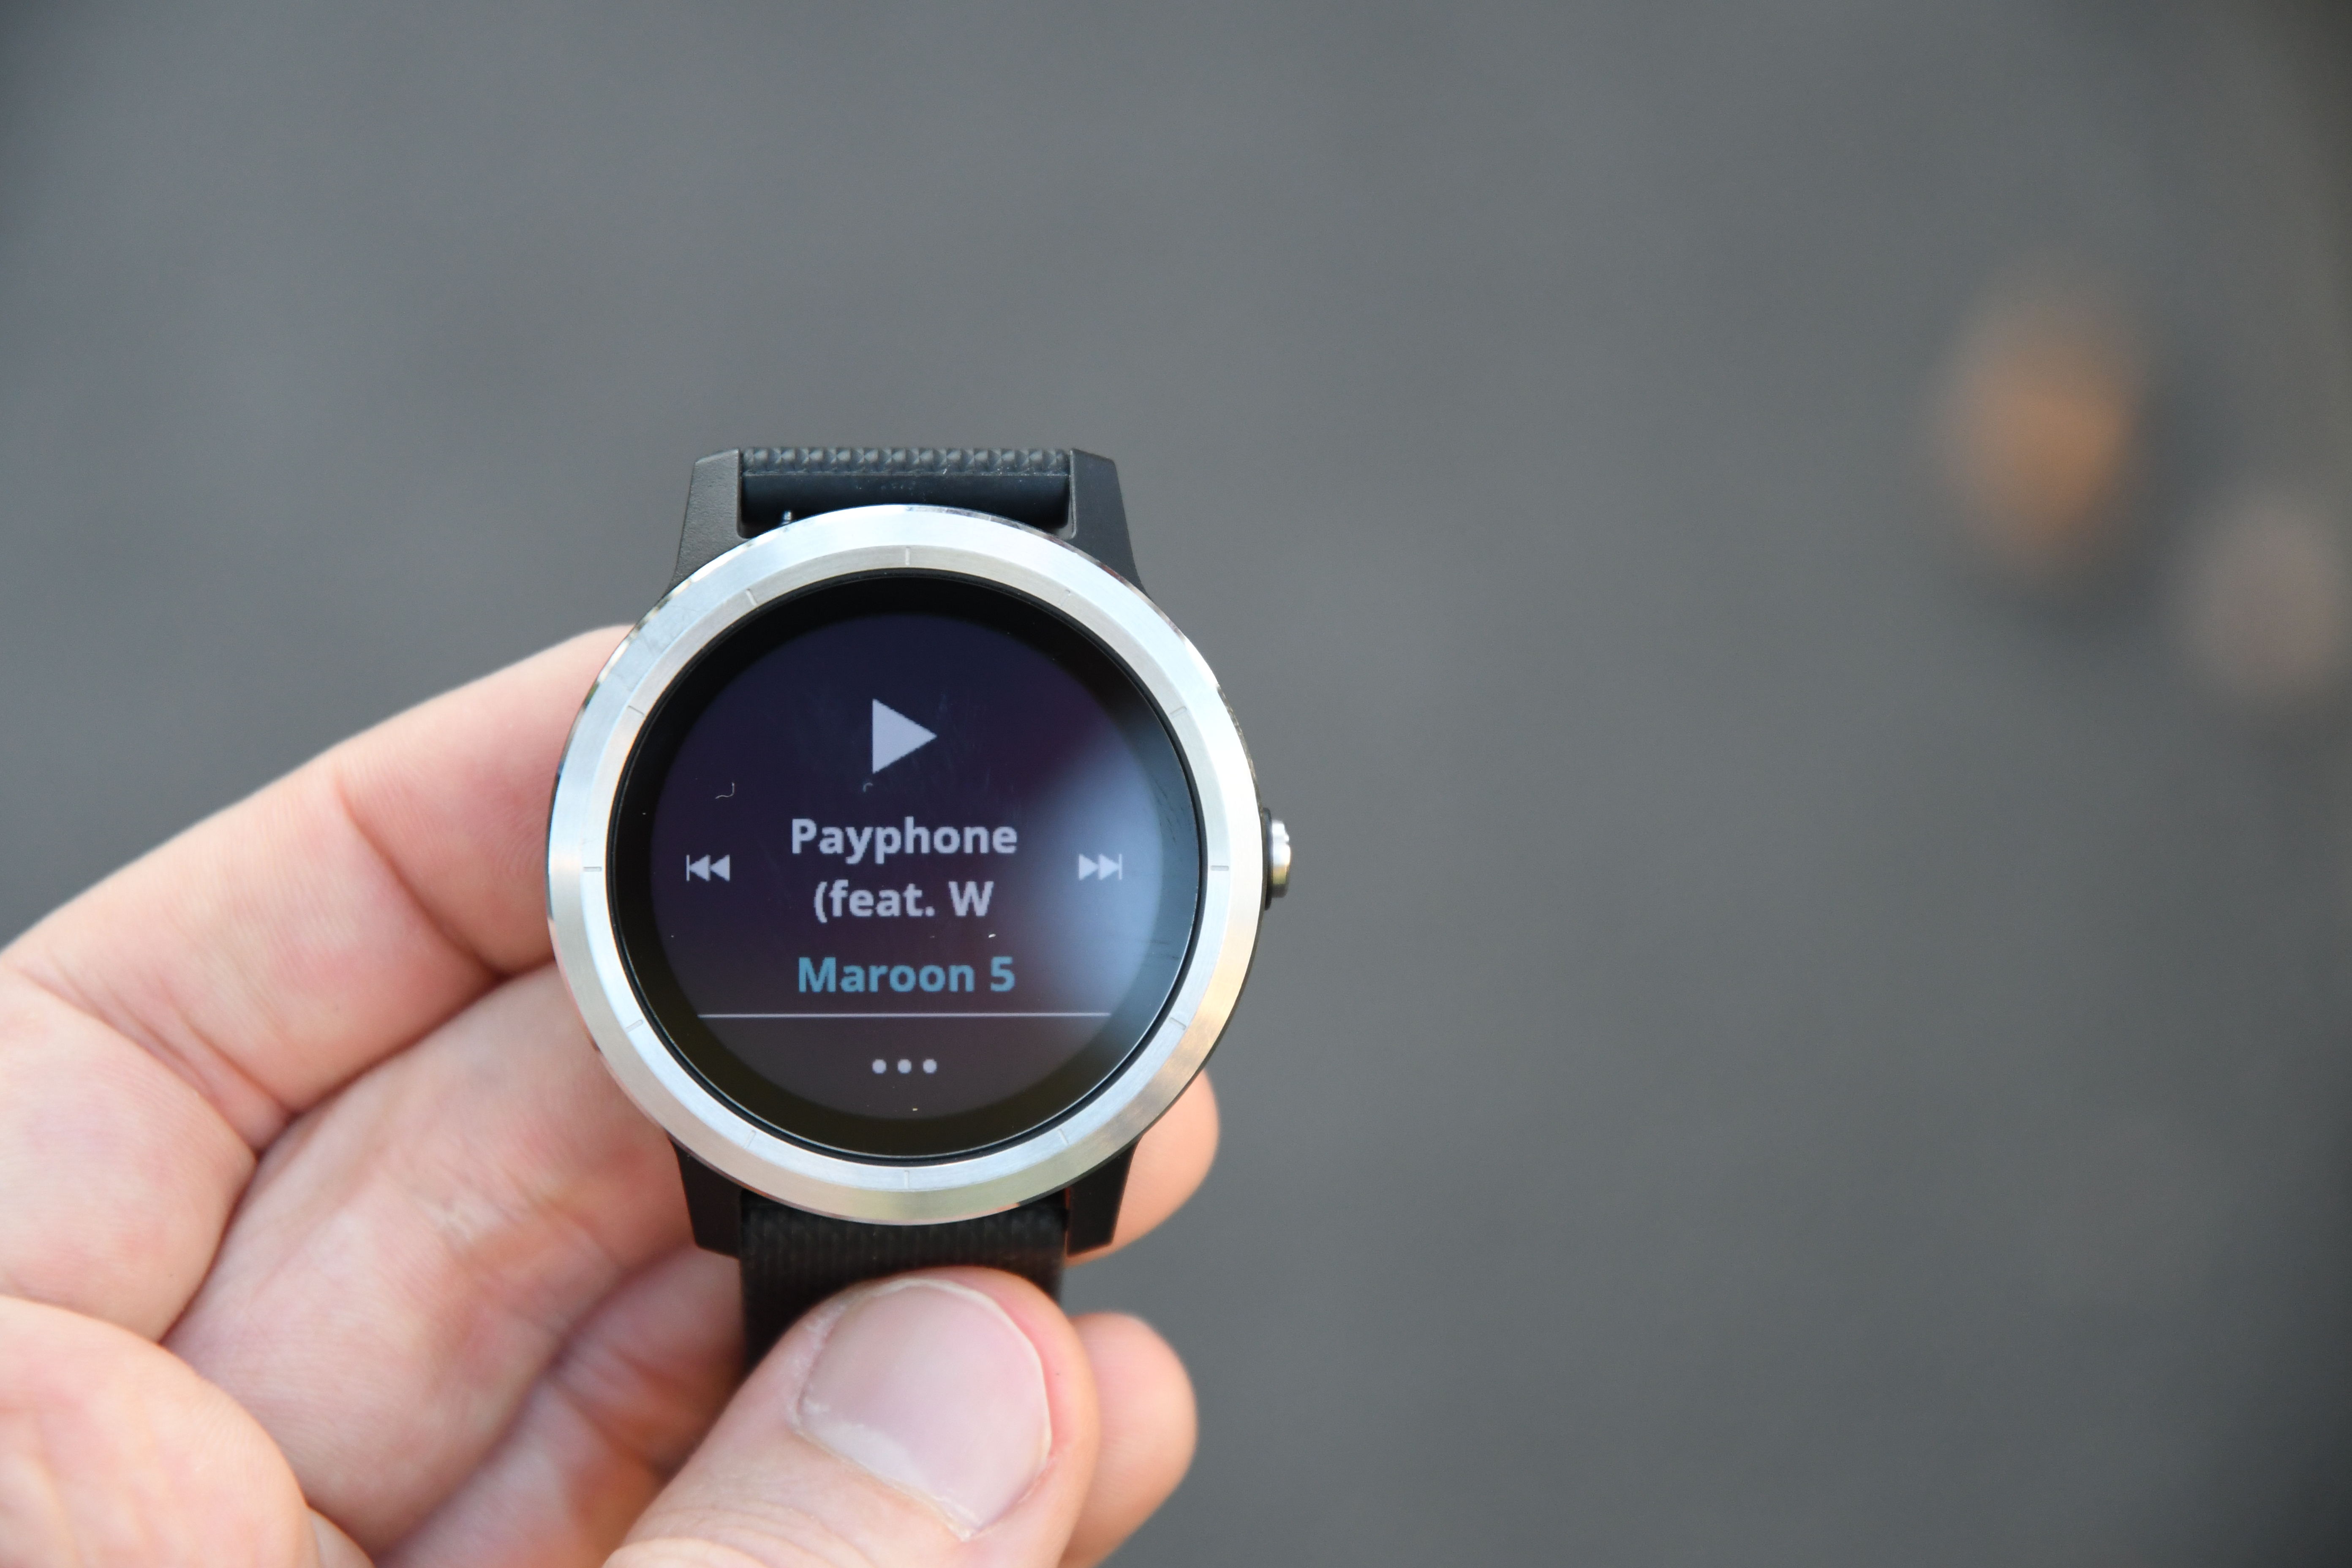
Next, to be clear, the Vivoactive 3 does NOT have music capabilities in it. It can control the music on your phone (e.g. stopping/starting it), but does not have any method or storage for music on the watch itself. That would require additional storage, a different Bluetooth stack configuration, and likely other changes.

Finally, for lack of anywhere else to mention it – let’s talk briefly about the backlight. It’s bright as a lighthouse. Too bright for my liking in fact, but the good news is you can turn down the brightness, as well as the automatic gesture activation of said lighthouse. That’s my recommended settings here, is to put the backlight at about 10-20%, and then to turn off gesture activation, except in workouts. Further, I always lock the screen to prevent accidental touches. The first settings will save your batteries, and locking the screen will help minimize false touches. The most recent firmware helps significantly, but it’s still not perfect. Especially in the shower – it’ll go crazy with false-touches by strong water pressure (rain is fine).
Garmin Pay:

Next up we’ve got Garmin Pay. The Vivoactive 3 is Garmin’s first device to offer contactless payments (NFC), which enables you to just tap your wrist against a reader and pay for fitness-focused things, like McDonald’s or Dunkin’ Donuts. Or perhaps that extra chocolatey creation.
To get started though, you’ll need a bank that’s supported. Garmin has a current list of them here (well, soon they will anyway), but I’ll save you some trouble: Your bank probably isn’t on the list. Especially if you’re outside the US. But even if you’re in the US, you’ve got a barely single digit chance your bank is there.
And that’s not totally Garmin’s fault. Fitbit is suffering the same issues. Apple is a few years down the road – so many banks support their payment solutions. And keep in mind, every vendor that gets into this had to individually approach and negotiate with every bank. Yes, every bank in the world. It’s more or less a nightmare. Garmin has somewhat outsourced the payment processing aspects to a company called FitPay. But really, Garmin is still heavily involved in it – especially the negotiations with larger banks.
In my case, none of my multitude of credit cards or banks that I have in the US are supported. Nor any of my French bank accounts here. So instead Garmin sent over a small $20 prepaid card to see how it works. In return, I stuck $20 in the package that the Vivoactive 3 will go back to them in.
First up is using Garmin Connect Mobile to get it added into my account:


The entire process is pretty quick and can be done by either scanning the credit card, or by manually entering in the numbers.


Upon completion of that process, it’ll activate the card, which takes a few more seconds. From there you’ll see it within your Garmin Pay wallet, which shows any cards you’ve added. You can also temporarily suspend cards from the watch, as well as delete them. Also, along the way the watch required a pin be added for when you use the card.
With the tech all set, I was off to find a contactless payment terminal at a store in my neighborhood. While I live in the heart of the city (Paris), and while almost every store has a contactless payment terminal…almost none of them work. The last time I found one that worked was for a coffee machine on the side of the highway at a rest stop. Even the Starbucks ones don’t work here. Nor the grocery stores, or the Metro system.
But ya know what does work? McDonald’s. And thus, enjoy:
In general though, if your bank is supported then you’re golden Which is basically the same story as on Fitbit. On Apple’s Watch it’s got far greater coverage. but keep in mind the coverage will dramatically increase in the coming months. I’d expect by early next spring you’ll have tons more banks around the world that you don’t today.
In either case, the underlying tech (NFC) is well established – it’s just a matter of the financial world bureaucracy catching up. Having worked in that world for a while…nothing moves fast when they don’t want it to.
Sport Usage:

Next up we’ve got using it in sport. After all, that’s likely why you bought a GPS watch. To begin, you’ll simply tap that silver button. That’ll show you two sports on the main page (default is Run and Bike), and then you can tap the little colorful dots to get the additional sports.

These sports are individually customizable, so you can tweak settings per sport, mostly on the watch itself.

For example, in running you’ve got three customizable data pages (screens), plus a HR zone gauge screen. All of the three screens though have to share either a 1, 2, 3, or 4 data field layout, which is kinda quirky. I’d like to have one page set as 3 field, one as 4 field, etc…
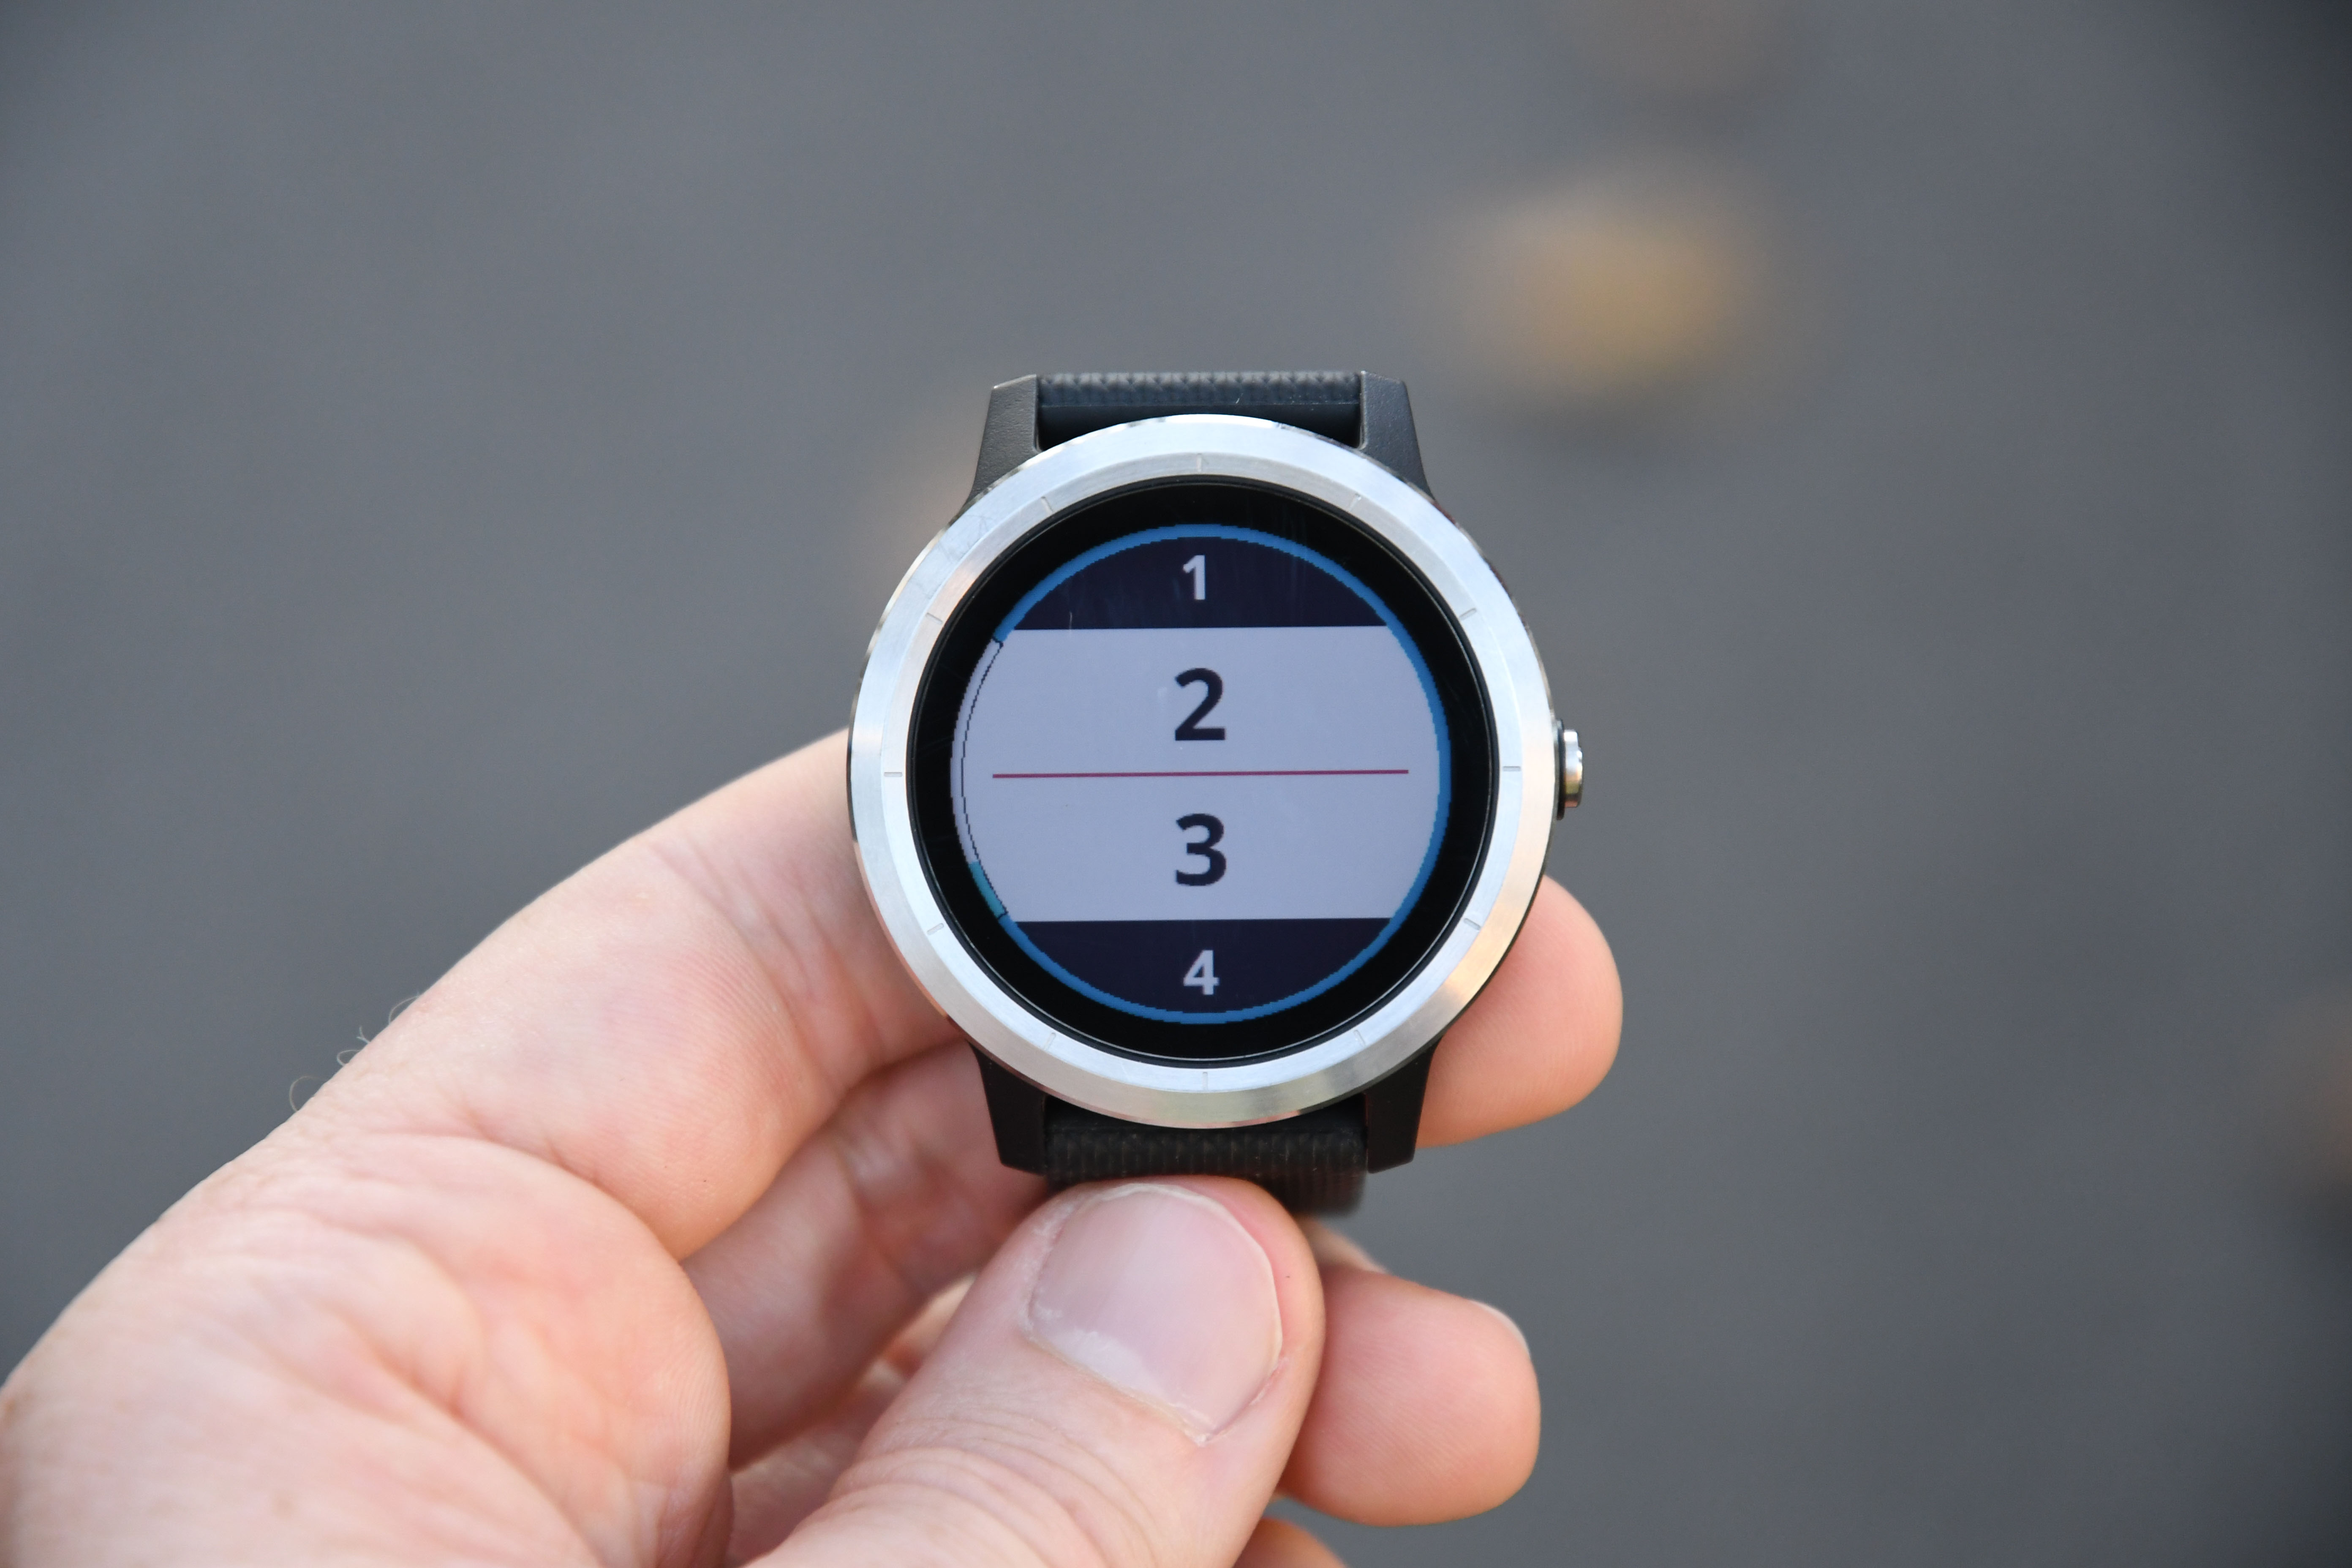
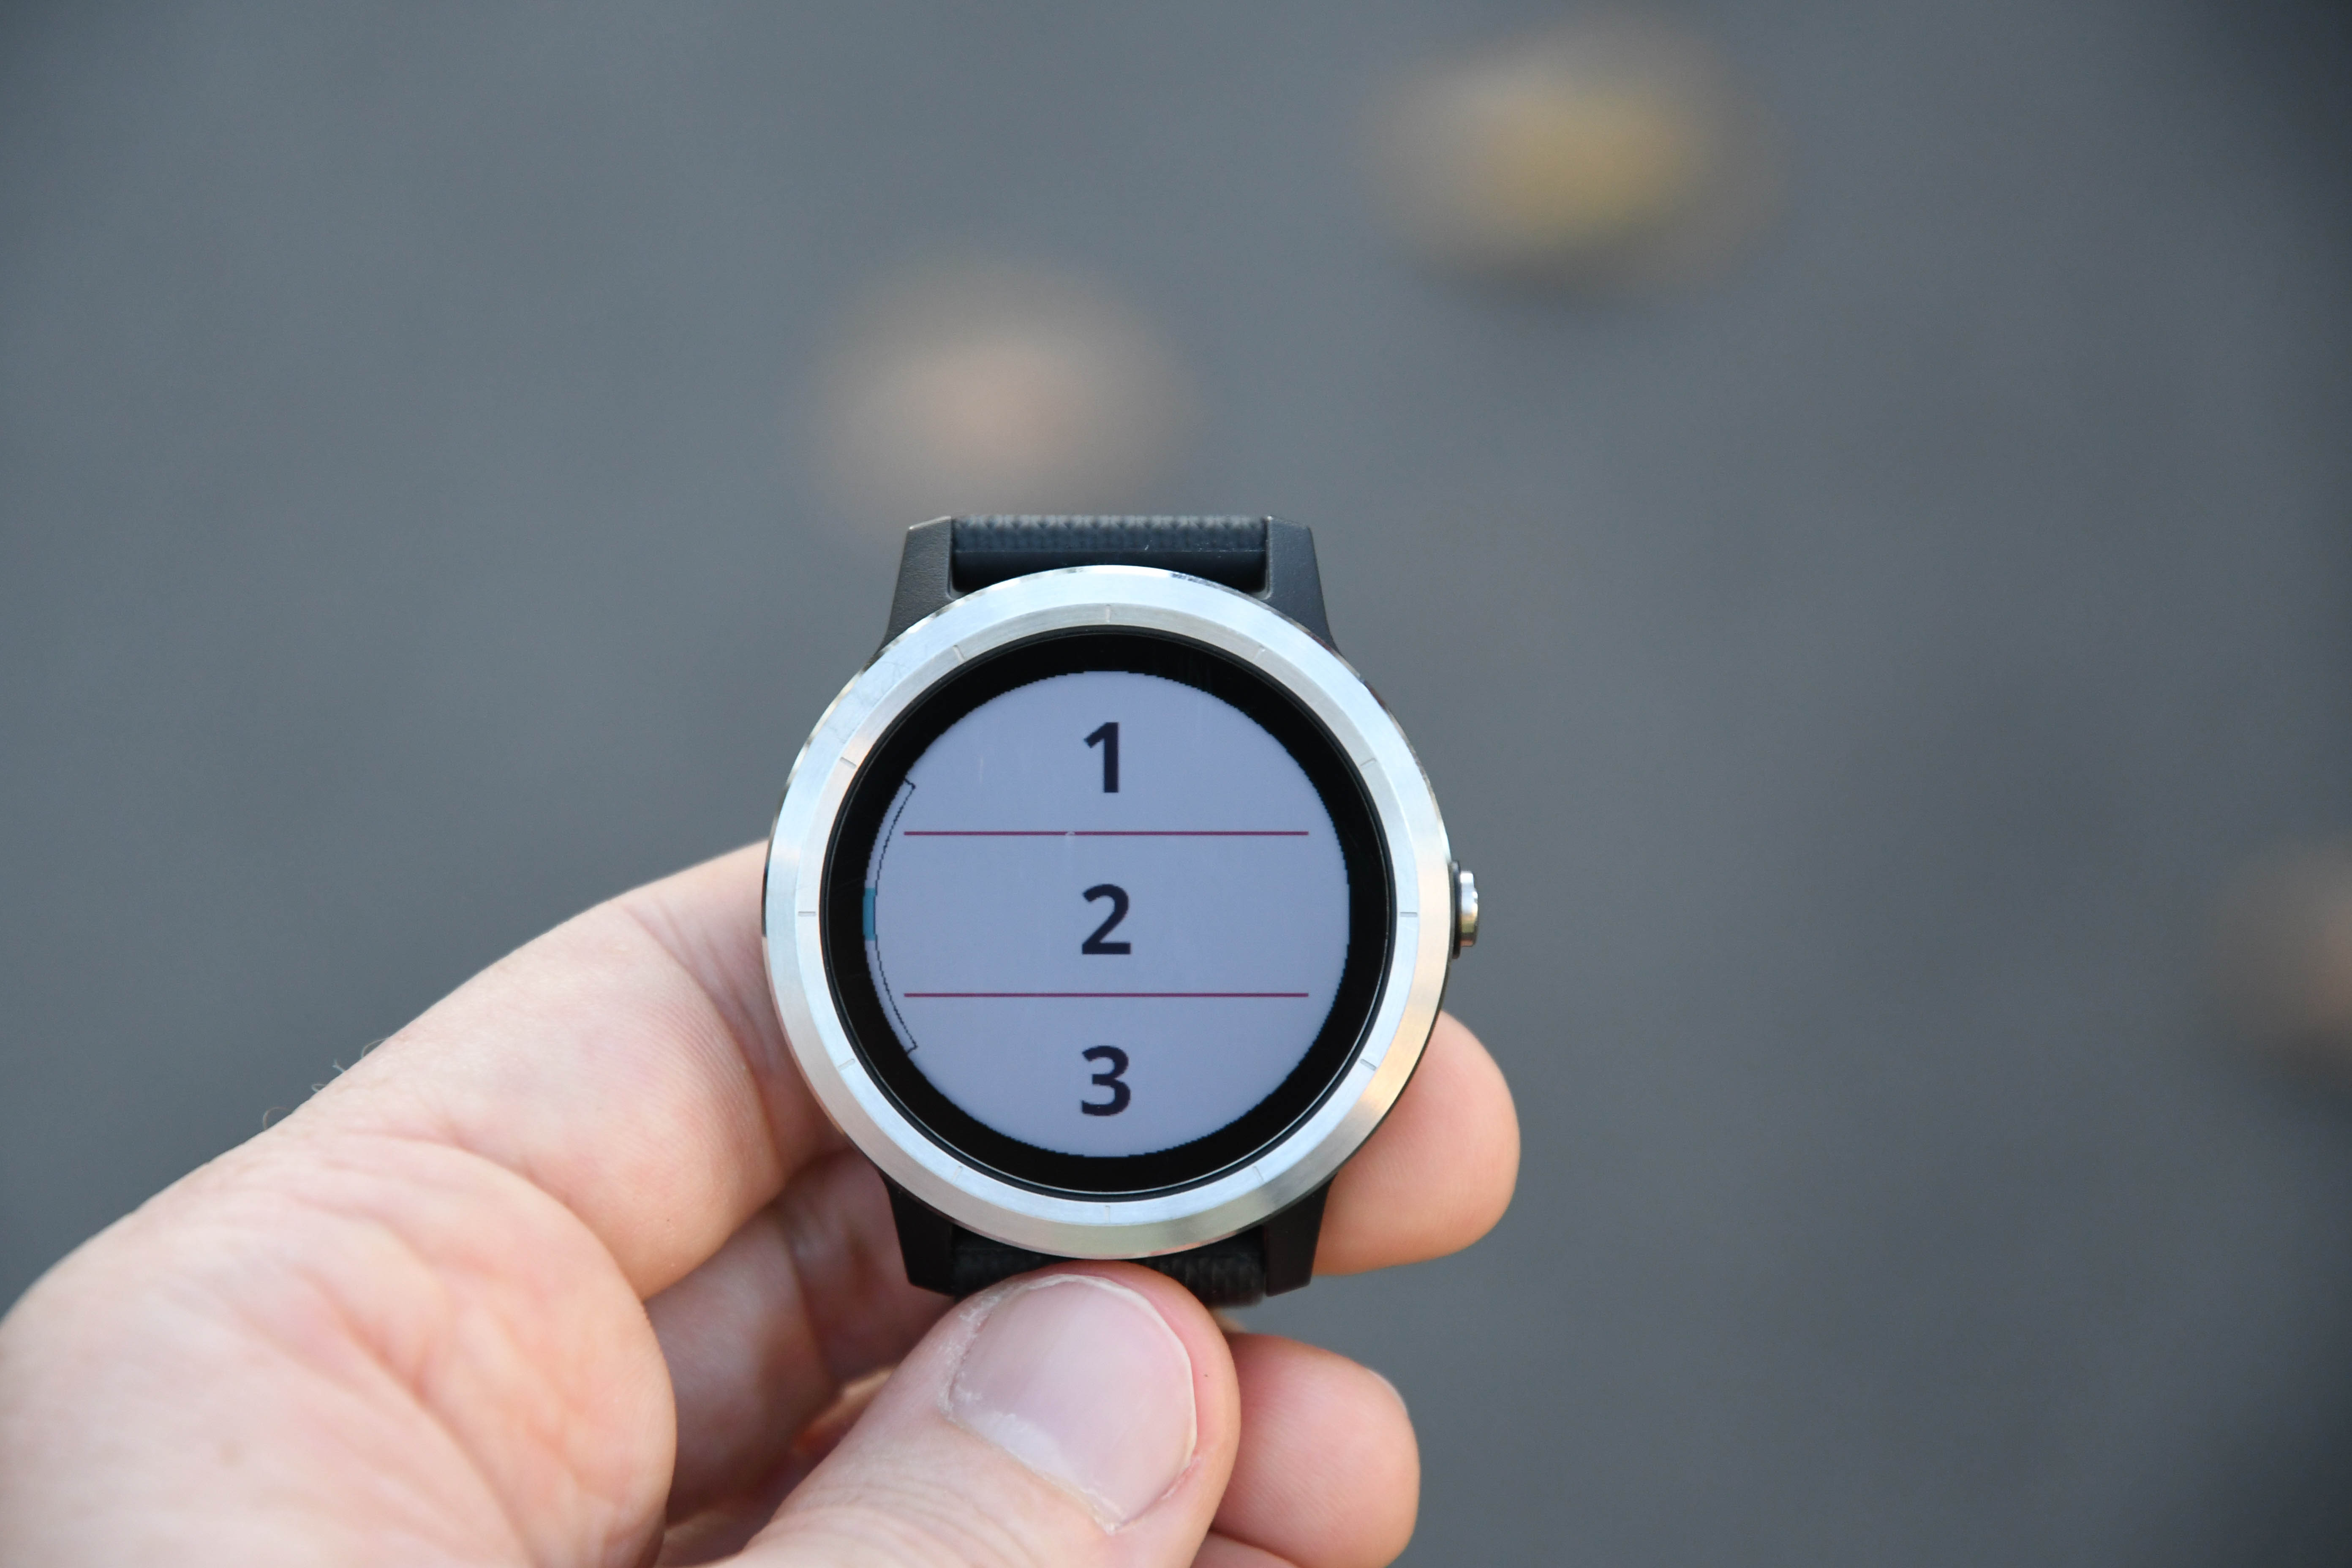

Choosing the four field layout for a moment, within that you’ve basically got two middle fields and two edge fields:

The challenge here is that the data fields you can stick in them are limited by their location. For the two upper/lower edge fields, you’ve only got the following fields: Timer, heart rate, calories, distance, time of day.
Whereas for the middle fields you’ve got a boatload of options, pretty much all the ones and boatloads more than you’d expect from any running or cycling watch.
What’s annoying about the top fields being limited though is I like to set up a lap-specific page, that has: Lap Time, Lap Distance, Lap Pace, and Heart Rate (current). I can’t do that here, for no good reason.

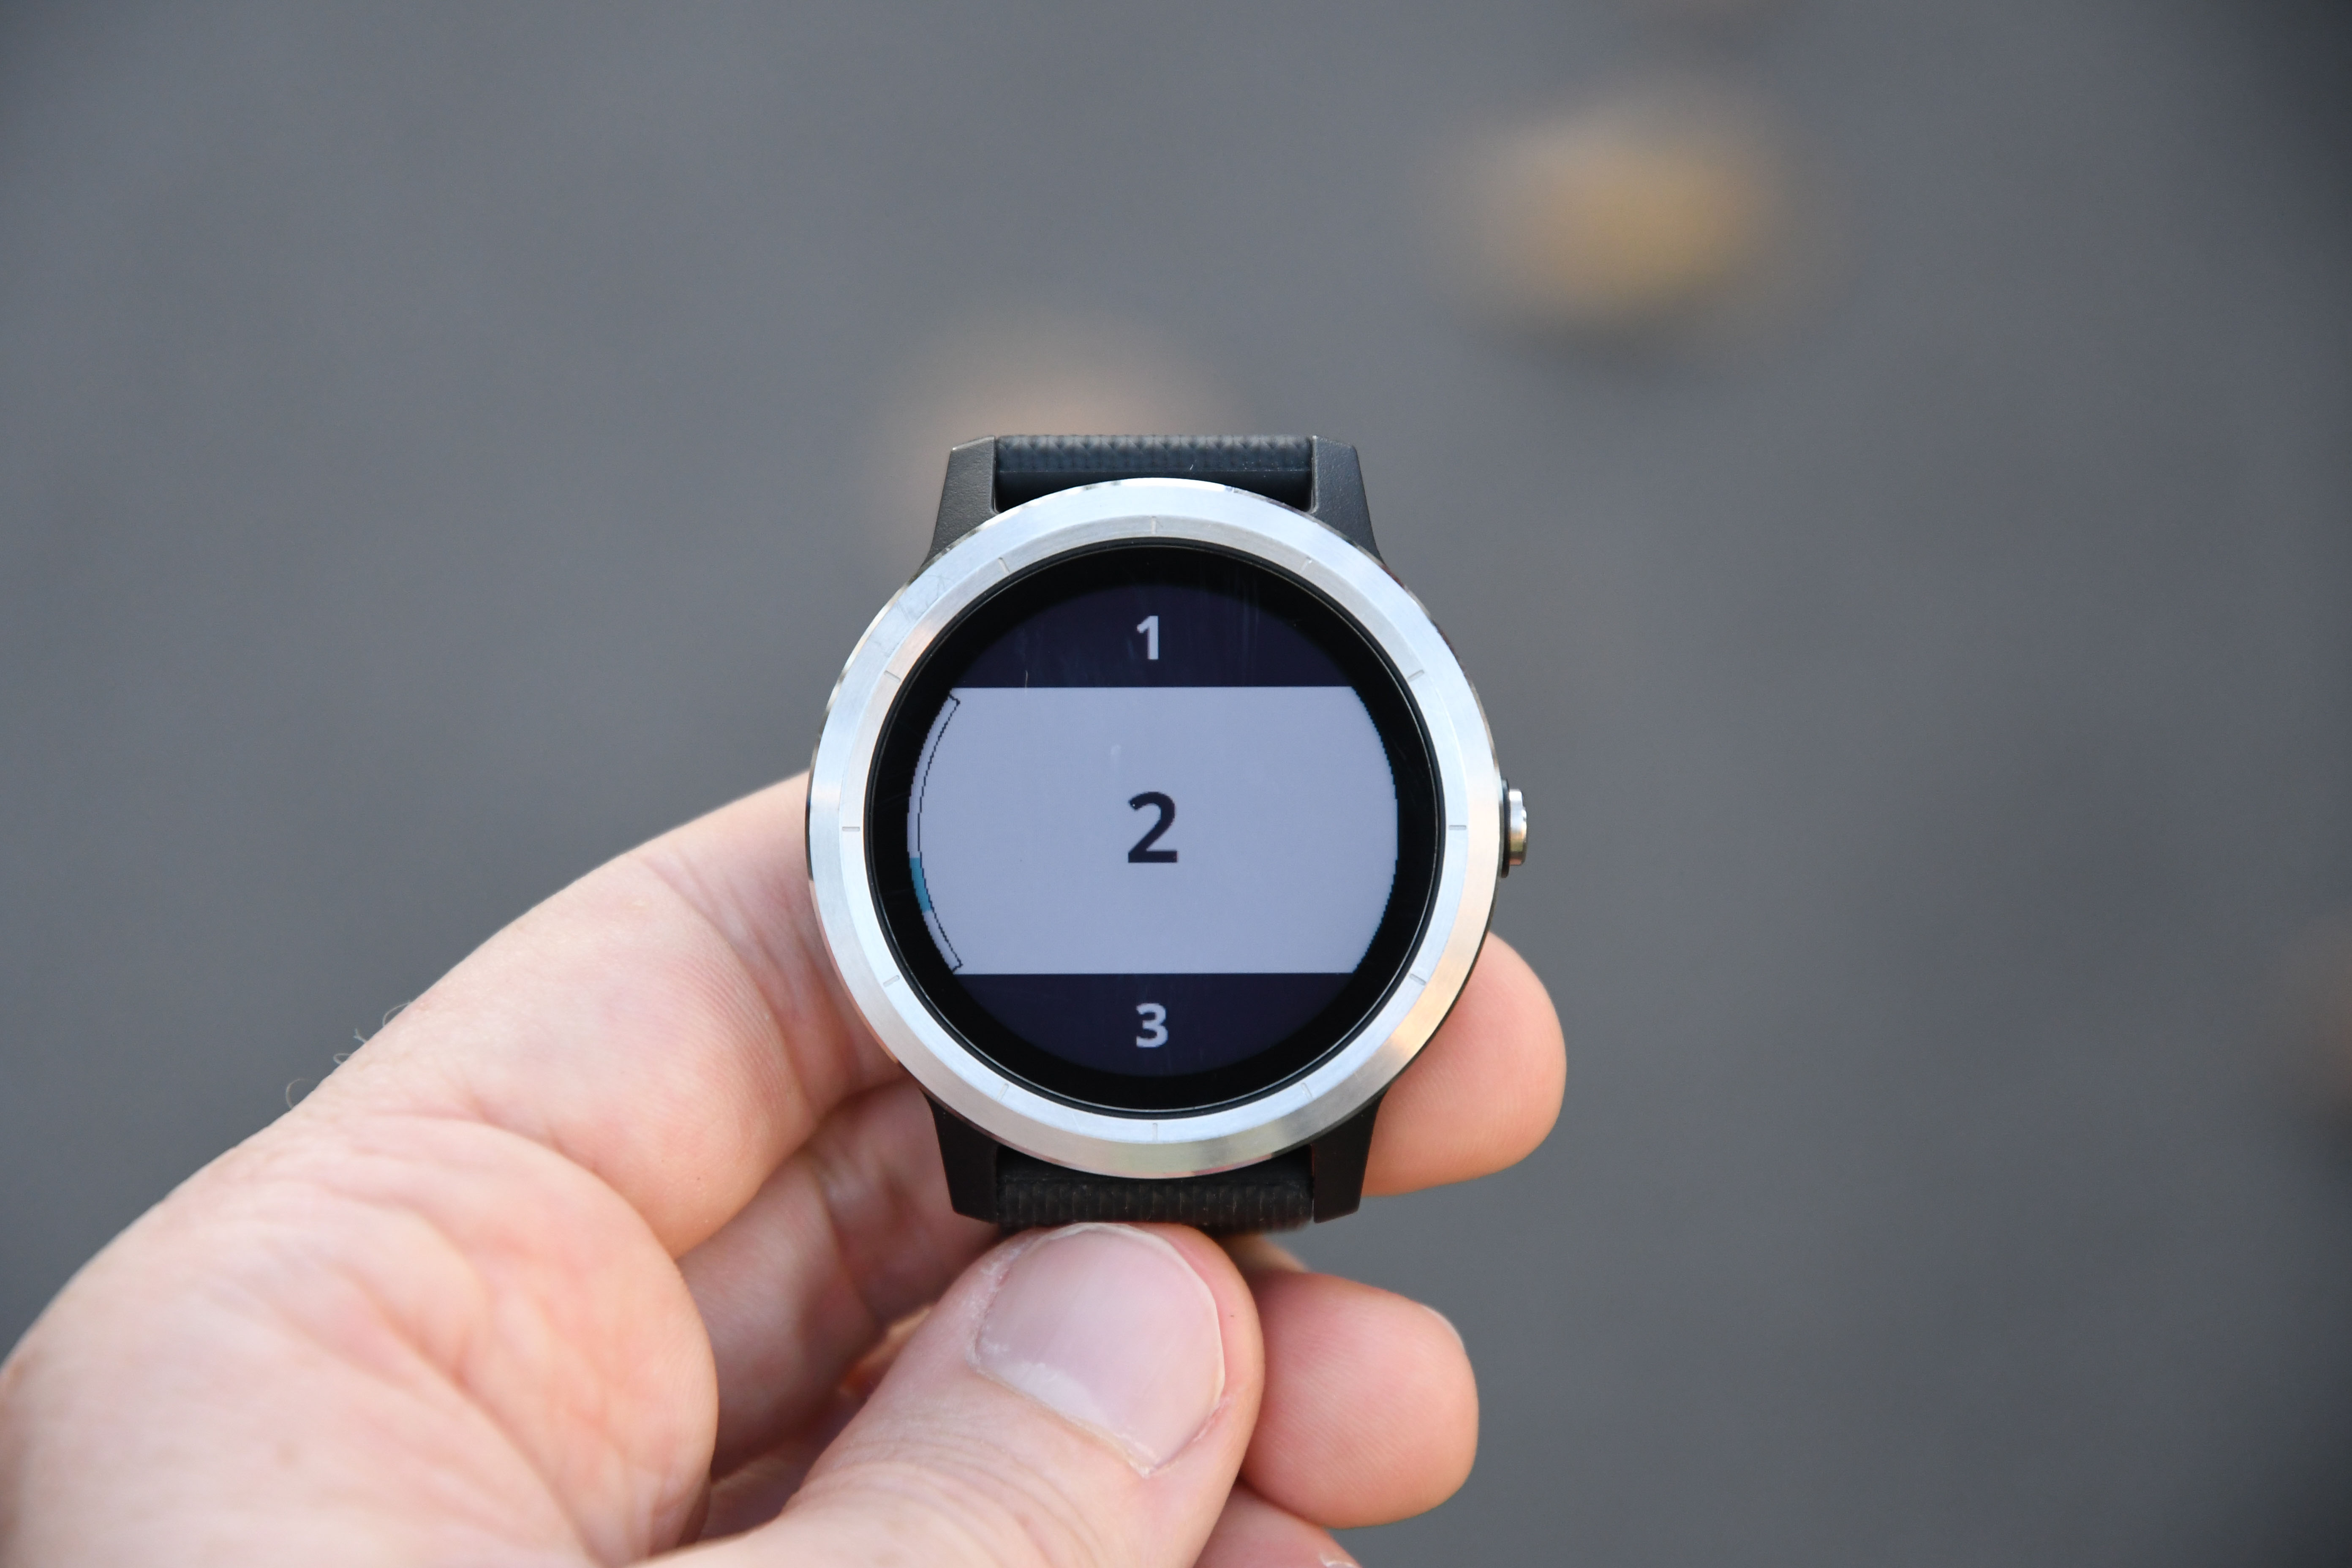
Garmin notes that if you use the 3-data field configuration, then you can configure all three fields as you see fit, and aren’t limited to the subset as per the four field configuration.
In addition to customizing data fields, you’ve also got alerts for metrics like heart rate, run/walk, pace, time, distance, cadence, and calories. As well as standard features on Garmin wearables like Auto Pause (to pause the timer when you stop running temporarily, like at a stoplight) and Auto Scroll (to automatically iterate through the data pages).

One tricky area is laps though. As of this writing (October 13th, 2017), you cannot manually set a lap. Only auto-lap is supported, which is based on a distance you specify (I.e., every one mile). Garmin says that as of the next firmware update, they’ll be adding in manual lap control. This is critical for those of us that want to do a workout and break apart the pieces of the workout using laps (like most people do). These laps of course then show up on any training platform out there, making it easy to analyze workout segments.
[Update: As of October 26th, 2017 – manual lap is now added. You’ll enable it within the individual sport mode settings, and then it’s done mid-workout via a double-tap of the screen.]

Hopefully the manual lap piece makes it out into the wild soon!
In any case, while all this was happening the watch was finding GPS. Typically this only takes a few seconds. At the same time, it’s also acquiring heart rate from your wrist, unless you use a HR strap, in which case it’ll connect to that (either ANT+ or Bluetooth Smart).

Note on that screen you can access structured workouts. Garmin’s included a couple (two) interval workouts on the watch itself, or you can download and create tons of workouts on Garmin Connect or Garmin Connect Mobile. You can also download full training plans (for free) as well here. This is actually probably the biggest change from the Vivoactive HR (its predecessor). [Update: Actually, the Vivoactive 3 should come with 3 workouts each of Strength, Cardio, Run, and Bike. My unit, and some other people’s are missing some or all of them. It sounds like the next firmware update will reinstate all workouts that may be missing for all users.]


Within structured workouts it’ll iterate through each of the workout segments, specifying what your goal is for that portion of the workout and then telling you when to start/stop each chunk. The only challenge with this though is that while it tells you the step guidance for that step as you start that step, you can’t see a count-down timer anywhere after you tap on that screen (i.e. 3 minutes left), nor can you see the workout target.
Back to that GPS pending screen though, finally, we’ll press start. This will start recording on the workout:


At this point you can swipe through the data pages using the touchscreen, or also the side swipe area thingy. I guess I just don’t really get the side swipe thingy. I’ve almost never used it, as I find it too finicky most of the time (overshooting mostly). A simple swipe of the touchscreen works, even in rain or with sweaty fingers.
As a side note, you can access the simplified navigation menu as well as the settings menu by holding down the screen at any time. This also gets you to PR’s, history, stats, and so on:

When you cross through an autolap marker (if you’ve set them up), it’ll notify you of that and display the last lap info. Note that if you go through a tunnel, it’ll simply use the accelerometer to manage pace and distance while running. If cycling, and you have a speed sensor – it’ll use that. Upon exiting the tunnel it’ll resume using GPS.
Which is a good time to mention that, for the most part, all sports have the same basics as running that I’ve discussed here. The one exception is strength workouts, which now have the ability to track specific sets and reps. At the end of each set when you press lap, it’ll ask for how much weight and to confirm how many reps (just in case it miscounted).


All of this is then shown afterwards in Garmin Connect/Garmin Connect Mobile. It actually works fairly well on the whole.
And as far as general GPS and non-GPS workouts go, those too are all available afterwards online. Here’s an example of a recent run (you can use this public Garmin Connect link to look at it in more detail):


Further, any 3rd party services, like Strava and TrainingPeaks, can receive the files the moment they are uploaded.
So what about swimming? The Vivoactive 3 supports pool swimming, but not openwater swimming. Meaning that it doesn’t utilize GPS to track openwater swims, but can do anything in a pool just fine (which uses accelerometers instead). For openwater swims, you’ll have to move up to Garmin’s multisport series watches like the FR935/Fenix5, or slightly older models like FR920XT or FR735XT (Fwiw, the FR735XT is a great deal).
In any event, to start a pool swim you’ll go into the sports menu and locate the pool swimming option. I’d *strongly* recommend you get through the basic swim start menus before you get wet in the pool.

Why’s that? Because the touch screen is less than awesome when wet. And there’s no button combinations that get you there without touching said screen. So it’s best if you simply get yourself to this pending swim start screen:

Along the way, you’ll have selected your pool size, which is important for getting accurate distance. It supports 17M/18Y through 150Y/M.

After that, simply swim. It’ll automatically track your distance and time on the screens. When you finish a set, you’ll tap the physical button once to enter rest mode (the touch screen is thankfully disabled during the swim).
Once in rest mode, it’ll show your last lap distance/time. Note that optical HR is disabled during the swim, and Garmin’s HRM-SWIM strap isn’t compatible with the Vivoactive 3 for loading that HR data.
Then you can tap it again to resume swimming for your next set. All of which is tracked as ‘sets’ within both the watch, but later on Garmin Connect as well:

From an accuracy standpoint, on a recent swim both it and the Apple Watch each missed a single length. Given I had 13 people in my lane at the time, and every few laps somebody would randomly stop in front of me half-way or three-quarters a way across the pool causing all sorts of drama, I think only having one missing length is probably expected and somewhat acceptable.
And again – no openwater swimming natively, though we have seen some 3rd party openwater Connect IQ apps out there in the past, so perhaps those will come over to the Vivoactive 3 in time.
In any case – for sport, overall it’s pretty good. I would much prefer the unit had a few more dedicated buttons for specific lap vs start/stop – but alas, I get the whole minimalistic thing.
Heart Rate Accuracy:

Next up we’ve got heart rate accuracy. This roughly falls into two buckets: 24×7 HR, and workout HR. As is usually the case with most devices these days, I see no tangible issues with 24×7 HR. It works well across both normal daily routines as well as things like sleep. Speaking of which, I talk about RHR values and 24×7 monitoring here and why it’s interesting.


Before we move on to the test results, note that optical HR sensor accuracy is rather varied from individual to individual. Aspects such as skin color, hair density, and position can impact accuracy. Position, and how the band is worn, are *the most important* pieces. A unit with an optical HR sensor should be snug. It doesn’t need to leave marks, but you shouldn’t be able to slide a finger under the band (at least during workouts). You can wear it a tiny bit looser the rest of the day.
Ok, so in my testing, I simply use the watch throughout my normal workouts. Those workouts include a wide variety of intensities and conditions, making them great for accuracy testing. I’ve got steady runs, interval workouts on both bike and running, as well as tempo runs and rides – and even running up and down a mountain.
For each test, I’m wearing additional devices, usually 3-4 in total, which capture data from other sensors. Typically I’d wear a chest strap (usually the HRM-TRI or Wahoo TICKR X), as well as another optical HR sensor watch on the other wrist (many models during this testing period). Note that the numbers you see in the upper right corner are *not* the averages, but rather just the exact point my mouse is sitting over. Note all this data is analyzed using the DCR Analyzer, details here.
Note that while I’ve been using the Vivoactive 3 since mid-August, I’m mostly going to use recent data in this review – since that’s the firmware that it’s currently on.
First up we’ve got a relatively easy and flat run on an island. Very little change in effort here, as it was just a fun run with a friend. Though we did stop and start a little bit to figure out our way. You can look at the DCR Analyzer set here, if you want to zoom around and such (or download the original files).

In this set, there’s the Vivoactive 3’s optical HR sensor, the Apple Watch 3’s optical HR sensor, and a FR935 connected to a TICKR-X HR strap. Overall, all three units track fairly similarly. You do notice though that it takes about 5-6 minutes until the Apple Watch Series 3 acquires a HR. Unfortunately, using the default app there’s no method to know whether the Apple Watch has acquired HR, or whether it’s acquired GPS. You just gotta go and hope.
Looking at those little interval-looking sections above (they were actually brief stoppages), you can see that the Vivoactive 3 quickly tracks those stoppages in the first instance, though is slightly delayed in the second and 3rd instance. The Apple Watch 3 was the least accurate at detecting those in the 1st/3rd instance, and debatable in the 2nd (neither was great there).

The rest of the run however, all three matched without issue.
Let’s switch gears and look at an outdoor bike ride. This one from yesterday covers a wide range of terrain from road to cobbles to off-road in multiple instances. The data here is the Apple Watch Series 3, the Vivoactive 3, and a TICKR-X HR strap.

Looking at this optical HR data, this is actually the best I’ve seen on a bike while riding from any Garmin wearable, ever. Now, that said, it’s also a fairly low bar too. Still, large chunks of it are pretty darn good. For example, let’s look at the first 70 minutes:

You can see some wobbles in the first 10 minutes or so. My guess is this is related to me warming up a bit. The Apple Watch seems to do slightly better in this first 10 minutes, but don’t worry, it has its moments a short bit later. After those 10 minutes, the Vivoactive 3 is great till the 45-minute marker. What was I doing then? Taking some photos while stopped. So, I suppose if accuracy matters to you while taking photos while stopped, then you may want to avoid this.
Still, once riding again, it was good till about the hour marker, when something happened where all three sensors disagreed for a few minutes. I’ve really got no idea why – since there wasn’t anything of note here.
Let’s look at the next hour’s worth of data. Things were pretty good here too, except again when I was taking some selfies on the bike (1:25-1:28):

It’s actually funny, I went back and looked and every time I took photos, the Vivoactive 3 suffered optically. I don’t know why.
For the remainder of the ride it was stop and go getting back into the city, and you can see the Vivoactive 3 struggled a bit when that happened. When I was riding consistently and constantly, it was pretty much spot on.

And that’s the pattern I tend to see with not just Garmin’s sensors, but also Fitbit and Apple too: Stop and go on a bike is for whatever reason, tricky. Once at pace it’s usually fine (even intervals were fine here). But the act of stopping and starting just seems tough. Perhaps it’s flex of the wrists for braking, or something else.
To round things out, here’s an indoor trainer (bicycle) ride. I can’t seem to get the export of the Apple Watch data to come out on this one, though realistically the point of showing this data plot is to illustrate that if you remove the bumps of the road, then basically the HR is perfect indoors:

There’s only one moment for a second that the HR dropped. Without remembering exactly what was going on then, it’s possible I did something that caused that (typing on a keyboard, a phone, who knows). Either way, the rest of the ride was almost perfect, especially those intervals at the end. The only flaw was some slight wobbles after that final interval coming down off the sprint that you see at the end for a short period.
In general though, I’d say the HR accuracy of the Vivoactive 3 is mostly good for running, and a bit mixed for cycling. Which is about the same as I typically find most recent/2017 Garmin optical HR sensors. I prefer lighter watches (FR935/Suunto Spartan Trainer Wrist HR), which in turn helps for optical HR accuracy. Whereas typically heavier watches (i.e. Fenix 5X/Suunto Spartan Sport Wrist HR) bounce a bit more, which reduced HR accuracy in some cases. The Vivoactive 3 is obviously considered a lighter watch, so for some people it’ll probably translate into better accuracy than a heavier watch.
Note: All of the GPS and HR data sets are linked at the beginning of each set. I use the DCR Analyzer to upload and analyze all the data. You can click on the links and analyze the data as you see fit, or even download the original files. Further, if you want to use the DCR Analyzer for your own comparisons, go forth!
GPS Accuracy:

There’s likely no topic that stirs as much discussion and passion as GPS accuracy. A watch could fall apart and give you dire electrical shocks while doing so, but if it shows you on the wrong side of the road? Oh hell no, bring on the fury of the internet!
GPS accuracy can be looked at in a number of different ways, but I prefer to look at it using a number of devices in real-world scenarios across a vast number of activities. I use 2-6 other devices at once, trying to get a clear picture of how a given set of devices handles conditions on a certain day. Conditions include everything from tree/building cover to weather.
Over the years I’ve continued to tweak my GPS testing methodology. For example, I try to not place two units next to each other on my wrists, as that can impact signal. If I do so, I’ll put a thin fabric spacer of about 1”/3cm between them (I didn’t do that on any of my Vivoactive 3 workouts). But often I’ll simply carry other units by the straps, or attach them to the shoulder straps of my CamelBak. Plus, wearing multiple watches on the same wrist is well known to impact optical HR accuracy.
Next, as noted, I use just my daily training routes. Using a single route over and over again isn’t really indicative of real-world conditions, it’s just indicative of one trail. The workouts you see here are just my normal daily workouts.
I’ve had quite a bit of variety of terrain within the time period of Vivoactive 3 testing. Be it from major mountains and trails of the Alps, to the deserts of Las Vegas, to the mountains of Canada and the streets of Paris. It’s been everywhere!
First up we’ll start with something relatively easy – a run around a flat island with very little tree coverage. Sometimes though, the easiest things are the hardest things. Sorta like cooking a perfect egg. Here’s the set data, and the high-level look:

As you can see, the Apple Watch 3 overcooks the egg right from the start. It doesn’t pick up GPS until a few minutes later, due to the way it poorly hands-off from access to the cellular phone to no-phone. So it pretends to have GPS signal when it doesn’t. That’s compounded by you starting to move, which lengthens the amount of GPS time. This despite standing outside about two minutes before we started. In any event, here’s a bit more zoomed in look at that initial section:

What’s notable here is that while the FR935 and Vivoactive were similar, the Vivoactive 3 was cutting some corners. In this case, it inadvertently had ‘Smart Recording’ on (the default, after a firmware update). In theory, it shouldn’t have caused this, but in theory, the Apple Watch also shouldn’t have crapped itself for the first half a mile or so.
After that point though, the units largely agreed, and there wasn’t much of concern beyond that point.

The Vivoactive 3 did well for the remainder of the run, though you see the Apple Watch struggle a bit here and there:

While not terribly important, here’s the total distances from all the units:

Note that the Apple Watch still recorded distance for that first part using the accelerometer, while the Vivoactive meanwhile shorted itself about 100m by the end of the run through those early cuts of corners. Looking at the tracks, I’d say the FR935 was the most accurate to where we actually ran.
Next, we’re going to make it more difficult, with a very short city run. I normally don’t bother including something like this short run in my results (I was testing something else entirely), but decided to because it’s actually a fairly difficult city GPS route, despite only being about 2KM long.

This section has everything from going over and under bridges, to running along skinny streets right next to reasonably tall and very concrete/rock buildings, as well as just general quick and tight turns.
Let’s start off with the first bridge crossing (note: this run had GLONASS off):

You can see here where the FR935 and Vivoactive 3 both prematurely boarded the bridge, and weren’t aligned to it. The Apple Watch was most correct here, but I also had my phone with me – so it would have been leveraging that data instead of the internal GPS of the watch, so do keep that in mind.
Next, you can see that while running under a bridge the FR935 and Apple Watch 3 nailed it without any wanderings upon exiting the other side. Whereas the Vivoactive 3 added a very slight bump here that was incorrect. Yet, a few meters later, the Vivoactive 3 was actually the most correct one when it came to running up and over the next bridge. The Apple Watch 3 and FR935 took the turn just a bit too sharp compared to where I actually ran.

Finally, coming around onto the tip of one of the two islands, this is a super tough spot. Somewhat tall-ish buildings, along with moderately dense trees, it’s trickier than you might expect.

The FR935 nails it, but the Vivoactive 3 and Apple Watch/Phone both have issues. It’s possible this would be an example where had GLONASS been enabled on this run, it probably would have helped quite a bit (it was enabled on the FR935).
GLONASS is generally great in cities, and I almost always use it. Just had been reset after trying a beta firmware, so I didn’t turn it back on yet. It gives units more satellites to work with, which can help when satellite coverage is limited or blocked by buildings. So when you see the Vivoactive 3 likely lose half its satellites, had I enabled GLONASS it probably would have been quite a difference.
You saw this in my earlier runs with the unit in the mountains in the preview post in tough spots that it handled very well with GLONASS enabled.
Let’s wrap up some GPS pieces with a bike ride – this one yesterday out of the city and into the farms.

Looking at a few random/tougher sections, here’s one where I made a small loop around Place de La Concorde and then back across the bridge. I was just avoiding some road closures. What’s notable is that the Vivoactive 3 nails this along with the Edge 1030, but the Apple Watch 3 cuts the corners a bit (despite being paired to the phone). Also, check out the far left side of the route where the Apple Watch is out in the wrong place.

In fact, you can consistently find throughout this ride that the Apple Watch Series 3 is on the wrong side of the road, whereas the Vivoactive 3 is correct (you can zoom around the file here).

It does it dozens of times, cutting straight across traffic circles and more. It’s like it was off beating to its own drum. In sifting through 40 miles of riding, I can only find one instance where the Vivoactive 3 briefly wanders off-course in a wobbly way, here, perhaps 10-meters into some buildings:

I did find 2-3 other instances in the woods where it offset slightly (maybe 2-4m offset the others), but the track was parallel without wobble. But seriously, if you have time – check out the wonkiness of that Apple Watch track. I don’t think I’ve ever seen something like that. It’s like looking at a drunk driver who just cuts all the intersections and keeps on trucking. Almost to the point where I wonder if it’s doing some sort of behind the scenes roadway matching…
For those curious – here’s another bike ride to dig into – very solid GPS accuracy from the Vivoactive 3 as well here. While less opportunities to do so, the Apple Watch also cut some traffic circles there too.
Finally, a super quick diversion to elevation data. The Vivoactive 3 does indeed record barometric elevation data, so I wanted to throw this plot out there with the elevation data for three devices (Apple Watch 3, Garmin FR935, Vivoactive 3) to consider:

What you see is that all three devices differ a bit from the starting elevation, and mostly carry that through to the end. The mountain was Sulphur Mountain that I ran up, and according to Wikipedia, the peak of that where I ran to was 2,256m. If I look at the graphs at the highest point, the figures are:

As such, the Vivoactive 3 was technically the closest (even with Price Is Right rules). I’d say the Apple Watch 3 was the most variable as you can see (whether that’s right or wrong I don’t know). Neither the Apple Watch Series 3 or Vivoactive 3 offers a way to manually adjust the altimeter data, which is set by GPS initially.
So what’s the overall consensus on GPS? It depends. I don’t find it as good as the FR935’s GPS is. But it’s also generally better than the standalone Apple Watch 3 (with no phone on me). I think if I had enabled GLONASS on some recent runs, it’d likely do as well as it did on earlier runs (which was quite well, as seen here – some in my Fitbit Ionic review are the Vivoactive 3). Looking at all the data I have from nearly two months (again, I tried to keep the data in the review the most recent stuff), it seems like turning GLONASS on makes some clear difference and moves it into the ‘happy’ category (for me anyway). The downside is you tend to get a 10-20% hit on battery life.
(Note: All of the charts in these accuracy sections were created using the DCR Analyzer tool. It allows you to compare power meters/trainers, heart rate, cadence, speed/pace, GPS tracks and plenty more. You can use it as well for your own gadget comparisons, more details here.)
Product Comparison:
You’ll find the Vivoactive 3 has been added to the product comparison database, which allows you to compare it to a boatload of other products I’ve reviewed. For the moment, I’ve compared it below to the Fitbit Ionic and the Polar M600 (Android Wear). Though I’ll be shortly adding the Apple Watch Series 3 LTE into the database, so that’s definitely something to compare it against as well. Of course, you can make your own comparisons against any other watches here within the product comparison calculator.
| Function/Feature | Garmin Vivoactive 3 | Fitbit Ionic | Polar M600 |
|---|---|---|---|
| Copyright DC Rainmaker - Updated May 11th, 2021 @ 5:43 am New Window | |||
| Price | $129 | $229 | $329 |
| Product Announcement Date | Aug 31st, 2017 | Aug 28th, 2017 | Aug 3rd, 2016 |
| Actual Availability/Shipping Date | September 2017 | Oct 1st, 2017 | Sept 2016 |
| GPS Recording Functionality | Yes | Yes | Yes |
| Data Transfer | USB, BLUETOOTH SMART | Bluetooth Smart | USB/Bluetooth Smart/WiFi |
| Waterproofing | 50 meters | 50m | IPX8 (good for swimming) |
| Battery Life (GPS) | Up to 13 hours GPS | 10 hours | 10 hours |
| Recording Interval | 1s or Smart Recording | 1-second | 1-second |
| Alerts | Vibrate/Visual | Visual/Vibrate | Visual/Vibration |
| Ability to download custom apps to unit/device | Yes | Yes | Yes (Android Wear) | Music | Garmin Vivoactive 3 | Fitbit Ionic | Polar M600 |
| Can control phone music | Yes | Yes | Yes |
| Has offline music storage and playback | No | Yes | Yes |
| Streaming Services | Pandora, Deezer | Payments | Garmin Vivoactive 3 | Fitbit Ionic | Polar M600 |
| Contactless-NFC Payments | Yes | Connectivity | Garmin Vivoactive 3 | Fitbit Ionic | Polar M600 |
| Bluetooth Smart to Phone Uploading | Yes | Yes | Yes |
| Phone Notifications to unit (i.e. texts/calls/etc...) | Yes | Yes | Yes |
| Live Tracking (streaming location to website) | Yes | No | With some apps |
| Group tracking | No | No | No |
| Emergency/SOS Message Notification (from watch to contacts) | No | No | No |
| Built-in cellular chip (no phone required) | No | No | No | Cycling | Garmin Vivoactive 3 | Fitbit Ionic | Polar M600 |
| Designed for cycling | Yes | Yes | Yes |
| Power Meter Capable | With some Connect IQ apps | No | No |
| Speed/Cadence Sensor Capable | Yes | No | No |
| Strava segments live on device | No | No | With Strava app |
| Crash detection | No | No | No | Running | Garmin Vivoactive 3 | Fitbit Ionic | Polar M600 |
| Designed for running | Yes | Yes | Yes |
| Footpod Capable (For treadmills) | Yes | No (but has treadmill functionality) | NO, HAS INTERNAL ACCELEROMETER |
| Running Dynamics (vertical oscillation, ground contact time, etc...) | No | No | No |
| Running Power | No | ||
| VO2Max Estimation | Yes | Yes via app | No |
| Race Predictor | No | No | No |
| Recovery Advisor | No | No | Yes |
| Run/Walk Mode | Yes | No | No | Swimming | Garmin Vivoactive 3 | Fitbit Ionic | Polar M600 |
| Designed for swimming | Yes | Yes | Yes |
| Openwater swimming mode | No | No | No |
| Lap/Indoor Distance Tracking | Yes | Yes | Yes |
| Record HR underwater | No | No | Yes |
| Openwater Metrics (Stroke/etc.) | No | No | N/A |
| Indoor Metrics (Stroke/etc.) | Yes | Yes | N/A |
| Indoor Drill Mode | No | No | No |
| Indoor auto-pause feature | No | No | No |
| Change pool size | Yes | Yes | Yes |
| Indoor Min/Max Pool Lengths | 17M/18Y TO 150Y/M | 10m/y-100m/y | |
| Ability to customize data fields | Yes | Yes | Yes |
| Captures per length data - indoors | Yes | Yes | |
| Indoor Alerts | Yes | Yes (distance) | Triathlon | Garmin Vivoactive 3 | Fitbit Ionic | Polar M600 |
| Designed for triathlon | No | No | No |
| Multisport mode | No | No | No | Workouts | Garmin Vivoactive 3 | Fitbit Ionic | Polar M600 |
| Create/Follow custom workouts | Yes | No (Premium Coached only) | Yes |
| On-unit interval Feature | Sorta (2 preloaded ones, but no customization) | No | No |
| Training Calendar Functionality | Yes | No | Yes | Functions | Garmin Vivoactive 3 | Fitbit Ionic | Polar M600 |
| Auto Start/Stop | Yes | Yes | No |
| Virtual Partner Feature | No | No | No |
| Virtual Racer Feature | No | No | No |
| Records PR's - Personal Records (diff than history) | Yes | No | No |
| Tidal Tables (Tide Information) | No | No | No |
| Weather Display (live data) | Yes | Yes | Yes | Navigate | Garmin Vivoactive 3 | Fitbit Ionic | Polar M600 |
| Follow GPS Track (Courses/Waypoints) | No (but some 3rd party apps can) | No | No |
| Markers/Waypoint Direction | Yes (to pre-saved spots) | No | No |
| Offline Maps | No | No | No |
| Back to start | YEs | No | No |
| Impromptu Round Trip Route Creation | No | No | No |
| Download courses/routes from phone to unit | NO | No | No | Sensors | Garmin Vivoactive 3 | Fitbit Ionic | Polar M600 |
| Altimeter Type | Barometric | Barometric | GPS |
| Compass Type | Magnetic | N/A | N/A |
| Optical Heart Rate Sensor internally | Yes | Yes | Yes |
| Heart Rate Strap Compatible | Yes | No | YES - CONTAINS OPTICAL HR SENSOR |
| ANT+ Heart Rate Strap Capable | YEs | No | No |
| ANT+ Speed/Cadence Capable | Yes | No | No |
| ANT+ Footpod Capable | Yes | No | No |
| ANT+ Power Meter Capable | No | No | No |
| ANT+ Lighting Control | Yes | No | No |
| ANT+ Bike Radar Integration | No | No | No |
| ANT+ Trainer Control (FE-C) | No | No | NO |
| ANT+ Remote Control | No (Yes for VIRB camera control) | No | No |
| ANT+ eBike Compatibility | No | No | No |
| ANT+ Gear Shifting (i.e. SRAM ETAP) | No | No | No |
| Shimano Di2 Shifting | No | No | No |
| Bluetooth Smart HR Strap Capable | YEs | No | Yes |
| Bluetooth Smart Speed/Cadence Capable | Yes | No | No |
| Bluetooth Smart Footpod Capable | Yes | No | No |
| Bluetooth Smart Power Meter Capable | No | No | No |
| Temp Recording (internal sensor) | No | No | No |
| Temp Recording (external sensor) | Yes | No | No | Software | Garmin Vivoactive 3 | Fitbit Ionic | Polar M600 |
| Desktop Application | Garmin Express | PC/Mac | No |
| Web Application | Garmin Connect | Yes | Polar Flow |
| Phone App | iOS/Android/Windows | iOS/Android/Windows | Polar Flow (iOS/Android) |
| Ability to Export Settings | No | No | No | Purchase | Garmin Vivoactive 3 | Fitbit Ionic | Polar M600 |
| Amazon | Link | Link | Link | DCRainmaker | Garmin Vivoactive 3 | Fitbit Ionic | Polar M600 |
| Review Link | Link | Link | Link |
And don’t forget – you can make your own product comparison here within the product comparison charts!
Summary:

Overall, the Vivoactive 3 is a very solid and fitness-focused watch. It’s likely the iteration that many folks have been waiting for in terms of a more stylish unit than the Vivoactive HR was in the last version, and more functional than the super-slim original Vivoactive was a few years back. The addition of Garmin Pay should be useful to some, at least once more banks get added.
From a GPS accuracy standpoint, things generally look pretty good, though as you saw, I’d definitely recommend turning on GLONASS for the GPS pieces. And as usual, I think for the most accurate optical HR while cycling, you’re still going to either want a chest strap or an optical HR sensor worn on your upper arm (i.e. Polar OH-1 or Scosche’s Rhythm+), both of which tend to get better results purely due to placement.
I do also wish there was music included on the unit, since Polar and the M600 is at that same price with music and Android Wear. And the Apple Watch 2 with GPS and music will also flirt with that price. Though in the case of both of those, their batteries are far less than that of the Garmin Vivoactive 3, most notably for GPS-off time (standby mode). With the Apple/Polar options you’re basically charging it every night with moderate use, or every other night with limited use. Whereas with Garmin you’re going 4-6 days in my experience (again, depending on usage).
Still, as far as a mid-range running/workout watch goes – it’s pretty darn solid. The addition of custom workouts to this price point is much welcomed. Overall, it’s a pretty solid all-around unit.
Found this review useful? Or just want a good deal? Here’s how:
Found This Post Useful? Support The Site!
Hopefully you found this review/post useful. At the end of the day, I’m an athlete just like you looking for the most detail possible on a new purchase – so my review is written from the standpoint of how I used the device. The reviews generally take a lot of hours to put together, so it’s a fair bit of work (and labor of love). As you probably noticed by looking below, I also take time to answer all the questions posted in the comments – and there’s quite a bit of detail in there as well.
If you're shopping for the Garmin Vivoactive 3 or any other accessory items, please consider using the affiliate links below! As an Amazon Associate I earn from qualifying purchases. It doesn’t cost you anything extra, but your purchases help support this website a lot.
Here's a few other variants or sibling products that are worth considering:
And finally, here’s a handy list of accessories that work well with this unit (and some that I showed in the review). Given the unit pairs with ANT+ & Bluetooth Smart sensors, you can use just about anything though.
This wifi-connected scale will track your weight and related metrics both on the scale display and in Garmin Connect (plus 3rd party apps like TrainingPeaks). It'll also then sync your weight to your watch/bike computer, to ensure accurate calorie data.
This is a dual ANT+/Bluetooth Smart cycling cadence sensor that you strap to your crank arm, but also does dual Bluetooth Smart, so you can pair it both to Zwift and another Bluetooth Smart app at once if you want.
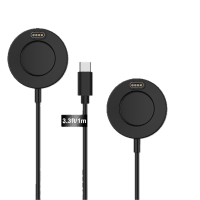
Seriously, this will change your life. $9 for a two-pack of these puck Garmin chargers that stay put and stay connected. One for the office, one for your bedside, another for your bag, and one for your dog's house. Just in case.
These are one of my favorite power meters, due to both cost and accuracy. These have mostly become my defacto gravel pedals, and also get used on a lot of other comparison testing.
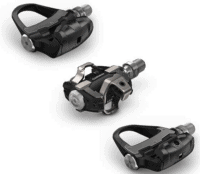
The Garmin Rally series is effectively 3 power meters in one, for three pedal types. I use these often in accuracy testing. While they're a bit more expensive than the Favero pedals, they offer the ability to swap pedal types easily.
The HRM-PRO Plus is Garmin's top-end chest strap. It transmits dual ANT+/Bluetooth Smart, but also transmits Running Dynamics & Running Pace/Distance metrics, stores HR data during a swim, and can be used without a watch for other sports. Also, it can transmit XC Skiing Dynamics as well.
And of course – you can always sign-up to be a DCR Supporter! That gets you an ad-free DCR, access to the DCR Shed Talkin' video series packed with behind the scenes tidbits...and it also makes you awesome. And being awesome is what it’s all about!
Thanks for reading! And as always, feel free to post comments or questions in the comments section below, I’ll be happy to try and answer them as quickly as possible. And lastly, if you felt this review was useful – I always appreciate feedback in the comments below. Thanks!