Yesterday the Edge 200 was announced as Garmin’s latest cycling computer in the Edge lineup. Unlike past Edge series devices though, this one took a notable departure from the pattern of adding new features, and instead choose the route of reducing features while also reducing the price by nearly half. This matches their moves on the running watch lineup to offer different levels of products at very different price points for very different audiences. But would this unit cut too far, or would it be in the perfect sweet spot for new users? Stick around to find out!
Like all my reviews, they tend to be pretty in depth (perhaps overly so) – but that’s just my trademark DC Rainmaker way of doing things. Think of them more like reference guides than quick and easy summaries. I try and cover every conceivable thing you might do with the device and then poke at it a bit more. My goal is to leave no stone unturned – both the good and the bad.
Because I want to be transparent about my reviews, Garmin sent me this Edge 200 for a period of 60 days as a trial unit. Once that period has elapsed, I send the whole messed up box back to the folks in Kansas. Simple as that. Sorta like hiking in wilderness trails – leave only footprints. If you find my review useful, you can use any of the Amazon links from this page to help support future reviews.
Lastly, at the end of the day keep in mind I’m just like any other regular triathlete out there. I write these reviews because I’m inherently a curious person with a technology background (my day job), and thus I try and be as complete as I can. But, if I’ve missed something or if you spot something that doesn’t quite jive – just let me know and I’ll be happy to get it all sorted out. Also, because the technology world constantly changes, I try and go back and update these reviews as new features and functionality are added – or if bugs are fixed.
Packaging/Unboxing:
The unit is packaged in Garmin’s standard sports device box packaging which includes a plastic window on the front that allows you to see the product you’re about to lay the cash out for.
Once you’ve opened up the box you’ll find a small assortment of plastic bags – each containing a different part:
After clearing the scene of plastic, you’re left with the following:
Here’s the skinny on the different pieces. First up is the unit itself – which is slightly bigger than a standard Costco chicken nugget:
Once you’re done admiring the unit you’ve got the quarter turn quick release mounting system. This system uses industrial strength rubber bands that you can easily move from bike to bike. It’s the same system that both the Edge 500 and Edge 800 utilize. In my experience with the Edge 500 for almost two years now – I have yet to find a way to break these bands.
Then we’ve got the AC adapter that charges via USB. It actually comes in two parts – first the block itself, and then the country specific wall socket component.
From there we have the standard mini-USB cable – the same as all your other gadgets like digital cameras and the like.
And finally, there’s the warranty card and a little software redirection card that tells you to swing over to Garmin Connect to signup for your included/free account and how to download data from the Edge 200.
Now that we’ve got it all unpacked, let’s get to some comparisons to give you an idea on the size…
Size & Unit Comparisons:
If you’re familiar with the blue (or gray scale) Edge 500 unit, you’ll find this one virtually identical. In fact, there’s almost no differences between the two from a dimensions or weight standpoint. But let’s go ahead and compare it to some of the other more popular units in the cycling world today.
I’ve got it lined up next to its larger cousin the Edge 800, the Polar CS500, and the CycleOps Joule.
You can see it’s the smallest of the bunch. And even when looking at the new CycleOps Joule GPS units that were announced back in June, it remains smaller than those since the size is identical to the Edge 500.
From a height standpoint, the units are all pretty similar:
Because it’s logical you don’t have all those units sitting in a stash of sports gadgets, I’ve gone ahead and compared it to something that you do probably have handy: A standard business card.
You can see it barely takes up 2/3rds of the length of the card, and is roughly the same width:
I previously weighed the Edge 500 which has the same form factor and found it weighed less than an egg (Egg was 2.20 ounces). Curious to see if the weight changed, I went ahead and stuck this on a scale too – and low and behold…still less than an egg (or I started buying bigger eggs).
While you’re deciding whether the Edge or the Egg came first, I’m going to go ahead and move onto initial power on.
Initial Setup:
When you first power on the unit, it’ll go through asking a few questions. The primary purpose of these questions is to ensure that the settings you have are appropriate for your country and language. The secondary purpose is to assist in basic calorie calculations. First up – determining language and unit format.
You can change the unit format to Miles, Kilometers and Statue UK.
Then you’ve got the selection of 12 hours or 24 hours for time display.
Once you’ve given the Edge 200 a rough idea of how you want information displayed, it’s time to enter in your personal details so that it can make some calorie calculations. This will include gender, weight, height and age.
So why does it need this? Well, in order to do basic calorie math it’ll use your specific information combined with simple distance calculations to determine calories. Of course, out of all the methods of calorie burn that the different Garmin units offer, this is the most basic. More advanced methods move to heart rate based options, and then heart rate based options with a New Leaf test. But since the Edge 200 is unable to connect to a heart rate strap, the more basic “Weight multiplied by Distance” type calculations are used here. I previously wrote up a pretty detailed post on all the options available on all Garmin units today from a calorie measurement standpoint. I encourage you to hit it up if calorie burn is of importance to you.
The Quick Release Mount System:
The Edge 200 uses the same quick mount system that its brothers the Edge 500 and 800 use. I’ve found this system to be hands down the best mount platform out there. Instead of the pain in the butt zip ties that others use, this goes the way of industrial strength rubber bands. The bands come in two sizes – smallish and largeish.
Each Edge 200 unit includes two mounts, and enough rubber bands to mount 7 units (in other words, you can lose 10 rubber bands before you have to buy more). Each mount requires two bands. I’ve yet to find a bike that these don’t fit on, and I’ve yet to find a way to break them – and we’re talking thousands and thousands of miles of riding each year.
The Edge 200 simply slides onto the mount, and then with a quarter turn it’s locked in place. I will point out that when I got hit by a car, my Edge 500 using the same mount system stayed on my bike just fine. The same can’t be said of either me or other pieces on my bike.
If I’m riding my road bike, I just mount it on the handlebar, and for my triathlon bike I prefer the aerobars. You’ll find that in most cases your arm will actually wrap around the Edge – so it really isn’t in the way. On my mountain bike, it’s back on the handlebars. And for my two turtles, I can hook four rubber mounts together and make it all the way around their shells (they aren’t as slow as people think!).
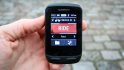
Now let’s get to the good stuff – actually using the unit! The primary goal of the Edge 200 is to track where you’ve gone and your speed and lap information. Essentially ‘where and how fast’. Additionally, it can also provide directions on getting where you want to go. When you first power on the Edge 200 it’ll bring you to this main menu screen with four options. We’ll talk about courses, history and settings in a bit – but for now, let’s just ride.
Once satellite acquisition is complete, you’ll be ready to go. I found this to be the fastest acquiring Garmin unit I’ve ever tested it. Every time I turned it on – including the first time, it acquired within 3-5 seconds. Really astounding.
As you ride you’ll find that the display has four main areas. The 3/4ths of the screen is dedicated to your current speed, your total distance and your total time. These are non-configurable.
The bottom quarter of the screen is changeable by pressing the page button (lower left button) and this controls a scrolling data field that displays: Average Speed, Ascent (total), and calories.
Additionally, the bottom field will display your lap time and lap distance once you press the lap button – though it will not display it until the button is pressed.
The lap button is used to demark portions of the ride. For example, if you have a 10 minute warm-up, followed by 10 minutes of moderately hard, and then 10 minutes of very hard – you may want to separate those out later on for better analysis online. By pressing the lap button (lower right button), it’ll take care of the separation for you. Everything will still be part of a single ride file with total length/time/etc, but those different chunks will show up as subsets available.
You can pause your ride at any time by pressing the upper right button, which temporarily stops recording. You can then either resume the ride, or end it by pressing Save or Discard (to save or trash the data). Also, you can press ‘Back to Start’ to get routing information back to where you started from.
Auto Lap:
Pretend for a second that you don’t like pressing buttons – say you’re just not comfortable taking your hands off the handlebar to press the lap button. Instead, you’d rather the computer automatically create laps every mile or ten. Well, auto lap does exactly that. It will automatically create a lap within your file for the set distance you’ve configured. For example most running folks use 1 mile (or kilometer), but for cycling, every 5 miles seems to be more popular. Either way, however you configure it – it’s up to you.
In addition to just using a set repeating mileage – you can also do it based on position. This is useful if you have a circuit route that you’re doing repeatedly and you want to demark each time you pass a certain point (like a starting line or a random tree).
By setting the Edge 200 to automatically create a lap marker on each lap past your driveway, you can avoid any embarrassing crashes into the neighbors trash can in front of their Saturday morning yard sale as you try to press the lap button while doing circuits around your neighborhood.
Alerts:
In the same vein as automatic lap configuration, you can also setup alerts. Alerts are different in that they won’t make any sort of marker in the file, but rather just ding (actually, a very loud twirly ding sound) and display a message instead. You can setup alerts of time, distance or calorie burn.
I use alerts to remind me that I should be taking nutrition – especially on longer training efforts. I do this using the time alert function.
By simply setting up a repeating 20 minute alert timer, I’m easily reminded that I’m due for taking in some gel.
GPS Log Route Overview:
One of the biggest reasons one would buy the Edge 200 over a standard non-GPS based cycling computer is to have information about exactly where one went after their ride. With the GPS data constantly recording, that data is easily displayed once uploaded to Garmin Connect. I’ll talk more about Garmin Connect later, but the key areas that you’re probably looking for is the map of where you went, and your total speeds – both of these are provided on Garmin Connect. For example, here’s what the map looks like:
You can see it shows you where you’ve been and where you started and stopped. The major difference when comparing something like the Edge 200 and a generic cycling computer from a distance measurement perspective is that while both will measure distance – the Edge 200 doesn’t require any wires or sensors to do so. Because it relies purely on GPS for determining distance, you don’t have to configure a wheel sensor like a typical non-GPS bike computer. You just need to be able to successfully rubber band the mount to your handlebar…which I’m fairly confident you’ll be able to handle (especially if you have experience with shooting rubber bands at your little brother like I do).
Courses:
I was happy to see the Edge 200 included courses. This was a feature that was cut recently on one of the running watches (FR610) – so I was a bit concerned we might not see it make an appearance here on this lower end cycling computer. Courses allows one to create a predefined route to follow using a variety of sites, such as MapMyRide.com. From there you then simply export out the course and copy it to the Edge 200 for routing while out on your ride. This is ideal for bike rides that may be covering new territory, or if you suspect your friends will attempt to ditch you.
To create a route, you just wander over to a site like MapMyRide and create a course by simply dragging and dropping markers:
Once done, you choose to export out the course and save the file to your Garmin device once you’ve plugged it in – just like saving files on a USB hard drive (they go in the GarminNewFiles folder).
Note that in the near future Garmin Connect will be introducing this functionality directly onto Garmin Connect itself. It made a brief appearance back a few weeks ago but due to some bugs was temporarily pulled. You can see my write-up on it here though in the meantime. [Update: Garmin has since added the Course Creation feature]
Once you start up your Edge 200 and you’ll find the names of each course available for you to select.
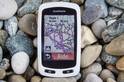
After you’ve selected the course it’ll show a route of the course (breadcrumb style) and give you status information about your progress on the course.
Unlike a traditional car GPS though, this unit won’t give you street by street directions – but instead gives a breadcrumb trail to follow. For street by street and turn-by-turn directions with a map, you’ll need the Edge 800.
Altimeter (GPS Based):
Unlike the rest of the Edge cycling computers, the Edge 200 uses a GPS based altimeter instead of a barometric based altimeter. This means that the data isn’t quite as accurate during the ride, but in some ways that’s probably of less importance to you if you’re looking at this unit instead of something like the Edge 500 ($50-100 more). The good news though is that once you upload to Garmin Connect, it’ll automatically correct the data using known elevation data for the GPS line that you have. In other words, it uses data provided by mapping providers with painfully exact elevation measurements, which in turn is substituted over the less accurate GPS based measurements from the Edge 200.
You can turn this feature on or off per ride by simply clicking the little button on Garmin Connect for that particular ride. By default, it’s turned on.
Start Notice:
You know when you stop in the middle of a ride to eat ice cream and then you forget to start your bike computer again when you leave the ice cream place? You remember how annoying that is (forgetting to start it again, not the mere act of leaving Dairy Queen behind)? Well, Start Notice attempts to solve that for you. If it thinks that you’re trying to make a getaway without actually starting the timer, it’ll let you know.
You can configure start notice to alert you once, alert you repeatedly, or not alert you at all (tough guy, ehh?). I personally leave it set for just alerting me once – and I’ve found it’s saved my behind more than once over the years.
Auto Pause:
Now take the start notice concept and kick it up a notch. Say you’ve just got a personal policy against any button pressing at all (I have a personal policy against falling off my bike, but that’s different). You just want the computer to simply start the timer when you go forward, and stop the timer when you stop. Well, that’s what Auto Pause does. The unit will automatically start and pause dependent on whether or not the GPS detects movement.
You can configure it though based on your preferences. For example if you want to increase or lower the threshold of the speed which triggers a start or stop.
I find this great for city riding where you may have a lot of stoplights or stop signs to deal with (you do stop a stop signs, right?) For longer country roads with few stops I don’t tend to use this but instead just do it manually.
Water & Weather Resistance:
Despite having a little USB port on the back, the Edge 200 is fully waterproofed to IPX7 standards. This means that it can hang out in water 1 meter deep (3 feet) for up to 30 minutes. If you have your bike constantly submerged in water that deep for more than 30 minutes…I suspect you have other issues.
The USB port is internally waterproofed, so no concerns about water getting in through the backdoor, even if the flap is open.
For fun, I tossed it in a pot of water while I proofed this review and just let is sit there. No issues.
And if you find dunking of computing electronics fun, then here’s some of my previous water bound tests that I’ve done with other Garmin units – complete with a rubber ducky.
Backlight & Night Riding:
The Edge 200 includes a LCD backlight that easily illuminates the entire screen for night riding. This means you can very clearly see the display from your bike seat even on the darkest of commuter days. It does not however mean you should use it as a replacement for a front headlight.
You can configure the backlight timeout such that it automatically goes off to save battery, or stays on indefinitely to provide you with a clear understanding of your ride. I personally prefer to just leave the backlight on, as I’ve never really found a case where I really needed the full 14 hours of battery for a single ride, especially since I usually charge it back up between rides when I download the data.
You can also change the contrast levels as well, with a selection from 1-4.
Again, I prefer to just leave the contrast and backlight up all the way – but that’s certainly not required either.
Perhaps the biggest item of note with the Edge 200 is that it is not compatible with any ANT+ sensors such as a heart rate sensor, speed/cadence sensor or ANT+ power meter. The Edge 200 actually contains no ANT+ chip in it at all, thus there is no hope for eventually getting a firmware update to enable those. If you’re looking for data from one of those categories, I’d suggest looking at the Edge 500 instead. The Edge 500 is essentially the grown-up version of the Edge 200, but for about $50 more (common price), or $100 more (official retail price).
If you plan to train indoors, the Edge 200 does have an indoor training mode, but given it accepts no ANT+ sensors to track speed indoors (ANT+ speed sensor), this mode is essentially just limited to using the timer function.
Included Software Options:
The Edge 200 connects to your computer using a simple mini-USB cable. This cable plugs into the back of the unit using the USB port, under the rubber cover.
Once plugged into your computer, the unit acts like a USB hard drive (or a thumb drive, officially termed ‘USB Mass Storage Device’) and will enumerate its contents on any modern computing platform – PC or Mac.
The Garmin unit has a simple file structure, but you’ll realistically never need to worry about it if you use any of the other software applications.
In short though, your history is saved in the ‘Activities’ folder, and in the .FIT file format – like all newer Garmin devices made in the last two years. The Courses folder holds courses, and the NewFiles folder is where you stash new stuff that you want the device to pickup and consume. The other file folders contain files that you’ll never touch.
Once you have it plugged in, you’re ready to use it with any of the below applications – let’s go ahead and dive into Garmin Connect, which is free of charge for any Garmin customer (well, actually, it’s free for everyone).
Garmin Connect:
After you’ve arrived at the main Garmin Connect screen, you’ll go ahead and choose to upload your data. The Garmin Connect site will have loaded a small control in your browser which allows it to enumerate any Garmin devices you have attached. From there it’ll notice that you’ve got the Edge 200 hooked up to it:
You can choose to upload selected activities (manually picking them), or you can simply just upload everything new that it finds. Because I’m lazy, I just let it do the work and find the new stuff. Once you click that magical button, it’ll go to work and grab anything it doesn’t already have. This process takes a few seconds per file.
Once you’ve got the activities uploaded, they’ll appear in your activities list. You can also display them on a calendar instead.
After you’ve selected the activity, you can bring it up to view more detail:
(Ok, not my fastest effort – I was busy!)
Garmin Connect also has a slew of other functionality, including both reporting and health pieces. For example, you can pull reports on all your past activities, or just specific time slices:
Garmin Connect is a great overall solution for when folks are just getting into the sport. It doesn’t have the super advanced analytic capabilities of a program like TrainingPeaks – but then again, if you’re looking at the Edge 200, that type of software is probably overkill, especially given the lack of ANT+ sensors for areas such as heart rate, cadence or power.
3rd Party Software Compatibility:
Just to very briefly cover 3rd party compatibility of the Edge 200 and other services, it is fully compatible with any service or software application that supports the .FIT file format – which is the same format as the Edge 500/800 and newer Forerunner running watches.
TrainingPeaks:
In the case of TrainingPeaks, from the current device agent version you can simply select Edge 500 or Edge 800 from the dropdown menu to access the Edge 200 unit’s activity files:
Once this is done, you can select the files as normal and upload to Training Peaks as normal:
Final Summary:
Comparison between models:
If you’re looking at all the options out there on the Garmin Edge lineup, I put together this handy little chart to try and sift through some of the relevant features from the ‘marketing features’.
As you can see, the major differences between its closest sibling – the Edge 500 – is the lack of ANT+ functionality and advanced workout features. If you’re looking for car-navigation style GPS maps, then you’ll want to focus on the Edge 705 or Edge 800 instead (I’d highly recommend the Edge 800 instead). Also, the other Edge units have a full fledged Virtual Partner feature, while the Edge 200 is limited to only displaying when in courses mode. Virtual Partner allows you to race against a little virtual cyclist that keeps a given speed (i.e. 16MPH) – and you can see how far ahead or behind him you are.
Pro’s/Con’s:
There’s a lot of reasons to buy the Edge 200, and there are also some gotchya’s, so let’s boil them down to the always present Pro’s and Con’s list:
Pro’s:
– Small and lightweight. Slightly larger than a chicken nugget and lighter than an egg.
– Super easy to use. There’s no confusion here with this unit, it’s impossible to get yourself into any sort of menu trouble – it just works.
– Allows you to see where you went, and for how long and how fast. Both on the unit, and on the computer.
– Fully downloadable and compatible with both Garmin Connect as well as 3rd party applications.
– Super fast satellite acquisition times – fastest of any Garmin sports unit to date.
– Cheap at sub-$150 [10/29/12 Edit: Now $129].
Con’s:
– The lack of ANT+ accessories is a bummer, primarily for the indoor speed sensor if you want to train in the winter, or if you want heart rate data.
– Calorie burn is best guestimate and uses fairly rudimentary assumptions, due to lack of heart rate sensor.
– GPS based altimeter instead of barometric. Given the product line goals, I understand the choice made – but would have preferred all Edge units keep barometric altimeter.
– Unable to customize data fields. While the fields shown are logical, a little customization would have been nice.
Conclusion:
If you’ve made it this far and are trying to decide which unit to get, I offer the following thoughts:
A) If you’re just getting into cycling and aren’t sure what you want from the sport yet – this is the unit for you. It’ll tell you exactly where you went and all the goodness that comes with it. It’s cheap, easy to setup and fairly indestructible. This is also a great unit for bike commuters that don’t care much about ANT+ data like heart rate or power on their commute to work- but that still want the total mileage data consolidated into their Garmin Connect accounts, or training logs.
B) If you’re into cycling a fair bit, then you really should look at the Edge 500 instead. That’s the same form factor but has tons of additional features like intervals, advanced workouts and most importantly: ANT+ sensor data compatibility. Combine that with the new power meter features being added to it in the next month and you’ve got probably the best small cycling computer on the market.
C) If you’re into cycling and looking for mapping and navigational capabilities, then check out the Edge 800. It’s got pretty maps (even satellite imagery!) and the ability to do on street routing. It’s got everything the Edge 500 does, but adds a whole bunch more than you’d come to expect from a car GPS unit.
D) If you’re a triathlete, then you’ll want to be checking out either the Garmin FR305 or the Garmin FR310XT – both of which are geared towards the multisport crowd.
Make sense? Good.
Overall, I absolutely see the value in a device at this price point and understand the cuts that Garmin made to shave off $100 from the Edge 500. I see this is an ideal starter device that’s easy to move between bikes because of the mount system – making it ideal for sharing within a family. While one could make the argument that the FR305 does virtually everything this unit does at the same price, it can’t be said that the FR305 is as clean as this device from a user interface standpoint, nor does it have the quarter-turn mount system. If you’re looking for a great starter GPS device – this is probably the best product out there for the money. It’ll just work every time without complications or setup requirements.
Found this review useful? Or just want a sweet deal?
Hopefully you found this review useful. At the end of the day, I’m an athlete just like you looking for the most detail possible on a new purchase – so my review is written from the standpoint of how I used the device. The reviews generally take a lot of hours to put together, so it’s a fair bit of work (and labor of love). As you probably noticed by looking below, I also take time to answer all the questions posted in the comments – and there’s quite a bit of detail in there as well.
I’ve partnered with Clever Training to offer all DC Rainmaker readers exclusive benefits on all products purchased. You can read more about the benefits of this partnership here. You can pickup the Edge 200 through Clever Training using the link below. By doing so, you not only support the site (and all the work I do here) – but you also get to enjoy the significant partnership benefits that are just for DC Rainmaker readers. And, since this item is more than $75, you get free US shipping as well.
Additionally, you can also use Amazon to purchase the unit or accessories (though, no discount on either from Amazon). Or, anything else you pickup on Amazon helps support the site as well (socks, laundry detergent, cowbells). If you’re outside the US, I’ve got links to all of the major individual country Amazon stores on the sidebar towards the top.
As you’ve seen throughout the review there are numerous compatible accessories for the unit. I’ve consolidated them all into the below chart, with additional information (full posts) available on some of the accessories to the far right. Also, everything here is verified by me – so if it’s on the list, you’ll know it’ll work. And as you can see, I mix and match accessories based on compatibility – so if a compatible accessory is available at a lower price below, you can grab that instead.
K-Edge Garmin Handlebar Mount X-Large for Edge units (including Edge 1000) $45.00
$45.00
N/A
Thanks for reading! And as always, feel free to post comments or questions in the comments section below, I’ll be happy to try and answer them as quickly as possible. And lastly, if you felt this review was useful – I always appreciate feedback in the comments below. Thanks!
Finally, I’ve written up a ton of helpful guides around using most of the major fitness devices, which you may find useful in getting started with the devices. These guides are all listed on this page here.
I swim, bike and run. Then, I come here and write about my adventures. It’s as simple as that. Most of the time. If you’re new around these parts, here’s the long version of my story.
You'll support the site, and get ad-free DCR! Plus, you'll be more awesome. Click above for all the details. Oh, and you can sign-up for the newsletter here!
Here’s how to save!
Wanna save some cash and support the site? These companies help support the site! With Backcountry.com or Competitive Cyclist with either the coupon code DCRAINMAKER for first time users saving 15% on applicable products.
You can also pick-up tons of gear at REI via these links, which is a long-time supporter as well:
Alternatively, for everything else on the planet, simply buy your goods from Amazon via the link below and I get a tiny bit back as an Amazon Associate. No cost to you, easy as pie!
You can use the above link for any Amazon country and it (should) automatically redirect to your local Amazon site.
While I don't partner with many companies, there's a few that I love, and support the site. Full details!
Want to compare the features of each product, down to the nitty-gritty? No problem, the product comparison data is constantly updated with new products and new features added to old products!
Wanna create comparison chart graphs just like I do for GPS, heart rate, power meters and more? No problem, here's the platform I use - you can too!
Think my written reviews are deep? You should check out my videos. I take things to a whole new level of interactive depth!
Smart Trainers Buyers Guide: Looking at a smart trainer this winter? I cover all the units to buy (and avoid) for indoor training. The good, the bad, and the ugly.
Check out
my weekly podcast - with DesFit, which is packed with both gadget and non-gadget goodness!
Get all your awesome DC Rainmaker gear here!
FAQ’s
I have built an extensive list of my most frequently asked questions. Below are the most popular.
You probably stumbled upon here looking for a review of a sports gadget. If you’re trying to decide which unit to buy – check out my in-depth reviews section. Some reviews are over 60 pages long when printed out, with hundreds of photos! I aim to leave no stone unturned.
I travel a fair bit, both for work and for fun. Here’s a bunch of random trip reports and daily trip-logs that I’ve put together and posted. I’ve sorted it all by world geography, in an attempt to make it easy to figure out where I’ve been.
The most common question I receive outside of the “what’s the best GPS watch for me” variant, are photography-esq based. So in efforts to combat the amount of emails I need to sort through on a daily basis, I’ve complied this “My Photography Gear” post for your curious minds (including drones & action cams!)! It’s a nice break from the day-to-day sports-tech talk, and I hope you get something out of it!
Many readers stumble into my website in search of information on the latest and greatest sports tech products. But at the end of the day, you might just be wondering “What does Ray use when not testing new products?”. So here is the most up to date list of products I like and fit the bill for me and my training needs best! DC Rainmaker 2024 swim, bike, run, and general gear list. But wait, are you a female and feel like these things might not apply to you? If that’s the case (but certainly not saying my choices aren’t good for women), and you just want to see a different gear junkies “picks”, check out The Girl’s Gear Guide too.