(Please Note: As of April 29th, 2013 there is a new Ambit – the Ambit2 and Ambit2 S. Please check out that review, especially because Suunto has now said no further functionality firmware updates will occur for the original Ambit – the one in this review.)
The Suunto Ambit is the first GPS device out on the market that’s very clearly targeted at ultra runners – and those wanting to go long distances for a long time, upwards of 50+ hours. Additionally, the device claims smoothed GPS paces using a new ‘FusedSpeed’ technology, as well as a 3D compass and barometric altimeter. But with all these new features, does the watch fail to deliver on some of the basics? And how does it fit into the scene for non-ultra runners? Well, I dig in to find out.
Like all my reviews, they tend to be pretty in depth (perhaps overly so) – but that’s just my trademark DC Rainmaker way of doing things. Think of them more like reference guides than quick and easy summaries. I try and cover every conceivable thing you might do with the device and then poke at it a bit more. My goal is to leave no stone unturned – both the good and the bad.
Because I want to be transparent about my reviews – Suunto sent me a final retail unit to try out. Once I’m complete here shortly, I’ll send this back to Finland and then go out and buy my own (to be able to support y’all in the comments section down the road). Simple as that. Sorta like hiking in wilderness trails – leave only footprints. If you find my review useful, you can use any of the Amazon links from this page to help support future reviews.
Lastly, at the end of the day keep in mind I’m just like any other regular athlete out there. I write these reviews because I’m inherently a curious person with a technology background, and thus I try and be as complete as I can. But, if I’ve missed something or if you spot something that doesn’t quite jive – just let me know and I’ll be happy to get it all sorted out. Also, because the technology world constantly changes, I try and go back and update these reviews as new features and functionality are added – or if bugs are fixed.
So – with that intro, let’s get into things.
Unboxing:
The Ambit comes in a box roughly half the size of a carton of milk, with a generally non-glossy exterior.
Once you remove the outer box, the inner box opens up like a clamshell, with the Ambit looking right up at you.
From there you’ll remove the inner tray and find the Ambit manual below it (in what seems like 98 languages), as well as a credit card sized customer service card.
Within the box that the Ambit itself is perched on, you’ll find the heart rate strap and charging cable (assuming you bought the version with the heart rate strap, otherwise just the charging cable).
Here’s all the items without the box:
Individually, looking at all the pieces, we’ve got the ever exciting quick start manual:
Then the product support help card. This is kinda interesting – I haven’t seen this idea in a while. But it’s handy and makes sense, also, by making it more obvious it’s more likely that folks having trouble will call the card, rather than just return the product.
Then we have the USB charging cable, which clamps onto the side of the watch via four small metal connectors:
Next is the heart rate strap. This wirelessly transmits data to the Ambit using Suunto’s variant of ANT. Note that this is not compatible with ANT+.
Size Comparisons:
The Ambit as a watch manages to just squeak by in the category of ‘normalcy’. You can easily wear it day to day during non-athletic activities. And because it looks a bit rugged, it doesn’t stand out like many other brightly colored square GPS units.
However, it’s often difficult to understand how it compares in size to other GPS units on the market – so I broke out the trusty kitchen rolling pin and put on a bunch of units that are in the same rough market as the Ambit.
As you can probably see – the Ambit is amongst the higher units (thicker), though, it doesn’t tend to feel that way while wearing it.
Here’s a side profile shot as well:
Note that in the case of the Polar RCX3 (unit to the left), it doesn’t include GPS inside of it, so it’s a bit thinner. Instead, it connects to a separate GPS pod.
Running:
As a GPS unit, the first task that you’ll want to do is to get outside and let it grab a GPS fix. The first time I did this, it took about 60 seconds to find a fix. But on subsequent activities, it tends to be pretty quick if I’m in the same place I left off from last time – in some cases finding the fix in as little as 3-5 seconds. When I went down to Houston, it pretty much started back over again at 60 seconds. But then the next day while still in the same place, it was back to a few seconds.
The GPS unit has what’s called ‘hotfix’ technology, which essentially places the satellite location into memory – enabling quicker location of satellites for future activities.
The first step though in starting a run is selecting an activity type – in our case, running. As you’ll see later on, different activity types trigger different data views and settings.
Once you’ve got satellites acquired, you’re essentially good to start running. To begin recording, you’ll press the start button again, which will begin display of data related to the run.
As you run, your pace will display on the unit, as well as other metrics such as distance, time, elevation, heart rate and anything else you’ve configured. I go into detail a bit later on the full list of display fields.
By default the unit will have an autolap set every 1KM (even if you switch to miles mode), but you can change this value as you see fit. Autolap will essentially create a lap marker at the predetermined time. This is primarily useful on longer runs where I want a quick check of my average pace over just the last mile. Or, the split for that last mile.
For other sessions – such as interval work, I prefer autolap to be off, so that I can record the intervals as I specify them (by pressing the lap button). Unfortunately, there isn’t a way to turn this on/off from the watch itself. So you have to somewhat think ahead, or create different workout profiles (i.e. Running – Long, and Running – Intervals).
But, back to the run.
When you want to pause the unit, you can go ahead and do so by pressing the stop button – which will pause the activity until you’re ready to continue. This is ideal if you need to stop mid-activity at a stoplight or ice cream truck. You can see the paused icon up at the top of the watch.
Once you press resume, the timer will resume.
FusedSpeed:
Suunto has introduced a unique feature to the Ambit, called FusedSpeed. FusedSpeed aims to utilize the unit’s internal 3D accelerometer to reduce GPS based speed fluctuations. The one item that many folks new to GPS units find out is that GPS based speed tends to fluctuate a bit. Different companies counter that in different ways – typically through simple smoothing (i.e. display a 3-5 second running average as ‘instant pace’).
However, Suunto came up with a new method that looks at arm movement within the unit to determine if your speed is actually changing. There are many watches these days (and have been for a while) that utilize internal accelerometers as their only means for speed/distance (no GPS). Effectively, Suunto took that technology and applied it to smoothing the incoming GPS data.
What is incredibly important to note here though is that FusedSpeed does not replace the requirement for GPS data – nor does it give you speed/distance indoors on a treadmill. This would easily be within the unit’s technical capabilities, but I suspect it didn’t make the initial firmware cut simply because it would have required an additional calibration option/routine – thus adding more development.
In the future I’d expect to see utilization of the 3D accelerometer for more than just speed/distance on a treadmill. I expect them to do the same thing as the Motorola Motoactv where they just added over 40 sports that leverage the accelerometer to provide sport-specific data. Make no mistake, that’s the future of many sport-devices over the next 3-12 months – a carefully balanced merge between GPS and accelerometer data.
Saving Data:
Once you’ve completed your run, you’ll want to stop the watch by pressing stop. Then, you’ll hold the stop/start button for about 3 seconds to save the activity.
After that’s complete, the unit will give you a summary screen that you can scroll through with final data for the run.
Note that the unit will ONLY show you the very last activity you’ve completed within the ‘Previous Activity’ menu, and will not show you history beyond that. It does of course retain that history for downloading to the computer, but it’s just not visible on the unit itself. [Update: Added within firmware update later in 2012]
Cycling:
While the Ambit wouldn’t be classified as a cycling computer by traditional standards, it does work just fine as one. The Ambit has a default cycling mode, which primarily serves to switch the display units from pace (typical running metric) to speed (typical cycling metric). Though, as I’ll show later on – this switch can be done for any sport you define.
Of course, the bigger reason to utilize the specific cycling mode is that you can connect to the Suunto bike accessory pods. These pods add cadence (Cadence Pod) as well as Speed (either of the Speed Pods). Note that neither is required for display of speed while cycling, as GPS is used. Instead, this is primarily for indoor training – enabling you to record speed and distance. It’s also useful for those that would prefer to get speed information using the speed pod instead.
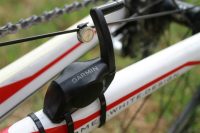
I talk about the different pods that are available later in the accessories section. Unfortunately, if you have a triathlon bike, you’ll end up likely having to mount it sideways – or pickup one of the various aerobar bike computer mount extensions, so it doesn’t look like the below.
In cycling mode, you have the same display customization options as in running mode – which means you can continue to add up to 8 pages of display, with up to 3 data fields per page. You can then press next to scroll through these.
For myself, I find that when using it on a bike I prefer to pickup a cheap bike mount kit. There’s a gazillion of these on the market today, but all of them cost $7 to $11. It honestly doesn’t matter which brand you pickup, since they all essentially just emulate a wrist, allowing the unit to easily wrap around the rubber block and in turn be secured to the handlebar.
While indoor cycling, you’ll want to use the rear wheel bike speed pod. The front wheel one won’t likely do you too much good (except on rollers). Use of the cadence pod is optional.
By using the speed pod and correctly configuring your wheel circumference, you’ll be able to display speed and distance data on the unit.
As noted, be sure to use the Movescount site to change your wheel settings. Note however that this is set across all of your pods, and thus if you modify it and you have different wheel sizes, you’ll want to update it between changing bikes.
Ideally, this would have been tied to a given sport – which in effect would have allowed you to create separate bike profiles for each bike you have (i.e. My Triathlon bike) with a different tire circumference than ‘My Mountain bike’. Perhaps in a future version.
After your ride is complete, the data up on Movescount will be just as detailed as if you were out running. If you were outside, you’ll get full GPS data (as well as cadence/HR data if applicable). And if you’re indoors, you’ll get speed/distance data (again, assuming if applicable).
And as I cover later on in the Movescount section – you can slice and dice the data in the same manner as running data.
Waterproofing and Swimming:
The Suunto Ambit is waterproofed to 100 meters, via the ISO 2281 standard. The unit claims water resistant for active swimming, though not for scuba diving uses.
The Ambit can be used without issue in the water (though, they don’t recommend pressing the buttons while underwater). I haven’t had any issues with plenty of button pressing underwater, but your mileage my vary. The Ambit’s usefulness in the water though is essentially a glorified stop watch.
The unit does not contain any form of swim stroke/distance/lap recognition. Though as I’ve mentioned elsewhere in the review – down the road they technically could utilize the accelerometer to do so (but I wouldn’t hold out on that happening in the immediate future). While swimming with it, it is fun to see the changes in ‘altitude’, due do the unit being submerged every stroke – resulting in higher water pressure while underwater.
Also note that like ANT+, Suunto’s variant of ANT will not transmit more than about 1-2” underwater. This means that you will be unable to utilize the heart rate strap while underwater to gather heart rate data. You can see in the below two underwater photos how if I place the unit directly next to the strap, I do get a heart rate reading:
But as I pull just about an inch away – the reading drops out.
Note that the heart rate strap itself is fully waterproofed, and as soon as you exit the water it instantly picks up your heart rate. This means that for triathletes there’s no issues wearing the heart rate strap under your triathlon suit, which is the standard/common practice for most triathletes.
Also note that while the heart rate strap that came with the unit does not support swimming, you can/could use the Suunto Memory Belt – which will track HR data and store it in the strap itself, then synchronize to the watch afterwards. Though, I don’t have a memory belt and was unable to try it at this time.
Other Sports:
Like virtually all other GPS watches out there today, folks tend to find interesting/different uses for them – compared to what was intended. For example, I often go skiing with my GPS watches. And in the case of the Ambit, it does indeed have a skiing mode (which essentially just changes the data fields to focus on metrics more in line with skiing).
But what if you come up with a sport that isn’t on the pre-canned list? Well, with the Ambit, you can create it yourself. For example – I decided to add the sport of ‘Dodgeball’ to my unit. To do so, I go online to Movescount and add a new sport profile:
I used the ‘Racquet Ball’ base profile, and then customized it from there. The only reason I did this is that it allowed me to keep the nifty paddle/ball icon. And while Dodgeball historically doesn’t have a paddle, it was as close as I could get.
As you can see, I then customized the data fields to be more applicable to the game of Dodgeball. for example – heart rate seemed more interesting, and the stopwatch field would also probably be of use. I left out stuff like average pace or speed – because those realistically wouldn’t be applicable.
The point being, you have a fair bit of customization, as you can see above.
And in some cases – you may be creating non-sport profiles. In other words, the ability to track an activity that may not be sporty at all. For example, on my flight down to Houston this past weekend I let it record during the flight. It tracked everything from speed to the cabin-pressured altitude (hence why it doesn’t show ~35,000ft).
I always think it’s fun to zoom in at the beginning and ending of the flight and see the taxi routes overlaid onto the maps. Probably only me that finds that fun.
The irony of the above satellite image is that is indeed a Continental-now-United Boeing 737 pulling out of the same gate I left from (the flight I took always leaves from the same gate). Funny that it just happened to be there when the image was taken.
The point of this section being you have a fair bit of flexibility in how you customize activities – something that most other watches simply don’t have.
Altimeter Options:
The Ambit has a barometric altimeter, which means that it can more accurately display altitude information – depending on whether or not said altimeter is correctly configured. In the case of the Ambit, you can (and should) set the initial starting altitude by using a known and correct elevation source.
You can either set the original elevation via direct altitude (i.e. in feet/meters), or via known air pressure.
Unfortunately, in my particular area (Washington DC), I don’t have very many big hills to work with for validation of attitude accuracy – an area I know many are concerned with. On the bright side, I’ll be down in Vegas in two weeks and plan to take a closer look at it then out in the mountains.
Suunto does have a very solid history though as a company in getting elevation data correct. And the data I do have from some of my hillier runs does match fairly closely to the terrain and elevation data that I know to be correct. However, mountains tend to be a much better validation of those.
Navigation:
The Ambit supports basic navigation between preprogrammed waypoints. When defining waypoints you can either define them in advance online at Movescount – or you can create waypoints on the fly on the watch (but only for the point in which you are currently residing).
While doing this online, you’ll go into the Movescount site and then under the Ambit you’ll select the Waypoints section.
Within that, you can select to create a new waypoint. This allows you to either define a given Lat/Long, or to simply use the map (driven by Google Maps) to zoom in and select a specific location.
Once done, you can name the location. The map allows you to switch between standard street map mode, and satellite imagery mode.
After you’ve named and saved your location – you’ll need to sync it to the watch. To do this, simply connect the watch to your computer and then wait for the Moveslink application to download the updated waypoint list.
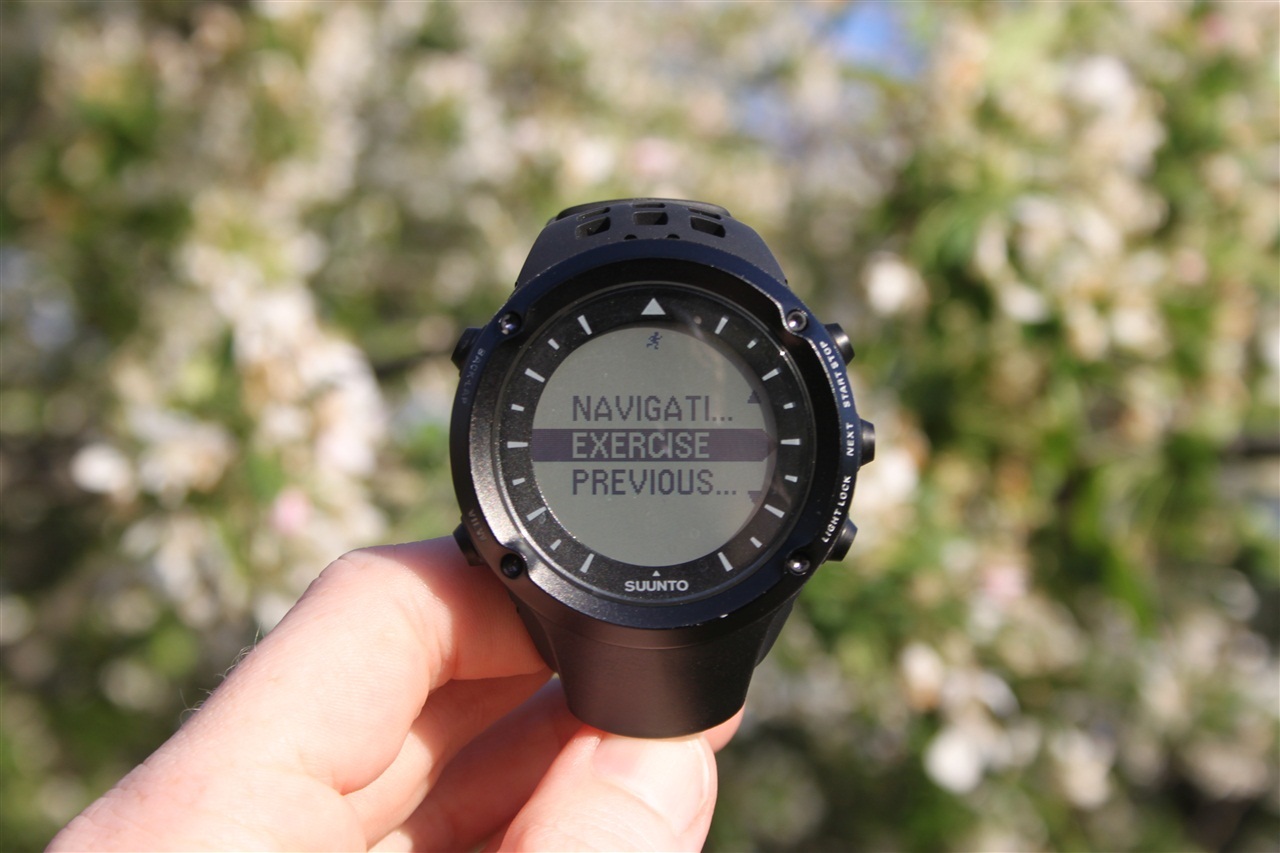
Once that is done, crack open your watch and open up the Navigation menu.
From there you can view any of the waypoints – which are organized by when you created them, then subsequently by the name you assigned them.
Once you’ve selected a waypoint, you’ll choose to Navigate to it. Note that you cannot add multiple waypoints for subsequent navigation. It’s a one-time, one-waypoint operation.
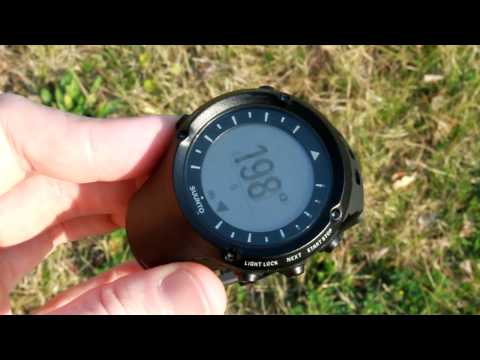
The unit will display the degrees that you’re currently offset along the bottom, with two little arrows on top that disappear when you’ve got yourself perfectly aligned.
Additionally, it will display distance to the location.
When you get within .03 miles of the location, it will display ‘Arriving at [Waypoint name]’. Once you’ve arrived at the location and .00 is shown, it’ll simply display the small icon for the waypoint type (i.e. hotel).
I went ahead and put together this super-quick video just to show you what it looks like as you rotate the watch and walk. Nothing fancy, but should help understand it a bit more.
Simple navigation demo
Make sense? Good.
As I noted above – this is fairly basic, and ideally you’d be able to enter multiple waypoints (i.e. a track/course).
Finally, note that you can create waypoints on the fly using the watch. To do this, you’ll go into the Navigation menu and then choose to save a waypoint. This will take your current location and save it with the name of your choosing. It will NOT allow you to specify a different set of coordinates to navigate to.
In other words, if you don’t setup your waypoints ahead of time – you’re kinda hosed. The good news here is that Suunto will be adding the ability to manually add waypoints in the May 2012 firmware update – so that should resolve that issue (see later firmware update section).
Also per request below, you can change the format to Mils for the compass, though it must be done via the Movescount site (online), then synchronized to the watch.
However, you are able to change the various GPS formats, including on the watch itself, such as below:
3D Magnetic Compass:
Amidst the features most applicable to the ultra and hiking crowd is the unit’s 3D magnetic compass. This is different than many other GPS units that don’t have magnetic compasses and instead depend on track movement to determine your orientation. For example, if you think back to boy or girl scout camp, you could twist the compass while standing still and have it display the correct heading. Whereas a GPS unit without a magnetic compass would simply not know which way is north, since they lack a compass that can utilize the earth’s magnetic field.
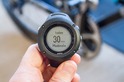
At all times, the unit’s compass is accessible – regardless of whether or not you’re in an activity. For example, if I’m just sitting at Chipotle eating a burrito, I can simply press the ‘Next’ button to instantly display the Ambit’s 3D compass. Pressing it again will give me the current temperature and barometric pressure, and pressing it once more will bring me back to time.
Here’s what the compass looks like (note, you can set the default to display in Degrees or Mils):
Note that if I press the ‘View’ button, the small text below the heading will change between: Time, Nothing (empty), and direction (W, SW, NW, etc…).
Finally, to briefly show how rotating the unit instantly changes the heading – as well as how quickly it stabilizes, I’ve shot this super-thrilling video:
Suunto Ambit 3D Compass Demo
Through the configuration menu you can both calibrate the compass (the 3D aspect of it), as well as separately set a declination value, which is typically located on maps.
In fact, when you first get the unit, it’ll have you walk through a very brief calibration procedure where you rotate the watch while level, 360°. Then you rotate it up on end, 90°.
Temperature:
The Ambit displays and records temperature across all activities. The unit displays it both within specific data fields that you can add, as well as on the main home screen below the current heading.
Note that the temperature sensor reacts rather slowly to temperature changes. For example, you can see this activity where I left my house and went out for a run – it took about 15-20 minutes before the temperature stabilizes from 80*F to 60’s*F (it was sitting next to the fan output of my laptop, hence the high initial temperature):
Similarly, if I place it in my freezer, it takes close to 30 minutes for it to reach rock bottom:
Nonetheless, this is definitely useful when you’re talking longer time periods with slower temperature shifts – such as a 100 mile run.
Ultra Long Battery Life:
One of the most sought after features of the Suunto Ambit is battery life, in particular – its claim to go upwards of 50 hours within 60-second GPS recording points.
In this mode, the unit plots a GPS point every 60 seconds, instead of the more common 1-second interval (often defined as 1s).
Below is a custom mode I created for an ultra run, which would last a longer time period with 10s recording and 60s GPS fix.
Because I was actually using the Ambit every day over the past two weeks, I didn’t have a chance to take it out of commission for 2 days to test it out. However, upon publishing this tonight I’ll be turning it on with the GPS enabled and letting it hang out and seeing when it does run out of battery – similar to other longevity tests I’ve done.
[4/6/2012 Update]:
The best way to test the GPS battery life for upwards of 50hrs straight, is to simply turn it on and let it record until it drains the battery completely. So that’s exactly what I did. Previous to starting the test, I set the settings to a recording interval of 10s, and a GPS fix & recording rate of 60s (per the screenshot above). This is the ‘longest’ setting combination that the Ambit offers. Note that these changes must be done online via Movescount and then synchronized to the watch prior to heading out.
I turned it on around midnight one evening and then placed it on my deck. This ensured it had easy GPS access the entire time, not that it would matter – since in a typical 50hr ride/run scenario – you’d likely be in all sorts of overhead coverage conditions. Note that I did not add additional sensors such as heart rate data or cadence data, though, in my longevity tests with other watches those rarely affected battery life very much – if at all. Most of the battery drain tends to come from powering the GPS unit, then powering the display.
At about the 20hr maker, I took it along for a run, since I figured it needed a bit of scenery change. The run wasn’t terribly long (only 40 minutes) – but it did illustrate what the recording interval looks like on a run where you have turns involved. You can see below the route the unit recorded, as well as the route I actually took.
The accuracy of such a recording interval would greatly depend on the terrain and speed at which you were moving. If you’re out on a roadway that’s near perfectly straight (i.e. middle of nowhere), then you’ll probably continue to get fairly accurate data. And in fact, you can see on the straighter sections of my run – it looks nearly spot on with where I ran:
But if you’re doing a mountain bike ride at speeds of 15-20MPH with tons of turns, the data will likely be far less accurate and likely fairly short. In fact, in virtually every circumstance the data will be short – since it would be cutting off corners. But again, that’s the tradeoff to be made.
So how long did the battery last? All in it lasted 45 hours and 5 minutes before it kicked the bucket:
It should be noted that I didn’t have any issues uploading to Suunto Movescount. It took maybe 1-2 minutes in total for that activity, but not much more than it seems to take sometimes anyway. You can see the full length of time displayed here:
I did notice that there was a fair bit of distance ‘noise’ as the GPS unit would record about 1 extra mile per day. This is actually fairly common in GPS receivers at this commercial level, and is just a function of the accuracy of the device deviating, and thus thinking its moving.
Backlight/Display Visibility/Lock Options:
The Suunto Ambit features a backlit screen that’s easily viewable while running at night (which, is when I do a lot of my runs this time of year).
The backlight can be activated simply by pressing the light button – which turns it on for five seconds. I do wish however that there was an option to have it display for longer periods of time – specifically, until I turn it off. For me, in the middle of the night doing intervals the last thing I want to do is press the light button constantly. You can enable ‘night’ mode, which means that you can press just any button to get a light – but still, that’s kinda lame.
In addition to the light button, you can also invert the display – which flips the black and white areas. Here’s a before/after image:
You can adjust contrast settings within the menu, increasing or decreasing contrast:
Also note that the test menu allows you to run a display test if you need to. This can be accessed by holding the top two buttons down for a bit of time:
Once in the menu, you’ve got a slew of test, info and config options:
Kinda cool that they actually put this in the manual!
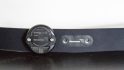
And finally, you can lock the display at any time by pressing and holding the lock button in the lower right corner for 2 seconds. To unlock it, you’ll press the same button for two seconds:
Pretty quick and simple.
Data Field Display Options:
Probably the coolest feature of the Suunto Ambit is the ability to change the display fields online, and have it synchronize to the unit when you plug it in. Others (Timex and Nike+) have done similar things in the past, but none as graceful or as expansive.
Once you login to the Suunto Movescount site you’ll go ahead and navigate to the ‘Gear’ section and then to the Ambit. From there, you’ll expand out the sport modes, and finally, the sport of your choice.
Once within that, you can create up to 8 data pages (the most of any GPS watch I’m aware of), with up to three data fields per page.
There are essentially two types of data fields: Numerical ones, and charts. Both can be selected from a field picker that shows you the appropriate data fields for each type. On the numeric fields, here are your choices:
While this is a good starting point, I feel like for a watch of this price range, there should be more options around data fields. In my opinion – any data field that you offer should ALWAYS offer a ‘Last Lap Avg’, ‘Last Lap Max’, ‘Overall Avg’, ‘Overall Max’ option. One doesn’t have to utilize all these fields, but since the point of computerized watches is data display, allowing flexibility for what people choose is key in my opinion.
For the chart type, the options are reduced a bit – but still about what you might expect – altitude and heart rate:
Once you’re done selecting your data fields, be sure to save, and then validate it syncs to the watch. I’ve found that the best way to do that is to unhook the watch, and then re-connect it. This forces the unit to re-check Suunto’s servers. Otherwise, it’ll just sit there blissfully unaware of a pending change.
Now, the only downside to the time Suunto spent on the awesome portion of the site is that you actually can’t modify data fields on the watch itself. Which is a pretty big bummer. This bit me a bunch of times when I wanted to change the data fields mid-activity or away from my computer, and was unable to.
Note that you can scroll between the selected data pages that you’ve created of course, while in the middle of an activity.
Suunto Movescount Online Training Log Site:
The Suunto Movescount online site is Suunto’s primary software application for analyzing data from the Ambit. Further, it’s the only method for making many of the configuration changes that are required for the Ambit (such as display field settings, or sport profiles). I talk a lot about the site throughout this post, but I wanted to briefly highlight some areas:
Connecting and downloading to computer:
To get information on or off the unit, you’ll connect the Ambit to your computer (Mac or PC) via the supplied USB charging cable. This is also the only method for transmission of data (no wireless connection to the PC).
Once connected, you’ll need to download the MovesLink 2 application, which is the small installed application that Suunto has developed that allows you to transfer data to the Movescount site online. Additionally, this application also can download firmware updates to the watch – like you see in the below photo.
The Moveslink application monitors for connections to the watch, and once one is established it’ll automatically validate the connection and then upload your workout data to the Movescount site. Additionally, it’ll download any configuration options.
Ambit Configuration:
I’ve noted many places in the review where specific feature configuration is done via Movescount, but I do want to highlight that at the top of your Movescount account you’ll see a Gear button, which then displays all registered gear. In my case, just the Ambit:
Once you click on that, it’ll bring you to the full page of configuration settings for the Ambit:
It’s in this area that you can specify unit settings, personal settings, general settings, customization (sport profiles), and waypoints (for navigation):
I’ve covered in depth those sections above elsewhere. So it’s probably best to simply start at the main scoreboard page that you’ll most likely land on:
This page features all of your most recent moves, as well as the activities of members that you may be following. Like other social networking sites, you can ‘follow’ various folks. And subsequently, I can see those following me.
Let’s look at a single activity. I’ll do that by selecting it from the calendar (by clicking ‘My Moves’ at the top), or the latest moves on the right side.
Once the activity is pulled up, I can view detailed information about the activity – such as heart rate data, speed, pace, distance, and where I went.
I can also drill down and view lap data about any given lap. In this particular case I had inadvertently set this run for 1K auto-laps, hence the .60 mile chunks:
Finally, as I noted earlier, you can track others’ activities, make comments on their activities and reply to comments made on yours. You can change the privacy settings to prevent this as well.
To illustrate this, I found one reader had followed along and made a few comments as I was reviewing the unit – which enabled me to reply to the comments on the site. You can see this brief conversation along the right side of the below screenshot.
In addition to activities specific to yourself or others, the site also features training plans which guide you to different goal workouts. This is something that isn’t very common across the industry today – so it’s pretty cool to see them here:
Overall, the Movescount site is fairly well laid out and easy to use. I really like the integration with the Ambit as a watch, especially when it comes to configuration settings, which make it really easy to set on the computer, versus on the watch.
Compatibility with 3rd party software:
Movescount enables you to export your activities via their site, allowing you to port them to a variety of applications – such as TrainingPeaks and others. Once exported, the file is in XLXS format (essentially a variant of Excel). I did notice however that when I exported to TrainingPeaks, it did not process the detail from the unit – only the summary information. Hopefully, they’ll look at adding support for the Ambit detail/sensor data in the future.
If you were to look at the data using Excel, you’d see the correct recording rate that you’ve selected, as well as the recorded data:
Given the CSV format, most any application can support the Ambit (or Suunto products in general) – which is great news.
Accessories:
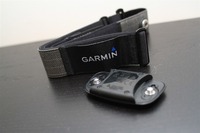
The Ambit is compatible with a handful of Suunto accessories, supporting primarily cycling as an activity, as well as the heart rate strap. Note that if you bought the heart rate strap bundle with your Ambit, you’ll have the below strap. If you didn’t, you can buy the strap separately.
It’s important to note that Suunto accessories utilize the Suunto ANT variant, and not the more common and ubiquitous ANT+ standard. Thus, Suunto accessories are NOT compatible with ANT+ devices, and vice versa.
Heart Rate Strap:
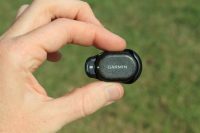
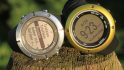
The heart rate strap enables you to display and record heart rate data. The strap snaps together on both side of the pod, which has a coin cell battery (which should last for close to a year). The battery can be replaced easily, at only the cost of a new coin cell battery.
You can specify heart rate strap pod use on any activity type, as well as skip it if you’re not wearing the heart rate strap that given day.
The heart rate data is displayed on the unit in real-time as you train, and you can choose whether to show the data as BPM (beats per minute) or Percentage (of Max HR):
After the completion of the activity, heart rate data is viewable on Movescount.
You can display straight HR values (BPM), as well as EPOC (an estimated measure of oxygen debt), energy (aka Calories), an estimated VO2 value (in ml/kg/min), Respiration, and R-R.
For all values, you can choose to overlay multiple values onto the same chart at the same time. Additionally, you can expand the chart to full screen:
Note that like all heart rate straps, there tends to be a dependency for a bit of moisture for the most accurate readings. While the vast majority of my readings were correct, I did find a few incorrect spikes at the beginning of an occasional workout – where the strap wasn’t wet enough. For those, I’d suggest picking up some simple $5 HR gel – which ought to solve the problem. Or, just lick the strap.
The DuoBelt HR strap (which also supports legacy analog treadmills) costs $80 and I’ve received confirmation from a reader that the Duobelt strap does work with the Ambit.
Bike Speed Pod (Rear Wheel Variant):
The rear wheel pod enables you to record speed and distance while indoors on a trainer. The kit also includes a bike handlebar mount for the watch itself.
The primary two components of the kit aside from the handlebar mount is the transmitting pod and the spoke magnet. The transmitting pod attaches to your bike frame at a location of your choosing near the rear wheel. The magnet is then attached via a small flat blade screw driver to a spoke (you can see the upper pod in the below image is the speed pod, with the spoke magnet just above it).
Be sure to configure the correct wheel circumference within Movescount for your particular bicycle wheel (in millimeters). Otherwise, indoor speed/distance will be inaccurate. However remember that indoor speed/distance on trainers is really a function of resistance and gearing applied. Which means that I can change my gearing without adding any more effort, and subsequently change the speed of the trainer from 10MPH to 20MPH. Again, without any effort.
The speed/distance is recorded to the unit and is then visible both during the activity on the watch itself, as well as afterwards on Movescount.
And of course, you can always use this outdoors instead of GPS – though, there tends to be very little benefit to doing so for most applications (i.e. non-track applications).
The bike pod kit (rear wheel) costs $60 and includes the handlebar mount as well. Technically, you can put it up on the front wheel – though aside from recumbents, I’m not sure why anyone would willingly do that.
Bike Speed Pod (Front Wheel Variant):
The front wheel speed bike pod is primarily designed for Suunto’s non-GPS units, though, it does work just fine with the Ambit. Normally this pod is used for recording distance outdoors where a GPS unit isn’t used. But with Ambit having a GPS, the front pod isn’t terribly useful – especially since indoors you’d want the rear pod for a trainer wheel.
Note that like the rear-wheel pod, this also comes with a watch mounting block for your bike.
The one thing that’s pretty interesting nice about this design though is that it’s super clean and requires no zip ties. The magnet simply screws onto the wheel, and the skewer slides through and locks right in place:
Now, only if they could have done something like this for the rear wheel instead – that would have been much cooler.
Again – I wouldn’t recommend getting this pod unless you really don’t trust the GPS unit outside. In which case, I’d question why you’re spending $500 for a GPS watch that you don’t trust the GPS of. Nonetheless, it’s available for $50, should you wish to buy it (though it doesn’t appear to still be available as a kit as pictured above).
Bike Cadence Sensor (Crank mounted):
The Bike Cadence Pod enables one to record cycling cadence with the Suunto Ambit (and all Suunto devices). Cycling cadence is measured in RPM’s (Revolutions Per Minute) and is simply how many times per minute the crank arm rotates past a given spot. Most cyclists aim for about 90-95RPM, though for varying situations you might have higher or lower cadence.
This pod has two components – the first is a small magnet that simply attaches magnetically to your crank arm. There are no zip ties or other adhesives holding it on – just pure raw magnetic power (thus far, mine hasn’t fallen off).
The second is the wireless transmitting pod. This is attached via extra-small zip ties, and is typically placed as close to the crank arm as possible, without getting hit by the crank arm (in the photo below, the upper pod is the speed pod, and the lower pod is the cadence pod):
Once you’ve got it installed, you’ll go ahead and pair it through the settings menu. Then, each time you prepare to start a cycling activity the unit will search for the Cadence Pod before starting. Though, you can skip this if for some reason you’re on a different bike.
Finally, the data will show up within Suunto’s online site as Movescount.com. Additionally, you can display data within the watch by adding the cadence data field.
Here’s what the cadence data looks like for a recent indoor trainer ride I did:
And yes, those max cadence values were correct – it was part of some spin-up drills I was doing.
While the footpod is NOT compatible, I really wanted to call it out up front. Partly to draw attention to the fact that it’s not compatible so folks don’t accidentally purchase it like I did. And partly to prod Suunto into adding support for it in one of their planed firmware updates.
But, for those not familiar, typically Suunto running watches support the Suunto footpod – which is unique in that the latest edition actually transmits BOTH ANT+ and ANT (Suunto variant). This means that it’s compatible with Suunto units (again, not the Ambit at this time), as well as other ANT+ units (i.e. a Garmin). In other words, if you’re looking at picking up an Ambit down the line, but have a Garmin today, and want a footpod – pickup their version instead of the generic Garmin one.
Usually folks buy a footpod in order to enable indoor treadmill running. Sure, you could simply look at the distance on the treadmill – but if you’re collecting data (or transmitting it to a coach), being able to look at speed/distance information over the entire course of a workout (which could include a slew of intervals/sets) – is fairly valuable.
The only bummer here is that the Suunto footpod is twice as expensive as the Garmin one – despite being almost the exact same item (all these companies simply rebrand the same footpod, made by Dynastream in Asia).
As I note in the next section – the rumor mill is pretty clear that support is going to happen in a subsequent firmware update – though Suunto has no comment as to exactly when (or even if). Other than that it won’t be in the May 2012 update.
Finally, a quick note about ‘FusedSpeed’ (I cover it in detail earlier in the running section) – this does NOT provide for indoor treadmill running speed/distance. This is merely for GPS fluctuation reduction.
One area I’m excited about is that Suunto is already banging the drum about their planned firmware updates. Admittedly, probably to compensate for some of the initial lack of features the watch has as-is today. On the radar thus far are two significant firmware updates. One will be in May 2012, and is being dubbed ‘version 1.5’, and the other is being targeted for September 2012, and being dubbed ‘version 2.0’. At present, Suunto was willing to share version 1.5’s update listing, as planned for May (note, as always, things are due to change):
—–
AMBIT 1.5 Software update release content – to be launched in May 2012
As promised, AMBIT features will be enhanced over time through SW-updates. Our plan for the content of AMBIT SW 1.5 release in the end of May 2012 is the following:
· Route creation and navigation based on waypoints
· Improvements in how waypoints are named and listed
· Improvements in how compass and navigation can be used while exercising
· Manual adding of waypoints directly in Ambit
· Some additional local grids and datums
—-
The 2.0 update for September does not yet have a released timetable, though rumors are present around both ANT+ support and/or footpod support [Update: This was implemented in Nov 2012 and added ANT+ support]. Suunto has told me that your feedback is critical to them deciding what to add, and they’d love that feedback funneled to this e-mail address: ambit@suunto.com
As noted earlier in the review, firmware updates are simply uploaded to your watch using the Moveslink application – and usually only take a minute or two.
Comparison Chart:
Here’s a high level overview of features amongst the higher end GPS sport watches out on the market today, targeted at runners:
In my mind the Suunto Ambit has a very clear target audience – one that Suunto itself is marketing very specifically to (ultra runners and some segments of the hiking crowd). The challenge is that many want the watch to be more than it is, and thus I fear folks outside of Suunto’s target audience will purchase the watch without taking into account the target audience as of April 2012.
Today, as noted, that target audience is ultra runners who need a solid barometric altimeter and ultra-long battery life. For these folks, the Ambit is indeed a really solid watch. Physically, it’s very durable, and functionally-wise, it’s what many people have been asking for. Unlike many GPS watches, I feel confident I could take some spills with this in a rock garden and it’s gonna come out just fine and dandy. The glass face is set into the bezel a fair bit – allowing for it to be dropped on concrete without breakage (something I’ve already done accidentally). Further, the magnetic 3D compass offers clear navigational support to those looking to navigate between waypoints.
So who is this watch not for?
Well, triathletes. The reality is that the many different features that most triathletes want aren’t there today in the watch. That’s not to say that they won’t be there in the future – but as of now and until at least September (2.0 firmware update) – that’s where things will stand. For example, there’s no multisport mode (ability to quickly change from swim > bike > run). There’s also no support for swimming, either openwater or lap/pool swimming. There’s no quick release style kit to enable moving it from the swim to bike to run. And, there’s no power meter support for ANT+ devices (or any power meters).
It’s also not for the casual runner. At $500 it’s five times the cost of a basic GPS watch (Soleus GPS 1.0 and Timex Marathon GPS), and four times the cost of the cheapest GPS triathlon watch (Timex Global Trainer). There are quite frankly cheaper watches with more features on the market today than the Ambit. In fact, if you objectively look at pure feature quantity – the Ambit has less features than virtually every GPS watch cheaper than it (Polar, Timex, Garmin, Soleus, Nike, Motorola) – most of these at half the price. But, it does excel in very specific areas that others do not, notably battery life and more controls around altitude data.
With that, let’s move to the pros and cons:
Pros:
– Hardened and ruggedized watch
– Display technology clean and easy to read, even at night
– Very clean and easy to use integration with Movescount site
– Fully waterproofed unit, no issues with water while swimming
– GPS data appears to be quite accurate/consistent
– 3D magnetic compass
– Barometric altimeter
– 50hr battery life (in reduced GPS interval mode)
Cons:
– No workout support
– No history on watch (only last activity shown) Added in Firmware Update
– No interval support (Nov ’12 firmware added barely functional interval timer)
– No pre-defined course/track support with waypoints
– Does not support ANT+ accessories at this time. Firmware Update as of Nov 2012 added this.
With that, hopefully I’ve given you enough information to decide whether the Ambit is a fit for your needs.
Found this review useful? Here’s how you you can help support future reviews with just a single click! Read on…
Hopefully you found this review useful. At the end of the day, I’m an athlete just like you looking for the most detail possible on a new purchase – so my review is written from the standpoint of how I used the device.
The reviews generally take a lot of hours to put together, so it’s a fair bit of work (and labor of love). As you probably noticed by looking below, I also take time to answer all the questions posted in the comments – and there’s quite a bit of detail in there as well. If you found this review helpful in your purchasing decision, you can support future reviews like this by usingany of the Amazon links (unit or accessories above). If you’re overseas, I’ve got links to all of the major individual country Amazon stores on the sidebar towards the top.
Thanks for reading! And as always, feel free to post comments or questions in the comments section below, I’ll be happy to try and answer them as quickly as possible. And lastly, if you felt this review was useful – I always appreciate feedback in the comments below. Thanks!
As you’ve seen throughout the review there are numerous compatible accessories for the unit. I’ve consolidated them all into the below chart, with additional information (full posts) available on some of the accessories to the far right. Also, everything here is verified by me – so if it’s on the list, you’ll know it’ll work. And as you can see, I mix and match accessories based on compatibility – so if a compatible accessory is available at a lower price below, you can grab that instead.
Finally, I’ve written up a ton of helpful guides around using most of the major fitness devices, which you may find useful. These guides are all listed on this page here.
I am looking for a watch for running, cycling, and mountaineering.
Since I am doing log distance cycling, I want a long battery life, although for multiday ventures, I will be carrying a USB-battery.
I cannot see too many reasons to go for a Ambit2 vs the discounted Ambit for my purpose. Except maybe for the fused altimeter, but to me it doesn’t seem to be worth the extra cash. Am I missing something?
The critical issue is memory capacity for me: I am worried that multi-day recordings will excedd the memory, since I will not have a computer with me.
I have read contradicting statements as to how long the memory will last (with regard to the 1s/60s saving intervals).
Do you have any better data on that?
Due to your in-depth review of the Suunto Ambit2 I purchased one and it has made me look at the way I train in a totally different way, many thanks. I was training at the same pace each time I now realise, from the Suunto, that I wasn’t giving my body enough time to recover. I have now purchased a ANT+ 2 in 1 digital sensor device from Giant. I can get the speed sensor to pair with the Ambit2 and so record the data but have not been able to pair with the cadence sensor, have you come across this before in your testing, if you have so is there a workaround you are aware of please.
Working in a store that sells Garmin, Suunto, Timex, Polar means that I have sent many customers to this site to read your reviews before making their purchasing decisions. (I have also suggested that they follow your links and purchase there if the price is better.) Surprisingly, I have also sent a a rep from one of the companies to this site since his product knowledge seminar was incredibly lacking in knowledge. Thanks for all your hard work.
Also working warranty/returns at the store, I can say from numerous experiences with Suunto that their customer service is fantastic. Perhaps a bit slow on the return but otherwise great to deal with.
I have an Ambit 1, great watch and very reliable. When I use it on multiway treks, I stop the watch at the end of each day and start the next. I would like to join the days together on movescount to give one single track with combined stats. Can anyone let me know how to do that.
Also is it possible to delete a section of a track where I have inadvertently left the watch recording.
Bought a Suunto Ambit (1) early this year and I really like it. Except for one thing – when starting open water swimming with the watch this summer it really gave me strange readings for distance (too long). I e-mailed with the Suunto customer service and their reply after looking at my data was: “Please be informed that such deviations are due to temporary bug in our software. Our technicians are working on the solution to it. Meanwhile we recommend using “Pool Swimming / Indoor Swimming” mode where distance is calculated from wrist movement instead of GPS. We apologise for the inconvenience.” I havent tried using the indoor swimming mode while swimming – but thought that the Suunto Ambit did not use/calculate wrist movements?
Thanks – thats what I thought – before these problems I was thinking of upgrading to the 2/2S or mayebe even to the 3 – but then the OW swimming mode must work….
Great review – really appreciate the time you took to detail every feature/option. I purchased an Ambit2 and took it out of the box yesterday. First trail run planned today.
I’ve been playing around with the apps, and customizing the sport mode screens. Is there a similar way to customize the general screens? Specifically I downloaded a sunset/sunrise app, and would love to have that data available on one of the main screens (without having to be in a specific sport mode). Do you have any suggestions?
Great review as always. Unfortunately the chief reason – other than the watch looks cool – was to use it for swimming. I swim 1500 meters 2-4 times a week in a 50 meter pool and the Ambit 2 has not recorded the distance correctly, except once over almost 100 swims! The thing is my cousin has a Ambit 2 S and my brother the Ambit 3 Peak and they report the same exact problem, except the Ambit 3 Peak is off by the most. This is quite odd, especially since my brother and I used to be on a swim team and hence our stroke is technically quite good and we swim almost exclusively breaststroke (my cousin swims freestyle) for the entire distance. We all use the same olympic pool.
I just find it depressing that a 600 euro watch can be wrong every time. For us the whole point with the watch during swimming is that one does not need to keep counting laps over long swim swims, it should liberate and not cause doubts.
Hi, I have a trouble with my anbit.
I can’t see anything on the display. I hope it’s just a setting problem. So could you please say me how to set the contrast step by step? Many thanks
Do you know the best way to record multi day hikes as one single move? Is hitting pause the best way between days or can you start up a saved move and continue on?
I’ve had an Ambit mainly for hiking, climbing etc, for 2 years now.
I’m just getting into cycling and want to buy a cadence pod. I see in the release notes release 2.0 now supports ANT+ . My question is that the firmware 2.0 or the AMBIT 2?
PS I totally love your review – you have covered EVERYTHING well done.
I swim, bike and run. Then, I come here and write about my adventures. It’s as simple as that. Most of the time. If you’re new around these parts, here’s the long version of my story.
You'll support the site, and get ad-free DCR! Plus, you'll be more awesome. Click above for all the details. Oh, and you can sign-up for the newsletter here!
Here’s how to save!
Wanna save some cash and support the site? These companies help support the site! With Backcountry.com or Competitive Cyclist with either the coupon code DCRAINMAKER for first time users saving 15% on applicable products.
You can also pick-up tons of gear at REI via these links, which is a long-time supporter as well:
Alternatively, for everything else on the planet, simply buy your goods from Amazon via the link below and I get a tiny bit back as an Amazon Associate. No cost to you, easy as pie!
You can use the above link for any Amazon country and it (should) automatically redirect to your local Amazon site.
While I don't partner with many companies, there's a few that I love, and support the site. Full details!
Want to compare the features of each product, down to the nitty-gritty? No problem, the product comparison data is constantly updated with new products and new features added to old products!
Wanna create comparison chart graphs just like I do for GPS, heart rate, power meters and more? No problem, here's the platform I use - you can too!
Think my written reviews are deep? You should check out my videos. I take things to a whole new level of interactive depth!
Smart Trainers Buyers Guide: Looking at a smart trainer this winter? I cover all the units to buy (and avoid) for indoor training. The good, the bad, and the ugly.
Check out
my weekly podcast - with DesFit, which is packed with both gadget and non-gadget goodness!
Get all your awesome DC Rainmaker gear here!
FAQ’s
I have built an extensive list of my most frequently asked questions. Below are the most popular.
You probably stumbled upon here looking for a review of a sports gadget. If you’re trying to decide which unit to buy – check out my in-depth reviews section. Some reviews are over 60 pages long when printed out, with hundreds of photos! I aim to leave no stone unturned.
I travel a fair bit, both for work and for fun. Here’s a bunch of random trip reports and daily trip-logs that I’ve put together and posted. I’ve sorted it all by world geography, in an attempt to make it easy to figure out where I’ve been.
The most common question I receive outside of the “what’s the best GPS watch for me” variant, are photography-esq based. So in efforts to combat the amount of emails I need to sort through on a daily basis, I’ve complied this “My Photography Gear” post for your curious minds (including drones & action cams!)! It’s a nice break from the day-to-day sports-tech talk, and I hope you get something out of it!
Many readers stumble into my website in search of information on the latest and greatest sports tech products. But at the end of the day, you might just be wondering “What does Ray use when not testing new products?”. So here is the most up to date list of products I like and fit the bill for me and my training needs best! DC Rainmaker 2024 swim, bike, run, and general gear list. But wait, are you a female and feel like these things might not apply to you? If that’s the case (but certainly not saying my choices aren’t good for women), and you just want to see a different gear junkies “picks”, check out The Girl’s Gear Guide too.


Is it possible to meassure deep with this type of SUUNTO and if it possible what is the biggest deep.
Hello,
Thanks for the reviews!
I am looking for a watch for running, cycling, and mountaineering.
Since I am doing log distance cycling, I want a long battery life, although for multiday ventures, I will be carrying a USB-battery.
I cannot see too many reasons to go for a Ambit2 vs the discounted Ambit for my purpose. Except maybe for the fused altimeter, but to me it doesn’t seem to be worth the extra cash. Am I missing something?
The critical issue is memory capacity for me: I am worried that multi-day recordings will excedd the memory, since I will not have a computer with me.
I have read contradicting statements as to how long the memory will last (with regard to the 1s/60s saving intervals).
Do you have any better data on that?
Thanks in advance
Due to your in-depth review of the Suunto Ambit2 I purchased one and it has made me look at the way I train in a totally different way, many thanks. I was training at the same pace each time I now realise, from the Suunto, that I wasn’t giving my body enough time to recover. I have now purchased a ANT+ 2 in 1 digital sensor device from Giant. I can get the speed sensor to pair with the Ambit2 and so record the data but have not been able to pair with the cadence sensor, have you come across this before in your testing, if you have so is there a workaround you are aware of please.
Many thanks
DCR,
Working in a store that sells Garmin, Suunto, Timex, Polar means that I have sent many customers to this site to read your reviews before making their purchasing decisions. (I have also suggested that they follow your links and purchase there if the price is better.) Surprisingly, I have also sent a a rep from one of the companies to this site since his product knowledge seminar was incredibly lacking in knowledge. Thanks for all your hard work.
Also working warranty/returns at the store, I can say from numerous experiences with Suunto that their customer service is fantastic. Perhaps a bit slow on the return but otherwise great to deal with.
Again, thank you. Take care.
I have an Ambit 1, great watch and very reliable. When I use it on multiway treks, I stop the watch at the end of each day and start the next. I would like to join the days together on movescount to give one single track with combined stats. Can anyone let me know how to do that.
Also is it possible to delete a section of a track where I have inadvertently left the watch recording.
Bought a Suunto Ambit (1) early this year and I really like it. Except for one thing – when starting open water swimming with the watch this summer it really gave me strange readings for distance (too long). I e-mailed with the Suunto customer service and their reply after looking at my data was: “Please be informed that such deviations are due to temporary bug in our software. Our technicians are working on the solution to it. Meanwhile we recommend using “Pool Swimming / Indoor Swimming” mode where distance is calculated from wrist movement instead of GPS. We apologise for the inconvenience.” I havent tried using the indoor swimming mode while swimming – but thought that the Suunto Ambit did not use/calculate wrist movements?
They’re confused. The Ambit1 isn’t designed for swim tracking (or triathlon), only the Ambit2/3.
Thanks – thats what I thought – before these problems I was thinking of upgrading to the 2/2S or mayebe even to the 3 – but then the OW swimming mode must work….
Great review – really appreciate the time you took to detail every feature/option. I purchased an Ambit2 and took it out of the box yesterday. First trail run planned today.
I’ve been playing around with the apps, and customizing the sport mode screens. Is there a similar way to customize the general screens? Specifically I downloaded a sunset/sunrise app, and would love to have that data available on one of the main screens (without having to be in a specific sport mode). Do you have any suggestions?
Thanks again for a great review!
Great review as always. Unfortunately the chief reason – other than the watch looks cool – was to use it for swimming. I swim 1500 meters 2-4 times a week in a 50 meter pool and the Ambit 2 has not recorded the distance correctly, except once over almost 100 swims! The thing is my cousin has a Ambit 2 S and my brother the Ambit 3 Peak and they report the same exact problem, except the Ambit 3 Peak is off by the most. This is quite odd, especially since my brother and I used to be on a swim team and hence our stroke is technically quite good and we swim almost exclusively breaststroke (my cousin swims freestyle) for the entire distance. We all use the same olympic pool.
I just find it depressing that a 600 euro watch can be wrong every time. For us the whole point with the watch during swimming is that one does not need to keep counting laps over long swim swims, it should liberate and not cause doubts.
Hi, I have a trouble with my anbit.
I can’t see anything on the display. I hope it’s just a setting problem. So could you please say me how to set the contrast step by step? Many thanks
Do you know the best way to record multi day hikes as one single move? Is hitting pause the best way between days or can you start up a saved move and continue on?
Hi
I’ve had an Ambit mainly for hiking, climbing etc, for 2 years now.
I’m just getting into cycling and want to buy a cadence pod. I see in the release notes release 2.0 now supports ANT+ . My question is that the firmware 2.0 or the AMBIT 2?
PS I totally love your review – you have covered EVERYTHING well done.