It’s been just over a year since the first Suunto Ambit came out (which for clarity I’ll use the term Ambit1 during this review), and during that time Suunto has made impressive progress on the original unit through a series of pre-announced and predictable (and even on time!) firmware updates. Today, Suunto has officially announced their latest addition to the lineup, the Ambit2 and Ambit2 S. With the new Ambit, Suunto is squarely taking aim at not only the ultra-running and hiking market that the Ambit1 targeted, but now – the triathlete. It introduces both indoor and openwater swimming functionality, as well as multisport mode. With a slew of other features, make no mistake that this is aimed directly at the Garmin FR910XT.
But, how well does it work? And can it knock the FR910XT off the top spot? Well, I’ve spent a lot of miles with the watch recently, and am here to give you all the details: Good, bad, and ugly.
Because I want to be transparent about my reviews – Suunto sent me two final retail units to try out (Ambit2 and Ambit2 S). Once I’m complete here, I’ll send this back to Finland and then go out and buy my own (to be able to support y’all in the comments section down the road). Simple as that. Sorta like hiking in wilderness trails – leave only footprints. If you find my review useful, you can use any of the Amazon or Clever Training links from this page to help support future reviews.
Lastly, at the end of the day keep in mind I’m just like any other regular triathlete out there. I write these reviews because I’m inherently a curious person with a technology background (my day job), and thus I try and be as complete as I can. But, if I’ve missed something or if you spot something that doesn’t quite jive – just let me know and I’ll be happy to get it all sorted out. Also, because the technology world constantly changes, I try and go back and update these reviews as new features and functionality are added – or if bugs are fixed.
So – with that intro, let’s get into things.
Unboxing:
Because I’m covering two slightly different variations of the Ambit in this post, I’ll be doing two unboxing’s below, somewhat in concert.
Here are the two models. The Ambit2 is on the left, and the 2S is on the right. Apparently there was a mix-up and they sent me the original Ambit1 box for the Ambit2 S. Nonetheless, here they are:

On the back however, you’ll see in the SKU that it does list the 2S on the right side for the lime one. Perhaps they were trying to recycle old boxes. Shrug.

Taking a detour for just the full Ambit2 model, here’s its inner box removed from the outer shell:

Inside, you’ll find the watch looking up at you:

Below the watch is a compartment with all of the accessories included. This will vary slightly depending on whether or not you picked up the variant with the heart rate strap. Otherwise, you’ll still find the USB charging cable, and the manual.

Here’s a closer look at the Ambit2 (Sapphire):

And the back:

Switching back to the Ambit2 S, here’s its inner/outer box:

Inside you’ll find the 2S just like Ambit2:

Inside the box of the 2S you’ll find the USB charging cable, the manual, and depending on which variant you’ve bought – the heart rate strap.


And the backside of the 2S. You’ll see it’s essentially identical on the back to that of the Ambit1, and the Ambit2.

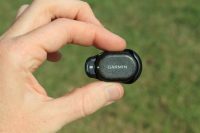
Looking at the common accessories, you’ve first got the USB charging clip. This four-pin charging clip simply bites onto the unit itself, and can be powered via any old USB wall outlet you have lying around – or a computer.


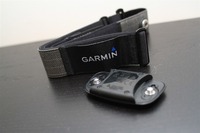
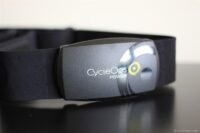
Then depending on which bundle you bought you’ll also have the HR strap. This includes the strap piece, and the little pod that snaps in between it:

Here’s how it snaps into place on both sides (in this photo, it’s half-snapped on the left-side):

Note that the Suunto strap included is NOT ANT+. Meaning the strap included is not compatible with any ANT+ devices you may have, instead, only working with other Suunto devices over a proprietary variant of ANT. That said however, if you do have an ANT+ strap (say you’re converting from being a Garmin/Timex/etc…. user), then that will work with the Ambit lineup (all Ambits). Good deal, huh?
Finally, you’ve got the manual. Unlike most companies in the sports technology world however, Suunto’s manual is actually really detailed and very solid. And in nine languages.

Now that everything is unpacked, let’s go ahead and look at how it compares in size to other units.
Size Comparisons:

As you can see above, the watch face sizes are actually really similar across the most competitive units in this space: The Ambit’s and Fenix. Virtually indistinguishable. On the far sides we have other triathlon-focused watches with integrated GPS. At the far left is the Timex Global Trainer, then the Garmin FR310XT, then the Garmin FR910XT, then the Garmin Fenix. Continuing towards the right we have in silver the Suunto Ambit2 Sapphire, then the Ambit2 S Lime, then the original Ambit followed by the Magellan Switch Up. Both the Garmin FR910XT and the Magellan Switch up in these photos are utilizing the quick release kits.

Here’s a closer look at the three Suunto Ambits. Again, from left to right: Ambit2 Sapphire, Ambit2 S Lime, Ambit1.

What’s actually somewhat interesting is the height of the display. You’ll notice that the Ambit1 is the thickest alongside that of the Garmin Fenix, with the Ambit2 following, and the thinnest being the Ambit2 S. You’re looking at the airgap between the watches and the desk.

(Preemptive question and answer about previous section: If I send everything back, how is it that I have all these units for the rolling pins? Simply put: I buy them. Supporting the site through the links you see at the end helps with this. In recent months, Clever Training helps out with the majority of the unit re-purchases from their retail stock.)
Next is to note that the Ambit2 and Ambit2 S are slightly different in terms of thickness. Not a ton, barely noticeable unless you had them both and something like this to measure them:

As you can see below the Ambit2 (silver) is 1.74mm thicker than the Ambit2 S (Lime) – again, remember we’re talking millimeters here. I threw in the older Ambit1 (black) as well, which is .75mm thicker than the Ambit2.


Width-wise, all Ambit units are identical – I measured it as 49.89mm (excluding the buttons):

Then if we look at weight, the Ambit2 is heavier than the Ambit2 S as well. The Ambit2 is 93g, whereas the Ambit2 S is 73g. This comes from the addition of the barometric altimeter and temperature sensors, which adds 9g of weight between the Ambit2 S and the non-Sapphire Ambit2 (82g – not pictured):


While the above is the Sapphire model (for the non-S Ambit2), the non-Sapphire model is slightly lighter at 82g – identical to that of the Garmin Fenix.
And for reference, here’s the weight’s of the Ambit1 (78g) and the Garmin Fenix (82g):


Many folks ask about smaller wrists, so I always defer to The Girl’s opinion on this given her 5’2” height and small wrists. Her wrist size is 14cm (or 5.5 inches), my wrist size is 17cm (or about 6.5 inches). She did a couple of runs with the Ambit2 S.

In her case, she had to have it tightened down to the very last notch in order for it to be snug. Anything less and it was bouncing around.


For those curious about her thoughts – she actually didn’t mind running with the unit (she ran a few times with the Ambit2 S) ,and didn’t find it uncomfortable or too large (she’s run with the Garmin FR310XT and FR910XT previously, but is currently using the FR10).
In comparison, here’s what it looks like on my wrists. First, the Ambit2 S:


Then the Ambit2 Sapphire:


With that, let’s start running!
Running:
First up is pressing the Start button and choosing exercise. It’s here that you’ll select which activity type you’ll be using. In our case, we’re going to go with running:

We’ll dive into all the other activity types later on. Each activity type has pre-configured device pairings associated with it, for example – a heart rate monitor, or a bicycling cadence sensor. In this case, I’ve got my ANT+ heart rate strap paired to it, so it goes and finds that first:
Then it looks for satellites. As I’ll cover in the satellite section, it doesn’t take too long at all – merely a second or two sometimes.

Once that’s done, you’re ready to being running. Note that you’ll see I’ve got the metrics displayed as minutes/mile (typical running format):

However you can also display them in metric format as well, and that can be easily changed in the settings menu:

After pressing the start button to begin running you’ll see your pace, distance, HR and any other metric you’ve configured on the screen. To iterate between the different data pages you’ve configured, you’ll use the next button. Then the view button can be used to change the bottom half of the screen within a given data page. Sorta like a rotating banner.
In the below screen I have workout time up on top, current pace in the middle, and average workout pace along the bottom:

In the next screen I’ve tapped the view button to keep the top screens but change the bottom screen to BPM (heart rate):

Then I tap the Next button and now I’m in a more heart-rate focused screen. Current HR in the middle, average HR at the bottom, and the Training Effect at the top.

All of these screens are customizable and I’ll talk about that later on.
To pause the run, you can simply tap the start/stop button which will trigger a pause. To resume, you’ll press the same button. Additionally, you can press the lap button to create a lap marker that will allow you to see lap-specific intervals either during the run/ride, or later on within the Movescount site.
While running there’s an option called ‘FusedSpeed’, which effectively blends together accelerometer based wrist movements with GPS speed in an attempt to smooth out your speed and provide a smoother pacing experience. Note that FusedSpeed doesn’t work indoors because it depends on the GPS speed.
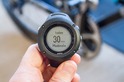
Below is a short video clip I took showing what the instant-pace looks like on the Ambit2 while running. You’ll see that it’s remarkably stable. I was pacing against a boat along the river (which I assume was doing the same speed as they almost always do in this section). My pace was just going back and forth between 6:15/mile and 6:20/mile. Note that the Ambit2 won’t display 6:17/mile – it displays pace in :05/mile increments. The number you’re watching is the middle number (that’s my instant pace):

For those city runners you can configure AutoPause to automatically pause the watch when you stop running, and then resume the watch after you start running again.
Like the Ambit1, the Ambit2 and Ambit2 S both support the ANT+ footpod. The footpod enables you to gather speed/distance data while indoors on a treadmill, or in situations where GPS may be problematic (such as some trail running scenarios and/or canyons). To pair to the footpod, you’ll go via the settings menu into the pairing menu. From there, simply select ‘Foot POD’:

The Ambits support two types of footpods: Suunto ANT footpods, and ANT+ footpods. As I’ll talk about later, it’d be completely silly to buy a Suunto-only footpod when the ANT+ footpods work with every unit on the market today except Polar devices. Further, the ANT+ footpods are cheaper than the Suunto ones and work just as well (same innards actually).


In any case, once you’ve got everything all paired up, you’re pretty much good to go and calibrate it. You should do this with a known distance location – such as a track. You’ll run around the track at your normal pace (min suggested is 400m, I suggest 800m), and then post-activity you’ll adjust the distance of the activity to the actual distance you ran on the track.
Once paired the unit will at this point automatically use the footpod in place of GPS for speed and distance data, as well as provide cadence data.

Now, let me repeat that again – as it’s a pretty big stumbling block. Instead of supplementing your speed/distance data in cases where the GPS data may drop out (such as a tunnel), it will flat-out replace it for the entirety of the run. This sucks. This means you’ve got to have the footpod calibrated correctly, and even then, it still sucks. That’s sorta the point of buying a GPS watch.
Other units on the market today will automatically failover to the footpod in times of need (i.e. a tunnel), while still using the footpod cadence data and recording that for the entirety of the run.
I’m hopeful that Suunto will change this behavior. In the meantime, to understand more about footpods and how they work – read my super-detailed post on them here (which applies to all ANT+ footpods).
Cycling:
Cycling with the Ambit2 is in many ways like running. First you’ll start off with choosing the sport – obviously cycling in this case.

In doing so it’ll attempt to pair to any of the sensors you’ve previously configured via the pairing menu. The Ambit2 supports three bike profiles. However, these bike profiles are a little different than most other units in that they apply to specific pods, and not to the whole bike. Meaning that if you have separate power meters for each bike (somewhat rare today, I do understand), then you’ll have to manually pair the power meter each time as the Ambit2 units today only support a single power meter pairing.

As for the other pods, it can be a bit confusing. Bike Pods are what Suunto calls any ANT+ speed/cadence combo sensor. Meaning that when pairing these sensors – be sure you select ‘Bike Pods’ and not Cadence Pods. As the Cadence Pods are specifically the Suunto ANT (but not ANT+ sensors).

And, since we’re talking about that – remember that Suunto now supports ANT+ sensors from any vendor, but that the sensors Suunto makes themselves (I’ll cover them later) are NOT ANT+ but rather Suunto ANT. Suunto ANT is private and closed, and only Suunto devices can use it. There’s zero advantages to Suunto ANT, it’s just how they used to do things before they went to open standards.

Ok, at any rate, once paired up and you’ve got satellite you’re ready to begin cycling.

Note that in cycling mode you’ll see metrics displayed in the format of MPH (Miles Per Hour), or if you’ve configured it for the Metric format you’ll see KPH (Kilometers Per Hour).

Like in running, you can switch through the different bike related fields by simply tapping the Next button, and then the Lap Button to alternate the bottom portion of the screen:

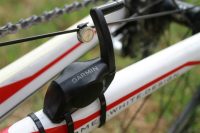
The one challenge with cycling with the Ambit is that by default there’s no quick release system, thus it’s either on your wrist, or you pickup one of the cheap $10 universal rubber bike mounts for your handlebars. I’ve put some links in the accessories table at the end to utilize for this. Of course, you can also jury-rig something too. In the case below I was using my Dad’s bike and it had an older FR305 bike mount on it. This provided just enough thickness over the slim handlebar to allow me to wrap it around it:


For triathlon bikes, you’re kinda hosed. You’ll need to pickup not only a universal mount, but also one of the Profile Designs UCI mounts and combine the two together. All in you’re only looking at less than $20US though.

Indoor cycling is no problem at all any of the bike sensors. In my case I went with just using the ANT+ speed/cadence sensor. It’ll then report the wheel speed of my wheel on my trainer, as well as the cadence and power information.

Note that you can configure the wheel circumference for each of the bike pods you’ve configured.
Within the indoor mode, you won’t get any GPS information – because obviously you aren’t going anywhere. But the rest of the information is exactly as how you’d see it outdoors in terms of detail.

By default the Indoor Training mode on the watch doesn’t attach to the cycling computer pieces, so you’ll either need to use the default Cycling mode indoors (and just tap ‘Later’ for GPS), or simply create your own cycling mode with GPS disabled on Movescount:

Note how I’ve set the GPS fix to off, but left the recording rate at 1s and kept the power/cadence/bike/HR sensors on.
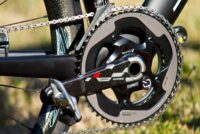
Cycling Power Meter Notables:

The Ambit2 and Ambit2 S are the first Suunto products to support cycling power meters. In doing so, they’ve supported the ANT+ power meter standard, which is used for virtually every power meter on the market today (except the $2,500 Polar/Look Keo system). Power meters enable a cyclist to measure their actual output, irrespective of environment conditions such as head winds or changing grade (a mountain). Output is measured in watts (displayed such as 250w), however comparisons between riders should always be done with watts/kg – as bigger riders will generally put out more than smaller riders. This enables you to compare the output of a 200lbs rider to a 110lbs rider. It’s also how Pro Teams compare power output between riders.
Measuring and recording power meter data is probably one of the most fickle things you can do in sports technology today. While it seems easy, there are literally a hundred ways companies can (and do) screw it up. These screw-ups often come in the form of incorrectly parsing the data, or more importantly, the drops of data. How a given head unit handles different power meters, the calibration of such, and the data recording rates are absolutely critical to accurate power data. Riders can spend an entire season just to move their FTP (Functional Threshold Power) 5-10w, so data screw-ups that have a wider margin of error are simply unacceptable.
Before we get into how the unit performs in the data space, let’s look at the pairing process. Doing so is relatively simple. You’ll dive into the settings menu and then within the pairing menu you’ll choose ‘Power POD’:

It’ll find the unit and complete pairing. Ideally this should only take a moment, though I have seen issues with the ANT+ pairing process taking multiple attempts for no good reason.

Once it’s paired, the unit will then be available the next time you select cycling from the exercise menu. In doing so, it’ll activate the power meter search process, which searches for your previously paired power meter:

Once found, it’ll notify you of that:

Then, it’ll immediately do a manual calibration of the unit. This is of particular note, because you generally want to be prepared for such things. For example, in the case of a PowerTap, you should be off your bike and holding it still. In the case of the Quarq, you should be off your pedals and not rotating them.


Once that’s complete, it’ll comeback with success or failure.

Now, what’s interesting here is that it actually will track these values for you. Or at least, the last and current value. Each time you calibrate it’ll show you the current value to the left, and the previous value to the right. This is actually pretty cool. I just wish it went one step further and recorded this within the file for later reference.

If along the ride you wish to manually calibrate (and you should about 10-15 minutes in), you can access the manual calibration menu quickly by holding the middle button down (Next) for a few seconds. Then, select Calibration.

Like before, it’ll come back with current and previous offsets.

Finally, you can enable Auto Zero for those power meters that support it via this menu. Auto Zero enables some power meters to effectively self-calibrate in known situations. For example, while coasting the PowerTap will calibrate. Or if you pedal backwards on the Quarq while coasting – the same thing.

While doing all of this, the Ambit will continue to record data unless you’ve otherwise paused it. And I should point out that this is the fastest process for accessing the calibration menu I’ve seen on any cycling ANT+ head unit to date. Almost all of the others require more steps than the tango to complete.
While riding, power information is displayed with the data pages and fields that you’ve set it up for. By default this includes instant power, 3s averaged power, 10s averaged power, and 30s averaged power. Or essentially the trifecta of averaged power display modes. I find it much more realistic and easier to pace based on a combination of 3s and 30s averaged power. Note this doesn’t impact the recording rate which by default is 1-second. This only impacts the display rate, which effectively averages the previous/trailing 30-seconds.


You can however change to a 10-second power recording mode for ultra-long cycling. However, I’d highly recommend you don’t do so. At that rate, you’ve largely lost any of the detail necessary for power meter metrics such as TSS/NP/IF to work.
Note that the Ambit2/S doesn’t support TSS/NP/IF within the data fields to choose from, however, with the improved App Zone functionality – it may be possible for someone to create an app to display those data fields manually. Here’s all that it supports from a power standpoint today by default.

Also of note is that the Ambit2/S will utilize cadence from ANT+ power meters that transmit it.
Finally, I have seen some drops in power (in particular on a trainer workout). It’s not 100% clear whether or not this was the fault of the Ambit2, the power meter, or some other factor. I did not see these drops on another device that was recording power at the same time however.

In the coming day or two I’ll be finishing up the ANT+ power meter test suite tests (8 tests in total) that validate power meter collection across a wide swath of scenarios focusing on accurate data collection. These tests are quickly becoming the go-to method for head unit companies to validate power meter data collection has occurred correctly. They are put together by the folks at Quarq, but also cover scenarios from other power meter companies. As time allows, I’ll be going back to previous reviews and adding these as well.
Swimming – Openwater:

Both the Ambit2 (and 2S) support openwater swimming, which enables you to track distance, strokes and swimming pace while swimming in openwater (lakes/oceans/etc…). This is different from pool tracking, which I’ll talk about in the next section.
While in openwater swimming mode, the Ambit2 will utilize both its internal accelerometer (to measure stroke information) as well as the GPS antenna to measure distance and speed. To enable openwater swimming mode you’ll go to start an exercise and choose ‘Outdoor swimming’.

Note that the ANT and ANT+ transmission protocols that the Ambit2 utilizes to transmit heart rate don’t transmit well underwater (about 1-2”), thus, you won’t get any heart rate data.
Once satellite reception is completed, you’ll be ready to swim:

While swimming the unit will update distance and time information, as well as pace information in realtime.


Additionally, you’ll get stroke information as well (strokes per minute):

You can press lap and create laps just as you would in any other mode. In my case, I created one at the outbound of my short swim, so I could see the rough split between the outbound and return. These would then show up later on in the site:

And again, this works on the Ambit2 S as well:

Once you’re done with your swim you’ll stop it just like normal. In the event of a triathlon and multisport mode, you’d continue onto the next sport and wouldn’t get summary information until the very end. But for those of you just doing a single session swim, you’ll get typical post-exercise summary around distance and speed:

Because it’s most definitely the wrong time of year to be swimming openwater in the northern most reaches of the planet, my time with the watch is somewhat limited in this respect. I have more swims I’ll be able to do in May and will update accordingly.
Thus I only have a single distance test to work with for outdoor swimming. In this case, I took along a Garmin FR910XT on one wrist, and the Ambit2 on the other wrist (I gave the Ambit2 S to another swimmer to capture data as well, but not for comparative purposes since that was the only device they had on). I then swam a well known and very well documented course when it came to distance. While my sighting likely wasn’t an example of absolute perfection, I did probably get very close though.
Here were the two watches upon completion:

The actual distance of the route should have been 704y or .40 miles (this particular route between buoys is well measured by folks repeatedly each year). I suspect I probably swam closer to .42-.43 miles based on my non-perfect line. As you can see, the FR910XT came closest at .45, while the Ambit was closer to .55 – a bit high (ok, a lot high). Now, before one assumes it’s off 20% do remember that in most cases when I look at openwater units (such as the FR910XT) we tend to see cases where the further you go, the better the results get. This is because of the way it plots points along the way, attempting to average large chunks of distance.
Remember that neither the Ambit2 nor the FR910XT can receive GPS signals underwater, so it’s constantly losing signal during each stroke and then attempting to regain that signal in the split second between when the watch is back underwater again. Within that split second of satellite signal the actual accuracy may be +/- 50m or 500m. So the points it is plotting could literally be all over the map. The watch then attempts to plot the most likely path across this range of dots, ultimately ending up with a track that it displays to you.
You can then see this track (from the Ambit2) later on within the Movescount site online:

Here’s how that compares with the same track as seen by the Garmin FR910XT:

In both cases it overestimates my turnaround point slightly. If you were to zoom in on the Garmin side, I actually touched all four buoys along the course, whereas both units assume I went a bit wider around them than I did.
On the Ambit side you can see that it’s note quite as smoothed – accounting for some of the differences I see in distance.
Overall, it’s a touch too early to say how accurate the unit is overall, simply because I don’t have quite enough time with it. Given a bit more time and I’ll be able to have better data. However I still wouldn’t expect that the unit will be as accurate as the tried and true swimcap method – which is just putting the watch in your swimcap. This means you won’t get stroke data, but you will get spot-on distance data. While the Ambit2 is a bit large to stick up there (especially with the harder wrist straps), it does sorta work:

Ok, openwater swimming complete – let’s head indoors.
Swimming – Indoor Pool/Lap:

Welcome to ‘my’ pool. About one of the craziest I’ve swam in (and I’ve swam in a LOT of places), in terms of everything from the size (33m) to the density of people in each lane (average is 10, maximum I’ve swam in is 17 per lane). And that’s all before we talk about the locker rooms…
As such – it makes for a great test bed for the Ambit2 and Ambit2 S and their ability to count laps while indoors in a pool.
The technology within the watch that enables this is the 3D accelerometer inside. The accelerometer measures acceleration and movement on a 3D axis. This is similar to how your phone understands when you tilt it from portrait to landscape mode, or when you play games by moving it. The same technology enables the watch to track stroke type and lengths within the pool – ultimately giving you distance and pace information.
Because the unit is measuring changes in acceleration, it’s critical that it understands how long your pool is, along with when you change directions (finish a length). I’m going to talk a bit later on how to improve your accuracy in these situations – in part based largely on my recommendations for similar watches such as the Garmin FR910XT. But for now, let’s talk about how to use it.
First up is selecting ‘Indoor Swimming’ from the exercise menu:

Then, you’ll select your pool size. By default you’ve got four sizes – 25y, 25m, 50y, 50m.


However, you can also select ‘Custom’, which enables you to enter in wonky pool sizes like my 33m one:

The ‘Custom’ setting allows you to enter a pool as small as 15y/15m, and a pool as large as 1,200yd/1,200m. Yes, those of you in Vancouver with your 120m pool are good to go! And all of us stuck in short hotel pools can do endless flip turns in style.

Once that’s done, you’re pretty much ready to start swimming. You’ll notice that your pool size is listed on the right side:

To start, simply press the Start button. If and when you want to create a lap, you’ll press the Back/Lap button. As you swim, it’ll provide the distance and current pace, along with the time. But that does require you to tap the next button. Otherwise it’ll just show this screensaver page of sorts, a picture of a swimmer – with no current split information. Below though is what you’ll see once you tap it:

You can change the view by pressing either the Next button, or the View button, which alternate through screens as well as the bottom portion of the screen:


The unit will record per-length information, which is then available later on. I’ve been using Laps/Intervals however to record various sets of mine. For example, if I do a 500m set, I’ll just create a lap at the start and end of it.
Additionally, the unit will record stroke type – which can be retrieved later on on the Movescount site:

Unfortunately however, the only stroke I ever did was freestyle. Which means that either my stroke sucks (very likely), or the unit isn’t very good at stroke recognition (also likely). To be fair, most units on the market suck at stroke recognition, and given the crowded pool I’m in, I’m happy it thinks I’m swimming at all.
As I said earlier, one thing I don’t like though is a strange swimmer screensaver screen that pops up while I’m swimming. Just a blank screen with a picture of a swimmer on it – like a screensaver. I then have to press a button to have it go away. Kinda really super annoying. I asked Suunto about this and they are looking at modifying this so that the current split shows. But in the meantime, you’ve gotta look at the empty screen until you tap it.
So how’s swimming accuracy? Well, surprisingly good. Keeping in mind that with 10-17 people in a lane at one time there’s a lot of stop and go, a lot of hard and quick passes down the centerline, and just a lot of chaos. Thus, I was pleasantly surprised that in most of my swims I was within 25m of the actual laps. And in every case I knew exactly which lap I got it off-count (due to a mid-lane stop). For this, I really can’t blame the watch.


Here’s a comparison to the Garmin FR910XT one day. Note, before I remembered to change from 25m to 33m – so paces are super-slow. In the below comparison, neither were actually correct. The correct distance was half-way in between (2050y, though in reality 1.3X higher than that if we accounted for the wrong pool length.)

And then a comparison to the Garmin Swim another day. Note, before I remembered to change from 25m to 33m – so paces are super-slow. Also note that in this example, the Garmin swim got paused on one set for 100m due to my improper button pushing. My bad. Real distance is 100m higher for the Garmin swim.

And finally, another comparison with the Garmin Swim:

Based on what I’m seeing, I have no problems using this watch from an indoor swimming standpoint. Yes, it’s bulkier than the slim Garmin Swim, but it’s on par with the Garmin FR910XT from a width/weight/size standpoint.
Finally, let’s spend a brief second to talk about improving your accuracy. The below is an updated variant from my Garmin FR910XT review – and it’s what most folks have been using to help improve the accuracy of their swim data.
Troubleshooting Pool Swim Data
I wanted to quickly cover this, since I’ve seen a number of folks ask about accuracy in the pool. Some have had the distance issues where the unit reports longer than normal. And a few people have issues where it reports shorter. With that, I wanted to provide some tips based on my using the unit. In all of the cases with the Ambit2, I’ve only seen errors due to stopping mid-lane. So, I’d consider that fairly accurate. Along with all of my time with the Garmin and Swimsense products I have a really high level of accuracy. So I figured I’d share my tricks.
The first thing to keep in mind is that the unit measures distance purely on accelerometer data. That means that it’s measuring what your wrist is doing, and in particular, changes to direction and acceleration. Thus, you have to keep in mind that any movement you make while the timer is running is being analyzed. The watch is constantly thinking “Is this a stroke?”, “Was that just a new lap?”. Keeping that in mind is critical to accurate data.
1) When you’re not actively swimming back and forth, pause the timer. I know that there’s some guidance that says you can just keep it going, but honestly, that’s wrong. If you’re standing at the wall waiting for your next set – just pause the timer. That tells the watch to stop looking at whether or not you should be swimming. And thus, it won’t increment the distance until you press start.
2) Separate out your laps/sets using the lap button. If my workout calls for 1,000y warm-up, then a 500y build, then a slew of 100’s, I’m going to press lap between each section. Thus, at the 1000y marker I press lap to create that set. At the 500y marker, I press lap. And then after each 100y I press lap. In the case of the 100’s, I’ve got a short rest at the wall, so I FIRST press lap, then I press stop (note: For reasons beyond me, you can’t press stop then lap on the Ambit, you have to press lap then stop. It’s annoying, as I generally recommend the other way because it makes your data cleaner).
3) Be strong on your wall push-offs. Because the Ambit2/2 S is looking for changes in acceleration, you want to ensure that you push off the wall strongly. Fast being the key. It doesn’t matter if you do a flip turn or an open turn (I vary sometimes for fun), it just matters that you do it with conviction. If you ever-so-slowly do a turn at the wall and make it more graceful than Ms. Daisy, the unit might never actually detect an acceleration change, and thus, no new lap.
4) Be aware that passing someone mid-line is an acceleration change: Folks have reported issues with sudden surges to pass another swimmer mid-way down a lane being counted as a new lap. I do a lot of this in my new pool in Paris, and I’ve yet to have it false trigger with the Ambit. By a lot, I mean just about every other length. My advice here is to try and ‘soften’ the acceleration/deceleration just a touch to not trigger it. I realize of course that when it comes time to pass someone mid-lane, the most important thing is doing it quickly – but just easing into the pass for that split second longer will help. Or, do it at the end of the lane (again, not always possible).
5) Pause when in drills: Because the unit is looking for one of the recognized stroke types, it will only be accurate when you’re doing one of those stroke types. So if you’re doing a bunch of drills with three pieces of swim equipment and look like a fish out of water, it’s best to pause the timer.
6) It won’t work if your arms aren’t moving: This goes hand in hand with the above, but if you’re doing kick-only drills, the unit simply won’t measure that distance. For these, I just pause the unit. The time is counted in total activity time, but it doesn’t try and incorrectly record laps (which it will, trust me).
7) Don’t leave the unit running when you go to the bathroom: I only mention this, because I got an upset e-mail from someone that indicated that the unit incorrectly added a lap when they went to the bathroom while leaving the timer running. I really wanted to note that technically they probably did go 50y round-trip, but decided against it. Again, remember, as your arm swings, it thinks you’re swimming. So as you get out of the pool, walk to the bathroom door, open the door, go to the bathroom, and do it all again in reverse, it’s prime time for the unit to think you’re swimming. Just pause, you’ll be happier later.
Hopefully these tips will help you get the best possible swim data from the Ambit2 units.
Multisport (Triathlon) Mode:

Many folks often ask what the difference is between a multisport watch, and a watch that can do both cycling and running. They key differentiator is the ability for the watch to seamlessly transition from one sport to the next without ending the activity currently underway. This is critical to any multisport athlete that competes in an event with two or more legs (the very definition of multisport). Watches like the Ambit1 did support both cycling and running, but didn’t support any way to seamlessly transition from cycling to running. Whereas the Ambit2 units support multisport mode, which allows you to create multiple segments of a given event.
In this case, we’ll start off with the default sport of Triathlon, as per the default watch settings. In this sport it assumes one will first swim outdoors, then cycle outdoors and then run outdoors. I note outdoors each time because it’s using the GPS in those modes. Opposed to something such as indoor pool swimming (which I’ll talk about in moment).
After going into the exercise menu and selecting triathlon, it’ll then tell you which sport is up next:

Then, it’ll switch into the display settings for that sport. In this case with swimming, you’ve got metrics relative to pacing per 100yds and distance (again, customizable):

Once you’ve completed that sport segment, you’ll then hold the upper left button down for about three seconds. The outer ring will then loop around 360* as you hold it, to prevent just an accidental change of sport.

Once it changes the sport it then displays the new sport – in this case, cycling:

The context would change as well from being pace per 100 yards to MPH (or KPH). During this it would connect to the applicable cycling sensors – such as power meters. This is exactly the same way other watches work on the market.
Then, you rinse and repeat again for running:

And now in the running mode you’ll see running-specific stats.

You can create laps just as you normally would within any given sport by simply pressing the lap button as always. Additionally, you can pause and resume by pressing the start/stop button as normal.
When you’re done you’ll simply pause and then do a long hold of the start/stop button to save the activity in the same fashion as any single-sport activity would.
Once everything is uploaded, the activity data is displayed as a single entity:


In my case I didn’t have any swim-bike-run bricks, but I had bike-run bricks. So you can see I just used the swim mode for 4 seconds and then switched sports. What is somewhat interesting however is that I can overlay my heart rate across the entire activity. In the below example you can see my bike power stop at the 26 minute marker, then a short gap as I paused the unit to get downstairs outside (my transition essentially), and then my HR resume on the run for my interval work.

Note that the unit doesn’t include the ability to set separate transition times between sports (which most units do include), so that’s an area that I’d love to see added as it really makes a lot of sense. In some triathlons (take for example, the Escape from Alcatraz triathlon you’ve got a really long run from swim to bike (over a half a mile before you even get into the massive transition area). That time significantly skews your various averages (for example you can likely run much faster than swimming, and you run much slower than cycling).
You can however create your own multisport modes, so if you’re like me and do a lot of bike-run bricks, you can just go ahead and create your own Brick Mode. The cool part is that it allows you to select your other pre-created sport modes:

And in fact, what I thought about while writing this section is that I could actually create my own transition section. Check it out. I created a vanilla sport that recorded GPS distance but wasn’t really tied to any other sport, I then called it transition. Then I just simply layered it in as a sport:

Bingo! DIY transition times! I’ll have to try it out tomorrow…
Calorie Burn/Count Information, Indoor Training, and Heart Rate Information:

The Suunto Ambit2 utilizes the information you set within the personal profile in conjunction with the heart rate strap to determine calorie burn. This is true even in cases where you are indoors.
Calorie burn is shown within the activity screens during an activity by default, and can be accessed by tapping the lower left view button (or next button depending on which page you’re on). Below for example, you can see the kcal displayed – 372kcal at this point.

Additionally, you can see the average HR for this activity and the peak for this activity. These are all customizable of course from the Movescount site. And post-activity you’ll see the graphs of your HR displayed as well:

For indoor activities the Ambit doesn’t at this point use the accelerometer for any sort of movement tracking (aside from swimming), such as how the Motorola Motoactv does in terms of activities like basketball or Yoga. Perhaps some day they’ll incorporate that.
Finally note that activities exported from Movescount online will contain RR information, which is a more detailed level of heart rate information supported by some 3rd party applications such as FirstBeat.
Compass, Routing & Navigation:
First up is waypoints and navigation to waypoints. The Ambit2 supports the ability to create waypoints or points of interest which you can utilize the magnetic compass to navigate to. The magnetic compass was introduced on the original Ambit, and allows you accurate navigation with the device. A magnetic compass is different from the compass found on some other GPS units in that it doesn’t rely upon any speed to determine heading. Instead, upon rotation you’ll notice that it still gives the correct bearing for magnetic North:


To calibrate the compass it only takes two quick steps of rotating the watch 360* while flat, and then 90* tilted.


Once that’s setup, you’re ready to navigate.
Navigation can occur at any time from the menu. This can be navigating within the context of an activity, or outside of an activity just wandering around. To navigate outside of an activity you’ll just press the Start button and then choose Navigation.

From there you can select a point of interest or route to navigate to:

Once you begin navigation to a given point of interest, it’ll provide direct navigational compass directions to that point. Meaning that it’s ‘as the crow flies’ and doesn’t take into account any terrain features that may be in the way (you know, like a river). So do keep that in mind.

The unit will then show you a small arrow which helps you navigate to the waypoint. When the arrow is long, it means you need to turn in that direction before continuing.

Then, once you’ve pointed the correct direction the arrows will shorten up and look like this:

In addition to navigating to already created points, you can create your own POI’s at any time via the same navigation menu. The system allows you to create types of POI’s, as well as name them (sorta):


Next is looking at routes. To create a route you’ll go online with Movescount and into the Plan & Create, and then “Routes Planner” section:

Within that, it’s very similar to how MapMyRide or other sites work. You just click and drag along the route:

You can configure the site to also follow roads as well (I recommend it). Note that each dot I create is considered a waypoint, and the routes features supports 100 waypoints each.

Once I’m done, I’ll go ahead and click ‘Save Route’. You can also export the route as well to other formats:

By default it should immediately show up in your account, but you need to go in and edit it within the settings to be enabled:

Just check that box at the bottom that says “Use this route in watch.” With that, it’ll get transferred over. You may just want to unhook your watch and re-hook it in to have it re-download.
Once outside you can go ahead and go into the navigation menu. Again, this is supported on both the Ambit2 and the Ambit2 S.
Once in the navigation menu you’ll select Routes:

From there you’ll select the route in question. Obviously, mine is pretty important:

After the route enumerates you’ll get a listing of all the waypoints. You can navigate to any specific waypoint on the route.


There isn’t any concept such as ‘start the route’, rather, you just start at a given waypoint. Obviously choosing the first waypoint makes sense. What’s cool though is that you can then select to navigate the route forwards or backwards. This means that after you successfully hit that waypoint, do you go to the next waypoint in the list, or the one previous to it (ideal for going back home).

Once you choose to navigate to a given point, it’s pretty much just like before as far as the compass goes:

You do also get a map of all the waypoints on it, along with a bit of a breadcrumb trail. Note that you can’t seem to zoom in any less than .25 miles:

To show the difference between forward and backwards, I had each watch configured to route differently. In the case of one watch it’s telling me to go onto the next logical step in the waypoint towards Ice Cream. Whereas the other watch is telling me how to get home. Both watches just checked off the same waypoint however.

Update Aug 30th, 2013: As of the firmware update released today, the Ambit2 does now support a proper trackback function where it retraces your steps back to the start.
Note that the Ambit2 doesn’t support a trackback function. Trackback is when you go wandering in the woods for 5 miles, and then want to use the watch to retrace your exact steps back to the start. Instead, the Ambit has the ability to utilize predefined routes (ones that you have to setup on your computer ahead of time), and the ability to navigate straight to a point. But neither of these is Trackback, and both require you to know exactly where you’re going in advance and to set it up far in advance (at your computer).
Altimeter & Elevation Accuracy:

Elevation accuracy testing amongst sports watches is generally quite difficult to nail down. This is for a few reasons. First, is that when testing this, absolute and trusted elevation information about a given location can be hard to obtain. It’s often marked at various points on mountains, but isn’t usually found outside of mountains (or minor hills in Florida).
Second, is that barometric elevation information typically requires an initial fix – which is then used to help gauge all subsequent fixes. This is often not at the peak of a mountain, but rather in a place even less likely to have an accurate elevation marker.
And third, as you’ll see – even two devices that should be alike, still aren’t alike. In general, for me, I’m less concerned with small variations in absolute accuracy as I am concerned in relative accuracy. Meaning, when I climb up and down a hill on the same route, is my altitude ascent and decent identical? That’s more of interest than knowing whether I’m 30 feet off at the top of a 6,000ft mountain.
With that, let’s dive into a few tests I did. First, was a climb a few weeks ago to the top of Mount Ventoux. This is fabled stage in the Tour de France (here’s a good video of it here), outside of Alpe d’Huez, probably the most famous TdF climb in the world. During this test, I had four units running. They were the Suunto Ambit2 and Ambit2 S, the Garmin FR910XT, and the Polar RC3. The Ambit2 and FR910XT use barometric altimeters, whereas the RC3 and Ambit2 S use a GPS based altimeter. In an effort to keep all units on a level playing field, I let all units sit outside the night before for about 30 minutes and get both a GPS fix, as well as any automated altitude information. Given I didn’t have a base marker, I didn’t have anything to manually set (which the Suunto and Garmin units do support).
Then I dragged my butt via bicycle up to the top. It’s a long way up.

The top was officially marked as 1,912 meters (6,272.965ft). And all of the photos taken were taken within 2 feet of that marker. Given how much effort they’ve put into marking every 1KM of the entire route, I’m going to make the assumption that in this case their altitude markings are probably correct. Here’s the results:


To put that in writing (remember the top is 1,912m/6,273ft):
Suunto Ambit2: 1,895m / 6,217ft
Suunto Ambit2 S: 1,899m / 6,230ft
Garmin FR910XT: 1,907m / 6,255ft
Polar RC3: 1,904m / 6,246ft
And here’s the variance:
Suunto Ambit2: -17m / -56ft
Suunto Ambit2 S: –13m / -43ft
Garmin FR910XT: –5m / -18ft
Polar RC3: –7m / -27ft
In this case, the FR910XT did better than either of the two Ambits. More interesting was that the non-barometric altimeter on the Ambit2 S actually beat the barometric altimeter on the Ambit2. Even further however, was actually how well the RC3 did, which I didn’t expect to be so close. And in fact, I think it was actually even closer before I took the photo, but drifted slightly downwards.

Now in this scenario I had FusedAlti enabled for the Ambit2 (the 2S doesn’t support it). FusedAlti combines GPS and Barometric altimeter reading to in theory offer a more accurate representation of situations such as where both environmental conditions change and altitude changes (like ascending a mountain).
Using as a watch day to day:
In addition to sport uses, the watch also functions just fine as a day to day watch. Obviously given its weight (93g), it’s a bit heavy. So some folks may find it uncomfortable, or even simply too large. But if you don’t mind the size and weight, then it has a number of functions that cater towards day to day use.

First up is the dual-time aspect. This enables you to display two different times (as in time zones) on the front. You can’t specify labels though for them, so you’ll just have to remember what they are. You can see this above where I have my home time zone shown (Paris), and the time zone I was in (Seattle).
You’ll set these through the settings menu. Note that unlike many GPS watches, the Ambit2 doesn’t actually automatically set the current time with time zone information. Meaning if I got on a plane from NYC to LA, it won’t correctly show my new time as 3 hours behind when I land and turn on GPS. You’ll have to manually set the time zone – though it does utilize GPS to set the time relative to GMT. I’ve never quite understood why companies do this, as that’s not terribly useful to me. I generally know the minutes/seconds – it’s the hour piece that can be confusing. In any case…
In addition to the dual-time zones you’ve also got the ability to set alarms:

You can set one alarm and for the alarm you can use both audible and display alerts.
Also, in using it day to day I went into the tone settings and turned off beeps for both button presses and other actions. This just keeps it more quiet. Obviously, for running alerts, you’d want to leave alerts on and just button presses off.

In addition to changing the tone settings you can also modify the display. First up is the ability to change contrast and brightness, as well as modify the backlight:


Then you can also invert the display such that black becomes white and vice versa:

And, for those curious – here’s the backlight:

And with one unit’s backlight on, and the other’s off:

Finally, the watch does slip under dress shirts fairly easily, so it’s not too bulky in that respect.

Other Random Uses (Flying):
Being that it’s a GPS device, you can use it to record just about anything you can think of. In my case, since I fly a ton I figured I’d just see how well it tracked on a long intercontinental flight. This is often an interesting test for me as some GPS devices struggle with it.

Throughout my flight (yes, GPS devices are permitted by the way – read the back of your airlines magazine).
However, perhaps even more interesting is that FusedAlti kicked in here. Normally on a plane when using a GPS unit with a barometric altimeter you won’t get any altitude numbers higher than about 8,000 feet – which is typically what aircraft are pressured to. However, with FusedAlti and the idea of using both GPS and barometric altimeter data I got correct elevations all the way up:

Really cool.
Accuracy wise I was getting both altitude and speed numbers that were identical to what the inflight entertainment system was providing:

The only caveat I saw here was that the unit looks to have some data field bugs with the average speed data field not supporting something in the 500MPH range (though, instant speed is fine), and the current altitude field not supporting over 30,000ft (though, total ascent is fine). Additionally distance over some number of thousand miles isn’t supported (between 1,000 and 4,000m – not sure where as I fell asleep after 800 miles).

Here’s the map at the end of the day:

For recording the data, I simply used the default cycling mode. When my flight left I was at 98% battery, and when I landed some 9 hours later, I was down to 40% battery. Not too bad, and of course not in the full battery saving mode either.
Nonetheless, the point of this section being that you can use the unit to record just about anything you can think of.
Satellite Reception and Accuracy:
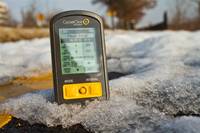
When it comes to reception and accuracy of satellite, one is easy to measure, and one is like altitude accuracy – fairly difficult. The first up, satellite reception. I’ve had no issues running with the unit in a slew of different areas, from the downtown streets of Paris, to the mountains of France, to Seattle. All work just fine.
Upon first going to a new location, it generally seems to take about 30-45 seconds. A fair bit faster than most units on the market today.

However, turning on in the same location again, I’ve seen the GPS reception take as little as 1-2 seconds. Pretty astounding actually. So fast I really can’t get a photo of it. Just from 0% to Ready in a flash:

Here’s a quick video demonstrating that. You’ll see that I tell it ‘later’ for the footpod, since I didn’t have that with me for this run.

Within the context of cities and buildings, I’ve taken a look at some of my track files to see how they tracked. And in general, things seem to track quite well – they recorded where I ran as expected.

There are case where it’s not perfect around turns even at 1-second, but it’s on par with other GPS units. The yellow thick highlight is where I actually went:

Now, to show the difference between the 60-second ultra recording mode and the 1-second mode. Check out these two routes. Done at the exact same time, one configured for 60-second mode to get 50 hours of battery, and the other in the typical 1-second fashion. I’ve highlighted again with the highlighter where I actually went:


Now, in August 2013 (yes, this section is updated/new), Suunto introduced a new 5-s recording mode. In this recording mode the unit records data every 5-seconds, as opposed to either 1-second or the longer 60-second mode. The idea here being to gain a bit more battery life. For the Ambit2 this gets you 24-hours, while the Ambit2s this gets you 12 hours.
Over the past few runs I’ve been looking at how this impacts total distance measured. In my tests of standard city runs (non-trails), I’ve found that it’s in the same ballpark as other devices within 1s recording. Not perfect, but no more different than what I expect with different units in GPS accuracy. I expect this might vary a fair bit more in trail running and faster cycling, but not considerably since in the case of trail running you’re moving slower than street running.
To show an example of the differences in data, let’s look at two screenshots. Focus on the yellow line, where I’m coming from across the bridge/water, and then looping down to the water and back under the bridge:
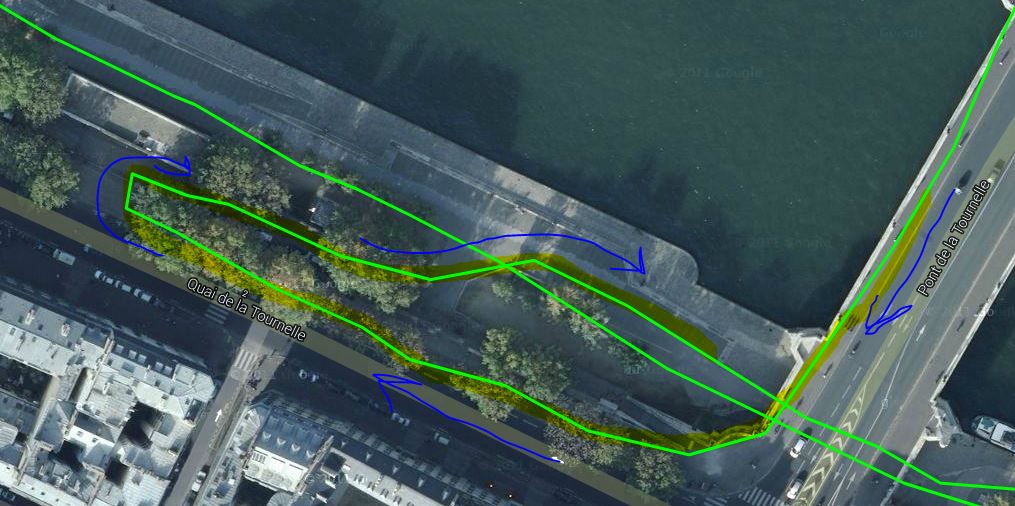
The second is the Ambit 2s with the 5-second recording. You’ll see that it’s not quite as smooth, but still gets the general idea of where I was. Above you’ll notice how I actually went a bit further (to where the trees open) before making the turn, simply because there’s a wall there you can’t see on the satellite. But because of the 5-second recording below it ‘skip’s that short section.

Thus you see that while it’s not 100% perfect, for running I think it’s perfectly fine in most cases. In cycling, I’d avoid it for use with a power meter, but otherwise for longer rides, it’s going to cover things fairly well. Of course, you still have the ‘gold-standard’ 1-second recording available to you, so keep that in mind.
Next is how it tracks relative to other units. This is where things can get a bit dicey. For starts, you don’t really know which unit is truly correct. Instead, you’re taking a bit of a swag. I’ve done accuracy tests in the past with units, but I haven’t subjected the Ambit2 to this test yet.
In all of my testing thus far, I’ve found the Ambit2 and 2S to be incredibly close to the other units I was testing – be it the Garmin Edge 500, 800, 610, and the Polar RC3. In most cases I saw them within .1 to .3 miles on longer routes (i.e. over 20 miles), and about .01 to .05 on shorter running routes.
One final item to be aware of is that with the footpod enabled, there isn’t a way to select whether the speed/distance comes from the footpod or the GPS. This is actually a pretty big gap, as it means it will use footpod over GPS data, which in general isn’t as accurate as GPS. I cover this more in the running section though.
Battery Life Considerations:
The extended battery is one of the major reasons the first generation Ambit devices got so much attention. It was the first wrist-mounted GPS device to go upwards of 50 hours while recording GPS tracks. At the time, the next nearest device only did 20 hours (Garmin FR910XT).
The Ambit2 supports a battery life of up to 50 hours of recording time with GPS enabled. However in such mode the recording rate is reduced to every 60 seconds. In standard 1-second recording mode, the Ambit2 gets 15 hours of recording time.
The Ambit2 S has a battery life of upwards of 25 hours with GPS enabled, but also in every 60 second mode. In standard mode it’s only 8 hours. 8 hours isn’t sufficient for all but the world’s fastest triathletes to finish an Ironman in, so this is one stumbling block.
I wish there was the ability to configure with a bit more flexibility here. For example, in swimming I’m somewhat indifferent, so a lesser time (say every 5-10 seconds is sufficient). In cycling with a power meter, 1-second recording is absolute must for useful power meter data. But back in running, I could probably do with every 5-10 second again and not have it have a big impact in a typical Ironman race. Ideally you’d want to get to about 17 hours to cover an Ironman event. But really, I suspect that most power meter users are falling between the 8-13 hour timeframe, thus finding a blend that covers power meter users at 1s and still getting 13 hours of battery would be a good happy median.
Interval Mode:
The Ambit supports a very basic interval mode. And by basic, I mean 99-cent store basic. In fact, I wouldn’t even call it an interval mode. I’d call it alerts. Because really, that’s what it’s doing. Here’s the sum total of what you can set:

On the left side you set effectively the work interval. In my case, I just went with 1-mile. In the middle you set your recovery, I figured 2 minutes was fine. And then reps you can set the number of repeats:

Then you save it. That’s it.
To access it you’ll just hold down the ‘Next’ button and then activate it when you’re ready.
Honestly, it’s not very useful. It’s not what an interval feature should be. Ideally you’d be able to set paces/speeds/wattages/anything as a target, and then the number of repeats, along with the targets of time or distance for both work and rest portions of the interval. You’d be able to set the warm-up, the cool-down as well. Perhaps in the future they’ll update this area.
Suunto AppZone Apps:
Suunto originally introduced the Appzone concept back in November of 2012, with the introduction of Apps to the original Ambit. This allowed folks to create basic applications that took variables such as your speed or distance, and then did simple math equations on them. At the time the functionality was primitive, as it wouldn’t allow saving of any of the data or any complex calculations. Additionally, you could only run a single app at a time, which was really just a single data screen. You can read more in-depth about my thoughts then.
With the Ambit2 comes an update to the Appzone that enables additional features. First is that you’ve got a much wider range of data fields to pull from. Looking at the developer manual, there’s literally pages upon pages of attributes – such as max power, stroke type and various sensor data components. Tons of stuff. Second, you can now have multiple app screens on your unit displayed. And third, most importantly, you can now save your work (these calculations) into various attributes that show up later on.

In addition, the logic is far more advanced than in the past – almost code-like (though, not quite full-fledged).

All of the previous apps are still available, but now you can create (and download new apps). Ultimately, this is the direction that sports technology is going in, just like phones went in this same direction.
To access apps you’ll go into Movescount online and under ‘Plan & Create’ you’ll select Apps:

You can then search and filter apps. In general at this point I’d recommend filtering by date, just because the newest ones are those apps likely to be fully able to take advantage of the Ambit2 and Ambit2 S.

Picking one sorta at random, here’s the Aerodrag. The idea behind this is to calculate drag based on a variety of known metrics. Of course, being this is somewhat a heavily simplified calculation, I wouldn’t quite use this as the end-all-be-all of aerodynamics. But still, it shows some of the thinking that’s possible.


Here’s another couple examples of Apps:


To go ahead and add an app to your unit you’ll simply click ‘Save App’, which adds it to your account.
The next step is to go into your device settings within Movescount and add it to a given display field, within an activity profile (I went with Running). In my case I selected one of the 8 display pages available, and then selected ‘My Apps’ and chose the 10K time app.

On the next data page that I had empty, I went ahead and added in the Oxygen one:

With all that set, it’s outside we go to check out the apps on the unit.
Once in the mode you set them up for, you’ll access them just like any other data pages by pressing the Next button:

I encourage you to go check out my much more detailed look at apps. And hopefully once we see a few more Apps out there in the AppZone for the Ambit2 and 2S I’ll revisit this. Right now, things are pretty slim there.
Uploading workouts to Suunto Movescount (online site):

In order to upload data you’ll need to connect the Ambit to your computer (Windows or Mac) via the included USB cable. Once that’s done, you’ll also need to download the Suunto Moveslink software, which acts as a device agent to upload data from your watch to the Movescount site.

After that’s all installed and configured you can go ahead and connect your watch to your computer and the Moveslink agent will upload the data automatically.

After the data is uploaded, you’ll then head over to the Movescount site (Movescount.com), which is Suunto’s free online site for viewing and analyzing your workouts. In conjunction with the Ambit2 release, the Movescount site got a pretty significant upgrade – both in terms of functionality, but also some of the UI design. So if you’re an existing Suunto Ambit user, you may want to swing over and check it out.
After logging in you’ll likely be at your dashboard:

(In case you’re wondering why or how I did 6,000 miles of cycling, it comes from an airplane flight)
It’s here that you can go ahead and dive into any of your latest activities (they call them ‘Moves’):

Clicking on any one of them will bring you to the activity detail page. Starting at the top you’ll have summary information:

Then as we move down the page we’ll get into the map. You can click on any point in the map and get further details about that exact point in the activity.

As we slide down the page we’ll get more information in graph format. You can toggle the different fields via just clicking on the titles. In this particular case, I do wish ‘pace’ was shown, rather than just ‘speed’.

Looking at a different activity with a few more laps in it, you’ll see the lap data below (and more detail on the bar chart data):

In addition to viewing the data on Suunto’s site, you can also export the data out and import it into other sites via the Export Tools:

I’ll export out a few files and post them later tonight for those folks wishing to try it out on their favorite websites. Look for them to be posted here in this section once I do that.
[Update: Here’s the sample files from my workouts. Included is a file sample set of every sport type – indoor swim, outdoor swim, bike, run, and multisport workout.]
Data Fields:
Below are the data fields that can be configured within the Ambit2:

Note that for the 2S, you will not get any of the Altitude or Environment data fields except ‘Attitude Current’. For both watches, you can display heart rate fields as BPM or % of Max HR.
Here are the swimming data fields:
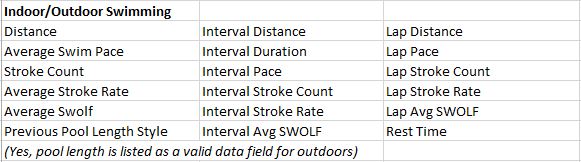
All data fields can be displayed as imperial or metric (but has to be defined on the entire watch). Additionally, compass can be displayed as mils or degrees. GPS formats that you can select are as follows:

For each ‘sport’ you define (custom or default), you can configure 8 data pages. Each page can include from either 2 or 3 pieces of information, and apps can display a single piece of information. You can always create an app to simply display a single value from above.
There is a limitation of 8 active sports loaded onto the watch at at time, but you can have other sports non-active in your Movescount account and sync them as needed.
Compatible Ambit Accessories:
Accessories for the Ambit is actually an unusually interesting subject. There are effectively two classes of compatible accessories with the Suunto lineup. The first is their proprietary sensors (they call them POD’s) that only work with Suunto devices). The second is open ANT+ accessories that work with any device in the ANT+ ecosystem (hundreds of devices and hundreds of phone apps). One is expensive. One is cheap. Branding doesn’t matter when it comes to functionality, for the most part virtually every ANT+ accessory is built in the same factory by the same company and just rebranded to the various companies you know and see.
Thus in the below chart I’ve included both the proprietary accessories, as well as the ANT+ accessories. It should be obvious though that buying the Suunto accessories at this time would be downright silly (the one exception is the footpod, which actually is both Suunto ANT and ANT+ compatible, but even then that only matters if you have older Suunto devices). Just buy the open ANT+ accessories that work with any device, should you switch down the road (or add other devices).
| Product | Street Price | Amazon | |
|---|---|---|---|
| 2013 Recommendations: Running GPS Watches | |||
| 2014 Giveaway Extravaganza | |||
| 2014 Summer Recommendations: Running Watches | |||
| 2014 Winter Recommendations: Running Watches | |||
 | PowerTap G3 ANT+ Power Meter (Hub) $790 (hub only) | $790 (hub only) | Amazon |
| PowerTap Pro ANT+ Power Meter (Hub) $899 | $899 | Amazon |
| Garmin ANT+ Heart Rate Strap (Classic Plastic Strap) - HRM1 $37.00 | $37.00 | Amazon | |
| Garmin ANT+ Heart Rate Strap (Premium Soft-Strap) - HRM2 $69.00 | $69.00 | Amazon | |
 | Garmin ANT+ Heart Rate Strap (Premium Soft-Strap) - HRM3 $50 | $50 | Amazon |
 | Garmin ANT+ Running Footpod (Mini) $45 | $45 | Amazon |
 | Garmin ANT+ Speed/Cadence Cycling Sensor (GSC-10) $35.00 | $35.00 | Amazon |
 | Motorola ANT+ Speed/Cadence Cycling Sensor (Quick Install) - BEST! $55.00 | $55.00 | Amazon |
 | Power2Max ANT+ Power Meter $970 (no cranks) | $970 (no cranks) | N/A |
 | PowerCal ANT+ Estimated Power Meter $99 | $99 | Amazon |
 | SRAM Quarq Cinqo (Original) ANT+ Power Meter Discontinued | Discontinued | Amazon |
| SRAM Quarq Elsa & RED ANT+ Power Meter $1,600 (with cranks, no chainrings) | $1,600 (with cranks, no chainrings) | Amazon |
 | SRAM Quarq Riken ANT+ Power Meter $1,200 (with cranks, no chainrings) | $1,200 (with cranks, no chainrings) | Amazon |
 | Stages ANT+/Bluetooth Smart Power Meter $699 | $699 | N/A |
| Suunto ANT/ANT+ Running Footpod (good for both ANT types) $70.00 | $70.00 | Amazon |
| Suunto Ambit 1/2/2s Charging Cable $29.00 | $29.00 | Amazon | |
| Suunto Bike Mount Kit (for mounting any watch onto handlebars) $10.00 | $10.00 | Amazon | |
| Suunto-ANT (not ANT+) Bike Cadence Sensor Pod - Suunto-Devices Only $59.00 | $59.00 | Amazon | |
| Suunto-ANT (not ANT+) Bike Speed Sensor Front Wheel Pod - Suunto-Devices Only $70.00 | $70.00 | Amazon | |
| Suunto-ANT (not ANT+) Bike Speed Sensor Pod - Suunto-Devices Only $59.00 | $59.00 | Amazon | |
| Suunto-ANT (not ANT+) Heart Rate Strap - Suunto-Devices Only $72.00 | $72.00 | Amazon |
As you can see above, there’s a lot of compatible stuff from companies other than Suunto. I don’t simply just show you the Suunto accessories. Instead, I’m showing you everything that I use that’s compatible. I see no reason to buy a Suunto branded item when an identical item branded with a different logo costs half as much (or is twice as good for half as much). Just the way I am.
Note that the Ambit does NOT contain any Bluetooth or Bluetooth Smart technology/chips in it, thus is not compatible with any Bluetooth Sensors, nor can it connect directly to phones. Further, it does NOT at this time support the ability to wirelessly transfer workout files (FIT files) to phones like some of the Garmin watches can do when combined with the Wahoo Fitness iPhone/iPod/iPad adapter.
Bugs that I saw:
The firmware that I tested for this review was the final shipping firmware that’s included on units arriving this week to customers. Within that context I’ve actually seen no critical show-stopper bugs. There are things I don’t like (i.e. the lack of footpod settings for using GPS over it), and bugs that make using the watch annoying. But, I haven’t seen or had any incidents where the unit flat-out stopped working or otherwise corrupted my experience (either from a display or data standpoint).
Smaller less critical bugs that I have seen are:
– Issues with pairing ANT+ accessories: Routinely accessories would not pair (initial pairing), across both units and a myriad of ANT+ devices. The sensor would pair just fine to other units, but not the Ambit’s. I talked with Suunto about this and they have confirmed they see it as well in some cases, and are working on a fix.
– Issues with edge case scenario data fields: As noted in the airplane I saw bugs with lack of high speeds (i.e. 500MPH) or high altitudes (about 30,000ft). In talking Suunto, they did this on purpose to filter out potential bad data points. Nonetheless, they are looking to fix this in an upcoming update.
– Occasional ANT+ power drop Issues: I can’t be 100% certain that this is an Ambit issue, or some other communications impacting issue in my place. However, I did see a handful of ANT+ power meter drops where the Ambit dropped the power meter channel, but other ANT+ head units maintained the channel. This is going to take longer monitoring in controlled environments (like inside where I noticed it) to see if this is a bigger issue.
– Inability to see swimming data mid-length: This may not be a bug per-se, but it’s annoying enough to me that I’m declaring it a bug. As it stands today you cannot glance at your wrist mid-stroke or mid-length and view data on your current interval (pace/split/time/anything). Instead, you have to stop and press the ‘Next’ button to view it. I’ve asked Suunto about this, and they were open to suggestions on how to handle it. I suggested they do what everyone else does and simply update the screen shortly after the flip/turn at the end of each length. That’s all I’m looking for. [Update: The swimming screensaver has been removed in an Aug 30th, 2013 firmware update]
That’s not to say there aren’t more bugs (because I can guarantee there likely are). It’s just that I’m not seeing any others for the scenarios I’ve tested as outlined in this review. Just like there were edge cases I found with the airplane flight, there are likely also edge cases that others will find too.
Differences between the Ambit2 and the Ambit2 S:

While I’ve covered the majority of the differences throughout the article, here are the core areas that are different between the two units:
Barometric Altimeter: The Ambit2 has a barometric altimeter via an internal pressure sensor. The Ambit2 S does not, instead relying on GPS altitude data. Note that the original Ambit1 does have this sensor (barometric altimeter), but it doesn’t have FusedAlti (the combination of GPS and barometric altimeter).
Temperature Sensor: The Ambit2 has an internal temperature sensor (used in conjunction with the altimeter). The Ambit2 S does not. The original Ambit1 does have this sensor.
Screens: Due to lack of barometric altimeter, the Ambit2 S does NOT include the alti-baro screen. Additionally, current Ascent/Descent and Vertical Speed functions are not present in the Ambit2 S. However, they are considering adding these back in via firmware update, based on GPS data instead (and the stability seen thus far).
Compass: The compass is not within the main modes of the Ambit2 S, however it is still offered via the start menu as a temporary screen. The thinking behind this being that the Ambit2 is focused more towards outdoor/hiking, whereas the Ambit2 S is more towards the performance athlete. Again, the compass is still there, just not as readily accessible.
Size/Weight: As seen earlier in the review in the size comparison section, the Ambit2 is slightly heavier than the Ambit2 S, as well as just a touch thicker (in terms of depth).
Battery Life: The Ambit2 S has a GPS-on battery life of 25 hours (every-60s), whereas the Ambit2 has upwards of 50 hours (every 60s). At 1-second recording, it’s 8 hours and 15 hours.
Price: The Ambit2 S is the least expensive model, starting at $400, versus the Ambit2 starts at $500 (plus more for heart rate strap or Sapphire versions).
Colors: The Ambit2 S offers three colors (Graphite/Lime/Red), while the Ambit2 offers three slightly different colors (Sapphire/Black/Silver). In this review you see the Lime (2S) and Sapphire editions (Ambit2)
Based on what I’m seeing with the GPS altimeter, I wouldn’t have any problem recommending the Ambit2 S over the Ambit2 for triathletes or cyclists in some situations. Ironman finishers with power meters are going to have some challenges with the 2S due to the lack of battery. On the altimeter side, as you saw in my climb data, it was pretty darn close. And the other functions (temperature sensor) just aren’t of much use to most performance athletes (I’m not saying they aren’t interesting as I’m a data geek too, but I’ve yet to hear a training-specific reason in three years of devices having temperature recorded as to why it’s useful to know the current temperature you’re in).
Note: Because this can be a bit confusing (and really important), I specifically sent Suunto this small section and asked them to validate it ahead of the review.
Existing original Ambit Owners:

If there’s one thing that won’t make existing original Ambit owners happy – it’s the fact that almost none of these new features I’ve discussed are making it to the original Ambit. In fact, the only feature that will be made available on the original Ambit is additional App logic relate to saving app state and ‘If’ statements in the code (and this doesn’t even require a firmware update). No doubt, these are great improvements within the App Zone functionality – but in comparison to the wide swath of features being added to the Ambit2, it’s going to come across as a big slap in the face.
While part of the firmware changes are dependent on updates to both the units CPU and GPS chipsets (same type, but just newer versions in the Ambit2), Suunto has argued that many of the changes simply wouldn’t have required additional processing power. I don’t really buy that. For example, the recording of ANT+ power meters would have required no more processing power than recording heart rate or cadence data (done today). I could potentially understand the swimming calculations or dual-app pieces requiring more CPU, but others such as multisport mode are a tough one to believe as well.
The case of not updating the existing Ambit is especially of note due to the age of the previous original Ambit only being about a year old. Further is that Suunto had made quite a big deal at trade shows, consumer events, and in the media about their plans to ‘continually upgrade’ the watch. You can see this starting at about the 1:15 marker in this video from a year ago. Or in this video at the 25-second marker, one of their sponsored athletes working the booth talked about year over year software updates.
And, to be fair – these updates did happen numerous times in calendar year 2012 – with the addition of new features to the original Ambit. And today’s update to Movescount does extend some of the new app functionality to the original Ambit. That said, in talking with Suunto, the last firmware update to the Ambit1 will be a near-term bug-fix only update. No new features will be added to the Ambit1 going forward.
Perhaps with some additional consumer pressure we’ll see a larger set of the features ported from the Ambit2 back into the firmware updates for the Ambit1.
Update May 7th, 2013: As a result of said pressure and feedback, Suunto has announced a series of changes and updates they’ll be making to the Ambit1 (original Ambit). You can read the full announcement letter here.
Product Comparison Tables:
You can utilize the below comparison table that’s dynamically updated over time (so as features change via firmware) to compare the different watches that I’ve reviewed – including the Ambit2, 2S and original Ambit1. Note the key part being ‘I’ve reviewed’. There are no doubt many other great watches on the market, it’s just that if I haven’t reviewed it, I don’t feel right including it based on some marketing fluff. However, with that said – I’d also suggest that within the GPS running/hiking/triathlon market, I’ve reviewed virtually every major product that you’d want to be looking at.
Since the Ambit is a bit of a higher end product (actually, the most expensive GPS watch on the market), if you’re looking for a more wallet-friendly option, see my GPS recommendations post from a few months ago.
| Function/Feature | Suunto Ambit2 | Suunto Ambit2 S | Suunto Ambit | Garmin Fenix | Garmin Forerunner 910XT |
|---|---|---|---|---|---|
| Copyright DC Rainmaker - Updated April 29th, 2021 @ 5:06 am New Window | |||||
| Price | $319 | $219 | $400.00/Discontinued | $299 (on sale) | $399 |
| Product Announcement Date | APR 29, 2013 | APR 29, 2013 | Jan 18, 2012 | JUL 10, 2012 | OCT 4, 2011 |
| Actual Availability/Shipping Date | May 2013 | May 2013 | Apr 2012 | AUG 2012 | JAN-APR 2012 |
| GPS Recording Functionality | Yes | Yes | Yes | Yes | Yes |
| Data Transfer | USB | USB | USB | USB & Bluetooth Smart | ANT+ Wireless |
| Waterproofing | Yes - 100m | Yes - 50m | Yes - 100m | Yes - 50m | Yes - 50m |
| Battery Life (GPS) | 50 hours | 25 hours | 50 hours | 50 hours | 20 Hours |
| Recording Interval | Variable | Variable | Variable | 1s to variable | 1s or Smart |
| Alerts | Sound/Visual | Sound/Visual | Sound/Visual | Vibrate/Sound/Visual | Vibrate/Sound/Visual |
| Ability to download custom apps to unit/device | Yes | Yes | Yes | No | No | Connectivity | Suunto Ambit2 | Suunto Ambit2 S | Suunto Ambit | Garmin Fenix | Garmin Forerunner 910XT |
| Bluetooth Smart to Phone Uploading | No | No | No | Yes | Via Wahoo Fitness Adapter |
| Phone Notifications to unit (i.e. texts/calls/etc...) | No | No | No | Yes | No |
| Live Tracking (streaming location to website) | No | No | No | Yes (as of Feb 2014) | No |
| Emergency/SOS Message Notification (from watch to contacts) | No | No | No | No | No |
| Built-in cellular chip (no phone required) | No | No | No | No | No | Cycling | Suunto Ambit2 | Suunto Ambit2 S | Suunto Ambit | Garmin Fenix | Garmin Forerunner 910XT |
| Designed for cycling | Yes | Yes | Yes | Yes | Yes |
| Power Meter Capable | Yes | Yes | No | No | Yes |
| Power Meter Configuration/Calibration Options | Yes | Yes | N/A | N/A | Yes |
| Power Meter TSS/NP/IF | No | No | N/A | N/A | Yes |
| Speed/Cadence Sensor Capable | Yes | Yes | Yes | Yes (full support added Sept 2013) | Yes | Running | Suunto Ambit2 | Suunto Ambit2 S | Suunto Ambit | Garmin Fenix | Garmin Forerunner 910XT |
| Designed for running | Yes | Yes | Yes | Yes | Yes |
| Footpod Capable (For treadmills) | Yes (internal accelerometer) | Yes (internal accelerometer) | Yes | Yes | Yes |
| Running Dynamics (vertical oscillation, ground contact time, etc...) | No | No | No | No | No |
| VO2Max Estimation | Yes | Yes | Yes | No | No |
| Race Predictor | No | No | No | No | No |
| Recovery Advisor | Yes | Yes | No | No | No |
| Run/Walk Mode | No | No | No | No | Yes | Swimming | Suunto Ambit2 | Suunto Ambit2 S | Suunto Ambit | Garmin Fenix | Garmin Forerunner 910XT |
| Designed for swimming | Yes | Yes | No | No | Yes |
| Openwater swimming mode | Yes | Yes | N/A | N/A | Yes |
| Lap/Indoor Distance Tracking | Yes | Yes | N/A | N/A | Yes |
| Record HR underwater | No | No | No | No | No |
| Openwater Metrics (Stroke/etc.) | Yes | Yes | N/A | N/A | Yes |
| Indoor Metrics (Stroke/etc.) | Yes | Yes | N/A | N/A | Yes |
| Indoor Drill Mode | Yes | Yes | N/A | N/A | No |
| Indoor auto-pause feature | No | No | N/A | N/A | No |
| Change pool size | Yes | Yes | N/A | N/A | Yes |
| Indoor Min/Max Pool Lengths | 15m/y to 1,200m/y | 15m/y to 1,200m/y | N/A | N/A | 20m/22y to 100y/m |
| Ability to customize data fields | Yes | Yes | N/A | N/A | Yes |
| Captures per length data - indoors | Yes | Yes | N/A | N/A | Yes |
| Indoor Alerts | No | No | N/A | N/A | Yes | Triathlon | Suunto Ambit2 | Suunto Ambit2 S | Suunto Ambit | Garmin Fenix | Garmin Forerunner 910XT |
| Designed for triathlon | Yes | Yes | No | No | Yes |
| Multisport mode | Yes | Yes | N/A | N/A | Yes | Workouts | Suunto Ambit2 | Suunto Ambit2 S | Suunto Ambit | Garmin Fenix | Garmin Forerunner 910XT |
| Create/Follow custom workouts | No | No | No | Yes (As of Dec 6, 2013) | Yes |
| On-unit interval Feature | Barely | Barely | No | Yes (As of Dec 6, 2013) | Yes |
| Training Calendar Functionality | No | No | No | No | Yes | Functions | Suunto Ambit2 | Suunto Ambit2 S | Suunto Ambit | Garmin Fenix | Garmin Forerunner 910XT |
| Auto Start/Stop | Yes | Yes | No | Yes | Yes |
| Virtual Partner Feature | No | No | No | Yes | Yes |
| Virtual Racer Feature | No | No | No | No | Yes |
| Records PR's - Personal Records (diff than history) | No | No | No | No | No |
| Tidal Tables (Tide Information) | No | No | No | No | No |
| Weather Display (live data) | No | No | No | No | No | Navigate | Suunto Ambit2 | Suunto Ambit2 S | Suunto Ambit | Garmin Fenix | Garmin Forerunner 910XT |
| Follow GPS Track (Courses/Waypoints) | Yes | Yes | Yes | Yes | Yes |
| Markers/Waypoint Direction | Yes | Yes | No | Yes | No |
| Offline Maps | No | No | No | No | No |
| Back to start | Yes (added Aug 30, 2013) | Yes (added Aug 30, 2013) | Yes (point to point only) | Yes | Yes |
| Impromptu Round Trip Route Creation | No | No | No | No | No |
| Download courses/routes from phone to unit | No | No | No | Yes | No | Sensors | Suunto Ambit2 | Suunto Ambit2 S | Suunto Ambit | Garmin Fenix | Garmin Forerunner 910XT |
| Altimeter Type | Barometric, GPS (FusedAlti) | GPS | Barometric | Barometric | Barometric |
| Compass Type | Magnetic | Magnetic | Magnetic | Magnetic | GPS |
| Heart Rate Strap Compatible | Yes | Yes | Yes | Yes | Yes |
| ANT+ Heart Rate Strap Capable | Yes | Yes | Yes | Yes | Yes |
| ANT+ Speed/Cadence Capable | Yes | Yes | Yes | Yes | Yes |
| ANT+ Footpod Capable | Yes | Yes | Yes | Yes | Yes |
| ANT+ Power Meter Capable | Yes | Yes | No | No | Yes |
| ANT+ Remote Control | No | No | No | Yes | No |
| ANT+ eBike Compatibility | No | No | No | No | No |
| Shimano Di2 Shifting | No | No | No | No | |
| Bluetooth Smart HR Strap Capable | No | No | No | No | No |
| Bluetooth Smart Speed/Cadence Capable | No | No | No | No | No |
| Bluetooth Smart Footpod Capable | No | No | No | No | No |
| Bluetooth Smart Power Meter Capable | No | No | No | No | No |
| Temp Recording (internal sensor) | Yes | No | Yes | Yes | No |
| Temp Recording (external sensor) | No | No | No | Yes | No | Software | Suunto Ambit2 | Suunto Ambit2 S | Suunto Ambit | Garmin Fenix | Garmin Forerunner 910XT |
| Desktop Application | Moveslink Agent | Moveslink Agent | Moveslink Agent | Basecamp | GTC/ANT Agent |
| Web Application | Movescount | Movescount | Movescount | Garmin Connect | Garmin Connect |
| Phone App | Suunto Movescount | Movescount | Suunto Movescount | Garmin Basecamp (iOS) | iOS/Android |
| Ability to Export Settings | Yes (online) | Yes (online) | Yes (online) | Yes (profiles XML) | No | Purchase | Suunto Ambit2 | Suunto Ambit2 S | Suunto Ambit | Garmin Fenix | Garmin Forerunner 910XT |
| Amazon | Link | Link | Link | Link | Link | DCRainmaker | Suunto Ambit2 | Suunto Ambit2 S | Suunto Ambit | Garmin Fenix | Garmin Forerunner 910XT |
| Review Link | Link | Link | Link | Link | Link |
Remember to click the ‘Expand Results’ button as it’ll show a gazillion more rows than the quick preview above. Or, you can mix and match your own comparison table here with products that are of interest to you.
Pros and Cons:
As always, I’d suggest that the below pros and cons is highly concentrated, and doesn’t really cover all the details of the 11,000+ words above. But, with that warning, here we go:
Pros:
– Multisport mode is now included, and customized creation of these modes is neat
– Supports power meters
– New App Functionality increases ability for unit to be customized
– Now supports swimming (openwater and pool)
– FusedAlti helps in narrowing the gap between GPS and barometric altimeters
– Movescount site updates fairly impressive in some areas
– Route navigation forward and backwards is handy
Cons:
– Multisport mode needs transition times added (manual workaround is semi-functional)
– Ambit2 S battery is tough for iron-distance triathletes with power meters
– No vibration alarms on any of the Ambits
– No proper Trackback feature for getting un-lost [Update: Firmware update added it Aug 30th, 2013)
– Indoor swimming screensaver screen sucks [Update: Firmware fixed Aug 30th, 2013)
Again, there are lots of little details that I’ve sprinkled throughout the review that are worth paying attention to.
Summary:

It’s been a while since I’ve been excited about a triathlon or multisport watch. Mostly because most of them in the market today don’t really do all three legs of a triathlon. Doing bicycling and running and declaring yourself a triathlon watch is like saying you’ve delivered baby after six months of pregnancy. Both the Ambit2 and Ambit2 S deliver on all three sports for triathlon, and they have multisport mode – critical for racing.
The next area to look at is whether the watch is good enough to hold its own within any single sport that makes up a triathlon. Meaning, is it still a good running watch? Or a good cycling head unit? In this case, I’d give the unit B+ marks from an individual standpoint in running and cycling, and about a C+ in swimming (until they workout the swimming screensaver thing, then it’s an ‘A’ [Update: Fixed in Aug 30th firmware update]). The main reason I mark it slightly lower in running and cycling is that other units in the market simply have more features (i.e. a real interval feature, workout support, virtual pacing support, nutrition alerts, etc…). For example in running the inability to choose whether speed/distance data comes from GPS or the footpod is a problem. And in cycling, the lack of TSS/NP/IF metrics inbox can be an issue for some.
With that said – I’d still have no problems using it as a triathlon multisport watch (either model). Is it the best overall unit on the market today? Not yet. Could it be? It has the hardware to, just a matter of the software improvements.
When it comes to hiking, navigation and outdoors, I’m seeing minimal improvements over the Ambit1. The addition of FusedAlti is definitely a helper, but not a reason in my mind to go out and upgrade the watch from an existing Ambit. Overall the Ambit2 was more about the sport athletic side than it was about the hiking/outdoor side of things. In many ways, the Ambit as a name for this product may not have actually been a good choice. In reality the Ambit2 and 2S now compete more with the Garmin FR910XT than they do with the Garmin Fenix. Whereas in the past, the Ambit competed more with the Fenix.
Going forward, the increased capabilities of the application engine can and likely will continue to produce some really intriguing options. It’s really too bad though that Suunto didn’t add in a Bluetooth chip to the unit, as that would have significantly opened up the game for connectivity out to the internet. In that single aspect this watch lags behind something like the Fenix, in the power of the phone app side from Fenix.
Overall though I’m impressed with the Ambit2 and think it makes for a solid multisport and outdoor/hiking watch – hopefully one that Suunto will improve upon for years to come.
As always, thanks for reading, and feel free to drop any questions below.
Found this review useful? Here’s how you can help support future reviews with just a single click! Read on…
Hopefully you found this review useful. At the end of the day, I’m an athlete just like you looking for the most detail possible on a new purchase – so my review is written from the standpoint of how I used the device. The reviews generally take a lot of hours to put together, so it’s a fair bit of work (and labor of love). As you probably noticed by looking below, I also take time to answer all the questions posted in the comments – and there’s quite a bit of detail in there as well.
I’ve partnered with Clever Training to offer all DC Rainmaker readers an exclusive 10% discount across the board on all products (except clearance items). You can pickup the Suunto Ambit’s below. Then receive 10% off of everything in your cart by adding code DCR10BTF at checkout. By doing so, you not only support the site (and all the work I do here) – but you also get a sweet discount. And, since this item is more than $75, you get free US shipping as well.
Suunto Ambit2 (with/without HR strap)
Suunto Ambit2 S (with/without HR strap)
Suunto Ambit2 Sapphire (with/without HR strap)
(All colors available)
Additionally, you can also use Amazon to purchase accessories (though, no discount on either from Amazon). Or, anything else you pickup on Amazon helps support the site as well (socks, laundry detergent, cowbells). If you’re outside the US, I’ve got links to all of the major individual country Amazon stores on the sidebar towards the top. Though, Clever Training also ships most places too and you get the 10% discount. Thanks for reading!
As you’ve seen throughout the review there are numerous compatible accessories for the unit. I’ve consolidated them all into the below chart, with additional information (full posts) available on some of the accessories to the far right. Also, everything here is verified by me – so if it’s on the list, you’ll know it’ll work. And as you can see, I mix and match accessories based on compatibility – so if a compatible accessory is available at a lower price below, you can grab that instead.
| Product | Street Price | Amazon | |
|---|---|---|---|
| 2014 Summer Recommendations: Triathlon Watches | |||
| 2014 Winter Recommendations: Triathlon Watches | |||
| PowerTap G3 ANT+ Power Meter (Hub) $790 (hub only) | $790 (hub only) | Amazon |
| PowerTap Pro ANT+ Power Meter (Hub) $899 | $899 | Amazon |
| Garmin ANT+ Heart Rate Strap (Classic Plastic Strap) - HRM1 $37.00 | $37.00 | Amazon | |
| Garmin ANT+ Heart Rate Strap (Premium Soft-Strap) - HRM2 $69.00 | $69.00 | Amazon | |
| Garmin ANT+ Heart Rate Strap (Premium Soft-Strap) - HRM3 $50 | $50 | Amazon |
| Garmin ANT+ Running Footpod (Mini) $45 | $45 | Amazon |
| Garmin ANT+ Speed/Cadence Cycling Sensor (GSC-10) $35.00 | $35.00 | Amazon |
| Motorola ANT+ Speed/Cadence Cycling Sensor (Quick Install) - BEST! $55.00 | $55.00 | Amazon |
| Power2Max ANT+ Power Meter $970 (no cranks) | $970 (no cranks) | N/A |
| PowerCal ANT+ Estimated Power Meter $99 | $99 | Amazon |
| SRAM Quarq Cinqo (Original) ANT+ Power Meter Discontinued | Discontinued | Amazon |
| SRAM Quarq Elsa & RED ANT+ Power Meter $1,600 (with cranks, no chainrings) | $1,600 (with cranks, no chainrings) | Amazon |
| SRAM Quarq Riken ANT+ Power Meter $1,200 (with cranks, no chainrings) | $1,200 (with cranks, no chainrings) | Amazon |
| Stages ANT+/Bluetooth Smart Power Meter $699 | $699 | N/A |
| Suunto ANT/ANT+ Running Footpod (good for both ANT types) $70.00 | $70.00 | Amazon |
| Suunto Ambit 1/2/2s Charging Cable $29.00 | $29.00 | Amazon | |
| Suunto Bike Mount Kit (for mounting any watch onto handlebars) $10.00 | $10.00 | Amazon | |
| Suunto-ANT (not ANT+) Bike Cadence Sensor Pod - Suunto-Devices Only $59.00 | $59.00 | Amazon | |
| Suunto-ANT (not ANT+) Bike Speed Sensor Front Wheel Pod - Suunto-Devices Only $70.00 | $70.00 | Amazon | |
| Suunto-ANT (not ANT+) Bike Speed Sensor Pod - Suunto-Devices Only $59.00 | $59.00 | Amazon | |
| Suunto-ANT (not ANT+) Heart Rate Strap - Suunto-Devices Only $72.00 | $72.00 | Amazon |
And as always, feel free to post comments or questions in the comments section below, I’ll be happy to try and answer them as quickly as possible. And lastly, if you felt this review was useful – I always appreciate feedback in the comments below. Thanks! Finally, I’ve written up a ton of helpful guides around using most of the major fitness devices, which you may find useful in getting started with the devices. These guides are all listed on this page here.