
Today TomTom has announced they’re venturing into the action cam business, with the introduction of the TomTom Bandit. This Twinkie sized action cam contains 2.7K (30FPS) and 4K (15FPS) capabilities, as well as GPS functionality that you’d expect from a GPS satellite navigation company.
I’ve been using the unit for a number of weeks now as part of all sorts of activities – from cycling to running to time lapses, and simply just goofing around. Thus, I’ve got a pretty good idea on how it works. The unit I have has the final launch firmware on it, and the app is now final too. The unit itself with the exception of the mount and waterproofing is considered final. Given the finality of most of it, I’m going to go ahead with an In-Depth Review and then circle back to the review once I can validate any outstanding concerns on the final hardware.
To be clear, I’ve been using a unit provided by TomTom to test with. Like always, I’ll be shipping that back to them in Amsterdam in the next little bit and going out and getting my own via regular retail channels. That’s just the way I roll.
Lastly, at the end of the day keep in mind I’m just like any other regular athlete out there. I write these reviews because I’m inherently a curious person with a technology background, and thus I try and be as complete as I can. But, if I’ve missed something or if you spot something that doesn’t quite jive – just let me know and I’ll be happy to get it all sorted out. Also, because the technology world constantly changes, I try and go back and update these reviews as new features and functionality are added – or if bugs are fixed. So – with that intro, let’s get into things.
Bandit Versions:
In my case, I didn’t have a final retail box since those are still outstanding. However, I had all the components that go in a final retail box. So that’s good enough for me for now. I’ll add in a pretty box picture once I get said pretty box.
It’s worthwhile noting there are two versions of the TomTom Bandit, they are:
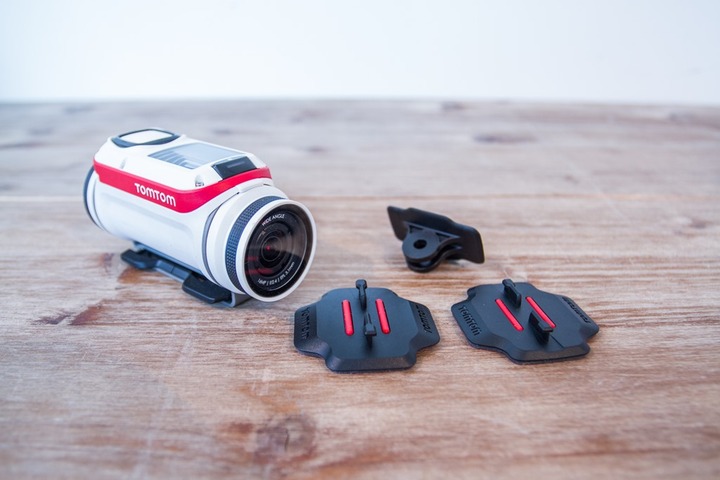
Base Pack: The camera, 2x surface mounts, one GoPro adapter
Premium Pack: The camera, 2x surface mounts, one GoPro adapter, one 360° pitch mount, one handlebar mount, waterproof lens cover, remote control, power cable
The camera is identical between the two of them. It’s simply a case of different accessories that are bundled together. Sorta like how a watch might have a HR strap bundled with it.
In my case I had mostly the base version, however they then supplied me with extra parts afterwards to be able to test it all. Here’s what the base unit looks like (with a side dish of the handlebar & tripod mounts):

And here’s the premium package:

Looking at the individual components, we’ve got first the GoPro adapter. This allows you to mount it to any GoPro mount out there – definitely handy given the wide availability of GoPro accessories:

Next, there are two sticker mounts, one flat and one slightly rounded. These allow you to mount it to a helmet or the like.

Then we’ve got a tripod mount, useful of hooking it up to a standard tripod adapter (best for longer time-lapse shots).

Then there’s the bike mount. Or perhaps more like a roll-bar mount. It’s kinda massive. Way bigger than any action cam bike mount I’ve used before:

Finally, there’s the Bandit action cam itself:


With that, let’s move onto weights and size comparisons.
Weights & Sizing:
So how does the Bandit compare to other units on the market size and weight-wise? Well, first let’s look at sizing.
I’ve placed the TomTom unit next to the Sony AS-100V (and in another photo 4K capable FDR-X1000V), Garmin VIRB/VIRB Elite, and GoPro Hero4. As you can see from the front, it’s sorta in the same ballpark. Each unit has their own shapes, so it makes it a bit tricky.

Here’s the same line-up with the barely size-wise different (a smidge taller than the AS100/200V), but now 4K capable Sony FDR-X1000V cam:

Also, some will point out that the Hero4 doesn’t have a case on it, and isn’t mountable. Sure, but it’s also the smallest you can make it – and there are many times where I just handhold a camera. In any case, here it is with the case:

Here’s how it looks from the side:

Again, it’s sorta tricky to compare since they all are different shaped. But by most assessments the TomTom unit is basically the largest one.
Next, let’s look at weights of the unit. The weights below are essentially the lowest possible mountable variant that I could come up with.

As you can see, it weighs in at 192g.
For comparison, the others were:
GoPro Hero4 Silver with skeleton frame: 114g
Sony HDR-AS100V Action Cam with tripod mount: 103g
Sony FDR-X1000V Action Cam with internal mounts: 115g
Garmin VIRB Elite: 180g (technically it would have been 207-239g with a mount)
For those curious, on the VIRB X/XE front, the unit weighs in at 151g, though I didn’t have it with me at the time of this weigh-in.
Ultimately, you’ve got two classes of cameras here from a size standpoint. Those at the smaller end without much native protection (i.e. the GoPro series in skeleton cases), or those that are fully protected for water at the higher end. If you add in the GoPro waterproof case it ends up being within a few grams of the TomTom/Garmin units that are more water-friendly. So you probably want to look at what your typical use case it.
Basic Operation & Use:
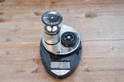
Before we get into the different modes, a brief note about the unit from a mechanics standpoint. First up is that there’s two pieces, the main shell and the “batt-stick” – which is what TomTom calls the thingy that contains the battery and the SD card.

The batt-stick has a USB plug built into it, so it plugs directly into any USB port you’ve got handy. The unit contains USB3.0, to ensure rather quick transfers to your computer. You can identify that by the blue innards (so look for the same on your computer).

On the outside of the batt-stick there are LED lights that show you battery charging status. Though, on my laptops these lights are upside-down against the table, making them kinda useless.

(Note: In the above photo I’m simply using a straight forward USB extension cable)
The batt-stick is what holds the standard Micro-SD card, which is inserted into the side of the stick. The unit supports up to 128GB cards:

When you’re ready to plop this into the rest of the camera shell, you’ll do so by sliding it in and twisting. It’ll eventually lock in place. To unlock it, you press in the small button on the front.

There’s also a small port on the front of the unit, which can be used with the extra (non-inclusive) charging cable.

By using this port you can provide continual power to the unit should you want to do a time lapse or other long-term video.
To begin using the Bandit you’ll power it on. This is done with the little button with the red star on it at the back of the unit:

The unit will chirp a bit, and then within about 3-4 seconds the unit will be ready to go. It’ll bring you to the last mode you were in. So if you were last in the photo mode, you’ll be there now. To control the camera you use the little toggle joystick on the front.

Essentially, just like the TomTom GPS watches. If you press to the left, you’ll get to the main strip of options. You can go up and down and choose between the modes: Photo, Video, Slow Motion, Time-Lapse, and Cinematic. To select you’ll press the right button.

Each of these modes then has corresponding settings with it, to access those settings you’ll press the down button that has the little settings icon on it.
This is where you can configure aspects such as video resolution and frame rate. Each mode allows you to configure that separately. Additionally, within these menu settings you can enable support for connecting to a Bluetooth Smart heart rate sensor, as well as the TomTom remote control.

You can also go into the general settings and configure options such as language, units (miles/kilometers) and the backlight.

And even display the status of the GPS/battery/memory card:

Next, after you’ve selected a mode you can select the right button again to get to a screen indicating how much video time would be left in that mode (or, photos remaining). At the top you’ll also notice the GPS, battery, and MicroSD card status indicator icons:

It’s at this point that you’re ready to record. To do so, just press the little red button again, which starts recording. You’ll see the display now show the recording status:

The TomTom Bandit has the ability to highlight tag within the camera. It can do this automatically based on internal sensors, but also by just pressing the red button it’ll create a highlight tag for the app to pickup later:

At this point, with the unit recording you can go out and do whatever exciting action cam thing it is that you do. You know, like capturing yourself walking down the street.

Next, when all is said and done you’ll press the top ‘Stop’ button, which stops the recording:

At this point, the footage is saved – inclusive of any sensor data (within the actual .MP4 video file). Of course, the exact resolutions vary based on which mode you’re in. So with that, let’s talk about all the main modes – as specified within the TomTom Bandit menu system.
General Video Mode:

The unit includes three basic video modes, and one photo mode. The first mode is simply called ‘Video’. Which, I realize can be slightly confusing when there are other video modes. But just go with it for now.
This video mode is more of your all-arounder option. It has the middle of the road resolutions and frame rates that you’ve come to know and love on action cameras for the last few years. You can specify which resolution you’d like within the settings of the Video mode.

You can also specify whether you want the video to have a wide-angle view, or a ‘normal’ more zoomed in view.

Once you’ve done that, you can also configure areas such as sensors that are paired to the unit.

Today this is just the Bluetooth Smart heart rate strap – but down the road it might expand.

Additionally, you’ll find the ability to pair the remote control here. This allows you to start & stop the unit, as well as to trigger highlights. If you look at the red button that’s for start/highlights, and at the top there’s a thin silver button for stopping the video.

With everything all configured and ready you’ll be back to the main screen showing your settings.

You’ll tap to the right to prepare to record. To start the recording, you’ll tap the red button:

And then the screen will display a counter as well as a red light on both the top and back of the unit. Further, it’ll show you how much storage space is remaining. Up top you’ve still got the GPS signal status, storage space, and battery life shown.

If you want to save a highlight, you’ll do so by tapping the red button at the bottom of the unit, which will then show you a quick confirmation that you marked a highlight for later.

Additionally, if you have a heart rate strap paired, you’ll notice at the top of the unit there’s a small heart rate icon, showing that your HR is being recorded.

Speaking of videos, let’s look at two clips shot side by side (GoPro Hero4 Silver vs TomTom Bandit), 1080p @ 60fps. First up is the TomTom’s video:

Next, here’s the GoPro Hero4 Silver’s video:

(Note: Due to some sort of issue when currently attempting to upload the native TomTom clips to YouTube showing a max of 360p resolution, all clips in this post have had a one-pass through a file converter to correctly show on YouTube. The source/output quality is identical however, it just fixes some metadata issue that was breaking uploads to YouTube (but no other applications). I’ll be providing the original source clips later today on Dropbox for those that wish to see them. TomTom is also working to address the YouTube issue.)
Finally, you can stop it at any time by pressing the stop button, which is at the top of the unit.

Note that while the buttons are clearly labeled, I find them occasionally a bit awkward to press depending on where I am. I wish for example that the start/highlight buttons were on the longer portion of the unit. Pressing from the back is a bit odd. On the flip side, having the stop button entirely separate is handy – as it ensures you don’t accidentally do a double-tap start/stop before your activity and not realize it (as can be the case with the GoPro lineup).
Of course, this is just the first of the different video modes. However, each mode largely has the same features – it’s really only the resolution that changes.
Slow Motion Mode:

Next we’ve got the slow motion mode. This mode is designed to shoot at a higher frame rate in order to allow the appearance of slow motion. It does this by shooting at 120FPS (frames per second), and then during playback the video is played at typically 30FPS. Meaning that instead of your moment of action taking 1 second to playback, it’ll take 4 seconds to playback.

The unit supports three slow motion modes: 1080p @ 60FPS, 720p @ 120FPS, and WVGA @ 180FPS. Though, some would argue that 1080p @ 60FPS isn’t really slow motion. In any event, let’s focus on the 120FPS since that’s the best bang for the bug resolution-wise.

For that, it’s easiest to just demonstrate it. This is a video jumping off a dock into the water. Pretty straight forward:

In this case I specified the video at 720p at 4X (aka 120FPS). The way the TomTom unit works is that it’ll actually do the slowing down automatically in the recorded video. So if you shot for 10 seconds, then the actual video clip recorded would be 40 seconds long. There’s pros and cons to this. On the plus side, it makes it a little easier to edit video. On the downside, getting to the right moment in a clip can take forever.
Additionally, I’ve noticed that the video quality isn’t terribly awesome – it seems a bit more pixelated than I would have liked. Here’s another video clip, this time of me cannon-balling::

I could have slowed the video down even further by shooting at one of the other frame rates offered within Slow-Mo, but honestly, the video quality there just isn’t worth it to go below 720p.
Time-lapse:

Next up is the time-lapse mode. Within this mode the camera will compile shots (essentially photos) taken at a preset interval into a ready to go movie. This is similar to the time-lapse function that the Garmin VIRB action cameras introduced, and that GoPro then added as well this past winter.
To set it up you’ll first go to the Time-lapse function:

Then from there you’ll want to choose the ending resolution – either 4K or 1080p:

Finally you’ll select how frequent a shot you want to take. The options are currently: 1-second, 5s, 10s, 15s, 30s, 60s.

TomTom has noted to me that they’re looking at expanding a few options there.

In general, when looking at the interval you want to consider how long you’ll be taking video. If you’re only shooting for perhaps 45 minutes, then you’ll likely want to go with 1-second. But if you’re shooting for 12 hours, you’ll probably want to choose a higher interval.
I’ve done a number of time lapses now, mostly sunset/sunrise ones, as well as a few other random ones. In most of the cases I was just letting the unit go until the battery died.
Here’s the first one, a sunrise time-lapse:

You’ll notice that the low-light quality isn’t terribly awesome on the TomTom Bandit. Neither during regular video nor photo use. One of the things I noticed is that it doesn’t handle lighting changes well compared to a GoPro.
But if you remove that and just go with a nice sunny day, it’s definitely a bit better. Here’s another time lapse I shot in a bit sunnier conditions. In this case I actually rode across town with the unit in the time-lapse mode. It doesn’t quite create a hyper-lapse style video, but it’s fairly close.
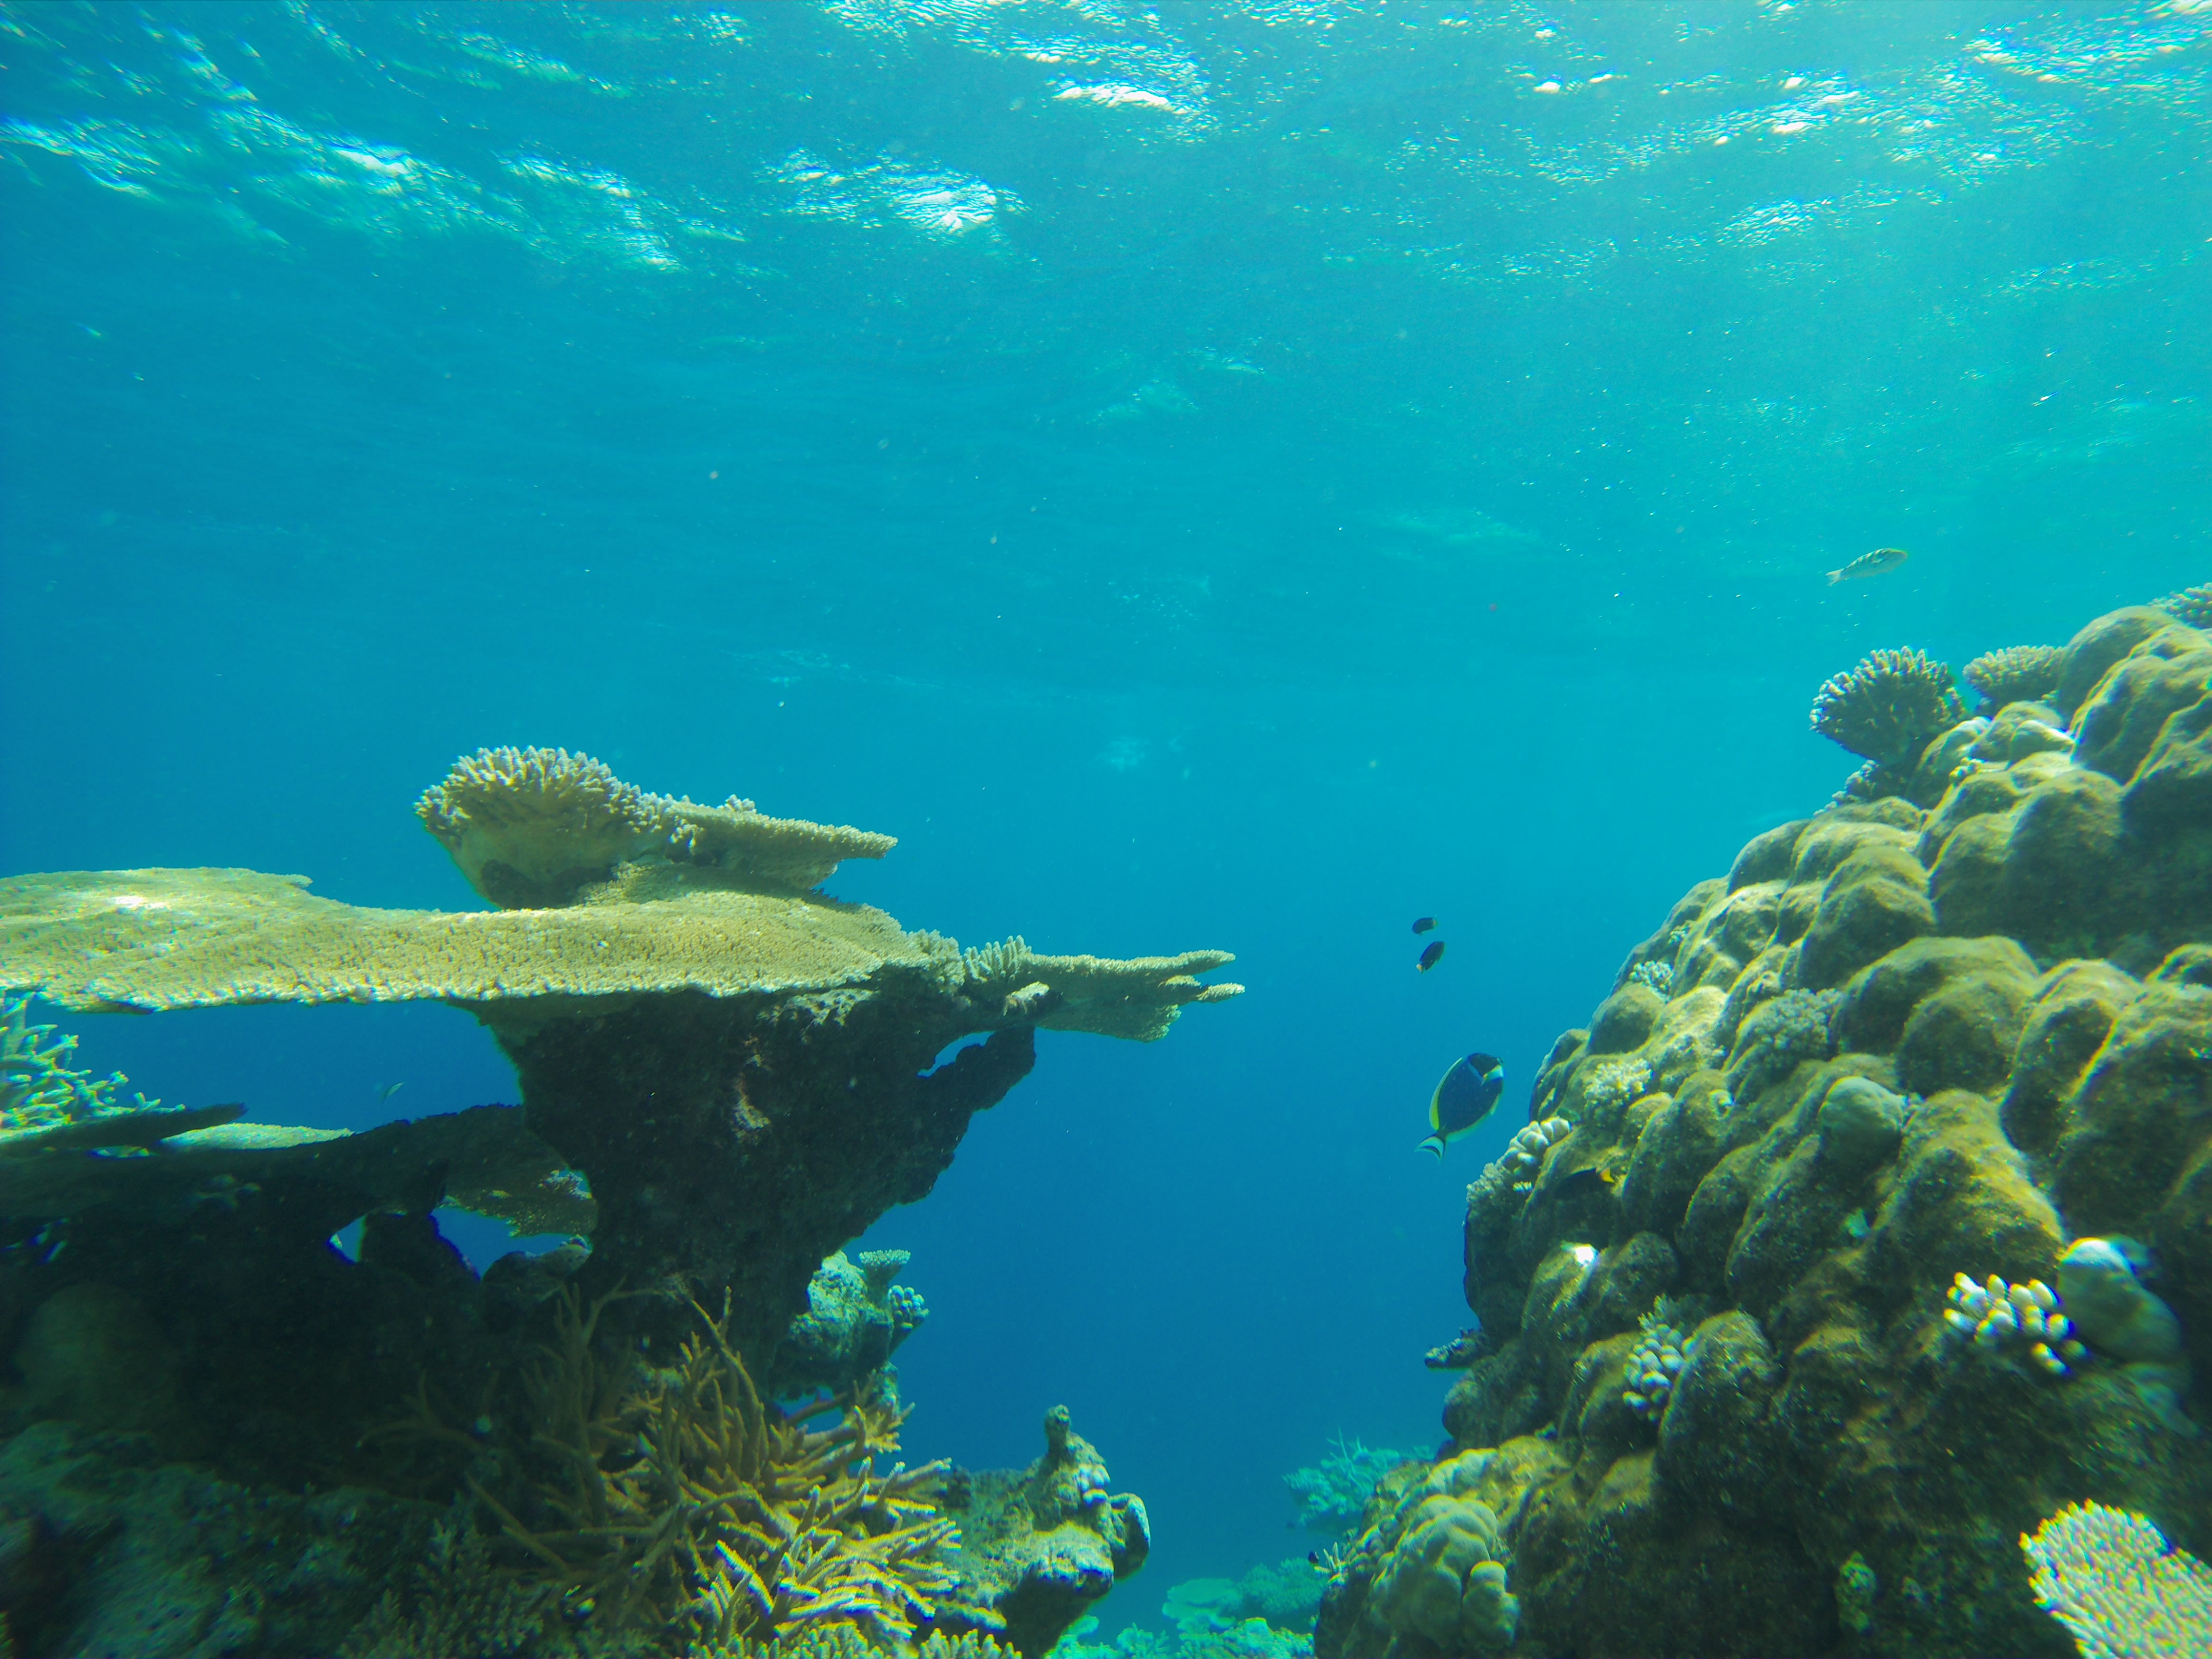
Here’s another timelapse I shot, this time over the calm waters of the Maldives.

Overall the time-lapse function works quite well from a simplicity standpoint, I just wish the quality matched it in all cases. Note though that if you want to go beyond the 3 hours or so on the battery life of the unit in timelapse mode, you’ll want to pickup the charging cable:

This cable enables you to continually provide power to the unit for longer time lapses (or just longer recording). My concern is that while the cable is pretty cool in the way it’s fully weatherproofed for continual charging outdoors (should you patch together a battery pack to it), the clip design will likely easily break. My guess is that if I’ve had it just a few more weeks I’ll break the cable clips that secure it in place.


Note that the only disappointing thing here is that other companies allow you to use standard USB cables, whereas with the TomTom Bandit you have to buy an extra cable because it’s a special connector. Even in cases where companies use the special connector (i.e. Garmin’s new VIRB X & XE), they are at least including said cable. In my opinion, for a $400 device, a $2 cable should be included.
But again, beyond my cable concerns, the time lapse feature does work quite well – I’ve got no complaints about the function itself and am really glad to see it in the unit.
Cinematic Mode (2.7K/4K):

Lastly on the video modes, the Bandit can shoot 4K video at 15FPS and 2.7K at 30FPS. I’m not quite sure why they separated out the modes from the regular mode. But they did, so I’ll do the same here for the sake of consistency. Said 2.7K/4K mode is called Cinematic mode. Now of course there are very few scenarios where you’d want to shoot 4K video at only 15FPS. About the only thing I can think of is a nature scene where the movement is very slow.
For everything else, you’d go with 2.7K at 30FPS, which is the normal video speed.


Rather than talk about these modes, I’m just going to show you a few clips. First up is a bike ride segment shot at 2.7K:

As you can see, it’s not too bad; but, how does it compare to the GoPro Hero4 Silver (closest competitor) also at 2.7K/30FPS? Ask and you shall receive. I shot these side by side:

And here’s the GoPro video from that:
Next, let’s look at something a bit less demanding.
To understand how the 4K might look, I’ve shot the following two clips back to back. One in 2.7K for a minute, and then again in 4K for a minute. Here’s the 2.7K clip first:

And then the 4K clip. Remember that with 4K it’s down to 15FPS. But for this particular shot you wouldn’t likely notice.

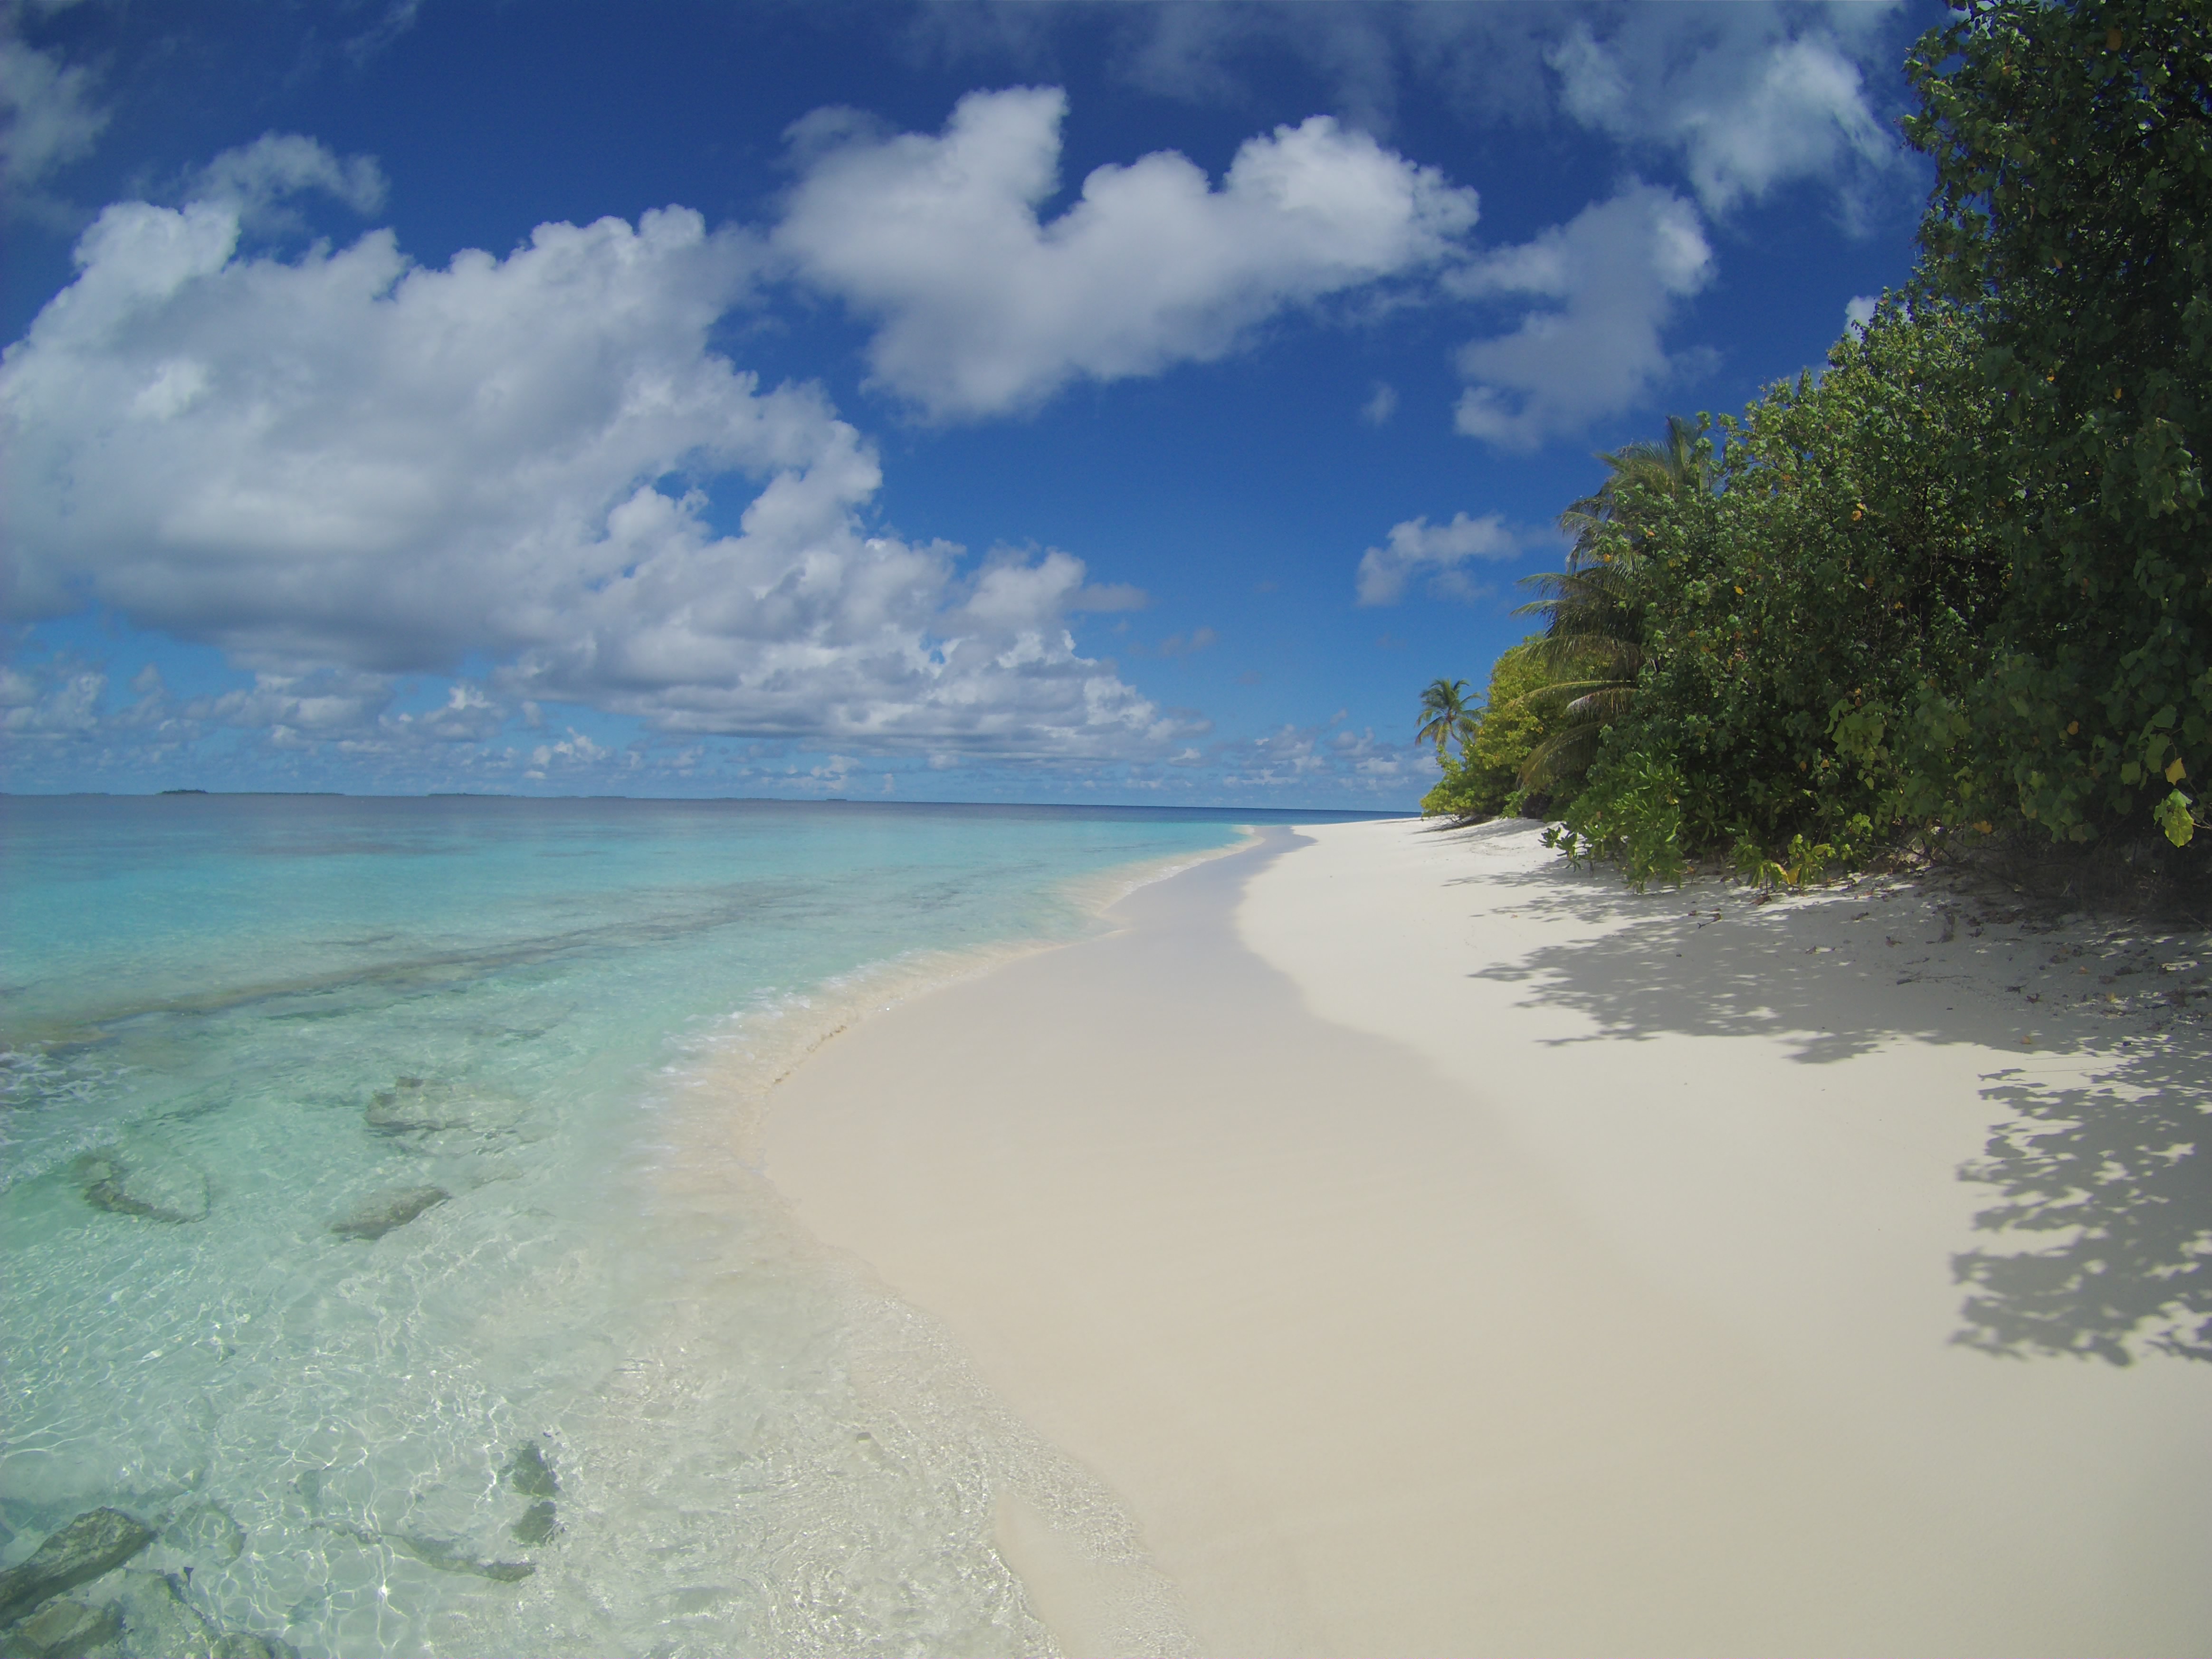
Finally, for the fun of it here are two videos shot in 2.7K on a tropical island just with the water just doing its thing. First, across a quiet bay:

And then, if you need a bit of a 6 minute long time-out from reality, the water just lapping against the shore in beautiful 2.7K footage:

With the ‘norm’ for action cams being 2.7K/4K, these days, it’s definitely a good move for TomTom to support these resolutions. While the footage may not be quite as sharp as the GoPro’s footage in all light conditions, it’s certainly very good in most cases and better than the 1080P footage for certain movements. For fast moving sports, you’ll probably want to stick with the higher frame rate options within the other modes.
Photo Mode:

Lastly on the available modes is the ‘Photo’ option. This mode allows you to take photos. Really, it’s as simple as that.
Actually, to be fair, there are two variants within the photo mode – normal shots and burst shots.

Within the normal mode it’ll take one photo at a time. Whereas within the burst mode it’ll take upwards of 10 shots in 1 second. So you’d want to use burst mode for taking quick action shots where you might not know when the best possible moment to press the trigger is.
For an example of the burst, here’s a gallery of shots taken in burst mode:


Note that you can change to either 1s or 2s. Meaning, either 10 photos in 1 second, or 10 photos over the course of 2 seconds. In either case, the quality appears to be less, even though in theory it’s 16MP.
In either burst or normal mode you can specify a resolution of 16MP or 8MP. For reference, I’m generally seeing 16MP photos taking up about 1.5-3.0MB per photo (depending on colors/etc…). Said differently, just shoot 16MP. There’s no good reason to shoot 8MP, since you’ll get crappier photos (obviously). But more importantly, micro-SD cards are so cheap these days (about $10 for 16GB) that realistically if you’re buying a $400+ action cam you should at least spend an extra $10 for an extra SD card if you need it.

In case you’re wondering just how many photos you have left to take on the camera, it’ll show that on the screen as well. In this case, I’ve got a ‘crapton’. Seriously, it’s an official scientific term.

To get a feel for the quality of the camera, I’ve taken a boatload of photos with it over the last few weeks. Here they are, without any editing of any sort. Just straight from the camera to the website.


All in all, the photo feature works well enough during daylight hours – however it does suffer a bit with any sort of poor lighting conditions. Even when mounted on a tripod, I still see a fair bit of graininess at night.
Mounts and accessories:

TomTom has a number of accessories available for the Bandit. What’s interesting isn’t necessarily the quantity of them (it’s far less than GoPro or Garmin), but actually that some of them are a bit more unique than those by GoPro or Garmin.
The mounting system works by clicking into the grooves on the bottom of the unit. They expand and snap into place. While I didn’t have any issues with the units ever falling off (including a lot of cobblestone time), I did find that the pre-production hardware didn’t quite make as tight of a fit as I’d have liked (thus introducing extra movement). TomTom tells me that’s fixed in production mounts, but I haven’t had a production mount to validate that myself yet. If they do, then I’ll remove that concern here.

To start with the mounts themselves, you do of course have your regular sticky mounts – both flat and curved. And, you’ve got both a tripod and GoPro adapter.

But at the back there you see what’s called the 360° tilt mount. This allows you to rotate the camera 360° (but it has a lock), as well as rotate it up and down.

You can see it popped off here (unlocked):

It’s a fairly versatile mount – and probably best suited for a surfboard, airplane, or vehicular use where you might want to occasionally adjust the view to get other angles. This would allow you to do so without having to get a new sticky each time. For example, I mounted it to a kayak, which worked quite well:

Next you’ve got the bar mount. This takes some of the same concepts as the 360° mount in that it allows you to adjust it with the top bending around.


This is interesting on a bike, because you can change the orientation of the mount easily:

And for example, get a shot or video like this:

Next is the charging cable. I discuss this briefly in the timelapse section, but essentially it allows you to continue charging the unit while recording. Otherwise you have to pop out the batt-stick.

Next you’ve got the microphone wind block, which looks like you’re going to give your TomTom Bandit a little beard:

Then there’s the remote controls. The package comes with two different sized wrist bands:

The remote was useful for getting shots like the below. I triggered the burst photo mode just as we ran over the top of the unit, with the remote visible in my right hand:

You can also use any Bluetooth Smart heart rate strap, which TomTom does sell as an accessory.

Next, you’ve got the Batt-stick container, which is like a condom for your TomTom Bandit Batt-stick. This comes with any extra Batt-stick’s you buy, and is a fully waterproofed case. So you can basically take the extra stick with you, without concern for breakage.

Oh, finally, while not technically a mount, the unit does have an optional Dive Lens and floaty case.

The floaty case is designed such that should you try and drown your unit, it’ll resist politely and just keep floating.

For realz, it floats:


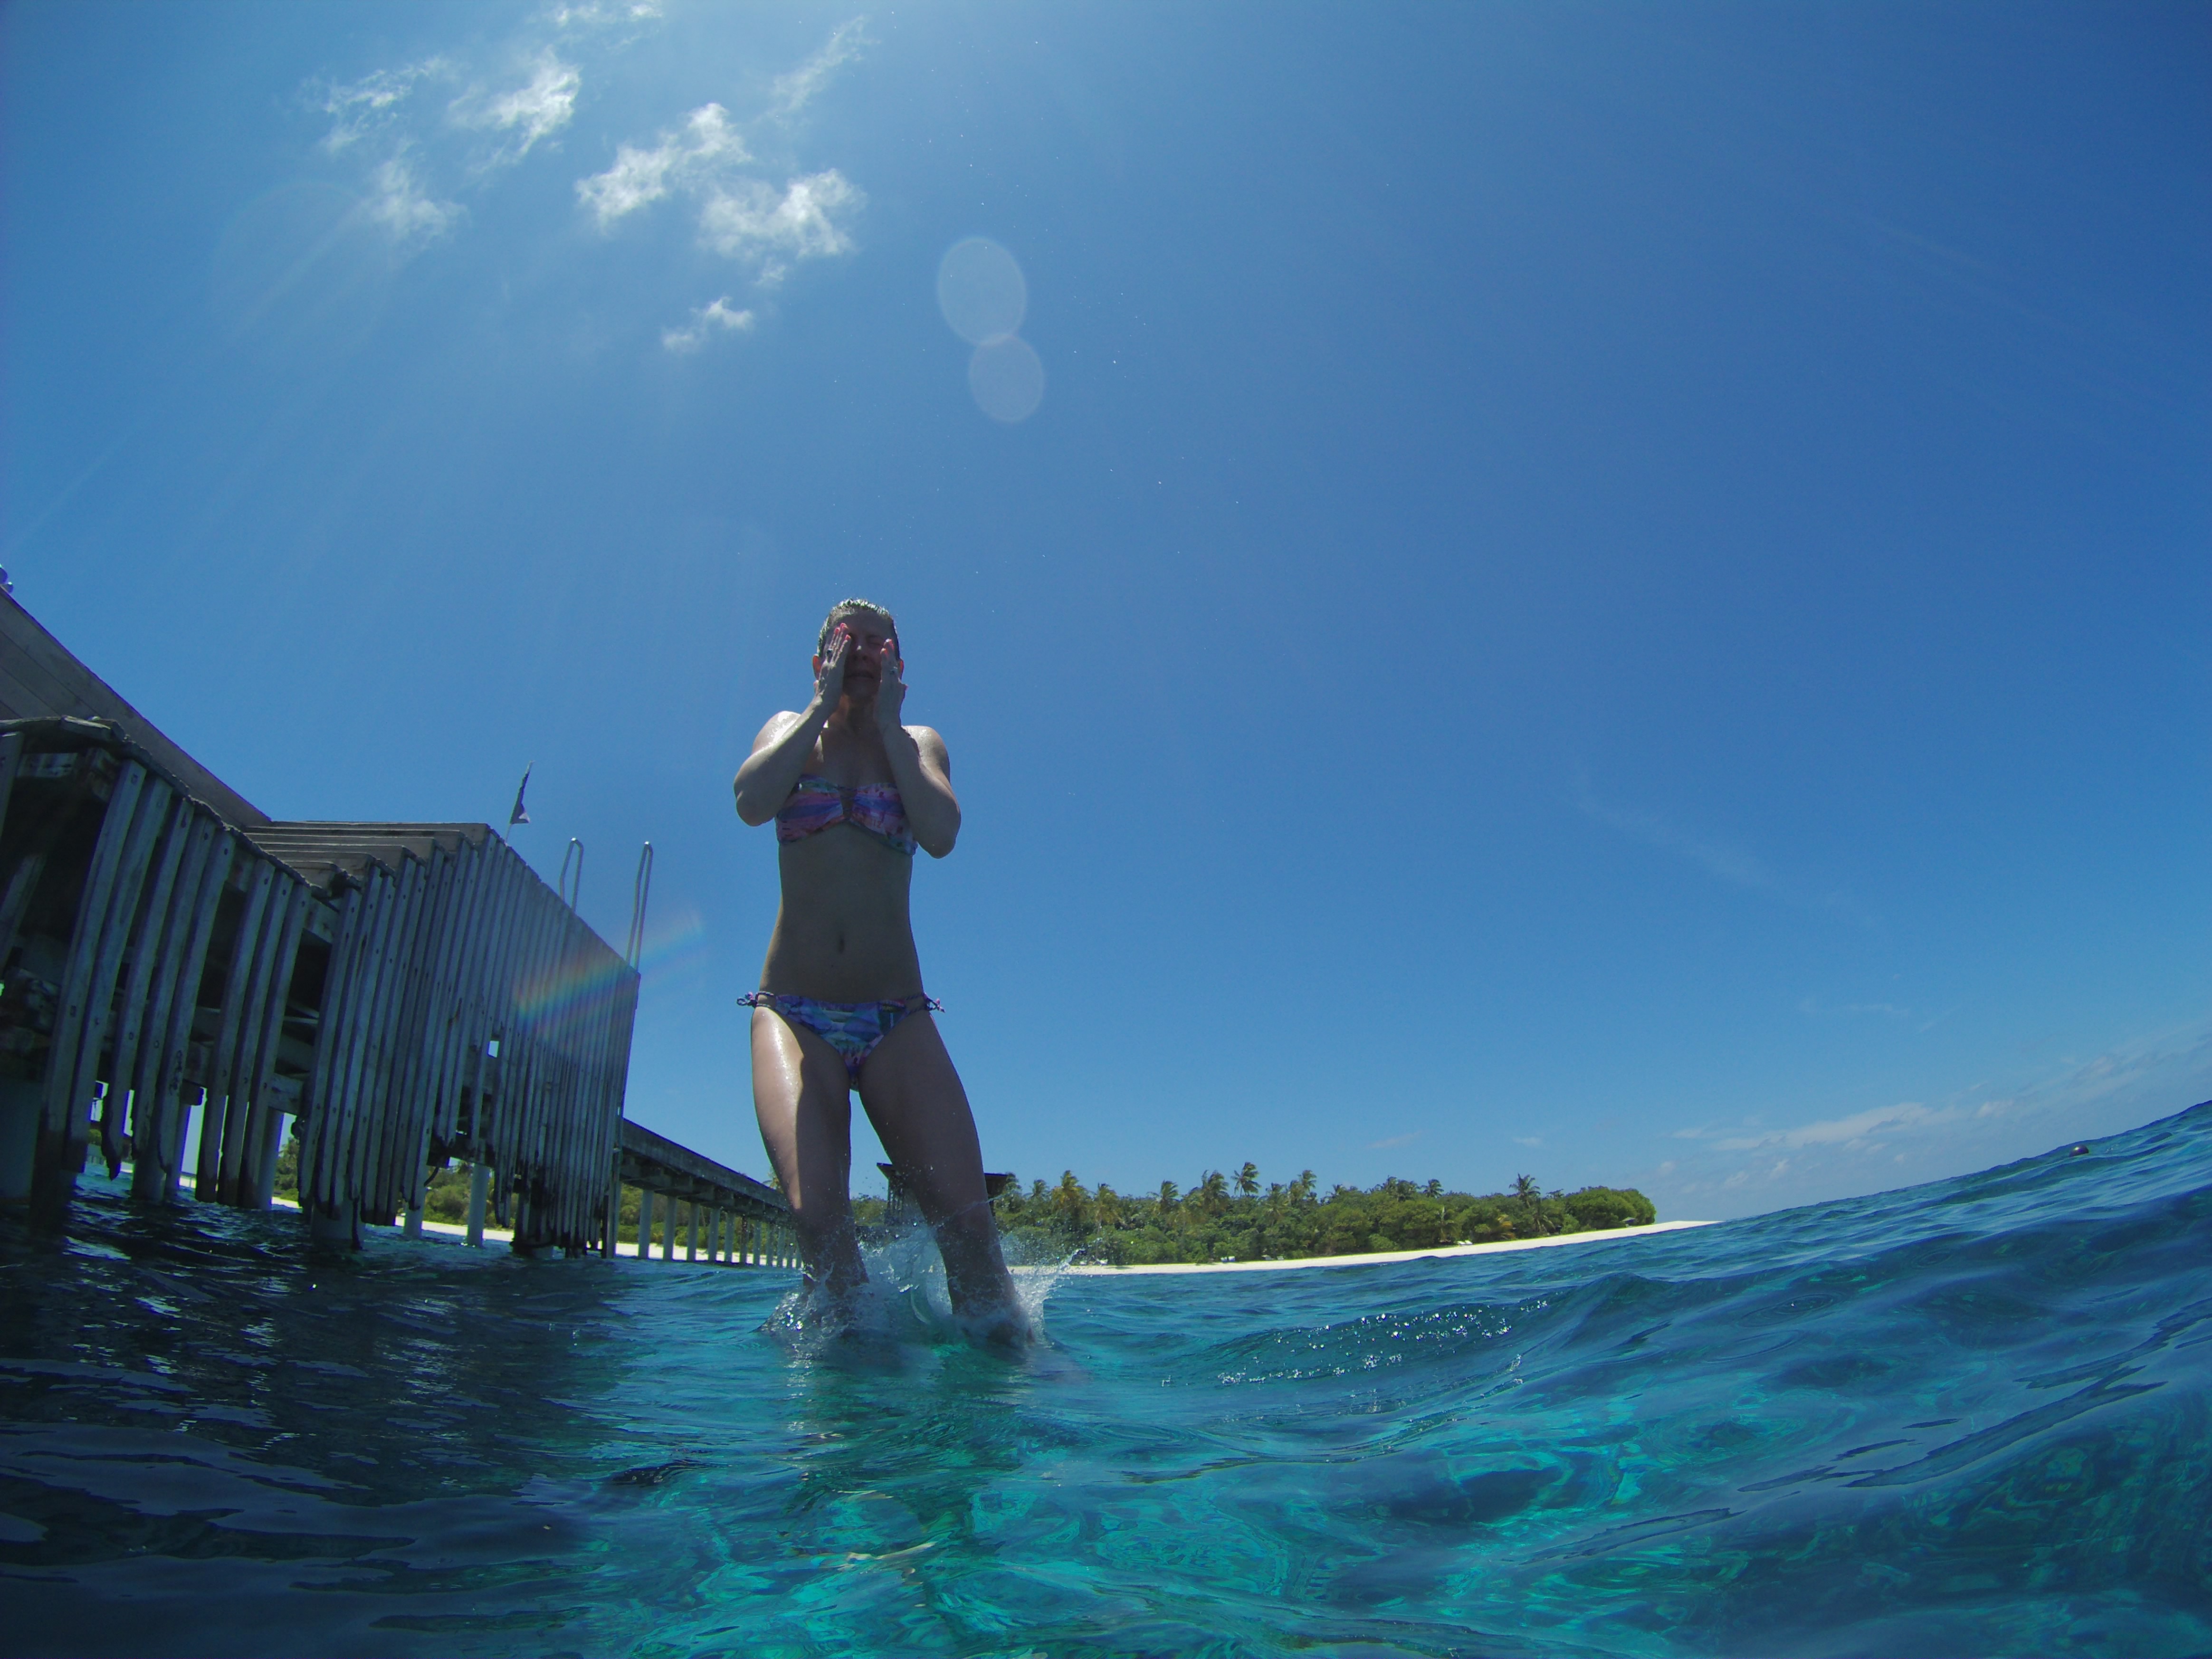
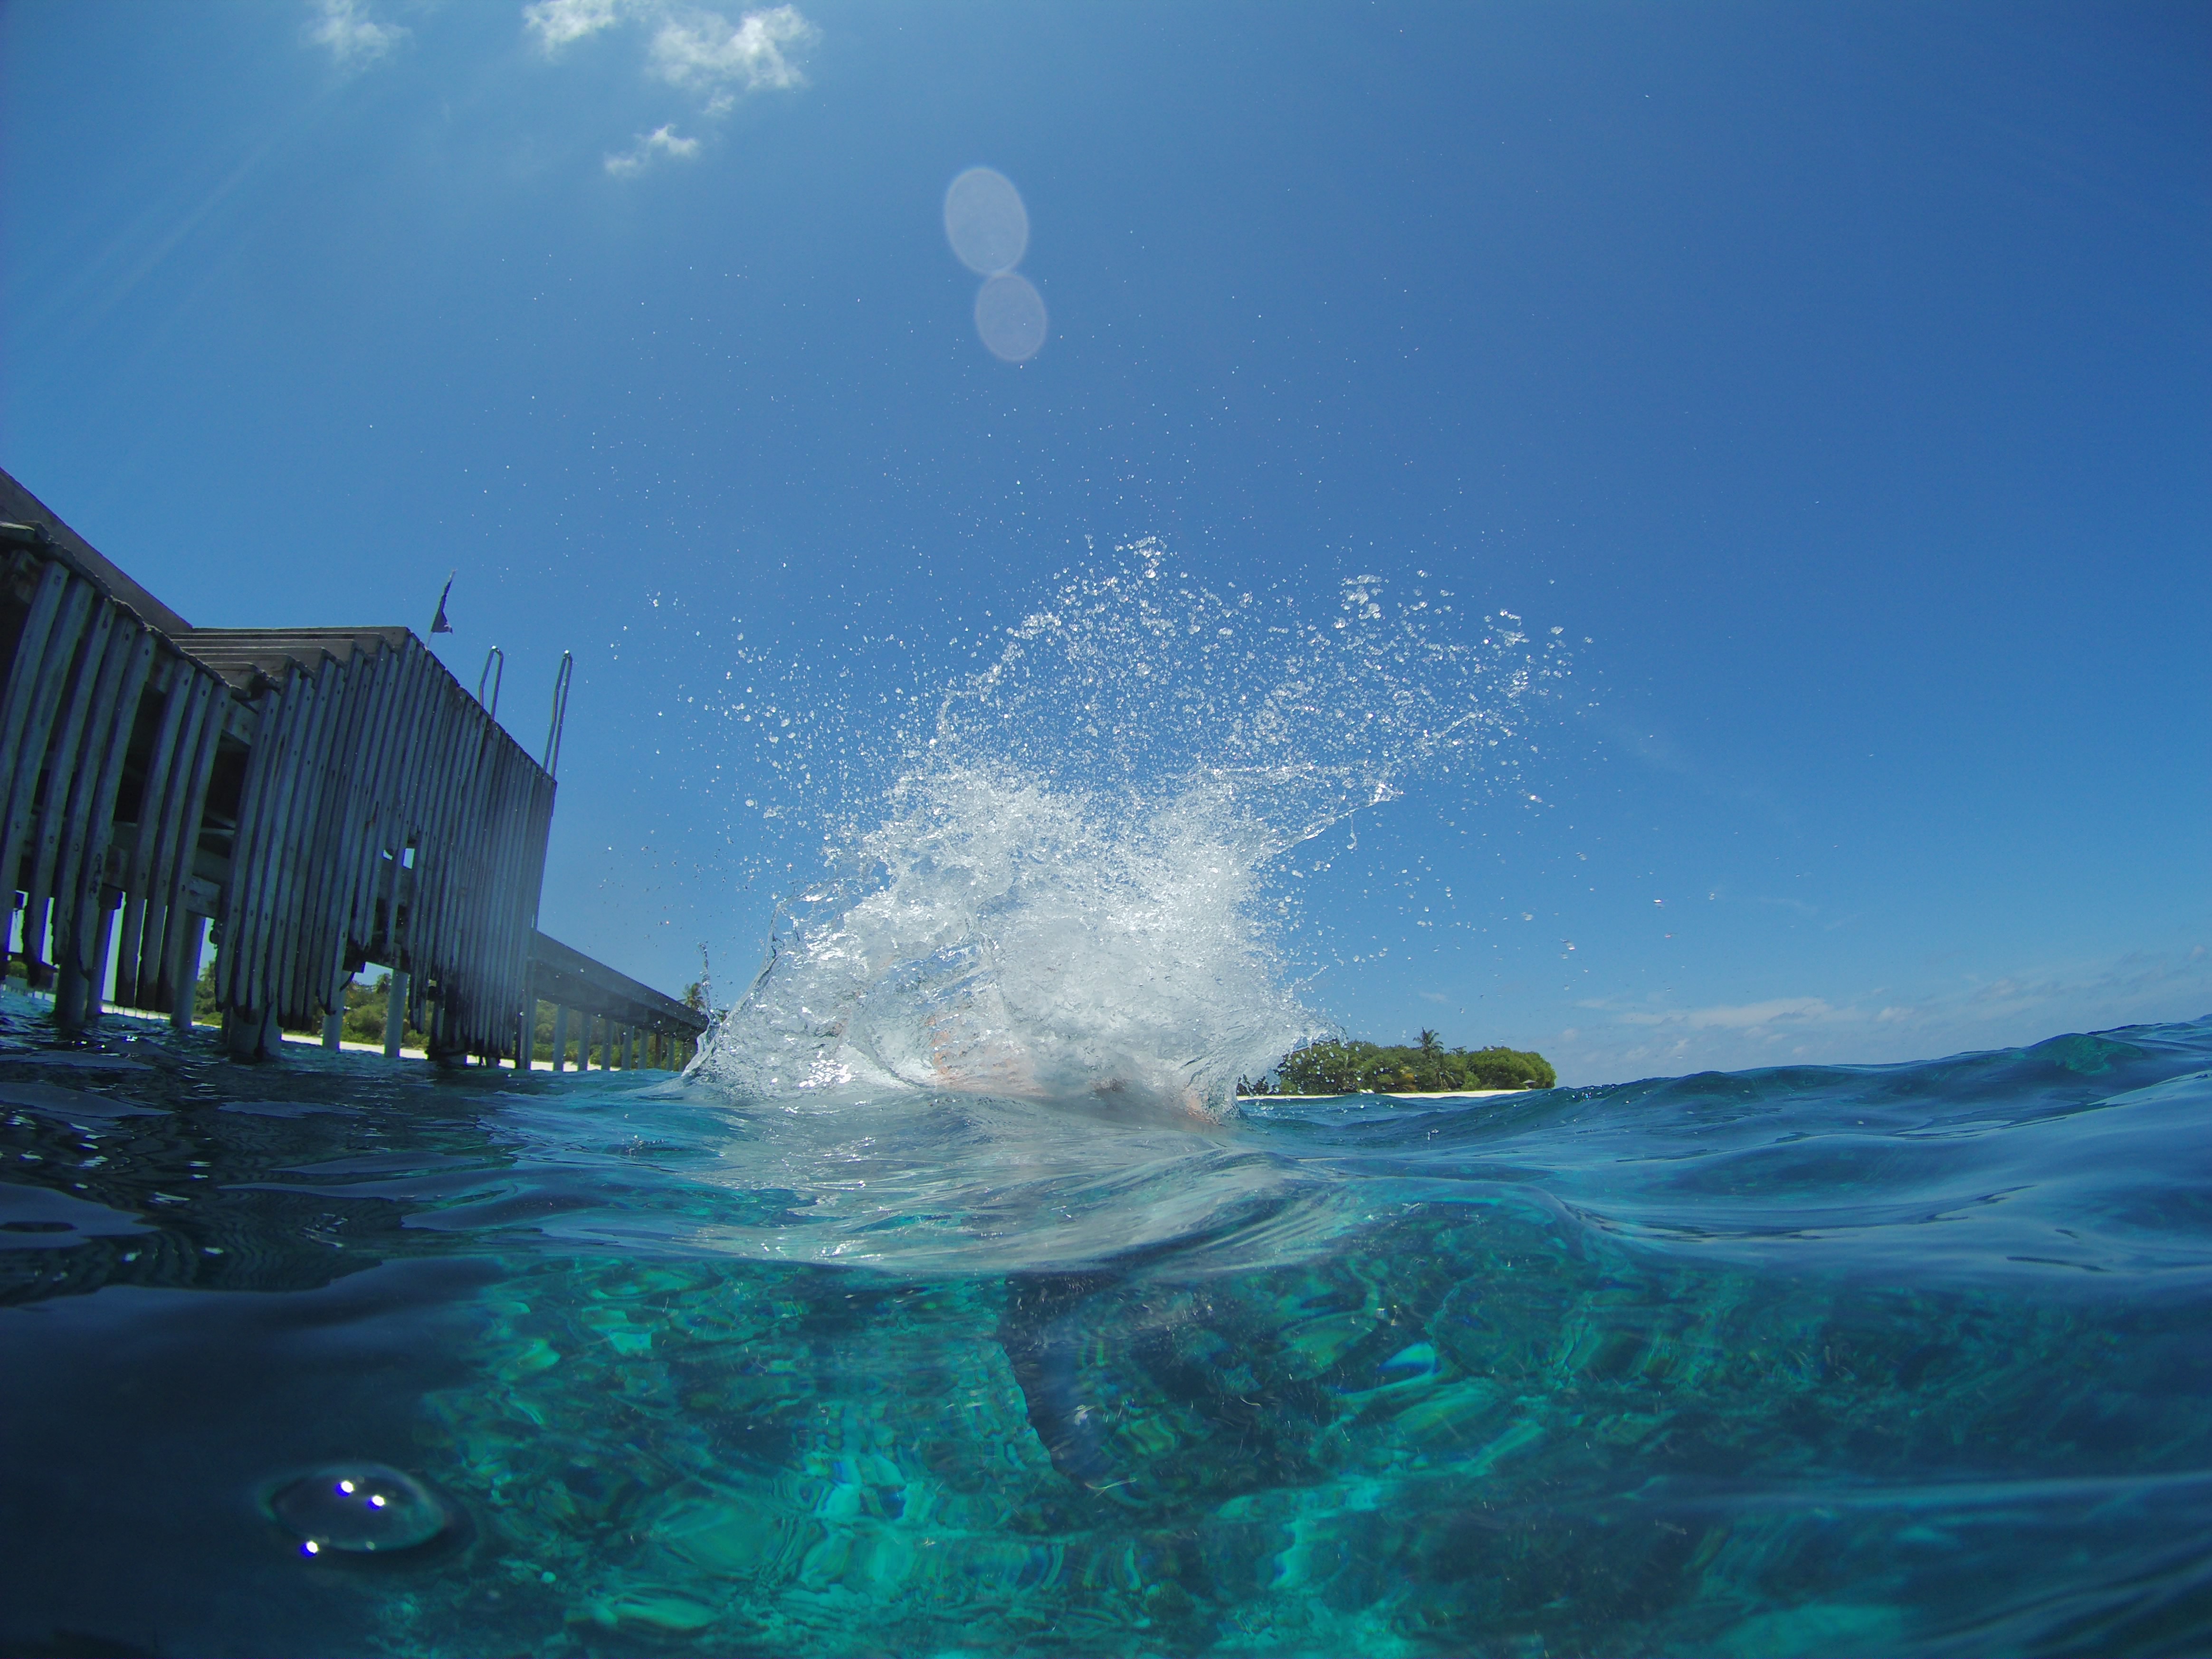
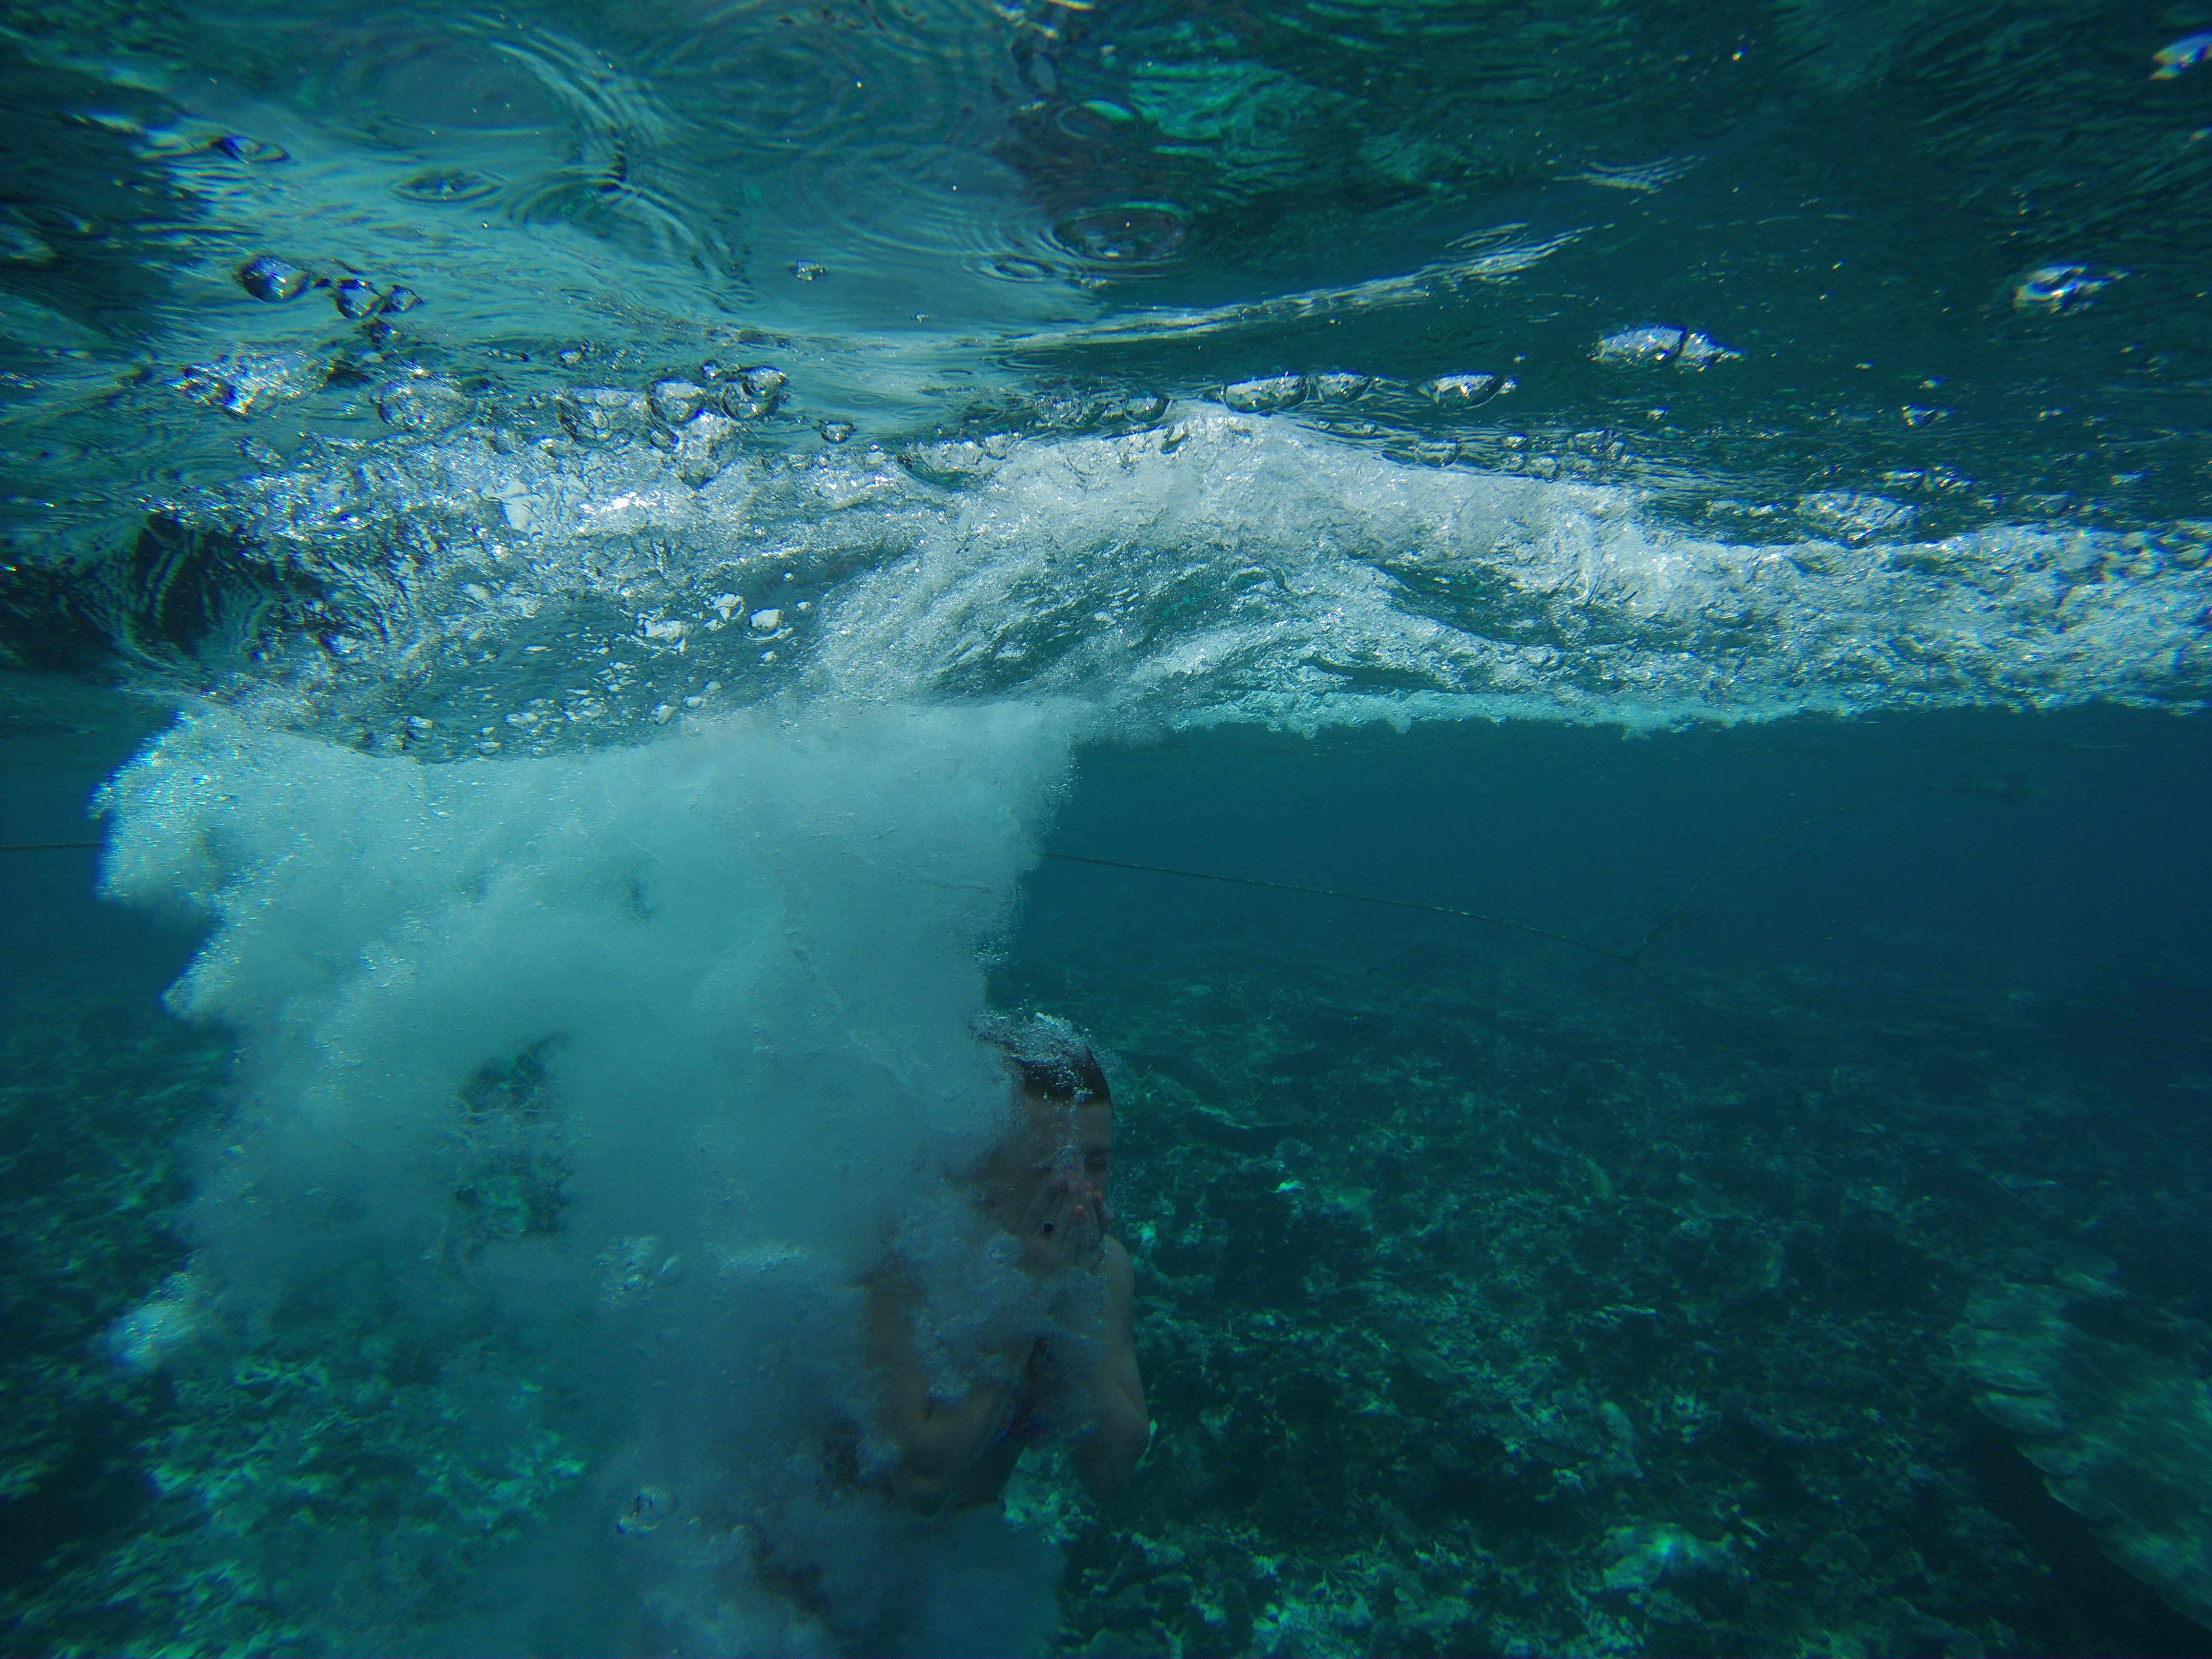
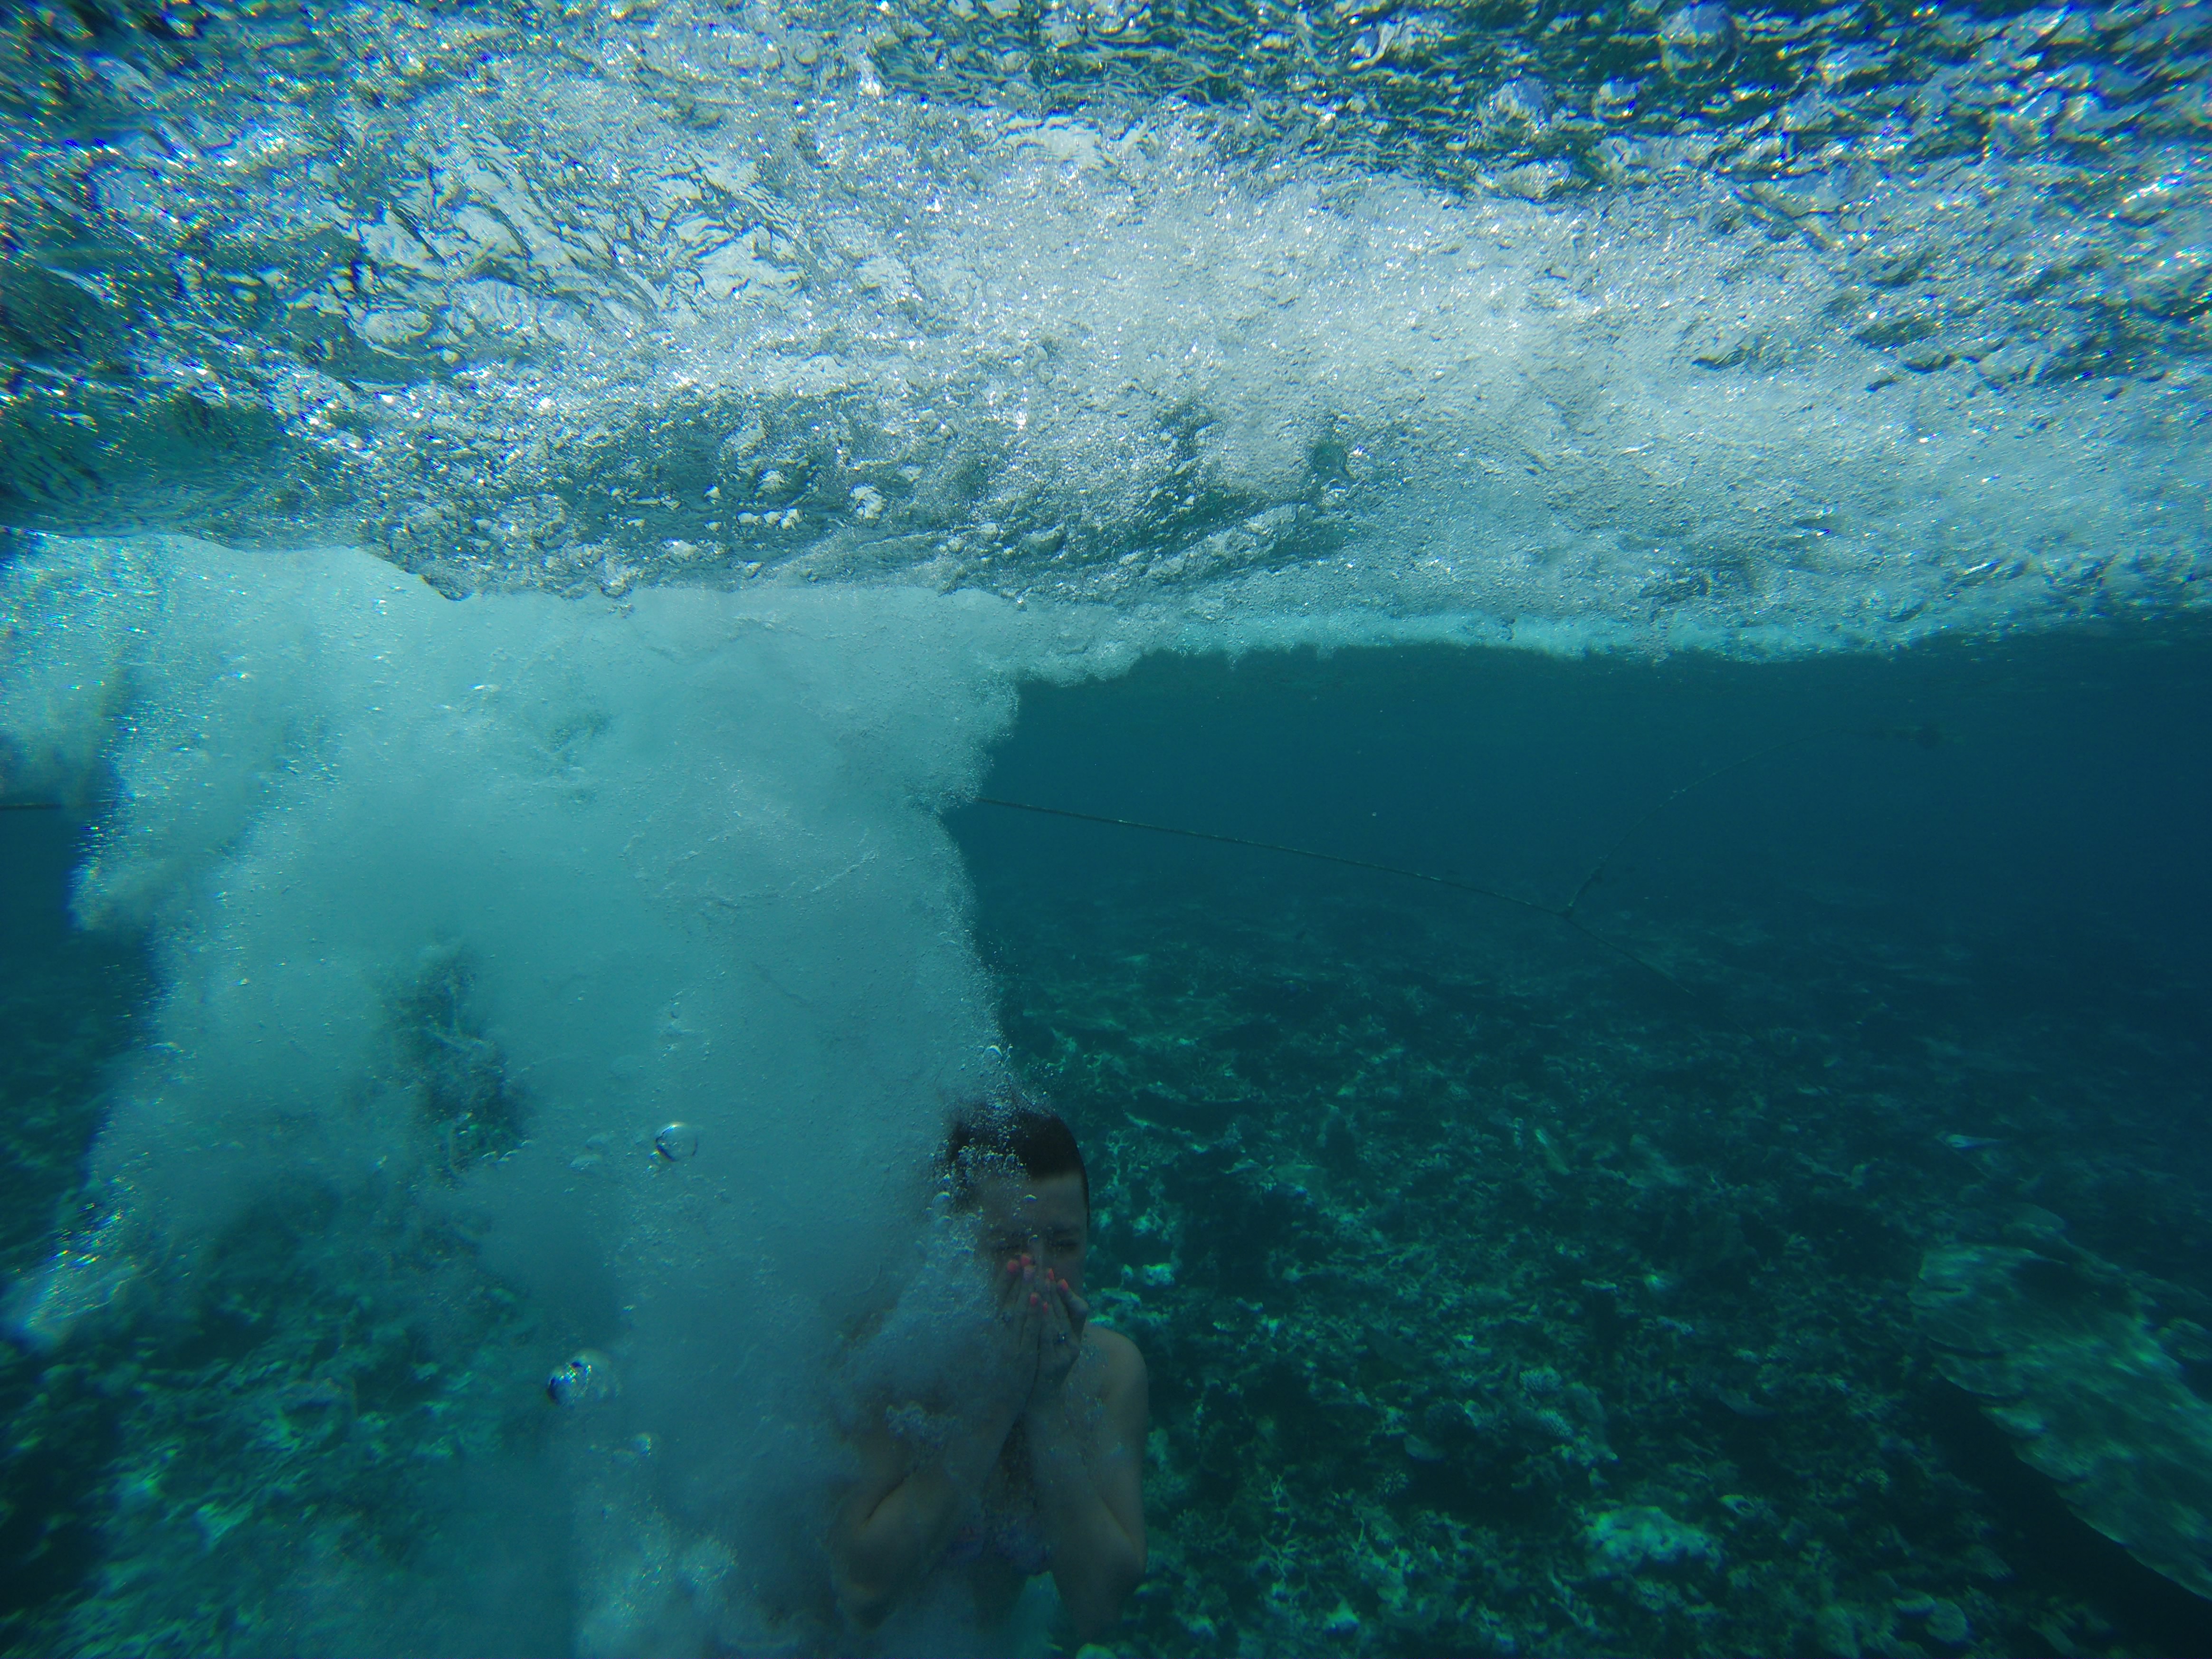
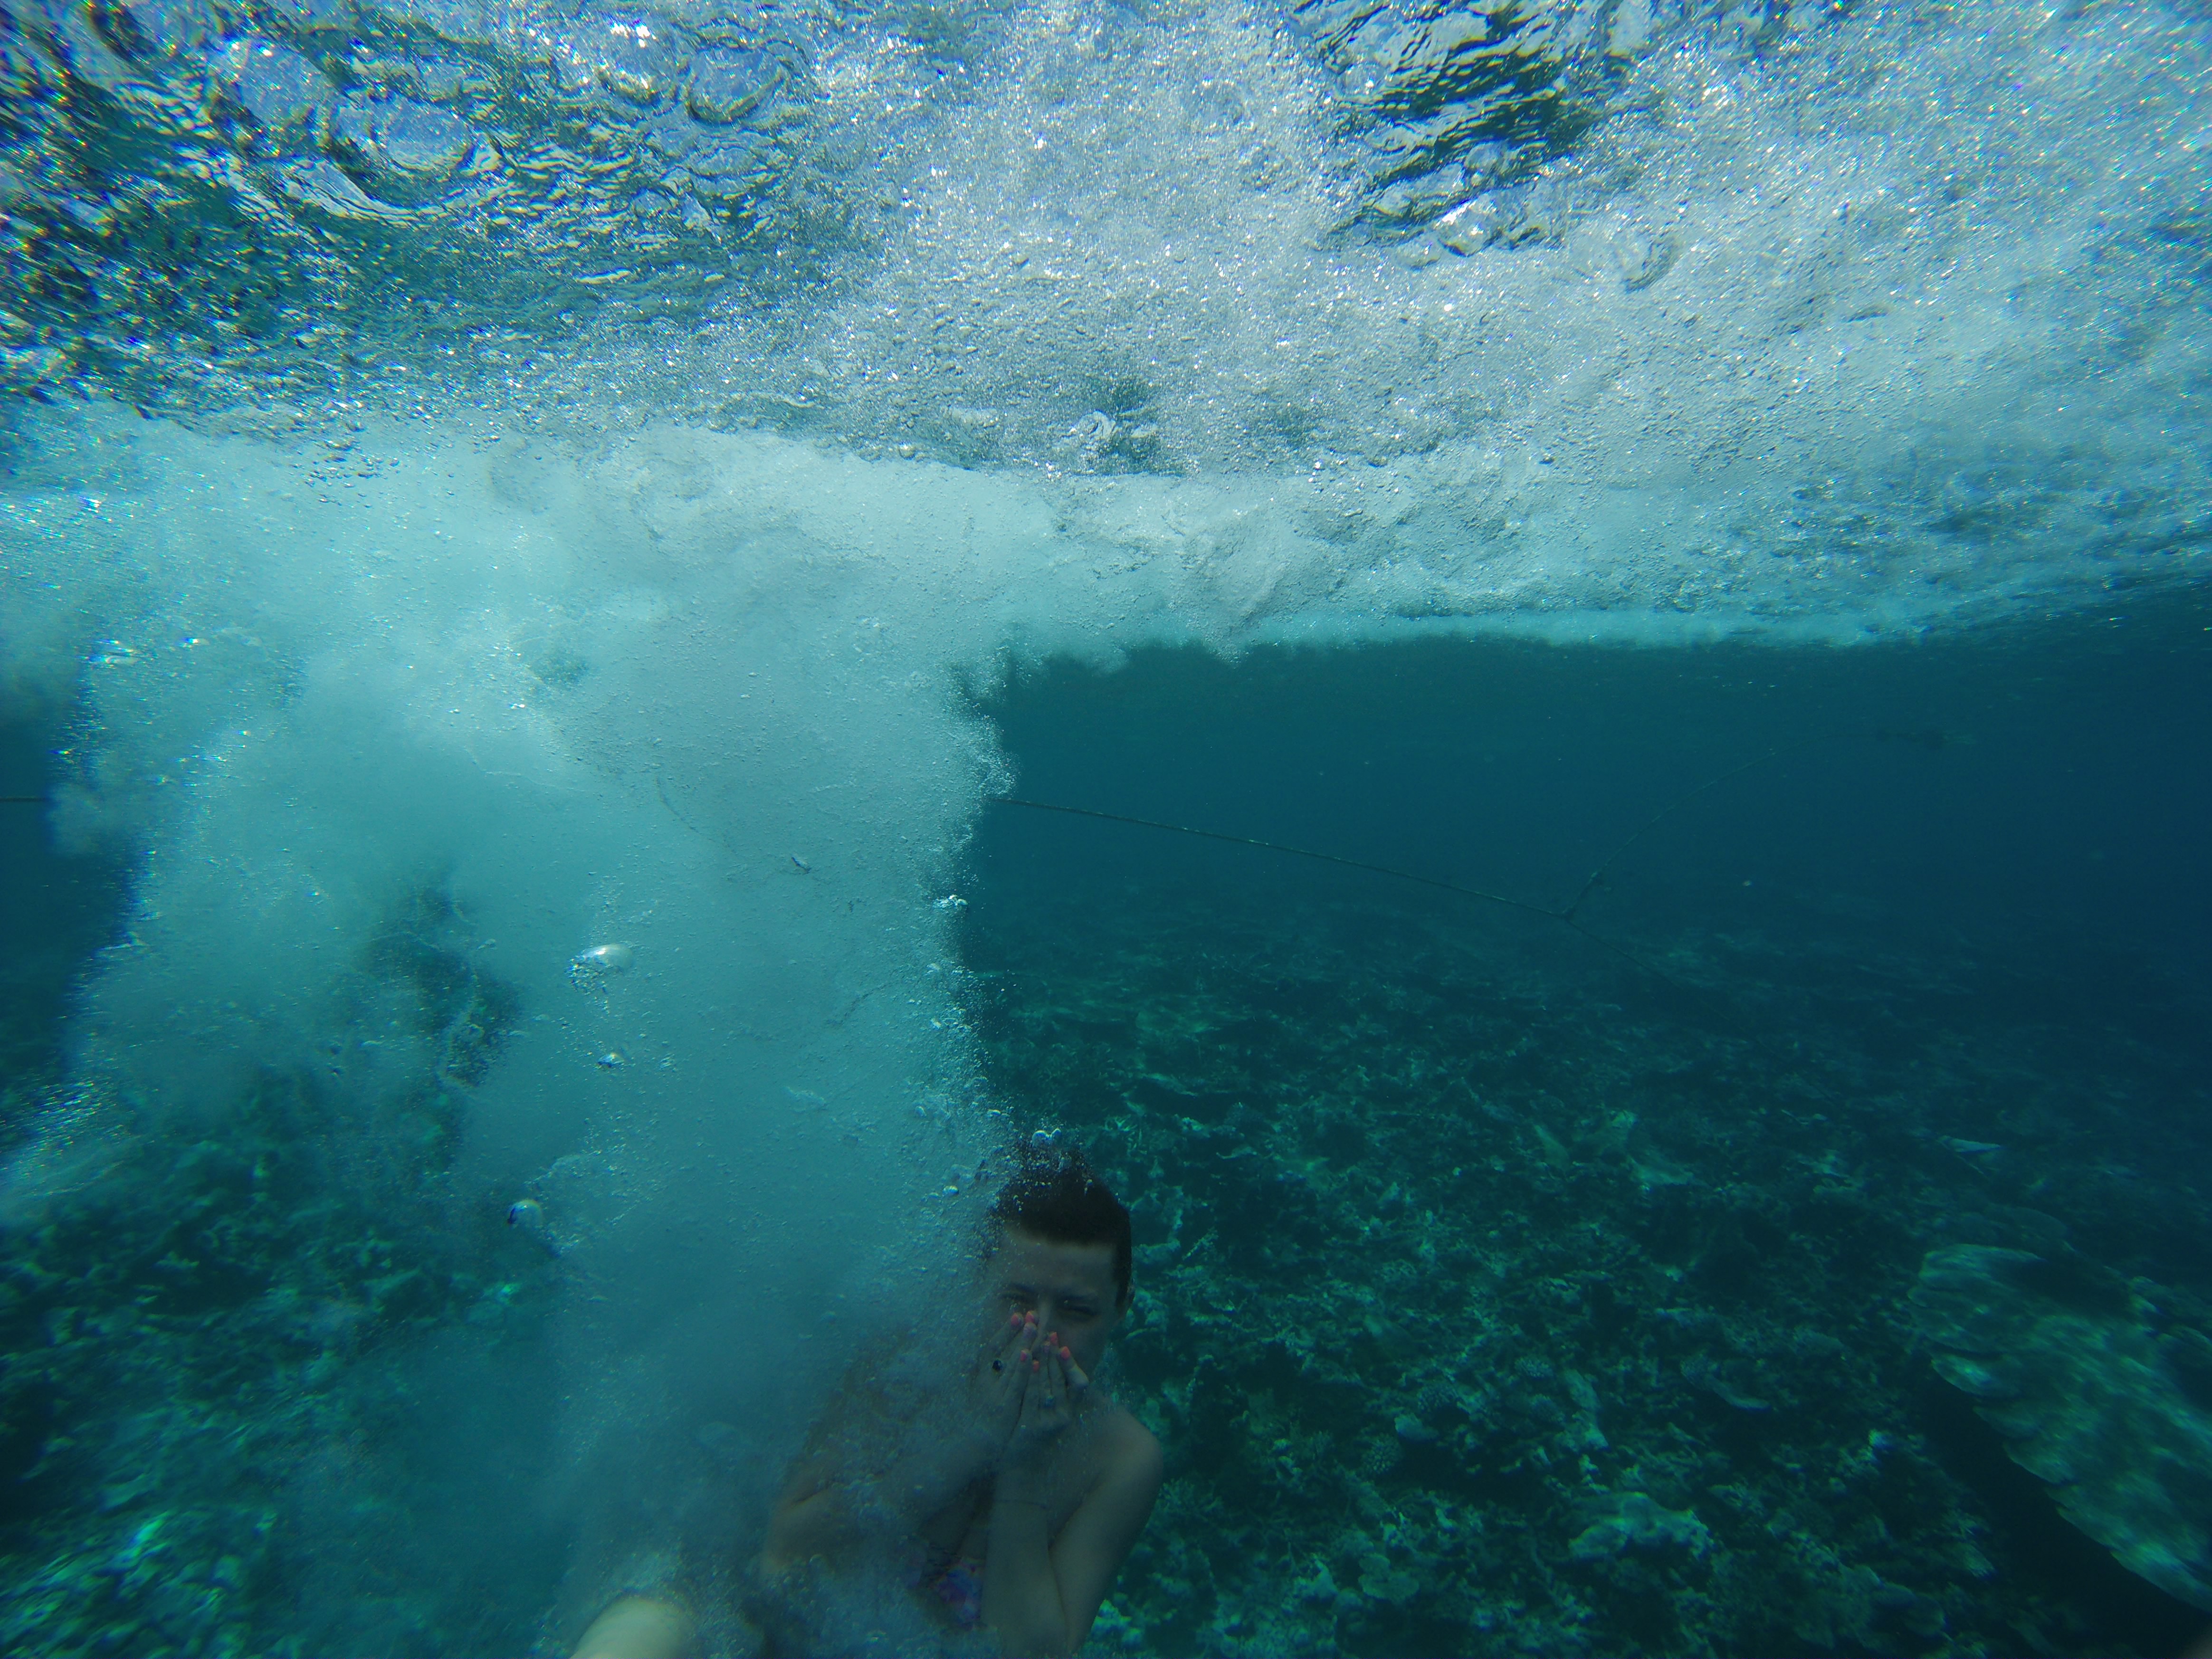
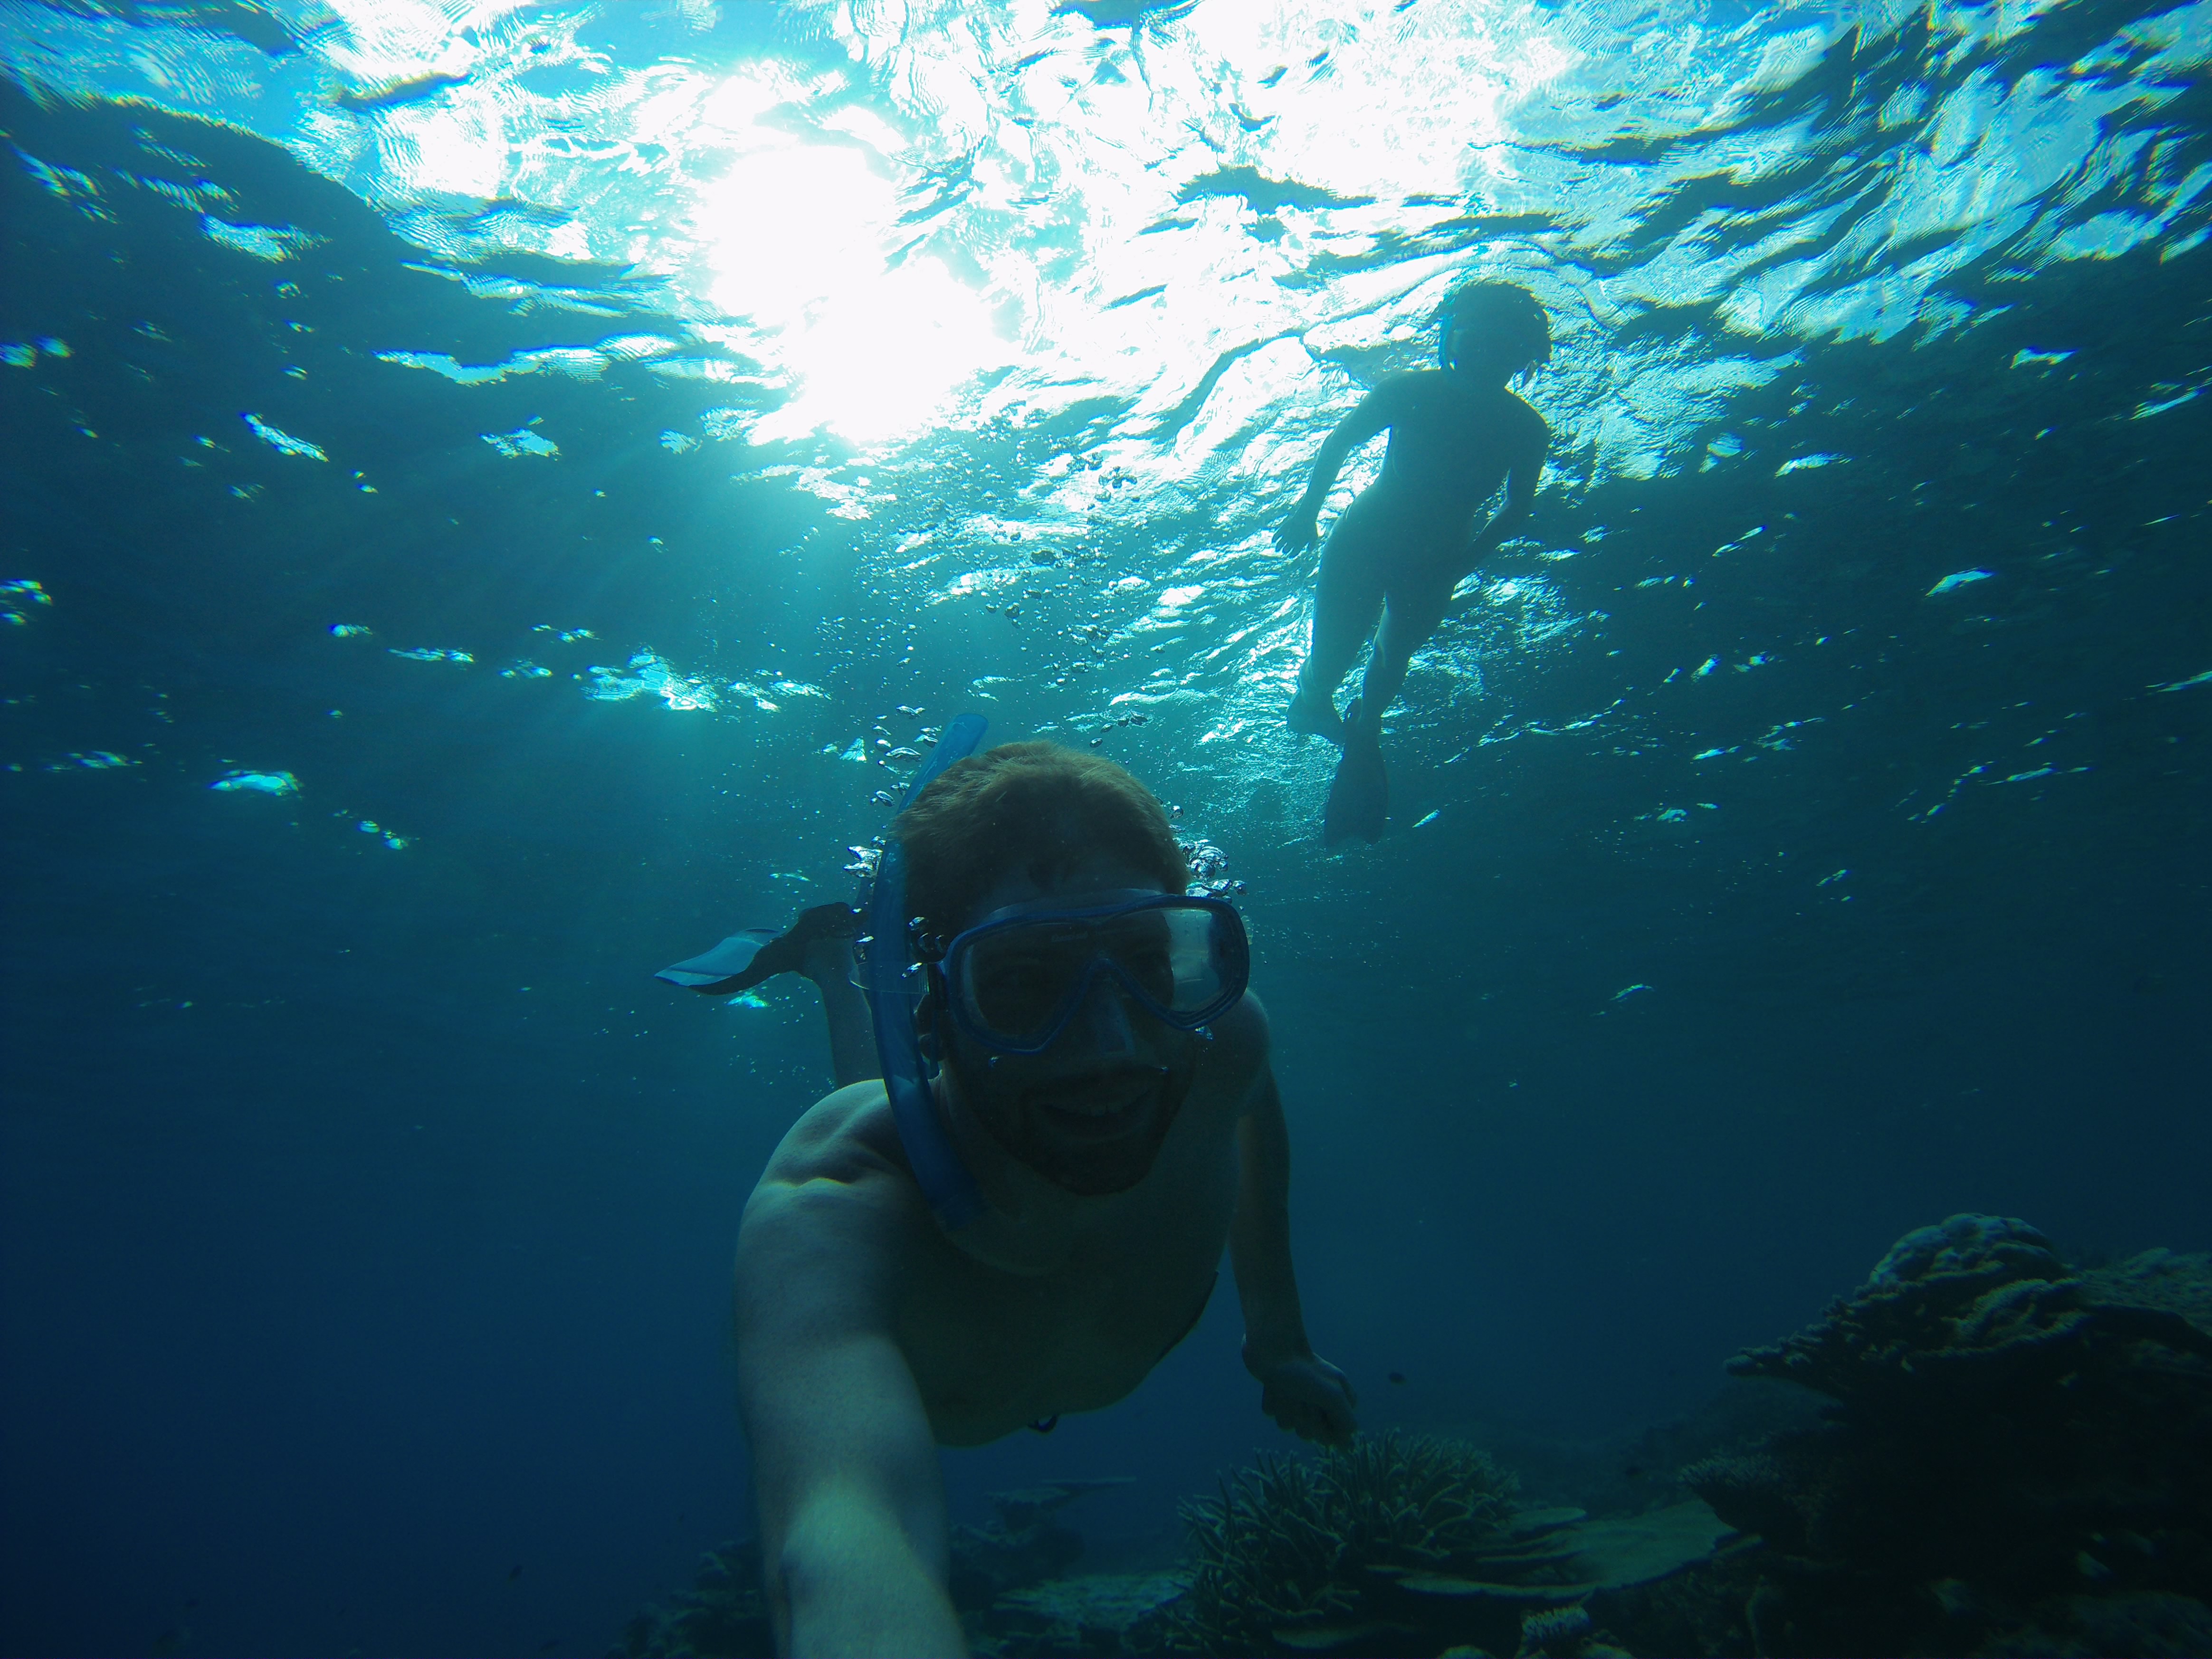
Meanwhile, the base lens is IPX7 (30 minutes up to 1-meter/3-feet deep). However the dive lens accessory is waterproofed to 50m. It just rotates on and locks, just like the battery stick does. I left it underwater for quite some time, just filming away:

All of the underwater photos/videos you see in this post are taken with the dive lens, as are all of the ones jumping into the water.
The Mobile App:

Much of TomTom’s marketing drive behind the Bandit is aimed at its simplicity in terms of editing videos. The goal being that they can simplify the editing process and speed folks to being able to create interesting videos from all the content that was gathered.
The logic behind that idea is sound – editing videos is one of the biggest pain points with capturing so much video content. It often takes hours to get a simple couple minute video file. Much of that time spent wading through long video chunks to try and find the few seconds of content that’s actually interesting.
In order to speed that process TomTom leverages the sensors within the Bandit, notably the following;
– GPS (Global Positioning System)
– Accelerometer
– Gyro
– Altimeter (Barometric)
– Heart Rate (via separate HR strap)
These sensors allow the camera to identify ‘interesting’ moments. For example, the accelerometer can detect accelerating moments such as passing someone. And the altimeter can detect a drop in altitude – such as ski dropping off a cliff. Same goes for the heart rate sensor – picking up HR spikes. And finally, the GPS can be used for shifts in speed.
The TomTom App will then enumerate these data points into the following categories, which are tagged within the app:

To connect the camera to the app you’ll enable WiFi on the device. That’s done by pressing the ‘Up’ button from many of the sport modes:


Then, on your phone you’ll connect to that WiFi network before going back to the app, where it’ll search for the connection.

Now on the app you’ve got a few basic areas to work within. First is that you can use the phone as a viewer for the live video feed from the camera, such as below. You can control the camera including which mode you’re in and then start and stop the camera:

This is useful when you might have the camera mounted in a location that could be tough to validate the right angle. Or, if you put it on your head and want to validate the view there.
Also of note is that TomTom heavily emphasis the lack of delay over WiFi. And it’s true, there’s only a split-second delay. Check out the below photo I took. Note the man walking. Note the position he’s in relative to the poles – it’s virtually identical both on the iPhone app as well as in real-life (as taken from my camera).

Next is after you’ve controlled/shot the video. This is where you start focusing on the editing piece.
To begin you’re going to head into the ‘My Library’ area. This is where you have basically two two ways of viewing things: Full clips, and Highlights. Full clips are those that you’ve created by pressing the start and stop button. If you press start and then press stop 5 minutes later, you’ll see a clip for 5 minutes (if you press stop an hour later, you’ll see a bunch of 19 minute clips).


Whereas highlights represent both automated and manually created highlights, such as those triggered by acceleration changes.

You can select any regular clip or highlight, and tap it to copy it to your device.

Alternatively, you can tap the little checkbox to then copy it to your movie you’re about to make.
Of course, creating a movie this way is perhaps the longest process. Instead, TomTom focuses on the ‘Shake’ option (I suppose as in, ‘Shake to make!’).

This option goes out and finds interesting clips over the last 5 days and pulls them all together into an automated movie. It does this by looking at the various highlights you, or it, have created.

The process only takes a second or two, so it’s impressive in its speed.

The challenge with this is that it pulls in clips that might not be relevant, such as prior to the start of your trip. So if you need to edit those out (or slightly increase/decrease the length) you can do so from the timeline.

From there you can also add in overlays (aka dashbaords, aka data goodness). These show metrics like your speed or g-forces:

Additionally, you can add in music from your mobile phone, though it doesn’t contain any music library of preselected songs.

Once you’re done, you can create the video compilation by pressing the ‘Share’ button. This starts the process of transferring all the files from the unit to the phone, where it’ll then edit them together:


Finally, you can share this video to various sources, such as YouTube and Vimeo:

While this whole creation process might sound easy – in reality I actually found it sorta convoluted. It’s almost overthought, whereby the goal of simplicity resulted in more complexity than just sticking with the “good ole way”. Which isn’t to say the old way is actually good, but I think TomTom has a bit of work to smooth out the wrinkles (and it’s pretty rough today).
For fun, The Girl also tried out the app a bit and while she really liked the automatic highlights piece (even if they were slightly off), she found the ability to create a video from those highlights a bit tricky as the app doesn’t really sort or allow you to filter all your clips. So it became kinda overwhelming for her (and I) since we shot a lot of little clips – ironically the exact thing the app was supposed to help with.
On the bright side, none of this impacts your ability to use the video clips in other apps. Nor does it mean TomTom won’t find a happy medium here. In my talking with them they already surfaced up a bunch of upcoming changes/tweaks that will address some of my concerns. For example, today when you Shake and Bake, it pulls any clip from anytime on the camera (so I got clips from pre-vacation in my vacation mix). Whereas, going forward there will be an option to limit the timeframe of the clips selected.
Frequently Asked Questions (FAQ):

I figured there might be a number of questions that weren’t directly answered anywhere within the review to date. For that, I’ve put together an FAQ of sorts.
When will the Bandit start shipping?
The current plan is for near-immediately, coming up in early May.
What about US availability?
At present, TomTom is only launching the unit in Europe. They noted they’ll launch to the North America and Asia-Pacific later in the summer. Why on earth you’d launch solely to the one geographic area that has historically least used action cameras more than the other two geographies is beyond me. But then again, I’m not a marketing person…
Does the TomTom Bandit shoot 4K video?
Yes and no. Technically it shoots it at 15FPS, which is about half the normal frame rate of video. Instead, it shoots 2.7K at 30FPS, which is the normal frame rates. These specs are on par with what GoPro offers in their latest Hero4 Silver. Whereas in the higher end Hero4 Black they offer the full 4K at 30FPS.
Now, it does create 4K 30FPS videos when in timelapse mode, though I’ve found the quality rather lacking there.
Does the Bandit have a desktop app to use for editing?
No, it doesn’t, though the company tells me it is coming later this year.
Can I still use the footage in other programs?
Yes, I’ve tested it in a few programs (Windows Movie Maker, GoPro Studio, Garmin VIRB), and it works fine. However, note that in those applications you won’t see the highlight tags, nor any of the GPS/sensor data.
What about YouTube?
As noted earlier on, for reasons slightly unclear right now – all the clips fail to upload at a resolution greater than 360p to YouTube. TomTom is aware of the issue and investigating. As noted, in order to get around that, for this review I passed all clips through a simple converter that stripped whatever was causing the YouTube converter to fail, to be successful. I see no difference in quality between the two. When clips were great previously, they’re great after. And when they sucked previously, they still suck. In any case, I can’t imagine this won’t be fixed in the coming days.
What’s the battery life look like?
It’s reasonably good. I rarely had a situation where battery was an issue. Doing a test at 1080p/60fps I got 2hrs 10mins non-stop recording (on a warm 80°F night). I got a bit longer during time-lapse shoots as well. You can also buy extra battery sticks. These include the little plastic case thing that makes them waterproof, which is kinda neat.
Can you update the firmware on the Bandit?
Yes, you’ll do so via the mobile phone app, which will send the update file wirelessly to the Bandit, and then update it upon the next reboot.
Would you recommend the Bandit or the GoPro?
Well, there’s a bunch of GoPro models. So if you compare it to the base GoPro Hero 2014 edition for $129US, then I’d recommend the TomTom. However, if you compare it to the GoPro Hero4 Silver/Black, then in general I’m going to recommend the Hero4 Silver/Black – unless you like the speed/sensor aspects within the unit enough to sway you. If you don’t plan to use any of that, then at this stage it’s hard to justify the TomTom over the Hero4 line. If however, TomTom puts some solid work into their automagic app, then my decision might be swayed for certain audiences (those that care less about image quality). For those doing any sort of video editing at a higher quality level, especially with slow-mo type footage, then the GoPro quality is hard to beat.
Would you recommend the Bandit or the Garmin VIRB X/XE?
It depends a little bit about how much you value image quality at 2.7K/30fps versus speed/acceleration/sensor data. See, unfortunately the new Garmin VIRB X/XE units don’t do 2.7K footage, whereas the TomTom does. And, TomTom’s 2.7K footage is pretty good. Meanwhile, Garmin’s sensor related data aspects are unbeatable these days. Currently TomTom only has two metrics (acceleration and speed), though they note others are coming. Whereas Garmin has quite frankly more ways to capture and show data than I could begin to number. Had they gone with 2.7K/30fps, they’d have a runaway winner.
So, if you’re mostly shooting at 1080p, then Garmin is probably the better choice. Whereas if you’re doing 2.7K footage and want just some basic sensor pieces, then the Bandit is the way to go.
What about the Sony FDR-X1000V 4K action cam?
They just started shipping the FDR-X1000V in the last few weeks, and about the same time this review publishes, the FedEx man will be delivering the units I ordered. So, check back in about a month and I’ll be happy to let you know. Sony continues to really push the envelope though on merging video quality with most of the same metrics found in the Garmin camp. What they lack that Garmin has though is connectivity to sensors (i.e. Heart Rate, Cadence, Power, and now automotive and boating related sensors too). On the flip side, they’ve got 2.7K/4K footage, as well as the concurrent camera preview options on the app. Oh, and they’re actually shipping today.
Product Comparison Tool:
I’ve added in the TomTom Bandit action cam to my product comparison database/tool. In doing so, you can compare it to any other action camera that I’ve reviewed or had hands-on time with.
For the sake of this page, I’ve created a view that shows the TomTom Bandit, the GoPro Hero4 Silver, the new Sony X1000V, and the new Garmin VIRB X. These are all basically in the same price range as the Bandit. But of course, you can mix and match your own comparison charts here.
| Function/Feature | TomTom Bandit | GoPro Hero4 Silver | Garmin VIRB X | Sony FDR-X1000V |
|---|---|---|---|---|
| Copyright DC Rainmaker - Updated December 3rd, 2020 @ 4:37 am New Window | ||||
| Price | €429 | $399 | $299 | $499 |
| Availability | Europe initially, US June | Global | Summer 2015 | Global |
| WiFi Builtin | Yes | Yes | Yes | Yes |
| Bluetooth to Phone | No (supports Bluetooth sensors on device) | Yes | Yes | No |
| Recording Light | Yes | Yes | Yes | Yes |
| GPS builtin | Yes | No | Yes | Yes |
| Altimeter builtin | Yes (Barometric) | No | No (uses GPS elevation) | No |
| Water Resistant | IPX7 without dive lens, 50m with dive lens. | 40m with included case | 50m | 3m with included case |
| Accellerometer | Yes | No | Yes (+Gyroscope) | Yes |
| Video Preview Screen | No | Yes | No | Separate wristband accessory |
| Voice Control | No | Battery | TomTom Bandit | GoPro Hero4 Silver | Garmin VIRB X | Sony FDR-X1000V |
| Recharges via | USB stick builtin | Mini-USB | USB | Micro-USB |
| Removable battery | Sorta | Yes / 1160 mAh | Yes | Yes |
| Recording Time | 3hrs | 2 Hours | 2 Hours | 4 hours |
| Secondary attached battery | No | Accessory | No | No | Storage | TomTom Bandit | GoPro Hero4 Silver | Garmin VIRB X | Sony FDR-X1000V |
| Storage Card Type | MicroSD | Micro-SD | Micro-SD | Micro-SD |
| Maximum Card Size | 128GB | 64GB | 128GB | 64GB | Video | TomTom Bandit | GoPro Hero4 Silver | Garmin VIRB X | Sony FDR-X1000V |
| 4K | 15 FPS | 12.5/15 fps | No | 24/25/30 fps |
| 2.7K | 30 FPS | 24/25/30 fps | No | No |
| 1440p | No | 24/25/30/48 fps | No | No |
| 1080p | 30/60 FPS | 24/25/30/48/50/60 fps | 25/30 FPS | 24/25/30/50/60/100/120 fps |
| Records 360* Video | No | No | No | No |
| Automatic Image Rotation | No | Yes (Feb 2015 update) | Yes | No (Manual setting) |
| Image Stabilization | No | |||
| Looping Recordings | No | Yes | Yes | Yes |
| Timelapse Mode (constructs timelapse video) | Yes | Yes (Feb 2015 update) | Yes | No |
| Travelapse/Hyperlapse Mode | No | |||
| Pro Settings Mode | Yes | Audio | TomTom Bandit | GoPro Hero4 Silver | Garmin VIRB X | Sony FDR-X1000V |
| Internal Microphone | Yes | Yes | Yes | Yes |
| Supports Bluetooth Microphones | No | |||
| Pro mode with seperate tracks | No | Photo | TomTom Bandit | GoPro Hero4 Silver | Garmin VIRB X | Sony FDR-X1000V |
| Megapixels | Up to 16 MP | 12 MP | 12 MP | 12.8 MP |
| Timelapse Mode (photos on interval) | No | 0.5,1,2,5,10,30,60s | Yes | 1,2,5,10,30,60s |
| Burst Mode | Up to 10/second | Up to 30 photos/second | UP TO 10 PHOTOS/SECOND | Up to 10 photos/second |
| Continuous Shooting Mode | No | Yes | Yes | No |
| Concurrent w/video mode | No | Yes | Yes | No |
| Records 360* Photo | No | No | No | No |
| Pro Settings Mode | Yes | |||
| RAW photo creation support | No | Sports | TomTom Bandit | GoPro Hero4 Silver | Garmin VIRB X | Sony FDR-X1000V |
| Skiing Mode | No | No | No | No |
| Control from sport computer | No | No | Yes | No |
| ANT+ Sensor Connectivity | Bluetooth Smart sensors | No | Yes | No |
| Bluetooth Sensor Connectivity | No | |||
| ANT+ Profile Types | Bluetooth Smart HR sensor | No | HEART RATE, SPEED, CADENCE, TEMPERATURE, POWER (+ Bluetooth OBD data) | N/A |
| Overlays sport data on recording | Yes | No | Yes (via Garmin apps) | Yes | Phone | TomTom Bandit | GoPro Hero4 Silver | Garmin VIRB X | Sony FDR-X1000V |
| App platforms available | iOS (Android early summer) | iOS/Android/Windows Phone | iOS/Android/Windows Phone | iOS/Android |
| Use as remote control | Yes | Yes | Yes | Yes |
| Video preview | Yes | Yes | Yes | Yes |
| Transfer video-photos from camera | Yes | Yes | Yes | Yes |
| Multi-camera live control/preview | No | NO | Up to 10 cameras | Yes | Software | TomTom Bandit | GoPro Hero4 Silver | Garmin VIRB X | Sony FDR-X1000V |
| App for computer | No (later 2015) | GoPro Studio | VIRB Edit | Windows/Mac | Accessory | TomTom Bandit | GoPro Hero4 Silver | Garmin VIRB X | Sony FDR-X1000V |
| Remote control button/key | Yes | Yes | Yes | Yes |
| Diving case | Partially (Dive lens required) | Included | No (unit already waterproofed to 50m) | Yes | Device Connections | TomTom Bandit | GoPro Hero4 Silver | Garmin VIRB X | Sony FDR-X1000V |
| USB Connector Type | USB3 | Mini-USB | USB | Micro-USB |
| Micro-HDMI | No | Yes | No | Yes |
| Composite Video | No | Adapter Available | Adapter Available | No |
| Audio 3.5mm Stereo Mic | No | Adapter Available | ADAPTER AVAILABLE | No | Purchase | TomTom Bandit | GoPro Hero4 Silver | Garmin VIRB X | Sony FDR-X1000V |
| Amazon | Link | Link | Link | Link | DCRainmaker | TomTom Bandit | GoPro Hero4 Silver | Garmin VIRB X | Sony FDR-X1000V |
| Review Link | Link | Link | Link | Link |
Again, don’t forget you can mix and match your own comparison charts here with the product comparison tool.
Summary:

Overall, the TomTom Bandit is a strong first generation action cam, especially from a company that hasn’t previously made cameras of any sort. The platform is easy to use, starting with the hardware itself as well as most aspects of the software. And the 50m deep waterproofing on the action cam without any extra dive case is pretty sweet. And their lineup of accessories is reasonably strong, especially with the fairly cool 360° tilt mount, the first I’ve seen with a design like that.
TomTom has stressed that they believe heavily in the concept of simplifying the video creation workflow, through their app and its ‘Shake to Make’ function. This functionality in turn relies on the automatic highlight detection algorithm within the Bandit itself. While both these features are off to a good start, I feel they do need a bit more time in the oven until they find their stride. If I were a teacher I’d grade both features about a “B-“ in terms of implementation. For example, that the detection algorithm gets that something interesting happened when The Girl jumped off the dock is good – but that it assumed the interesting part was after she was already in the water, isn’t so good. The bright side there is that both aspects can be easily updated through future software upgrades. TomTom has already outlined to me some areas that they’re looking at implementing changes/additions/updates to, some of which should help the experience quite a bit.
It’ll be interesting to see how TomTom slots into the action cam market at large. At this stage, much of the higher end market is being courted (and captured) by GoPro, Sony, and Garmin. TomTom’s pricing certainly matches that range – but I’m not quite convinced they have a complete solution capable of competing in that price range yet. Though, I think given some determination they could likely be there later this year.
With that – thanks for reading, and feel free to drop any questions below!
Found This Post Useful? Support The Site!
Hopefully you found this review/post useful. At the end of the day, I’m an athlete just like you looking for the most detail possible on a new purchase – so my review is written from the standpoint of how I used the device. The reviews generally take a lot of hours to put together, so it’s a fair bit of work (and labor of love). As you probably noticed by looking below, I also take time to answer all the questions posted in the comments – and there’s quite a bit of detail in there as well.
If you're shopping for the TomTom Bandit or any other accessory items, please consider using the affiliate links below! As an Amazon Associate I earn from qualifying purchases. It doesn’t cost you anything extra, but your purchases help support this website a lot.
These are my favorite action cam accessories that I use day in and day out across all the action cams. They just work dependably, and are my go-tos!
GoPro Jaws Flex Clamp Mount
GoPro Magnetic Swivel Clip Mount
GoPro Seeker Backpack
GoPro Shorty Mini Extension Pole Tripod
SanDisk 256GB Extreme Pro microSD Card with Adapter (SDSQXCZ-256G-GN6MA)
And of course – you can always sign-up to be a DCR Supporter! That gets you an ad-free DCR, access to the DCR Shed Talkin' video series packed with behind the scenes tidbits...and it also makes you awesome. And being awesome is what it’s all about!
Thanks for reading! And as always, feel free to post comments or questions in the comments section below, I’ll be happy to try and answer them as quickly as possible. And lastly, if you felt this review was useful – I always appreciate feedback in the comments below. Thanks!


Ahh, this was what the TomTom product launch was. While exciting, disappointing there was no watch update(s) announced today.
In the twitter flurry, someone said that TomTom mentioned it could “connect to TomTom Runner or Cardio” — is that the case or were they mistaken (perhaps just to a TomTom heart rate strap)?
It can connect to the HR strap, but not directly to either of those watches.
Great information you shared through this blog. Keep it up and best of luck for your future blog posts.
Hi Ray
Great review as always.
There is a missing video. The one below “Next, here’s the GoPro Hero4 Silver’s video:”
Weird, fixed! Thanks!
No problem!
I think this is interesting but too big and overly engineered .
As with the original Virb, I like the form factor — never have liked the Gopro ‘box’ look and feel it’s an odd choice for an action cam, and the BLE support is nice given that everything seems to be heading that way (why so few things supports both BLE and Ant+ is a bit of a mystery, though). But, also, as with the original Virb, there’s just too many ‘gotchas’ and the ability to record data outside of the camera and merge it later has gotten sufficiently easy to do, and lacks all of the annoying downsides of trying to do it in-camera, that it’s just not an overly compelling feature anymore — not as it was to me before I actually tried using it.
At least not unless it was handled a lot better than it seems to have been so far.
Anyway, my Virb Elite still does everything I want so I’m not in the market for a replacement just yet. But when I start feeling the itch for higher res and frame rates it sure won’t be the new Virb I go for.
Or, it would seem, Tom Tom’s entry into the field.
Nice review!, seems like they picked a very similar form factor to the first generation garmin virbs, too bad there is no video preview on the built in screen.
Do you think the bike mount is strong enough to retain its position with moderate to hard impact or vibration? I am thinking about mountain bike usage. I have tried threaded camera mounts for a bike handlebar and a gopro adapter connected to the virb cradle and it seems due to the virb weight, it ends up moving and the lens pointing down, and I can see the bandit might be heavier.
I took it through some cobbles, which can be sometimes worse than mountain biking (since it’s never ending). With the current beta mount, it rotates a bit (the camera in the bracket). They said the production version won’t have that issue. Though, as noted in the review, that’s a key item I’ll be looking at once I get a unit with the finished mount bracket.
Hello Jose, thank you for this feedback! I would like to help answer your question regarding the bike mount. It is designed to withstand strong vibration or impact. The mount will stay well in place and should be tightened using an Allen key, which can be purchased separately.
Trying to get my head around the form factor and regular use. You did a another great job with the various use cases, yet it is pretty odd dismantling/reassembling components out of tube controller case just to plug it in. Not sure how many cycles that would end up being over the life span, and the resulting wear and tear conditions.
Note that I really appreciate having feedback from TheGirl on ease of use. While I’m the gadget guy in the house, what is simple for me can be complex for MyGirl, and I get to hear about it…a lot.
Hi Scott E, thanks for leaving your comment. We appreciate your feedback. I would like to address the point you made regarding the TomTom Bandit possibly wearing over time due to the Batt-Stick being removed and reinserted each time it needs charging. The Bandit has a durable case design which allows for the easy removal of the Batt-Stick. We did rigorous testing to ensure it can withstand the test of time and designed it with this in mind. In order to minimize the possibility of wearing, there is a separate connector for charging and another one for the transfer of data.
Seems like a waste of money to me compared to other units, but thats just me
well… I think Ray overlooked ease of use when comparing with the gopro line: design wise Tomtom has 2 separate buttons to start and stop recording, which will end the “wait, is it already recording?” syndrome (especially when mounted on a helmet). Even better: pushing the “record” button while it’s already on would allow me to insert edit points as I record, saving precious time finding the good bits when editing… and if that automatic editing thing actually works, I might even have something to show as soon as I finish recording…
whoever has ever lost a moment due to a start/stop button mixup in the heat of the action and has gigabytes of footage from last summer just sitting in a hard drive will understand.
can you check the stats to see which videos were played more often in this post? I would be willing to bet that “jumping off a dock into the water” got more plays with the preview image showing the tugging of the bikini top….
What’s funny is for that clip I didn’t choose the preview image for that on, that’s the default it actually selected. Go figure.
FYI, the YouTube videos have the ability to show the full 2.7K or 4K video. Click on the settings “gear” and select the resolution you want.
Just compare the video quality between tomtom and gopro.. I find the video quality is superior in TomTom, You see the sky and the greenery and the road.. you can find accurate color reproduction in TomTom and not the same in GoPro..
Sky is looking much better and so are the trees with tomtom
you look the objects in the both the videos and compare, TomTom video looks cool to your eyes and GoPro looks more saturated to me..
Seems like everything Tomtom has released in the last few years has been interesting hardware with half-baked software that is never sorted out. The “Shake to Make” sounds neat in theory but in real life it was a mess. I think Tomtom has burned up the trust and good will of many former customers and future customers with their inability to perform on the software front.
Hi Nicholas, thank you for your comment. I will share it with the team internally. I would like to mention that we are committed to delivering on the promise we are making with the TomTom Bandit and our other products. For example, when you have a limited amount of footage on the microSD card, the “Shake to edit” feature may pull chronological highlights from various days of shooting to ensure an exciting and shareable edit. As you increase the amount of footage on the microSD card, the camera will look for breaks between filming, so that the more recent highlights are suggested. Of course, you can always remove or add additional selected highlight clips to the edit before publishing the video. We strive to keep improving our products and we will work on including any customer feedback in our future updates.
I don’t appreciate the PR template polluting the real information here. The real information as noted by another poster, is that your company had a timeline for improvement to their Runner and Multisport line. The timeline disappeared as did any and all legitimate improvements. Afterwards your company’s “commitment” to “delivering on promises” and striving to “keep improving our products” has been nothing more than a couple bug fixes.
Your company has seriously damaged their reputation with their customer base and with the community in general that uses items like sport/smart watches, action cams, etc.
Having a PR hack come around and spew a bunch of platitudes won’t fix that. Having an actual team of internal developers deliver the software goods for current products will do that and introducing new products that are half-baked (no desktop app, etc.) just reminds people of the previous pattern.
Let’s try and keep things a bit civil.
It’s always valuable when companies come here to answer questions. Additionally, it ensures they’re hearing voices (even yours). Knowing the person beyond the account, they aren’t a PR hack, but rather a member of the product team.
As noted in the post, while the Shake to Make feature has a good foundation, it will indeed take some of the changes that are planned for the near term to optimize it. There are certain optimizations which sound like they’re days away (if that, it could drop tonight for all I know). While others are obviously much later in the game.
One feature I believed should be in your “action” cam charts is image stabilization. If mechanical, eletro-mechanical , or by software in the camera.
Tks.
Cool product – but no matter how amazing it is the recent lack of update and communication around the watch is going to render this a non-starter for me.
the watch had regular updates, roadmaps, and great communication – until they started missing roadmap updates – then they just deleted the roadmaps and stopped updating the watch (apart from bug fixes)
Great detailed review! My only comment…. take a vacation and enjoy life a bit. I can’t believe you produced most of this while on a vacation with your wife. Take a break, we will get by for a week or so!
Fear not Jim – virtually everything was written pre-vacation actually.
The only thing I did post vacation was the summary section, and then inserted a few videos I shot on vacation and a few screenshots/photo galleries. :)
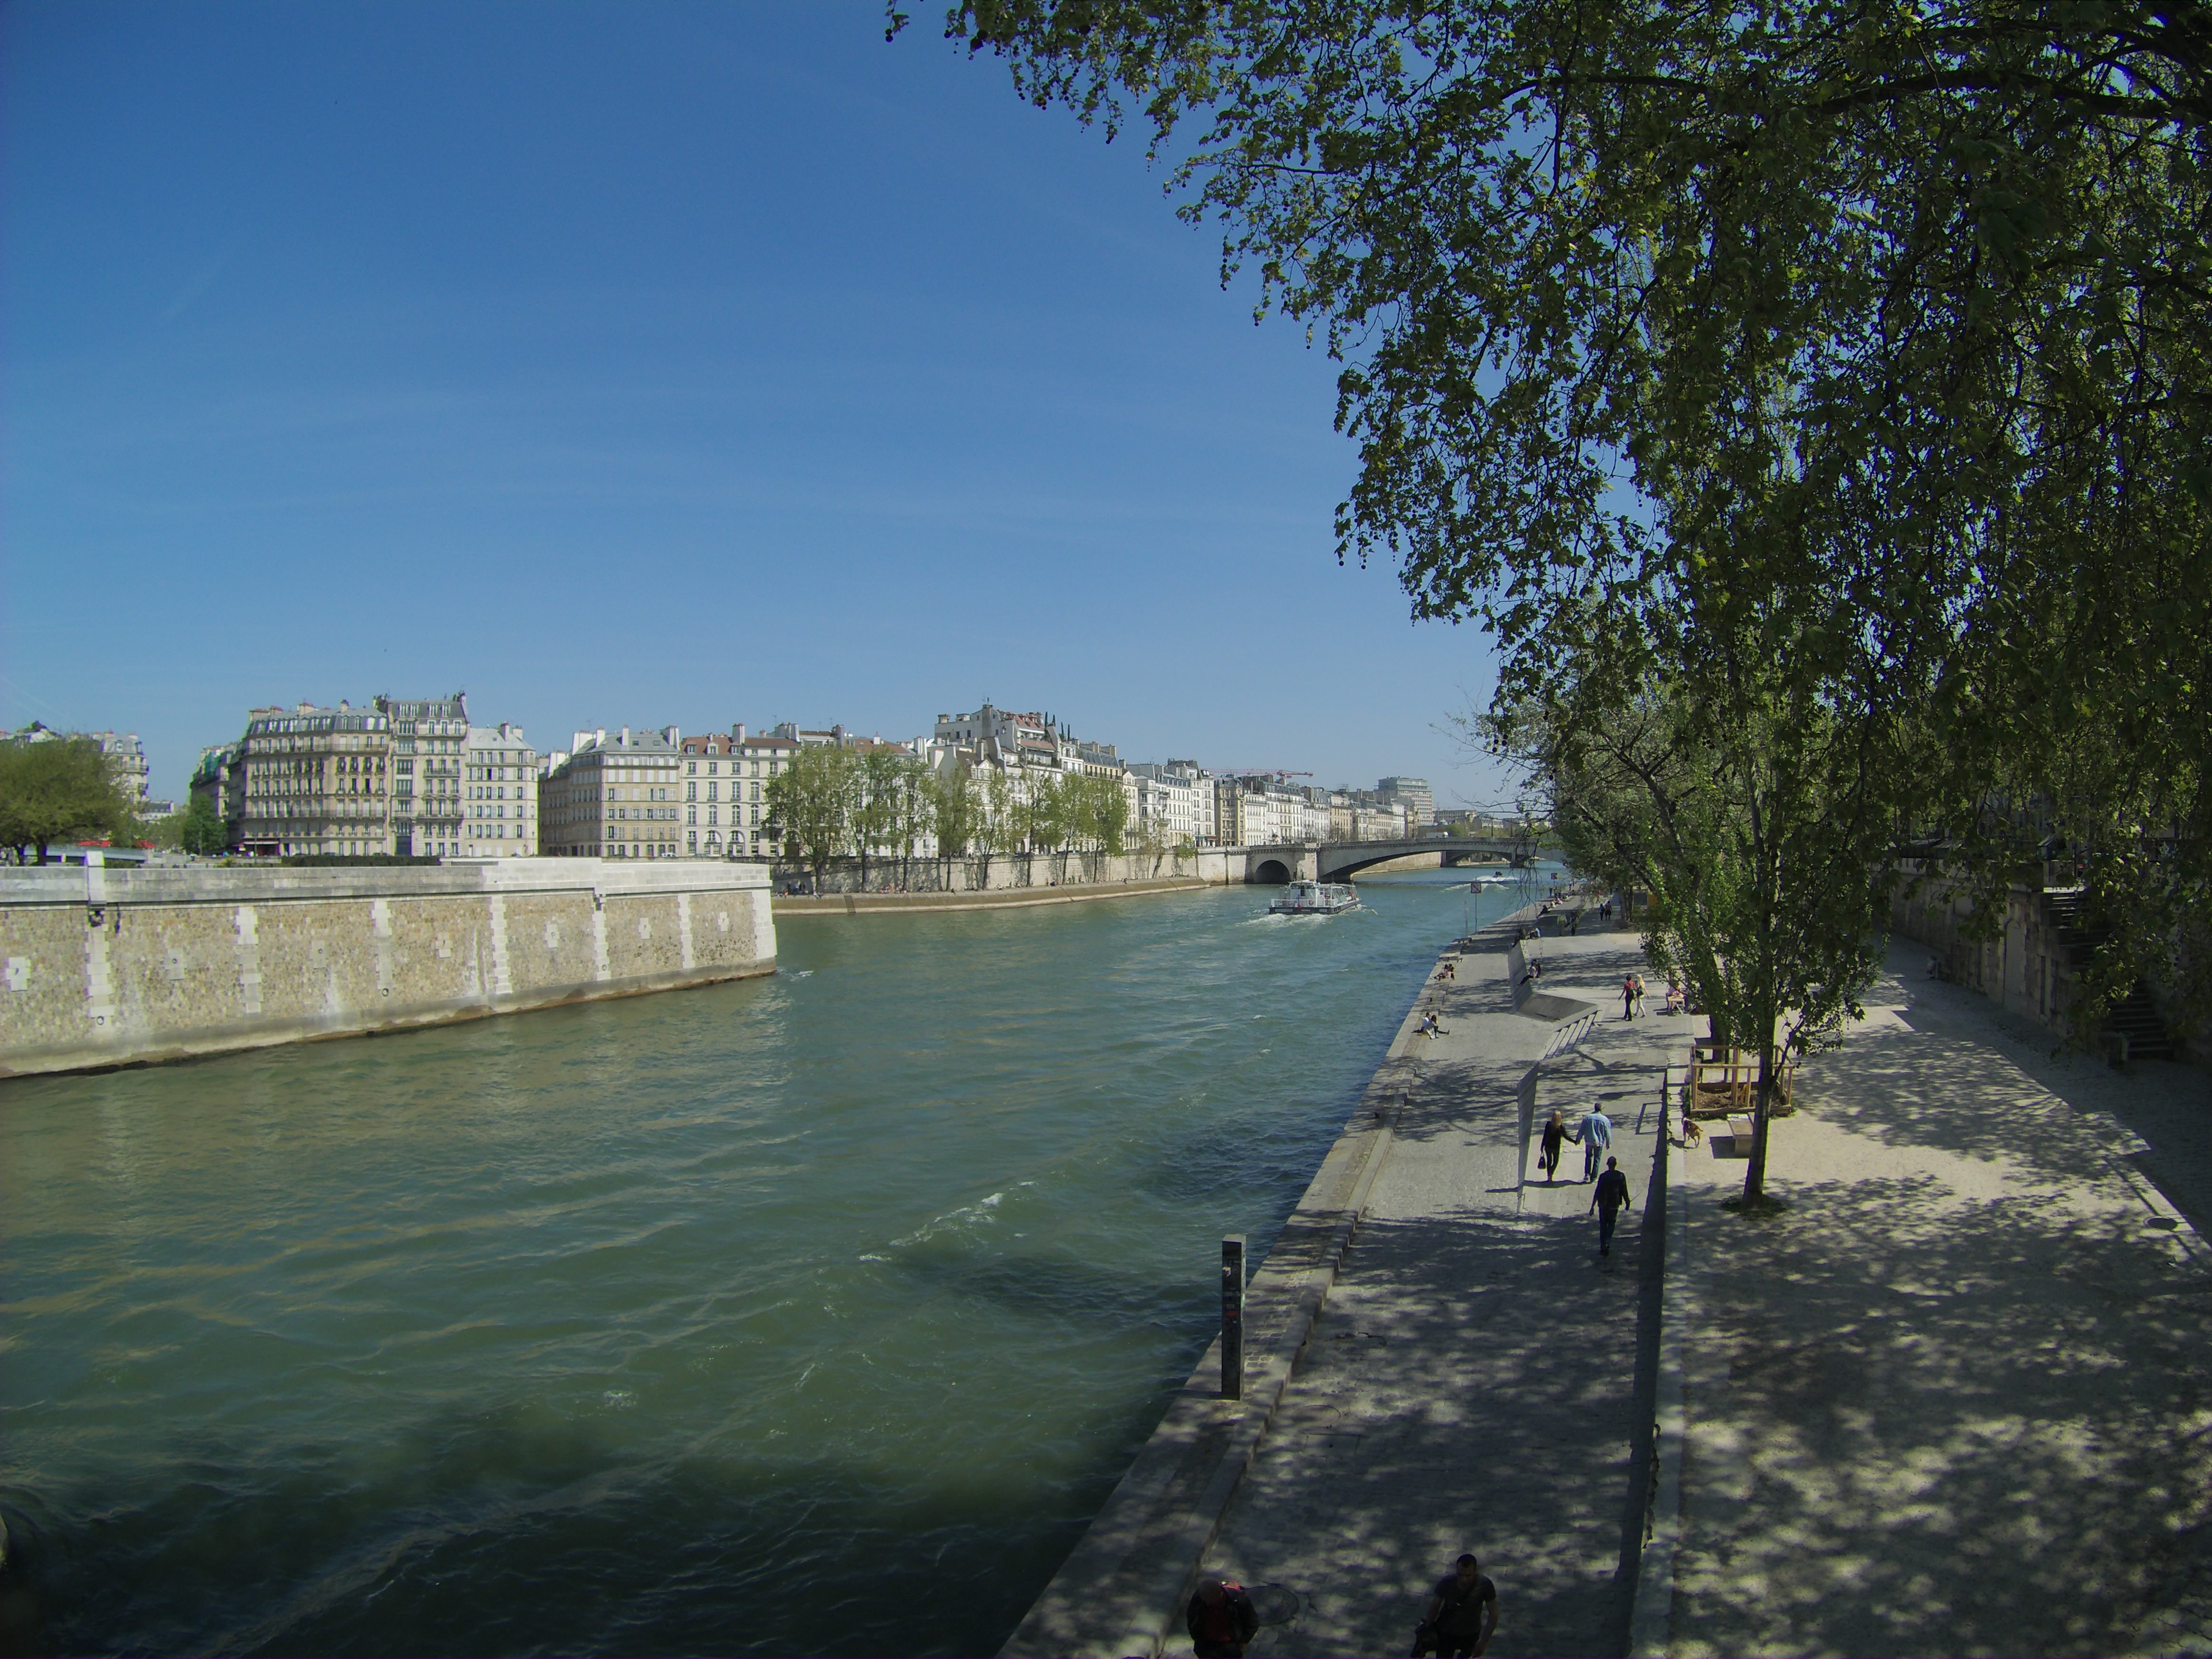
I had quite a bit of content shot while roaming around Paris, but most of the vacation footage came out better (was more eye catching), so I used that instead.
Thank you for the review. I admire your dedication to finding good places to test the product.
There’s no sound in the TomTom videos of your cycling. I wanted to compare the sound because it seems to me that the GoPro picked up a lot of noise that I don’t think would normally be so audible and yet (for example) I couldn’t hear your freewheel which is very noisy on my bike.
Also I noticed in your comparison chart you say that there is no Time Lapse functionality for the TomTom but according to your review there are 1, 5, 10, 15, 30 and 60s.
same for water resistance, apparently it’s ipx7 with normal lens cover, and 50m with black (dive) lens cover.
do we know if we can operate the buttons while under water without compromising water resistance ?
RE: Videos in sound
Sigh. I know, I found out yesterday. Sucks. Basically when I got snagged up with the issue whereby all my initially uploaded videos to YouTube from the unit natively showed a resolution of 360p, I had to run through through a converter. Somehow in that process the sound got zapped. So…I need to re-run and re-upload. Sorry! I’ve got it on my plate for later this weekend when I’m back home with a faster interweb.
RE: Timelapse
Actually, the chart is accurate. You’ll see two timelapse entries – one in photo and one in video. Unlike the GoPro, the Bandit does NOT have the ability to create photos on an interval. Whereas, it does have the ability to create a video timelapse based on an interval. So, I list them separate.
RE: Waterproofing
Hmm, good call, I’ll tweak the wording to be more clear there.
RE: Buttons
No issues with buttons pressing underwater. I did plenty of that, and I know a member of their team did some scuba with it a fair bit and captured videos too.
regarding timelapse :
Yeah, i realized you made a distinction between pictures and videos, but it’s a bit difficult to see at first glance since they re so far from one another. I think like most people i only take timelapse pictures in order to make a video, so pics would only be needed in case i want (and have time) to do some editing here and there.
Maybe a different presentation would make it easier to understand ?
Ray-
Which of these units would you recommend for a whitewater kayaker? My priorities would be:
1. Waterproofness, even with crashing waves
2. Battery life
3. GPS integration so tracks can be created and shared with trip reports
4. Image quality, although poor image quality at decent frame rates would be a dealbreaker
You might want to look at the new Garmin VIRB X/XE to be honest. The TomTom unit is good, but you can’t share the GPS tracks at all, so that’s kinda a bummer (the Garmin creates tracks you can share).
Another option is the Sony Action Cam as well. I’ve got a review coming up later this month on that.
I like the waterproofness of the Virb X/XE, but 2 hours of battery life is not enough. I’ll look forward to your new Sony review. I’m grabbing GPOS tracks with my phone (iPhone with Gaia GPS app) now and can merge the two later, although I’d prefer it to be integrated.
Another Q- do you actually use any of the manufacturer’s software? I’m a Mac and iOS guy, so I’m using iMovie. I predominantly use image stabilization and text labels, but also draw arrows on the videos to point out certain features of river runs (routes through rapids, undercut rocks, etc). I can’t imagine doing this with Garmin or Sony software, but maybe it’s gotten much better than I remember it?
I do sometimes use the software. Definitely the VIRB software, and also the GoPro software.
On the GoPro side, it’s mostly because it actually supports 2.7K/4K video. Whereas on the Garmin side, it’s for the guages.
If I’m just doing 1080p editing, I generally use Windows Movie Maker.
If I’m doing something crazy, then I’ll crack open Premier.
gopro has different lenses for under water colour correction, Will tomtom have the same?
Will the remote work while Diving? Is IT waterproof to the same depth?
Which is better (in your opinion) for scuba, Gopro4 silver or tomtom? A bit anoyed that One has to pay an extra tenth of the price of the camera for waterproofing.
Hi Andreas, to answer your question regarding the remote, it is water resistant (IPX7), but it’s not suitable for diving though. When diving, you can use the button on the device itself to mark highlights as you record them. Regarding the lenses for underwater colour correction, these are not available at the moment, but if they will be offered in the future we’ll make sure to let you know via our usual communication channels. Thanks!
Tomtom released a sw update with sw color correction for underwater scene
link to techradar.com
Hi
I have been reading your reviews which helped me decide what not to buy :)
What is the white balance on tomttom have you tested it in snow conditions?I bought KODAK SP1 cam and it was perfect in all but snow conditions and Kodak customer service did not reply to my questions (rubbish)!
Cheers
Pez
Hi Pez, the TomTom Bandit has auto white balance, which we have tested in snowy conditions to make sure it works very well. Here’s a video shot using the action camera. The first part of the video is shot on the slopes, so hopefully this will give you a good impression on how footage can look like: link to youtu.be.
Hi, thanks for the review, this camera actually sounds like it might be kinda perfect for what I’d need. I was wondering if you know what sort of range you need to be within for the remote to work? I was also wondering about the Manual Highlights, how much footage do they grab when you tag one of those? And is the amount of footage they grab per highlight customisable, i.e. can you set it to isolate X amount of seconds per highlight?
Hi Brendan, I will try to help answer your questions. Regarding the remote, it will still work even if it’s 10-15 meters away from the TomTom Bandit. Each single highlight that is captured either manually or automatically will have a length of 6 seconds. You can change this within the app as follows: holding the phone horizontally, press on the icon of a highlight, which will give you the option to reduce or extend the length of that particular highlight to, let’s say, 3 or 15 seconds.
Great, thanks a lot for the reply. I’ve just got one other question on manual highlights, which bit of footage is captured in that 6 seconds when you tag the highlight, for example is it the 6 seconds before the button push, the 6 seconds after the push or 3 seconds either side of the button push, etc.?
Hi Brendan, a manual highlight will capture the 3 seconds before and the 3 ones after pressing the button.
Hi Brendan,
I wanted to come back to you and elaborate on my previous response. You can make a manual highlight during recording and in post-processing.
1. During recording: the assumption is that the during recording the interesting moment already happened, so the starting position is -6sec [-6sec,+0sec]. The moment someone has clicked the button for manual highlight is when the Highlight ends.
2. Post-processing: via the mobile app, the starting position is -3sec [-3sec,+3sec].
I hope this helps fully answer your question.
Can I please have some comments regarding the use and performance in low light and darkness.
I’ve bought a bandit and can’t see any way to flip the picture 180 degrees.
I’m wanting to use it on my bike and have it under the bars on a k-edge mount and under my saddle.
Seems like a massive omission for a sports can not to have this basic function, or am I missing it?
Hay, wanted to ask how you added the overlay with the sensor information like speed.
Did not find it in the android app and bought the cam because if that feature.
Thanks in Advance
I am looking for an actionCam for running – I don’t have any clue which product is senseful.
Do you have some regards for me? Thanks.
I’d check out the HERO+LCD or the Hero4 Silver. The reason being both have a LCD screen on the back that makes it easy to line-up shots.
When running, I’ve found it handy since you want to quickly take a photo and keep going. But having the screen makes it easier to get the right photo. Versus mounting on something like a bike or wherever, you’ve got a bit more time to break out the phone and line-up the shot.
The 3 hours battery is not enough for me and I am nervous about the expense of the battery packs for a day long expedition.
In 1s or 5s video timelapse mode am I reading correctly that battery life is unaltered?
Do you have any rough idea pleas on how big a 720res timelapse video for 3 hours would be on 1s or 5s ?
(or any suggestions on how to video 12 hours in the wilderness!!)
ty :-)
thanks Rainmaker, you publish a very detail passage about Tomtom Bandit camera. Thanks for sharing!
Nice review! Very thoughtful, very thorough. I just bought two of these and your review was very helpful in lieu of any sort of manual. Thanks! Keep up the good work…
Hi there, nice review.
I’m after a camera for commuting to work. You mentioned the low light performance wasn’t exactly that good! Most of my commuting is in poor light so have you any suggestions of what camera would suit me best? One that video loops is essential.
Both the Garmin VIRB’s and GoPro Silver/Black tend to do fairly well low-light.
Hi
No looping?? Shocking TomTom. Software update needed.
trimming available only for gopro source clips?
Hi,
I’m trying to use GoPro Studio to create a video that includes GoPro video as well as HD video from the TT Bandit (or just from the Bandit).
GoPro Studio imported the movies without any problem and they plays it well.
I’m also able to convert the movies.
However, GoPro Studio will not let me extract clips from it. Specifically, the “mark in” and “mark out” buttons are disabled and I see a message saying “trimming available only for gopro source clips”.
The MP4 files seem to be compatible, as they ARE imported and converted in Studio.
What do I need to do to correct this?
Thank you,
Daniel
Just bought a Bandit after a long clothes shopping trip… It’s currently dramatically cheaper than when tested, plus there is £60 cash back… does that make a difference to the test?
How does it deal with vibrations?
I use mine with my aircraft and it vibrates heavily (even with the 360 mount), rendering the footage unusable.
I do like its ease of use and in my opinion its colors are far better than my gopro hero 3+ silver.
Bad low-light footage, though, and also white screens when shooting against the sun.
The thing that interests me the most is a solution for the vibrations.
Quick question, is the remote waterproof?
Great review, one of the best I have come across! Thank you
Thanks….another excellent review.
viewing angle ????
woah man! this is extensive, accurate and better review than any other in specialized websites!! Thank you a lot for your time and work doing it.
I’m very undecided about buying Hero4 Silver or the Bandit. The main diference I acan see is Bandit has better colors and Hero 4 Silver better sharpness and better way of focusing all the objects in the scene.
I’m not an assiduous sportsman, I want an action camera for doing snorkel, trekking on deep forests, take some timelapses, and other day-to-day activities. Which one would you recommend me?
Any idea of the GPS location data actualization rate (Hz)? Even a call at TomTom didn’t get me an answer to that important question for petrol heads like me where this question is essential for such a cam… Is it 1 Hz like with an iPhone or either 20 Hz like with a high performance external BT GPS tracker? Garmin Virb Ultra 30 states 10 Hz in comparison which is really good.
Hi there,
What is the tripod mount that you are using when the Tom Tom is on the seabed surface?
cheers,
I’m using the included GoPro adapter mount, along with the GoPro 3-way pole.
Aha, excellent stuff thanks for the reply!
Ive got a Hero 4 Silver at the moment but really not impressed with its underwater capabilities, battery life and general fiddlyness. The down side to the Tom Tom of course is no screen so one can’t frame stuff. And the hero when the light is good, does return good imagery on the whole.
With the Tom Tom its use at depth with less light hasn’t really been reported on so it would be a risk. Would be interesting to see any divers that use one pitch in with their views?
cheers,
ian
Have you got a review of the Olfi one.five?
I saw on their website (www.olficamera.com) that they’ve just rolled out break it replace it
Thanks for a very good review.
I’ve used this camera down to approximately 30m scuba diving, and it’s great. Good video, and one can operate it effectively underwater.
Cheers.
Hey folks-
I’m going to go ahead and close new comments on this post. While it’s rare I do that, this particular post gets an overwhelming amount of SPAM that makes it through the filters compared to just about any other post on the site.
Given the camera is five years old, the company cased production of it nearly that many years ago, and there’s been no real comments in two years…I think it’s probably time.
Cheers!