
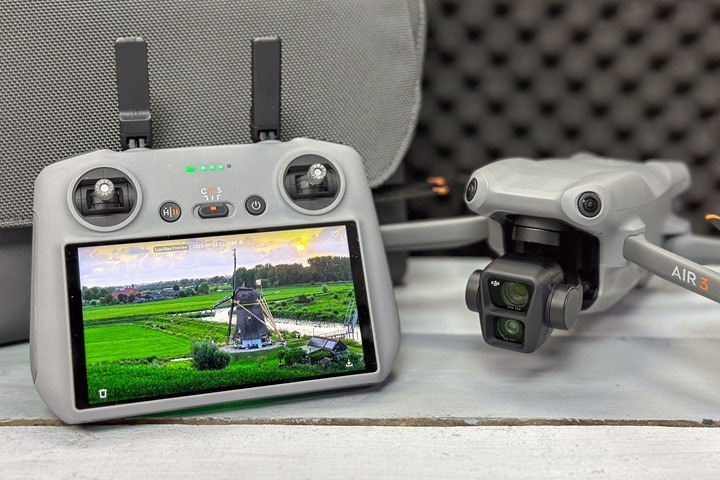
DJI has announced and released the DJI Air 3, the successor to the Air 2S, and the ‘middle-child’ of the core DJI 3-series lineup. This drone is meant to slot in below the Mavic 3 Pro price/feature-wise while being higher-end than the Mini 3 Pro. In doing so, it includes the vast majority of the Mavic 3 series features, while being largely a step up in minor features compared to the Mini 3 Pro. In other words, it makes for a complicated buying decision tree.
The biggest addition for the Air 3 is that of the new secondary tele/zoom lens, which is a 70mm equivalent lens (compared to the 24mm main lens). As was the case on the Mavic 3/3 Pro, this has quickly become my favorite lens – especially since the resulting image quality coming out of it has been virtually identical to that of the Mavic 3 Pro lens. Likewise, the main camera also got a spec boost, going from f/2.8 on the Air 2S, to f/1.8 on the Air 3. Albeit, that has come with a drop in the total resolution, which was 5.4K on the Air 2S down to 4K on the Air 3. On the flip side, we got much higher slow-mo speeds/resolutions that weren’t there on the Air 2S.
In any case, let’s dive into it!
Oh, and as usual, this review isn’t sponsored. I’ve been using a media loaner Air 3 to put through its paces, after which it goes back to DJI. No company gets to preview my reviews ahead of time, nor have any say on what’s in them. As always, I’m gonna call it like it is – both the good and the bad. If you found this review useful, you can use the links at the bottom, or consider becoming a DCR Supporter, which makes the site ad-free, while also getting access to a mostly weekly video series behind the scenes of the DCR Cave. And, of course, it makes you awesome.
What’s New & Pricing:
The DJI Air 3 is mostly a solid upgrade over the Air 2S, but in some cases it won’t be as obvious. It’s one of those upgrades that if you look at something like resolution, you’ll cock your head sideways for the clear resolution downgrade (let’s call a spade a spade), yet when you approach every other aspect of the aircraft, it’s clearly a big upgrade. So much so that the resolution going from 5.4K to 4K isn’t a big deal given the new secondary optical zoom lens gives you native 4K, thus, in effect, giving you greater resolution than if you were to crop into that 5.4K image. Anyways, more on that later in the photo section.
Here’s what’s new compared to the Air 2S:
– Added secondary tele (3X) f/2.8 lens, with full/all resolutions and feature support
– Main camera increases from f/2.8 to f/1.7 (better low-light performance)
– Main camera decreases resolution goes from 5.4K/30FPS to 4K/60FPS
– Main camera goes from 1” sensor to 1/1.3”
– Slow-Mo options increase, 4K from 60FPS to 100FPS, and 1080p from 120FPS to 200FPS
– Increased photo size from 20MP to 48MP
– Increased panoramic photo size from 8192×4096 to 13000x6500px
– Increased gimbal arrangement to allow from –90° (straight down) to beyond 0° (flat) to upwards 60° (max previous 24° on Air 2S)
– Added sorta-vertical shooting mode (doesn’t rotate gimbal, just crops)
– Added/supported 10-bit on the secondary lens
– Decreased Hyperlapse mode on Air 2 from 8K to 4K
– Added/included support for Hyperlapse mode on the tele camera
– Added Waypoints feature (pre-planned and repeatable flight routes)
– Increased claimed max flight time from 31mins to 46mins
– Added additional obstacle avoidance sensors, now full omnidirectional avoidance (previously no sideways avoidance)
– Added/changed to APAS 5.0 from APAS 4.0 (automated flight system)
– Added support for all FocusTrack modes (ActiveTrack/Spotlight/POI) on BOTH lenses at full resolutions/FPS (previously only 30FPS)
– Added ActiveTrack 5.0 features like one-tap configurable angle of filming
– Added/changed to O4 transmission type from O3
– Increased range to 20KM (FCC), 10KM (CE/EU), 10KM (China), 10KM (MIC)
– Increased controller streamed FPS from 1080p/30fps to 1080p/60fps
– Doubled the controller video streaming bitrate from 16Mbps live video to 80Mbps
– Increased max speed slightly from 19 m/s to 21 m/s (75.6kph)
– Increased official wind resistance spec slightly from 10.7 m/s to 12 m/s
– Aircraft weight increases from 595g to 720g
– Charger supports USB-C 90w fast charging (60 mins)
– New Charging hub can take three partially charged batteries and give you one full one (when not plugged in)
– Aircraft has EU/CE C1 label/sticker on the bottom
– Maintained internal 8GB storage (expandable to 512GB with microSD card)
Got all that? Good. Let’s do a quick spec dump. The TLDR message here on specs is that the two camera lens systems are considered equal in virtually every mode/capacity/resolution, the singular exception being the main lens is f/1.7 and the tele is f/2.8. That won’t matter at all during daylight hours, but will be more noticeable as daylight fades, as an f1.7 lens will handle darkness better. I practically have lived on the tele lens here, it’s just awesome, just as I have with the DJI Mavic 3 & 3 Pro. It makes it SO MUCH better to use the drone, and to be a good ‘drone neighbor’, by allowing you to be further from people/things, and get arguably more interesting shots (and certainly safer shots in most cases, especially for Active Track).
Pricing-wise, here’s the details:
DJI Air 3 with DJI RC-N2: $1,099/€1.099/962GBP
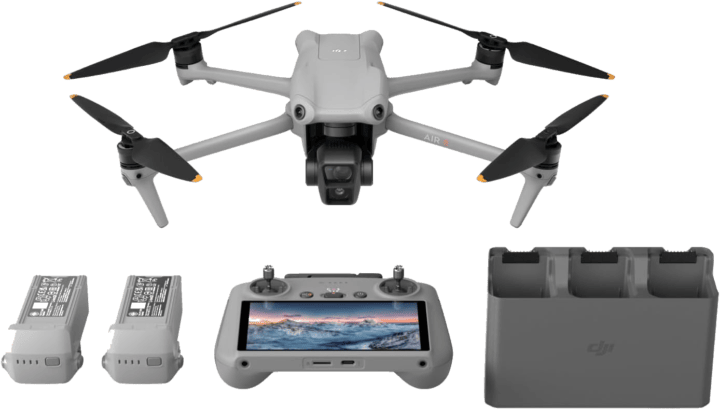
DJI Air 3 Fly More Combo (with DJI RC-N2): $1,199/€1.349/$1,199GBP
DJI Air 3 Fly More Combo (with DJI RC 2): $1,549/€1.549/1,379GBP
DJI RC 2 (just remote): $369/€369/323GBP
DJI Air 3 Battery Charging Hub: $69/€69/59GBPIn the combo: Drone, 3 batteries, remote controller, extra props, charging hub
Notably, if you want the DJI RC you need to buy the combo pack. Or, buy the two pieces individually, which at that price point ($1,468) means you should just pay the extra $81 to get the two extra batteries, extra props, bag, and charging hub. In other words, DJI is shifting back to what they used to do, where the combo made a ton of sense. Whereas in the last few years, it didn’t make much sense to purchase for most people. And since the Air 3 isn’t compatible with any other past controllers, you HAVE to get a controller here.
Tech Specs:
This section is all about tech specs, and just the specs. Well, with some opinion mixed in where warranted.
Starting with the two camera systems, or lenses here’s the details:
Main Lens: This is a 82° FOV equivalent to a 24mm lens, at f/1.7, ISO 100-6400, 12,800 for night
Tele Lens: This is a 35° FOV equivalent to a 70mm lens, at f/2.8, ISO 100-6400, 12,800 for night
Note that on ISO, the max for ‘Normal’ shooting mode is 6400, D-LOG M is 1600 and HLG is 1600.
For the most part, both lenses are identical in terms of features, which is notable as many past dual-lens DJI products give lesser features/specs to the secondary zoom lens. Both night and slow-mo modes are supported equally on both lenses. Here’s the core resolution and related specs:
Wide-Angle Lens:
Formats supported: H.264/H.265
4K: 3840×2160@24/25/30/48/50/60/100*fps
FHD: 1920×1080@24/25/30/48/50/60/100*/200*fps
2.7K Vertical Shooting: 1512×2688@24/25/30/48/50/60fps
FHD Vertical Shooting: 1080×1920@24/25/30/48/50/60fps
Normal: 8-bit 4:2:0 (H.264/H.265)
HLG/D-Log M: 10-bit 4:2:0 (H.265)
Still photography resolution: 8064x6048px
*FPS only supported in H.265 formatTele Lens:
Formats supported: H.264/H.265
4K: 3840×2160@24/25/30/48/50/60/100*fps
FHD: 1920×1080@24/25/30/48/50/60/100*/200*fps
2.7K Vertical Shooting: 1512×2688@24/25/30/48/50/60fps
FHD Vertical Shooting: 1080×1920@24/25/30/48/50/60fps
Normal: 8-bit 4:2:0 (H.264/H.265)
HLG/D-Log M: 10-bit 4:2:0 (H.265)
Still photography resolution: 8064x6048px
*FPS only supported in H.265 format
On the photo-spec side, both lenses are 100% identical for stills (note that panos and such are done on the main lens):
Single Shot: 12 MP and 48 MP
Burst Shooting: 12 MP, 3/5/7 frames; 48 MP, 3/5 frames
Automatic Exposure Bracketing (AEB): 12 MP and 48 MP, 3/5 frames at 0.7 EV step
Timed: 12 MP, 2/3/5/7/10/15/20/30/60 s; 48 MP, 5/7/10/15/20/30/60s
Photo Formats: JPEG/RAW (DNG), either singular or concurrent
On the controller side, you’ve got two options: The all-in-one DJI RC 2, or the phone companion DJI RC-N2. More annoyingly/importantly though, no existing/past DJI controllers are compatible. That’s right, the barely one-year-old DJI RC is not compatible with the Air 3. Nor is the DJI RC Pro. Inversely, the DJI RC 2/N2 is not compatible with any other DJI drones. You’re welcome.
The biggest thing to note about the new O4 on the DJI RC2 & DJI RC-N2 is a huge bump up in real-world range on the European side (CE specs). With the previous DJI RC, for flyers operating under CE/EU transmission rules (which are automatically configured based on your current GPS position), the controller would often drop-out, well short of range.
But with O4 on the DJI Air 3 and the new controllers, I’ve had zero drop-outs. Previously I’d easily drop-out at 1,000m or so – but now I’m able to go well beyond double-that before I turn around to maintain visual contact. For North America folks under FCC rules, you didn’t likely have much issues previously, as the transmission power was higher there. The current specs here are: 20KM (FCC), 10KM (CE/EU), 10KM (China), 10KM (MIC).
DJI classifies basically the entire world into one of two buckets: FCC rules or CE rules, and those are automatically enforced based on where the aircraft is, not where it was bought. So if I take an aircraft I bought in Amsterdam to the United States, it gets more range under FCC rules (as transmission power changes), and vice versa. Unfortunately, I’m not aware of any DJI site that lists which countries fall under which bucket, but not in the EU will fall under FCC rules.
Long story short, the range is a heck of a lot better now. Yet, at the same time, I’m incredibly disappointed that the DJI RC I bought a year ago is useless with this. The *ENTIRE POINT* of DJI switching to controllers like that was to have a multi-year cycle of supported aircraft, not barely a year. Further, the same is true of the DJI RC Pro. Sure, that’s two years old now, but at the same time, it’s taken DJI an incredibly long time to support new aircraft with it. That too is now useless. That means if I want to go somewhere with the Mini 3 Pro (for cases requiring a lighter aircraft) and also the Air 3 (for better lenses), I need to take two controllers. Likewise, since there is no DJI RC 2 Pro, people that need some of those features (like HDMI out or 3rd party apps, etc…) can’t use the Air 3.
Sure, I get that in a year or two there’ll be a Mini 4 Pro and a Mavic 4 – and they’ll all probably work with this. But I also refuse to believe DJI couldn’t have at least added backwards compatibility here. I’d have no (major) problems buying a new RC 2 controller, if it at least supported the Mini 3 Pro and Mavic 3 series. Hopefully this is something they consider for the future (especially something like a future DJI RC 2 Pro, and have back-unit support), because these sorts of droppages will cause people (including myself) to stop recommending the nicer controllers since the lifespan is effectively just one product.
Air 3 & RC 2 Hardware Usage Basics:

(Above you’ll find my complete beginners guide, which is an hour-long tutorial on how to use the DJI Air 3 from start to finish, covering virtually every feature based on months of usage.)
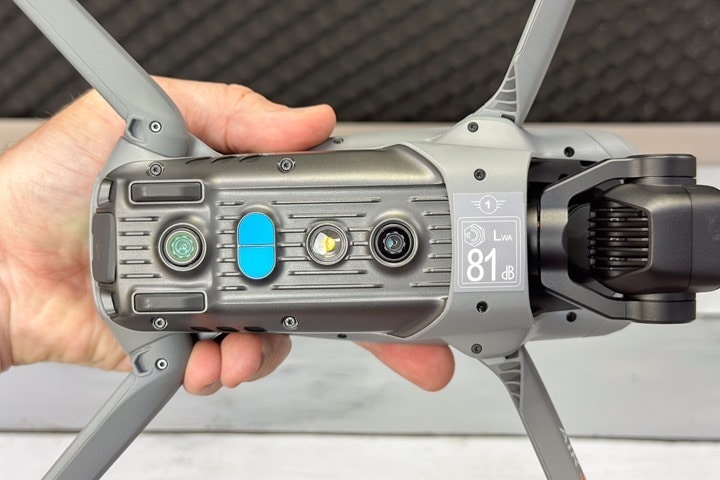
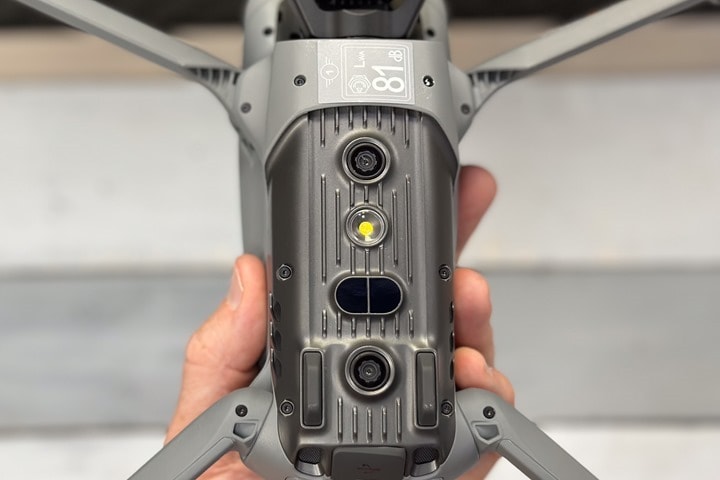
Let’s start with the hardware side and some basics. For European users, the first thing you’ll notice is the C1 label already on the bottom. For US folks, you’ll have Remote ID built in:
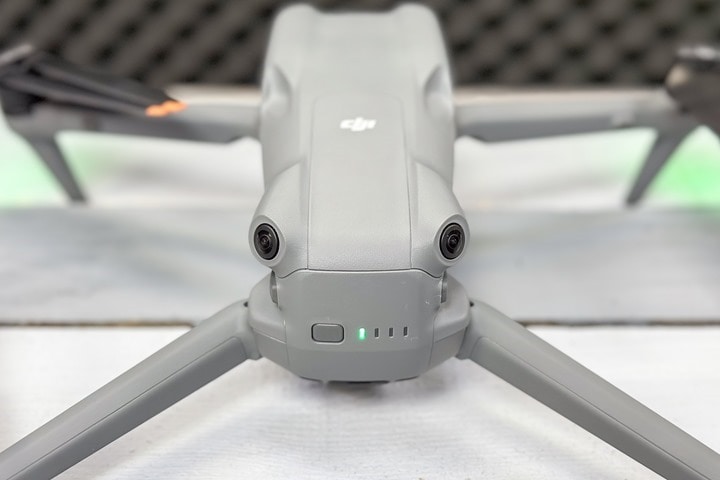
Meanwhile, the biggest notable new feature on the Air 3 is the new obstacle avoidance sensors. The previous Air 2S had front/rear/up/down obstacle avoidance sensors, but not sideways (lateral). The Air 3 solves that by positioning four obstacle avoidance sensors on the corners, which form a 360° view of things around it. You can see the two front ones here:
And then the rear ones below. Again, these also cover the sides and up portion too:
This is supplemented by downwards vision, and ground detection sensors, which help it when close to the ground:
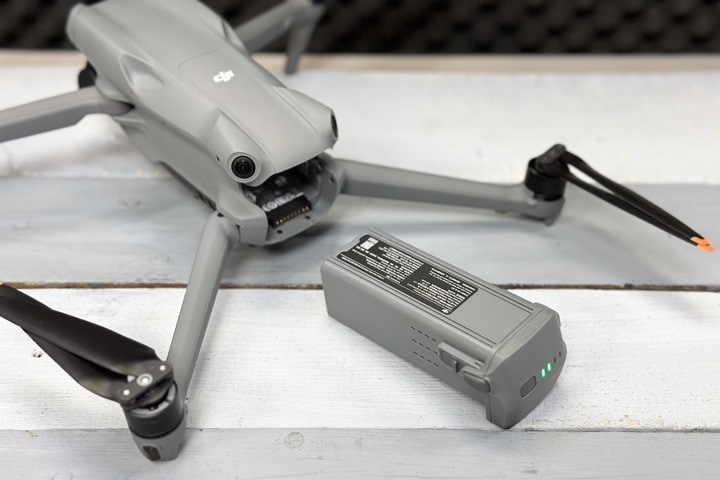
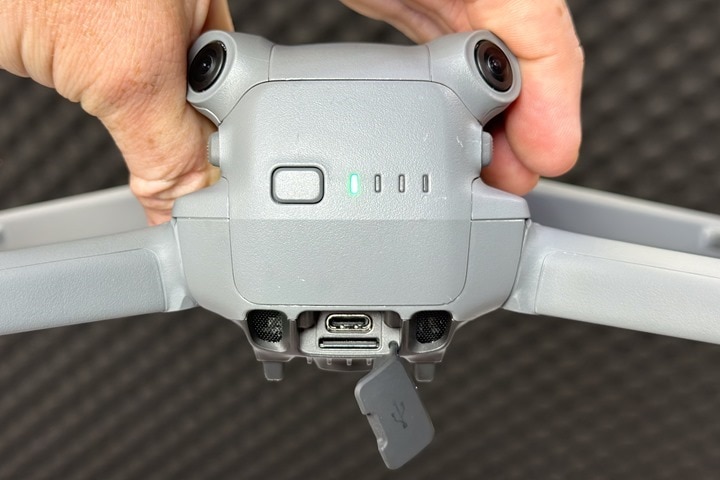
On the rear of the drone, on the battery itself, you’ve got the power button and battery status lights. You’ll also use the power button for pairing the remote, or your phone.
Below that is the MicroSD card slot and USB-C charging port:
The drone batteries can be charged directly in the drone using a USB-C power cable (60w or higher, 90w or higher if you want 1-hour charging times), or they can use the charging hub noted below.
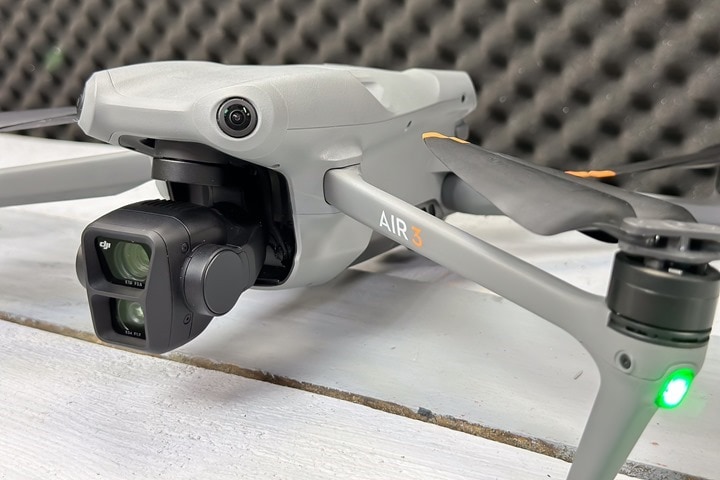
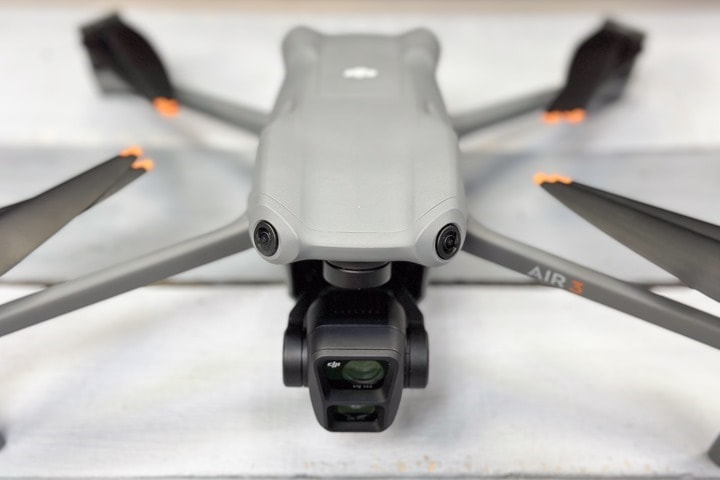
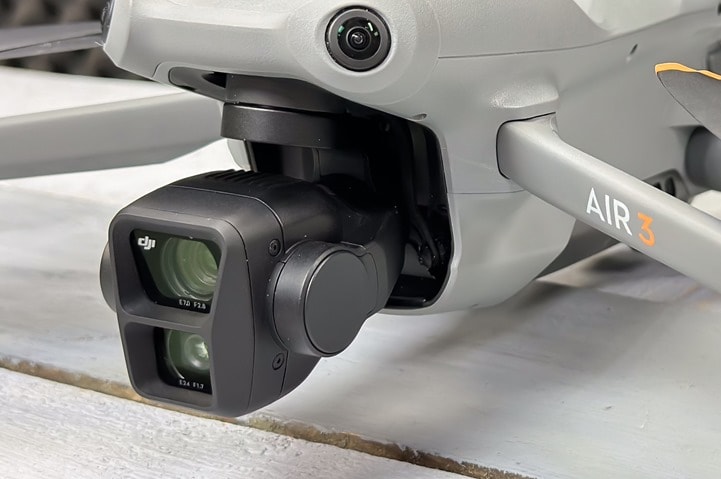
On the front of the drone is the gimbal. You’ll see the two lenses clearly labeled, this gimbal has a larger mechanical and controllable range than the previous Air 2S. On the mechanical range, that helps in strong winds or scenarios where the drone is tilted but the camera gimbal can remain level. On the controllable range, you can now use this to tilt upwards to 60° (versus the previous 24° on the Air 2S). That’s useful for doing shots like pointing up at the top of a skyscraper/tree/etc, then ascending above it while tilting down.
As usual, never touch the gimbal while powered on. When unpowered it’s totally fine to touch it gently. There is a plastic gimbal protector to protect the gimbal during travel. Always use it. Just like DJI’s battery charging hubs, every single version is different, and this is probably the best and easiest one to use to date. Some of them have been super finicky, but this one is actually really clear and snaps easily in place.
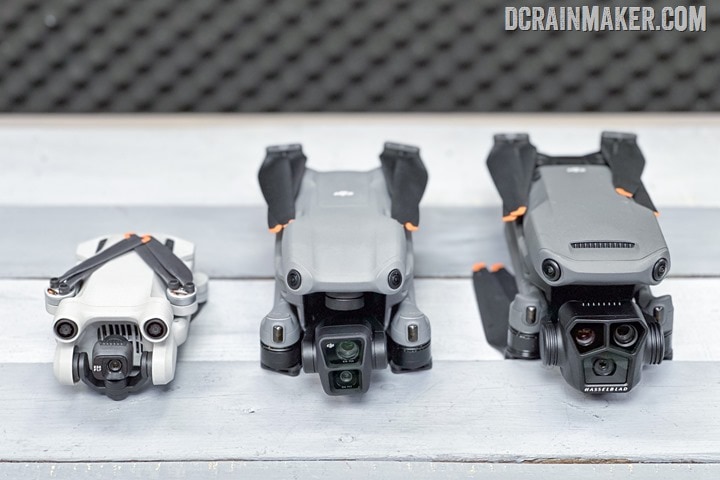
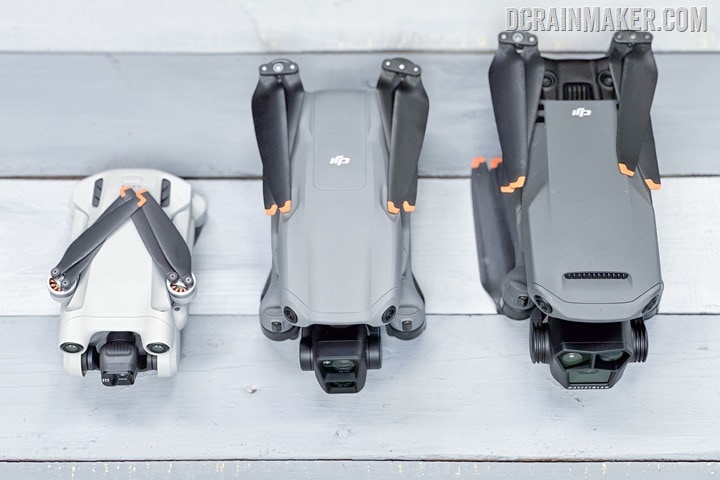
In terms of folding, like all consumer DJI aircraft, the arms fold back towards itself. Still, the weight is 720g, and the size is considerable. It’s basically about the size of a running shoe, so it’s not viable to put in the back of a jersey pocket while cycling (whereas the Mini 3 can easily fit back there). I mean, sure, you can put it in there in a pinch, but you’re one bump away from it flying out.
(Above/below: Mini 3 Pro at left, Air 3 in the middle, and Mavic 3 Pro to the right)
Instead, for cycling and hiking, I’ve been putting it in a hydration pack, which works well. I stick the DJI RC 2 in a thin/small fabric bag just so it doesn’t get all scratched up.
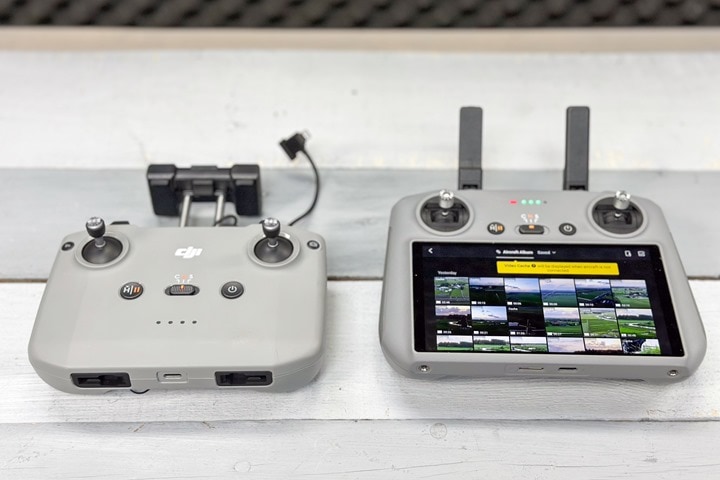
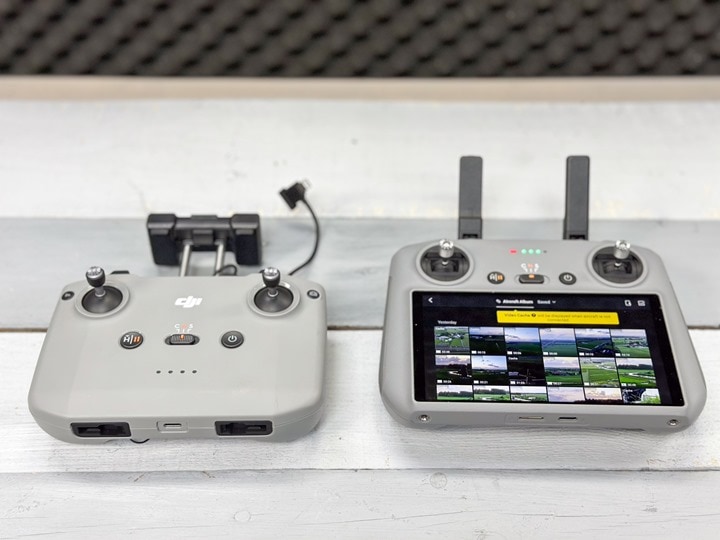
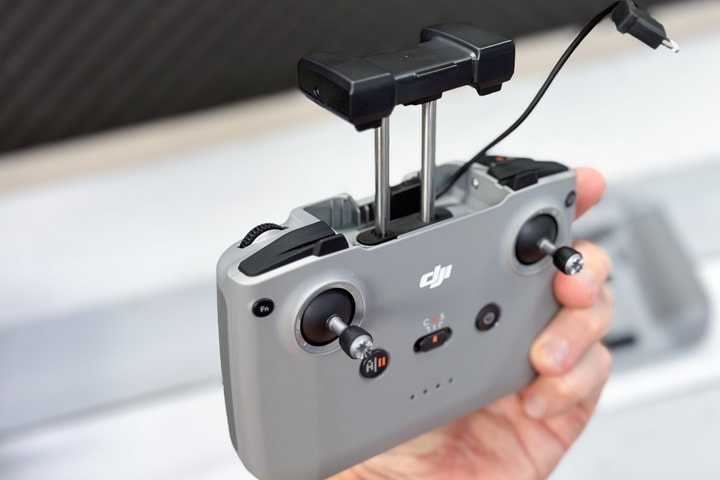
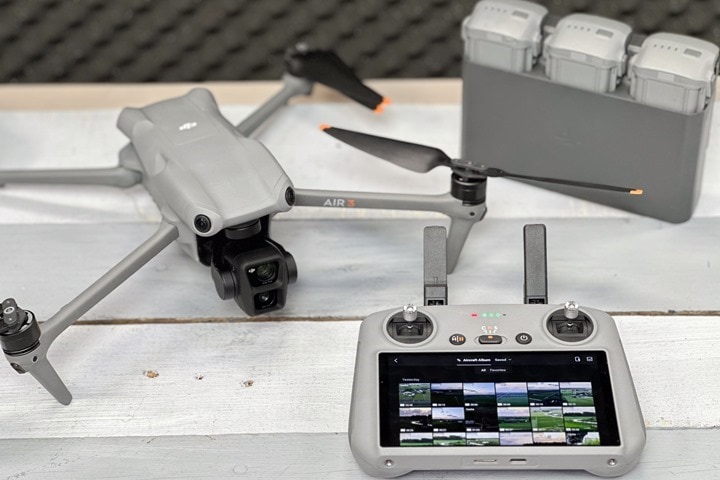
Speaking of which, let’s take a look at that. This is very similar to the DJI RC 1, except that it now has two external antennas. Here you can see the DJI RC-N2 at left, and RC 2 at right:
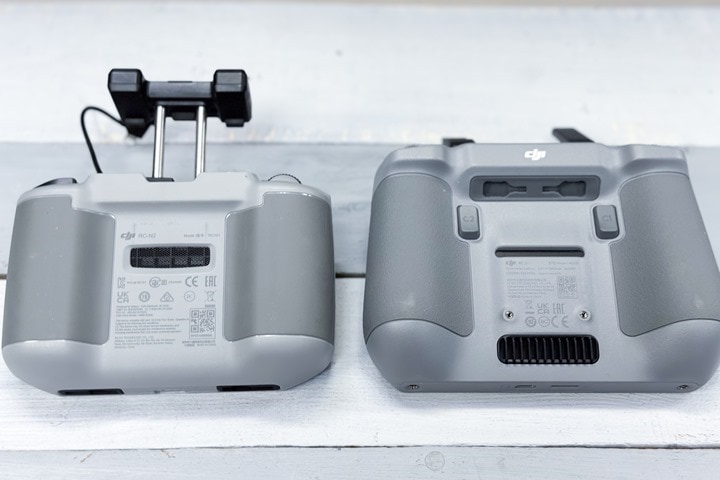
On the back, you’ll see they moved the vent placement slightly, and also – most annoyingly, changed the two screw locations in the middle. These screw locations were used for 3rd party mounts to hold the remote on a bike. These screw holes moved about 1mm wider. Yes, just 1mm.
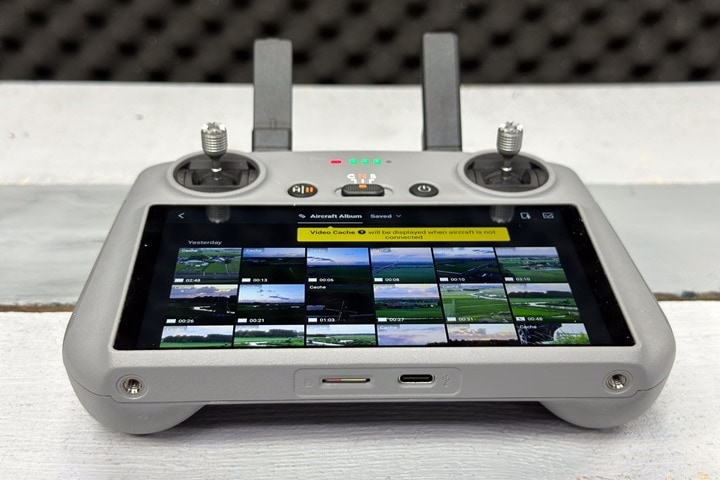
DJI says they made the processor faster in the DJI RC 2 as well, though I haven’t seen any meaningful impact of that. The old one worked fine for me. The display nits are the same at 700 nits, less than the 1,000 nits seen on the DJI RC Pro. Practically speaking, I haven’t had any major issues there in bright sunlight. While your phone does have a much higher nits value, that’s only when it’s not overheating. On a hot sunny day (where nits matter), once you stick your phone in something like the DJI RC-N2, it’ll quickly get into a thermal condition that lowers the phone display nits to the same level as the DJI RC 2. Thus, a wash. Note they got rid of one of the two USB-C ports, which served no consumer-facing purpose anyway.
The biggest item is that the new one isn’t compatible with any other DJI aircraft to date (and DJI says that’s a hardware limitation), and inversely, all previous DJI remotes (including the fancy DJI RC Pro), don’t work with the DJI Air 3. The only other remote that works with the DJI Air 3 is the also-newly announced DJI RC-N2, which you use your phone with:
Notably, this remote is backwards compatible with the existing bike mounts I’ve outlined here. It’s how I did my ActiveTrack testing.
In my testing of the two remotes, I found the DJI RC 2 easily beats the range on the DJI RC-N2. I never got low-signal issues on the DJI RC 2, but I am getting low-signal in the 1,500-1,600m range on the RC-N2 with the Air 3 (in clear/open conditions).
Finally, as for battery life, DJI claims up to 46 minutes of flying time. While I’m sure they managed to get that in the windless environment they note in their testing, I didn’t see that in my windy Netherlands environment. In fact, here is said crazy test:

In most of my tests I was getting about 30-35 minutes of battery time before a forced landing around 10% battery remaining. Keeping in mind that when recording video you burn battery far faster than no-video (such as taking photos). In fact, as a tip – if you’re running really tight on battery life trying to get back, always stop recording, you’ll see a huge bump in battery burn rate.
The Charging Hub:
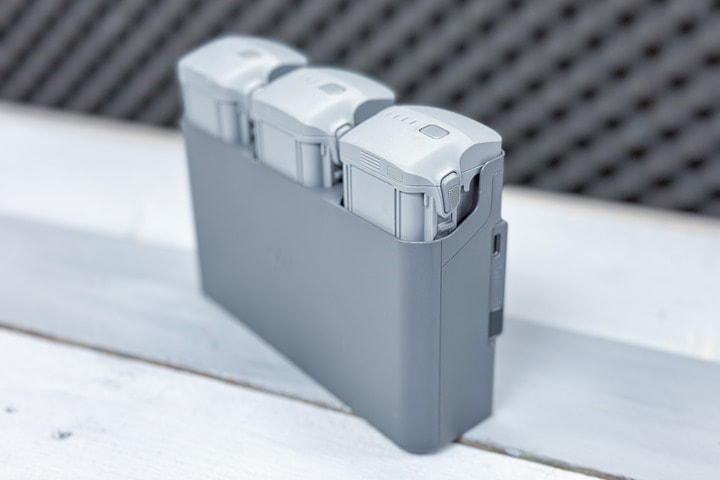
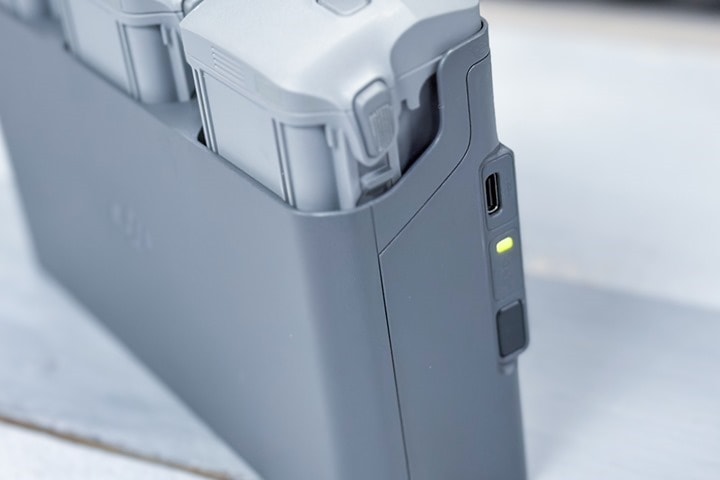
Now, just a quick word about the charging hub, since it doesn’t fit anywhere else. First up, with each successive drone, DJI gives us new batteries. Some day, we’ll get the same batteries for more than one series of drones. However, despite that – they are getting better and better each time with their charging hubs. Sure, it’s taken a decade, but this new one is by far the best. To begin, it can leverage 100w charging (USB-C), thus you can charge each battery in 60 minutes, which I’m happy with. And because it’s USB-C, I’m just using my laptop charger to do so. Though, DJI does sell this 100w (dual-USB-C) charger as well:
Second, and most interestingly, if while not connected to power (such as hiking or something), you double-press the charging hub button, it’ll consolidate the juice from the three batteries into one. Thus, if you’ve got three batteries at 25% left, it’ll consolidate that into one battery at ~75%. That’s effin awesome! That almost makes me tempted to drag this thing on treks, because I always end up with multiple 15-25% batteries that are kinda useless.
Lastly, as with the past, you can plug other things into it, and use it as a monster USB-C battery bank.
About the only thing I wish this did was concurrently charge batteries as long as you had a big enough power supply. Today, it’s still successive – one battery after another. But there are plenty higher-wattage chargers (especially in this day of higher-powered USB-C laptops, that could easily take advantage of that. Still, this is by far the best charging hub DJI has made to date.
Video & Photo Features:
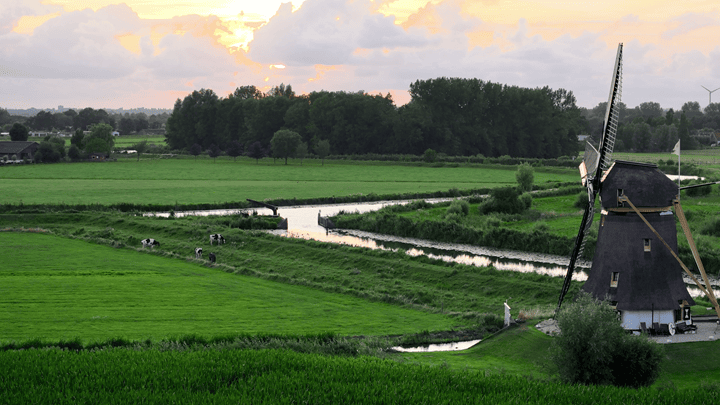
(Above: Still from the 70mm lens at sunset shooting 4K/60, no editing)
The Air 3’s two cameras are undoubtedly a selling point, as is the increased aperture of the main 24mm lens, from F/2.8 down to F/1.7. The secondary 70mm lens has an F/2.8 aperture. Both are static.
Much will be made about the shift from a 1” sensor in the Air 2S to a 1/1.3” sensor in the Air 3. Frankly, that’s silly. Mostly because the sensor size is merely one component of a modern imaging pipeline. We’ve seen countless examples of cameras that perform better than 1” sensor cameras, and vice versa. One only need to look at some 1” action cameras that have produced lesser images than that of a non-1” camera. Further, the Air 2S has an imaging pipeline that was developed about 3 years ago, versus the newly generated stacked sensor CMOS of the Air 3.
Instead, we should look at the actual end-results to decide whether the imagery is good. In fact, in some of my testing – specifically low-light testing, the Mavic 3 Pro and Air 3 Pro were not only indistinguishable, but the Air 3 actually shot better shots on both the 1X and 3X. Again, because the Mavic 3 Pro is really just a Mavic 3 in terms of imaging pipeline technology, and that pipeline is now nearly two years old.
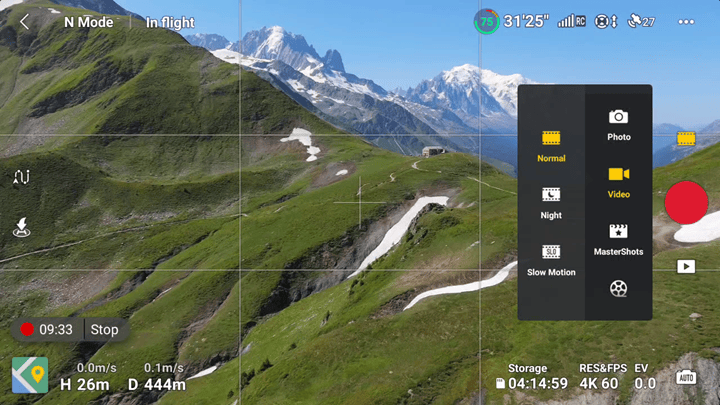
In any case, a quick lap around the photo block – and I’ll add a link here later this afternoon with some raw footage samples people can take a look at, from both cameras. I’ve got a separate Air 3 user guide I’ll be publishing later this week that dives into all the features in extreme detail (akin to my incredibly popular Mini 3 Pro user guide). Once the drone is up in the air, you’ve got a menu on the right side with the different shooting modes. This is separated out into photo and video, plus various special modes like QuickShots, Mastershots, Hyperlapse, and Pano
Resolutions are controlled down in the lower right corner. Beware that by default you’ll be 1080p, so get yourself quickly to 4K. Likewise, for photos it’ll default to shooting in 12MP, rather than the 48MP option. The Air 3 will use a remosaic algorithm for the photo side, akin to what many mirrorless cameras use. For those that want to geek out, DJI engineers sent over this PowerPoint presentation on how the Air 3 sensor works:
- Slide 1
- Slide 2
- Slide 3
- Slide 4
- Slide 5
Anyways, back to the subject at hand – shooting videos and photos. With the Air 3 you’ve got up to 200FPS for 1080p slowmo, and 120fps for 4K slowmo. You’ll find samples of both in my video. However, most noteworthy is that these are available across both lenses. Again, that’s a huge shift from past DJI products where the secondary lens always got sloppy seconds. The only thing you can’t do on the second lens is shot a panorama from it, which would be cool and perhaps down the road (you could, of course, still manually/painstakingly shoot it and stitch it later).
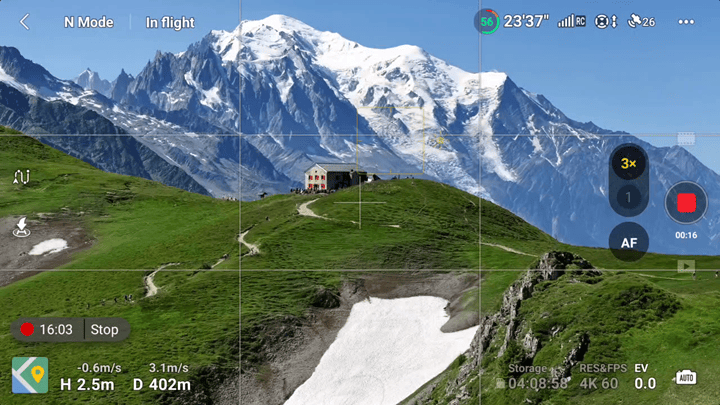
As with other DJI products, you can manually change photo and video settings by tapping the icon in the lower right corner. The Air 3 lets you change white balance, aspect ratio, photo format (JPEG, RAW, or both), ISO, Shutter speed, and EV comp. You cannot change the aperture.
Likewise, for those that want to color grade themselves, you can use D-Log M, which is accessed through the camera menu in the upper right corner (the same place you’d change from 12MP to 48MP).
I’ll dive into all these settings more in the video tutorial, but nothing is a surprise here in terms of DJI features – it’s all been seen before on previous drones, including the Mavic 3 series and even the Mini 3 Pro.
Unsurprisingly, I found myself gravitating back to the 70mm lens over and over again. I think for two reasons. First, the image quality is great – especially in daylight conditions (in low-light conditions you’ll start to see the differences to the main lens). But more importantly, it let me get better shots. The reality is that when you stick a camera hundreds of feet up in the air, the wide-angle look can become boring and repetitive. Most shots lack something to draw the eye towards. Whereas when you get a zoom lens involved, you can start to develop foreground/background interest (even if the blur here is minimal). You can get a safe distance away from people/things while still getting fascinating shots. For example, tracking boats out in a harbor, or cyclists on a road, doing so with a zoom lens is just way safer, and also more friendly for uninvolved people. It reduces drone noise for those nearby.
(Above: Screenshot from 4K/60 footage on 70mm lens)
However, one downside compared to the Mini 3 Pro is that the gimbal doesn’t turn sideways/vertical. Thus while it does have a 2.7K vertical shooting mode, it’s simply a crop from the horizontal image plane. DJI does give you the full sensor height though, so you do get a tiny bit more out of it, but it’s nothing compared to the full 4K shot on the rotated gimbal on the Mini 3 Pro.
I just wish for a day where we get this camera into the drone size of a Mini 3 Pro, with a rotating package. Perhaps someday.
(Note: I’m putting together a Dropbox/etc share with a pile of original footage/stills, should have that uploaded/labeled fully later today.)
Sports Tracking:

The single biggest item with the Air 3 is that it now supports omnidirectional obstacle avoidance. Previously the Air 2S lacked sideways obstacle avoidance, which meant that when it flew sideways tracking you, or if trying to avoid an object, it might go sideways, it could whack into something. And by ‘could’, I mean ‘most definitely will’. However, the Air 3 now has full coverage in every direction with new added sensors. These should keep it safe, at least in most conditions. I suspect winter low-light conditions with thin tree branches will still be challenging, as that can be even for Skydio.
Now, the second biggest new sports-related item, and arguably almost as important, is that the Air 3 supports using the tele lens in Active Track. This means that you no longer have to be as close to the person that you’re tracking. This is incredibly useful because it can get you away from problematic objects (trees), or even away from people. It’s super useful for side-profile shots, especially low ones, because you can be substantially farther away with the 70mm lens than the 24mm lens.
And the third most notable thing, is that you’ve now got ActiveTrack 5.0 related functions. So sure, there’s the better object recognition and recovery, but also the ability to insta-select which filming angle you want (e.g., left/front/angled/etc…). Previously it was just back/side, and to get different angles you had to manually shift the aircraft.
Oh, and finally, you can film in 60FPS with ActiveTrack, which you couldn’t do previously on the Air 2S. Likewise, you can enable 10-bit via DLOG M, as well as any other feature you darn well want. Everything is supported in ActiveTrack modes.
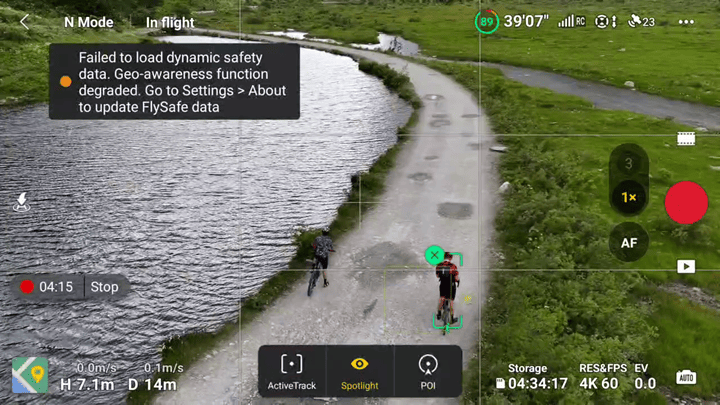
So, when it comes to tracking, I’ve got a full video I’ll be uploading shortly above, but in the meantime, let’s run through the gist of it. First up, you’ll get the drone in the air and pointed towards you. Then, you can simply draw a box around yourself, or use the automatic recognition to select you or any other trackable object:
(Note: These are all lower-resolution screen recording shots. Further, the FlySafe data error message was a bug at the time for European users, that couldn’t be dismissed for more than 10 seconds.)
Once you’ve done that, it’ll pop-up the FocusTrack menu. This menu gives you three core features: ActiveTrack, Spotlight, and POI. The differences are as such:
ActiveTrack: This is the main mode where the drone will follow you, at a preset angle (e.g., behind/side/left-back/etc…), and you can adjust height/distance in real-time.
Spotlight: In this case, the drone’s camera will follow you, but the drone will stay put. Think of this like a stadium TV camera, following the action, but staying on a tripod. This is a great way to get varying shots for b-roll.
POI: In this mode, it’ll circle the subject (either going left or right), but, and here’s the big piece: It’ll still follow you! This is awesome if you’ve got a big wide-open area, and can just let it slowly (or not slowly) rotate around you.
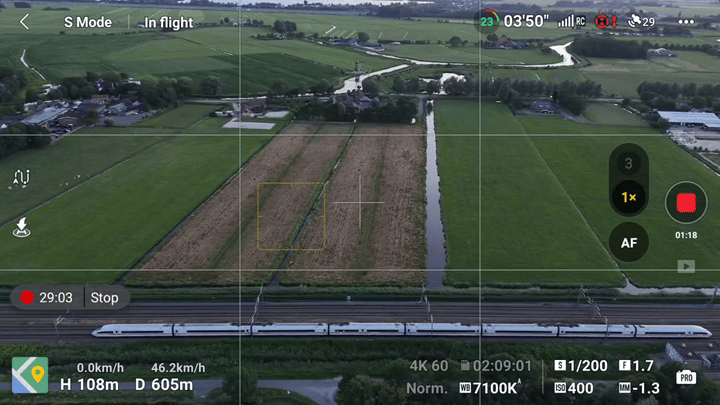
Most of the time, you’ll use ActiveTrack, but I used POI today when I was out in the middle of a farm path/road, with nothing around that could cause problems, because it gave me interesting footage.
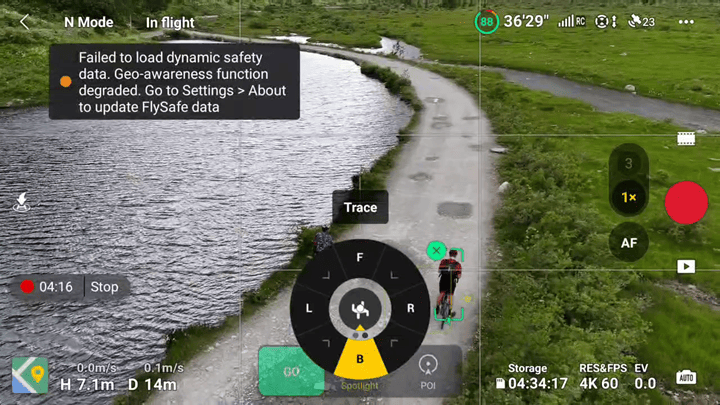
In any case, for now we’ll select ActiveTrack and get going. You *MUST* click the ‘Go’ button, and additionally, you *MUST* remember to hit record. Why on earth DJI can’t have it automatically start recording when it starts tracking (or at least have an option for such), is beyond me. Skydio does that, and even DJI themselves do that for QuickShot modes. I struggle to see *ANY* scenario where I want to ActiveTrack but not record. Sigh.
Here’s the menu to choose which side you want to record from:
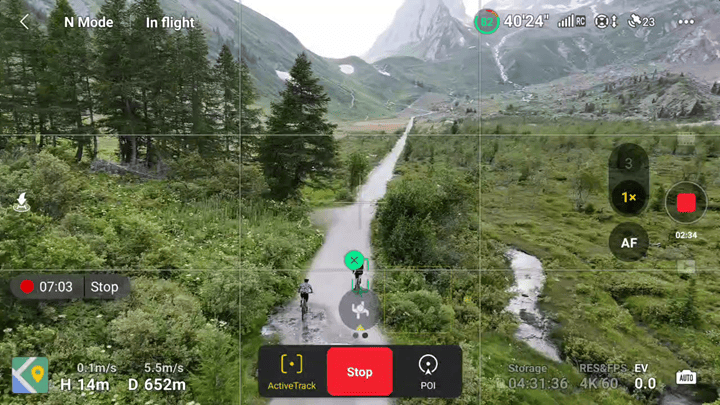
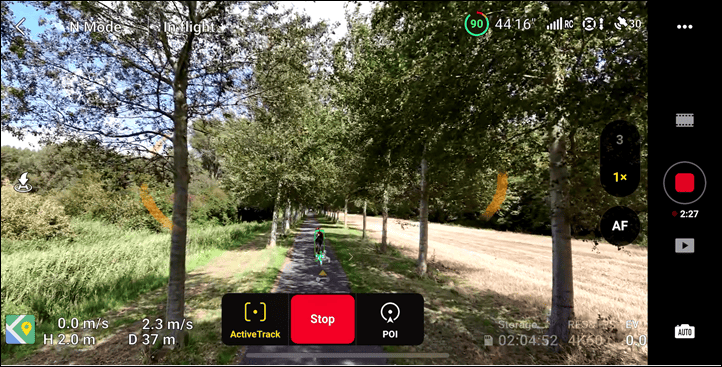
With that, off we go. Now, if you’re free and clear of objects to avoid, then the DJI Air 3 ActiveTrack is pretty darn solid. It never lost me once in this mode, even with light tree coverage. Easily tracked the entire time, and when I’d go behind trees, it’d also pick me back up again, as long as the gap was under a few seconds.
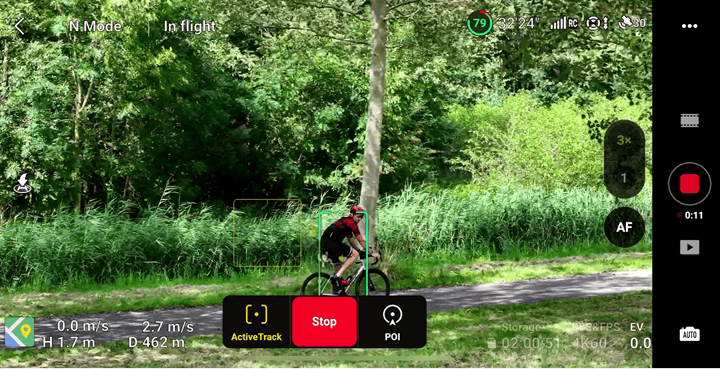
Here you can see we switched it to the side:
However, in areas of denser tree coverage, the Air 3 really struggled. Of course, one has to define the struggle. Firstly, the Air 3 did not crash into any trees, ever. That in and of itself is a first for me on a DJI drone. This thing made it three weeks without crashing itself. Were there close calls? Absolu-fudging-lutely. Did it crash? No. Not in the easier summer season (I suspect winter with thin tree branches would end differently).
Instead, the core issue was hesitancy. The DJI Air 3 is simply far too conservative/hesitant around trees, and when it got within a few meters of any trees (or the ground), it would slow to the speed of a walk. Thus making it impractical for anything but walking (again, if near substantial tree/obstacle coverage).
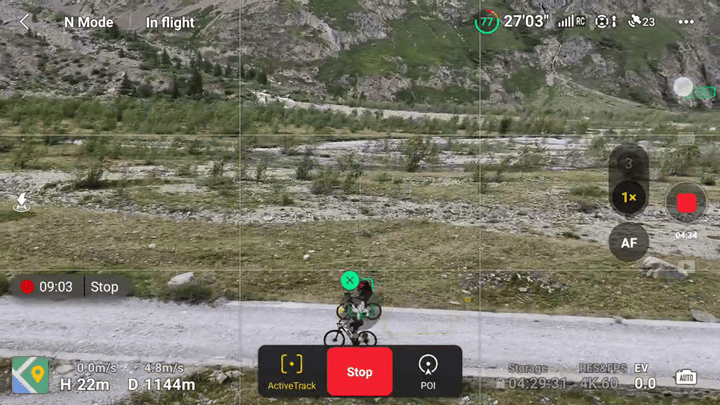
Now, that said, what can help substantially here is the 3x lens, because it can get you ‘out’ of the obstacle range – especially when shooting from the side where you may have a row of trees/etc and can get beyond that, such as this path here:
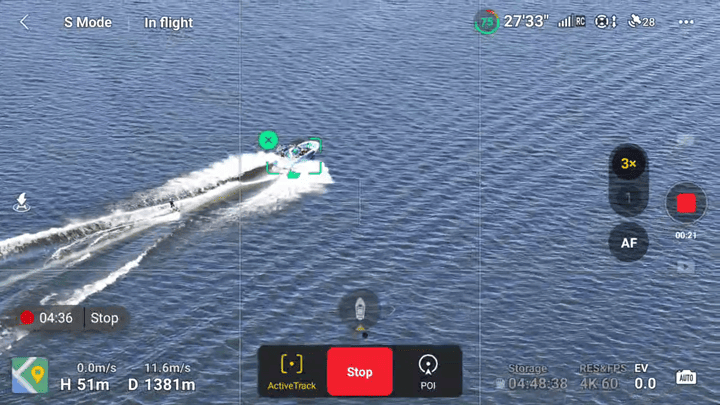
In that scenario, you’ll now be clear of the obstacle and can go pretty fast. Mind you, that you need to get the aircraft in ‘Normal’ mode and not ‘Sport’ mode, at least if there’s any chance of hitting anything (sport mode lets you go up to 75KPH). That’s because in sport mode there is NO OBSTACLE AVOIDNACE, thus it’ll happily plow into that tree. However, if you’re out in the ocean/lake/whatever, then that’s not a problem. I used sport mode with ActiveTrack and the 3X lens to track a waterskiing boat, for example:
Worked great! I could have gotten in quite a bit closer, but given I didn’t know the people, I didn’t want to be super creepy. Only half-creepy.
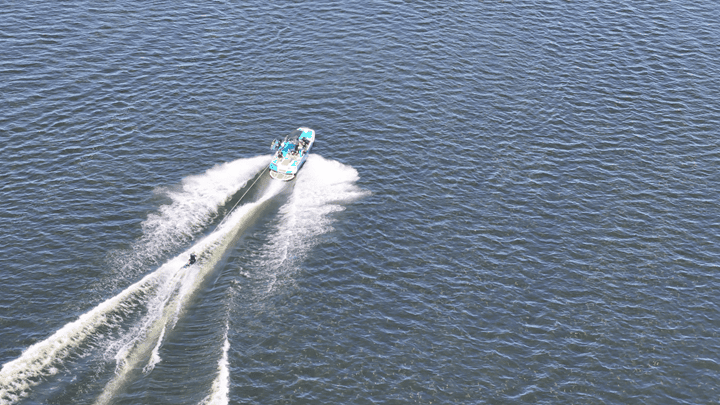
A resulting snippet from the 4K video file. I do find that the Air 3, like the Mavic 3 Pro, tends to struggle a bit with exposure near the wake of boats on bright days.
Ultimately, the ActiveTrack on the Air 3 is a modest upgrade, mainly due to the added ActiveTrack 5.0 features (previously found on the Mavic 3) in conjunction with the tele lens. However, the object avoidance speed/system still falls far short of what Skydio offers, or has offered on even their oldest models. Further, the lack of a dedicated GPS beacon/locator, means that you need to fly with the full remote control, which adds more complexity. In my case, I used the previous remote control holder that I’ve reviewed, which worked with the DJI RC-N2 as well.
However, frustratingly, the DJI RC 2 remote uses rear screw holes that are literally 1mm wider apart than the DJI RC 1, thus, my existing handlebar remote for that won’t work. I kid you not, 1mm wider apart. Why?!? Either way, having to carry a remote on a bike is still cumbersome. And while I have done MTB with it successfully, I always feel concerned my phone is going to fly out, go under my wheel, then somehow get sucked up into the drivetrain and splintered into a million pieces. Hasn’t happened yet, but I’ll undoubtedly be the one it happens to.
Either way – ActiveTrack is great in light coverage or moderately open environments, getting you easy-to-manage awesome shots. Just don’t expect it to work well in dense trees. And as always, please don’t use ActiveTrack in busy areas around others (like around cars on public roads).
Skydio Sports Tracking Comparison Thoughts:
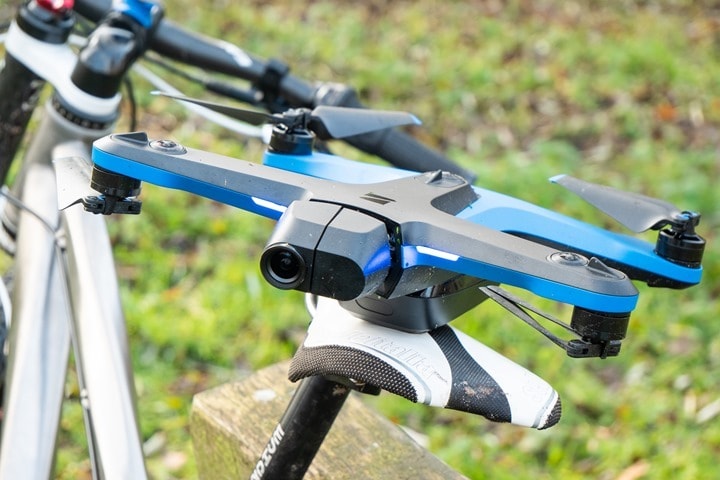
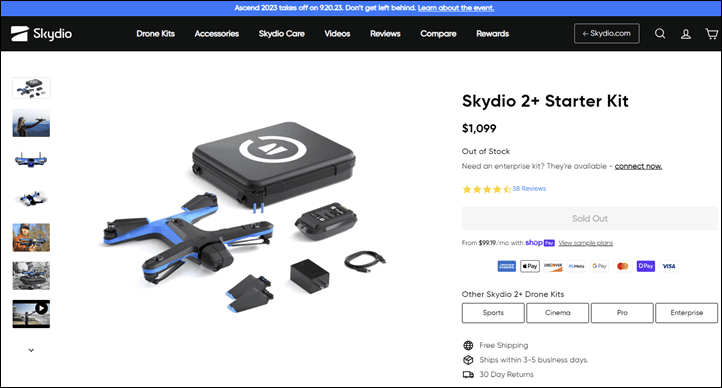
Many will ask: Should I get the Air 3 or Skydio 2+? The Skydio drones are amazing sports-tracking drones, albeit with a not-so-amazing camera. While Skydio’s obstacle avoidance and esports tracking capabilities make DJI’s look like child’s play, the inverse is true on camera quality and features – Skydio doesn’t come close there. One could hope Skydio simply walks the 20 meters from their corporate headquarters front door, to GoPro’s corporate headquarters front door (seriously) – sharing the same parking lot. But alas, that hasn’t seemingly happened yet.
But the challenge is actually bigger: You can’t even buy a Skydio consumer drone anymore.
There’s continuing signs that Skydio is unfortunately exiting the consumer market. Their consumer drones haven’t been available for a few months now, and when other media outlets have asked whether or not they’re continuing in the sports space, the answer has been “We will have a firm update to share in the coming months and can provide answers to your questions at that time”. There’s nothing confidence-inspiring about that. Instead, it’s likely that Skydio will continue to shift their focus towards consumer/military applications. Heck, even their website title now says they’re focused on the enterprise market.
While I get that from a business standpoint, I think it might be short-sighted. As DJI continues to see more and more US political pressure each month, with continued taunts of expanding the already-existing governmental purchase ban of some sort, Skydio could be left in the position to easily capture the US consumer market if political winds shift. The US market is merely one political chess move away from Skydio being in the position to own the entire US market overnight. I’d hope their investors see that opportunity, and realize that the ‘cost’ of maintaining a consumer division is relatively small compared to the opportunity that continues to increase in political temperature. While I don’t think a single-manufacturer scenario is good for consumers in any scenario (here or otherwise), one can’t ignore that reality.
In any case, given Skydio’s lack of comment, there’s little choice left but to recommend the Air 3 for sports tracking as the best overall option.
[Update Sept 2023: Skydio has unfortunately announced they’ve pulled out of the consumer drone market]
Summary:
The DJI Air 3 is a modest upgrade in some categories, a major upgrade in others, and a slight downgrade in a few. It really depends on which perspective you’re coming from, or rather, which drone you’re coming from. For an older unit like the DJI Air 2 or Air 2S, the obstacle avoidance and battery life is a big step up. Likewise, having a secondary lens is incredibly useful – both from a photograph/videography standpoint, as well as a safety/regulatory standpoint.
While some will dismiss the unit due to the lack of a 1” sensor from the Air 2S, both my imagery as well as numerous other reviewers’ imagery show that argument simply doesn’t hold real-world water. The imagery coming off the unit is incredibly good, and on par with the DJI Mavic 3 Pro in almost all my shots (and even better in a handful) – even if at lower than 5K resolutions. Again, as I outlined above – imaging pipeline technology moves on. And what might have been great 2-3 years ago, is run of the mill today.
Rather, my criticisms on this unit are, as usual, the lack of meaningful/major progress forward on the ActiveTrack front. Sure, it has ActiveTrack 5.0 – but that’s what the Mavic 3 had when they added it 1.5 years ago. And it wasn’t all that different from other drones before it. Likewise, it’s a bit quirky to me that the Mini 3 Pro has a gimbal that can rotate vertically, but the Air 3 doesn’t. While one could make that same argument for the Mavic 3 series, that unit came out 1.5 years prior to the Mini 3 Pro. Whether you like vertical (portrait) imagery or not is somewhat irrelevant in 2023, if you’re shooting for clients, they’re gonna demand those shots – and this unit puts you at a disadvantage to the Mini 3 Pro in that realm.
Still, despite my minor annoyances, this is a good middle-ground option in the DJI lineup. It certainly lacks the ‘holy crap’ wow-factor that DJI delivered with the Mini 3 Pro, but it also lacks the ‘holy crap’ price tag of the Mavic 3 Pro. Thus, if you’re looking for a bit of an edge with more features than the Mini 3 Pro, notably waypoint support or full obstacle avoidance, this delivers on that front.
With that – thanks for reading!
Found This Post Useful? Support The Site!
Hopefully you found this review/post useful. At the end of the day, I’m an athlete just like you looking for the most detail possible on a new purchase – so my review is written from the standpoint of how I used the device. The reviews generally take a lot of hours to put together, so it’s a fair bit of work (and labor of love). As you probably noticed by looking below, I also take time to answer all the questions posted in the comments – and there’s quite a bit of detail in there as well.
If you're shopping for the DJI Air 3 or any other accessory items, please consider using the affiliate links below! As an Amazon Associate I earn from qualifying purchases. It doesn’t cost you anything extra, but your purchases help support this website a lot.
And of course – you can always sign-up to be a DCR Supporter! That gets you an ad-free DCR, access to the DCR Shed Talkin' video series packed with behind the scenes tidbits...and it also makes you awesome. And being awesome is what it’s all about!
Thanks for reading! And as always, feel free to post comments or questions in the comments section below, I’ll be happy to try and answer them as quickly as possible. And lastly, if you felt this review was useful – I always appreciate feedback in the comments below. Thanks!






The stacked CMOS sensor specs might be a DCR exclusive. DJI does not mention it in their own tech specs. Only the top end Canon, Fuji, Nikon and Sony have stacked sensors.
I have a Mini 3 Pro, and this is a step forward for sure, but the sensor/main lens combination seems the same as in the Mini 3 Pro, and – that one has limitations in dynamic range that are very clear. I think, I’ll try to use the Mini 3P more, until a Mavic 4 appears.
On the other hand, longer range and tele lens… hmmm…
When you get right down to it, there are three ways that a larger sensor is advantageous.
The first is resolution: all else being equal, a larger sensor will let you cram more pixels on it. But the amount of resolution you can get out of a tiny sensor is remarkable these days.
The second is light sensitivity: all else (including resolution) being equal, a larger sensor will collect more light. But my Canon EOS 5D III goes up to ISO 25,600 natively, or 102,400 if I use the extended (poorer quality, but still impressive) range – and that’s a camera that was released over ten years ago; technology has marched on and improved since then. (eg: the EOS R3 – which I’d love, if I had the spare cash, which I don’t – goes up to ISO 204,800. Which is just NUTS – I think the fastest film ever made was around ISO 3200, and the grain was massive.)
The third is depth of field. If you want that lovely shallow depth of field to make the subject pop out at you, you need a large aperture (I’m talking absolute aperture size, not f/whatever, here) – which means a relatively long lens and large sensor. Which would open up some interesting artistic opportunities for drone footage, but I don’t think we’re anywhere near being able to get decent flight times with the weight of all that glass.
So yeah.. when it comes to the question of sensor size, it’s a big “meh” from me; it’s not a factor in the buying decision. Wake me up when they start putting in 35mm sensors (24x36mm) and lenses to suit – that’s when I’ll be sitting up and taking notice of the sensor size as a significant thing. Or bigger would be even more interesting. I don’t think it’ll happen any time soon, though. My 70-200mm f/2.8 lens weighs almost 1.5 kg just for the lens; that’s a massive amount for a drone to carry. Granted that the prime is lighter (765g for the 200mm f/2.8), but that’s still a lot in this context. It’s possible, but I’d expect the drone size to be significantly bigger than a standard “recreational” drone, with a price tag to match (tens, if not hundreds, of thousands of dollars.)
Great review Ray
For active sport tracking what would it take to create a beacon that the Mavic could lock onto in the same way that Skydio does/ or should that be did ? I do surfing/ foiling and have long been waiting in vain for the Skydio to come to Europe to use it to track me on the water.
Do you reckon I could leave the controller on the shore and get the new Mavic to follow me out ? – I go several hundred metres from the shore.
Yeah, there isn’t a great option there. Basically, your best option is to find a trusted friend. Someone that can at least monitor it and ensure it RTH’s back to shore. Assuming regulations allow, you could do it with leaving it on-shore, and that might work fine if it tracks well, or, it could be just a series of frustrations where it keeps losing you – requiring you to go back to shore and re-acquire.
Even if one rigged up some sort of waterproof case, operating with water on a screen (even in a case) would be near impossible, since touch is required to select the object.
Thus, DJI really needs a beacon of some sort. Everything points to Skydio exiting the consumer market, thus…yeah. :(
A side by side photo comparison might warrant a donation :-) Full Auto fair comparison.
A question, but first thank you for the thorough and careful review. A question about the Active Track & Obstacle Avoidance. Compared to your test of the Mini 3 Pro, the Air 3 seems inferior in that bike-through-trees test. First, is my impression of the two videos accurate? (The other video is the Mini 3 Pro vs. Skydio.) If so, can you offer your informed expert insight to account for the Air 3’s hesitancy, slowness, and difficulties? Is there a fix… a sensitivity setting that can be adjusted? Or perhaps the Air 3 chip isn’t fast enough for omnidirectional sensing? (I’ve actually ordered both to compare sizes and was leaning toward the Air 3 because of the omnidirectional obstacle avoidance, until I saw your tree test. That concerns me.)
Thank you,
David
Similar inquiry to the above; how does Active Track on this particular unit perform in comparison to the Skydio?
Did you see his comparison of M3P and Skydio? It gives a good comparison of Skydio to DJI functionality.
link to youtu.be
I did. And, per your suggestion, I just watched it again just to be sure I wasn’t missing something.
My question remains, how does this new unit (with 360 obstacle avoidance + one year later in tech refinement/advancement) compare to the Skydio?
Imo, the Skydio’s active track feature crushes DJI. Sure, it bounces all over the place but I interpret that as it’s effort to “get the shot”. When you watch the video, despite the vehicle bouncing around, it’s always smooth and presentable.
Whereas the DJI seems lethargic. It appears to not be able to track a complex shot at higher speeds. As DC indicates, it’s focused 80% on all of its other functions whereas the Skydio is focused 80% on tracking.
So, I’m curious if it’s tracking capabilities have improved as result of 360 obstacle avoidance. And, maybe/hopefully that DJI has refined it’s Active Track during the last year too.
Thanks for the dialogue!
Yeah, I think in general, even a year+ later, Skydio’s obstacle avoidance and human tracking still easily beats DJI, not even close.
DJI has definitely improved, but much of that improvement seems more focused on obstacle avoidance than the maintined tracking of the subject. And to be fair, maybe they just got sick of me crashing their drones into giant obvious tree trunks every time they released a new drone. This is legit the first DJI drone that didn’t crash on me. True, it tends to be easier to do that in summer than winter releases, but still.
(I will say, the Mini 3 Pro crash though was mostly of my own accord accidentally going sideways into something, so I won’t blame them entirely there. And it wasn’t harmed at all. Only one other time the Mini 3 Pro crashed, when it got itself in a wonky Active Track pickle, and in my attempt to help it out, I went upwards, except, from my angle I didn’t realize there was still a tree branch just barely above it. It got caught in the branch, and then I spent a while throwing rocks at it till it finally came down.)
The main limitation I see with DJI’s implementaton is that it’s just too cautious right now. Sure, it’s great for filming out and about in farms, wide open areas, water, etc… Awesome. But once you involve any forests (such as what they literaly show in the DJI Air 3 ad), it’s a non-starter.
That said, as with before, the DJI footage is FAR more usable than the Skydio footage. For the Skydio footage, you really need summer light, or bright snow bluebird conditions. Anything else, and the camera is just too poor.
Of course, all this is likely a academic discussion. The Skydio 2+ has been out of stock for months, and the company says they’ll discuss their consumer strategy later this year. That’s basically corporate speak for its dead.
Thanks, DC.
Your review and this dialogue have ultimately confirmed that I need to warranty my Skydio 2+ that took an epic fall from the sky a la tree limb last April in Prescott, AZ while attempting to capture content at the Whiskey Off-Road.
skydio is quitting consumer drone support, not the best news for me in case my skydio breaks.
Great review!
The fact that I can control my original “Air” just with my phone makes it stand out for me, regardless of better cameras, sensors, range, features etc.
Give me a decent Mini that I can control with only my phone and I might consider it.
Excellent review, as always!
I have used both Air 2S and Mini 3 Pro and found the M3P stills camera to be a big disappointment in terms of clarity and sharpness/acuity of the image files. A2S has been great, not just the acuity but the dynamic range as well especially the sunset/sunrise scenarios. So, if folks compare Air 3 to Mini 3 Pro’s camera for still images, that wouldn’t be anything to write home about, at least for me. Guess I will have to try for myself.
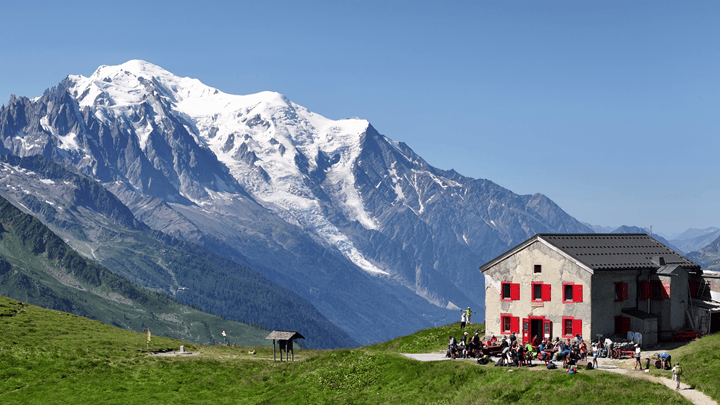
Also, would you mind telling me the exact location of this mountain hut in the Alps?
Thanks,
Faisal.
Hello!
This hut is directly atop the border between Switzerland & France, at the end of the Chamonix Valley in Le Tour. The name is Refuge du Col de Balme.
Cheers!
FYI Skydio has made it formal, they’ve existed the consumer business…
link to techcrunch.com
Skydio today announced that it will be shutting down its consumer drone business.
Beginning today, the firm will no longer be selling its Skydio 2+ Starter, Sports, Cinema or Pro kits, although it will continue to offer the Skydio 2+ Enterprise Kit to business customers. Skydio also promises to continue supporting those consumers who have already purchased a drone. That includes offering vehicle repairs and other support related to warranties. The company says it will also stock batteries, propellers and other accessories “for as long as we can.”
Skydio is closing up its consumer wing as it expands support for various enterprise offerings. The firm has established 1,500 clients that also include various public service applications.
Update info needed, re: link to techcrunch.com
Great review. This is one of the most detailed and honest reviews of any drone I have ever read. Great work! The only downside is it’s focused on Air 3 vs M3P (for obvious reasons). It doesn’t help me decide which one to choose to expand my advertising business (enter the drone world with business in mind) – M4P or Air 3.
DC, any expert thoughts now that you have tested both drones thoroughly (price and licensing aren’t issues if Air 3 is worth it more)?
Sincerely,
Vivid
Was thinking about making a video on it, something like ‘Which one to get in under 5 mins’ or such.
TLDR: Get the Mini 4 Pro, unless you specifically want the longer 3X lens of the Air 3 (which, is admittedly awesome). Sure, there are other minor differences – but honestly, less than people think.
For example, both drones are using the same stacked CMOS sensor, albeit with different lenses, and slightly better dual-native ISO on the Air 3. Flying perf in terms of wind/etc is the same between both (real world, tested performance in heavy winds is the same).
The Mini 4 is a heck of a lot quieter, so that’s positive. Albeit the Air 3 can carry more payload, if that’s something of use (probably won’t be for 99% of people, but figured I’d mention it).
The Mini 4 performance better in ActiveTrack than the Air 3, albeit I presume at least the Air 3 should get the new ActiveTrack 360 feature sometime (but, that won’t likely change the underlying Air 3 activetrack performance).
I’ve gotta do a bit more side-by-side shots on M4P vs Air 3, but I’m not seeing a meaningful difference, given that the underlying sensor is the same.
More to come…
Thanks for the quick reply, DC!
I will probably go with your suggestion. Just mulling in my head will that additional 70mm 3x help me make better product/real-estate videos (that sweet paralax effect is more engaging than wide shots). I know it helps with events and weddings, so you don’t need to be buzzing above everybody’s heads, but events are really not my thing. I will probably go with M4P and see how it goes :-)
Also, your idea for a 5-minute video sounds interesting :-)
Looking forward to more content from you.
Thanks again,
Vivid
I went Air 3. It seems like a very similar drone but the flight time, and lenses made the difference to us.
Also went with the ‘Fly More Kit’. The batteries are great, and the charger works great for charging, and organizing/containing the little (big) buggers.
Some things I bought with it: An Apple 140 watt charger block (the DJI 100 watt isn’t available), Sandisk Extreme 256G chips: cheap, known brand; an extra USB-C cable and actually thinking if another charging block (JIC), to charge both the batteries and controller (probably the Apple 96 Watt block).
So far, flying it seems straight forward. I’ve already gotten some great shots and videos. Thinking about getting the quiet blades too, as it is kind of noisy.
Already had an interesting experience: hit a harsh wind at a higher altitude that the controller warned me about. The Air 3 took a noticeable drift in the direction of the wind. I was able to fight it, but descended to save battery, and the drone to be honest. I was surprised how strong it was all of a sudden, but have some experience in private air travel, and scuba diving. It’s totally possible to hit wild winds, and currents, and temperature changes. Be safe, be aware, be careful.
The shoulder bag could be larger. With everything in it, it’s stuffed pretty full. (Thinking of using a messenger bag instead as I get more parts and accessories)
If it wasn’t for DC’s videos and reviews, we’d still not have a drone. Thank you for your work and honesty.
Thanks for the awesome info CowRob. Your setup is what I have in mind, minus the ND filters I plan to get from day one for my Air 3. I will probably put a car charger in the mix as well. The bag looked a bit small to me too. I noticed in the videos that many have bigger bags, although I won’t have much equipment for some time in the future.
I can’t wait to go on holiday next week and get my Air 3 there (not available in my country) \o/