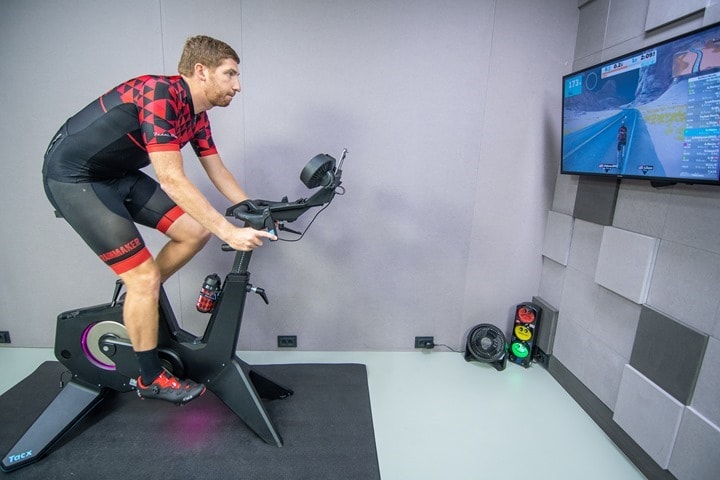
Two years and two weeks. That’s how long it’s been since Tacx first announced the NEO Bike Smart. And in my mind, I keep thinking that by now I should be calling this the NEO Bike 2. And in some respects, there’s actually a lot of truth to that. When it was first shown in 2017, it was modeled after a Tacx NEO (1) trainer. But going on two years now, and we’ve seen last year’s release of the Tacx NEO 2, and this year the Tacx NEO 2T. Thankfully, the NEO Bike is more akin to the NEO 2T; in fact, the NEO 2T is designed after the bike.
But we’re getting ahead of ourselves. While Tacx may have shown their cards a bit early in the development cycle, the reality is that all companies have elongated development release timeframes. Wahoo has been working on their bike just as long as Tacx, but simply weren’t public about it. The same goes for Stages. So ultimately these are all new bikes with new components, it’s just you happened to hear about it well before the Tacx bun came out of the oven.
Lastly, in the case of the NEO Smart bike, I have a media loaner. Well, technically I’ve had five different media loaners since this past spring, various minor iterations and such. The one I have now has been the same unit since June, with only firmware updates since then. Once I’m done with it here in the next few weeks (after some comparisons to other bikes) I’ll return it back to Tacx and figure out how to con ‘The Accountant’ into getting my own for the DCR Cave.
As always, if you find this review useful, hit up the links at the bottom of the site, especially in this case, as they help convince The Accountant/ The Girl/ The Maker Family COO, that such purchases aren’t totally crazy.
Unboxing & Setup:
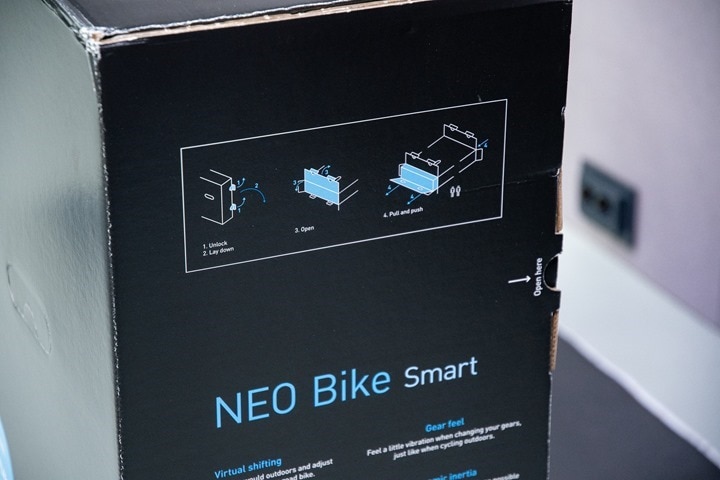
One of the more unique aspects of the Tacx NEO Bike is actually the box. No, it’s not the exterior, but rather the fact that Tacx has made it all fit the same dimensions as a normal bike box (121cm x 29.5cm x 80cm). That’s notable for a lot of reasons, but mostly ones around shipping.
By keeping to these dimensions, Tacx is able to avoid having to deal with being classified as ‘freight’, or with more unique custom carriers (such as how the Wattbike Atom is). The entire weight comes in at 50kg/110lbs.
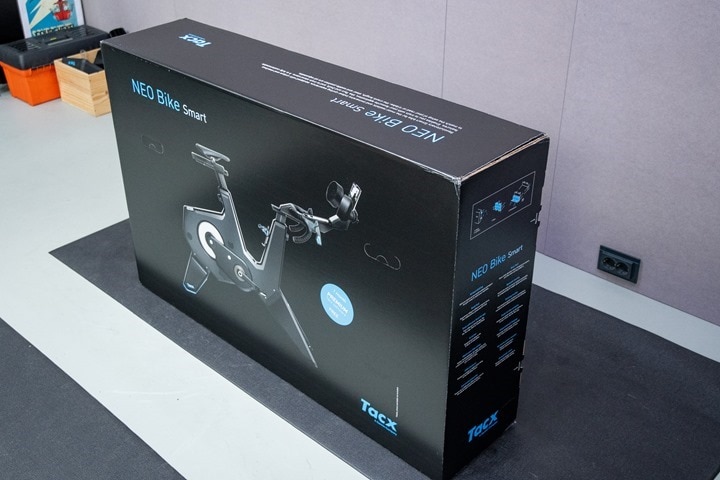
In any case, here’s what that box looks like. More or less the same styling as existing Tacx products, though, you’ll notice the little ‘A Garmin Company’ detail under the Tacx logo now.
In a funny twist of things, the blue box actually held up shipments for everyone. Fun tidbit for you: Tacx actually shipped containers of bikes to Garmin’s Olathe distribution centers in the white boxes, and then Garmin re-boxed them last week into the final boxes. So in my case, I had a non-final white box initially for unboxing, and then Tacx shipped me an empty final box for the photos above. Like receiving coals in your stocking on Christmas morning.
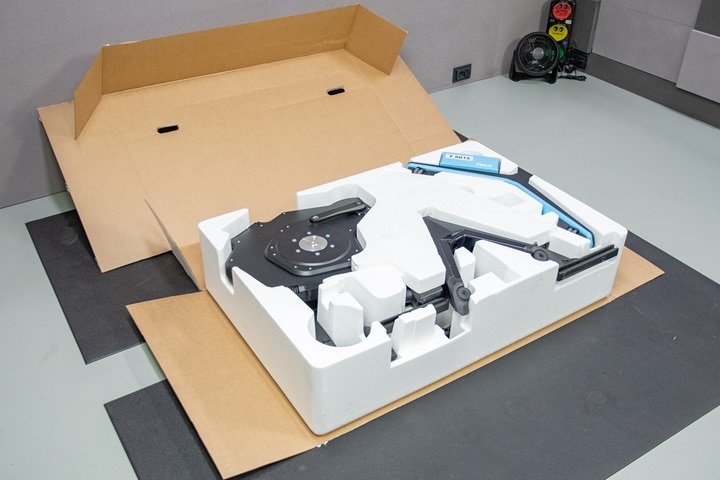
In any event, once you crack it open, here’s what’s inside:
For each of the numerous times I’ve assembled/unboxed a Tacx NEO Bike, I averaged about 30 minutes all-in, including taking photos and video. My guess is it’ll take you about the same amount of time to assemble. None of it is hard, it’s just following the instructions.
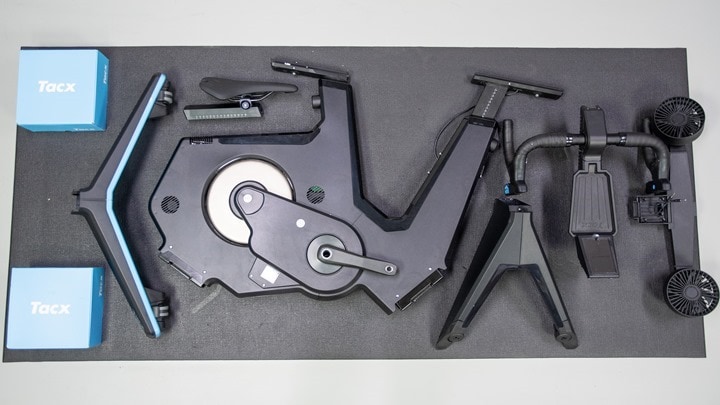
I’d classify the parts into two piles: The big parts, and the small parts. Here’s the big parts, which include the main frame, two sets of legs, seat, fan, and handlebars:
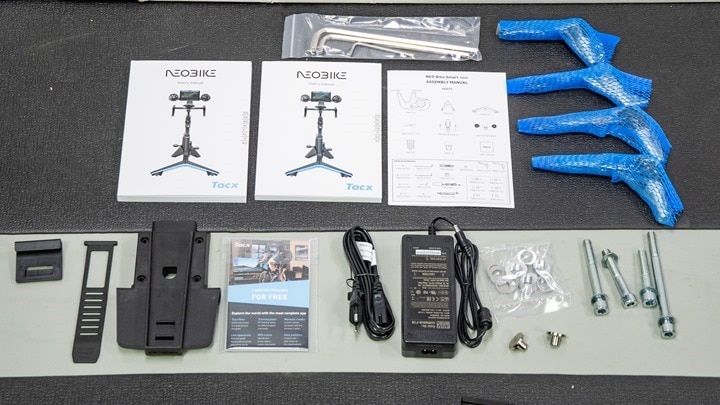
And then if you take those two blue boxes and unpack them, you’ve got all the small parts. Here’s the first blue box:
Above you’ll find the contents of the first box: Manuals, tools, handles (the things in blue wrappers), bolts, power supply, crank length pods, and the tablet holder. Here’s a mini-gallery of those parts with a closer up view:
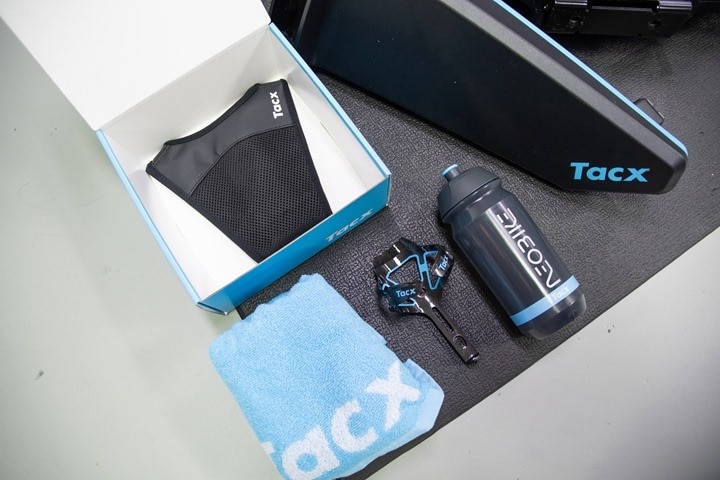
Whereas below you’ll find the contents of the second blue box, which includes a Tacx NEO BIKE water bottle, the water bottle cage, a towel, and a bike sweat protector thingy you won’t ever use:
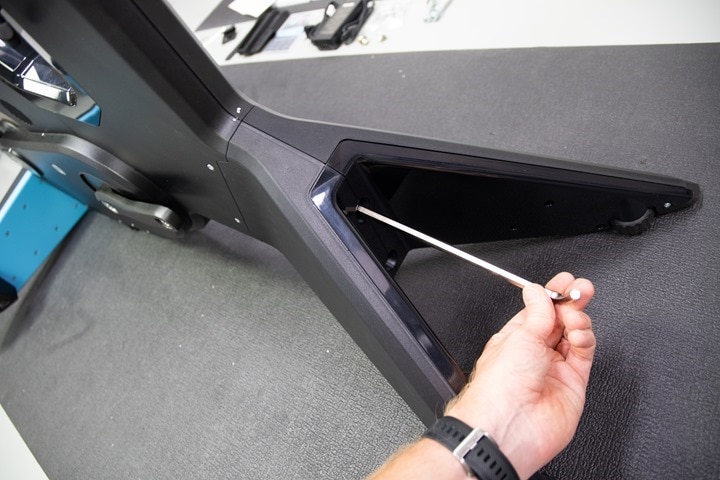
Next, let’s assemble the whole thing. This will take less time than getting all the parts out of the box. You’ll start by putting on the front leg with two bolts and the included wrench:
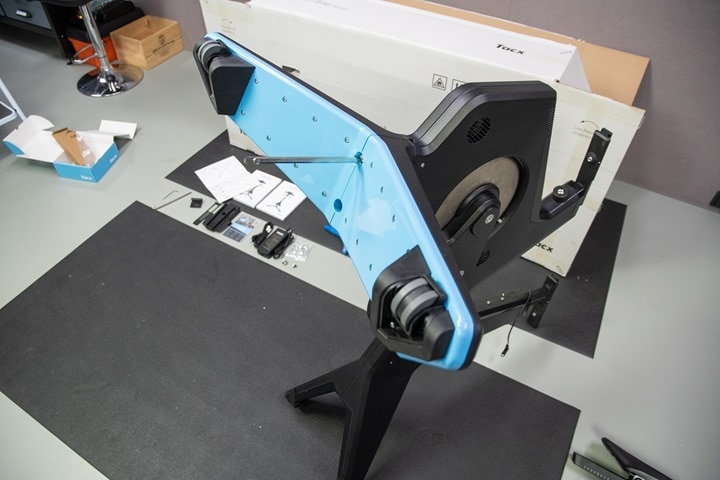
Then you’ll flip the thing up on its nose and do the back legs:
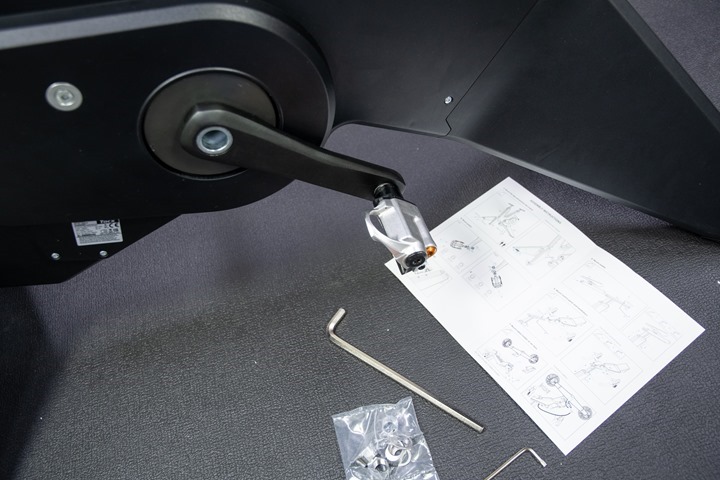
Next the manual has you attach your pedals. You’re going to use these little pods that allow you to specify one of three crank lengths depending on orientation: 170mm, 172.5mm, and 175mm:
They go into the backside of the crank arm, and then you apply a little plate to the front side and thread your pedal through like normal. Don’t worry, we’re gonna chat more about this a bit later.
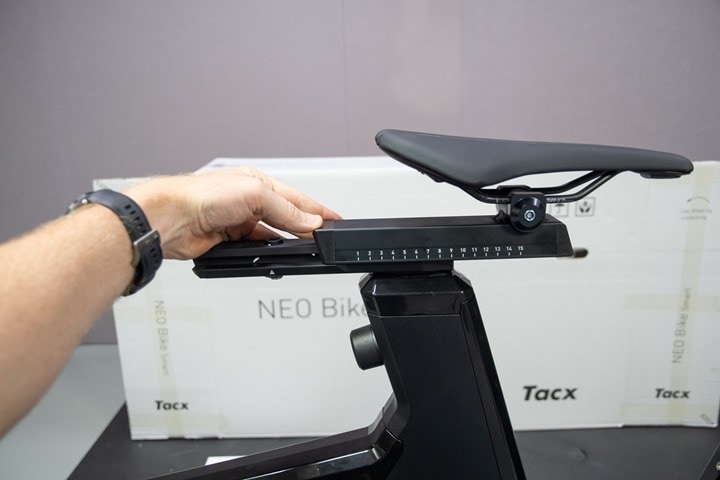
Next, grab your seat and slide it onto the bike:
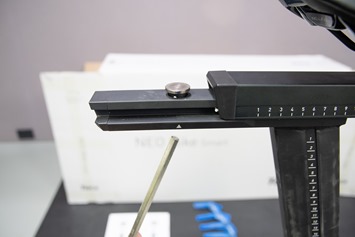
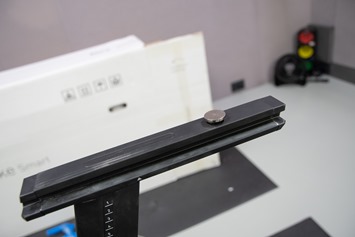
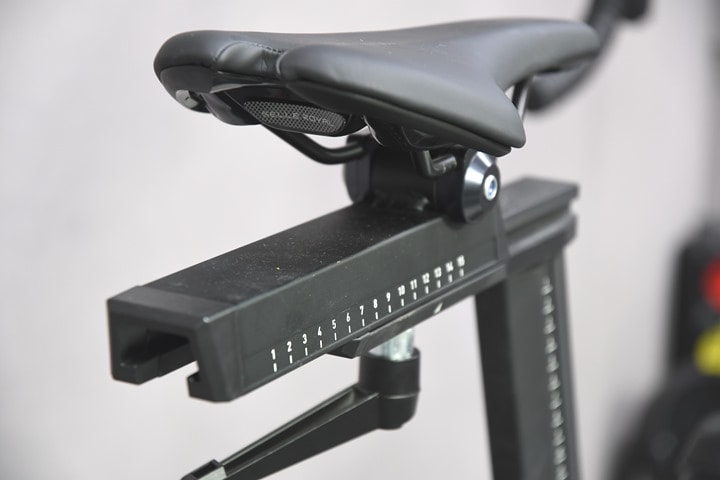
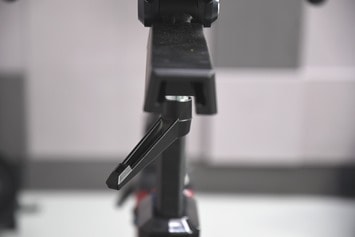
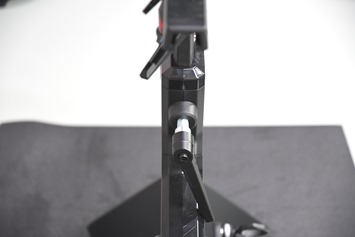
Then, you’re gonna have two bolts of sorts which you place one on the seat forward/back rail, and one up front. They essentially are used to tighten the forward/back component. You twist them upwards and it locks things in place, and twist them downwards and it loosens it to slide the seat foward/back. Below at left is the rear seat post, and at right is the front handlebar holder.
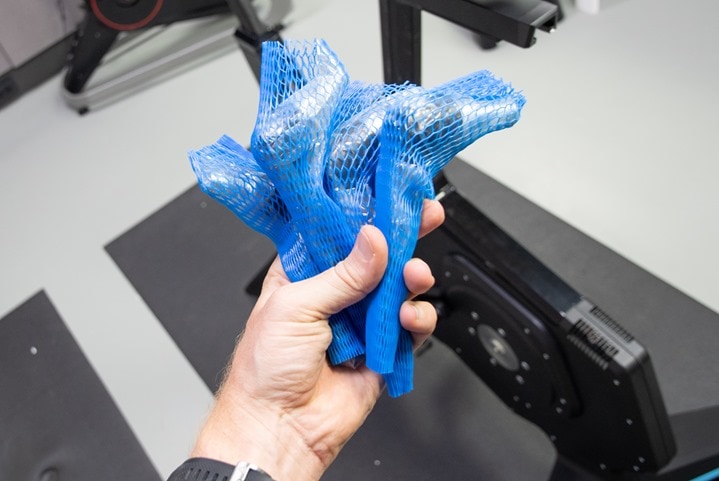
Now’s a good time to mention that out of the box there are no adjustment handles on the unit. Those are the wrapped blue things that you see below:
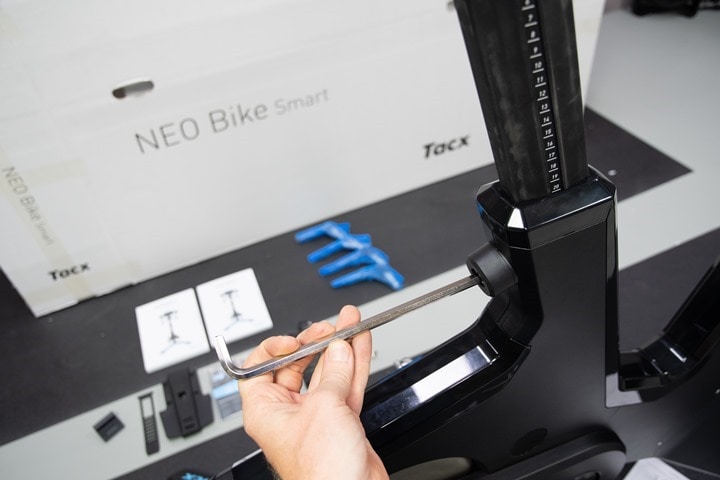
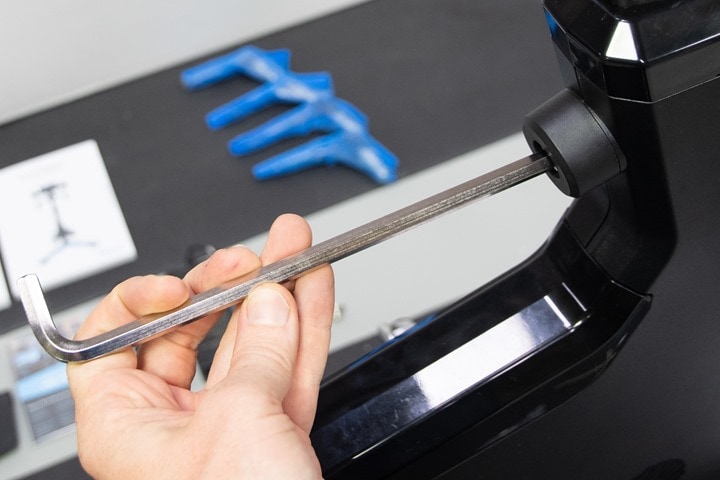
Instead, you can use the larger hex wrench to adjust the different components, such as seat post height below:
Or, you can remove the bolts and instead install the handles for easier adjustability on the fly, which is what I did.
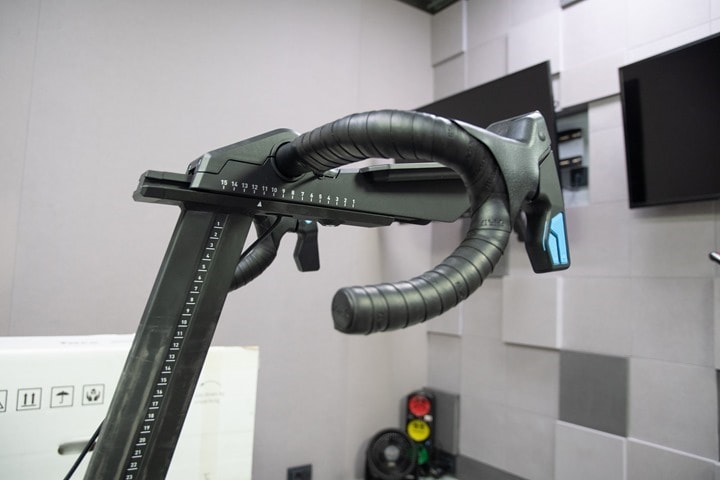
Moving forward to the front, we’ll slide on the handlebar attachment:
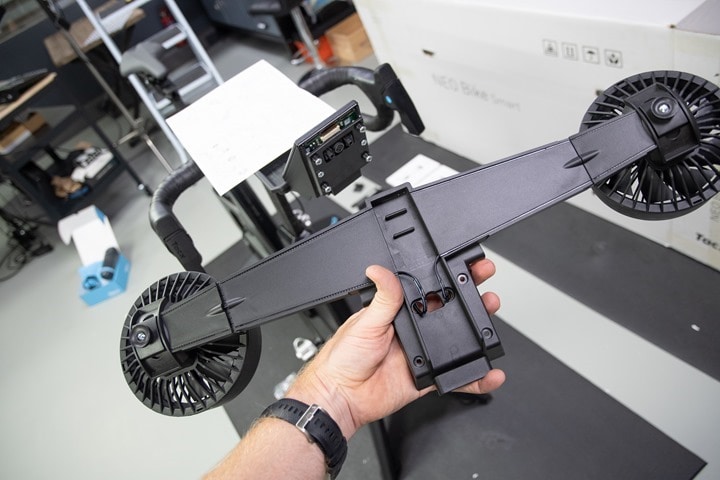
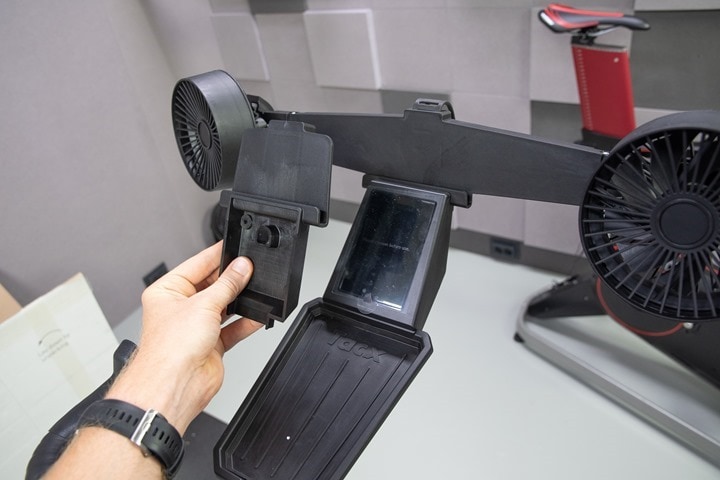
Then we’ll add in the dual fan & tablet piece, it slides on and bolts in place with four screws:
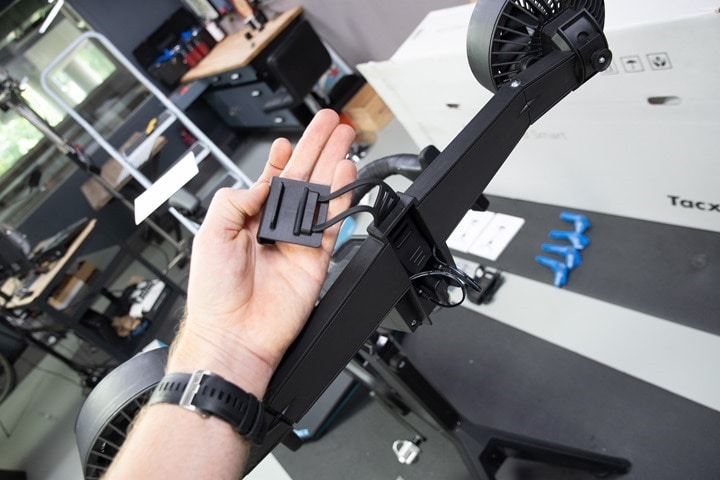
You don’t have to add the fans if you don’t want to. You can just use the base tablet holder instead:
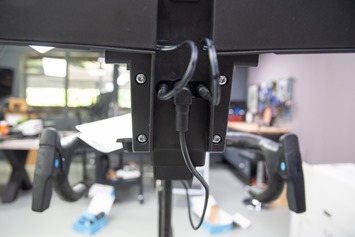
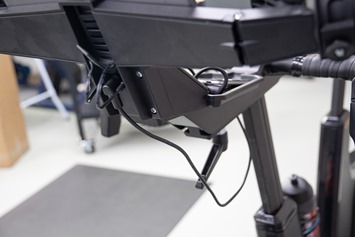
Next, go ahead and plug in the fans and display cord. One of my semi-big complaints is that these cables are too long, so they dangle around and take away from the $3,200 motif that is this bike. Walmart bikes for $199 have better cabling routing/management than this (and mind you, I have the same complaint about the Wahoo Bike). There’s no excuse for it here, though there is a barely acceptable reason on the Wahoo bike as they allow you to adjust the handlebars, so they need the extra length.
Then go ahead and attach the little rubber clip that holds the tablet in place. It’s adjustable and is surprisingly secure. I’ve had no issues using my tablet with it.
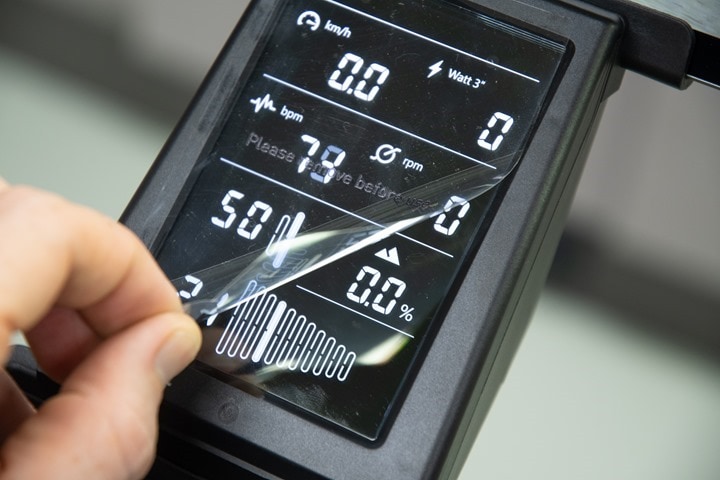
Finally, go ahead and remove the display sticker:
With that, you’re done.
The Basics:
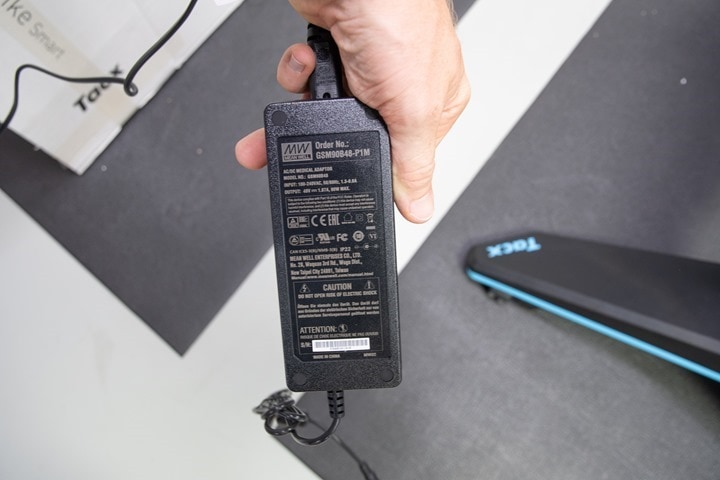
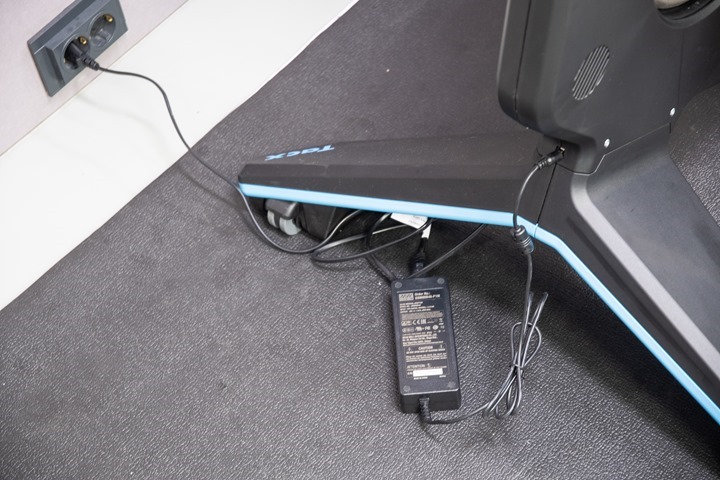
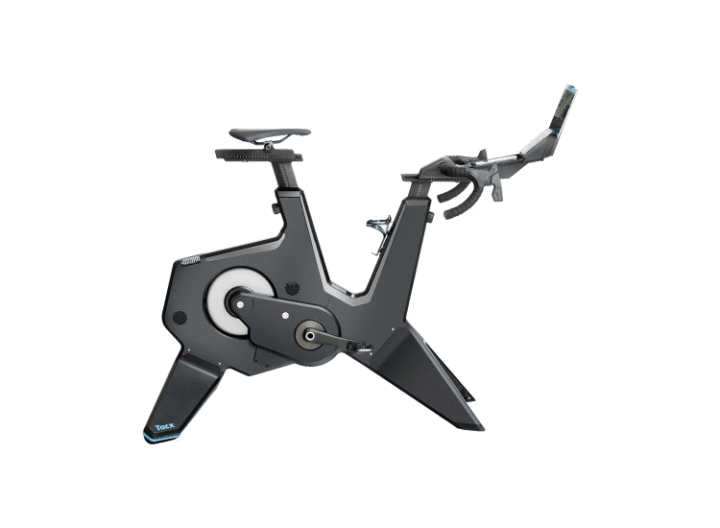
Now that we’ve got things all in one cohesive piece, let’s run through it all from back to front. I find that’s the easiest way to approach these bikes. So, the furthest point towards the back is likely going to be the power supply:
For those keeping score at home, it’s actually a very slightly different power supply than the NEO trainers. So if you happen to have two, while they look similar – the NEO bike one has a bit more power to it.
Now – you don’t actually need to plug it in at all. However, by plugging it in you’ll get downhill drive (where it essentially spins the flywheel forward to simulate going down a hill), as well as you’ll get always-on power for the two USB ports. So I’d recommend leaving it plugged in, so that your iPad or whatever is always nice and charged. But if you don’t plug it in, then the power from your pedaling will still power everything up just fine.
Next, you’ll find the crankset, and in particular the creatively engineered crank-length adjustment system, which allows you to flip the pod inside to go from 170mm to 172.5mm to 175mm depending on the orientation.
Now, compare that to the Wahoo KICKR bike crank arm below, which has a bear-paw looking system with individual crank lengths from 165mm/167.5mm/170mm/172.5mm/175mm:
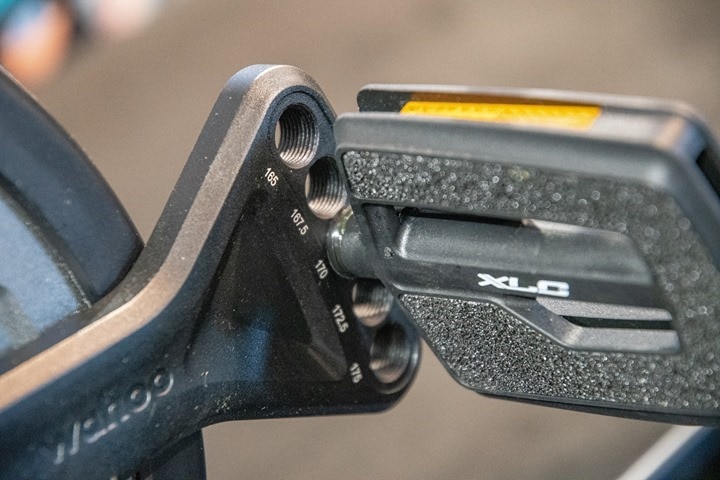
I point this out, not to say one is better than the other. In fact, it’s a bit of a ‘pick your poison’ scenario. With the Wahoo setup you get function over form (meaning, it mostly looks hideous). Whereas with the Tacx setup it looks clean, but is a pain in the ass to get everything perfectly aligned initially, especially with the pod-caps that go on the other side of the crank arm (more on that later on). So again, you can choose beauty or functionality – not both.
I suppose I’m likely a bit unusual compared to most in that I’ve swapped the pedals on this bike countless times for testing, so I’ve had to deal with that finicky-ness. Whereas most normal people would do it once and be done forever.
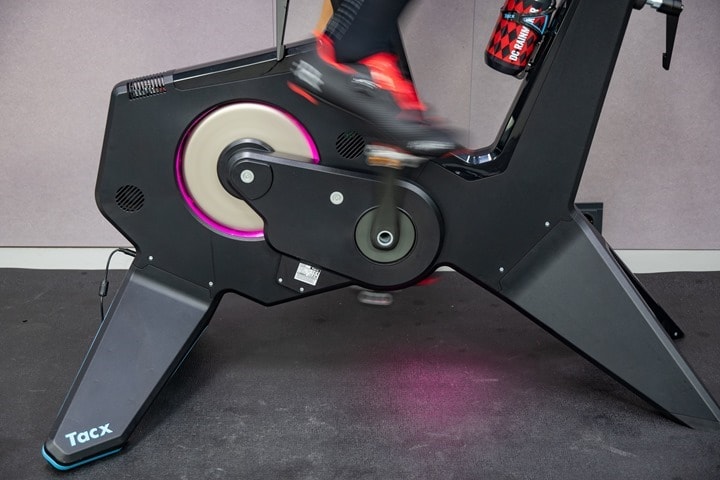
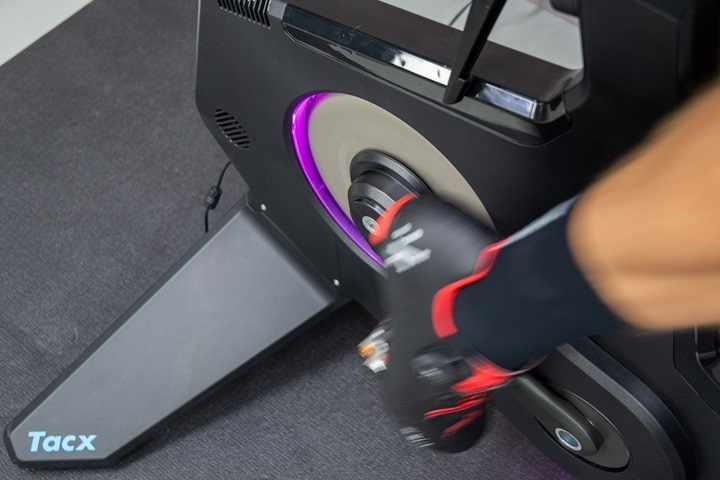
Just to the inside of the entire crank arm situation are lights that illuminate under the trainer based on power output. The more you throw down, the redder the lights get:
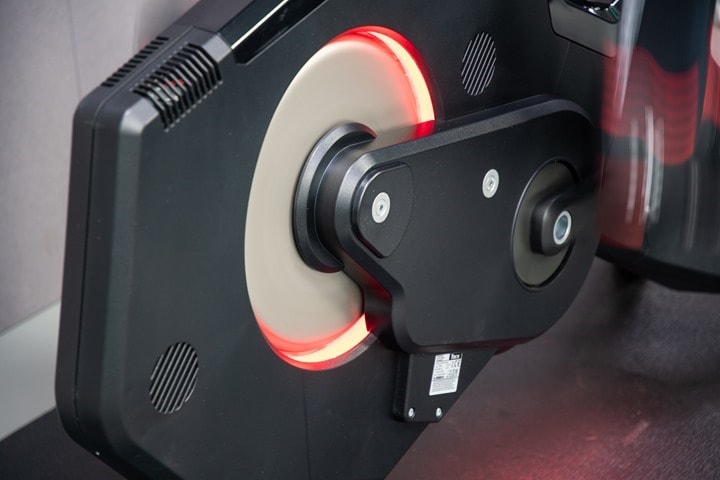
These same lights are also on the inside of the flywheel too. Also, note that the less than bad-ass looking sticker is now being applied to the other side after I pointed out that it looked fugly there.
The below-frame lighting mirrors the same functionality as the Tacx NEO 1/2 trainers (in terms of overall lighting, the flywheel light is new to the bike). Realistically it’s unlikely you’ll be training power zones by looking at the light show below your crotch, but hey, it does make you look bad ass. The underside lighting functionality on the Tacx Bike isn’t configurable by apps at this point (nor has it been since the NEO trainer days). Though, I could see some potentially fun integration options there for certain apps (akin to what Philips Hue lighting does).
Next, let’s talk adjustability. The Tacx bike can be adjusted in the following areas:
– Saddle tilt angle (standard saddle rails, but also secondary tilt adjustment)
– Saddle forward/back movement on marked slider
– Saddle height up/down movement on marked slider
– Handlebars/display height up/down movement on marked slider
– Handlebars/display forward/back movement on marked slider
As you likely gathered by the above, each one of these includes a marked ruler with specific numbers that you can memorize or write on a random sticky note.
However, there are two ways you can set up your bike in terms of adjusting all those things I noted above. You can choose to:
A) Set it up with handles (included) to make on the fly tweaks
B) Set it up with no handles using the bolts that require a beefy hex wrench (included)
Having the handles is ideal when you have multiple people using it, or are too lazy, like myself, to get the positioning right the first time, and keep tweaking it until it’s right.
Whereas the bolts are better if you enjoy giving the middle finger to anyone who wants to even think about touching your bike’s setup and configuration. Thou shall not dork with my bike fit!
That said, I’d argue on my list of ‘annoyances’, I’d put the handles pretty far up there. It’s mostly a horrible design that requires you to pull the handle out and then rotate to tighten/loosen. That piece is fine, what’s annoying is that it only ‘snaps/locks’ back into a few spots on the rotational clock if you will. So this means that the handles are usually sticking out at odd angles, or otherwise don’t look clean.
It’s not the end of the world, but it’s just annoying for a $3,200 bike. Again, other companies have annoyances too – you’ll see those in my review. You’ll also see me being more and more critical of things like this because of the cost factor. It’s one thing to be annoyed at something on a $500 product, but $3,200 is a different ballpark.
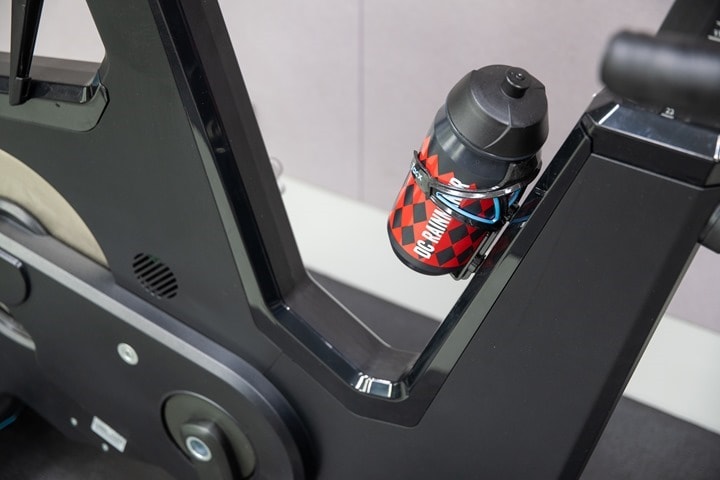
Finally, when it comes to the fit side of things I will point out that those with larger thighs might run into a scenario where your thighs touch the seat post frame casing (so, across from the water bottle holder):
This is a bit of a thicker section that, depending on how far back your saddle is, may result in some light touching. I’ve found a specific position that doesn’t touch, but I did have a position at one point earlier this summer that did touch. Again, I’m also the height of the Space Needle and can only presume it’s my Wattage Bazooka-alike legs causing that. Normal humans probably don’t have this issue. Here’s a quick video showing it while pedaling:
I’ve got no doubt that I could probably find a slightly different position that might not touch, but I suspect this will still be an issue for some. With all the non-moving things covered, let’s get on and start dorking with stuff.
Shifting & Riding:
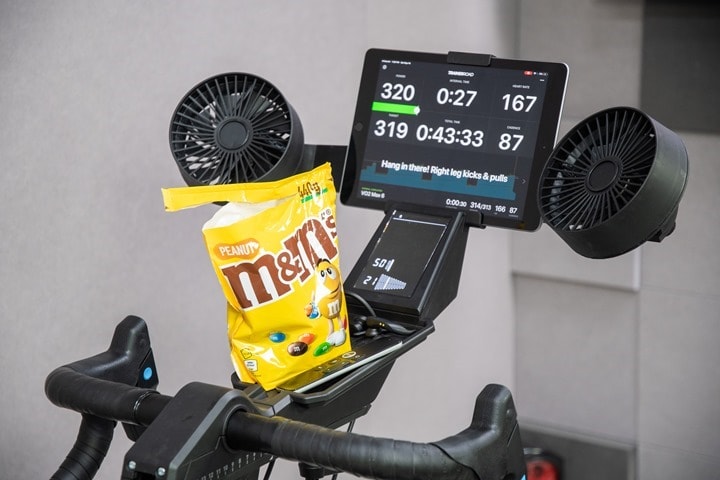
Up towards the front of the unit we’ve got the entire display console bit. First, there’s a small tray for stashing any goods you want. Phones, earbuds, M&M’s, EPO, etc… Whatever you need space for, it maybe will fit.
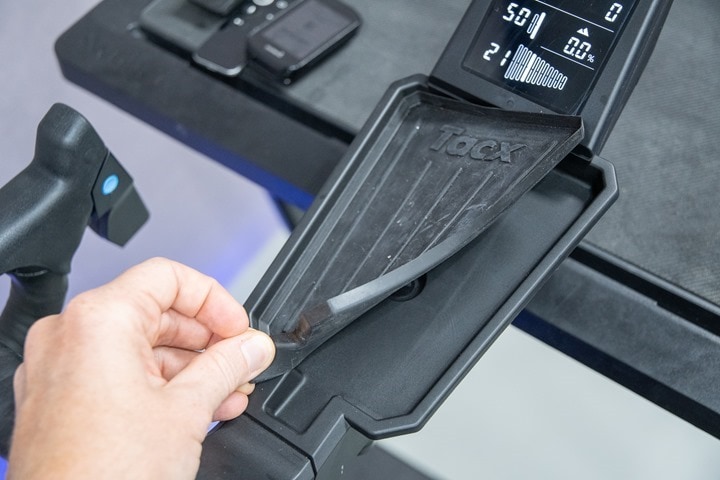
The tray is in fact a rubber insert, so if you spill gels in there, it’s easy to clean:
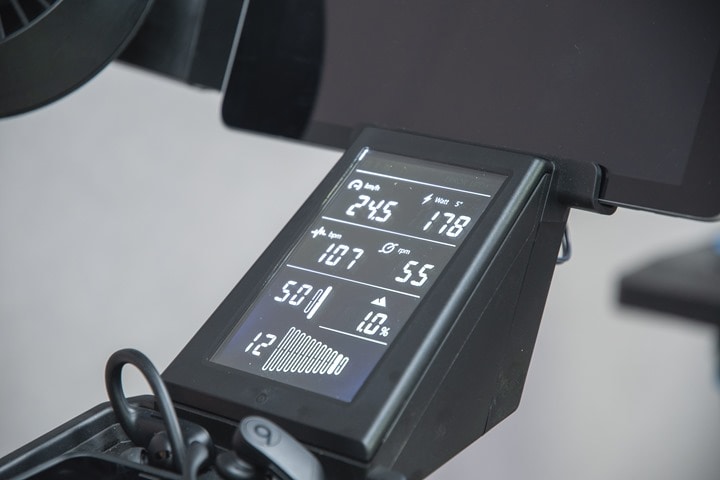
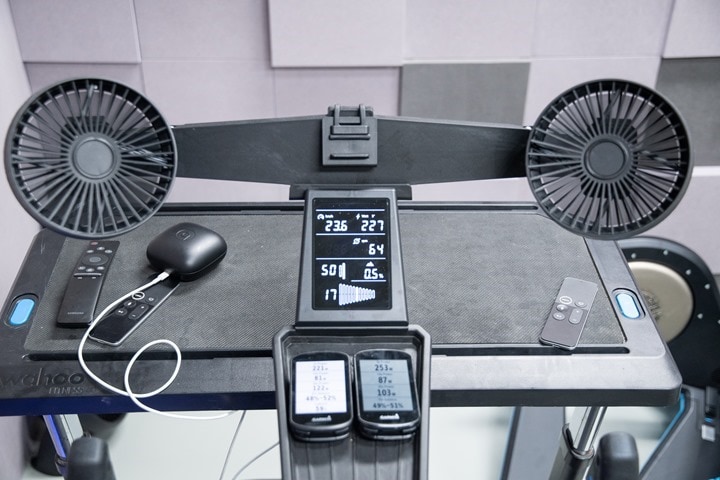
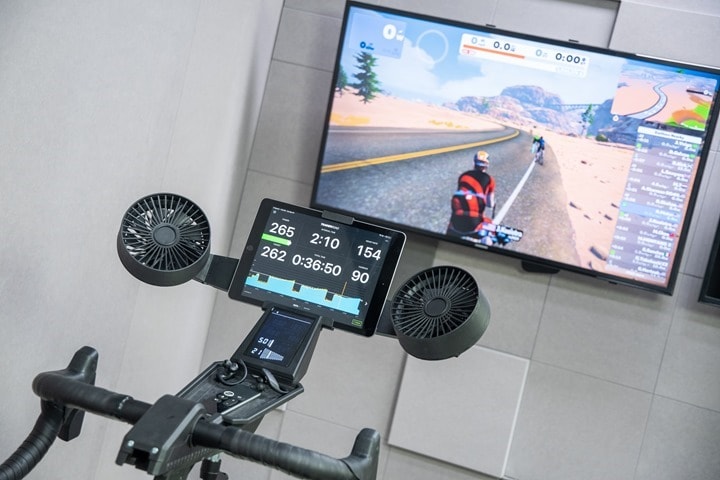
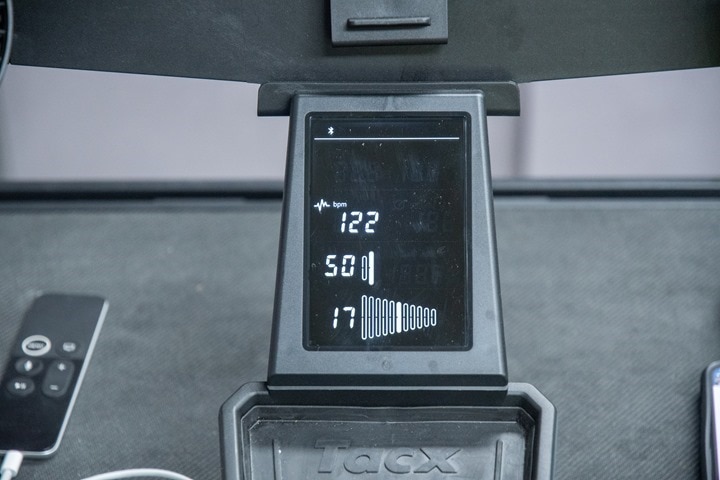
Behind that is the display itself. This has two modes. When an app isn’t controlling the trainer, it’ll show all your stats, including your gearing:
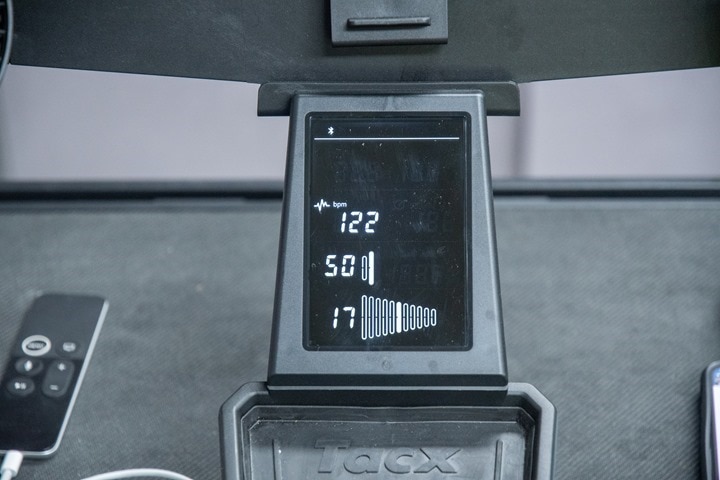
Meanwhile, when an app takes over controlling the trainer it’ll just show your gearing, and depending on the app it may also show heart rate. It gets your heart rate by pairing to your HR strap automatically via ANT+:
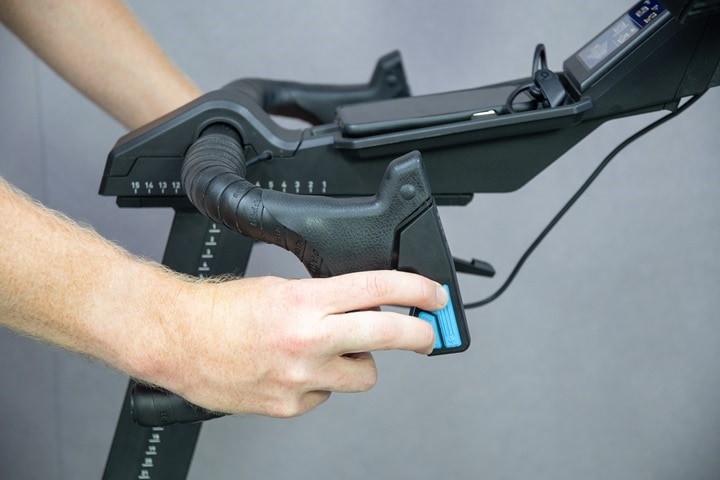
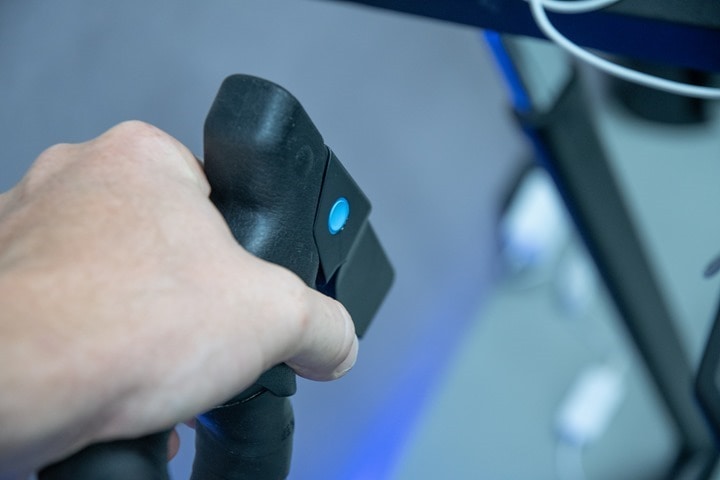
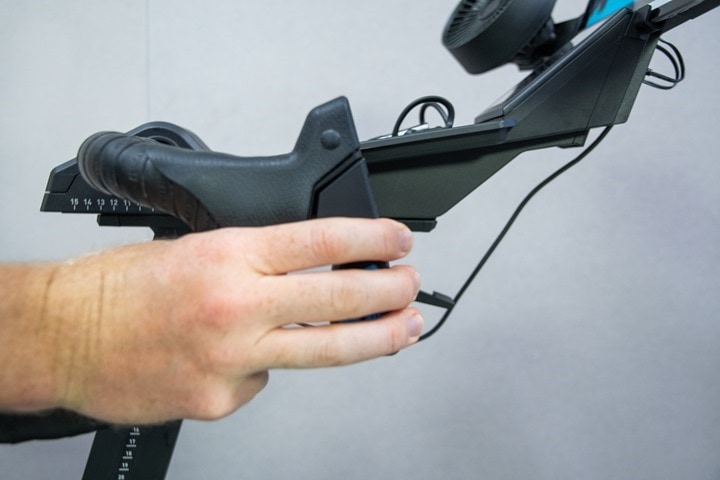
Which takes us to shifting. On the handlebars you’ve got two blue shift buttons on each side, plus an incline button on the inside of each side (incline on one, decline on the other), plus brakes on both sides.
Here’s the inside, where you can see the blue incline/decline button:
The shift buttons don’t make any feel themselves, however, the bike will replicate the feel of the shift internally. The way it does this is to briefly stutter the electromagnetic motor for a few milliseconds, which crazy-realistically replicates the outside ride feel when you shift your bike and for the briefest of split-second there’s a slight bump in the drivetrain pressure. It’s super cool and is a huge deal compared to riding a bike without such an effect.
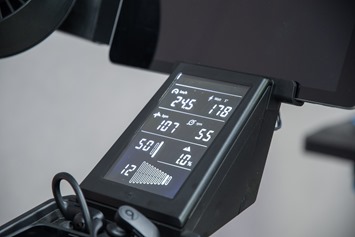
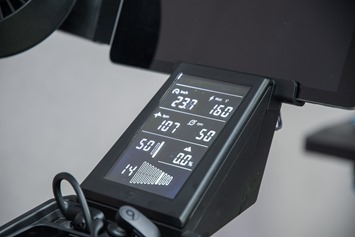
When you shift, you’ll also see your gearing displayed on the small display in front of you. Note the difference between the two showing the cassette in the back shifted from the 12 to 14:
At this point, gearing is not displayed on Zwift or any other app to my knowledge (as it is on the Wattbike Atom, though that lacks a display).
The act of shifting is instant with zero lag whatsoever. When you shift, you better be ready for it. Meanwhile, if you’re not in an app you can use the incline/decline buttons on the inside of the handlebars to increment the virtual gradient in 0.5% increments. This isn’t changing the position of the bike like the KICKR CLIMB, but rather, is just incrementing the otherwise flat road that you’re riding along without any apps connected. You can see the incline shown above (1.0% and 0.0%).
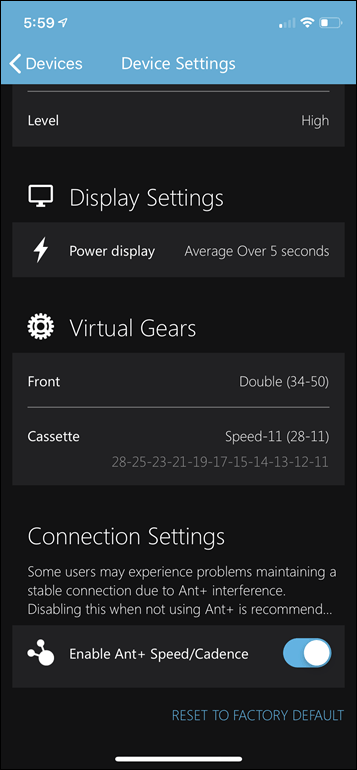
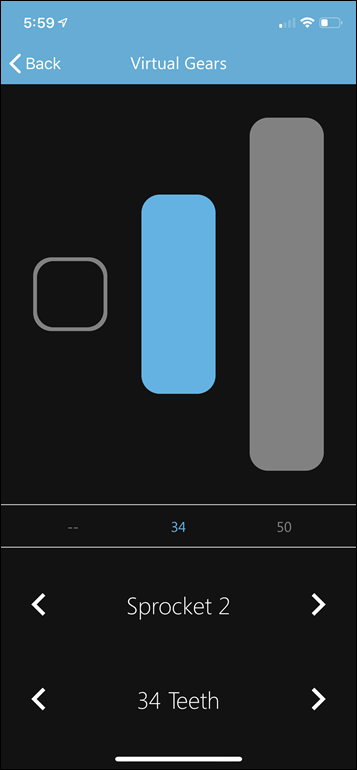
From a gearing perspective, you’ll configure that to whatever cassettes & chainrings configuration you want via the Tacx Utility app. This is a less glamorous but completely functional version of what Wahoo has done with their KICKR Bike configuration app functionality, and allows you to specify things like the number of chainrings you want in a ‘virtual gearing’, as well as the exact chainring and cassette specifications:
The difference here between Tacx and Wahoo is more around shifting itself, whereby Wahoo can replicate SRAM eTAP, Shimano Di2, and Campagnolo. Tacx at this point cannot (though, certainly could via a firmware update if Tacx were to decide to). Ultimately, the gearing selecting you choose will impact how well you climb and such on various apps.
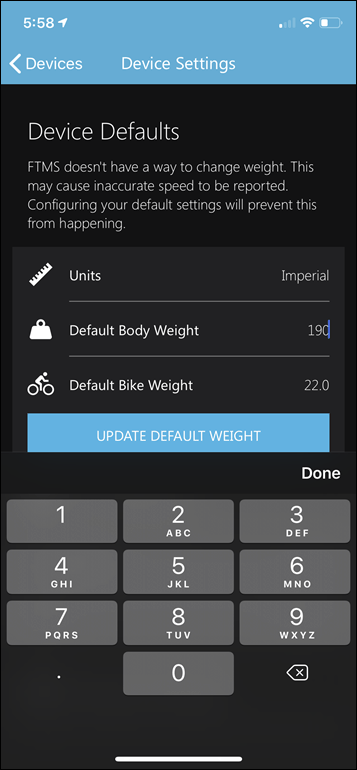
You should also update your weight while you’re in the app as well, as it’ll ensure the correct road feel.
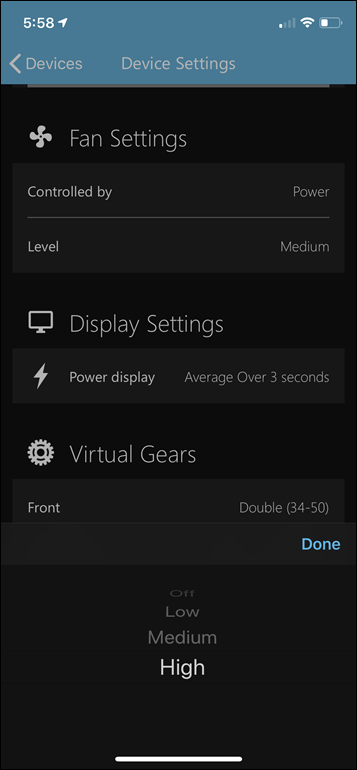
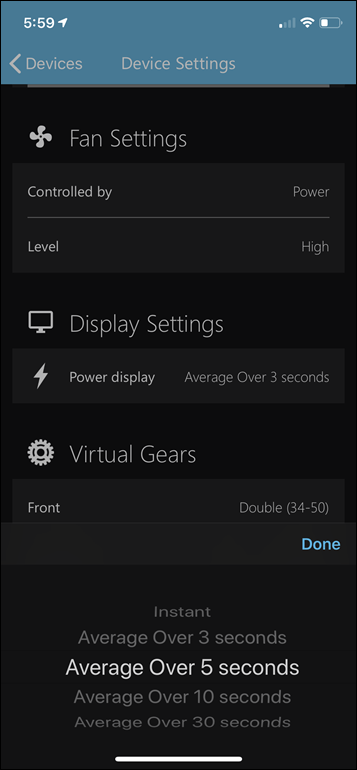
The app is also where you can configure the default fan strength. For some reason they leave it on the middle setting, which has about as much fan strength as a butterfly flapping its wings towards your face. So I’d recommend changing that to ‘High’. While you’re here you can also tweak the power display averaging shown.
As for the fans, it’s probably not going to replace your main fan, but isn’t horrible when set for ‘High’.
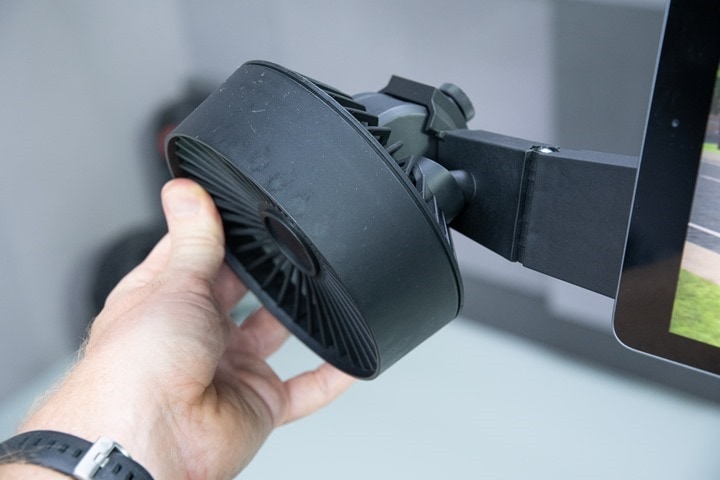
You can adjust the position of the fans to get the angles just right as well:
Before we go onto brakes and such, let’s take a brief moment to talk triathlon/TT/aerobars. In short, there aren’t a ton of good options here for a fully integrated setup, whereas there are fine options for just clip-ons. The unit uses a standard handlebar, so any sort of clip-on system will work, and there’s space in that region of the handlebars to do so. Where you run into issues though is the bars extending towards the front display. You’ll need to either ensure your aerobar spacing/fit is wide enough to account for that, or that it’s short enough that it doesn’t hit the front display. All of which might be slightly awkward. Still, as an update to this post I’ll try and add some of my RedShift aerobars to the setup and see if it works. Note that Tacx doesn’t sell any accessory integration bits, so you wouldn’t get shifting or brakes from said aerobars.
As for brakes, these will stop the flywheel when pulled. You’ll have to give them a fair bit of force to get things to stop, but they do indeed stop. And if you try and pedal against it, you can do that too – but it’ll spike the wattage up (as it would outside, to a point anyway). However, there’s no connection with Zwift or other apps here. So your avatar in Zwift will continue to do as it does, as it doesn’t have awareness of braking.
So what about ride feel? Well, it feels like a Tacx NEO series. Because, it is. Technically the NEO 2T is built atop the NEO Bike unit. So the two units are virtually identical. And in fact, that’s something I noticed when it came to things like responsiveness, but also accuracy too. Like I always say though, when it comes to ride feel I can’t easily separate the reality of staring at a wall from outdoor riding. Inside is still gonna be inside. Still, you’re looking at bits like inertia and how it feels when you roll into a sprint and how it reacts.
And again, it feels just like a NEO. Which is to say it’s pretty darn good. Though, having toyed side by side with a KICKR18, I’d give that a slight edge for road feel in this case. Note however that the KICKR Bike is *not* built atop the KICKR18 internals, but a new electromagnetic system almost identical to that of the Tacx NEO series. Of course, the two companies can reach different levels of road feel, and I’ll be putting those to the test side by side in an upcoming shootout.
And how about the noise? About the same as a microwave. In fact, the fans on the NEO Bike itself are louder than the underlying bike. To demonstrate this, check out the following quick video I made. This is totally shown on the on-camera microphone, about 2-3 meters away, in the concrete echo-chamber that is the DCR Cave.
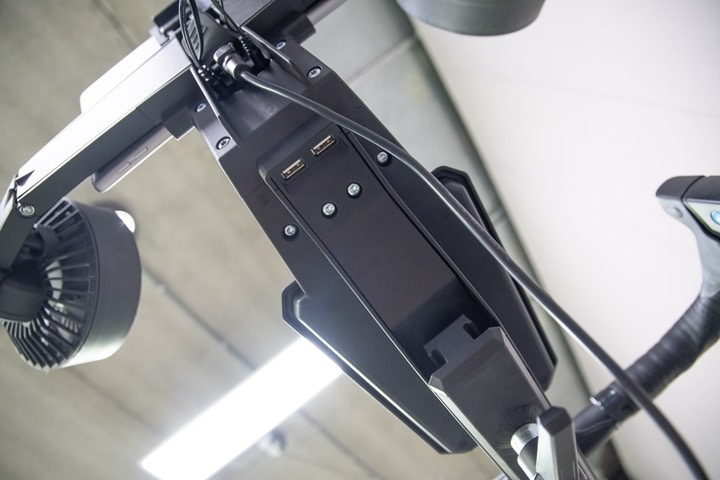
Lastly, I didn’t mention it in complete detail earlier, but there are two USB ports on the underside of the M&M holder:
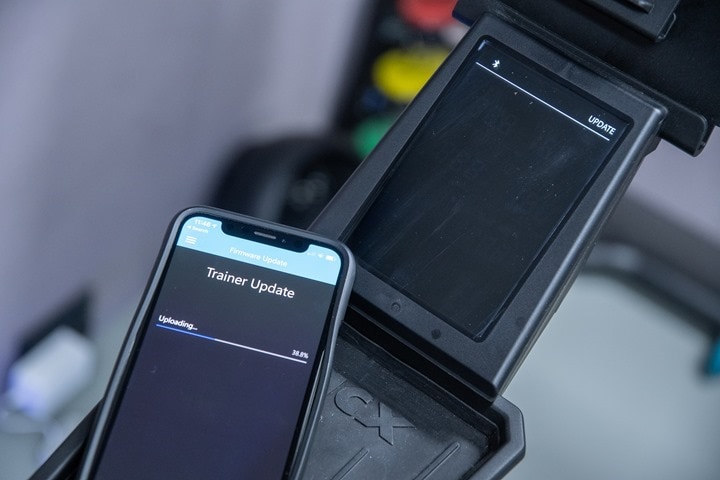
These are both capable of 2 AMP’s, so enough to keep an iPad or such charged. Also, you can use your smartphone to update the firmware on the bike as well.
Now, to wrap up this section I’ve got a quick little summary of things I do and don’t like about the bike. I hesitate to call this a pros and cons list, though that’s more or less what it is. I’m sticking it here in the middle of the review so people that just skip to the end without reading will miss it (and thus hopefully read the whole review to make an informed decision – nuance matters on products like these). I’ll ignore any accuracy likes/dislikes in this section and keep it more on practical things. Basically, this is more of a list of likes/dislikes than pros/cons:
Things I like:
– The bike feels solid and stable
– Responsiveness is instant, and powerful
– The gearing display is awesome, works for any app since it’s not app dependent
– There’s a place to stick your phones/devices/Haribo
– There’s two USB ports and both can power 2.4A (so an iPad can charge)
– Downhill drive is cool on downhills (just like past Tacx products)
– Road feel is cool on things like cobbles (more on that Tacx NEO series function in my older post here)
– There are brake levers, maybe someday Zwift will use them
Things I dislike:
– The loose wiring upfront doesn’t look classy/price-appropriate
– Installing pedals is somewhat clumsy
– The shifters don’t feel like a real bike, buttons that don’t audibly click
– The adjustment handles are clunky to deal with
– The width of the seat post can rub depending if you have thunder thighs and specific positioning
– Only one water bottle cage/position
You’ll see the same list formatting on all my indoor bike reviews, including the next indoor bike review which will be the Wahoo KICKR Bike – likely later this week or early next week. With that, let’s dig into the app aspects.
Apps Compatibility:
The Tacx Bike follows most of the industry norms as you’d expect from most trainers these days. As you probably know, apps like Zwift, TrainerRoad, SufferFest, Rouvy, FulGaz, Kinomap and many more all support most of these industry standards, making it easy to use whatever app you’d like. If trainers or apps don’t support these standards, then it makes it far more difficult for you as the end user. And while I used the term ‘most’, the reality is that the leftover bits not yet following the industry standards (Bluetooth Smart FTMS) are handled by most apps supporting Tacx’s own Bluetooth Smart protocols anyways.
The Tacx Bike transmits data on both ANT+ & Bluetooth Smart as well, allowing interactive resistance control across both ANT+ & Bluetooth Smart. By applying resistance control, apps can simulate climbs as well as set specific wattage targets.
To be specific, the Tacx Bike supports the following protocol transmission standards:
ANT+ FE-C Control: This is for controlling the trainer via ANT+ from apps and head units. Read tons about it here.
ANT+ Power Meter Profile: This broadcasts as a standard ANT+ power meter, with speed soon to be baked in as well.
ANT+ Cycling Dynamics (Limited): This is within the ANT+ Power Meter profile above, but includes some extended cycling dynamics metrics. Note: This feature is coming in October, and is currently being trialed on the Tacx NEO 2T firmware prior to being released on the Tacx NEO bike in October 2019. Once released, it’ll be a slightly reduced set of features compared to Vector pedals, since it can’t measure platform center offset (PCO).
ANT+ Speed/Cadence Profile: This broadcasts the speed and cadence portions as a standard ANT+ speed/cadence sensor. This is handy for those that have devices/apps that may not support power meters, but still get some basic cycling data.
Bluetooth Smart Tacx Trainer Control: This is Tacx’s private method of controlling the trainer. At this point it does NOT yet support FTMS, but that switch-over is planned, according to the company. Most apps support this Tacx method, so it’s not a huge deal at this point in time. The main reason they haven’t switched yet is that the FTMS standard doesn’t support a way to configure the rider’s weight, which is important for correctly applying the ride feel.
Bluetooth Smart Power Meter Profile: This broadcasts as a standard BLE power meter with speed soon to be baked in as well.
Bluetooth Smart Speed/Cadence Profile: Same as the ANT+ variant above.
Both Tacx and Elite lead the way when it comes to protocol standards support, with Elite having a slight edge over Tacx due to supporting FTMS already on their trainers. All companies these days transmit cadence within their trainers too, though on most other units this is a bit of an estimation. With the Tacx Bike (and the Tacx NEO 2/2T), this is actually measured though each time your leg passes by the frame of the bike, uses magnets to detect the crank arm.
Baked in cadence data is handy if you’re connecting to Zwift on an Apple TV, due to Apple TV’s two concurrent Bluetooth Smart sensor limitation (plus the Apple TV remote). While you can use the Zwift mobile companion app for additional sensors, I find that can be sometimes a bit flaky.
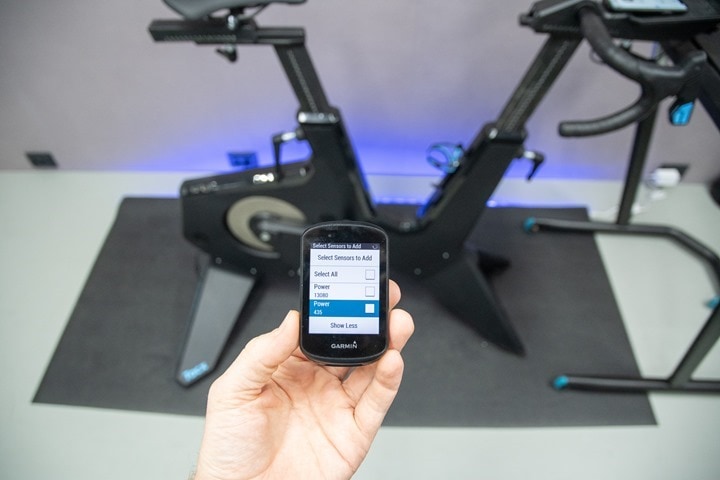
It’s these same standards that also allow you to connect via head units too. For example the Wahoo ELEMNT/BOLT as well as Garmin Edge series support ANT+ FE-C for trainer control, so you can re-ride outdoor rides straight from your bike head unit to your trainer. For example, for my accuracy testing section, I recorded the data on a Garmin Edge 530 & Edge 830 as well as the trainer apps. From there I’m able to save the file and upload it to whatever platform I like.
In addition to baseline power and cadence, the NEO Smart Bike also includes both left/right balance as well, which you can see on head units as well as in recorded data files:
For me, in my testing, I used Zwift and TrainerRoad as my two main apps (which are the two main apps I use personally). In the case of Zwift, I used it in regular riding mode (non-workout mode, aka SIM mode), whereas in the case of TrainerRoad I used it in a structured workout mode. I dig into the nuances of these both within the power accuracy section.
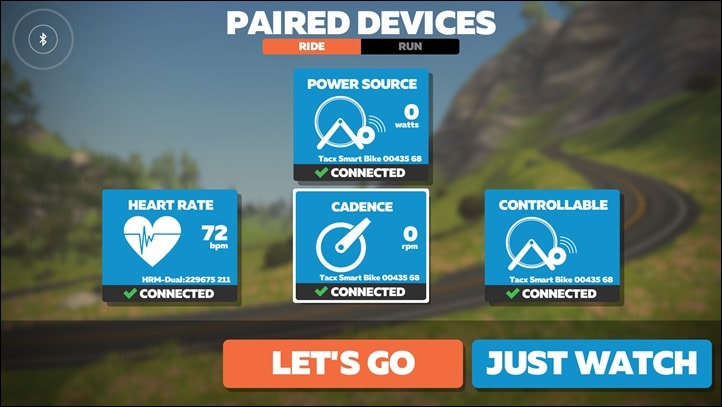
Here’s an example of Zwift paired on an Apple TV, you can see it shows the sensors as a controllable trainer, a regular power meter, and a cadence sensor:
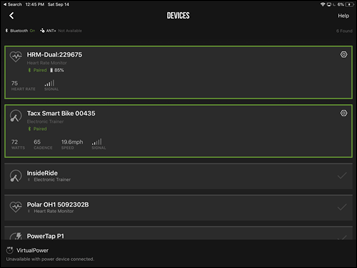
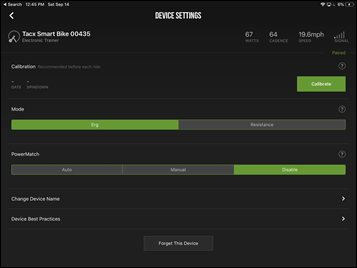
And here in TrainerRoad using Bluetooth Smart on an iPad:
What you may notice though is that the calibration option is actually present. In reality, if you try using it, it’ll fail. This is by design, the NEO Bike doesn’t require any calibration (nor does it support it).
Now remember from above, where things get a bit different than other trainers is what happens when you have an app connect to it, in which case the display will go to a reduced metric mode.
This is mostly fine, but there’s some room for all companies to perhaps standardize on gearing display and give the option for the user to display it on the screen. For example on the Wattbike Atom, you’ll get this gearing display in Zwift at left (depending on how you connect it). Now, of course, the Tacx Bike has the gearing display down below, whereas the Wattbike Atom doesn’t have any display at all. Still, I feel like this should definitely be a user-configurable option, and something Zwift and trainer companies need to come together on to standardize. The ball on this one is mostly in Zwift’s court, but it should also be applicable to any 3rd party app – including ones like Rouvy, FulGaz, and others (FulGaz just added it for the Wahoo bike for example).
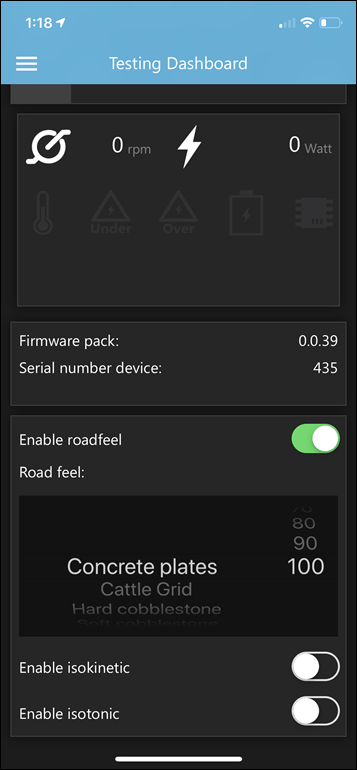
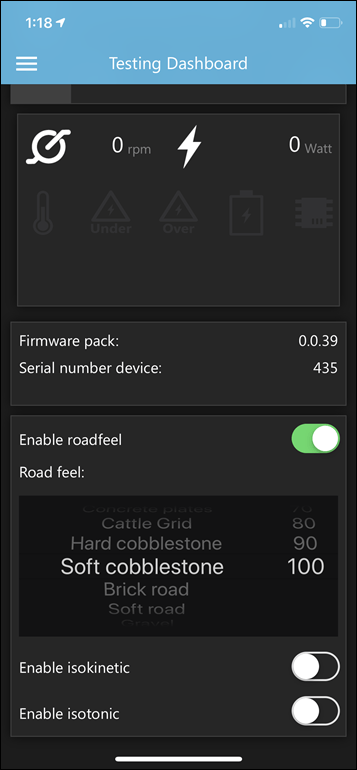
Next, the Tacx Bike can simulate/replicate the feel of the roads as you ride them in the game. Cobblestones will feel like riding on cobblestones. Planks on a boardwalk will feel just like an actual boardwalk. It really is fascinating – and has been a draw for the Neo series since it came out a few years back. You’ll feel the same here as well on the Tacx Bike, and you can also test out this feature whenever you want via the Tacx Utility app:
Now, there’s not a ton of training benefit here, per se. But that’s true of many things we do on trainers indoors. If it was all about training benefit we’d just be riding in ERG mode every day on perfectly structured workouts. Instead, we have a wide variety of apps that by and large are designed to keep us entertained. And this feature simply adds to that entertainment factor. And I’ve always liked it. It’s fun to have the feeling of the road kick in on certain sections of Zwift. Just like when you go from clean pavement to something dirty, there’s a realism factor there. No other trainer offers that today.
Next the Tacx Bike has downhill drive simulation, which means that as you go downhill the flywheel will forward spin the rear ‘wheel’ (cassette and flywheel since there is no wheel). This means that the bike will simulate the inertia of going downhill. This is yet another little touch that makes things feel more realistic than they are. However, this seems to be hit or miss for me on the NEO Bike. I’m not sure if it’s a Zwift issue or a Tacx Bike issue, either way, it’s not consistently turning on. I expect this will be a minor tweak via software update.
Power Accuracy Analysis:
As usual, I put the bike up against a number of power meters to see how well it handled everything from resistance control accuracy, to speed of change, to any other weird quirks along the way. In the case of indoor bikes it’s a bit more tricky to have 2-3 other power meters, since you typically can’t swap out the crankset or rear hubs. So you have to rely upon other power meter pedals.
No problems, I’ve got plenty of those. I’ve set up the bike in three different configurations over the past many months:
Config 1: With PowerTap P2 pedals
Config 2: With Favero Assioma pedals
Config 3: With Garmin Vector 3 pedals
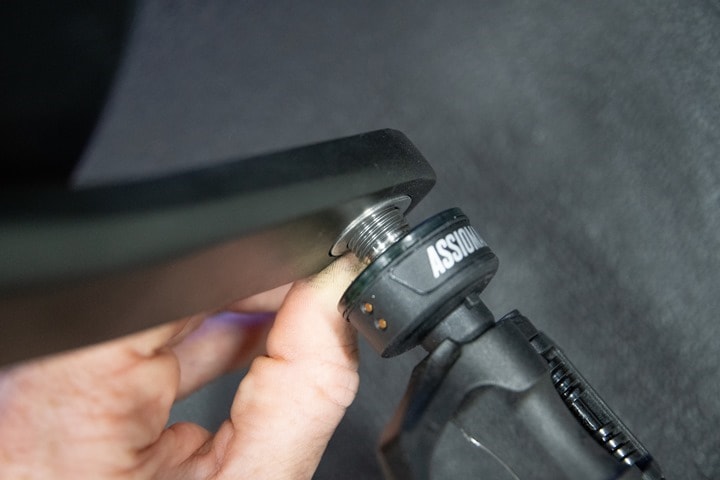
I’ve not seen any difference with those different pedals, however, I will give a word of caution. In fact, I’m going to bold this caution to other people doing reviews (or, if you read other reviews of the Tacx bike). Installing regular or power meter pedals on the Tacx bike is easy physically. However, for those odd ducks like me installing power meter pedals on the Tacx bike, ensuring the pedals are absolutely perfectly aligned for power meter testing/comparison is tricky. Trust me, I’ve screwed it up more times than I can count on this bike.
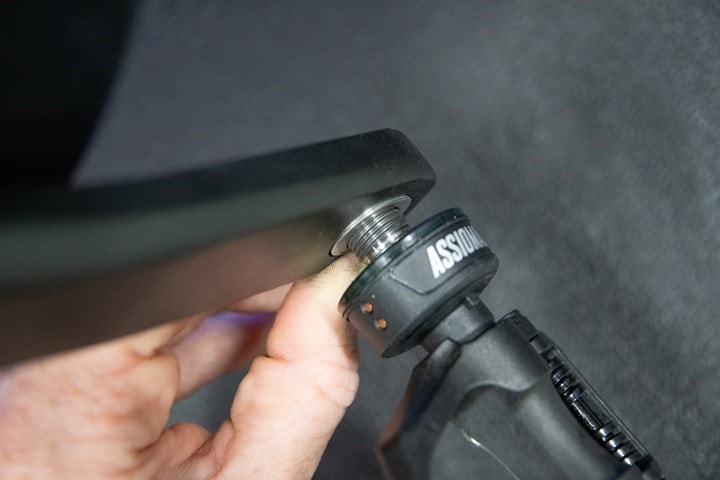
The reason is that you’ve got to ever so perfectly and carefully ensure that the small removeable inset plate that faces the pedals is completely flush with the rest of the crank arm. Perfectly flush, even a 1mm offset will impact your power meter pedals. Also, you need to ensure that it’s very strongly tightened so there is no play whatsoever in either the pedal to crank, or crank to inset plate. As you tighten the pod/washer combo will often become non-aligned – especially at the last second as you do the final turn or two of the wrench.
Any play or offset will result in inaccurate data from your power meter pedals (the Tacx bike itself will remain totally accurate no matter how you screw up pedal installation). How inaccurate you ask? Here’s a data set example of improperly installed power meter pedals:
And in fact, there may still be a bit of a settling period for power meter pedals on the Tacx bike, such as this – seen over the course of a first install ride below. It takes till about the half-way point to really settle in and lock. This isn’t actually that unusual for power meters in general, and again, has nothing to do with the Tacx bike accuracy.
The tell-tale sign that I’ve screwed it up over and over again is when there’s a weird semi-variable offset (either above or below the actual wattage). Every time I’ve had this happen I’ve realized it wasn’t perfect. However, it took a while to understand just how perfectly flush it needs to be. And again, this does *not* impact the actual accuracy of the Tacx NEO Bike, but rather of your power meter pedals (any of them), which are not designed to deal with incorrect installation.
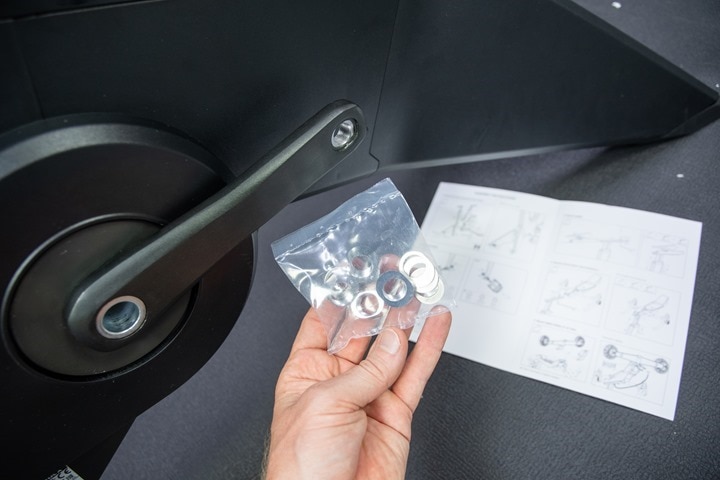
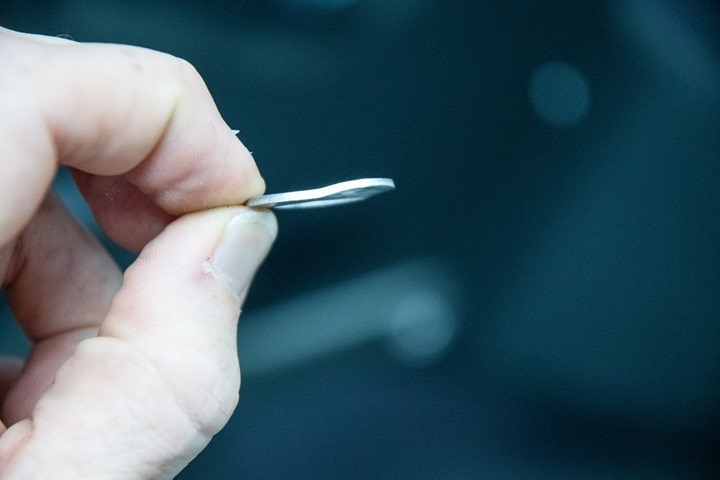
You’ll also see that the small washer I’m holding is deformed, from tightening the pedals to the spec for power meter pedals.
This has no impact on normal usage, but if you put power meter pedals on there, there’s a bit of flux otherwise, which will cause inaccuracies in your power meter pedals (but have no impact on the Tacx bike/accuracy). Tacx says they’re going to address this washer with a stronger one that won’t bend. That’s an easy part that can be sent out to those impacted via a single envelope and a stamp or two.
In any case – with that caveat out of the way, I was looking to see how it reacted in two core apps: Zwift and TrainerRoad (Bluetooth Smart on Apple TV and iPad). The actual apps don’t typically much matter, but rather the use cases are different. In Zwift you get variability by having the road incline change and by being able to instantly sprint. This reaction time and accuracy are both tested here. Whereas in TrainerRoad I’m looking at its ability to hold a specific wattage very precisely, and to then change wattages instantly in a repeatable way. There’s no better test of that than 30×30 repeats (30-seconds at a high resistance, followed by 30-seconds at an easy resistance).
First, let’s start with a Zwift ride, this of the Titans Groove loop from the deserts. I’ve converted over to using this route this past summer for trainer/bike testing, because it’s so demanding on trainers in terms of responsiveness. While the early desert portion is flat, the hills and climbs up into the Titans Grove piece are relentlessly changing gradients, which means you not only test how fast a trainer/bike can respond to that, but also how effective indoor bike gear shifting is. Here’s that data set:
In the above case, that data set is with a PowerTap P2 pedal set (dual-sided). As you can see, it’s pretty darn perfect. There’s one blip at 40:30 when for whatever reason the P2 pedals momentarily lost connectivity to the Edge for a second, but that’s got nothing to do with the Tacx bike.
Let’s go ahead and look at the first sprint I did in more detail:
This is on the flats in Zwift’s Watopia desert, and you can see the tracking is super close. A bit of a 1-second difference as I come back out of the sprint, but that’s pretty normal anytime we’re talking multiple power meters transmitting and recording data to/from different sources and destinations. It’s simply a timing thing.
Let’s fast forward a bit to the rolling section a bit, and you can see it’s super close. There’s some slight differences in the valley’s and peaks of each acceleration, and I’m 99% confident that’s due to the flexible washer I noted above. With that tiny bit of flex it’s throwing off the pedals slightly as I press into the crank arm. The degree of that gap seems to vary on the luck of the install. We’re only talking a couple watts here, but from a comparison standpoint it’s clearly visible.
This is the first of two areas where companies need to focus less on automated testing and more on human testing. An automated test rig won’t likely catch this because the machine is applying extremely even and locked forces the entire time, versus my legs variability in power and acceleration. It’s why I haven’t bought/built an automation test rig. Still, the difference is small above.
Skipping ahead to the last sprint of this ride, you see that momentary purple dropout I mentioned earlier. So just ignore that, the Tacx bike data is clean throughout this and very similar/close to the PowerTap P2 pedals.
It’s notable that we don’t see any loss of power accuracy coming off the sprint. There are often cases in trainers these days where coming off a hard sprint it overshoots and takes time to catch back up again, as if the trainer lost its breath and needs a moment. That doesn’t happen here.
Next, just to throw the Zwift way-back machine on here – here’s a set from earlier this summer, this one a Zwift ERG workout. I don’t tend to do my ERG workouts in Zwift, but use TrainerRoad instead. So this is a rarity that I figured I’d include for fun. Full data set here:
The exact name of this workout is ‘Jon’s Mix’, and is something I occasionally use for Zwift workout mode testing. From an accuracy standpoint, there’s no issues here, the two units are virtually identical across the board. Even when zoomed in (and again, two minor PowerTap P2 pedal connectivity drops here):
What you do see though is a bit of wobble. You’ll notice it most in the longer 10-minute sections here:
It’s just not holding that number steady. There is a difference between the two units within this section, likely because of this oscillation. Though if you drag your mouse across the data set in the Analyzer, the max difference is about 6w, or within spec for the 250w this is.
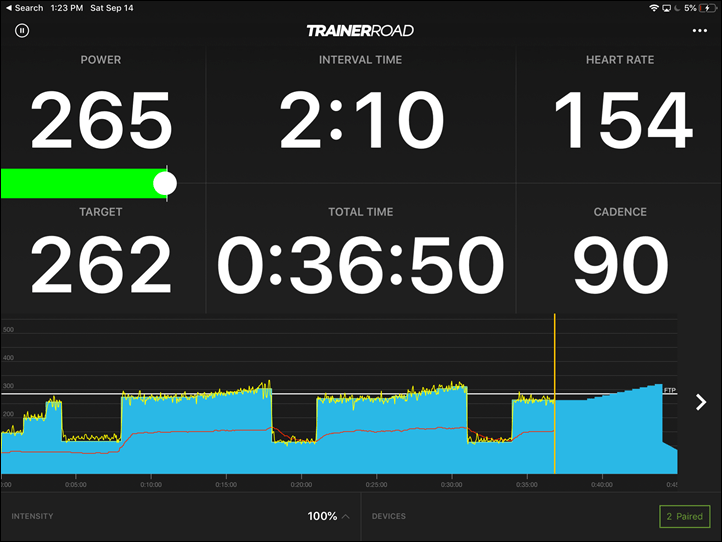
Now, let’s move away from Zwift and show you ERG mode on TrainerRoad. In this case a workout from this past Saturday. This TrainerRoad workout starts off with a flat chunk for each interval, and then increases in 2% steps every 60 seconds.
Once again, I was having connectivity issues with the P2 pedals – though that doesn’t keep you from seeing what’s going on here in the comparison data:
The actual accuracy itself is good, and the initial responsiveness in each set is normal/good as well. What is not good though is the overall ability for ERG mode to hold a given set point. It oscillates upwards of +/- 20w throughout the set, which is why you see this variation. It should be super firm and without much wobble.
(Minor note: Above you see the first two sets, and below is the third set. I had momentarily paused TrainerRoad to check a setting and it added a recording delay so the files didn’t line up properly for the third set, which is why I split it out below and show it without the delay.)
For example, on the third set you’ll see how it appears to slowly ramp up. In reality, those are steps, and we should absolutely be seeing the steps here.
I talked with Tacx about this and they agree it’s an issue. And is in fact the same issue as seen on the Tacx NEO 2T. The company says they’ve just about got it fixed on the Tacx NEO 2T trainer so that it doesn’t oscillate and hoped to ship that firmware update any moment now (maybe today, maybe tomorrow). After that they’ll circle back and get it applied to the NEO Bike as well.
Given it works just fine on the NEO2 (non-T), I expect they’ll sort this relatively quickly. They said the main issue was that the firmware ported from the NEO 2 didn’t expect the faster responsiveness/power of the NEO 2T/Bike, so it basically overcorrects constantly, which is what we see.
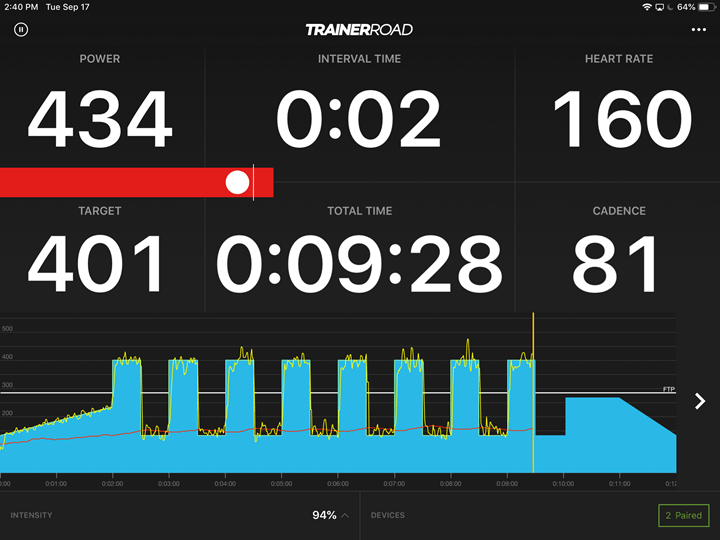
Speaking of that responsiveness, one final accuracy test for ya here, also on TrainerRoad, but the usual 30×30 workout test I do. There’s two ways to look at this. First is how quickly it responds to the commands of the application. So for that, we need to actually look at the overlay from TrainerRoad showing when it sent the command followed by when the NEO Bike achieved that level. Here’s the levels being sent:
From a responsiveness standpoint it seems to hit somewhere in the ballpark of the initial setpoint within 2-4 seconds. However, then the stability oscillations kick in. We don’t need to re-hash it, you can see it quite plainly above.
Looking at power accuracy though, there’s no issues here – it’s virtually spot on. Again, a few minor quibbles due to the washer, but otherwise good. Here’s that data set.
Oh wait, and for lack of anywhere else to stick it – I haven’t seen any cadence issues at all. This appears super solid, which makes sense given they’re magnetically measuring cadence. So there’s no real reason that won’t be perfect:
Ok, so, what’s the final scoop on accuracy?
Well, I think/suspect the power meter accuracy is actually quite good and solid – but it’s being slightly overshadowed by two issues that make it harder to see that. The first being the slightly flexible washer that troubles all the power meter pedals I’ve tried, due to the little bit of flex it gets, causing the slight variations we see. Sure, we’re only talking a couple of watts here – and again, it’s not the Tacx Bike accuracy that’s being impacted, it’s my comparison pedals.
The second though is a more real issue which is the ERG mode stability, for which we see this wobble in ERG mode (no matter the app). Tacx agrees and they hope to have it fixed very shortly with a firmware update. In that scenario, if that’s fixed relatively quickly, then I don’t believe there’s anything in the accuracy/responsiveness/stability realm that’s a problem.
Note: All of the charts in these accuracy sections were created using the DCR Analyzer tool. It allows you to compare power meters/trainers, heart rate, cadence, speed/pace, GPS tracks and plenty more. You can use it as well for your own gadget comparisons, more details here.)
Indoor Smart Bike Comparison:
In the coming weeks I’ll be doing a complete shoot-out between the Wahoo Bike, Tacx Bike, and Wattbike Atom. The three units you’re most likely to be comparing, and all three of which are now shipping or expected to ship in the coming weeks. This will include everything under the sun you can imagine, similar to my past power meter pedal shootout post.
Until then, here’s a blow by blow spec comparison between them – complete with some new data fields I’ve added into the trainer database to account for indoor bikes. I’ve also included the new Stages Bike in there, though that won’t ship till Q1 2020.
| Function/Feature | Stages Bike (SB20) | Wattbike Atom V1 | Tacx NEO Bike Smart | Wahoo KICKR Bike V1 |
|---|---|---|---|---|
| Copyright DC Rainmaker - Updated November 23rd, 2023 @ 2:27 pm New Window | ||||
| Price for trainer | $2899 | $2,599 | $3,199 | $3,499 |
| Trainer Type | Indoor Bike | Indoor Bike | Indoor Bike | Indoor Bike |
| Available today (for sale) | Yes | Yes | Yes | Yes |
| Availability regions | Global | UK/South Africa/Australia/Scandinavia/USA | Global | Limited Initially |
| Wired or Wireless data transmission/control | Wireless | Wireless | Wireless | Wireless |
| Power cord required | Yes | Yes | No | Yes |
| Flywheel weight | 50lbs | 9.28KG/20.4lbs | Simulated/Virtual 125KG | 13bs/5.9kgs | Resistance | Stages Bike (SB20) | Wattbike Atom V1 | Tacx NEO Bike Smart | Wahoo KICKR Bike V1 |
| Can electronically control resistance (i.e. 200w) | Yes | Yes | Yes | Yes |
| Includes motor to drive speed (simulate downhill) | No (but kinda) | No | Yes | Yes |
| Maximum wattage capability | 3,000w | 2,000w | 2,200w @ 40KPH | 2,200w @ 40KPH |
| Maximum simulated hill incline | 25% | 25% | 20% (and -15% downhill) | Features | Stages Bike (SB20) | Wattbike Atom V1 | Tacx NEO Bike Smart | Wahoo KICKR Bike V1 |
| Ability to update unit firmware | Yes | Yes | Yes | Yes |
| Measures/Estimates Left/Right Power | Yes (actually measured independently) | Yes | Yes | No |
| Can directionally steer trainer (left/right) | Yes (with compatible apps) | No | YES (WITH COMPATIBLE APPS) | Yes (with compatible apps) |
| Can simulate road patterns/shaking (i.e. cobblestones) | No | No | Yes | No | Motion | Stages Bike (SB20) | Wattbike Atom V1 | Tacx NEO Bike Smart | Wahoo KICKR Bike V1 |
| Whole-bike physical gradient simulation | No | No | No | Yes |
| Can rock/tilt side to side (significantly) | No | No | No | No | Accuracy | Stages Bike (SB20) | Wattbike Atom V1 | Tacx NEO Bike Smart | Wahoo KICKR Bike V1 |
| Includes temperature compensation | Yes | Yes | N/A | Yes |
| Support rolldown procedure (for wheel based) | Cross-references power meter data | No | N/A | N/A |
| Supported accuracy level | +/- 1.5% | +/- 2% | +/- 1% | +/- 1% | Trainer Control | Stages Bike (SB20) | Wattbike Atom V1 | Tacx NEO Bike Smart | Wahoo KICKR Bike V1 |
| Allows 3rd party trainer control | Yes | Yes | Yes | Yes |
| Supports ANT+ FE-C (Trainer Control Standard) | Yes | Yes | Yes | Yes |
| Supports Bluetooth Smart FTMS (Trainer Control Standard) | YEs | Yes | Yes | Yes | Data Broadcast | Stages Bike (SB20) | Wattbike Atom V1 | Tacx NEO Bike Smart | Wahoo KICKR Bike V1 |
| Transmits power via ANT+ | YEs | Yes | Yes | Yes (added Sept 30th, 2020) |
| Transmits power via Bluetooth Smart | YEs | Yes | Yes | Yes |
| Supports Multiple Concurrent Bluetooth connections | No, just one | Yes, 3 Concurrent | ||
| Transmits cadence data | Yes | Yes | Yes | Yes | Indoor Bike Features | Stages Bike (SB20) | Wattbike Atom V1 | Tacx NEO Bike Smart | Wahoo KICKR Bike V1 |
| Shifting type | Buttons | Buttons | Button Based | Normal bike levers |
| Can customize shifting (Shimano/SRAM/Campagnolo) | Yes (not yet SRAM) | No | In future update | Yes (Shimano/SRAM/Campagnolo) |
| Can customize gearing | Yes | Mininimal | Yes | Yes (both cassette and chainrings) |
| Supported Crank Lengths | 165/170/172.5/175mm | 170mm | 170/172.5/175mm | 165/167.5/170/172.5/175mm |
| Display | No | No | Yes | Small display near top-tube |
| USB Ports | Two Ports (Fast Charging) | No | 2 USB Ports (2AMP) | 1 USB port | Purchase | Stages Bike (SB20) | Wattbike Atom V1 | Tacx NEO Bike Smart | Wahoo KICKR Bike V1 |
| Amazon | Link | |||
| Backcountry.com | Link | Link | ||
| Competitive Cyclist | Link | Link | Link | |
| REI | Link | |||
| Other | Link | DCRainmaker | Stages Bike (SB20) | Wattbike Atom V1 | Tacx NEO Bike Smart | Wahoo KICKR Bike V1 |
| Review Link | Link | Link | Link | Link |
Oh, and before you ask why I haven’t included some products into the above – here’s the quick and dirty answers:
Peloton Bike: It’s not a ‘smart’ bike in the sense of the above, it doesn’t allow you to set a specific power level (it does tell you the current power level). Rumors are Peloton is working on such a bike, but nothing today.
SRM Bike: I just don’t see this as a competitor in this space. At $5,000, it’s mostly for various research purposes and is designed in that realm.
True Kinetix Bike: They’re planning on dropping me a test unit next week, so I’m looking forward to getting some hands-on time on that, and then understanding what the actual shipping/etc timeframes and current state of the unit looks like for others.
VirtuPro: It could also get escalated into the above chart, I’ve talked about it in the past. But I need clarity on when they’ll (actually) ship it with ANT+/BLE support, and realistic timelines to that. Else, it’s a proprietary solution that doesn’t really fit what the tables are designed for (the rest of the bikes here are compatible with all industry protocols).
Again, I’m more than happy to add products into the database. In general, my rule of thumb is I want hands-on time (or butts-on in this case), and I want some realistic level of clarity on delivery time frames.
Summary:
While the NEO Bike’s journey over the course of the last two years has been fairly public and rocky, the ultimate end product ended up rather polished in looks and functionality. Aspects like the display and related front-end functionality are a definite feature over competing units that don’t have that. When one steps off the exhibition show floor and into your living room for an hour ride and realizes you want to stash your phone connected to the USB charging port, these details become apparent. While other details are simply just more fun and cool – like the NEO bike lighting and road-feel on cobblestones.
Which doesn’t mean Tacx got it all right or perfect. In fact, I’ve outlined numerous things that aren’t perfect. Be it the cable lengths or ERG mode stability. Items like cable length or washer flexibility are minor for most people, whereas as ERG mode stability is a bigger issue. Luckily for Tacx however, every issue I’ve identified is either a software fix or an easy in-line manufacturing tweak (and even retrofit). New washers would fit easily in an envelope with spare room for M&M’s. Even new cabling would be trivial to get right-sized.
And I think we’ll likely see this across the board from companies as they go through growing pains on 1st gen smart indoor bike products. That kinda comes with the territory of buying a first gen unit – whether it’s Tacx, Wahoo, or Wattbike. We’ve seen Wattbike for example take these two years to optimize their product with a pile of minor tweaks that ultimately make for a markedly different unit than two years ago, and also sets the stages for their future products.
Still, for Tacx’s first go at things, it’s pretty darn good – and I suspect most folks would be pretty happy with it. And once they sort out the ERG mode stability via firmware update – it’s a very strong option that’s in the market now, and actively shipping to folks.
Found This Post Useful? Support The Site!
Hopefully you found this review/post useful. At the end of the day, I’m an athlete just like you looking for the most detail possible on a new purchase – so my review is written from the standpoint of how I used the device. The reviews generally take a lot of hours to put together, so it’s a fair bit of work (and labor of love). As you probably noticed by looking below, I also take time to answer all the questions posted in the comments – and there’s quite a bit of detail in there as well.
If you're shopping for the Tacx NEO Bike Smart or any other accessory items, please consider using the affiliate links below! As an Amazon Associate I earn from qualifying purchases. It doesn’t cost you anything extra, but your purchases help support this website a lot.
And finally, here’s a handy list of smart bike accessories that most folks getting a smart bike for the first time might not have already:
And of course – you can always sign-up to be a DCR Supporter! That gets you an ad-free DCR, access to the DCR Shed Talkin' video series packed with behind the scenes tidbits...and it also makes you awesome. And being awesome is what it’s all about!
Thanks for reading! And as always, feel free to post comments or questions in the comments section below, I’ll be happy to try and answer them as quickly as possible. And lastly, if you felt this review was useful – I always appreciate feedback in the comments below. Thanks!





















FYI
For who is still looking to get the older version of the Tacx Smart Bike (T8000.61).
Last week I received the Tacx Smart Bike. And to my surprise is had the 5-wholes-bearclaw for fitting pedals in-stead of the hoped 3-wholes-bearclay crank (os even the one-whole that i fearde could also be on it). Is also had a sticker on the manual stating this new crank. I assume this is the same as on the new verion (?).
Now I have to be carefull not to get too much excersize…enjoying my new smart bike ;-)
Wow, that’s awesome! Does it have the same original shifters though?
Tacx/Garmin had said they ‘were working on a way to bring the new shifters to the existing bikes’, and I’ve not heard a thing. But at least they went through their NOS (Near Old Stock) and refreshed them at some point. I’d be surprised if they are still making the original bike, but it is less expensive, would hit a price point for some people I imagine. Not that there is anything wrong with it, I’ve been riding one for years now, and love it!
Congrats!!
It indeed it is still with the same shifters. The ones with the 2 blue bottons (changing gears) on the oustsite and 1 smaller round button on the inside of the shifter (to my knowledge that is the old shifter).
And you are wright about the pricepoint, the new version is too expensive for my taste.
Hope to ride this one also for years to come!!
My bike has again developed a strange noise:
link to youtu.be
I have had the same issue develop 3-times with the bike. Each time I report it to Garmin they exchange the bike for a replacement but the replacement has always developed the same issue. I’m getting tired of this cycle (no pun intended). It seems like Garmin are doing something to fix the issue then making the bike available as a replacement again, however, their fix is not permanent.
Has anyone else experienced this? And, has anyone worked out how to fix it themselves? I asked Garmin if there was some maintenance procedure that I could do to stop this from happening but they just gave me the standard instructions from the manual. I’d much rather do a bit of maintenance at home than have to dismantle and box up the bike and be without a home trainer for a week.
Interesting. I had a 2T that developed a harmonic coupled noise too, and after pulling the disc, looking concerned at it, wiping with a microfiber, apparently magic, rag, the noise completely went away. The problem with the Bike is you need their ‘special service tool’ to get the belt off to pull the disc. And if you are still under warranty, they might not want to give you that tool. (You actually need 2 tools, the belt release tool, and the disc extractor, and a metal piece has to be removed over the disk hub)
I had a bike develop a knocking sensation similar to your noise (bump bump bump bumpity bump bump bump bump bumpity bump) that they were concerned about, and sent me a brand new bike (gen 1 again) that coincidentally had an issue with skipping (the rear freehub had very little grease and the pawls were rusted) but after a rebuild on my side, I was able to get it to work. (They did replace that part though which helped) Again, a gen 1 bike.
But have you tried different pedals or shoes, just in case?
The other thing that you can try, I say this somewhat tongue in cheek, is get a pair of noise cancelling headphones (I had the PowerBeats Pros at the time) and keep riding. They will block the majority of the noises. Why I say this is because I was able to ride through the destruction of a pair of Speedplay pedals and a chain that was severely rusted. I’m sure those pedals alone were making a lot of noise as they failed due to rusted bearings from sweat. If your headphones/ear buds are good enough, you will ride the bike long enough to fully develop your noise into something bigger that they can get really excited about.
Is the NEO Bike or NEO 3M (with bike attached) quieter?
Quieter than what? I’ve had both their 2T and the gen 1 smart bike and both are very quiet. Incredibly much quieter than the H2 I had. But the kind of floor they are placed on can make a difference. Hollow wood floors and it might amplify the noise of the disc and harmonics from the magnetic drive, but on concrete they are both really quiet.
I used to use noise canceling ear buds and they easily blocked any noise, but switched to a Bluetooth speaker and all my fans make far more noise than the bike does.
I meant the noise difference between Neo Bike and Neo 3M. By the latter probably the drivetrain is making more noise but I’m not sure about the belt driven Neo Bike. My belt driven eliptical trainer is far from quiet…
I plan to put it behind the sofa and watch TV during cardio in the evenings
Gotcha. The H2 was belt driven and my wife could hear me riding from the garage before she opened the door, two rooms away, but the Smart Bike is nearly silent. I don’t hear any belt noise at all. If anything, I hear the hum of the magnetic drive, and the ratchet of the freehub on the flywheel disc. The days of the noisy trainer are long gone.
“I plan to put it behind the sofa and watch TV during cardio in the evenings”
Well, again, if you sweat a lot, like me, the fans will make more noise than the Neo Smart Bike. I have 6 fans and can’t hear the bike, I feel it, but the fans covers a lot of sound (including the speakers). If you can afford the bike, I’d go that way because it eliminates the standard bike noise and manitenance. On the 2T, the amount of noise with the bike was louder than the trainer for sure, but I’m sure the pedal bearings and chain made a hell of a lot of noise as they died, Noise easily blocked by the noise canceling ear buds, but my wife and dog had to hear it until I eventually did.