Earlier this summer Elite launched four new trainers/rollers, and in doing so greatly simplified their trainer lineup. Previous to that they had enough trainers to allow each member of the Brady Bunch both a primary and backup trainer. Never mind the fact that they were confusingly named. However, now things are super-simple and nice and tidy.
The Elite Drivo (pronounced Drive-oh) is their top-end trainer. It’s direct drive (meaning, you take off your rear wheel), and it’s fully electronically controlled. They’ve upped numerous specs on it compared to past trainers, most notably around accuracy. I’ve had the trainer since July, and have had a fair bit of time using and testing it. And overall, I’ve come away quite impressed on a number of levels.
As usual, I’ll note that Elite sent me the trainer as a loaner to try out. Also like usual, I’ll be sending it back to them upon completion of this review. That’s just the way I roll. If you found the review useful, you can pickup the Elite Drivo and other gadgets from Clever Training at the bottom of this review. In doing so DCR Readers save 10% and support the site. Plus, you’ll get free US shipping. Win-win!
With that – onto the trainer!
What’s in the box:
I got shipped one of the first production Drivo’s off the line back in July, but at the time they were still waiting for the outer cardboard printing sleeve to arrive from the printers. So I got the equivalent of carrying a bottle of whisky in a brown bag to conceal it’s true identity. No worries, I’m reasonably certain a printed sleeve won’t impact accuracy.
You can see it’s serial number 130, which also aligns to the ANT+ ID too.
Once cracking open the box you’ll find an upper shelf full of smaller parts. Typically you don’t get a cassette in there, but they included one just in case I didn’t have one handy. I’ll talk more about that later.
After removing the shelf (which also contains the feet seen above), you’ll see the trainer below:
It’s easiest to just pick up the whole kit like a small dog and take it out of the box. Once done, you’ll have this tidy little picture:
Just to recap on the parts list, we’ll run through them all. First up is the feet, which allow you to adjust height of the trainer above the ground by rotating the feet into different positions.
Next we’ve got the power supply:
Then there’s doohickies for the cassette and different axle standards. Plus a standard ANT+ USB key.
Following that we’ve got Elite’s software, if you so choose to use it.
Then there’s the cadence sensor. That’s optional, but it’s there if you want it.
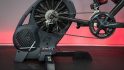
Finally, the unit itself:
Don’t worry, you’ll get a zillion shots of that trainer by the time this review is done.
Lastly, while not in the box, I know folks will be looking for specs like max wattage and stuff. All of those can be found later in this review in that comparison table section you see. It’s the part of the post that looks like it had a Tinder date with Microsoft Excel.
Setting it up:
The setup process is pretty easy and painless, only taking a few minutes once you get the cassette on it.
First up is installing the cassette on it. As many DCR readers know, this is a bit of a pet peeve of mine with (some) direct drive trainers that lack a cassette on them. This means that you not only need a cassette, but also the handful of tools to install said cassette. The cassette itself will run you between $50-$100 for a run of the mill Shimano Ultegra variant. You can install any of the major cassette types (Shimano 9/10/11 speed, plus an adapter for campy), so this does give you flexibility.
However, companies like Wahoo simply include it already installed on their KICKR lineup, simplifying setup. Beyond the cassette purchase, you’ll need tools – which will run you another $10-$30 depending on where you source them. Long term as a semi-serious cyclist you’ll undoubtedly use these again, so they aren’t a waste. Plus, your cycling buddies & buddettes might use them as well.
I suppose I could have done that step last, but, I just wanted to get it out of the way. Next, we’ll take out the feet and plunk them on the lower leg:
Next we’ve got the little red knob that locks the lower leg in place. Plus there’s also a red lever just behind the red Elite sticker. That’s a secondary lock for the upper leg.
Once that’s all done, you’re ready to roll!
Usage Basics:
Using the Drivo is quite frankly silly simple. You mount your bike and you pedal. I mean, basically, that’s it. Of course, I can’t just write that as you’d expect a wee bit more detail on what happens when you pedal.
Now the trainer sorta folds up for easier storage. Not so much under-the-bed flat storage, but more like vertical closet storage. The ‘foot’ will rotate under it and then align parallel with it. Here’s the Jenny Craig before and after photos:
There’s also that handle up top, making it easy to carry the unit around.
It has two safety systems on the unit, a small red locking lever as well as a bigger red rotating knob. Both ensure that you’ve got it locked in place before pedaling. If you forget to lock one (I mean, just a hypothetical, not saying that it happened or anything while filming one day – again, purely hypothetical), then it’ll simply slump forward when you get on the bike. That’s your cue that you should get some coffee.
Once all that’s done, it’s time to get it plugged in. The Drivo does require power, as it doesn’t have a built-in power curve or self-generation for unpowered use (only a handful of electronic trainers do; such as the Wahoo KICKR/KICKR2, Tacx NEO, and Tacx Bushido). The power cord is dual voltage 120/240V, so it’ll work anywhere in the world. You’d just need a $1-$3 power adapter if you’re using it in a different country than you bought it from:
Once plugged in you’ll instantly hear the resistance unit moving inside the trainer. It’s oddly this beautifully reassuring sound that all is happy in trainer land. You’ll also get the LED lights illuminated at the rear of the trainer. One for power, one for ANT+ connectivity, and one for Bluetooth Smart connectivity:
Once powered on, the unit is instantly ready to ride. There’s actually no calibration of the unit, nor roll-down process for it. It’s basically identical to the higher end Tacx NEO trainer in that regard. Attempting to send a calibration command to it from an app (or via FE-C) just results in a confused blank stare from the trainer. It’s basically saying: “I don’t need none of that peasantry roll-down stuff, I’m self-calibrated 100% of the time”. Roughly.
The main purpose of buying a resistance controlled trainer is of course the ability to automatically control resistance and power levels. This typically takes two common forms:
ERG Mode: Setting a specific power level – i.e. 225w. In this mode, no matter what gearing you use, the trainer will simply stay at 225w (or whatever you set it to). Simulation Mode: Simulating a specific outdoor grade – i.e. 5% incline. In this mode, it’s just like outdoors in that you can change your gearing to make it easier or harder. Wattage is not hard-set, only incline levels.
There are variants of these that different trainer control protocols utilize, but basically everything gets back to one of those two ways of controlling a trainer. From a usage standpoint, different apps will focus on different things. For example, Zwift in regular mode will be setting the incline/grade, while TrainerRoad and Zwift in workout mode will be using ERG to set specific wattages.
When it comes to ‘road-like feel’, it’s always fairly subjective. But essentially people are looking at the inertia and how it feels – primarily when you accelerate or otherwise change acceleration (such as briefly coasting). A key driver of this is the flywheel size. Be it physical or virtual, flywheel sizes tend to be measured in weight. In general, the larger the flywheel size the more road-like feel. Elite’s Drivo has two listed sizes, one is the actual flywheel size (6KG/13.2LBS), while the second is the replicated flywheel size. This is because with it’s two-belt system, it actually doubles-down on that replicated feeling in the same way pulleys or levers make it easier to move a heavier load.
For me personally, it’s hard to separate the fact that I’m riding indoors from outdoors. It’s still a trainer, and I’m still looking at a wall in front of me. My brain can only turn that off so much. Overall I think the unit’s got a pretty good road-like feel. I’m not sure if it’s the absolute best out there (trying to compare them all over time is near impossible), but it’s pretty solid.
Now it used to be that you’d use apps by trainer companies to control your trainer. But these days that’s far less common. Sure, companies like Elite, Tacx and others do make trainer apps. But the vast majority of consumers go with the vast collection of 3rd party trainer apps.
I’ll be releasing my detailed trainer app guide later this fall which will highlight virtually every offering in the space. Here’s the previous edition for those that are curious. With that, let’s talk standards.
App & Protocol Support:
The Drivo supports all of the main trainer transmission and control protocols used across the board in the industry today by virtually every trainer company.
This means that it’ll transmit across ANT+ & Bluetooth Smart, while also allowing resistance control across ANT+ & Bluetooth Smart. Resistance control is what enables apps to specify what resistance level the trainer is at, such as wattage and slope.
The Elite Drivo supports the following broadcast and control standards:
ANT+ FE-C Control: This is for controlling the trainer via ANT+ from apps and head units. Read tons about it here. ANT+ Power Meter Profile: This broadcasts as a standard ANT+ power meter ANT+ Speed/Cadence Profile: This broadcasts your speed and cadence as a standard ANT+ Speed/Cadence combo sensor Bluetooth Smart Control: This uses the Elite variant of BLE control, the same as their other BLE controllable trainers. There is no BLE trainer control standard, each company does their own thing. Bluetooth Smart Power Meter Profile: This broadcasts as a standard BLE power meter Bluetooth Smart Speed/Cadence Profile: This broadcasts your speed and cadence as a standard BLE combo Speed/Cadence sensor
Within these standards you can basically control or connect to the Drivo from just about any 3rd party app or device out there. If an app doesn’t support one of these protocols, it probably sucks horribly. Zwift, TrainerRoad, Kinomap and dozens more support these. As do head units like Garmin, Wahoo, Lezyne, Stages, and more. The power of using standards! No pun intended.
In my usage of the Drivo, I’ve utilized it with: Garmin Edge 520, Garmin Edge 820, Edge 1000, Zwift, Wahoo Fitness app, and TrainerRoad. It’s probable I’ve also connected with other devices I can’t remember. I didn’t experience any issues with any of those devices or apps. Note though that the Garmin devices in FE-C mode will offer to complete a calibration of the device, though, the Elite Drivo will ignore it since it doesn’t accept calibration commands. So don’t worry when nothing happens there.
Sound Levels:
So how loud is this tower of power?
Not loud at all.
In fact, it’s rather quiet. But it’s not silent.
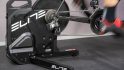
Elite has tapered expectations a bit on sound levels compared to years past with their Real Turbo Muin trainers that were pretty quiet, except for the sound of fluid whirling around. There’s quite simply moving belts and stuff moving around in this trainer, something that can be seen in the below internals of the trainer without a shell:
Still, it’s pretty darn quiet. To give you a feel for things, I’ve put together this video with the sound levels. As with any sound level tests, there’s a lot of variants. I outlined all these in my KICKR review, but I figure it’s worthwhile noting here again. There are a massive number of environmental factors that truly do have a huge impact:
– The room materials (which can make trainers quieter or louder due to echo, noise dampening, etc…)
– The size of the room
– The exact distance of the camera and/or decibel meter
– The mode of the decibel meter
– The type of mics used
– The sound levels of the mics used
– The exact position of the mics relative to different sides of the trainer
– How the mics capture different tones
– How I edited the audio (normalized levels)
– The speed of the trainer
– The cleanliness of the drivetrain on your bike
– The shifting accuracy (tuning) of your bike’s drive train
– Whether or not I remembered to turn on the @#$@# mics
– And other items I’m likely forgetting
Any one of these items can make the entire trainer sound dramatically different.
With that, here’s the Elite Drivo sound level videos:
Perhaps upon my return from Interbike I’ll do one comparing it head to head with the new KICKR (aka KICKR2). I’d say that between those I’d probably give the slight edge to the Elite Drivo in terms of sound (being quieter), but it’s not a huge difference.
Accuracy Testing:
Next up we’ve got power accuracy testing. This is one area that I’ve given Elite a hard time on in the past, as the Real Turbo Muin trainers that I’ve previously tested have been both slow to respond, as well as inaccurate in their response. Elite released a firmware update this past winter (Feb 2016) that addressed some of that responsiveness. But it would take adding a power meter to the actual unit itself (Drivo & Kura) to get better accuracy. You can see the power meter here:
The unit doesn’t use strain gauges, thus there’s no need for temperature compensation. Instead, they measure a time delay between two sets of teeth within the sensor. By measuring this time delay they can determine the exact amount of torque being applied to the sensor (graphic below from Elite).
By using optical sensors to determine the measurement, they’re able to avoid any temperature issues – since it doesn’t impact optical measurement. They dive into this a bit more in an e-mail to me explaining the technology and some questions that have come up around temperature compensation (geek-fest ahead):
“We’ve no temperature compensation. In fact, there is no need of temperature compensation as we’re not using strain gauges, where temperature is a critical point. We measure a time delay of the teeth of the sensor. The sensor measures the time delay between two series of teeth, as this delay is proportional to the torque applied to the sensor as each series of teeth is applied to one end of the axle.
The temperature variation doesn’t affect the reading of the teeth as measurement is performed from optical sensors (we use 2 optical sensor to read the same time delay to reduce further the errors). This differs from the “normal” power meters or trainers that measures the current that flows through a resistance (normally on strain gauges for power-meters or coils for trainers). In fact the electrical resistance is very sensitive to temperature variation so the temperature compensation is important.
Actually, the temperature variation may deform the mechanical dimensions of the teeth, but the teeth deformation due to the temperature is very limited as they are made with a very stable steel. Moreover the temperature affects the 2 series of the teeth in the same way and this neutralizes the deformation effect.
Furthermore the Drivo has been designed positioning the sensor far from the brake, where the temperature is generated. So the sensor doesn’t “suffer” the heat generated from the brake and work at stable temperature. For this reasons, the temperature doesn’t affect the accuracy of the trainer.”
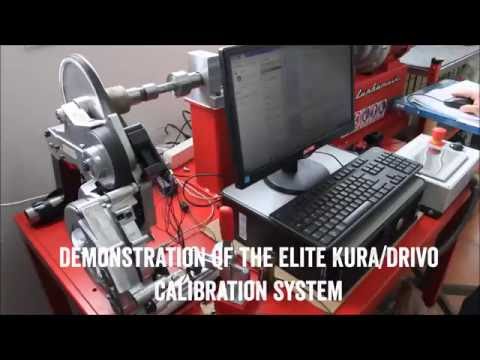
In fact, very few trainers actually have power meters in them. Most do calculations based on other factors to get accurate results. Either method is perfectly acceptable, as long as the end resultant is accurate. While visiting Elite’s factory back in June, I got to take a look at their power meter testing machine, which is outlined in the below video with a Drivo on the stand. Every trainer that leaves the factory gets put on this machine to validate accuracy.
However, Elite actually went one step further: They sent out the trainer to an independent German laboratory (Physikalisch-Technische Bundesanstalt (PTB) for testing and certification of their accuracy claims. That laboratory performed some form of step based testing against a calibrated industrial ergometer (the specific test details are kinda fuzzy*, though they seem like they’re roughly going in the direction of what I’d like to see):
“Tests were performed in two phases:
– Phase one at constant 130 RPM and gradual increase of resistance with steps of 50W
– Phase two at constant 50 RPM and gradual increase of resistance with steps of 40W”
Below is the machine that did that validation (photo provided by Physikalisch-Technische Bundesanstalt, via Elite):
That resulted in them being awarded a nifty 1% accuracy validation certificate. Below is said certificate (click to expand):
Now regular DCR readers know that fancy certificates don’t get you very far here. Sure, it’s good to see and certainly better than nothing at all. But I feel like real-world testing is often a far better indicator of actual performance. Putting a variable human rider on a bike often yields different results than a perfected automated test machine. As does different applications and test patterns.
In my case I was looking to see how it reacted in two core apps: Zwift and TrainerRoad. The actual apps don’t much matter (at all), but rather the use cases are different. In Zwift you get variability by having the road incline change and you being able to instantly sprint. This reaction time and accuracy are both tested here.
Whereas in TrainerRoad I’m looking at its ability to hold a specific wattage very precisely, and to then change wattages instantly in a repeatable way. There’s no better test of that than 30×30 repeats (30-seconds at a high resistance, followed by 30 seconds at an easy resistance). Previously Elite would fail this test (miserably) with the Real Turbo Muin pre-firmware update, as the unit would take too long to change wattage.
So, how did the Drivo fare? Quite well I must say. Below is a graph of that when compared against two other power meters on the bike at the same time (a Quarq RIKEN and PowerTap P1 pedals). You can click here to view the files in the analyzer, as well as download the original files.
Seriously, the above is a beautiful graph, especially tracking against the hard efforts and recovery. The only point you see any variation is for about three seconds after the final interval. This is interestingly because in my TrainerRoad test workout (seen two screenshots above), I’ve got a 1-second error that I’m too lazy to fix in the workout editor. It spikes the power, which the Drivo actually correctly picks up for the briefest of moments. The other two barely notice it.
You’ll notice that the points in which the resistance goes from 150w to 470w happen within about 3 seconds, though it gets to 450w in two seconds, so it just stabilizes that final 20w in the last second. You actually don’t want it to change instantly (sub-1-second), as that’s like hitting a brick wall. You can see this below when I remove the smoothing from the display, to 0-second smoothed. Each vertical line is one second:
Next, here’s a longer and more variable workout, this time using FE-C. Once again you see solid agreement during these longer intervals, with a caveat I’ll talk about below the picture. Analyzer link here.
Note that on the workout I was having some sort of dropouts on one of the recording devices for the Drivo, so you see those random bumps out the bottom in the above smoothed plot by the Drivo. If I remove the smoothing you see the obvious drops. I’ve got a lot of connectivity in the cave, and sometimes this sort of thing happens. I certainly wouldn’t blame this on the Drivo. Also of note is that it did not loose connectivity at any point from a control standpoint (as you can see where the Quarq maintains wattage).
And finally, here’s a session on Zwift, which is all about having variability within the ride file. As you can see here, it lines up quite well again. Here’s the analyzer link as well.
Seriously, another plot of beauty. Getting three power meters to agree this perfectly with zero drift is really darn difficult.
Note in particular if I zoom in on one of my sprints, that all of the power meters agree within 1.6% (end to end range), or basically a normal amount I’d expect given the differing and combined stated accuracy claims of each power meter. The P1 and Drivo agree within 0.2%.
Thus essentially, my findings are consistent with the claims that Elite has made around accuracy being pretty tight. This is in the same ballpark and accuracy that folks tend to see with the Tacx NEO as well.
(Note: All of the charts in these accuracy sections were created using the DCR Analyzer tool. It allows you to compare power meters/trainers, heart rate, cadence, speed/pace, GPS tracks and plenty more. You can use it as well, more details here.)
Trainer Comparison:
So which trainer is your best bet? Well, that’s an extremely complex topic. One that I dedicate an entire post on each year as part of my annual trainer recommendations guide. That guide typically comes out in late September or early October. The exact date is usually driven by when I get semi-final versions of new trainers from various companies to do at least preliminary testing on. At this point I have ridden every trainer coming out this season, but some were of varying degrees of beta/prototype state. Here’s where I currently stand on that riding effort for this season’s trainers:
Wahoo KICKR2: Rode final production version, review here Elite Drivo: Rode final production version, this is that review (duh) Elite Rampa: Rode pre-prod version, have production version on way to me with courier CycleOps Hammer: Rode very early prototype version, latest prototype has moderate changes, looks like early October for review unit CycleOps Magnus: Currently have prototype version, expecting production version early October Tacx Flux: Rode both early and late prototype versions, expecting production version for review in late September Kinetic Smart Control Trainer: Rode near-final prototype version, expecting production version in for review mid-late September
There are of course other non-electronically controlled trainers, but that’s the gist of things. I’ve talked extensively about trainer selection and where it stands today, most recently in the Zwift Community Podcast (for an hour). I’d give that a listen. But essentially right now if you’re looking for a high end trainer with the most accuracy the best options are the KICKR2, Drivo, and NEO, with the Drivo and NEO having the highest accuracy levels. At this point, nothing is changing my mind that the best overall trainer right now is the Tacx NEO – purely due to a combination of noise (almost nothing), features (stuff like road patterns), and accuracy (very solid). But, it’s also the priciest in most markets, so…you get what you pay for there.
However, if you can wait a few weeks and we can see what the accuracy levels of the Tacx Flux is – that could be the best bang for the buck trainer this season. We’ll have to wait and see.
In any case, I’ve added the Elite Drivo to the product comparison tables. For the purposes of below, I’ve compared it to the Wahoo KICKR2, CycleOps Hammer, and Tacx NEO. But you can make your own comparison tables here, and compare it against any trainers I’ve ridden:
Overall I’m very impressed with the direction that Elite has gone here. Over the last 12-18 months they’ve completed their convergence onto industry standards, as well as consolidated their higher end trainer lineup. Both moves make the company and their products far more consumer friendly.
But more importantly than that, they’ve released a solid trainer in the Drivo. It’s best in class when it comes to accuracy, rivaling any consumer trainer on the market (and quite frankly, besting virtually all of them except the one it matches: NEO). It’s easy to setup, and easy to use.
Now of course it’s not 100% silent, but the trainer that is costs $300 more. But it’s pretty darn quiet. It falls into the camp of ‘your fan is probably louder than the trainer’, which is the most oft-forgotten reality of training indoors: A fan to keep you cool. Still, trainer noises resonate (literally) with different people in different ways.
Finally, note that Elite has actually been shipping Drivo units since late July to retail outlets. Obviously availability is still slim, but the trainers are out there somewhere. Meanwhile, the next product I’ll test from them is their mid-range entrant this year, the Rampa trainer, which costs less than half as much but has dramatically different specs. Oh, and if you were wondering about Kura, it’s very similar to the Drivo, except that it’s missing one key spec compared to the Drivo: The ability to control the trainer. It just broadcasts your power/speed only, but does so with the same exact power meter as Drivo.
Thanks for reading!
Found This Post Useful? Support The Site!
Hopefully you found this review/post useful. At the end of the day, I’m an athlete just like you looking for the most detail possible on a new purchase – so my review is written from the standpoint of how I used the device. The reviews generally take a lot of hours to put together, so it’s a fair bit of work (and labor of love). As you probably noticed by looking below, I also take time to answer all the questions posted in the comments – and there’s quite a bit of detail in there as well.
If you're shopping for the Elite Drivo II or any other accessory items, please consider using the affiliate links below! As an Amazon Associate I earn from qualifying purchases. It doesn’t cost you anything extra, but your purchases help support this website a lot.
Since the Elite Drivo II is no longer sold, I recommend looking at Elite Direto XR:
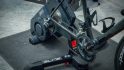
This is a super basic trainer mat, which is exactly what you'll see me use. All it does is stop sweat for getting places it shouldn't (it also helps with vibrations too).
I use Apple TV for Zwift the vast majority of the time, but also just for watching YouTube/Netflix/etc on the trainer. The Apple TV remote sucks though. This $8 case fixes that, it's a silicone strap that makes it easy to grab, but also has a strap to easily place on the edge of your handlebars. Boom! Note: Not compatible with 2021 Apple TV Edition.
Here's the thing, some people like front wheel blocks, some don't. I'm one of the ones that do. I like my front wheel to stay put and not aimlessly wiggle around. For $8, this solves that problem. Note some trainers do come with them. Also note, I use a riser block with *every* trainer.
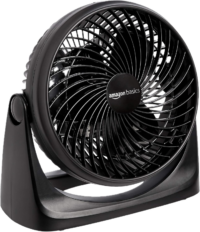
I've got three $15 fans floating around the DCR Cave (previously Honeywell ones, but seems to be rebranded as Amazon Basics now), and I frequently use them on rides. They work just fine. Sure, they're not as powerful as a Wahoo Headwind, but I could literally buy 20 of them for the same price.
This desk is both a knock-off of the original KICKR Desk, but yet also better than it. First, it's got wheel locks (so the darn thing stays put), and second, it has two water bottle holders (also useful for putting other things like remotes). I've been using it as my main trainer desk for a long time now and love it. Cheaper is better apparently. Note: Branding varies by country, exact same desk.
This is by far the best value in trainer desks, at only $59, but with most of the features of the higher end features. It's got multi-tier tablet slots, water bottle holders, non-stick surface, adjustable height and more. I'm loving it!
One of the most popular trainer fans out there, rivaling the Wahoo Headwind fan in strength but at a fraction of the price. It doesn't have smartphone/ANT+/Bluetooth integration, but it does have secondary outlets. I've been using it, and a similiar European version lately with great success (exact EU variant I use is automatically linked at left).
I've had this for years, and use it in places where I don't have a big screen or desk, but just an iPad or tablet on my road bike bars.
And of course – you can always sign-up to be a DCR Supporter! That gets you an ad-free DCR, access to the DCR Shed Talkin' video series packed with behind the scenes tidbits...and it also makes you awesome. And being awesome is what it’s all about!
Thanks for reading! And as always, feel free to post comments or questions in the comments section below, I’ll be happy to try and answer them as quickly as possible. And lastly, if you felt this review was useful – I always appreciate feedback in the comments below. Thanks!
I swim, bike and run. Then, I come here and write about my adventures. It’s as simple as that. Most of the time. If you’re new around these parts, here’s the long version of my story.
You'll support the site, and get ad-free DCR! Plus, you'll be more awesome. Click above for all the details. Oh, and you can sign-up for the newsletter here!
Here’s how to save!
Wanna save some cash and support the site? These companies help support the site! With Backcountry.com or Competitive Cyclist with either the coupon code DCRAINMAKER for first time users saving 15% on applicable products.
You can also pick-up tons of gear at REI via these links, which is a long-time supporter as well:
Alternatively, for everything else on the planet, simply buy your goods from Amazon via the link below and I get a tiny bit back as an Amazon Associate. No cost to you, easy as pie!
You can use the above link for any Amazon country and it (should) automatically redirect to your local Amazon site.
While I don't partner with many companies, there's a few that I love, and support the site. Full details!
Want to compare the features of each product, down to the nitty-gritty? No problem, the product comparison data is constantly updated with new products and new features added to old products!
Wanna create comparison chart graphs just like I do for GPS, heart rate, power meters and more? No problem, here's the platform I use - you can too!
Think my written reviews are deep? You should check out my videos. I take things to a whole new level of interactive depth!
Smart Trainers Buyers Guide: Looking at a smart trainer this winter? I cover all the units to buy (and avoid) for indoor training. The good, the bad, and the ugly.
Check out
my weekly podcast - with DesFit, which is packed with both gadget and non-gadget goodness!
Get all your awesome DC Rainmaker gear here!
FAQ’s
I have built an extensive list of my most frequently asked questions. Below are the most popular.
You probably stumbled upon here looking for a review of a sports gadget. If you’re trying to decide which unit to buy – check out my in-depth reviews section. Some reviews are over 60 pages long when printed out, with hundreds of photos! I aim to leave no stone unturned.
I travel a fair bit, both for work and for fun. Here’s a bunch of random trip reports and daily trip-logs that I’ve put together and posted. I’ve sorted it all by world geography, in an attempt to make it easy to figure out where I’ve been.
The most common question I receive outside of the “what’s the best GPS watch for me” variant, are photography-esq based. So in efforts to combat the amount of emails I need to sort through on a daily basis, I’ve complied this “My Photography Gear” post for your curious minds (including drones & action cams!)! It’s a nice break from the day-to-day sports-tech talk, and I hope you get something out of it!
Many readers stumble into my website in search of information on the latest and greatest sports tech products. But at the end of the day, you might just be wondering “What does Ray use when not testing new products?”. So here is the most up to date list of products I like and fit the bill for me and my training needs best! DC Rainmaker 2024 swim, bike, run, and general gear list. But wait, are you a female and feel like these things might not apply to you? If that’s the case (but certainly not saying my choices aren’t good for women), and you just want to see a different gear junkies “picks”, check out The Girl’s Gear Guide too.