Back about 45 days ago during the ANT+ Symposium I had the chance to sit down on a trainer and suffer through a nearly hour long test of both my physical fitness, as well as the Moxy Muscle Oxygen sensor.
It’s actually a sensor I’ve been poking at on and off with for about a year in a handful of rides and runs on my own. But the time spent with founder Roger Schmitz gave me some time to dive into how it works in a structured test case with multiple sensors and data channels recording, and purpose made apps presenting the data in real-time.
Many of you have asked how the Moxy compares to the BSX device that I also tested in September. Despite being a seemingly simple question, it’s a bit of a complex answer that spans a lot of areas. I’ll try my best to explain it in the clearest method possible over the next few dozen paragraphs of text – though, even that might be challenging. With that, let’s begin!
The Device Itself:

When it comes to unboxing the Moxy device, they take the cake for the fanciest box ever used in a fitness device. I can only assume someone was trying to offload US Government seized Cuban cigar boxes, and this was available at a good discount. No worries, it keeps it nice and protected and adds some swank and swagger.
Additionally, they’ve got a slew of ‘mounts’ (for lack of better term) that comes with it along with the carry tote. Seriously, this device is stocked when it comes to ways you can carry and safeguard it.

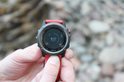
As for the device itself, the Moxy is essentially an optical sensor, albeit, a bit of a chubby one. But that’s OK, you don’t need to wear it on your head or your chest. These little dots emit light that is then read and analyzed. The slightly larger top dot sends out the near-infrared light, while the bottom dots are NIRS detectors that receive the scattered light from your muscle tissue.

To see the size differential, here’s a simple heart rate strap transmitter pod. It’s about the same length, but is deeper and slightly wider. On the bottom there is a Micro-USB port for charging and downloading. The whole thing is also waterproof, but they still recommend putting it in small plastic bags (seen above) to protect it further.

The Moxy typically straps to your thigh, though it can attach to any muscle you can find a way to affix it to. On your thigh the unit would use a molded system they’ve made, attached with some stickers. You can see the back of the sensor below:


The reason for the black rubber enclosure is that like other optical sensor systems, external light is the enemy. Like Darth Vader style enemy, even more so sensitive than typical optical HR sensors are to outside light. So there’s a bit more that they have to do to ensure that no external light gets in.
In my case, they applied the rubber casing to the Moxy sensor, and then taped the sensor onto my thigh. I then slid my cycling shorts down over it, adding more cover of darkness. It would be like Seal Team 6 in there, minus the tell-all-book.

In my test, for the fun of it, they also placed another sensor on my upper arm, to see how things differed during the test and to show variations with everything from how my arms were positioned to which muscles were actually doing the work. You can see it just below my cycling sleeve under the word “Alpe”. Further, I had the Scosche optical HR sensor on below that (seen outside my cycling jersey with the fabric band).

Speaking of which – now’s probably a good time to explain exactly what Moxy is measuring. In this case, it’s Muscle Oxygen Saturation – aka SmO2. To let the Moxy folks be more precise in that explanation, they note that:
“This is simply the percentage of hemoglobin that is carrying oxygen within the muscle tissue. Hemoglobin is the molecule in red blood cells that actually carries oxygen from the lungs to
where it is needed in the body. The measurement of SmO2 takes place in the capillaries of the muscle.This is where the oxygen is being consumed. SmO2 can be thought of as a measure of the balance between demand increases, but the heart hasn’t had a chance to speed up, and the blood vessels in the muscle haven’t dilated. The SmO2 drops quickly in these conditions.
As you warm up, your heart rate increases, and the blood vessels in the muscle dilate to 2 levels. When you stop exercising, the demand for oxygen suddenly falls, but the heart rate is still elevated and blood vessels dilated. At this time, a rapid increase in SmO2 is observed.
Generally, higher levels of exertion in the muscle lead to lower SmO2.”
So essentially you’re looking at how your body, specifically your muscles, responds to exertion over time. And the numbers you’ll get are sorta like a test score. For those interested, you can dive into more details from their site here in this PDF on how exactly the device works.

Finally, all of this is then transmitted over ANT+ from the device.
The unit transmits across ANT+ in two different ways. The first is that it can fake being an ANT+ Speed/Cadence Sensor or the ANT+ Heart Rate profile. Within those profiles it’ll transmit the data via those standard channels to virtually any tri/bike unit on the planet that supports ANT+. This means you could easily use a good old reddish colored Garmin FR305 to collect Moxy data.
![clip_image002[5]](https://media.dcrainmaker.com/images/2014/11/clip_image0025.png "clip_image002[5]")
The second option, is to use the new ANT+ Muscle Oxygen Profile. For this, you’ll need one of a handful of apps out there that can understand and record/display the profile. These are listed here, but the major ones are Peripedal & PerfPro (bike trainer apps), and then IpBike (Android app). IpBike is handy because it’s just your Android phone and is more portable than a trainer app (and ANT+ is natively supported on many Android devices these days). Meanwhile, the trainer apps are nice because they can specify the structure of the tests for you.
Then there’s actually one last option – which is to simply record the data to a file that you can download afterwards via USB cable.
The Test (and pain):

You know when something sounds like a great idea weeks in advance? Almost invariably, it’s a horrible idea the day it comes to fruition. I last had this occurrence just a few weeks prior with the BSX test. Seemed like a jolly fun time in Vegas, until they explained I had to have blood drawn every couple minutes.
Turned out my thinking was equally flawed here too. I figured how bad could a bike FTP/VO2Max-eqsue test be? I’d be done in a few minutes and onto some sort of filling Canadian meal in the mountains. What I didn’t account for was being at 1,522m (4,009ft) of elevation, nor the cumulative effects of multiple transoceanic boomerang flights in the preceding weeks. Nor that the test was slated for over an hour long. Turns out elevation hurts. A lot. No pain, no gain, right?
The test structure was already laid out for me. My job was mostly just to follow along. We had planned to use a random trainer along with one of the random bikes lying around the ANT+ Symposium. However, it turned out when two random’s are added together, they don’t always equal a right. In this case the only working combination of trainers/cassettes/wheels/power meters/pedals we could come up with was a bike that was slightly too small without clip-in pedals on a trainer that couldn’t specify an exact wattage. No worries, I’d just brute force it.
Normally, you’d want to use something like Peripedal to automatically control the trainer – such as the Wahoo KICKR. In that case you’d be able to setup the test profile ahead of time, which was specified as as series of dual steps that were going beyond my FTP. In my case, we had specified slightly higher goals, but with the last minute changes we had a bit less control. Here’s my steps (after the all-important warm-up):
2x138w
2x205w
2x280w
2x350w
2x415w
2x480w
Each step lasts a rather painful 5 minutes, with then 1 minute in between. Each step is repeated twice. So basically, a little part of you dies inside twice for each step.
These were based on my FTP (Functional Threshold Power – The max wattage you can hold for an hour), which I roughly knew ahead of time. Otherwise, a coach would be able to give you a good set of wattage steps. In my case, they used 315w as my FTP, and then the steps were constructed from there. The only challenge is that didn’t take into account the altitude, which definitely had an impact on me.
In any event, we got the test started:

As you can guess from the above listed steps, it starts off pretty easy. That’s by design. The goal is to understand your responses at a variety of levels.
The test was programmed into PeriPedal, but in my case I ended up on a BKOOL Trainer. Unfortunately, 3rd party apps can’t control the BKOOL Trainer, so we ended up using the the BKOOL velodrome option and then I just pedaled/geared harder as required to stay at the right power output.
Below, you can see the first few 5 minute steps. These are reasonably easy at this point since it’s below 300w. Or, if not easy, at least sustainable. Along the bottom you’ll see the Muscle Oxygen and Total Hemoglobin displayed.

Ifor Powell, who creates the Android app IpBike happened to be there – and he was tracking along the values on the app as well. His app is the only mobile phone app that can record the Muscle Oxygen data (as well as display it live).

Eventually, you get to the part in the test where things start to hurt a bit. These are 5-minute steps, and while the first chunks were easy, once you start hitting 350w for 5 minutes each (at 4,000ft), it hurts.

Of course, everyone else in the room found my pain funny. I was doing the test just as the product faire at the ANT+ Symposium was wrapping up toward the end of the day. You’ll remember the ANT+ Symposium is where all of the industry’s lead engineers and sometimes company founders are present. So basically, everyone who has products that I review and pick apart…stopped by to watch me suffer. Apparently payback.

Back to the test, you’ll remember that each step has a 1 minute break between them. This is where they can see how quickly you recover from an muscle oxygenation standpoint.
Of course, in my case, that assumes you can get through the tests. In some cases, the test will break you. And that’s perfectly fine. That was the case here for me. After nearly an hour, and at little more than half-way through the 1st 450w 5-minute set, I simply couldn’t turn the cranks any more. Defeat.

While I suspect that had I not been riding in running shoes and been on my bike at sea level I would have faired better, that’s OK, it still gives me a general idea of where I stand. And in this case, it gave me a good idea of how the platform works.

Above is the final chart from Peripedal showing my test results in real-time, from there we’d export it out and get it to .CSV format for analysis. Note that Peripedal does all sorts of other trainer things, we were just using a small fraction of it. But I’ll cover the trainer features tomorrow in a different post.
Now, while I’ve talked about some apps as a way to record the data, you’ll soon also have the Garmin FR920XT with Connect IQ as well. In fact, Moxy was the device/sensor that Garmin used in almost all of their demonstrations for Connect IQ. Demo apps and all were written with the explicit the idea of using the Muscle Oxygen profile that only Moxy leverages. Of course, not to be outdone, the Moxy folks are working on their own app for Connect IQ as well. So collectively, you’ll be well covered there for recording data directly to Connect IQ capable devices (currently just the FR920XT until next year).
Analyzing the Data:

Now, next comes the ‘fun’ part. Or, in some cases, the road less travelled. This is where you see significant differences between a product like BSX, and that of Moxy. In the case of BSX, they’re aiming to give you a complete recommendations set – a full set of automated reports with specific training guidance. Whereas with Moxy, it’s aimed at the coaching level and their goal is to give you specific raw information that you or others can then leverage.
To begin with, they showed me some graphs of how a typical Elite cyclist would respond to a 5-1-5 test (which is the test I did – 5 minutes on, 1 minute off, 5 minutes on, repeat). In the above image you can see how it takes a bit of time to stabilize, and then in each set you can see the Muscle Oxygenation (SmO2) level get progressively lower and lower each set. You can also see how it recovers less as the cyclist went along.
Next, here’s my data, first plotted against power:

But, let’s remove the power component in order to make the scale of the graphs pop out a bit:

Now that’s much easier to see. You can see my muscle oxygen level (%) is steadily going down, but it’s my final incomplete attempt that you really see it drop significantly towards the end of that set. It’s this specific drop that they’re really looking for in the test. At this point, while another step would have been interesting, it wouldn’t have been needed – they’d reached the point where there’s a sharp drop-off.
But, check this out: Here’s the MOXY sensor that was on my deltoid (upper arm near shoulder). You can see that by and large there was fairly minimal fluctuations until that last set. It’s unclear if this was because I was getting more active with the trainer (i.e. standing/moving/etc…), or just the result of ‘all hands on deck’ in my body to fight through. Still, it’s interesting.

So, what do you do with all this data? Well, there’s a lot of ways it can be used. First it can be used to determine your specific area of weakness in the body and the delivery (or lack thereof) to the muscle. A number of higher end/elite athlete coaches are looking at Moxy data from that specific side of things.
The second way of looking at the data is for a coach to establish zones based on it (such as power zones). The below graph gives an example of that (not my zones, just a sample).

The zones identified above are:
Green (AR): Active Recovery
Yellow (STEI): Structural Endurance Intensity
Orange (FEI): Endurance Intensity
Red (HI): High Intensity
Of course, coaches would likely call these other things (i.e. Zone 1, 2, 3, 4), but the structure is there. The idea being though is that the above zoning then aligns to the specific event you’re training for (as usual). But to extend that, you could then re-test the theory of a specific zone by doing a longer steady-state workout exceeding 50 minutes at that specific wattage and the oxygen level should stay the same.
Now coaches that are using Moxy more deeply would note that using zones based on HR or power is effectively dumbing down the NIRS data. And there’s truth to that. But there’s also a reality that most of us in this world can’t ride with yet another $1,000 sensor strapped to us on every ride and run, especially if the battery life is only 6 hours (far too short for an Ironman, for example). So compromises are likely to be made.
But – and here’s the thing that Moxy will outright tell anyone – there’s aspects of using the data that are still open to interpretation and study. The ability to have a muscle oxygen sensor data in this footprint simply hasn’t been there yet. Previous finger-clip style pulse oximeters didn’t see much shift in SmO2 because they were attached to the wrong parts of the body for athletes. Just like you didn’t see much shift when the other sensor was attached to my arm. Further, the Moxy sensor is simply measuring deeper and more detailed information. But again, using that information can be the tricky part.
Some Final Thoughts:

The technology is definitely cool, with lots of potential in many areas. For example, rather than measuring the ‘effect’ of something, this is actually measuring the direct attribute or cause. Whereas many other techniques focus on measuring resultant changes, versus measuring the specific changes in the muscle oxygen level via NIRS. The same technology could be used within sets to determine the precise moment you’ve recovered. Right now, you just hope you’ve recovered between a set.
Of course, the obvious challenge is that this stuff is complex. It’s not easy to understand for most athletes. That’s a fundamental difference between what BSX aims to do, and what Moxy is doing. BSX is looking at a holistic solution that gives you clear guidance. Whereas Moxy is looking to utilize their devices within the hands of coaches that want very specific NIRS data to be able to coach athletes from (or, self-coach). Moxy is available today (and has been for a year or so), while BSX is almost shipping. Neither method is right or wrong, just different. Measuring slightly different things. In fact, you’ll find both companies are generally fairly cordial to the other.
The coaching driven aspect is no doubt core to why the price is what it is at $999US. Whereas BSX is roughly 1/3rd the cost for the cycling or runner edition, but a bit more for the multisport edition. Whereas Moxy can be used for any sport on any accessible muscle. Again, different strategies.
If you’re either coaching, or looking at using the technology – then I’d spend some serious night and weekend time diving into how each solution works. The Moxy blog is mind-bogglingly detailed in posts out there on the technology and different scenarios. And the BSX blog is equally deep. Meanwhile, with BSX ideally shipping in the next month or so, you’ll likely start to get some real world usage there as well.
Definitely an interesting time in this field!
As always, thanks for reading, and feel free to drop questions below and I’ll attempt to get the answers. Even if said answers go slightly above my head.
(Note: I’d like to thank Ifor Powell, who willingly took over my camera during the test and documented my pain at an impressive #winning level of 449 photos. I appreciate it!)
FOUND THIS POST USEFUL? SUPPORT THE SITE!
Hopefully, you found this post useful. The website is really a labor of love, so please consider becoming a DC RAINMAKER Supporter. This gets you an ad-free experience, and access to our (mostly) bi-monthly behind-the-scenes video series of “Shed Talkin’”.
Support DCRainMaker - Shop on Amazon
Otherwise, perhaps consider using the below link if shopping on Amazon. As an Amazon Associate, I earn from qualifying purchases. It doesn’t cost you anything extra, but your purchases help support this website a lot. It could simply be buying toilet paper, or this pizza oven we use and love.