I suspect in the sports technology world there was no product quite as long awaited as Vector. It’s taken years of attempted delivery dates to get to this past August, when they started shipping production units. Since being equipped with a set a little over a month ago, I’ve been riding all over the world putting a pounding on the set. At this juncture I finally feel like I have enough data and time with them to publish a full review.
Because I want to be transparent about my reviews – Garmin provided a production edition Garmin Vector set, with final production firmware. As always, in the new few weeks I’ll be sending them back to Garmin and then going out and getting my own (to be able to support y’all in the comments section down the road). Simple as that. Sorta like hiking in wilderness trails – leave only footprints. If you find my review useful, you can use any of the Amazon or Clever Training links from this page to help support future reviews.
Lastly, at the end of the day keep in mind I’m just like any other regular athlete out there. I write these reviews because I’m inherently a curious person with a technology background, and thus I try and be as complete as I can. But, if I’ve missed something or if you spot something that doesn’t quite jive – just let me know and I’ll be happy to get it all sorted out. Also, because the technology world constantly changes, I try and go back and update these reviews as new features and functionality are added – or if bugs are fixed.
So – with that intro, let’s get into things.
Unboxing:
Now that you managed to actually get hold of a pair of Vector pedals, it’s time to crack open the box.
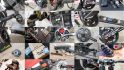
Inside you’ll find the set of pedals and pedal pods looking up at you. Additionally, there’s a pocket of goods in between them covered by a Thank You message. I suppose given how long everyone has waited for Vector, the Thank You note is a nice touch. Though, I would have just been happy with a snack size bag of gummy bears instead.
As I mentioned in between the pedals there’s a small pocket of goods. That pocket contains everything you see below on the top row. The pedals and pedal pods are sitting below them.
I’ll go ahead and quickly run through all the components. Obviously, starting with the least exciting. Thus, we’ll begin at the washers. These will go in between the pedal pods and your crank arms:
Then we’ve got the cleats. If you have your own cleats, that’s fine too.
Next is the mounting hardware for the cleats to attach to your shoes:
Then we’ve got the owners manual. Surprisingly useful actually.
Next we have the ANT+ USB stick. This is used for updating the Vector’s firmware (when new releases come out), as well as doing some configuration if you have an older head unit.
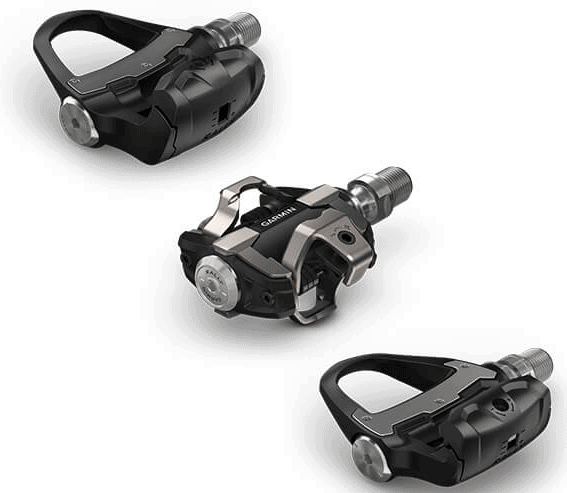
Now we’ve got the real meat of things – the pedals and pedal pods.
The pedal pods (the two little silver things) are the communications piece. They also contain the batteries (one CR2032 per pod). All communication runs between the pods and ultimately to your bike computer head unit, via ANT+. Note that the pods themselves aren’t left/right specific. They’re designed to be relatively easily replaceable as well.
You can see above the battery cover, as well as the little connector piece that snaps into the back of the pedal spindle.
Speaking of the pedal spindles, here’s the pedals:
The pedal body is a Look Keo compatible unit designed by Garmin. However, the pedal body and pedal cartridge are manufactured by Exustar, whereas all remaining components are made in-house by Garmin (or a component supplier).
Below you can see the end of the pedal spindle, which is really where the action happens. Within the pedal spindle is where the strain gauges are that measures your effort.
Which, brings me to another notable. The pedals themselves are paired to each other in the factory. This can’t be changed (in other words, you can’t mix half a pedal with a friend, or split pedals with a friend). The right pedal acts as the master (primary), and the left pedal acts as the secondary. Data is communicated from the left pedal to the right pedal via a private ANT channel, then broadcast via ANT+ by the right pedal to your head unit (using standard ANT+ power messages).
Every Vector set is individually dynamically calibrated (meaning with rotating weights by a computer) before shipment. In fact, everything is tested as a single system upon assembly in Taiwan.
The calibration values are recorded into the device at time of manufacture. Additionally, a multi-point temperature calibration is done at the factory as well prior to shipment. Since silicon strain gauges are known to have repeatable temperature drift properties, by doing a multi-point temperature calibration they can ensure temperature shifts don’t impact accuracy (the pedals have temperature gauges in them).
The pedal type is perhaps the single most controversial aspect of Vector. Initially in the Metrigear days pre-Garmin it started off life as a Speedplay pedal, but post-acquisition it changed to being a Look Keo compatible pedal. The reason for this is primarily business focused. They discussed the need to be able to effectively ‘own’ the process end to end from design to support – with them saying that “we wanted to own the spindle, and own the supply to the spindle.”
Which isn’t to say that other pedals aren’t being considered. Garmin Vector lead Clark Foy noted in a discussion that “Nothing technical prevents us from doing that [other pedal types], it’s a pure business decision.”
In fact, they commented that every pedal vendor has contacted them about offering a Vector-compatible unit. And no doubt in time they’ll be offering more pedal types. They believe that the next market for them will be mountain bike pedals, and then they’ve also expressed an interest in looking at spin bikes as well.
Finally, the official weights of the pedals are as follows (per pedal):
Pedal (including cartridge/spindle): 152g
Pedal Pod: 23g
Total per pedal: 175g
Total per set: 350g
I went ahead and tested that myself and found it pretty darn close (351g):
With that, let’s go ahead and get everything all installed.
Update April 15th, 2014: New wider Vector Pods announced
Today, Garmin announced new Vector pedal pods that now fit larger crank arms. The new pods fit crank arms up to 15-18mm thick, and up to 44mm in height. This is a change from previous, where the pods only fit crank arms up to 15mm thick and 38mm height. As a result, this extra length allotment will allow it to fit cranks previously not supported – like some of the S-Works, FSA, and ROTOR Flow arms that were previously not compatible.
Note that the crank length remains is unaffected, which previously supported 110mm-236.5mm. Additionally, the chain clearance remains unaffected, which is listed as 5mm, though, I’ve found you can get away with about 3.5-4mm in most situations.
Finally, there’s no other changes to the pods technically, and no reason for previous Vector units to upgrade. It’s just a form factor thing for wider crank arms. Availability is set as this spring. For folks who already own Vector and want to buy the new pods for bikes they already own, the set of the larger pods can be bought for $99.
Installation:
Before we dive into installation, we need to have a brief chat about tools. Don’t worry, it won’t take long. In order to get the unit properly on to your bike you need a pedal wrench. That probably doesn’t come as a surprise. However, the trend I’m seeing with Vector installs is that people aren’t installing them tightly enough – and thus aren’t getting accurate results. As you’ll see here, I’m able to get really darn accurate results when properly tightened.
So, how do you know what “proper” is? Well, it’s 25 foot-pounds of torque. You can measure that with a torque wrench (Tool #1 of 2 you’ll need). There’s a few to choose from, but likely your local hardware store will have them (for those of you in the US, Sears is actually your best bet here).
Note, when looking at torque wrenches you need to ensure you’ve got one that’s applicable. I’ve got three, and while the ones on the left and center both work – the one at the right doesn’t go high enough.
Next, we’ll need what’s called a crowfoot adapter. It’s a tiny little thing that you attach to your torque wrench and turn the pedal:
The trick to this part though is that it needs to be skinny. I bought a small gaggle of these on Amazon to try them out, and only one (the one the Vector engineering team recommends) actually is slim enough to fit (the left one):
Ideally, Garmin would include the cheap crowfoot adapter. A torque wrench is a reasonable request – as every other power meter on the market except the PowerTap requires you to have one to install properly. It’s the adapter piece that’s a bit complex to find in some parts of the world (I couldn’t find a compatible one here in France for example in local hardware stores).
Ok, with those two parts purchased, let’s get on to installation. I personally prefer to install stuff on my bike while it’s on a trainer. It just holds it nice and secure, and makes life a lot easier. I’ve also divided up the parts based on which side they’re going.
Assuming you’ve already removed your old pedals, the first thing you’ll need to do is add washers. The washers are added to the outside of your crank arm to help ensure there’s no movement. In general you’ll need 1-2 washers.
It’s really important to note that the goal is NOT to have a perfectly flush installation. In fact, you want to have a bit of a gap between things. The Vector team has been really clear that a gap is far better than being flush. Flush is actually bad in this case.
Next, you’re going to grab your pedal, pedal pod, and that washer. Likely the washer wasn’t going to stay in place all magical-like just hanging there. So instead make a mini kabob out of the three, like below:
Then, go ahead and just screw in the pedal using your fingers till it’s up against the pod. Don’t worry yet about the pod, just let it flop around.
Now it’s time to position the pedal pod. The end-state goal is that the pedal pod will point straight-down when the crank-arm is horizontal. However, because you’ll be tightening it and thus pulling it back towards the rear of the bike, you’ll actually want to position it slightly forward, like thus:
Now, go ahead and tighten the pedal pod until it reaches 25 ft-lbs. Again, you’ll see me re-iterate this 2,348 times in this review – this is the single most important factor in getting accurate data.
With that done, go ahead and repeat the process for the other side of the bike:
Next, we’ll need to pop in the little plugs for the pedal pods. This takes approximately 1.8 seconds:
Now, you’re ready to get on your bike and get things configured. At this juncture you’ve got two choices. Technically you could go ahead and run through the setup and calibration pieces first. But the thing is that you really want to do a couple of quick 10 or so seconds hard sprints to ‘settle’ things before calibration. So I’d actually recommend you do that first. Just go and do about 3-4 hard efforts for just a few seconds to ensure everything gets tightened up. The reason I do that first is that if you calibrate then you’ll need to re-do all these steps after you do that to get the most accurate data.
So, go ride for 2 minutes and come back.
Done? Good.
Next, we turn on our Garmin Edge. I’ll run through this with the Edge 810, but then at the end I’ll talk about how other head units work.
Within you’re bike computer, you’ll need to go into the bike settings and configure the crank length option. You can configure this separately for each bike you have in a different bike profile. This option is important because Vector uses that length to determine power. In my case, I have 175’s (though 172.5’s are most common). Note: If you don’t have a newer Garmin Edge unit, I’ll talk about how you set this at the end.
Next you’ll need to go into the bike settings and search for a power meter. Once that’s done, it’ll pop-up that the power sensor is found:
Immediately following that it’ll give you a notification that Vector needs to set the installation angles. This is basically your initial setup step:
After this it’ll have you briefly spin at between 80 and 90 RPM:
It only takes about 5-10 seconds to complete:
Next you’ll need to do a manual calibration.
To do this unclip from the pedals and put the crank arms horizontal (even with the ground). Then press the calibrate button:
About 8-10 seconds later it’ll come back that things are calculated. The number might initially show a torque value higher or lower than zero, but it should settle out to zero after a few seconds.
Next, we’ve got one final step – Dynamic Calibration. This step is designed to increase the accuracy from +/-2% to more accurate than that. The step is really focusing on the interconnect between your pedal and the cleat, and residual pressure there. Just sit on the bike and pedal for a few seconds, then go ahead and backwards pedal eight full rotations (Note: In a subsequent software update, backwards pedaling is now no longer required).
Upon doing that you’ll receive a little pop-up notification:
With that, you’re done. Go forth and ride!
Items of note for head unit compatibility:
Out of the box the Vector will transmit total power to any ANT+ compatible power meter that supports it. This means if you have an older Garmin Edge 705, it’ll display total power just fine.
What it won’t display is left/right power, or power balance. That requires a newer head unit. The following units support left/right balance:
In addition to displaying/recording left/right balance, there are other installation related fields that Garmin has added to a bunch of units. The goal of most of these updates is to ‘streamline’ the Vector experience a bit. Here’s the skinny on what’s been added over the past month:
Pedal Smoothness and Torque Effectiveness data fields: This adds these two data fields to the units being updated. These can be added to your data screens. Note that at present Vector does not transmit this information (yet). It’s planned, but a specific date hasn’t been identified. Only the Rotor power meter transmits this information today. [Update: As of March 2014, Garmin has added this functionality via a firmware update.] Initial Installation, Wizard for setting Vector Installation Angles: This is the mini-wizard which tells you to spin-up to 80-90RPM and then validates completion. For non-updated units, this will all happen behind the scenes without the confirmation (see calibration section). Dynamic Calibration Notification: This notification will occur upon backpedaling 8 times, resulting in the display rendering a confirmation message. Power Meter connection calibration reminder: This is probably the best update of them all, and impacts any power meter. With this update, when the unit powers on and you’ve got a power meter paired, it’ll remind you to do a calibration at that point. Hopefully this will dramatically increase the accuracy of power meter data for the general population that doesn’t do this today.
Here’s the units getting firmware updates, and the schedule for doing so:
Here’s the Vector-related updates with each firmware update:
Pedal Smoothness and Torque Effectiveness data fields: Edge 510/810 Initial Installation, Wizard for setting Vector Installation Angles: Edge 510/810 Dynamic Calibration Notification: Edge 500/510/800/810, Forerunner 910XT Power Meter connection calibration reminder: For the Edge 500 and 910XT, a ‘shortcut’ option to access the power meter calibration is being added (the other units already have it).
Note that some of the updates are also seeing other features/bugs added or addressed. For example, the 810 update saw a number of non-Vector fixes added.
Now one important setting that you’ve got to have is the ability to set the crank length. The challenge is many other non-Garmin (or older Garmin units), don’t have this.
In the event you don’t have a head unit that can configure the crank length, you can instead use the ANT+ USB stick and your computer to set it up. You’ll follow the instructions in the software (I’ve outlined the first few steps, which are identical, later in this post in the firmware updating section). Ultimately, that’ll take you here though – which allows you to specify the crank length:
As noted in the box above, you don’t need to do this if your bike computer already has crank length as an option (such as the Edge 810). And in fact, if you do it here correctly, but then it’s set incorrectly there – then the bike computer will always override the Vector settings.
Three Brief Post-Installation Notables:
While the previous section took care of installation, I wanted to call out three specific things:
Quick Checklist: With your installation largely complete, here’s a quick checklist I’ve put together for ensuring you’ve taken care of everything (and the Vector team has validated this checklist):
1) Washer in place if need be, more is better than flush/less.
2) Pedals tightened to 25 foot-pounds (ft-lb). Too little or too much can result in inaccurate power. If you firmly tighten with a wrench, you will be fine. Just don’t under tighten (e.g. finger tighten) or put your full force into tightening the pedals.
3) Pedal connectors plugged into pedals.
4) Pair pedals within the bike profiles. Ensure that your crank length is correct (i.e. 172.5mm, 175mm, etc..). If on older Garmin, use computer instead to do this.
5) Turning on Garmin unit, if on 510/810, run through Installation Guide, requires cadence at 80-90RPM (in other words, must be on bike). If on other units, go for short few second ride.
6) Post-installation guide, go into calibration menu. With pedals at 3/9 position (horizontal) and with you UNCLIPPED do a manual calibration (just press the calibrate button). 7) Finally, once riding, within the first minute or so of your ride, pedal backwards a full 8 times. A confirmation message will display on your Garmin.(Updated note: In a subsequent software update, backwards pedaling is now no longer required)
Note that steps 6 & 7 should be done every ride. This last component (step 6 specifically) is no different than any other power meter on the market today. The only exception I can think of is the Stages, which recommends every few weeks.
Vector crank arm compatibility notes: Here’s the limitations which Vector is bound to from a crank arm perspective:
Crank limitations (width): 15mm in width and 38mm in height. Certain models of S-Works, FSA, and ROTOR Flow units appear not compatible. Note: New April 2014 model allows up to 18mm and 44mm in height. Crank limitations (length): 110mm-236.5mm Minimum Chain Clearance (width): 5mm
Minimum chain clearance is an interesting one. This is tested when you’re in your smallest gear in the back and biggest gear in the front, and is the distance is measured from your crank arm to the chain. Specification lists 5mm, but I think you could probably get away with 3.5-4mm. However, 2mm simply won’t be enough. In measuring it (it’s actually really tough to measure, but a trusty Ikea paper tape measure sorta works), the pod connector sticks out about 1.8-1.9mm. Thus with 2mm you’d have .1mm of space, which excludes even the slightest of movement in the chain and/or crank arms. Here you can see what I’m referring to (“1” below equals 1cm, or 10mm):
The impact of not properly torqueing down the pedals: You’ll see me stress over and over again to properly install the Vector system you really need a torque wrench. Then, you need to use said torque wrench to a specific value (25 ft-lbs). To illustrate the importance of this I put together this fun little chart. What I did below was using multiple power meters to show the impact of different torque levels on Garmin Vector. I did this by running repetitive tests on a trainer with a set wattage. I removed all the ‘junk data’ in between each test run to make it cleaner to understand.
It’s important to note that we’re primarily looking at the groupings (how far apart the dots are at each test point), not so much the fact that the dots shift up or down, as that’s really a function of how perfectly I held a given wattage and cadence (even when it’s set).
Even though each time I adjusted the torque I pulled out the battery caps and completely re-did all calibration steps for Vector (full checklist above), you can see the impact on accuracy quite clearly. Especially if you don’t get within the region of proper torque. What’s interesting is that it’s not entirely black and white. You see that one of the tests at 15ft-lbs actually came pretty close. However, it’s important to remember that every single issue I’ve seen around accuracy with other folks has appeared to stem from non-proper torque.
In one case (at ‘snug’, or about 5 ft-lbs), I was off by almost 20-30w. Later, once calibrated I was within 4-5w (at 210w), or basically 2%.
What Vector shows (left/right data and related):
Perhaps the non-hardware feature that most people are interested in is the left/right power functionality. I’ll talk first to the technical side, and then I’ll discuss the usability of it.
From a technical perspective each pedal is effectively its own power meter – hence one reason the price is what it is. Each pedal is independently calibrated at the factory and then individually assigned as being either left or right. You can’t give half your Vector set to a friend, it must contain both pedals at all times. The pedal pods however (the things that hang down)– those aren’t actually assigned left/right and can be swapped around.
Within the ANT+ there are a number of metrics that apply to left/right power, but the core of them is something called “Power Balance”, which is a fancy way of saying “Left/Right Power”.
Power Balance is expressed as a data field on your unit using the following format: ##% – ##% (i.e. 48% – 52%). The first number is the “left” balance, while the second is the “right” balance. Thus in this case I’d be slightly right leg heavy at 52%.
Here’s how that looks on a Garmin head unit. You can see I have the total power up top (336w), and then my balance on the second line (48%-52%). Down below that I have cadence displayed, and below that I have the ride balance and 30-second balance.
As you’re riding, you’ll see this metric displayed. On Garmin devices you can set the metric to be instantaneous pedal balance, or a smoothed balance – such as over 3s or 30s. I prefer smoothed (it doesn’t affect the underlying data recorded at 1-second intervals). To get a feel for things, I put together this quick video. This shows the pedal balance, but then shows me switching to single-leg pedaling, where the pedal balance then switches to 0/100%.
Looking at what that looks like afterwards, here’s a graph of a recent trainer ride where I was switching from left-only leg to right-only leg drills. You see the dots representing my pedal balance. Initially these are roughly around the 50% mark. But then as I start the drills they go up to 100% on one leg or the other (I’ve highlighted them at the top).
You’ll notice a few random dots in the middle – that’s simply me having both legs on the pedals for a brief second to switch legs to the next leg.
Now comes the question of what to do with this data. See, it’s not quite as straightforward as you’d think. Garmin themselves doesn’t recommend you try and focus on maintaining “perfect balance”, and many other leading sport scientists in the field agree. The reality is that collectively the industry doesn’t yet know what to do with the data, nor how to train or race with it. The singular reason that left/right power can be useful for however is injury recovery. For example in a leg injury, being able to see and plot progress back to a pre-injury state (or just something slightly more normal).
In the month or so that I’ve been using the unit I’ve started to identify lots of little nuanced things that are probably close to being personal trends. Trends that really only apply to me. For example, I find that as I fatigue I become more right-leg heavy. I find that different cadence and wattage ranges changes that. Interestingly, when I’m in a “normal” wattage range (say 180w to 300w), I’m reasonably balanced. However, at the upper and lower ends (soft pedaling or sprints), my balance changes.
But, I don’t think I have quite enough data yet to make any scientific statements about myself – let alone everyone else. Ultimately I think Garmin is in a unique position with Garmin Connect to start gathering information on trending. Given how much data they’re collecting in Garmin Connect there could be some fascinating analysis pulled from that in an opt-in situation. For example I’d love to see a random prompt some day that allows me to opt-in to a program to give my power data (without location data) to researchers trying to establish trends.
Until then, it’s merely a curiosity that I find interesting to track – but it’s not something I’m specifically focusing on from a training or racing standpoint.
Before we move on, I should note there are a few metrics that Vector doesn’t yet support. They are Pedal Smoothness and Torque Efficiency. Both of these metrics look at how smooth your stroke is and how efficient your stroke is.
In talking with the Garmin Vector team, they’ve made it clear these are coming to the pedals via a future firmware update – but haven’t defined a timeframe for that yet. The good news though is that all of the current generation Garmin units (i.e. Edge 510/810) have already been updated to support these metrics – so it’s just a matter of the firmware in the pedals being updated (more on how that happens towards the end).
Riding with it:
Once you’ve completed calibration, riding with the Vector pedals is pretty easy and straight forward. Simply put, you just start riding.
There is no on/off switch, instead the units are automatically triggered on whenever the accelerometer in the pedals detects movement. The same sensor then shuts off the pedals after a period of inactivity. In total the batteries will get about 175 hours of battery life before you pay a couple dollars to pickup new CR2032 batteries. Newer Edge units will display the battery status of each – always reporting the lowest of the two battery values.
On the same screens, you’ll also get any error information from the pedals, as well as your serial number information.
As you start to ride you’ll see your power output displayed on your head unit. Depending on your head unit, you can configure other power meter metrics as well. For example below I’ve configured a bit of a Noah’s Ark of power meter metrics:
Cadence data for Vector is displayed as well, as you can see below – 93RPM. Vector supports 20RPM to 150RPM for all crank lengths, but can go beyond that for certain crank lengths.
Note that at this time Vector is not supporting non-round chainrings correctly. Garmin is looking into what is required to do this, but has not yet committed a timeframe nor potential resolution for non-round rings.
The most important thing about riding with Vector is always remembering to follow two simple steps:
1) Manual calibration unclipped prior to starting
2) Backpedaling 8 times a few seconds into your ride
With those two quick steps you’ll get consistently accurate data. Without them, your data is no better than any other un-calibrated power meter on the market today.
On the Trainer:
While this is probably somewhat obvious, I’ll nonetheless mention it. Vector works just fine indoors on a trainer. There’s no tie-in to rear wheel speed or anything else. The full system is self contained to your pedals, so it doesn’t have any awareness that you’re inside or outside.
I’ve done a number of rides on the trainer without any issues. Vector will transmit your cadence and power metrics just like outdoors. Note that Vector doesn’t of course transmit any speed metrics.
In the Rain:
I’ve been “lucky” enough to get plenty of rain time with the Vector system. Numerous rides in fact, all of which included a fair bit of climbing too.
The best part was that these rainy rides happened on the first day and first week of riding, so since then it’s been a little over a month. This is good in that if anything were to have happened, it would have manifested itself since then.
I saw no issues during the ride with rain, nor have any issues popped up since then.
Cobbles and Rough Roads:
Living in Europe has given me the unique opportunity to ride plenty of roads with cobbles. No matter where I go on a long ride it’s going to include a section with cobbles in it. But why ride cobbles? Well, one area where power meters can get tripped up is rough roads. This can throw a loop in those units that may use accelerometers to measure cadence. And when you ‘break’ cadence, you typically break power – since cadence is used to derive many power calculations.
For me, cobbles are the easiest way to surface these sorts of issues. It’s nonstop vibrations and bumps that you generally won’t find on the road elsewhere. Near me there are a few good long stretches of cobblestones that I can run tests on without having to analyze an entire ride.
So while I’ve ridden this section over a dozen times during other rides recently, I went out and did some runs of it just by itself, simply to make it easy to view the data. Each section is about 600m or so long. The below data has a 5-second smoothing on it to make it easier to understand. Any massive spikes would still stick-out however.
As you can see, there aren’t any concerning spikes – that is, random one-off power spikes or drops that can often occur in these situations. A spike might be a random 5,000w point. In this case, none surfaced. And in fact, I’ve seen none in any of my riding.
Next, looking at cadence, I don’t see any issues there either. You see typical lag for the first few seconds between units as I ramp up, but that’s completely normal and just a case of how different units work. The below data is not-smoothed, just straight-up as-is.
As you can see they track quite well, all within a RPM or two of each other. Simply put I’m just not seeing any issues with rough roads anywhere and Vector.
Accuracy Testing:
I’ve long said that there’s few things I like less than doing power meter accuracy testing. And while that still holds true, it’s probably one of the more involved, interesting and downright bizarre things I do on the blog. The only way to get it right is to test for some period of time with a significant number of power meters to be able to guesstimate at who’s telling the truth and who’s having issues.
So while it’s easy to go out and ride with a single power meter – or perhaps even two, it’s an entirely different thing to do so in a manner that provides quality data across 3-5 power meters concurrently ride after ride. And it’s the ‘ride after ride’ part that becomes most tricky.
A bit of background and pontification:
There’s an importance in ensuring that a power meter is not only precise, but also accurate. Can you not only get repeatable results day after day, but are those results accurate to another standard? That’s the general rule applied to any scientific measuring device. The goal with power meters being that you could go and install a different device, put out the same exact power and get the exact same result.
But here’s the harsh reality: That won’t happen every day.
It might happen 5 out of 6 days, or perhaps more. It might happen 18 out of 20. Or, perhaps 1 out of 4. The point being that I promise you if you put 4-5 power meters on a bike and ride for a month – despite incredible attention to detail that almost no riders will do – you’re going to see differences. One day one may be a few watts higher than the other, the other day a few watts lower, and so on.
Thus while it’s fun for folks to talk about ensuring that their future power meter will measure the same effort every single day within 5w of their current power meter, I’m just not seeing the state of technology there yet within the power meter industry. Until someone can go out and ride 4-5 power meters every day for a month and present evidence otherwise – I remain unconvinced. And since nobody to my knowledge has done that (aside from me) – I feel fairly confident in this statement.
Now, that lead-in isn’t actually to say that anything is wrong with Vector (in fact, it’s shown pretty astounding accuracy). Rather, it’s my casual way of doing some myth busting (on both sides of the aisle).
How I test:
I collect data using two methods. First is with simply a crapton of Garmin devices. This serves both as my immediate display while riding to see if things are looking good, as well as my backup for data sourcing. Typically I don’t use this data from what you see in the following sections.
Instead, for that I use a unit called the WASP, from North Pole Engineering. This little unit about the size of a small pack of cards collects every bit of nearby ANT+ data from any device and then streams it via WiFi to my phone, which records the data. This device collects significantly more data than a typical Garmin head unit. But more importantly, it makes it a heck of a lot easier for me to analyze since the data is all collected together into a single file (CSV).
I make all my testing files available for others to analyze. This time I’ve made my entire Vector test library available. I literally just zipped up every single day’s worth of testing and folks can go ahead and come to their own conclusions. My only ask is that you read the ride notes within each ride to explain any potential oddities (for example, interference issues or some other impacting item). It’s not always black or white. You can download the full set here.
Testing Mythology:
Finally, we’ll look at how I test units. I firmly believe that the best way to get relevant test data is to simply train as I normally do. Thus, my test data is from normal indoor and outdoor training rides. I often will add-in some other test at the beginning or ending of one of those rides. But in general I try and just use normal training data. There are certainly edge-case scenarios (such as the cobbles), where I’ll go out and collect specific data, but I try and minimize that.
From a test process standpoint every single unit is manually calibrated prior to the start of every single ride. Second, every single unit gets a second manual (set zero) calibration usually about 10-15 minutes into the ride. Beyond that, it’s up to the units’ internal auto zero (if applicable) technologies to compensate for any environmental changes.
I use the manufacturer’s recommended calibration methodologies, which I’ve confirmed the steps in writing with each and every company that I have power meters for. It’s as by the book and as data-anal as you can possibly get.
Following the ride the data files are all saved off and organized by ride date, with information about the head units and devices being used.
Finally, I then dive into the data files using Excel. Additionally others that are far more scientifically minded (as is the case here), have dug into the numbers as well, looking at the data in more non-traditional ways. In this post, Dan (DJ) Connelly helped out tremendously with diving into a handful of the files. But he also did a number of posts prior to this review using my data over the past month. I encourage you to check those out as well.
Outside Tests:
We’ll start by heading outside, after all, it’s the most demanding environment there is. And no better way to start than with a demanding ride. This ride was a 2hr long ride climbing up the mountainous Skyline Drive route on the Appalachian mountains going from hot weather into a flat-out downpour thousands of feet later in elevation gain and changing temperatures. Elevation gain is great because it triggers temperature changes. And temperature changes are great because it’s the area most power meters struggle with.
First up is the easy litmus test – how well they track with each other. This is interesting to look at, and helps to quickly illuminate obvious errors, but at the same time, it’s kinda easy to fool. Nonetheless, if you look at the vast majority of the graph things are almost right on top of each other.
We see one point around 600s & 1700s that there’s some oddities – though it appears to be a transmission issue between the Quarq and Vector and the WASP (stuck values while descending briefly), and not something I’m seeing on other files (one of the reasons I use multiple recording devices). The areas where you see some separation is when I’m descending a bit and mostly soft-pedaling. This is typically really hard to align because it’s random/sporadic and very brief. Thus if I pedal for 5 seconds quickly on a straightaway, you’ll see the different power meters respond to that slightly differently. You see that around the 5200s markers.
Overall though, things look quite good above.
Next we look at the differences between the units. In this case I simply try and understand how much each unit is different from the other units. The goal of this graph is stability – not so much the exact difference here. Though, outside of random soft pedaling and the stuck moments, things look about as good as you’ll ever see them – especially in the steady-state climbs. We’re talking differences between the Quarq and the Vector of mere single-digit watts…at most. Astounding tracking between two units really.
So what does this look like in real-life from a totals standpoint? Well, check out the below. It kinda tells the story if the above graphs don’t. First off, check out the fact that the Vector and Elsa were only 3w off on Average Power (1.5%), and the peak power was also only 1.5% different. It’s hard to express how rare it is to see all units within that small a range at peak power. I’ve never seen that in any of my previous power meter testing on a ride this demanding.
Now, I asked DJ to look at the file as well, and he spit out some more graphs on this one. Here’s what he had to say:
“I attached a histogram with 5-second smoothing where I only used points where all power meters were reporting at least 150 points. Vector and PowerTap tracked better than Quarq and PowerTap, with Stages a clear 3rd. Then I extracted peak power during peaks in the latter portion of the ride. I used 7-second smoothing because 5-second was still a bit noisy. I only retained 300+ watt peaks. On one sprint only the Vector was just barely higher than the 300W cutoff for the plot (hence the lone green dot), thus Vector has one extra peak, which doesn’t mean much. Vector, Quarq, and PowerTap are all very similar in what they report for peaks and when they report them. Stages is a notable outlier, due to L-R balance varying one sprint to the next.”
Lastly, here’s the maximal power curve for the ride. This is useful because it represents in an easier to understand method the efforts as they increase in intensity, and how they track. It also focuses on measuring power of maximal efforts, which is an accuracy priority for many users.
The Garmin Vector, Quarq Elsa, and PowerTap track nicely in that order. The Stages is an outlier, showing the variability of L-R balance during short intervals (with higher wattage), whereas once I get below about 350w things become quite close between them. 350w is above my FTP, which likely sits around 315w right now.
Next let’s look at another ride outdoors. This one I did up in Newfoundland on a hilly course. The specific pieces of the workout were actually a build of about 30 minutes, and then 2x20m hard efforts. Because of the terrain being up and down, it’s not as perfectly flat as you’d see on an indoor ride.
Starting with the simple 30s smoothed graph of the four power meters, you’ll see that they all tracked quite closely. The big drop towards the bottom is coasting down a hill into a stop-light, which happened to end up just perfectly with the end of that interval.
The challenge with the above is that it becomes hard to see where the difference are. So instead I plotted three variations below, comparing the difference (in watts) between each power meter. The goal of the below is to see as flat a line as possible. It doesn’t as much matter whether or not that line is +10w or 0w, what matters is that it’s consistent.
What you see below is that the Quarq vs Vector (blue) stay relatively stable, fluctuating at about 10w (on roughly 300-330w) – or basically around 3%. Meanwhile, Vector vs PowerTap is a bit higher (sorta logical with drivetrain loss).
Now don’t overthink all those big spikes/drops too much. That’s actually quite normal when I have a big power sprint or stop, simply due to the way units transmit. What is probably most interesting is that it appeared things ‘righted’ themselves after coasting a bit going into the 2nd 20m set, as the second set is very close between the Quarq and the Vector units.
So what does that mean when it comes to final numbers?
The Quarq and Vector tracked the most closely, which again, is logical given where they measure. The PowerTap being slightly lower is also completely normal, and the Stages a bit lower makes sense too since I’ve found I tend to become more right-leg heavy when I fatigue and at higher wattages.
The difference between the Quarq and the Elsa for average power is 1.8% – well within specs of both of those units.
Concluding the outdoor portion (also remember the cobbles piece above), I’m seeing really solid comparative data between the PowerTap, Elsa and Vector. Obviously I’ve only included a small snippet of the data with deeper analysis. However looking at the data day in and day out from a head unit perspective, I see astounding similarities between those three.
Inside Tests:
Next, DJ looked at some of my trainer data. This included a slew of different rides, so he focused on the areas that have the most potential for error: Single leg pedaling and Sprints. These are easiest handled indoors because we can control some of the variables by having constantpower applied. – DCR
First, I plotted the power during the one-legged section. All power meters handled it well except Stages (no surprise). One-legged peddlers in the crowd will need to look elsewhere.
Then I did a histogram comparing power meters to PowerTap. This worked better than CompuTrainer, which was a bit of an outlier. I omitted Stages, since that is affected by the one-legged sections. In this analysis I started at 1200 seconds, since the sprints are dominated by time synchronization. I did 5-second smoothing to reduce the “noise”. The histograms for Vector and Quarq relative to PowerTap line up in order of power transmission. The Vector above Quarq is somewhat curious. But the difference is well within specified accuracy: in fact I’d expect a larger difference versus PowerTap from drivetrain losses. But drivetrain losses are on order of the accuracy.
Then I was curious about the “sprints”. I smoothed the data 5 seconds then used parabolic interpolation to pick out the peaks. The ordering of powers is generally the same as in the histogram. Noteworthy is that Stages is something of an outlier here. It doesn’t track like the others. This isn’t surprising, since L-R balance may vary on short sprints. Note the dashed lines connecting the sprints aren’t interpolated power. They’re just there to group the points. Points are plotted where the peak in power was interpolated. They show good registration between the data sets.
Here’s the total bucketing of the ride, showing how closely the units compare. Notably the CompuTrainer appears to be skewed off from the rest, which is a pattern I saw in a few recent CompuTrainer rides.
I’m quite impressed: all seem to be working quite well on the trainer.
DCR: When I look at comparisons between the units on the indoor trainer over numerous rides I find that the Vector, PowerTap and Quarq Elsa all tend to be within 4-8w on virtually every ride. That’s at about 200-300w depending on the portion of the trainer ride. I see more variation with the Stages of course due to being measured differently, but the core three of Vector/Quarq/PowerTap are all within range of each other – and within range of the combined stated accuracy of those units.
Cadence Maximum and Minimums:
Garmin officially lists the Vector capable of measuring from 30RPM to 150RPM. However, that 150RPM is a bit of a soft-limit and really driven by your crank arms. Here’s their official wording:
“The value of 150 rpm is a conservative limit based on possible road noise and a crank length setting of 200mm. If a cyclist is on shorter cranks (e.g., 172.5mm), the limit goes up beyond 160 rpm. On track conditions or smooth road surfaces, the limit goes beyond 190 rpm.”
To test this on a trainer, I started off sub-20RPM until the unit finally picked up my cadence. This happened at 18RPM. Then I slowly built up to as fast as I could pedal on this day – 184RPM. It followed/tracked without any problems with my 175mm crank arms.
It should be noted that maximum is simply the max my legs were able to go that day I quickly tested it (just jumped on the bike and gave it a go). Typically I can get a bit higher into the mid-190’s with proper warm-up. I’ll update this section if/when I give it another whirl after being properly warmed up.
Fun with Left/Right power balance:
Perhaps one of the more interesting non-Vector specific items is actually comparing estimated left/right power balance (such as that found on the Quarq Elsa and Power2Max units), with Garmin Vector’s measured left/right power balance. Below I did a quick video showing both Vector and Quarq Elsa on a simple one-legged test. In this case I went ahead and pedaled normally with both legs, and then switched to single-leg pedaling:
As you can see from the video above, the key difference is that when I go one-legged the Quarq still assumes some portion of the non-pedaling leg is actually pedaling, when in reality it isn’t (it’s sitting on the trainer stand).
I’ll be diving into more of the Elsa estimated left/right pieces in the upcoming Quarq Elsa review.
Calibration Details and Options:
Like every other power meter on the market today, Vector requires some level of calibration. Some steps are initial setup only, while others are ongoing steps that you should do prior to and at the beginning of each ride. Let’s just recap and run through them.
You must set Vector’s installation angles anytime you remove the battery cover from the Vector pods, or, anytime you move it between bikes. The purpose of this step is to tell Vector how the force sensors are aligned in relationship to the cranks, which is required in order to calculate power. This step accounts for how tight you’ve cranked in the pedal, and how the pedals ended up on your particular crank when tightened down.
There are two ways this calibration method occurs, depending on which head unit you’re using. For the Edge 510 and Edge 810 you’ll get a prompted installation, which I’ll describe first.
From here you’ll need to get on your bike and pedal the bike (you don’t need to be clipped in, you can do this in street shoes). This can be done on a trainer or just on the road. You need to bring the RPM’s up to between 80 and 90RPM.
The process lasts about 5-7 seconds and then will give you a completion message. Once you’re done with the initial calibration, you’ll then move onto manual calibration (below, next section).
For those without the Edge 510/810, you’ll simply need to complete the same procedure, but without any additional confirmation from the head unit. In other words, just go ride 15-30 seconds (to be sure), and you’ll be good to proceed to the next step. The unit will internally perform this calibration, but since older head units aren’t updated to display the information, you won’t receive a confirmation. Note however that it won’t actually give any wattage until this is done, so you know that if you get wattage, then you’ve completed this.
Static Calibration (aka Manual Calibration):
Next is static calibration. This should be done prior to starting every ride, and is fundamentally the basic same process you would be doing on any other power meter on the market. In manual calibration you’ll go ahead and turn the head unit on and navigate into the power meter settings.
Once there, while standing over your bike (or next to it), but NOT clipped in, arrange the pedals in the 3PM/9PM position (horizontal). Technically any position is fine, but the Vector team recommends this position for the highest accuracy.
Next, go ahead and press the calibrate button. It’ll now measure torque on the unit. It’ll come back about 5-10 seconds later and display 0.00, though you may see that value fluctuate slightly as the torque value being displayed is actually in real-time.
With that, your unit is correctly calibrated and ready to get on and ride. Note again that this should be done before every ride. Also note that this is compatible with pretty much any power meter head unit on the market (except the Timex units, which don’t support calibration functions).
Dynamic Calibration:
This next calibration type is called ‘dynamic calibration’, because it’s done while the unit is dynamically moving. The goal of this is to remove any ‘clip-out residual strain’ that occurs within the pedal body. This is considered the method to get the absolute highest level of accuracy within the unit. If you don’t do this, you’ll still be within +/-2%, but this gets it a bit closer. And given how silly easy to perform, you might as well.
While on your bike within the first minute of your ride, go ahead and simply pedal backwards. Eight full times. Once done, you’ll receive the message shown above. (Updated note: In a subsequent software update, backwards pedaling is now no longer required)
Yup, that’s it. As easy as that. You do not need to do this each time you clip out, as they didn’t see any benefit there. Nor at any other point during the ride. Rather, just at the start of the ride. Not that it hurts either.
The Dynamic Calibration prompt message will be seen on the Edge 500/510/800/810 and FR910XT. Other units will not receive a prompt, but the Vector calibration is still done by the pedals. Should other head unit companies wish to, they could add this functionality in, as the confirmation is broadcast in standard ANT+ messages to the head unit.
Static Torque Test (Hanging Weights – for extremely advanced users only):
Finally, we’ve got the most advanced calibration method out there. This isn’t really so much a case of calibration, as it is validation. Within a Static Torque test you hang a weight of a known value (i.e. 25 pounds) on the cranks. In turn, you’re able to get the torque value read back to you, allowing you to validate if the unit is performing within specification. Garmin will be providing instructions and a formula to determine if the unit is within specification. The formula is: Mass (kg) x gravity (m/s2) x crank length (m) = Expected torque value in Nm
To do this, you’ll simply go into the calibration menu, which puts it into a torque display mode:
Then, you’ll go forth and hang the weights on the unit. Again, this should be scientific grade weights – not just something random you picked up at Sports Authority sporting goods store. The minimum weight that the Vector team recommends is 25 pounds. You’ll then take the torque value displayed, along with the weights used and compare it against values provided by the Vector team. They’ll be publishing a data sheet “within the coming days” o the Vector Owners site with the full table of correct torque values for each combination.
Breakage and Replacements/Repairs:
The Vector system has a 2-year warranty, which covers manufacture defects per their standard policy and process. The factory calibration is warranted for 1 year, and Garmin will offer a service to the end user if they are not able to calibrate the Vector themselves (i.e. torque validation).
In the event of an issue with your Vector system (either self-inflicted such a a crash, or unexpected support issue), you’ll start with a call to Garmin support for your local region/country. If they’ve completed troubleshooting and determine there is an issue with the system (for example, the left pedal not responding), then the entire pedal set would be returned to the local country/region support center and swapped out. This process works the same as any other Garmin product.
Now, in the event of the ugly self-inflicted issue, such as breaking a pedal pod on a curb, you can purchase two out of three of the core Vector components.
Parts available as accessories:
1) Pedal Body & Pedal Cartridge Set: $199US = Includes the pedal body, cartridge, as a pair, not including spindle.
2) Pedal Pods: $69US for a single pod (corrected)
The part that is not available as an accessory is the pedal spindle. The spindle is where the magic happens, and where the actual strain gauges are. Basically, that’s the bulk of the cost of a Vector system. Though, it’d be incredibly difficult to damage the spindle even in the most painful of crashes. The spindle is protected first by the pedal body (which Garmin has beefed up over the baseline models). Then you’ve got the pedal cartridge inside that. And finally, the spindle inside the cartridge. Having spent some time toying with the different parts, I’m honestly not sure what type of crash would impact the spindle – short of getting run over by a train. Though, in time, I’m sure someone will find a way.
The two above components will be standard SKU’s that any Garmin distributor/retailer can stock within inventory.
They noted that the part they consider ‘consumable’ is the pedal pods. This is for two reasons. One is that we could see physical changes to the pods, or additional versions of the pods offered. For example, a pod able to accommodate crank arms that are slightly wider than current allowances (they said they’d gauge consumer demand here, but it sounded fairly trivial to offer). They also saw opportunity to bridge into other wireless protocols. Remember this is the communications portion of the device, and today that’s ANT+. But they noted that down the road they could offer a Bluetooth Smart variant, or Bluetooth/ANT+ combo variant. No specific plans or dates are on the table today. But, that would ultimately be a pretty cheap ‘upgrade’ for owners at basically just $70 to get Bluetooth Smart.
Many folks have expressed concern about the pedal pods hitting the ground. That’s actually a bit of an optical illusion, it’s actually virtually impossible to hit the pedal pod without hitting your shoe first. They note that in thousands of hours of testing they’ve never had a single pedal pod break-off by hitting the ground. In my riding over the last month, I never had that issue either.
To demonstrate the impossibility of the pod hitting the ground first, I give you the following photo I took:
Here’s a bit more of a zoomed in look at the same photo. Note that in this case, the crank-arm is pointed directly down (the photo angle makes it appear otherwise). You can see that it’s technically impossible to hit the pedal pod at that angle.
Now, curbs are potentially another scenario entirely, as seen below:
Though, I still didn’t have any issues during my time thus far with them, including routinely stopping up against curbs while riding through and out of the city.
Finally, it’s probably worthwhile to see the pedal pod positions all the way around the crank. To do that I created a little animated GIF of the whole situation. However, because the GIF is a bit large to enumerate on this page, you’ll need to click the below image to start it in a new window. But it helps you understand where the pod is, and some of the optical illusions associated with it.
Finally, with the pod facing downwards towards the top of the stroke, it ensures that your shoe won’t clip it if you try and clip in and out:
With that, let’s talk about bike portability.
Switching between bikes:
Given much of the appeal of Vector comes from the ability to switch between bikes, I thought I’d briefly talk to that and include a short video of swapping it between two of my bikes (recorded in real-time as a single shot).
While I agree with the theory of being able to easily move Vector between bikes, I’d argue it’s not quite as simple as moving standard bike pedals. There are some things that complicate it. First are the pedal pods and ensuring the correct alignment before really tightening down. Then there’s the tightening component – which clearly requires a torque wrench to get accurate. So if you’re travelling, you’re going to need a torque wrench as well as you can’t just use a hex wrench stuffed into the back of the pedal (since the pods block that).
So how long does it take? Well, I’ve taken them on and off a bunch, so while I’m certainly no pro bike mechanic at removing them, I’m probably about average after you’ve done it a couple of times. My goal isn’t to slap them on as fast as humanly possible. My goal is to install them as fast as accurately possible. Thus, here’s what that looks like:
As you can see, about 6 minutes and 30 seconds end to end. About 90 seconds of that was removal, and 5 minutes installation. Oh, and note that I had never installed them on that second bike before – so that was a first attempt, and only did one video recording shot (like live TV!). I figure that makes it a bit more realistic.
I’ll be doing the same with a Quarq Elsa in the coming weeks (just need to get a different bottom bracket for my other bike). Having swapped the Quarq’s before, you’ll find you can definitely do it faster than Vector on a pure time basis. Of course, with the Quarq, you’re having to deal with chain rings and a large object that’s not quite as easy nor as compatible to travel with.
Firmware Updating:
The Vector pedals support updating of the firmware by you, the end user. The reasoning for this is to resolve bugs or add new features (discussed more below in next section). To do so, you’ll download the free little tool from the Vector owners site, which then takes advantage of the ANT+ USB stick that came with your pedals.
Next, you’re going to want to get your laptop and your pedals in the same general zip code of each other. Once that’s done, go ahead and launch the application:
After clicking next twice, it’ll have you remove the pedal pod connectors and reconnecting them. By doing so you put the pedals into a ‘pairing mode’, which allows your computer to go off and find them.
I just pop them out carefully with a flat blade screwdriver.
Then wait 20 seconds and plop them back in. Then click next twice. Which should bring you here. You’ll notice it has found the pedals and is ready to go, you’ll click next again.
At the top of this screen you’ll see the option to update software. In my case, from the initial release version of 2.00 to 2.10. Additionally, you’ll need to check the box to agree.
Note that the crank length remains at 175mm (the length of my cranks, yours will likely differ). After you’re done confirming everything, click Next.
First, it’ll send the update to the left pedal:
Then it’ll do the same thing for the right pedal:
Then, it’ll briefly confirm everything for about 2 seconds before giving you the “Mission Accomplished” banner (of sorts):
The whole process takes about 3-5 minutes for the upload, verification and updating.
Now, the next time you turn on your bike computer you will need to run through the three basic calibration steps again:
1) Setting installation angles (pedaling at ~80RPM)
2) Manual calibration (unclipped from pedals) 3) Dynamic calibration (backwards pedaling eight times) – (Updated Note: In a subsequent software update, backwards pedaling is now no longer required)
With that, you’re good to go!
Troubleshooting:
While I’ve yet to have any true issues with Vector, I’d give two pieces of advice to any future folks that purchase the unit and have issues. The below guidance is based on fielding a lot of questions over the past month from current owners.
Random issues: When in doubt, if something isn’t working, the best and easiest course of action is to pop out the pedal pod battery covers, put them back in, and see if it starts working. I’ve only had this happen once (during my initial test ride), but if you run into a snag, this seems to resolve it 99% of the time.
Power measuring low: Without question, the single biggest issue I hear from folks is that it measures low. Every.single.time (every time) I’ve responded back the person hasn’t used a torque wrench to properly tighten the units. I can’t emphasis this enough. It’s as simple as this: Vector is sensitive to being properly torqued down. You may think you’ve got it all fine, but unless you’ve measured it – I’m going to guess you don’t.
The Future of Vector:
Going forward the Vector team has outlined a few areas that are on the radar. Garmin sees two tracks when it comes to Vector development, the software track (i.e. firmware), and the hardware track (i.e. pedals). In their minds, the software track will be universal across all pedals, while the hardware track will spit out new pedal types in the future. They noted that they don’t at all expect to see any near term form of a v2 version of the current Look Keo pedal with additional features over the current one. Instead they’ll be focused on new pedal types.
Pedal Types: Garmin made it fairly clear that the next pedal type would be a mountain bike pedal. It doesn’t have a timeframe for that, but that’s where the direction is. This will require re-thinking a bit of the pedal pod layout (as it could catch on rocks/logs/etc… Additionally, they have confirmed to me that any future pedal type change won’t be compatible with the same spindle. Meaning you can’t just by the $200 pedal body parts and move your spindles between them. Beyond mountain biking, they’re looking at spin bikes as another area with a lot of interest.
Additional Pedal Pod Connector Widths: Garmin has stated that if they see demand, they’ll look to offer additional pedal pods that have a larger connector and can accommodate some of the wider crank arms out there. They haven’t specified a timeframe for this.
Bluetooth Smart: Given Garmin owns ANT+, it’s unlikely that a Bluetooth Smart variant is on the immediate horizon. However the Vector team did specifically note that down the line should they add Bluetooth Smart support it’d simply come in the form of a new pedal pod that’s compatible with previous Vector units. The pod houses all communications, so it’s just a case of buying new pods (about the same price as a footpod).
Pedal Smoothness and Torque Efficiency: Finally, we’ve got additional metrics that are supported by ANT+ that Vector plans to implement. These two were specifically included as coming down the line, though no specific timeline was given. Seeing that the competitive Rotor Power Meter has these, I suspect it won’t be terribly long until we see this added.
Power Meter Market Comparison:
Two weeks ago I walked through the entire power meter market as it will stand for some time in the future, as there are no other power meters outside that post on the horizon until at least next spring (at the absolute earliest). So I really encourage you to read that post, as I outlined a lot of different scenarios and recommendations – as well as answered a slew of questions in the comments.
With that said, here’s a dynamic comparison chart of the major power meters on the market today that I’ve reviewed. My rule is that if I haven’t reviewed it, it doesn’t go in the chart. Hence why SRM isn’t in there. Because there’s so many units, only a small number fit here. Instead, you can mix and match and create your own comparison chart here.
The benefit of the above chart is that over time as firmware updates add features to other units you can automagically see the comparisons here.
For those looking for information on the ROTOR power system, they’re aiming to get me a unit in late September 2013, and thus I’d likely have a review closer to November sometime (dates obviously could shift). My thoughts regarding ROTOR however are included in the power meter market post as well above.
Summary:
It’s been a long wait for Vector. When I met with the Garmin team back in April there was a clear and concise expectation amongst the team that the unit had to be spot-on accurate. It just had to, no ifs, ands or buts about it. If it wasn’t accurate but was perfect in every other way, it’d be a failure. Simple as that.
Thus, when it came time for me to do a review the cornerstone of that would be repetitive data capture and comparisons. How did it perform in all sorts of rough conditions from mountain climbs and temperature swings with driving rain, to hot summer days? Based on what I’ve seen over the last 5 weeks the answer is simple: It performs quite well when properly installed. I’m not seeing any of my own data, nor anyone else’s data that contradicts that. Nor has anyone that’s analyzed the loads of raw data I’ve published thus far contradicted that.
With accuracy out of the way from my perspective we look at other components. For example – installation. Installation is technically straight forward, though, it does have the drawback of requiring it be done properly with attention to detail. I can’t emphasis this enough. If you’re lazy during the install (or your bike shop is), you’ll have inaccurate power. I’d encourage potential Vector owners to learn how to install it themselves properly – after all, part of the reason you’re buying this unit is for portability.
I do believe however that Garmin should provide a crowfoot adapter with the Vector set (especially in places that are difficult to find such a tool…like Europe). In talking with them last night, they understand that line of thinking and are monitoring feedback from retailers.
Finally, when it comes to durability – that’s a more difficult question to answer. From a replacement plan perspective the way the unit is built makes it relatively cheap and easy to swap out the spindle into another pedal should you somehow break the pedal body. Same goes for the pedal pods, which are also reasonably cheap. Obviously I didn’t break mine, but I also was more lax with how I treated them. For example, during my repeated soft-shell bike bag trips and international flights over the past month I didn’t bother to remove the pedals during travel. Nope, I stuck a sock over them and called it done and hoped for the best. Came out just fine.
At this juncture I’d have no problems recommending Vector as a power meter to any torque wrench & crowfoot adapter owner. It produces accurate power that long-term as a software platform has the potential to be really interesting. How and where Garmin takes that directionally remains to be seen.
Thanks for reading, and as always, feel free to drop questions below and I’ll try and get the answers.
Found This Post Useful? Support The Site!
Hopefully you found this review/post useful. At the end of the day, I’m an athlete just like you looking for the most detail possible on a new purchase – so my review is written from the standpoint of how I used the device. The reviews generally take a lot of hours to put together, so it’s a fair bit of work (and labor of love). As you probably noticed by looking below, I also take time to answer all the questions posted in the comments – and there’s quite a bit of detail in there as well.
If you're shopping for the Garmin Vector or any other accessory items, please consider using the affiliate links below! As an Amazon Associate I earn from qualifying purchases. It doesn’t cost you anything extra, but your purchases help support this website a lot.
Since the Garmin Vector is no longer sold, I recommend looking at Garmin Rally Series:
And of course – you can always sign-up to be a DCR Supporter! That gets you an ad-free DCR, access to the DCR Shed Talkin' video series packed with behind the scenes tidbits...and it also makes you awesome. And being awesome is what it’s all about!
Thanks for reading! And as always, feel free to post comments or questions in the comments section below, I’ll be happy to try and answer them as quickly as possible. And lastly, if you felt this review was useful – I always appreciate feedback in the comments below. Thanks!
Hey really big fan of your site and what you are doing. RE: Garmin Vector 2, replacing the pedals (my old ones are really worn now) do I need any specific tools? Online I see that you guys used a special remover on a wrench but it seems like a difficult piece to acquire. Many thanks for your help.
Thanks for sharing this! I really love it. I remembered when my bike broke down and I need to buy new parts. And I was laughing because I bought some little screws for cleats as temporary I think at http://www.hornibrooks.com.au a store here in Australia. Anyways, thanks for sharing again!
I am desperatelly trying to find Pedal Pod (12-15mm) for Vector 2.
One of mine has broken, and I cannot get another one, because it was discontinued from Garmin. I have tried from Garmnin Slovenia (my country), even Garmin Europe does not have it. No internet store has it anymore (some 15-18mm are left).
The only place I have found is in Australia, but they do not ship to Slovenia (or any EU country).
Please somebody help me! If not I have to buy new power meter, which is unfortunatelly to much for me at the moment.
Garmin has offered to give me 325,00 EUR for the pedals, if I buy new Rally for 1.119,00 EUR. But this means still apr. 800,00 EUR. But new assioma both sided is around 700,00 EUR. And I would keep the pedals. But even this is too much. My Vector 2 pedals have worked perfectly the whole time. Did not have any problems with them.
I still do not understand how can Garmin stop producing spare items after 6 years from the new product release!!! I know some electronic companies have for over 20 years of making sure, you can get the spare items.
Hi Robert, I feel your pain! My pods just stopped communicating with my head unit then wouldn’t update on the vector updator app. Have you considered asking for the single unit replacement which might make the upgrade option more appealing?
No. Eventually I found one sensor pod, and made the Vectors 2 to work again. But also I have sold the pedals, as it was stuck in my head, that as soon as a sensor breaks down I can throw the pedals away.
Wild shot at at troubleshooting my problem. I moved my vector 2’s to a spinbike last week. I installed the pod, plugged it in and my ANT+ Dongle and Garmin could not see the pod. I then unplugged the pod and reseated it. ANT+ then found the pod. I rode the next day (zwift on the spin bike) for about 20 minutes.
I then decided to remove the pedal because there was some slop and repacking the grease I read would fix it. So I did that (noticed a brass ring – does orientation matter?), put it all back together and now the ANT+ / Garmin can’t see it.
I’ve tried the following (LED blinks twice green):
1. inspected pins on connector
2. reseated connectors numerous times
3. changed batteries a couple of times
Anything else I can potentially try?
Can’t tell if it’s a board issue or some issue with the connector (I read that it is a ribbon cable to the board, not exactly sure how to open up the pod to check if it is seated though. It looks glued)
Hi, Rainy! Great site. I’ve got some Vector “ones” that keeping showing low pod battery after about 5 or 6 weeks, but my battery tester says the ‘old’ batteries still have about 2.7 to 2.8 volts in them. I’m not riding a whole lot at the moment.
Following up on the discussion in comments about replacing pods: does Vector firmware reside exclusively in the pods? In case of firmware update failure, will replacing the pods revive the Vector?
I’ve had my Vector 1 for quite a while and it never skipped a bit. Unfortunately, I recently got a Fenix 7X Sapphire Solar which attempted pushing firmware upgrade to the Vector and bricked it.
Talking to Garmin Support Australia but they are pretty useless so far. Not hoping for a lot. Hence considering replacing the pods.
I tried swapping left with right hoping it will at least turn into one-sided Vector but not even that works, it’s pretty badly bricked.
I’d appreciate your suggestions and pointers.
I hate the Fenix 7 now and regret getting it, Garmin went towards eyecandy at the expense of core functionality. If I didn’t try using that silly gadget my Vector would still be fine :(
I also had my Vectors (2) bricked by a firmware update. Replacing pods didn’t fix it. Garmin denied that firmware killed my pedals but clearly it did. They offered me a bad deal on some new Vector 3’s. I was very unhappy about how the issue was dealt with.
I bought Faveros instead.
I swim, bike and run. Then, I come here and write about my adventures. It’s as simple as that. Most of the time. If you’re new around these parts, here’s the long version of my story.
You'll support the site, and get ad-free DCR! Plus, you'll be more awesome. Click above for all the details. Oh, and you can sign-up for the newsletter here!
Here’s how to save!
Wanna save some cash and support the site? These companies help support the site! With Backcountry.com or Competitive Cyclist with either the coupon code DCRAINMAKER for first time users saving 15% on applicable products.
You can also pick-up tons of gear at REI via these links, which is a long-time supporter as well:
Alternatively, for everything else on the planet, simply buy your goods from Amazon via the link below and I get a tiny bit back as an Amazon Associate. No cost to you, easy as pie!
You can use the above link for any Amazon country and it (should) automatically redirect to your local Amazon site.
While I don't partner with many companies, there's a few that I love, and support the site. Full details!
Want to compare the features of each product, down to the nitty-gritty? No problem, the product comparison data is constantly updated with new products and new features added to old products!
Wanna create comparison chart graphs just like I do for GPS, heart rate, power meters and more? No problem, here's the platform I use - you can too!
Think my written reviews are deep? You should check out my videos. I take things to a whole new level of interactive depth!
Smart Trainers Buyers Guide: Looking at a smart trainer this winter? I cover all the units to buy (and avoid) for indoor training. The good, the bad, and the ugly.
Check out
my weekly podcast - with DesFit, which is packed with both gadget and non-gadget goodness!
Get all your awesome DC Rainmaker gear here!
FAQ’s
I have built an extensive list of my most frequently asked questions. Below are the most popular.
You probably stumbled upon here looking for a review of a sports gadget. If you’re trying to decide which unit to buy – check out my in-depth reviews section. Some reviews are over 60 pages long when printed out, with hundreds of photos! I aim to leave no stone unturned.
I travel a fair bit, both for work and for fun. Here’s a bunch of random trip reports and daily trip-logs that I’ve put together and posted. I’ve sorted it all by world geography, in an attempt to make it easy to figure out where I’ve been.
The most common question I receive outside of the “what’s the best GPS watch for me” variant, are photography-esq based. So in efforts to combat the amount of emails I need to sort through on a daily basis, I’ve complied this “My Photography Gear” post for your curious minds (including drones & action cams!)! It’s a nice break from the day-to-day sports-tech talk, and I hope you get something out of it!
Many readers stumble into my website in search of information on the latest and greatest sports tech products. But at the end of the day, you might just be wondering “What does Ray use when not testing new products?”. So here is the most up to date list of products I like and fit the bill for me and my training needs best! DC Rainmaker 2024 swim, bike, run, and general gear list. But wait, are you a female and feel like these things might not apply to you? If that’s the case (but certainly not saying my choices aren’t good for women), and you just want to see a different gear junkies “picks”, check out The Girl’s Gear Guide too.


Hey really big fan of your site and what you are doing. RE: Garmin Vector 2, replacing the pedals (my old ones are really worn now) do I need any specific tools? Online I see that you guys used a special remover on a wrench but it seems like a difficult piece to acquire. Many thanks for your help.
Thanks for sharing this! I really love it. I remembered when my bike broke down and I need to buy new parts. And I was laughing because I bought some little screws for cleats as temporary I think at http://www.hornibrooks.com.au a store here in Australia. Anyways, thanks for sharing again!
Hello,
I am desperatelly trying to find Pedal Pod (12-15mm) for Vector 2.
One of mine has broken, and I cannot get another one, because it was discontinued from Garmin. I have tried from Garmnin Slovenia (my country), even Garmin Europe does not have it. No internet store has it anymore (some 15-18mm are left).
The only place I have found is in Australia, but they do not ship to Slovenia (or any EU country).
Please somebody help me! If not I have to buy new power meter, which is unfortunatelly to much for me at the moment.
Garmin has offered to give me 325,00 EUR for the pedals, if I buy new Rally for 1.119,00 EUR. But this means still apr. 800,00 EUR. But new assioma both sided is around 700,00 EUR. And I would keep the pedals. But even this is too much. My Vector 2 pedals have worked perfectly the whole time. Did not have any problems with them.
I still do not understand how can Garmin stop producing spare items after 6 years from the new product release!!! I know some electronic companies have for over 20 years of making sure, you can get the spare items.
Thanks for all your help.
Best regards,
Robert
Hi Robert, I feel your pain! My pods just stopped communicating with my head unit then wouldn’t update on the vector updator app. Have you considered asking for the single unit replacement which might make the upgrade option more appealing?
No. Eventually I found one sensor pod, and made the Vectors 2 to work again. But also I have sold the pedals, as it was stuck in my head, that as soon as a sensor breaks down I can throw the pedals away.
does anyone know if a large pod will fit on a standard setup? i cant find a standard pod anywhere. I did find someone selling a large pod
Jon – I might have a spare set. Hit me up on email from here….ggoldstein10@gmail.com
Just sent you a email
Wild shot at at troubleshooting my problem. I moved my vector 2’s to a spinbike last week. I installed the pod, plugged it in and my ANT+ Dongle and Garmin could not see the pod. I then unplugged the pod and reseated it. ANT+ then found the pod. I rode the next day (zwift on the spin bike) for about 20 minutes.
I then decided to remove the pedal because there was some slop and repacking the grease I read would fix it. So I did that (noticed a brass ring – does orientation matter?), put it all back together and now the ANT+ / Garmin can’t see it.
I’ve tried the following (LED blinks twice green):
1. inspected pins on connector
2. reseated connectors numerous times
3. changed batteries a couple of times
Anything else I can potentially try?
Can’t tell if it’s a board issue or some issue with the connector (I read that it is a ribbon cable to the board, not exactly sure how to open up the pod to check if it is seated though. It looks glued)
Hi, Rainy! Great site. I’ve got some Vector “ones” that keeping showing low pod battery after about 5 or 6 weeks, but my battery tester says the ‘old’ batteries still have about 2.7 to 2.8 volts in them. I’m not riding a whole lot at the moment.
Following up on the discussion in comments about replacing pods: does Vector firmware reside exclusively in the pods? In case of firmware update failure, will replacing the pods revive the Vector?
I’ve had my Vector 1 for quite a while and it never skipped a bit. Unfortunately, I recently got a Fenix 7X Sapphire Solar which attempted pushing firmware upgrade to the Vector and bricked it.
Talking to Garmin Support Australia but they are pretty useless so far. Not hoping for a lot. Hence considering replacing the pods.
I tried swapping left with right hoping it will at least turn into one-sided Vector but not even that works, it’s pretty badly bricked.
I’d appreciate your suggestions and pointers.
I hate the Fenix 7 now and regret getting it, Garmin went towards eyecandy at the expense of core functionality. If I didn’t try using that silly gadget my Vector would still be fine :(
I also had my Vectors (2) bricked by a firmware update. Replacing pods didn’t fix it. Garmin denied that firmware killed my pedals but clearly it did. They offered me a bad deal on some new Vector 3’s. I was very unhappy about how the issue was dealt with.
I bought Faveros instead.