Heads up – Massive Sports Tech Holiday Deals List is Live!!! The Garmin Fenix 8 is $250 off (even the Fenix 8 Pro is $100 off!), the Apple Watch Ultra 3 is on sale, the Garmin inReach Mini 2 is $249, the GoPro Hero 13 Black, DJI NEO, and a ton of other brands/deals, including Wahoo, Oura, Whoop, Polar, Samsung, Google, and more than 100 sports tech deals here!
This product has been discontinued by the manufacturer. It's been replaced by the Hammerhead Karoo 3, you may want to check out that review instead.
In most ways, the Hammerhead Karoo 2 is probably the most eagerly anticipated bike computer release of 2020. And not just because I feel like we’ve been waiting and talking about this moment for nearly the entire year, but because I think that they, alongside Wahoo, represent the most viable competitors to a higher-end Garmin Edge device. But for many people, myself included, it’s simply that high-resolution brilliant display that draws us in – like mosquitos to a hot summer evening bright light fly zapper.
The question is – how close does Hammerhead get with the Karoo 2 to being a true Garmin alternative? And what’s changed from the original Karoo 1? And perhaps most importantly – when the heck do these start shipping?
Well, they’re shipping already. For those that pre-ordered this past summer, those orders are sliding out in batches, one of the biggest being just yesterday, and will continue over the next few weeks. More on the nuanced details for everyone else without pre-orders, a bit later in the post.
Second – what’s new? Well, a beeper. It makes noise now. So when you get that navigational turn alert, you’ll actually hear it chirp – versus before it was as noisy as a mime. It’s also got significantly upgraded internals that will eventually be tapped for more advanced features. Plus, it can now integrate with your phone for smartphone notifications. But beyond that – they’ve taken an Apple-like approach of all new features having already been dropped onto the existing Karoo 1. As long as the hardware is capable, Hammerhead is going to keep updates coming.
With that out of the way, note that Hammerhead sent over a media loaner that I’ve been using for the last month or so. Well, two units actually. More on that later. Once I’m done with it I’ll pack it back up and go out and pick up my own through normal retail channels. Just the way I roll. If you found this review useful you can become a DCR Supporter to help support the site, details on that at the bottom! With that, let’s get into it.
Quick Specs & Newness:
The main changes to the Karoo 2 are largely hardware driven. The most obvious being size. It’s no longer the XL Bacon Cheeseburger that was the original Karoo 1, instead, the size here is much more akin to a Wahoo ROAM or slightly smaller than a Garmin Edge 1030 in size. It’s a touch bigger than the Garmin Edge 530/830, but not so much that it feels big. This new hardware retains one of the signature elements of the original Karoo – a cellular SIM card slot. But beyond those visually visible things, almost all the other changes are inside under the covers from a processing standpoint. They’ve upgraded memory, processor, and Bluetooth chipsets – making it faster and more capable for future updates.
They’ve also upgraded the version of Android it runs, from Android 6.0 to Android 8.0. As part of all these changes, the unit can now pair to your phone for smartphone notifications. It still can’t offload rides or sync details via Bluetooth (yet – that’s coming in 2021 to both iOS and Android), instead relying on WiFi as before (or, cellular if you have a SIM card inside it). Still, I used it without issue to receive notifications throughout the ride from my phone, and those notifications felt far more robustly phone-like than constrained one or two line text tidbits as seen on a Garmin or Wahoo device.
Like just about any bike computer GPS it’s got all the basics you’d expect:
– Records your ride using GPS – up to 12hrs battery life
– Full color touchscreen display, glove and rain friendly (mostly)
– Connects to ANT+ & Bluetooth Smart sensors (full list later in review)
– Pulls routes from Strava, RideWithGPS, Komoot, and others
– Pushes completed rides to TrainingPeaks, Strava, and others
– Gives turn by turn directions with full color/detailed maps for anywhere in the world
– Can re-route on the fly if you go off-course
– Can do structured workouts from TrainingPeaks, including smart trainer control
But what’s important is what’s changed. So here’s the differences hardware-wise compared to Karoo 1:
– Added a beeper (you can still pair Bluetooth headphones/speakers)
– Reduced size dimensions (in mm, now 60.8w x 19.3h x 100.6L vs 73w x 28h x 99L)
– Reduced unit weight from 186g to 132g
– Reduced mount weight from 55g to 33g
– Storage in the Karoo 2 is 32GB instead of 16GB
– Screen is covered in DragonTrail glass, which is sorta like Gorilla Glass – treated to reduce glare
– USB-C port waterproof spec IP67
– Added 4G coverage (2G/3G/4G, with your own SIM)
– Added dual Bluetooth Smart chipsets
– Added quad-core processor
And here’s what’s unique on the Karoo 2 software-wise that isn’t on Karoo 1:
– Smartphone notifications which are customizable by category
– Setup tool via website to pre-configure Karoo so that when it arrives in mail, you just connect to WiFi and it’s ready to go
– Various changes to sensor management
– Various changes to in-ride screens to handle different size
Ok, with that – let’s get this thing unboxed.
Unboxing:
While the Karoo 2 unboxing is kinda like one of those crazy paper pop-up cards, it’s what happens after you turn on the unit for the first time that’s on-point. They’ve completely nailed that first 15-second experience with a dramatic cycling scene video that plays on loop, welcoming you to the Karoo 2. It sounds trivial, but it basically says ‘Welcome to the future of what a cycling screen should look like’. And of course, obviously…with a drone shot. Because drone shots make all cycling videos better.
But before we get there, we need to extract the unit and parts from the box.
The matte black box accented with a glossy Hammerhead logo slides open from the side, revealing a tiered set of components.
In the top section you’ll find the Karoo 2 itself, as well as a little mini-instruction pamphlet to tell you how to power it on, notable because the buttons have no labels.
Below deck is the new Karoo 2 out-front mount, as well as a Garmin to Karoo quarter-turn mount adapter, letting you use your Karoo 2 with the gazillion 3rd party Garmin quarter-turn mounts found the world around, notably also found built-into some bikes/handlebars these days. As of current, they’re only planning on including that adapter for pre-order customers.
On the backside of this crazy unboxing situation is another box that includes a braided nylon USB-C cable, and a lanyard.
Once you compose yourself from all unboxing all the levels, here’s what’s left:
And, a close-up gallery of all those same components:
Next, for a quick size comparison, here’s a lineup of like-minded units in the mid to upper end of the cycling GPS landscape.
Left to right: Edge 1030 Plus, Hammerhead Karoo 2, Wahoo ROAM, Edge 530/830, Stages Dash L50
And here it is compared to the Karoo 1:
And then, here’s a look at the weights of them. While the Karoo 2 has lost a lot of weight – and bulk, compared to the original Karoo 1, it’s still a heavyweight of a unit in comparison to other products on the market. After all, the bigger screened Edge 1030/1030 Plus is still barely lighter than it. Realistically speaking you won’t notice, but I did find it interesting while weighing them all in.
Ok, with that let’s get it started and setup.
Initial Setup:
The Karoo 2 is designed to be more like a phone than a bike computer, in terms of the initial setup experience. Once you’ve gotten past that aforementioned drone cycling video on loop, you’ll be asked to connect to WiFi. That’s because there is no Karoo companion app, at least in the traditional sense. On Android there is an app, but it merely handles smartphone notifications – not syncing of data or configuration. Instead, all of that is done via WiFi (or, a SIM card if you so choose).
You’ll simply enter in your WiFi details like normal:
Before it goes any further, it grabs the latest software update from Hammerhead:
And after it’s done doing that (it usually takes 2-3 minutes), it finally asks you for your username and password. This is because it’s pulling in all your settings from their cloud platform. Or at least most of them. This includes your data pages/fields, Strava/TrainingPeaks/Komoot details, as well as general profile information like gender and age.
However, there are some settings it doesn’t pull in – such as sensors.
In terms of how this compares to Garmin or Wahoo, it’s similar, but different. For example, Garmin’s latest Edge 130 Plus and 1030 Plus units now do pull in all your past data pages/fields from older Garmin Edge devices, as well as pull in your sensors.
Wahoo doesn’t pull in data pages or sensors from other Wahoo units, but does make it easier to configure those data pages on your phone. All three companies use backend platforms to handle your Strava/TrainingPeaks/Komoot integrations, so that’s the same here too – that’s all pre-done for you.
Both Garmin and Wahoo select to download the update after the initial setup, rather than before it like Hammerhead. Whereas, both Wahoo and Karoo will grab your exact regions map after initial setup too. Garmin has the maps pre-loaded for the region you bought it in, and extra maps can be downloaded later (depending on which unit you get). Again, this area is mostly a wash.
After a few quick informational pages on setting up Strava and sensors, you’re basically ready to roll. However, do ensure you wait for everything to sync – especially your map region. By default the unit will automatically have started grabbing your correct map details, even without GPS. Meaning, even in the DCR Cave (which is under a 6 story building without GPS), it automatically started pulling in the Netherlands maps because that information is in my user profile. All in, just give your unit about 5-10 minutes for it to finish doing what it needs to do before bolting out the door.
Once that’s done, you’ll find your existing profiles already configured, or, ready to start using them.
Note that if you haven’t linked any 3rd party accounts, you can do that via the Hammerhead portal online, which is also where you can manage rides, and look at finished ride details.
I would argue that I’d really like to see Hammerhead set a goal of increasing these partnership accounts by 3x by the end of 2021. Compared to their competitors, this is a rather small number of partnerships to send your data files to. For example, missing are platforms like Relive, SportTracks, MapMyFitness, Today’s Plan, Final Surge, TrainerRoad, Xert, and countless other smaller ones. Or heck, I’d also love to see Dropbox added – it’s one of my favorite Wahoo ELEMNT series features.
Ok, with everything all setup, let’s roll into day to day aspects.
The Basics:
The Karoo 2 powers on by holding the lower left button. It’s definitely not the fastest unit to startup for the first time, roughly akin to starting any modern smartphone (because…under the covers, that’s what it is). On the upper portion of the screen you’ll see your profiles, which you can create/customize as you see fit. Meanwhile, along the bottom of the dashboard are the core areas of the Karoo 2:
– Rides: Your past activities
– Routes: Your routes from platforms like Strava or Komoot, plus ones you’ve created
– Workouts: Structured workouts from TrainingPeaks
– Profiles: This is where you tweak data pages and fields
– Sensors: Pairing of sensors (including trainers and Varia radar)
– Settings: Twisty knobs for all the things
In addition, you can swipe down from the top to get quick access to a few things, like WiFi, cellular, auto-pause, sensors, audio alerts, and battery states. Some of these require long-holds, such as Sensors, in order to access further details (versus just toggling on/off).
First up along the bottom is ‘Rides’. This is where you can see all your past rides. While you can change the title of the rides manually, I rarely remember to. Thus, everything for me is simply listed by the time.
Above is a great example of where the UI could mature a bit more. For example, they could mirror how it shows the mini-map in the Routes section (which I’ll show in a second). Sure, other companies just show a line item, but other companies don’t have Hammerhead’s display. Hammerhead: Use it!
Once you tap on a ride you can see some top-line stats, but again, it’s super slim here. Unlike every other company, you can’t see a quick preview of where the ride was map-wise, and even structured workout rides don’t show a quick chart of the workout. Again, so much potential here.
Going back to the dashboard there’s the routes page, this is where you select a new route to ride, and a great example of how the completed rides screen should look IMHO.
Now I’m going to dive into routes in the Navigation section in far more detail, so we’ll move onto the next chunk, which is workouts. This is where you select workouts from TrainingPeaks that are synced from your account there.
Also, I’m going to defer this to the structured workouts section lower down – where I go into far more detail.
Looking at profiles next, you can create new profiles for whatever reasons you want here. For example, I have a main profile and a trainer profile. But you could have one for race vs training, or mountain bike vs road bike. They simply allow the configuration of data pages, they aren’t tied to specific sensors.
Within the data page views, you can have numerous data pages, each with up to a dozen data fields. Data fields can be traditional fields with just simple numbers, or they can be graph/chart like fields. I like that in this setup page it shows fake data (err…simulated data), as it gives you a better idea of what the data will look like later. It’s a nice touch.
Also in the list of things I like, is Hammerhead’s documentation in the profile/data page area. Seriously, it’s mind-bogglingly extensive. With every data field listed (no biggie), but also seemingly every combination of data field layouts. Super well done.
However, one caveat is that you can’t quite customize everything as it might seem. For example, there’s no structured workout data field/page customization. It’s take it or leave it. So if you do structured workouts for example, you can’t customize it to show your heart rate on that data page. Just the stock power/cadence/target. It’s not terribly ideal. Thankfully, that’s an easy thing for them to address, also, it’s something I discuss in a later section.
Next we’ve got sensors, but I’m not gonna take the wind out of my own sail at this point, since there’s an entire dedicated section on that too. I know, I know…but hey – we gotta have sections otherwise this wall of text is even less approachable. So let’s talk settings!
There’s a slew of settings in here, rather than take screenshots of them all, let me just summarize:
Hammerhead Account: This is where you connect your user profile to the device, it’s ultimately what stores everything here Strava Live Segments: You’ll manually enable/disable segments here. I dislike this part a lot. Rider Profile: You can change your age/gender/weight here, as well as whether or not you’re a ‘lifetime athlete’. Connected Services: It’ll show you which platforms are connected (e.g. Strava), as well as whether rides auto-upload or not Bikes: You can specify a bike and odometer here. These are then selectable post-ride. Training Zones: You can specify both heart rate and power zones, as well as auto-calculate them based on FTP and resting/Max HR. Turn by Turn Directions: This controls your TBT overlay options Key Button Icons: It’ll toggle on-screen labels for the buttons Offline Maps: It’s here you can configure which maps are downloaded to the device WiFi: Connect WiFi networks Sensors: Pair ANT+ & Bluetooth Smart sensors Phone Pairing: It’s here you’ll pair up your iOS or Android device for smartphone notifications (e.g. texts) Bluetooth Audio: You can pair up a Bluetooth headset or such for turn by turn directions Cellular Data: If you insert a SIM card, you can control those settings here Airplane Mode: Self-explanatory Date & Time: Choose to override automatic network time with manual time Auto-Pause: If you stop on a ride, it’ll automatically pause Battery Save: This will decrease usage to optimize battery, it’s auto-offered below 20% battery Elevation Calibration: This lets you manually override the elevation at your current point Nacho Cheese Status: This indicates whether there is a nacho cheese dispenser nearby or not Display: This controls the brightness level, as well as sleep settings (default is 5 minutes of inactivity and it goes to sleep) Live Tracking: If you’ve got a SIM card or WiFi hotspot, you can enable live tracking here Audio Alerts: This is where you control all the beeps Are we done yet: Dear god why did I decide to write all these out Measurements: This lets you select between Imperial and Metric, as well as power & cadence averaging Storage: This shows how much space you have left Factory Data Reset: It resets the whole thing System Update: It gets new things from the magic of the cloud About: Shows the current firmware levels Learn more: Seriously, there’s nothing left to learn after reading this review. Just ignore this button.
One minor notable in the settings, is that your toggling the lifetime athlete option, which is used for calculating calories, is based on FirstBeat algorithms. Like many companies in the space, Hammerhead leverages Firstbeat for some of their physio bits, in this case just calories.
Update – Dec 29th, 2020: Hammerhead has contacted me to note this is an error in their UI, and they do not license or use FirstBeat algorithms in their products. This UI element should be removed in the next update.
Now, let’s talk about phone pairing and audio alerts. A major new feature of the Karoo 2 is the ability to pair your smartphone to the Karoo 2 to get smartphone notifications, such as texts or phone call alerts. To enable this you’ll swipe 19 times through the settings to find the Phone Pairing menu, and then toggle it:
Next, on your smartphone (iOS in my case) go and find the Karoo 2 at the bottom, and pair to it – just like you’d pair to a car stereo. You’ll get prompted for a pin code, which shows up on your Karo 2:
Once that’s done, you can enable which things will notify you on your Karoo 2, mid-ride. So for example you can toggle phone calls and messages only, but not other apps or voice mails:
This is the only phone integration at this time. There’s no syncing of data or such via your phone, only via WiFi or SIM card in the device.
Also new are the audio alerts, as the Karoo 2 now has a beeper. In the settings you can toggle which beeps are beeped for which beeping things:
However, despite these settings – to be honest, all the beeps kinda blur together. Especially when you’ve got Varia radar enabled while doing turn by turn navigation. It’s just a never-ending beeping good time. And while there are nuanced differences, I think they need slightly less nuance. Just my two cents.
Now, about that mount, it’s easy enough to install.
To insert the Karoo, you slide it straight in (I show it in my video), and then to dismount the Karoo, you rotate it slightly and pull it out. This is slightly advantageous for tighter fit situations (such as aerobars, though…this mount won’t work on aerobars).
They also included in the pre-order units a small adapter that makes it compatible with Garmin mounts:
Also, since we’re on the back of the unit, here’s where you install a SIM card:
You don’t have to install a SIM card, and I only had it installed for a single ride. But it does then allow LiveTracking, as well as any other function you want that you’d normally do via WiFi (like syncing rides).
Ok – for the love of all things, let’s finally start riding. That was the intent of this section before I got all distracted with settings and configuration. Simply tap your ride profile of choice (such as road bike or such, whatever you named them), and you’ll be brought here:
At this point the ride hasn’t started yet. Like most units, you’ll manually start it once you’re ready. The paired sensors will show along the top, such as power, shifting, or cadence. You’ll also see your battery stats and the time of day on that upper line. Meanwhile, you can swipe through your data pages left and right using the touchscreen, or, you can use the upper left and right buttons to change data pages.
Here’s a gallery of data pages during one of my recent outdoor rides, showing some of what things look like.
Notable in there is Garmin Varia Radar support. That’ll show along the left side of the screen (currently not configurable though to the right side of the screen for people driving/riding on the wrong side of the road).
In terms of usability during the ride, all in all it works pretty well. I find that the touchscreen swipes generally work good when it’s dry, but not quite as good when it gets wet. For example, on a recent trainer ride with standing sweat on the screen, some of the touches weren’t as responsive (like changing intensity of the trainer). I’d say it’s about 80% success rate with water or gloves, check out the video where I show some examples.
Still, the vast majority of core ride actions can be done via the buttons if you want to. Visibility is good in gloomier Netherlands almost-winter weather, though in brighter weather earlier this past fall I found the screen really required you bump up the brightness to get it as visible as I wanted it. Not a big deal, but that’ll burn more battery.
If you’ve got Live Tracking enabled (requires either SIM or WiFi hotspot), you can send the tracking link out to friends or family to track your ride. I tried to use it this morning, but it wouldn’t show on my computer. Later in the afternoon I tried and could access the tracking page from a different computer (all of one foot away from the first computer that it still doesn’t work on). So it looks like I’ll have to try again.
After your ride is complete you’ll get a small summary screen. Like with the earlier historical rides page – this could use some UI love. I would love to see a ride elevation profile, or a mini map, or time in zone…or…anything really.
One feature that is kinda nifty though is that you can type the title of your Strava ride here, and it’ll convey that title to Strava. In my case, I upload all rides to Strava as private, and then manually update the title and add a photo. But I used to be in the camp of upload and call it done – so I can appreciate that.
As far as battery usage goes, it’s honestly a bit hard for me to judge this one. Almost all of my rides had screen recording software on them, save a few recent rides. That screen recording software doubles the battery burn. Seriously, I measured it (it writes it to the .FIT file). So, looking at the data that I have, with the screen brightness for today’s 75 minute ride at about 20% (it was an overcast day), the battery burn was 12.46%/hour, thus, ~8hrs. That’s paired to a power meter, heart rate sensor, and Varia radar (though, very low traffic since I was out in the middle of nowhere). It was navigating a course at the time, but the vast majority of the ride it was on regular data field pages, not the map page. Thus, 8 hours is seemingly short of the claimed 12 hours.
Also, I have been having some issues with charging. I’m working with Hammerhead to figure those out, but essentially some chargers that should absolutely charge super fast, are barely charging at 1% every hour (such as a MacBook charger, and a heavy duty drone charger, both with USB-C PD). I’ll circle back once I finish testing the 4 different units I now have against all the charging cables/sources. Some do charge just fine, but not the ones I’d have expected.
Now, before we dive deeper into navigation – I need somewhere to mention that the Hammerhead Karoo 2 is built atop Android, but that doesn’t necessarily mean it’s the same Android experience as your Samsung phone. Rather, it’s a fully closed up device, so that means you won’t have the Google Play store on there to easily load Strava or Netflix.
But that doesn’t mean you can’t. With even just a minor amount of technical know-how you can sideload 3rd party apps (I wrote some instructions here). I’ve loaded a few, for example, Zwift’s Companion app:
And here’s the TrainerRoad app loaded, and paired to my Tacx NEO 2T trainer and the HR from a Garmin FR745 (broadcasting):
And, if you want to see a short video of that, here’s me opening the TrainerRoad app, looking at the sensors available, the paired ones, and then selecting a workout and starting it. In this case it’s controlling the NEO 2T. You’ll see the wattage is a bit wobbly at first, but then I shift into the smaller ring and it stabilizes like any other trainer (no relation to the Karoo 2).
Hammerhead’s ultimate goal here has been to get/convince 3rd party companies to write apps for their platform (via an SDK they have), helping to bridge some of the feature gaps, or, by giving a more compelling experience. That’s been the goal since Hammerhead first announced the original Karoo 1 years ago. And at present, no companies have bit – largely because till now, I don’t think most companies have seen Hammerhead as viably competitive.
But that sentiment is changing (rightfully so), and it sounds like there’s some very near-term announcements that will be made in this space, for some meaningful 3rd party integrations/apps. I’m excited about them, though I remain someone skeptical on how many companies/apps Hammerhead will be able to convince to write versions for the Karoo.
While it gives those companies massive display flexibility compared to Garmin Connect IQ, Hammerhead obviously has not even 1% the user base of Garmin Edge users (probably not even 1/10th of 1%). Certainly, that’s going to change in 2021, but it’s going to require a leap of faith on behalf of those companies to see the potential beyond just user base numbers. Like most situations, I expect smaller apps/platforms will be the first – and then if the user base grows quickly, others might find ways or the desire to integrate.
Mapping & Navigation:
There’s no question that if you’re buying a Karoo 2, it’s likely because you often like to navigate with your bike computer. Which isn’t to say that you shouldn’t buy the Karoo 2 if you’re not into navigation, but simply that it’s where the Karoo series is and always has been the strongest.
To start with routing, you’ve got two core options You can connect it up to routing providers like Strava, Komoot, or RideWithGPS – or you can create routes ad hoc using the online web builder. Also, you can create routes on the device as well, but only if you have an active internet connection (SIM card or WiFi). Here’s the routes dashboard on Hammerhead’s site:
To create a new route you’ve got two options: Manually just click your way through the map, or import a route. For routes, you can actually even just put in the URL of the website (which works for Strava, RideWithGPS, Komoot, TrainingPeaks, BikeMap, Google Maps, and any website URL that ends with .GPX). How cool is that? Or, you can simply upload the original file. Seriously, it’s super flexible.
You can also use their route builder online, but honestly, my attempts haven’t been great here. Take for example the below route between those two points. It ignores the massive cycle-highway that basically exists alongside the southern edge of the rowing basin, forcing me off onto minor cycling paths no matter what I try.
Now I get it – the bicycle networks of the Netherlands are legendary, and many companies have challenges – but this is a very straightforward case that every other GPS unit I’ve tried can map this properly on the most direct (and most bike friendly) path.
Still, some routes render just fine. For example, this one in the opposite direction worked pretty easily. Then again, it’s a lollipop loop with only one way in and one way out.
You can also add waypoints as well, such as this windmill:
Once you click to Save, seconds later it’s on the device. It’s super quick. Similarly, up above in the screenshot of the dashboard you’ll have noticed the Strava logo on routes, which means it came from Strava. As long as you favorite a Strava route, it’ll automatically show up here.
Once we’ve selected a route it’ll show you a preview of that route, as well as the elevation. Though, I’m not entirely clear where the elevation is coming from on this route. It’s literally the pancake of the Netherlands with a single overpass (once). Afterwards, it showed a mere 103ft of elevation gain (twice up the bridge).
Once you’ve pulled open the route it’ll show the route on the map with directional arrows, as well as your current location. You can see a few examples of that during a recent ride below:
If on the map page, as you approach a turn, you’ll get a banner that displays the distance until the turn, as well as the directional information, like these:
Whereas if you’re not on the map page, you’ll just a pop-up with the same turn information (see below).
While this generally works the vast majority of the time, I find the routing just isn’t quite as good/accurate as Garmin’s. Namely in cases where the Karoo thinks I’m turning, but in reality aren’t. These are so-called phantom turns, where usually it’s just a bike path changing names, but often times the path might slightly dip a few meters (literally, just a couple meters) to the left or right around a driveway. But these can often trip-up the Karoo into thinking there are big turns:
This results in two issues, namely if you aren’t on the map page at all times. That’s because there is no mini-map on the other data pages, it doesn’t show any pop-up of mapping context for what’s about to happen. It just shows the turn textually (like below).
And that’s a problem when there’s either a legit phantom error, or, in this particular case – my routing having a single data point a few dozen meters down one street. I turned, thinking I needed to turn, but in reality, it was just a misplaced dot of mine.
If I was in the map view, I would have seen that, or if a mini-map popped up, it’d have been apparent. Unfortunately, neither were true. And what followed originally started as my fault, but quickly escalated.
Somehow as part of trying to undo my failed keeping straight plan, the ride stopped recording. Hammerhead believes I paused while trying to change back to the map page to figure out why it was upset at me…all while trying not to get hit by gigantic green farm equipment. This explains the ‘Ride not recording’ banner up top (3rd photo above). But that covers the paused icon below it barely visible. I’m not sure why it just doesn’t say ‘Ride Paused’, since that’s more clear than ‘Ride not recording’ – which basically sounds like something has gone horribly wrong technically.
But how did I end the ride you ask? Well, that’s a funny story. See, normally you start a ride by pressing the lower right button (see 1st screenshot below). So first I figured I’d get myself back across the street and then resume the ride. So as I crossed the street (1st image left), seeing it was paused I instinctively tapped the right button to resume. Except one problem: During that few seconds crossing the street, it then showed the ‘Slide to end ride’ (center image). Now what? Well, I knew that sliding that screen would be bad, so I figured the same lower right button would also resume.
I was wrong. It ended it. Donezo. And there’s no confirmation or anything. It’s just over.
There’s two reasons for that:
A) Because ‘Start’ isn’t the same as ‘Resume’. Once you start, those buttons switch, so that the bottom right start button becomes the lap button, and the pause/resume button switch to the other side (bottom left). And once you stop, Lap becomes ‘End ride now”.
B) “Slide to end ride” also now means “Or just press the side button” after a few seconds.
That’s because Hammerhead recently made it so a slide wasn’t required, in case the touchscreen isn’t responding well with gloves/rain/snow/whatever. But without a safety check on that, you can get in trouble quickly. I’d eventually use FitFileTools.com to merge the two parts of the ride together.
And look – let’s say I take complete responsibility for not fully understanding that the pause/resume button becomes the ‘Death to Ride’ button after some period of time. My bad. Or that my Strava route had an errant point. Also my bad.
However, I think it shows that as forward as Hammerhead’s UI is, the above center screenshot is a literal dumpster fire of user interface. No really, it looks like it’s on fire. Some of that is exaggerated by Varia Radar data, but a lot of it is just too much. Why is the gigantic ‘Ride not recording’ bar atop covering up a paused icon? Those two are duplicate. The very verbiage of Ride Not Recording implies the recording went wrong, not that it’s simply paused. And if the ride isn’t recording, then why are you still telling me turn by turn instructions? And then under that entire mess is sitting the Slide to End Ride – hidden by the instructions. And finally, why on earth are the start/resume/pause buttons switched once you start a ride? I can’t think of a single other device I’ve ever reviewed that switches those. I guess that’s why they aren’t actually labeled on the exterior buttons themselves.
Ok, my rant temporarily over (and I’m writing this 6 days later) – these incidents are rare. I haven’t managed to shoot myself in the foot on any other rides, though incorrect navigation instructions do happen multiple times every ride. All of them tend to be minor, but all of them require you to be on the map page at all times. That’s because unlike Wahoo/Sigma/Garmin, Hammerhead doesn’t pop-over a mini-map upcoming turn page when you’re on another data page. It just shows the turn/street text information. You can see screenshots of the pop-over in this section, but it’s the same on all Garmin devices.
Ok…moving along to something they do really well – their Strava Live Segments page. It’ll sync your Segments automatically to your account once favorited on Strava. While previously that wasn’t syncing (and enabling) my favorites, it does appear to be doing it today, so I’m happy now.
Out on the road, you’ll see a message about an upcoming Strava Segment appear:
Once in the segment you’ll get an overlay along the bottom that shows the time in the segment, the time completed (left side), time remaining (right side), and then various icons indicating different goals – such as the KOM/QOM, your nearest competitor, your PR, etc…
These icons become clearer once you get a bit more into the segment. Also, there’s an elevation profile there as that line, but I don’t really have any elevation here.
At the end, it’ll list any achievements you unlock – in this case the carrot, which is basically the best effort recorded by my nearest competitor.
Except, I wish it would tell me who the heck that was, since I’ve got no idea. So instead, I have to go onto Strava later on and play detective and figure it out. Turns out…it was Lama. Sorry Lama.
(Side note: I can guarantee you that once Lama is able to travel again, you know he’s going to come back and just rampage around my regular loop to ensure I can’t keep using his name this side of a record.)
Also note that you can indeed have overlapping Strava Segments, it’ll properly show both, and you can then swipe left/right between the different segments. Like I said – I really like much of the implementation here, and with a few tiny tweaks it’d be incredible.
Structured Training & Sensors:
The Karoo 2 supports syncing structured workouts from TrainingPeaks, enabling you to complete structured workouts both inside and outside on the Karoo 2. Moreover, it also supports ANT+ FE-C trainers, so it can automate these workouts for you on your smart trainer (all of them support ANT+ FE-C these days).
And that gets into the sensors side of things. The Karoo 2 supports ANT+ & Bluetooth sensors, including almost every sensor type you’re likely to have on your bike. Also, internally the Karoo 2 has a barometric altimeter, as well as GPS of course.
We’ll start off with the structured training aspect. As of this time, the only platform that Hammerhead supports is TrainingPeaks, which means that you’ll need an account there in order to use structured training on the Karoo 2. While there have been some rumors and screenshots floating around of TrainerRoad integration, that hasn’t happened yet – and when asked, there isn’t a timeframe for that at this point. There also isn’t a method of just side-loading a workout manually, if you happen to have the structured workout file.
In any case, once you’ve linked your TrainingPeaks account to the Hammerhead dashboard, it’ll start syncing structured workouts per your calendar. Meaning, it won’t sync your TrainingPeaks library of workouts, just those that are on your upcoming calendar in the days ahead. So in my case as I primarily use TrainerRoad for my structured workouts, I went ahead and manually dragged the one structured workout I have in my TrainingPeaks library onto Monday:
Then, you’ll see it showing up on the Karoo 2 automatically. If it doesn’t appear at first, just hit the sync button at the bottom to re-sync via WiFi:
You can then tap the workout to get a highly distorted view of it. This is because they try and scale vertically, versus just leaving it like the preview, and instead putting some other random info/text below it (for example, they could put the estimated TSS, power zone compilation, number of tacos required, etc…).
In any case, you can select to open your profile now and get ready to start. However, you’ll likely want to disable your GPS first. Unfortunately the Karoo series don’t have any way to turn off the GPS automatically if you’re indoors on a trainer (or, via a certain ride profile). In my case, I created a trainer ride profile, but I still need to manually swipe down, long hold ‘Sensors’, and then manually disable ‘GPS’. And then – far more importantly, remember to enable it next time for my next outdoor ride.
With that, we’re ready to begin. You can see here the workout screen ready to roll:
It’ll now automatically control the trainer in ERG mode, keeping it at the mid-point of the wattage target ranges I had created.
Note that there’s *no need* for this workout to be executed only indoors. You can in fact do workouts outside on the road as well. In fact, you can even add a structured workout to ride at any time. So for example, let’s say you’ve got a 15-minute ride to get to where you want to start your structured workout (perhaps past stoplights and such). You can start recording your ride, and then later open up the workouts page and add the workout.
Both indoors and outdoors, the Karoo 2 will automatically create lap markers for each new section of the structured workout (such as a new interval). That way these are visible on all training platforms later on, including TrainingPeaks. Indoors on a trainer, you can also tap the +/- on the workout page to increase or decrease the target power in 5% increments. However, the only place you can see the entirety of the workout is at the end. I wish there was a bit more context beyond just that interval.
Both indoors and outdoors you can pause the workout (without pausing the ride), and then once paused you can skip or reset a given interval (such as if you hit a stoplight and need to reset).
Once you’re done with your workout, you’ll get a summary of it like normal. Meanwhile, up on TrainingPeaks, you’ll get the planned workout with the completed workout merged together:
Ultimately, all of this works pretty well – and largely in line with how their competitors do structured workouts. The main area that Hammerhead could improve here a bit though is customization of workout data fields. There isn’t any way to add workout data fields (like ‘time remaining in an interval’) to other data pages. All of the structured workout pieces are only available on a single non-customizable workout page. So if you don’t like that layout you’re outta luck. Still, in the grand scheme of things – that’s fairly minor.
Next, let’s talk sensors. The Karoo 2 supports pairing to numerous sensor types, and supports the saving and naming of multiple sensors per type. Meaning, you can save 3 power meters and name them for each of your bikes if you want to. Or 15 power meters if you’re me. Whatever floats your boat.
Here’s the complete listing of ANT+ & Bluetooth Smart sensor types:
– ANT+ & Bluetooth Smart Heart Rate Sensors
– ANT+ & Bluetooth Smart Cycling Cadence Sensors
– ANT+ & Bluetooth Smart Cycling Speed Sensors
– ANT+ & Bluetooth Smart Cycling Power Meters
– ANT+ FE-C Smart Trainers
– ANT+ Cycling Radar (Garmin Varia radar units)
– ANT+ Gear Shifting (SRAM eTAP, Campagnolo EPS)
– Shimano Di2 Shifting
This is the vast majority of types of sensors people would likely have. About the only mainstream type it doesn’t yet support are ANT+ lights (which would include Cycliq, Garmin, Bontrager, See.Sense, and others). It also doesn’t support some of the more niche sensor types like tire pressure sensors (Quarq), or Muscle Oxygen (Moxy). I don’t see this as critical path, but rather things that Hammerhead needs to balance with everything else.
To add a sensor you’ll tap sensors from the bottom of the dashboard, which takes you into the sensors page. It’s here that you can filter by ANT+ or Bluetooth Smart sensors, as well as see any sensors listed with icons showing ANT+ or Bluetooth Smart:
To pair a new sensor you’ll hit the ‘+’ in the lower right corner, which then lets you search by ANT+/BLE/Di2 (technically speaking Di2 uses private-ANT and not ANT+, which is why they’ve categorized it differently).
You can tap on a sensor to give it a friendly name if you want, or, just leave the default ID. Your call.
I’ve been dual-recording the vast majority of my rides (indoors and outside) to validate that the sensor data collected by the Karoo 2 matches that of other units, and so far I haven’t seen any discrepancies there. Note that I cover GPS data in this next section however. First though:
Complete User Interface Tour:
What’s that, you want a 30-minute long video to go with your 8,931 word in-depth review? Yes, another video aside from the other 15-minute video? Ask not and you shall receive anyway.
In the above video I go through the following things:
1) Complete unboxing
2) Size and weight comparison to popular/competitor units
3) Complete user interface tour indoors
4) Detailed ride-along user interface explainer as I ride across the countryside (including navigation/Strava Segments/Data pages and more)
You can use the YouTube chapters feature if you drag along the bottom to find the section you want. Give the video a like on YouTube if you found it useful.
Also, this is a great time to point out how incredibly easy it is to make the outdoor sections of that video given that I can load screen recording software on the Karoo series (since it’s just Android). I would love to see such a capability on other units, as it makes not just my job easier, but makes it far easier for people to share ride type videos online to increase popularity of a product. Just sayin’…
GPS Accuracy:
There’s likely no topic that stirs as much discussion and passion as GPS accuracy. A watch could fall apart and give you dire electrical shocks while doing so, but if it shows you on the wrong side of the road? Oh hell no, bring on the fury of the internet!
GPS accuracy can be looked at in a number of different ways, but I prefer to look at it using a number of devices in real-world scenarios across a vast number of activities. I use 2-6 other devices at once, trying to get a clear picture of how a given set of devices handles conditions on a certain day. Conditions include everything from tree/building cover to weather.
Over the years I’ve continued to tweak my GPS testing methodology. For example, I try to not place two units next to each other on my wrists, as that can impact signal. In the case of GPS bike computers, I put multiple units on my handlebars, though quite well separated (such as one on an out-front mount, another on the stem, and others to the side of the handlebars).
Next, as noted, I use just my daily training routes. Using a single route over and over again isn’t really indicative of real-world conditions, it’s just indicative of one route. The workouts you see here are just my normal daily rides/workout. At least as much as is possible in this COVID-19 world without being able to travel far, I’ve varied my workouts and terrain (cities/buildings, trees, quiet roads, bridges, etc…). But, given I live in a pretty flat place (Amsterdam), it means there’s very little high-altitude mountain type testing right now. Maybe later this summer. Sorry!
(Now, I’ll give you a spoiler since you made it thus far: By and large it’s pretty rare to see GPS screw-ups on road-cycling routes. And frankly, that continues here. This section is super boring because nothing ‘exciting’ happened.)
First, we’ve got a ride from last week where I meander all around the countryside, including numerous tunnels/bridges – even under airport taxiways, to see how GPS handles, but also how it recovers from no-GPS situations like tunnels/bridges. In this case the Karoo 2 is compared against the Wahoo RIVAL GPS watch, Garmin FR745 GPS watch, and Bryton Rider 750 bike GPS. Here’s that data set.
At a high level, no obvious error. So let’s zoom in to the very start to see how initial GPS accuracy looks as we get rolling:
Basically identical. Here, zooming further into a forested section – again, everyone near identical. A tiny bit of variance from the Bryton going under the bridge, but hardly anything in that context.
Seriously, this set is so boring, they’re all perfect:
So you know what we’re gonna do? Throw airplanes at it. Seriously, I’m going to go under airport taxiways, under airplanes (for real), and every bridge I can find. Along with some of the tallest buildings in Amsterdam (at the airport…go figure). Still boring:
In fact, it took a simple street crossing to finally get some disagreement. The FR745 was ranked first, followed by the Karoo, and then the Bryton and Wahoo units split the difference out in the grass.
Fine – let’s throw more airplanes at it. Even a runway! It still properly handles loss of GPS and picking up GPS at the tunnel exit (which is what I’m looking for here). Again the Karoo 2 and FR745 take the cake for best entry/exit.
Ok, enough airport games. The rest of this ride is boringly perfect (still).
Let’s go to today’s ride. This one I doubled down on Karoo 2’s, with two of them. Karoo Squared. Plus a FR745 and a Wahoo RIVAL. Here’s that data set:
This one I started off across the street from the hospital, and let all the units have a 30-60 seconds breather after pressing start (they all had like 10 minutes while I was shooting video to get GPS and lock firmly). About 30 seconds after I start pedaling I go under/through the Hospital. It’s basically like an overpass. Zero issues from the Karoo or Garmin units.
The rest of that street I did both directions, and actually has some new high-rise buildings on all sides of it. Pretty stable across the board.
Later on, as I do some interchange stuff, including bridges, you see the tracks are near identical, except for one brief tiny disagreement from the FR745.
Later in the ride…more boringness:
Still boring:
Ok, that’s a waste of time. The entire rest of the set is perfect. We need to find some bad GPS tracks here somewhere. Anywhere!
So, let’s go back to Nov 6th. Over a month ago, and like 4 firmware versions ago. But gosh darn it I’m gonna find some imperfection to complain about. Here’s that data set:
Look – in the trees, it’s off by one meter! Actually, so are the other two units, the wrong direction. But at least we now know the Karoo 2 isn’t perfect.
Actually, in all seriousness, it did struggle a little bit (four firmware versions ago) at the local cycle track loop that I did on repeat. Not hugely, but you can see it cut the inside edge of all the corners on most turns, compared to the FR745 and Wahoo RIVAL.
That said, given this was a month ago and four firmware versions ago (beta still I think), I haven’t seen that since (I also haven’t been back to that spot since). Point being, that’s the only error I can find in my GPS tracks.
Ultimately, I’m just not seeing anything even remotely problematic of discussion in the GPS accuracy of the final production firmware for the Karoo 2. Which honestly isn’t a huge surprise. I rarely see issues road-cycling with bike GPS computers. I’ve got some trail work I need to do over the coming weeks, so I’ll see if anything changes there.
(Note: All of the charts in these accuracy portions were created using the DCR Analyzer tool. It allows you to compare power meters/trainers, heart rate, cadence, speed/pace, GPS tracks and plenty more. You can use it as well for your own gadget comparisons, more details here.)
Product Comparison:
I’ve added the Karoo 2 into the product comparison calculator so you can see how it compares to other units on the market. To keep things simple for below, I’ve compared it against the Wahoo ROAM, Garmin Edge 530, and Edge 830 (all of which have routable maps onboard). Of course, there are plenty more units in the product comparison calculator, so you can make your own charts here as well. In the meantime, here’s how things line-up below:
And again, remember you can mix and match and make your own product comparison charts over in the product comparison calculator.
Summary:
In some ways, one could re–review the original Karoo 1 on this date and end up with a near identical review. After all, it’s near identical software. Except – it lacks that all important audible beeper, as well as phone integration. But my point here is more subtle – Hammerhead has made tremendous strides in getting the Karoo 2 to where it’s at, via investing time in the underlying Karoo software platform for everyone. So while the company hasn’t shipped a Karoo 1 in over a year now (seriously – that long without shipping any units) – they spent that time working on features and bugs for existing and upcoming users alike. That’s a great strategy that’s paying dividends now.
Their next challenge though is shipping out hardware. After fulfilling existing backorders over the next few weeks, they’ve selected to start stockpiling units from January to March, rather than shipping units as available off the manufacturing line. I personally think that’s a bit of a mistake, as it basically gives reason for people to wait to see what arrives next spring – after all, competitors don’t pause because you stockpile. And it’s not like Hammerhead is offering a discount on the Karoo 2 to get people to commit now. Still, eventually Hammerhead will get to a point where they’ve got actual units in stock all the time, and I’d assume expand out distribution and such then too like any other bike thing.
But as part of that, they’ll also need to have a clear roadmap on *new* innovative features. Much of Hammerhead’s work to date over the last few years has largely been playing catchup on core and secondary features. They’re at the point where they still need to continue that in some manner, but also need to start basically rolling out ‘Take my money’ type features. Innovate and new features at time of announcement, like ClimbPro on Garmin Edge units, or BestBikeSplit integration on Wahoo’s units. I’m optimistic they’ve got a team in place to do that, combined with a substantial investment round last summer.
All to say, I really like the direction that Hammerhead is going, and their trajectory is in the right spot. There’s nothing like it display-wise on the market today, and even if the navigation prompts aren’t quite 100% perfect, the overall navigation and display experience is unlike anything else out there. And I think that they’re quickly becoming the most viable competitor to Garmin’s Edge series aside from Wahoo. And ultimately, competition is good for everyone.
With that – thanks for reading!
Found This Post Useful? Support The Site!
Hopefully you found this review/post useful. At the end of the day, I’m an athlete just like you looking for the most detail possible on a new purchase – so my review is written from the standpoint of how I used the device. The reviews generally take a lot of hours to put together, so it’s a fair bit of work (and labor of love). As you probably noticed by looking below, I also take time to answer all the questions posted in the comments – and there’s quite a bit of detail in there as well.
If you're shopping for the Hammerhead Karoo 2 or any other accessory items, please consider using the affiliate links below! As an Amazon Associate I earn from qualifying purchases. It doesn’t cost you anything extra, but your purchases help support this website a lot.
Since the Hammerhead Karoo 2 is no longer sold, I recommend looking at Hammerhead Karoo 3:
And finally, here’s a handy list of accessories that work well with this unit (and some that I showed in the review). Given the unit pairs with ANT+ & Bluetooth Smart sensors, you can use just about anything though.
This magnetless Garmin Cadence Sensor attached to your crank arm and transmits cadence over both ANT+ & Bluetooth Smart to apps, watches, or bike computers.
The Garmin Varia radar alerts you to cars coming up behind you, well before you see them. It's awesome for quieter roads (country roads/mountains), especially on longer rides. It's less useful for city riding.
This dual ANT+/Bluetooth Smart sensor will transmit cadence not only to your bike computer/watch, but also 3rd party apps like Zwift, TrainerRoad, and more.
The HRM-200 is Garmin's newest strap that transmits concurrently on both ANT+ & Bluetooth Smart, as well as containing new authentication and encryption capabilities.
This is a great strap, especially if you're going to the gym. It's dual ANT+/Bluetooth Smart, but it also supports the 5kHz analog heart rate transmission for older gym equipment. Note that it only accepts a single Bluetooth connection, versus dual-connections for the Polar H10.
The Polar Verity Sense is the newer variant of the Polar OH1 Plus. And while it might seem odd to get this when your watch also has a optical HR sensor, this one is just better most of the time. Plus, it also has workout recording storage. Dual ANT+/Bluetooth.
And of course – you can always sign-up to be a DCR Supporter! That gets you an ad-free DCR, access to the DCR Shed Talkin' video series packed with behind the scenes tidbits...and it also makes you awesome. And being awesome is what it’s all about!
Thanks for reading! And as always, feel free to post comments or questions in the comments section below, I’ll be happy to try and answer them as quickly as possible. And lastly, if you felt this review was useful – I always appreciate feedback in the comments below. Thanks!
Not really. But not for the reasons you might think. Rather, mostly cause I’d expect it’s pretty easy to sell a Karoo 1 for more than $120, thus, you can put that cash in your pocket.
On the flip side, the easy button of taking their deal means you don’t have to deal with the logistics of it. So if you’ve got a friend that wants to give you $150 for it – obviously, take that. But if you have to list/sell/ship/etc it for $150, it’s probably not worth the extra $30 (on a $400 purchase).
Great stuff as always Ray. I’m going to do my usual and point out a typo though. “But I used to be in the camp of upload and call it done – so I can apricate that.” — should be “appreciate”.
Its probably worth a mention that any new pre-orders have gone up 17% as of now. I’ve been trying for three months to pre-order at the £306 price, but they’ve only been accepting email notification requests. Now you can buy a gift card at £359. Sounds like the Elon Musk rule of economics for self driving cars, “buy now or expect the price to go up further.”
My pre-order from the UK was £301.88 (plus an indeterminate %age of tax). The price has now jumped to £359 (plus even more %age tax). I cancelled my pre-order as I couldn’t get an answer to what would be the final cost, in fact I heard nothing from the moment they took my money. No promised ‘behind the scenes’, no updates, no browser configuration, nothing.
Am I wrong? I seem to remember to have signed up for an email notification so that I can order in time for the holidays. I supposed they meant the winter holidays. Now I got the notification that I can pay up and preorder for end of March. Bollocks :(
I think the £359 price now includes tax, so there’s nothing more to pay when it gets to the UK. Back when I bought the first Karoo they did a similar additional charge to cover taxes, so this is nothing unexpected.
“Note: To reflect the price of the Karoo 2 in a format more commonly used outside the United States, we are now including all taxes and VAT in the listed price”
My UK pre-order email says “When your Karoo 2 is close to shipping, we will notify you to return to checkout to apply this deposit toward your complete purchase ($399 plus tax and duties)”. And £359 is £300ish (~=$399) plus 20% VAT. So a £306 Karoo 2 was never an option.
“There’s nothing like it display-wise on the market today.”
How does the resolution compare to your average smartphone screen?
Does the anti-glare coating makes a big difference?
Nothing like it display wise on the market? What about the Dash. Way brighter and more readable. Also has a lot of cool widgets like the power and hr wheels, color coded elevation, heart rate, and power graphs. Route creation doesn’t exist on device but following a downloaded route works fine. I practically never need on the fly routing.
Nah, the Stages Dash isn’t in the same league when it comes to the display. Brighter…maybe? I’d have to do some side by side tests (or, dig out the specs).
But the Karoo has much of those same charts, just looking slightly differently/style. I do agree that Stages has a far better elevation chart. And I think in general Karoo has kinda missed the boat on elevation plotting potential here…but…sounds like some things are in the queue there.
Now, as far as readability for someone with less than optimal eyes, I would actually agree that Stages gives you more flexibility there. Certainly you can reduce data fields on the Karoo 2 and increase the size, but that readability doesn’t necessarily extend to everything. If you watch my UI video you can see a good example of that with the waypoints (it’s towards the end). This is an impossibly small screen to read/interact with while riding.
My eyesight 15 years ago was better than 20/20. However, my reading vision has deteriorated has deteriorated to the point that I need large and bright fields to be able to read them. Even with bifocal sunglasses. That is why the Dash is what I use now- Wahoo and Gamin (both of which I have) are too dim and small for me to read most of the time..
Circling back to my question —
Hammerhead’s website says “Karoo 2 has the largest color spectrum and twice the pixel density (292PPI) of its closest rival” but how does that compare to the average smartphone screen?
If you run Komoot or RWGPS on your phone mounted next to a Karoo 2 and compare the same map area, is there noticeable difference other than screen size?
You can search for the PPI on different phones pretty easily. A few numbers from the top end: iPhone 11 is 326. 12 is 460. Samsung S20s & Note are in the 500+ range. But I think the screen resolution is only noticeable to a point and refresh rate + power use become more important than PPI. I can’t do a comparison yet personally, but I’d say 292 is in the ballpark of the ‘average’ smartphone screen. Different apps will scale graphics differently so even if the PPI is close they may look different. More importantly the phone screen will be larger & show more of whatever is being displayed at the same scale.
What is their limit for the number of starred strava segments they support for strava live segments? (I can give you a script that uses the strava api to star and then unstar a large number of segments in order to test.)
Not sure if you’ve seen this already, but per Strava: “You can sync up to 100 starred segments and view 100 nearby segments” link to support.strava.com
That said, I read somewhere on a karoo forum that strava enforces a restriction on their API which limits the number of segments that can be pulled at a time. It sounded like hammerhead was looking into expanding… might need to be multiple ‘pulls’ from strava to manage it (maybe based on location?) so we’ll see. Sounds like you might be able to expand on how feasible that would be for hammerhead based on the API.
Thanks for that link, I had not seen it. (I had seen something about a much lower limit before the karoo 2 was released). Sad to see they have the same 100 limit as Garmin. Wahoo units have no limit on segments, so it must be possible to use the api in that way.
As a frequent user of the public strava api (the one used for live segments is not public) you frequently need to make multiple requests and obey rate limits to get the data you want. It’s a basic thing you need to do to use the api, so it shouldn’t be too hard for Karoo to do when using the non-public api as well hopefully.
I’d be happy to read any links on the karoo forum that have more details or info on this matter.
This is the thread. I don’t want to read too much into the support rep’s reply, but it sounds like they don’t want to risk annoying Strava with a big data pulls, but there may be room for improvement if they are more selective. I don’t really need more than 100 live segments per ride, so if it could figure out which of my starred are nearby that may be a work around. Let the others be stale. Understand that wahoo supports more, but I don’t think they are pulling more than just my best time and the KOM time. Karoo seems to also pull best efforts from some followers and maybe more data on segment progress so each call could be double the data. I’m not sure how the units show ahead/behind… it could be real progress which would be a lot more from the API or making some assumptions based on speed and doing a calculation.
“As of now, it has been limited and couple of reason being Strava are very conservative with how much load we are allowed to place on their API because they support a lot of other head units doing the same thing. We also want to ensure everyone can use the Live Segment experience on Karoo, we have to enforce a cap at some value to distribute that API load across our growing user base.”
Wahoo compares progress point-to-point, not based on average speed. So they are pulling more than just two times per segment.
From that comment it sounds like strava is giving hammerhead a total maximum daily number of api requests that they need to split between their users (“distribute that API load across our growing user base”). This is how users of the public api work as well, a per-day limit per app regardless of the number of users of the app (with the option to try to contact strava to ask for a daily limit increase, which I hear can be challenging). For public apps, ie developers that don’t have any special relationship and aren’t paying strava this seems reasonable. For a company which does have a special relationship with strava (they have access to this private live segment api at the least), and for which they are very likely paying strava (Ray has reported previously how everybody but Garmin has to pay strava for live segments), this seems like a silly way to run things on Strava’s part. Strava should scale the limit with the number of users.
Gotcha. So that point to point data would be pulled for the wolf and carrot (lol) in addition to your best and the Kom/QOM. But i think you’re right, it sounds like the limit is requests not data size.
I agree that it seems like poor scalability on strava’s end. With live segments being a premium feature for which I already pay strava to use, there shouldn’t be a limit. Feels like double dipping to also charge hammerhead/wahoo/polar/etc to pull data that the user already paid to access. If they want to enforce a limit on frequent redundant requests or crappy use of the api then fine, but not legitimate traffic for a premium user.
No ANT+ Cycling Dynamics support at this time. But I do agree, it’d make a good addition to the table. There’s a host of changes I want to make in those charts, so I might roll them in there. Some of the data fields are getting a bit stale as time moves on.
Not sure how much userbase there is for Varia Radar vs Varia Vision HUD, but it would be valuable to include that in the table too – this may be one of the ways to motivate Karoo to add suport.
For me personally – this is one of the few showstoppers when deciding between Garmin and Karoo (the other one would be climbpro and maybe cycling dynamics).
Yeah, I think that one might be a bit niche to be honest. With no other company supporting it aside from Garmin to my knowledge these days, and even Garmin seemingly not caring about it – I fear it’d be one of those line items that somewhat unnecessarily skews every chart towards Garmin for something almost nobody uses. :(
Maybe I’m not too knowledgeable about cycling, being more into running, but if the big advantage of this unit is that it has a screen as nice as your iPhone, why not just use your iPhone as your cycling computer ? You are probably taking it with you anyway ?
That is a legitimate question. In principle you could use an iPhone/Android as a cycling computer, but in practice this would be annoying for a number of minor issues:
* Lock screen – you don’t want to have to unlock your phone repeatedly during a ride. But if you disable the lock screen, you have to do that before every ride and remember to enabled it after every ride. Bike computers don’t have a lock screen, and if you leave it unlocked, it’s not a security risk because you’re not keeping anything important in a bike computer (like access to your bank accounts and email)
* Phone screens can’t be left on for hours without running down the battery. I’m not sure about Karoo, but Wahoo has reflective displays that can stay on without the backlight, and use very little battery
* User interface – phone apps assume that you’re sitting still and can totally focus on tiny UI elements on the screen to operate the app. Bike computers are designed to be operated while riding, where you have to pay attention to the road/trail so you don’t crash
d you can buy a new one. iPhone claims to be water resistant, but you can’t rely on it.
* Strava app sucks at recording data from sensors. They had it for years, then they said it keeps crashing and they don’t feel like fixing it, so they removed that function entirely. Then they added it back years later, but I think it’s limited to what it can do.
* The Strava app is more limited in general. I don’t think it has workouts.
* Battery – it’s good to have a bike computer that gets recharged in the garage and is fully charged for your next ride. With your phone, it’s easy to end up in a situation where you forgot to charge it, and now you’re starting a 6-hour ride with 15% battery
Nik & Robert,
if You want to start cycling with a “device” the best and most cost effective way is to use Wahoo Fitness app. I’ve used it on an iPhone but it’s also made for Android. App is free and it works. Design is clear and functional. Without spending any $ You have speed, distance, workout time, route and maps if You connect it with Strava you will have calculated power (post ride).
– If You want to step it up – go for Bluetooth cadence sensor
– then go for a heart rate monitor
– then go for a power meter
– shave legs at some point ;-)
my only issue with the Wahoo Fitness app as a “cheap” bike computer is that I can’t connect two Magene sensors at once (those are speed/cadence combos) and that the speed readings while using GPS have a massive lag… and I would like to see apple watch integration for HR readings.
But If You want to start somewhere it’s no-brainer.
Nik and Marcin did a great job of outlining things. It’s funny, I almost started down that path in the intro of the video, but ended up cutting it. It’s sorta like politics.
Still, the one argument that I think a lot of people overlook aside from all the hardware things noted correctly above – is just the cohesiveness of a phone as a bike computer.
Generally speaking, most phone cycling apps are focused on one thing. Meaning, recording a ride, or Strava, or perhaps navigation, or perhaps structured training. There are very few though that do it all. So you end up with this hodge-podge of apps trying to get one cohesive unit. Is it impossible? Of course not, but that’s part of what you’re paying for.
The ability for example (with the Karoo or others), to load up a navigational course, and then decide to add a structured workout to it, and still also pair sensors…plus of course the better mounting/battery life/etc… things.
I also use Wahoo Fitness app with iPhone and noticed that it overestimates the elevation gain quite significantly. But if you then connect to Strava, you will finally get the correct number there.
I definitely agree on the battery point. That’s the biggest reason as far as I’m concerned to have a dedicated bike computer.
For me though, I had been a preorderer for the Karoo 2 that I cancelled. It came down to the fact that I found a phone app that is ‘good enough’ combined with the fact I want to make some other bike-related purchases instead. It took a long time to find a good app on Android (so many of them suck), but I finally found a free app called Jepster that I really like (and for what it’s worth, zero affiliation with the developer). With that I miss Strava Live Segments and I miss turn-by-turn directions, but again, it’s saving me money I can put to other uses for now.
But it’s intended as a bike computer app, which means that it avoids some of the pitfalls of small interface elements that you describe.
“There are very few though that do it all”
Do you plan to elaborate on that list at some point in the future?
The last time you attempted to something similar was Feb 2012. :)
Regardless of the cons there are plenty of folks interested in an app that can do everything.
How about a review focused on the best all-in-one cycling app for iOS and best app for Android?
Minimum requirements would be full sensor connectivity (ANT+ and/or BLE), GPS routing, and trainer control with workouts and what else? That will narrow down the candidates considerably.
Yeah, I vaguely keep tabs on it. I think to some degree most roads lead to CycleMeter, RideWithGPS, or for more structured training Train2Peak or Final Surge. But I haven’t flushed out all the nuances with those.
And that’s ultimately where it gets sticky – the devil is definitely way deep in the details there on those apps. And many times the various documentation bits they have it woefully out of date.
It’s in my ToDoist list, but to be honest…so are some post ideas for products that have already been replaced by newer versions. :)
I would also add one little detail (which might be implicit in Nik’s points) – when you are on the trip and your navigation dies, you continue without it – no big deal (and if you get lost, you still can use the phone as a backup for orientation). But being on the trip with phone dead is a much more serious scenario in several aspects (security, emergency, group coordination etc etc).
Given that Hammerheads run on Android, do you think it’d be technically possible to wipe an old Android phone and load their software on it by means similar to the app sideloading you mentioned?
I get the software limitations of using my everyday phone; there are no apps out there that make sense. But I have a 2 year old phone I’m about to upgrade, maybe I can turn it into a 6.1″ Karoo 2+?
Certainly a bit late here but wanted to chime in that my app Cadence https://getcadence.app does all this: multiple Bluetooth sensors, turn by turn navigation, Apple Watch heart rate, screen customization, Garmin Varia support, power meter with pedal balance support, etc. I released in 2020 and am still under serious development. Working on elevation correction and activity cropping at the moment. Really trying to make a replacement for dedicated computers. Cheers!
So the summary says nothing about this device as a bike computer… Good? Bad? The best?
Some of us go straight to the summary and this time around the summary told me nothing…
Yes, I just sideloaded it and confirmed it works controlling a Tacx NEO 2T. I added a small section, and video, into the review towards the end of the The Basics section (but it’s faster to go to the next section and scroll up once): link to dcrainmaker.com
Is the sideloaded TR in your example any different than how an approved app would work in the future?
Why would a company like TR need the Karoo SDK if their Android app can run fine as is?
Couldn’t Hammerhead simply add approved apps to their own “store” so they install just like it works on an Android phone?
Informative review Ray. Did you happen to test with a Favero power meter? I’m curious because I’ve seen issues reported elsewhere of issues with the Favero Assioma Uno when paired over bluetooth (*). Since the software is unlikely very different between the Karoo 2 and the Karoo, I wonder if it will have the same issue. The reason I ask is because I’m looking to get my first bike computer and want to also get the Assioma Uno for use with my bike and my Peloton.
I don’t think I’ve tried the Favero this round, and definitely not an Uno (since, I don’t have an Uno).
That said, two questions:
A) Why pairing on Bluetooth? I don’t mean that in a rude way – but just curious. My rule of thumb is *ALWAYS* pair power meters via ANT+. The reasoning is simple: The Bluetooth Smart Power Meter Device Profile is a dumpster fire. Not full-rage dumpster fire, but more minor dumpster fire. Like, trash can fire. As such, in turn, the implementation of that across the industry is also trash can fire, especially in pedals. It’s hard to blame any one company, because they’re all trying to play whack a mole fixing it for everyone else doing it wrong. There hasn’t been ANT+ power meter pairing issues in roughly a decade (and even then, it was just SRM).
B) What’s your toggle in the Favero App on ‘Zwift Compatibility’? I can’t remember for Uno, but I know for Duo if you’re going to BT pair it, you want that toggled to yes.
For A) That makes a lot of sense for always connecting power meters via ANT+. I’m new to using these sort of sensors (although I do use Stryd with my Fenix 6 Pro Solar) and so I am interested in how well the bike computer company supports features in general. Sometimes if one feature (BT pairing) is stuck in an issue tracker backlog there could be more issues. For B) I’ve not gotten the Favero yet. That’s next on my list!
Thanks for the review Ray!
One question – is it possible to separately configure uploads and downloads for platforms Karoo supports (e.g. only download routes from platform but not upload workouts to it)?
And the USB port placement is unfortunate – can’t be used to charge the unit while riding
I’m not seeing any obvious way to do that, though, maybe you could do it as part of the permissions you grant from each platform (for example revoking a subset of permissions)?
That said – on the unit itself you can choose which platforms you push the workout to each time. So for example I can select to not push to TP or Strava, which is pretty cool.
Hey, is it possible to test the GPS (once more?) with a camera (Cycliq or GoPro) mounted right at the bottom of the mount and recording? What I’ve seen is recording cameras give out harmonic interference (due to high CPU cycles and bad RF isolation I’m assuming) and they mess up GPS signals, so in the Wahoo head units (tested with all three) the track becomes inaccurate and/or it lags, so it would show your position as of 3-4 seconds ago. I was wondering if that’s the case with this unit as well. Cheers!
That said – I’m curious which action cam you have? I haven’t seen that issue on action cams since the GoPro Hero 5ish or so days.
And it’s partly because these days GoPro cameras don’t leave WiFi on. It’s only turned on after your phone tells it to turn on with Bluetooth Smart. Instead, Bluetooth Smart stays on for 8 hours from the last time you touch the camera/power off (it actually stays on for 8hrs after you power it off, unless you yank the battery). So it uses that to jumpstart WiFi.
Happens to me all the time with the newest Cycliq (FLY12CE) to the point that I consider stopping recording if I’m navigating an unknown/new route. Had similar issues with GoPro Hero8 but less IIRC. I’ve even gone to lengths to cover the back side of my Wahoo Roam with sticky alu tape to prevent that, but since I can’t ground it it’s next to useless (or maybe even making things worse).
It was happening on my first commute cam few years ago (a “Mobius Actioncam” + Elemnt Bolt at the time) which I had resolved by covering the inside of the camera with sticky copper tape and grounding it using the side of its USB mini connector. That cam had (still has, I use it as an under-saddle sometime) brilliant quality btw.
man you know I love your reviews but this one is hard to read af… one short paragraph then a picture over and over and over and over again – it is hard to have some sense of continuity while you read with that format. perhaps some people love it that way but for me just doesn’t work.
the unit is promising but I don’t feel like spending that type of cash over a proven wahoo/garmin unit. $250-299 then I will def give it a try.
Regarding the structured workouts. It seams that Karoo only imports workouts based on the calendar – so I understand it’s only upcoming workouts. So if I’m doing a sight seeing ride and I decide to do a 15 high impact interval run (that I haven’t planned for today) but I’ve done it already last week – it’s a no go ???
Correct. It’s kinda annoying. I noted it in the review, and also brought it up to Hammerhead. They said they understand the concern, but at the moment their focus is on onboard more partners, rather than making a repository/storage in the device for workouts.
I included a chunk on battery life – including exact % burn rates that I’m seeing.
Interestingly, I rarely actually hear concerns about battery life in cycling GPS units – namely because it’s rarely an issue anymore. Most units get 10-20 hours without much of a problem. The Karoo 2 is definitely on the lower end of that as I noted.
Your estimate is 8 hours versus the claimed 12 hours but their number could be with limited sensors and all battery saving features enabled.
Since it’s Android based you could sideload a battery analyzer app and benchmark it if you really want to get technical. :)
I don’t even have to sideload anything – the DCR Analyzer does it for me. :)
Wahoo, Garmin, Hammerhead, and Stages files all write the battery level to the .FIT file each time it changes. So, we enumerate that in the DCR Analyzer. See attached pic from yesterday.
Interestingly, Hammerhead didn’t write the initial value for the first 30 minutes, but did after that. Not sure why. Typically speaking though, I don’t tend to focus on battery values for under 30-45 minutes, because things are still warming up and stabilizing. The longer the ride, the better the data.
Anyone using the DCR Analyzer can load their files to see battery burn rates. It’s fun! link to dcrainmaker.com
Nice!
So if you wanted to you could charge up a pile of similar featured models from Wahoo, Garmin, Hammerhead, etc., ride the same route, then show the battery burn for each.
I say “you” because you’re the only one who has the pile of devices and mounts required. :)
I haven’t compared battery life yet with/without SIM (just without).
The weather looks pretty craptastic for the next couple days, but Sunday might actually be viable. My rough thinking is:
Hammerhead #1 – The Norm: Routing/Power meter/HR/Varia – 25% brightness
Hammerhead #2 – No Sensors: Just routing – 25% brightness
Hammerhead #3 – No Routing: Just sensors – 25% brightness
Hammerhead #4 – Clean: No routing/sensors/just GPS – 25% brightness
As for other units, virtually every ride I’ve ever posted on every other review actually includes the battery stats already in the GPS Accuracy section (if you click on the ‘More Data’ post). Notably on watch reviews you’ll generally see Edge/Wahoo stats in there too. My point is that while I’ll see if I can fit another 1-2 units onto my handlebars beyond those four, that I’ve pretty well established the battery burn rates for those other units.
They ranged from 4.67%/hour (Edge 1030 Plus) to 6.07% (Edge 530) to 7.59% (Edge 830). I would caution however that I wouldn’t overthink that random data point too much, because there’s a pretty darn (near 100%) chance that the backlight settings were different for all of them, and probably set to higher/always-on levels than not.
Is there a need for cycling computers when everyone is riding indoors? The integration between cycling computers and indoor cycling platforms is virtually nonexistent.
I agree with the comment about zwift’s companion app is terrible. No support for marking laps or customizing the data fields on the companion or desktop app.
I have a pending pre order for the Karoo 2 and thinking about canceling it. Ordering it in the spring / summer when riding safely outdoors is realistic.
If, for example, you care about the Firstbeat Metrics that the various Garmin devices offer, then you have to record on one of them along with doing your usual Zwift effort. Pushing the Zwift file alone to Connect won’t trigger the metrics to update, they have to come from a Garmin device.
If there was a subscription option to get the latest metrics online, then you could park the device and just use Zwift/TR/any of the other indoor apps. But that would hurt the hardware side of garmin as they tend to last for years without need of replacement (beyond a battery at the correct time). My 810 went from release back in 2013 to the Fall of 2019 when the touch screen utterly failed. My 5x is still going strong and looks like new after 3.5 years of daily wear, no need to replace it with the latest hotness.
I currently use a Garmin Edge 1000 and the only FirstBeat Metric available is the VO2MAX calculation. The Edge is turned off 98% of the time because it doesn’t receive the course information,etc from Zwift. It does report the grade, etc from the smart trainer and allows me to start/stop laps for workouts.
I would prefer that Zwift and cycling computer hardware companies would allow Zwift to send virtual GPS data allowing the headunits track on the course and show the course when uploading to Strava / Garmin Connect / etc….
“Is there a need for cycling computers when everyone is riding indoors?”
I use an Edge to run resistance-controlled workouts on the indoor trainer. It’s not a Zwift substitute, but it’s a Trainerroad substitute. Once they started charging $20/month on superfluous noncore features it just became too much.
+1 for head unit driven indoor workouts. Target power in my case this off-season.
Personal preference, but I like to keep my indoor & outdoor configurations as similar as possible. Indoor riding for me is just practice for outdoor riding.
I have a pre-order and not entirely sure why I placed it. Probably as I just want to have a closer look at it which means, as funds are tight, it might go back within the 45 days.
I ride with a Fenix 6X and will use that to record my rides as it includes metrics that I don’t get from any other device, and probably won’t from the Karoo. I use Garmin Connect as my fitness tracking hub (steps, sleep, body metrics activities all in one place) and TrainerRoad as my indoor training option with their planning. For route following I use a Samsung S10 on a Quadlock mount and ipbike software. For me, the Samsung only has a few drawbacks and they’re not showstoppers. Battery life, screen touch and perhaps the risk of an expensive phone taking a hit in a crash.
You should trademark “take my money features”. That’s brilliant.
Maybe it’s just me, but I have sports tech fatigue on the “promise of more advanced features in the future”, post launch. Wahoo, Polar, Hammerhead, probably more — it’s becoming par for the course.
Even for suppliers who actually have met these promises, it causes me to lose interest at launch, thereby creating opportunity for a competing product to subsequently move in.
I’ve been eagerly anticipating your full review as I am one of the earliest owners of the original Karoo (I’ll call it K1) and bought into Hammerhead’s vision because of the promised incredible mapping abilities. Two of my three biggest complaints with K1, size/weight and lack of a beeper have been solved with K2. My biggest complaint has been the short battery life. I can’t seem to get more than two hours of life out of my K1 no matter how many of the battery saving measures I activate on the unit. The support team at Hammerhead has no answers that increase battery life.
Your K2 review and your reply to Francis Bacon (comment #50) do allude to industry lagging battery life. In your comparison chart you note, “12 hours claimed,” battery life. The word “claimed” indicates to me that you may not believe that number. I think that Hammerhead claims 10 hour battery life for the K1, though I don’t recall the exact number at this moment. The issue is that I’m getting only about 20% of claimed battery life on the K1, even with battery saving measures enabled.
What do you think is the real world battery life of the K2? That answer will play a critical role in my decision on whether or not to buy a K2.
Correct. The database always lists ‘claimed’ time versus not. In this particular situation, given my testing results, I decided to add the ‘claimed’ descriptor, since it was substantially less than claimed. I usually only do that when I see substantial differences.
In my most recent test yesterday with multiple units, the unit that was ‘clean’ with no extra screen recording or such, averaged 12.46%/hour, thus, ~8hrs of battery life. This was on low-brightness (~20ish%) for the entire ride, and on a regular data field for the majority of the ride. It was paired to an ANT+ power meter, ANT+ HR strap, and ANT+ Varia radar. It was also navigating. And, the temperature was basically 0* to 2*C.
Most of my tests have been with screen recording enabled, which burns battery like nobody’s business, so I didn’t want to use those otherwise in my battery testing results. In those cases, with screen recording it averages about double that.
I’ll do some non-navigation-enabled battery tests side. I’ve got a small flotilla of units, and if the weather doesn’t suck, I’ll put a bunch on the handlebars to see which things impact it the most. Though, typically speaking cold weather is one of those things that does indeed largely impact battery.
Finally, these days it’s very difficult to do accurate battery life testing in a ‘garden’ type setting, where you just leave it there overnight or whatever. Units and GPS subsystems now know to go into a sleep/lower power state when not moving, and they can also lower power to other systems when an accelerometer detects lack of movement. Plus, lack of movement means no navigation prompts, etc… ANT+ sensors is however easy to test overnight with an ANT+ simulator.
Ray,
I and I’m sure many others will thank you if you can validate this battery issue and bring it to Hammerhead’s attention. The Karoo is simply not a viable solution for serious riders until it has a realistic minimum battery life of 5 or 6 hours.
Plus one on only getting two-ish hours from a K1, one hour if it’s cold, with many attempts to rectify via support and resets. Now I duct tape a lipstick sized battery to my stem and have it charge all ride. Since I primarily use the device for navigating backroads and ‘gravel’ exploration, this is a really big problem, and also why, as a K1 pre-order person, I did not pre-order the 2.
Megan, As much as I would like to because of the K2’s feature set and usability I have been holding off on upgrading to the K2 as well. I really need to have an acceptable battery life prior to buying the K2.
Killer review, as always! The Strava Live segments look especially awesome.
Really wanting this for Mountain Biking – does the Karoo map system include a lot of mtb trails? Does sideloading the Trailforks app work pretty well / have you been able to test that at all? I’ve heard mixed reviews.
I wish that Hammerhead would acknowledge that for some of us, the SIM card / WiFI requirement for syncing is a reason not to buy this product. I just don’t see any reason why I would want a bike computer that needs a SIM card to sync rides when I’m in the parking lot, when others (like ELEMNT) can just sync using your phone. It’s not like I ride anywhere and not have my cell phone on me.
SIM cards come with expenses and monthly fees, and the cellular modem and antenna in the Hammerhead to support it must come at a cost, both regulatory and hardware wise, that they’d be able to make a cheaper product that didn’t support cellular.
Someone explain the reason why they persist with SIMs, that doesn’t include the phrase “well SIM cards are cheap in my country”, because syncing via phone costs me $0.
Perhaps Ray or someone from Hammerhead will offer their insights. Early in his review DC did mention that Bluetooth sync is targeted for 2021 so at least that specific functionality gap may go away.
A company attempting to challenge an incumbent like Garmin has a few different ways of going about it. It is possible the Karoo team views the ‘droid base and built-in cellular as pivotal in their plans to differentiate themselves from the competition. Otherwise the major appeal is the display & UI aesthetics.
Tethering to a phone app for in-ride networking is certainly a viable alternate choice. Going that route does somewhat permanently commit resources to refreshing the app on the phone vendor’s schedule. Some of that is unavoidable if you provide any kind of companion app at all. Many successful companies are able to do so, but perhaps the Hammerhead decision makers aren’t enthusiastic about that for the moment.
There are enough dead spots in my phone carrier’s coverage that a data-only plan on another carrier for a cycling computer would be useful to me. I would like to think cellular dead spots are getting smaller & more rare though.
The K2 has a physically smaller screen than the K1, but higher resolution… In your opinion, does the increased resolution compensate (or better) for the physically smaller screen size of the K2? i.e. Is the K2 easier, harder, or the same to read versus the K1?
Against my better judgement, I put in a pre-order with the rationale that it would be easier to get out of an order than get in line at the last minute. I finally jumped ship when they sent the email about delays.
The Karoo, and it sounds like the Karoo 2, is a hard one to place. They’re not doing anything terribly inventive with their platform, but they’re also not doing anything especially substantive. It’s miles behind Garmin on features, with only a good screen as your reward for making the compromise (and I will say that the screen, while “better quality” was never easier to see than the Garmin’s when out riding, especially before they optimized their layouts and made their maps higher contrast). I do think the mapping is excellent, but I have a hard time making that endorsement too strongly since it’s never worked reliably for me.
In truth, the things the Karoo does well are nice-to-haves while it lags behind everywhere that matters. And Garmin could just as easy throw a screen of this quality into their devices – I’d wager it makes up less than $5 of the Karoo/Karoo 2’s cost, and Garmin would get it even cheaper. The reason they don’t do it is because it causes all the problems that Hammerhead has with the Karoo: you get into an arms race using a huge amount of battery power to run it. The end result is a device that has a high-capacity battery and powerful processor with nothing to show for it in terms of battery life and features. Just a big and heavy device wasting all its power on its screen and OS. It’s not a compromise any cyclist would make.
That’s the problem they have to solve – not just slamming a cheap smartphone screen into a bike computer. But honestly, I don’t have faith in this company, and frankly I just don’t like them after their behavior during the Karoo launch. They lied to their own customers then and have pathologically lied ever since, even about things that really don’t matter. Hell, that line above about “we’re not selling more until spring for very smart reasons” is such an obvious obfuscation of the fact that they were waiting for the money from the first batch to come in before they could produce a second batch.
Yes, you’ve always been able to do this from the original Karoo. Having a wifi hotspot running on your phone might be a big battery drain though. Personally I use a free sim from Three(UK) that gives 200MB a month, which is fine for uploads/routing.
Is it possible to use the sim on the karoo and generate an hotspot from there to connect other devices?
I’m trying to find a solution to not bring the phone with me…
The Karoo maps are pretty incredible for hiking too. As a mt biker, I’ve gotten myself into trouble by following hiking trails I can see on the Karoo, so I started using it to discover hiking routes too. It’s really great!
Not sure I see anything pivotal with the K2 to lift me off my Wahoo Elemnt… don’t get me wrong, the nav screen, rerouting tech is nice, but that’s not *that big a deal* to get one now… Considering they still have/need to grow before they’re evenly competitive – and incorporate some must-have innovation (whatever that might be!), I’m guessing it’s still a waiting game…
I have now some weeks the Karro2, and my experience is good.
Also i use a SRM PC8, Element Bolt and my wife a Garmin Edge 1030….
So i know what the difference between Software and Features….
Normaly i used the SRM PC8 for the Training Races and Marathons.. and there you know the Profile and Streets, so i missed nothing like Navigation or map.
But with our Covid Situation we do a lot Routed Cycling tours but with the SRM PC 8 NO WAY….
The Element bolt is small, light und easy to use…. but the Display is also small !
So i do a Pro Order for the Karoo2…. don’t talk the Price…. :-)
The first impression from the Karoo2 Display is WOW… also the Zoom IN OUT Option in the Map is realy great.
At this side. The maps here in Bavaria are very detailed.. als very small single Trails in the woods, and the new street that opens 2 week ago is also in the map !
The Hammerhead Support answers normaly in one day… and the have a nice to find FAQ
Strava Segments Function is nice AND you can see all marked Segments from you in the map when you ride.
Battery Lifetime for me is at the moment OK
I ride at the moment 1-3h and i lose 7-10% per hour at 0 Degrees with Powermeter, Speedsensor, Heartrate and Phone connected… and with 10-35% Display brightness… i wait for the summer time too see the difference.
At the Moment i can touch the Display with my gloves, but this varies with the gloves.
But you can use the Buttons for switching the Display and ZOOM IN and OUT.. !
The Upload to Strava and TP is very fast, also to download the routes from komoot is very cool….
And now the small Problems in my eys:
When you Upload your ride to Strava, the AVG W and NP is always smaller then in the overview…
z.B. you ride 210W AVG then says Strava 185W AVG ….
With this “Problem” i’m in contact with STRAVA and HAMMERHEAD….
Then my SRM PC8 have the same AVG Power like the Karoo2… so what ?
Both have 1sec Record Time an include 0W for calculation AVG Power…
At TP both looks right like the file from the SRM PC 8 and Karoo2.
And the Starting Time is a little bit to high at the Karro2, but it have the GPS right away.
The SRM PC8 starts faster gut you have to wait 3-5 Minutes for a good GPS Signal….
Also a ClimbPro Feature from the Garmin will be nice to see at the Garmin….
But the Karoo2 shows at routing the upcoming Elevation with zoom Option… this is more than nothing.
Also nice will be a Small / medium / Large Font for the Datafields at the Map Overview.
Ok, that’s my Experience for the first Time with Hammerhead Karoo2
Thanks Ray! I was waiting for that review.
I am looking for a cycling computer mainly for navigation in 2021. What would be better:
Garmin edge 1030 plus or Karoo 2?
After reading your review I have mixed feelings. What would you choose?
I think ultimately they’re pretty different beasts (though, at current pricing, an Edge 1030 -non-Plus) is only $60 more on Amazon.
Still, I think the Karoo 2 would largely struggle to compete against an Edge 1030, just as just about every other bike computer would struggle to compete against it feature or functionality wise. The main advantage the Karoo series has over the Edge 1030 (or any Garmin device) is simply the beauty of the routing/mapping/navigation screens, as well as speed. Though practically speaking the routing/navigation accuracy in my experience tends to be better on Garmin’s platform.
As noted, there are other nuances between them that are worthy to consider Karoo, but against an Edge 1030 that’s a pretty tough battle for anyone but Garmin themselves.
+1 on pass… not just cause of the 2nd string tech, but because it price point would suggest its competitive or better than the 1st string (Garmin, Wahoo, etc)…
Thanks Ray.
I was holding off on the Edge 1030 deals, waiting to see what Hammerhead does. With about half my rides off-road, it looks like there’s a real downside to Karoo in terms of map support. It seems that at this point the reaon for Karoo 2 instead of original Edge 1030 are potential updates (HH seem to be adding features over time), side-load apps that add functionality, and the world wide maps (although not as good for off-road). I was really hoping this would be an easier choice, but at $450 the 1030 is hard to compete with
Is this not like comparing Windows (Garmin) and Mac (Hammerhead)? I would argue, this is no longer a feature comparison but a generational one. I’ve had a 1030, then switched to a Roam, then switched back to a 1030+ hoping Garmin would have ironed out their software bugs and generally improved the OS. Unfortunately, my hope was unfounded – the Edge 1030+ was released with software 2.20 that wouldn’t even work out of the box and needed a Beta installing just to synch with an iPhone. And whilst I enjoyed the Roam more with its iPhone App, over the spring and summer, Wahoo dropped the ball on their own updates killing Strava integration for weeks on end and well as activity synching.
The reason I’m switching to Hammerhead is not because its got a better screen, its because its got a more modern platform underlying it. It seems to me to be a generational leap. And whilst the Garmin may have more ticks on its list, I want something that is better for the 90% of the reason I use it. My only concern so far, having not yet received my Karoo 2 is whether Live Track is good enough. It’s a feature I value as a critical safety capability – but that is easily fixed. Meanwhile, Garmin requiring multiple bluetooth sessions with the iPhone that have rarely worked reliably for multiple generations of product would seem to be a much more complex engineering challenge to resolve. And, judging by what both Wahoo and Garmin are doing elsewhere in their product portfolio, its seems they are tied aggressively to their ageing software, trying to sweat out and stretch a code base across head units and watches, when it might have been better to retire it and start afresh.
Live track is critical to me, too, so that my wife can track my rides in case something goes wrong. Works “ok” with Wahoo, sometimes the tracking stops updating, but at least it’s just a link she can view in a browser. If I understand Hammerhead’s implementation, the person viewing the live track needs to register for a hammerhead account to even see it… That’s just dumb. I don’t want to have to ask my wife to have yet another account for something, or friends I might send a link to to track bigger rides.
I’ve just put down my $$$ for a Karoo 2. I was tossing up between sticking with Garmin – the only brand of cycling computer I’ve used – and testing out the new kid on the block. I went with the Karoo 2 as a) it looks like a really good unit, the graphics look very clear for my failing eyes, and b) I’m a bit over the Garmin ecosystem and clunky menu structure. I have to admit it was a close call between the Garmin 530 and the Karoo 2, but I’d really like to see the Hammerhead platform succeed and drive some real change in the head unit market.
Finally got notified to complete my pre-order for the Karoo2 and decided to purchase it. Looking forward to it and thanks for the detailed review which helped me to make an informed decision.
Great write up. I just received the pay up and we will ship email! I believe I read in your summary that it will link with electronic drivetrains? So my AXS & DI2 info will be available on screen? I don’t suppose my hood buttons on the DI2 will toggle screens like my Garmin though? Thank you!
I think I’m in the late December pre order group so I’m watching for an email soon as well. Your gear info should show on the karoo and the Di2 hood buttons are used to navigate screens, zoom the map, etc. That was one of the features I needed to confirm before ordering.
Hi Ray,
Thanks for your in depth review. I’ve had my Karoo 2 for over a month now and it seems to be working fine. Some little annoyances as you have detailed. The most significant issue for me was on my last ride, I got the red ‘Ride not recording’ banner. Not had this before and I hadn’t touched it and I was moving. I stopped and it auto paused and went away, as soon as I started again, it came back. I pressed on the banner itself and it went away and appeared to continue recording. My Strava output shows that it wasn’t recording during this time, so just a straight line. Annoying! If you or hammerhead figure this one out, can you update us please.
Thanks
My understanding is that it’s tied to auto pause, but also, there was some conversation that it had to do with going off-route. I’d have to dig into my notes on that one.
No, unfortunately nothing of that nature at this point.
I don’t know if that’s on Zwift or Hammerhead as a blocker. My guess would be Hammerhead would need to request it from Zwift, but given that Hammerhead doesn’t really have a platform that’s designed to track training at large (beyond just looking at quick ride data), I’m not sure there’s a huge incentive to do so.
True. I had the same thought later. It would be nice to use the Hammerhead Dashboard as a consolidation point for activities. I guess Strava will be my activity consolidation point.
True. I had the same thought later. It would be nice to use the Hammerhead Dashboard as a consolidation point for activities. I guess Strava will be my activity consolidation point.
Im growing increasingly frustrated with Hammerhead and their customer services team.
I made the final payment for my Karoo2 over 2 weeks ago and in spite of several emails to the support team still do not know when I am going to receive my unit.
The standard response seems to be “soon”. This is the response I received today “Your final order for Karoo 2 is intact. We are aiming to ship your unit as soon as possible and you will be getting a separate email including the tracking details as soon as it has been shipped. We are almost there!!”.
I know they are a small company and can tell they are struggling with the logisitics around this product launch but come on guys! The units were originally due to be shipped in October!?!
This is rapidly taking the shine off of the whole purchase experience.
IMO, nav with the great screen is it’s big selling point over other products. This is exactly why I went with the K2 over another 1030. Triathlete . com also reviewed the karoo 2 and said essentially the same:
“If navigation and “geography”—things like elevation, routes, and turn-by-turn directions are important to you, there isn’t a better computer out there.”
Though not nearly as good a review as DC’s, it came to the same conclusion as Ray did – the display and nav are it’s strong points.
I agree with all you say. I think my main hesitation is (1) the battery life; and (2) the comments of others that suggest Hammerhead is very much experiencing growing pains – the comments remind me of a lot of comments re kickstarter projects. There also seems to be a lot of promises about features that WILL be added, and I tend to be in the camp of not buying products based on promises but rather on the product as it ships today. Product features do have a way of being cut and de-scoped. And looking at the Karoo 2 side by side on Ray’s chart today compared with Wahoo Roam and Garmin 830, it just doesn’t tick as many boxes for the same price.
That said, it does look like a terrific screen and although the UI is a “dumpster fire” in places, it looks better than most others. It’s really hard to resist the allure of that screen. :)
For me, I’m looking for something that helps me navigate the large city I live in but don’t know very well by bicycle, and can stretch for use on bike packing excursions to small towns outside of my city when the weather’s nice. I don’t generally ride more than 8 hours, so the battery should be fine in the first case, but in the second case it would be nice to have something that can take you a full day (16-20 hours). I tend to carry a small battery pack to recharge my phone in my bag already, so perhaps using it to charge the Karoo 2 on a long bike packing trip isn’t a big deal. But it would be so much better if I could keep that battery for my phone and get 16-20 hours from the Karoo 2.
I have to say, I’m getting sour on tech companies and batteries generally. Garmin’s work on solar with the Instinct watch lineup this year is a direction I’d love to see all tech hardware companies move towards. All this movement to reduce the size of bezels…. but imagine if the bezels on the Wahoo Roam, for example, were solar charging strips… it could probably have unlimited battery life. That’s a win for the user and the planet.
You summed up my exact issue w/ the K2 and what is making my decision hard: you are buying what it CAN be, not what it currently is. Unlike you, I do have faith in the company. They are a young company finding their way. And I think they have shown that they are committed to making major improvements. But it will take a couple of years to make up the difference, and the battery life isn’t great. What happens after a few years when the software finally catches up, 6 hours or less?
I have a pre-order. But I’m pretty sure I will cancel it and get the 830. The K3 should be amazing though :)
It looks like I should be getting mine in January. Karoo 2 software supports structured workouts imported from my Training Peaks account. I’m planning on also getting a Kickr Core smart trainer for the ANT+, FE-C type with ERG mode to execute my workout. I’ve primarily been using TrainingPeaks for running plans and I’m not keen to simulate manually that on our Peloton. The only thing I need to work out is whether my Shimano HG50, 9-speed, 11-34t cassette on my Specialized bike will work with the Kickr. So I will need to research that some more.
Thanks for the review – very nice. I pre-ordered a Karoo 2 on Oct 16th and was just notified with the following status:
“Your order falls into Batch G [you can see all Batch shipment updates here], meaning that our website will open for you to complete your pre-order the week of January 18th, and you should expect to receive tracking for your Karoo 2 the week of January 25th.”
First, this seems like a very good update – unlike what others have experienced that received very vague updates. Good job Hammerhead! Secondly, I’m moving forward with my purchase because its strengths around nav and display. As a ride leader, I will use this to follow routes made with RideWithGPS and that’s about it. I have a Fenix6 that I use for all my hiking, running, cycling etc activities which connects my Assiomo, HR and speed/cad sensors. I don’t use the watch for nav cause it basically sucks due to screen size. However, I do have a Garmin light, so I am hoping Hammerhead adds support for ANT+ lights. it is really nice to be able to control the light with the headunit like I did with my 1030 (which was recently stolen). I have been using my smartphone with RWGPS for nav, but the battery life is simply unacceptable. I really do not want my phone involved with my activities so I can use it for phone stuff like calling the wife and taking pictures – a dead battery is not good if I have a mechanical and need a ride.
Honestly, I’m a bit pissed off I even bothered pre-ordering. I put mine in on August 25th, just a little too late to make the first batch, but still within the first day or two that pre-orders were even possible.
I assumed there would be delays, and that’s not really a big deal to me, it’s winter time, riding outside is a crapshoot right now anyways. Then I saw the email about the 75% off jersey offer, and thought, well, at least that’s a nice way to reward all the people who pre-ordered so early. But no. The whole pre-order option is completely open again, so there is absolutely no advantage to me, despite having put down a deposit four months ago. If I order now, I still get the Garmin adapter, and can also get the jersey offer. What the hell was the point of putting in a pre-order in August then? I haven’t completed my order, because honestly, this is already leaving a bad taste in my mouth, what a crappy way to treat people who put money down early.
On top of that, when I put in my pre-order, the price was 399 USD, the pre-order deposit was 99 USD, and I was charged 85.04 EUR, which led me to assume that the price would be 399 USD in the end for me here in Germany. But no, the price is now 399 EUR, which converts to 485 USD. Yes, there’s about 50 EUR VAT that needs to be covered, but if they can’t figure that out during the time of pre-order, then they shouldn’t bother doing sales outside of the US. Is the thing worth 485 USD? I think I’d rather have my pre-order money back, and wait until some of the long-term reviews start coming in. If TrainerRoad integration doesn’t make it, I don’t want it anyway.
Regarding the woeful interface to pause/stop/resume, perhaps suggest to them that any button press that results in a confirm/cancel response should see the confirm/cancel buttons places totally elsewhere on the screen. This avoids problems with double tapping.
And while we’re at it, avoid contextual words like “confirm/cancel” and make them actually describe the ultimate action being directed: “End recording”, “Continue recording”, etc….
Wait, so the only way to get at your data is via uplink to their web site (in the way Polar does it)?? That’s HORRIBLE. That means if they have internet issues, or business issues (go bankrupt), you have an expensive brick. That’s just *HORRIBLE*.
It’s one of the many reasons that I’ll never buy a Polar product again. They’ve had multi-day server issues that holds the unit and my ride data hostage. With my Garmin and Bryton units, at least I can grab my data via direct USB connections.
You can still access it. If you turn on USB MTP mode on the unit, then it’ll surface as a USB drive. The .FIT files are located in: k2\Internal shared storage\FitFiles
Now, Hammerhead could make this slightly easier pretty easily by offering a more easily accessible toggle to turn on MTP mode (and have it stay on). But if ya need it, it’s there with a few extra taps.
Yeah, so at a basic level it’s not by default, so you have to toggle developer options, then toggle on USB to enable it. Technically silly easy (literally just tapping a small of times). So didn’t think about it there.
Yes they should do this – easy option to enable USB file transfer – the tap on Build version hidden “developer options” –> USB options through Android should not be the only way you change the USB composition on K2.
OK, so I’ve done it. Pressed the Order Button. Does anyone know roughly what kind of data usage this thing really has using a SIM? I really value Live Track capabilities.
Lets say you do 100 miles per week and then get home to do the data upload where its hooked up to Wifi. What is it actually sending/receiving? What kind of data plan have others bought to use this feature? THANKS!
I decided to follow through with my pre-order. I’m in the last group aka late January. Hammerhead has been making steady improvements with each software release. I hope Hammerhead will add more integration with online services, improve battery life, add Phone data tethering using Bluetooth, and correct some of the UI oddities.
The main reason I’m switching from Garmin 1080 is the syncing with phone and computer. Garmin has just been to inconsistent. Did you find any issues syncing this with Strava and other sites? I had just been waiting for something to sync better and offer Varia Radar capability. I don’t train or do anything else so hoping this is a good move.
I didn’t see any sync issues, but then again, there’s no Bluetooth to Karoo 2 sync at all. The only sync is via WiFi, today anyway (sometime in 2021 they’ll add Bluetooth Sync).
Like you, I’ve long since hated the Garmin Edge sync process (specifically the Edge, compared to other Garmin devices). But my WiFi sync pretty much works without fail, and is how I tend to sync most of my test fleet of Edge devices for recording power meter/trainer comparisons, etc… these days.
So in essence, if you compare those two aspects (WiFi sync vs WiFi sync), it’s a wash. Where the Karoo 2 is far better on WiFi sync though is the ability to do maps and such via WiFi, versus Garmin’s USB connection only there.
Coming from both Wahoo Roam and Garmin Edge 1030, it’s really a new kind of bike computer. Recieving mine a few days ago, I did already several rides with.
Screen is amazing, UI, design, … As granfondo and ultra rider, I’ll see if it can hold 200 to 400k (14-15h) as my Roam and 1030 did (powerbank need?)
But to be clear, this computer is like your first smartphone .. a non return to old technologies ?
I paid 380€ … just a few more than a Roam
I have done a ton of research, looks like the only Normalized Power you can display is for the full ride? not for the current lap. Can you confirm that?
Also.. i do have the Zwift apk downloaded to my computer, and figured out how to access the Karoo2 directory via USB; however, there’s no system folder access nor a folder by default that would be used for sideloaded apps. Where did you load your Zwift companion to on your Karoo?? Thanks!!
Hello William or DCR, can you send me some instructions on how to sideload the zwift companion app to the KAROO 2
And can you tell me if it is then possible to use the wristheartrate broadcast function of the garmin Fenix 5x to send thru the companion app to Zwift ?
You can actually follow my Peloton instructions if you want, they’re virtually identical: link to dcrainmaker.com
The only difference is instead of tapping the about box 10 times, you’ll tap the build number 10 times.
And of course, instead of downloading the main Zwift app, just download the companion app (it’s more simplified and you can follow the TrainerRoad section but swap it out for the Zwift Companion app).
On the Fenix 5X, it broadcasts via ANT+, not Bluetooth Smart. I don’t believe Zwift Android allows ANT+ connections, only BLE: link to support.zwift.com
Thanks, but might the Karoo not function as a bridge for ANT+ ? I do see my Fenix 5X HR broadcasted to the Karoo, and might the companion app then send it to Zwift
So I was told that I was in Batch E by Hammerhead. I pre-ordered in August and completed payment in December. Batch E was supposed to ship by end of last week. But I then got an email that I’m now in Batch H. It’s a bit disheartening that for their second bike computer they haven’t figured out how to manage orders properly. At this point I’m going to cancel my order. I note they changed their email from allowing me to cancel ahead of time or return it in 45 days to just return it in 45 days. Since I’m leaning toward getting a Tacx I may rethink my choice and go for an Edge of some sort.
Yeah, I was wondering about that too. Seems like a poor solution. Pretty much every other head unit in the world has some sort of integrated charging port cover. :(
Good news. I got in touch with Support and they corrected my order and it is now shipping. Looking forward to using it with my new bike, Giant Contend AR 1 (2021) which I picked up today!
Thorough review as always, but a couple of questions… you comment that for navigation the Karoo2 is best in class but spend most of the navigation section of the view ranting about what it does wrong. What is good about Karoo2’s navigation? Also what approach does it take to re-routing when if you get off route – re-join farther on or route back to divergence point? Can you select preferred method?
I’m not sure where I said it’s “best in class”? I said “the overall navigation and display experience is unlike anything else out there” – which, it is. There’s nothing like it. It doesn’t mean though that it’s the best in class from a navigation perspective.
I’d suggest re-reading the Navigation section again, noting where I discuss importing or routes for example, or overlays of Strava Live Segments on routes, or speed of re-routing. I also discussed exactly what happens when you go off-course.
Ah, well yeah, I suppose “unlike anything else out there” could be a bad thing too, but it IS a tiny bit misleading n’est pas? And actually, I read the review, a couple of times and again just now, and all I really see is complaining about phantom turns (which all units experience and none handle well IME) and lack of clarity about buttons etc. Honestly, I also don’t see how Strava segments quality as “navigation” either. Strava segments don’t get me from Point A to Point B in a strange town or put me back on route if I make a wrong turn. Maybe more time discussing features like in most past reviews and bit less trying to be clever/obtuse?
Thanks, but might the Karoo not function as a bridge for ANT+ ? I do see my Fenix 5X HR broadcasted to the Karoo, and might the companion app then send it to Zwift?
The problem is that the Zwift companion app doesn’t bridge ANT+ signals, only BLE signals.
Now…there may be other ANT+ to BLE Android apps. I’m almost certain there are, I just haven’t looked anytime recently. In which case, that would solve it.
So here’s what sucks about the Karoo and is pretty much a deal breaker (or while I’ll be sending mine back, should have read this first)
1. No crash detection? Really?
2. In this day and age, why not include a front camera for crashes or whatever, cost is actually close to zero.
3. Is anyone really going to buy a SIM card in the US and spend $10 a month in charges?
4. It would be clever if they could take a beast of a road ride or gravel ride and replicate on smart trainer.
1) I find crash detection a PITA. Especially for mountain biking.
2) No head unit has a camera. Seems like a funny reason to point a finger at Karoo for this, By this logic you shouldn’t have ANY head unit.
3) I’ll get a SIM card. It would be nice to have tracking without needing to remember to start something on my phone. Another option would be to use my phone as a wifi hotspot.
4) That’s on the roadmap.
I finally got a Karoo 2 since they added a beeper. That was death for me for Karoo 1. After using it for a couple of weeks I am happy. The screen is easy to read. Setup of data screens is easier than any other unit I have used. So far, so good. No major issues for my. Does it have every single feature that Garmin has? Nope. But I never use 95% of them anyway.
How can I control the Indoor Trainer (like Wahoo Kickr Core) without a workout from TrainingPeaks.com? Is it possible to manually control the Watts or %?
Go to the activity on the right-hand side should be a button for “Show More”. This should show you the high-level details for your ride including calories burned.
1. On-unit calorie estimates <– Only available through a power meter
2. Post-ride calorie estimates through Strava
Strava can be a web of sub menu's etc. I tried to provide some direct links to what's referenced above.
Strava estimates your power output with or without an actual power meter. Virtually every unit or website can do it based on pure PM data. Training Peaks can estimate is based on the HR too. Strava can guess your power output without an actual power meter.
1. Add your bike to your Strava profile (My Gear) with a realistic weight.
2. Add your personal body weight when you're fully suited up for a ride (bottles, etc)
3. Make sure your cycling computer records every second vs smart recording
“Or how company serious about fitness would design a computer but omit this metric.”
A company serious about fitness will also know that guesstimating your calories is borderline worthless. Even adding in heart rate data, it’s still going have an error of 10-20%, so what’s the point of bothering with it? A power meter will allow the Karoo to calculate actual work done and energy expended based on wattage, which allows for a relatively accurate calorie count. You need a way to measure energy being used, if you don’t measure that, there’s no way to get a meaningful calculation. This applies to any fitness tracker, not just the Karoo.
Are you an employee of or affiliated with hammerhead?
I am beginning to get the impression you are trolling.
From hammerheads own staff
“As of now, our calculations are based on Training Peaks and calories are calculated based on the Power. We do not have immediate plans to change the calculation but I will definitely bring this up in the Product meeting.”
This was almost a year ago now. Just after the Karoo was released.
You can read this as Karoo does NOT Calculate Calories
LMAO. No I’m in no way affiliated or employed by Hammerhead. I’m just a guy that’s trying to figure out a way to get you calorie estimates one way or another. Karoo doesn’t do it and thought Strava could be used as a method to get you some calorie burn information. I use my calorie burn info with myfitnesspal and appreciate your need for it. Karoo was a dead end. I tHought strava could solve the problem. Why swim upstream…
While I’m not affected (power meter). It sucks for people who don’t have a PM and Karoo could license the FirstBeat algorithm like others and put it on the Karoo.
Dwayne is right. Some companies do the HR calorie estimates good and a lot do it terribly.
I’m just a fellow cyclist trying to help figure out a method to get you calorie burn information. I do not work for or affiliated with Hammerhead. I thought Strava could help since the Karoo doesn’t support it.
I think everyone is right, albeit with different perspectives. Gil is correct that many companies do calorie burn crappily, with only a few doing it really well. And among the best that is often easily wrong due to so many aspects. No company claims to be 100% perfect for every human in this area.
That said, I would agree that not providing any basic calorie data at all (for non-power meter users) does seem like a miss, especially given either licensing those algorithms or even providing relatively rudimentary calorie burn metrics using well understood equations would be an assumed baseline for a $400 device (since most $50 activity trackers do that as well).
Heartrate is a poor indicator of calories burned because it is a lagging indicator. Your heart rate goes up a few seconds after you increase effort and the lasts too long when you are winded at the end of the effort. Buy the Assioma Favero pedals, they are excellent and reasonable PLUS you can move them from bike to bike. I’m amazed what my Apple watch estimates versus my powermeter pedals.
I don’t see any value beyond total KJ output. Which is indeed provided by the K2. People should do their research and understand the mechanisms involved, beyond that? It doesn’t seem like algorithmic estimates are helpful here.
It seems to me that by having a SIM card you can both upload the ride and have live tracking without the use of a cell phone. Are these the main advantages or are there more? Also, since this is not an American made product, does a CDMA sim card say from Verizon function in this unit?
How do you actually go about getting a SIM card working (besides going to the Verizon store)? Does Verizon even work? It’s not in the Karoo approved list. Do I need to ask for anything special from Verizon? Once I have the card what do I do (besides sticking it into the Karoo)? Is there setup or configuration that I need to do?
This topic is , in my opinion, poorly covered in the manual.
I think you can order it. Verizon doesn’t use odd radio frequencies and should be widely supported. Do you have a link for the Karoo 2 that outlines which wireless protocols (LTE, 3G HSPA, etc) and radio frequency bands it supports?
What do you think to the charge portal covers? Just received my Karoo2 this afternoon and in a small ziplock bag were two little rubber bungs for covering the charge portal. Slightly worried I’ll lose them as they aren’t attached to the unto itself like my old garmin 1030
Apparently it’s waterproof without those plugs. I suspect it’s more for dust, dirt, and mud fouling up the connector. Still I think the little flaps on wahoo (and garmin?) are a better solution.
Hello,
Great review, but I’m still wondering about Di2 compatibility. I now have the Karoo2 and have been unable to set it to beep an alert when the next shift will cause a chainring shift in S2 mode, as my Garmin 1030 does. I don’t think the Karoo2 can do that. Not sure.
My Karoo 2 arrived today and will test this tomorrow. The karoo does have a data field for Di2 gear position and didn’t see it listed in the audio alerts section.
I just checked. The Karoo doesn’t notify you that the next shift will result in a chainring shift like the garmin. My Edge 1000 does it. I found it useful and helped me not be surprised by a shift.
Just a quick note that a few of you have asked recently via here in the comments and the contact form, for instructions on how to side-load Android apps on your Karoo. So…I wrote it up:
Great video, thanks! Question – does it look like uploads go direct from the device to Strava, or do they go via a Karoo server? Obviously Karoo isn’t as big a company as the likes of Garmin or Wahoo, so if Karoo and their servers went away tomorrow, I’m wondering whether the ability of the device to sync my workouts would be affected.
Does it still require Karoo servers to upload a ride? I thought perhaps the unit would upload directly to strava as it has a wifi connection. If not, that should be improved. Curious as the Garmin Connect downtime issue last year left many convinced that there was no way to transfer their ride files…when of course USB was always available. This is an opportunity for HH to differentiate.
Can anybody comment on the following?
1. How does Trailforks sideloading look?
2. How does MTBProject sideloading look?
3. Can I keep those apps running in the backaround or foreground and toggle between them and the built in system while riding and recording rides with the default OS?
4. Does the Karoo do anything special with OSM (OpenStreetMap) “TRAILS” that have tags for cycling or mountain biking? Meaning, do they stand out on the maps better than horse / hike trails in a congested area?
I’m really considering selling my Garmin based on the improvements made here, but I need to know those options for MTB work. Sure, it’s a pain with a Garmin to do custom maps, but it *is* possible. Aside from that, I don’t care about or use Garmin’s training metrics on the 830. I got it for navigation, which it kind of sucks at.
I also wonder about this. With my old Garmin I use custom maps, like the one based on mtbmap.no which gives me color-coded trail difficulty for mountain biking – basically for any European country (I would just need to tell my friend to generate it if I want to visit a country not yet listed). Screenshot examples at mtbmap.no/garmin :)
Great review, thank you !
You mention the option of turn by turn voice navigation using a bluetooth headset. Have you tried it? It would be great to hear how that sounds and looks on one of your ‘on the bike’ video’s.
I did my first ride with the Karoo 2 tonight. It was an indoor ride which eliminated the possibility of testing the navigation features and Strava segments.
It’s good, but different. I set up a profile that mirrors my Edge 1000 data pages. Again this eliminates the ability to test the advanced Karoo visualization features.
The good:
amazingly clear screen
fast page changes
Karoo 2 & Karoo mount hold my iPhone running Zwift companion app great! It would fall with the Garmin Edge 1000.
I do like the karoo native mount. Again different than the Garmin quarter turn, but prefer it.
Setup was pretty easy
The So-So:
Battery… The % of battery life is listed on the top. While the garmin is hidden under a menu. It felt like the battery drained faster, but could be me staring at the battery percentage field.
It doesn’t have Di2 Syncho Shift warnings like the Garmin. Nothing like a front gear change at the wrong time to scare something out of you.
The buttons for pause and stop ride are annoying, but I’ll adapt. Counterintuitive swapping positions as Ray mentioned…
Other:
It shows you all of your iOS notifications. Not just messages. A little too much information.
I wish the larger data fields would be center justified vs right justified.
I still have a lot of tuning to do with the data screens and exploring the Karoo unique features. Hammerhead could have an amazing head unit if they resolve some of the annoying missing features and minor UI improvements.
Correction: You can disable notifications from your other iOS apps.
Go to: Settings –> Phone Pairing –> Uncheck other apps.
Available settings:
Messages
Calls
Voice mail
Other apps <– I disabled this option. No need for companion app notifications to show up on my phone and head unit or breaking news alerts.
My first ride tonight. I agree with most of your comments. The biggest annoyance I found was I’m using a old kickr (no cadence) I have a old ant+ garmin cadence / speed combo on the bike that’s on the kicker because I still ride it outside occasionally. As such, I can have cadence, or I can have speed. I cannot have both. No matter what configuration I seem to try with pairing sensors / kicker ie ant+ or bluetooth, I just cannot have both yet.
I guess I just need to pick up separate sensors or a new one that has multiple channels.
I’ve done a few additional trainer rides and tinkered more with the Karoo 2 and Dashboard.
The good:
– The various graphical animations for the data fields are surprisingly useful and not a gimmick. I use them for my interval training now.
– Unit appears to be very stable (no crashes). I’ve adjusted the settings while recording a ride without it crashing or any weirdness.
The bad:
– I turned off Location (aka GPS) for indoor rides which causes issues with the Hammerhead Dashboard and syncing to Strava or 3rd party platforms. You can still sync an activity, but it requires you to tell it to sync with 3rd party platforms. Hammerhead is aware and working on the issue.
– The pausing and ending a ride user interface is frustrating. I realize they revised this area because users were discarding a ride when trying to save the ride. I don’t care. The unit is completely functional but this area of the UI workflow is aggravating.
The “other”:
– Hammerhead finally answered my question about LTE Band coverage and updated their support site with the information.
– The Hammerhead Dashboard is very basic. Its primary functions are managing routes and syncing to 3rd party platforms. It does not offer the analysis capabilities of Garmin Connect. I’m a Strava subscriber (MAKE STRAVA GREAT AGAIN!) which does offer some of the analysis features.
– Hammerhead doesn’t have data fields for Last Lap Power/HR/etc, but it’s on their to-do list.
– The Karoo doesn’t offer any of the advanced (First Beat) fitness metrics (VO2MAX calculation, etc). I thought this would be an annoyance, but it’s turned into a big who cares for me. The Karoo supports all of the licensable Training Peaks metrics (TSS, IF, etc). These I care about… Honestly, I want Hammerhead to focus on the head unit since there’s a healthy ecosystem of companies doing analysis. Why re-create the wheel? Spend those development hours on head unit features.
We just need Strava to use the Training Peaks metrics and have a common language across all devices and websites.
I’ve had the opportunity to use the Karoo 2 outside and more indoor rides. Plus Hammerhead has released a few software updates during this time.
Overall. I like the unit and selling my Garmin Edge 1000 and K-Edge Garmin XL mount.
Good:
– I love the mini and/or full banner telling me when is the next turn. (mini has the direction and distance and the full banner adds the street name)
– Strava Live Segments overlap is nice.
– Navigation is solid and so is the presentation of the information
– Hammerhead fixed the annoying lap and ride pause buttons back to a logical order. I’m happy and sure everyone else is happy about this change.
– Integration with Strava, etc is painless. Love it
– I’ve had zero issues with sensor dropouts
Bad:
– I still want to be able to discard a ride. I’m sure this will return in a future software update
– I’d like to see a chart outlining how to conserve battery life. I haven’t had an issue with battery life.
– A prompt to calibrate my power meter after it’s discovered.
– Can take a moment to discover all of your sensors after they wake up.
– Lap button behavior can vary based on your data screen. Super annoying when you’re doing intervals and trying to get a lap to start/end.
– Wish it would use Bluetooth tether to my phone for data (not using my phone’s hotspot)
Should I buy a Garmin Edge 1000 or the new Karoo 2? I am looking for a bike computer with good navigation and cycling stats (which would be a step up from my Garmin watch).
I have a Garmin Edge 1000 and bought a Karoo 2 for the navigation. The Edge 1000 wouldn’t maintain a tight enough lock within cities and the map would be impossible to read. Yes, I reduced the number of POI to help the situation without much success. The Edge 1000 is slow when typing in new addresses, etc. It’s fine if you load up a route, but changing the destination on the flow is insanely frustrating.
It’s cold outside and haven’t had a chance to test the Karoo 2 navigation functionality. Plus my travel schedule has reduced since COVID-19.
My personal opinion is skip the Edge 1000. Buy a Karoo 2 or Edge 1030 or 1030 Plus. The 1030 is older and I opted for the navigation and speed of the Karoo 2.
I really wanted to like the Karoo 2. Really I did. I’m all about devices based on commodity OSes and hardware. I was almost OK with the lack of support for ANT+ lights, but a single ride with the terrible color choice for the dashboard (and no way to change it) sealed it for me as being unusable. On a positive note, I found out that my Garmin 520 has been under reporting my climbing by about 28%.
I was annoyed to see that Hammerhead had removed the ability to unlock the bootloader with a semi-recent update.
I requested and RMA over 2 days ago and still haven’t heard back from them, either.
Can/will you share what screen recording software you side load onto your K2?
Also wondering then what video editing software will accept the output data from the screen recording software.
Will this then work as a viable alternative to the clunky process of editing in Garmin’s non-supported VIRB software to overlay ride metrics onto GoPro footage?
For me when I combined my GoPro + screen recording, I just did it in Final Cut Pro, simply laying the two clips together. But any video editing app will work. My only tip on doing this is to audibly record the elapsed time timer on your GoPro as the screen recording is happening (or even better, hold up the Karoo in front of the GoPro for 2-3 seconds), so you can get time sync. But since I often start/stop the GoPro numerous times during a ride, every time I start it, I’ll just audibly count whatever the timer is for 2-3 seconds, and sometimes do a swipe or two, to sync on.
I received Karoo2 yesterday and today decided to return it…sreen is nowhere near smartphone quality, it is slow and not accurate. Biggest issue is map quality, hard to see track type and cycling route network is absent, at least from Poland’map. I cannot plan route on the device unless i have internet connection. Even then it is useless. Locus Pro on small phone is so much better! All these cycling oriented Gps units are so bad at navigation.
I moved from Locus to Karoo2 and difference in map detail, colors, track type is massive. I have to go back to using phone unfortunately. You would have to see how 4 inch phone with Locus is much better, contrast, detail, speed, planning route, custom screen with font size and color adjustments…and phone with Locus costs 100 Eur, if only battery life was better…
I’m unable to upload rides directly to the HH Dashboard unless I use Karoo or RidewithGPS, am I missing something? I would have thought I’d be able to use the Karoo eco system without a third party app. Can anyone advise? Thanks :-)
How hammerhead uses their Dashboard is different than garmin connect, Strava and other websites.
It does appear to be a consolidation point for all of your rides. It’s more of a console where you manage routes, sync to other platforms, select which maps you want to log onto your Karoo, etc. Strava, garmin connect and other websites are aggregation points for all of your activities whether you used the Karoo or didn’t use it.
It took me a moment to realize the limit nature of the hammerhead dashboard and accept it. My Zwift Rides don’t show up on the hammerhead dashboard but show up on Strava. Unless I’m dual recording on the Karoo and on Zwift then the Karoo recording shows up on the dashboard and gets pushed out to Strava and other websites.
It seems there are some of us who are very much interested in this device –
*IF* it sideloads Trailforks or MTBProject smoothly.
Can someone who owns the Karoo 2 confirm this, and if it can run simultaneous to the native device software?
I tried loading Trailforks and seems to run smoothly. However, the GPS does not seem to be picked up in the app and gives the following strange error message.
Thank you for, as usual, a thorough and useful review of the Karoo 2. More useful than Hamerhead’s online instructions.
I wonder if you have encountered the problem of a ride not saving to the device. I have only had the Karoo2 for a week, and this happened in yesterday’s hills ride. I managed to get into the folder which holds the “fit” files and download yesterdays’ “fit” file to my PC, then manually load it to Strava where is shows.
But it is annoying not to have the ride on the device as it should be. There seems to be no way to import the file to the device. So far Hammerhead has not responded except with a generic response, that is as useful as a hip pocket in a singlet.
Peter JAMES-MARTIN
Hazelwood Park, South Australia
I really like the idea of the Karoo 2. Having struggled with Garmin for years I have been looking forward to a reliable device with a really good screen that performs well. I’ve watched the videos of how well it integrates with Strava and have been looking forward to building new routes that will take me to new places and then uploading them quickly and easily to the device then getting out there and riding. I have to say that my experience with the device to date has fallen disappointingly short of this.
I spent an hour trying to upload a route from Strava to the device yesterday. I had to open up the laptop in the end and even then the route didn’t appear on the device. Why? Eventually I found out that it wasn’t logged into my Hammerhead account. I kind of stumbled into this.
The device downloaded the latest software update whilst I was struggling with it. When I got out on the ride, it didn’t seem like the device completely knew where I was. The directions it was giving me weren’t quite right. Almost a turn or two behind where I was. Then it repeatedly returned to the home screen. I could still hear it beeping. I had to keep stopping and taking my gloves off to try and fix it. I guess you can probably use the buttons but it isn’t obvious which buttons you should press. They aren’t labelled. I could have done with zooming in on the map but again it isn’t obvious when you are out on the bike how you do that? I also notice that its quite unresponsive. You press a button and are never quite sure whether it is doing something. Eventually I gave up and switched it off. I used my Garmin watch to ride a route that I know. Definitely not the experience I have invested in
Is there a simple user manual that will explain to me how to use the Karoo2 properly?
Another thing I wanted to try was Strava segments. But when I try and enable this feature it tells me that I need a Strava summit subscription. Now Strava Summit doesn’t even exist anymore! I have a full Strava subscription and am logged into it from the Hammerhead account so what more do I need to do?
I am feeling quite disillusioned with the Karoo2 so far. Its at the point where I just don’t trust it and find it so frustratingly difficult to use that I am reluctant to switch it on. If I have a couple of hours for a ride I don’t want to be spending half that time struggling with a head unit.
Are there any head units or even generic gpx trackers that have a higher than 1hz recording interval? Is it possible karoo hardware is capable of more?
1hz really just doesn’t cut it in many tight/twisty mountain biking trails.
Genuinely curious, how is 1 sample/sec not a high enough rate? If you’re doing 40 km/h, that’s 11.1 m/s, and at that speed, I can’t imagine you’re changing direction fast enough to really need a higher sampling rate. The critical part is being able to get an accurate GPS fix in a wooded area, which will make much more of a difference than sample rate. As they say, garbage in, garbage out, sample rate is just how fast you collect the garbage.
I was super hopeful that I was going to love the Karoo 2- given that its speciality was supposed to be navigation.
Here are some thoughts I posted on the Karoo boards as well:
As a very recent Karoo 2 buyer, I already voiced a few things that I like and things that I think are needed badly like:
-ability to discard, rather than save a ride (I don’t want to go to Strava etc to delete rides- and I prefer not to do manual uploads)
-ability to calibrate elevation data through location information and where I am on the map
-no analysis whatsoever on the HH Dashboard
-no support for smart bikes
-no support for cycling dynamics
-no upcoming features roadmap
I did my first ride today- a 46km ride to Epping forest in London
I was very underwhelmed by some aspects of what was, supposedly, the best part of Karoo- the navigation experience.
-The Karoo lost GPS on a few occasions and my location was stuck on the map for a few minutes at a time.
-No ability to resume later
-All connected sensors (earphones, HR band and Assioma Duo power meter) got disconnected during the midway break and failed to reconnect; I was unable to reconnect my earphones as only the sensors menu is accessible during a ride?!
-Found it difficult to keep reaching for the Karoo to try and get it to follow my location instead of zooming out- why not come up with something similar to the Edge remote?
-The unit doesn’t zoom in when approaching a complex intersection
-Doesn’t go back to the map screen when I need to make a left/right turn- requiring the user to reach for the screen at a time when they should be focusing on the road
Very strange Hammerhead make an offer of 399usd then change to 399eur when voucher comes in. Which is a price increase of some 20%. When swapping in K1 suddenly price is 120usd again? Seems like currency play to the disadvantage of European buyers.
All righty, just completed my 3rd ride and about 200 miles with my Karoo 2. Overall, I really like it. Coming off a Garmin 1030 which was stolen, I’m glad I choose the Karoo2 to replace it. Some random observations… As others have reported, I also couldn’t figure out a way to delete a ride from the unit after I finished. I just do this from Strava now. This is not big deal for me since I upload all my rides private anyway, and change the privacy, after changing the ride name and loading pics, etc. For connected devices, I connected my Galaxy S10 phone, Assiamo power pedals and Fenix 6 watch for heart rate. For nav, which is my primary purpose for the head unit, I build routes using RideWithGPS and sync them to my hammerhead account. All of these things worked flawlessly. In fact, the seamless connectivity with Strava and RWGPS is really a great selling point of the Karoo2. After building the ride in RWGPS and pinning it, it just shows up in the route section. Super easy. My HRM or pedals never disconnected and the nav was perfect. The phone disconnected if it was in power save mode however. YMMV apparently as others mentioned connectivity issues, but I did not experience these. Regarding the display: Does it auto-zoom when coming to a turn? It didn’t, but it does list the name of the street, the distance to the turn and direction along the bottom as you near the turn. You also can manually zoom very easily, even with gloves, using the screen. On my last ride, a 73mi ride on road, it never missed a turn or misled me. Maybe I’m lucky or live in an area where the maps are good. Don’t know. I also was originally concerned that going to a smaller screen than the Garmin 1030 was going to be a problem, but my old man eyes actually like the display better. The yellow line to follow the route, the underlying map itself, the quality of the display and the always-on distance to next turn is great. As far as battery life, I was able to get through my 73mi ride using nav and connected devices as long as I was in battery save mode. This mode keeps all the features working, as far as I can tell, but shuts the screen down until you hit a button on the unit, you are coming up to a turn, or there is some notification like a message or a phone disconnect message. In battery save mode, I’m pretty sure I could get through a 120+ mile ride not prob. If I turned battery save off, and left all the radios on (WiFi, BLTE, ANT+) with the screen always on, I think it’d be closer to 50-60 miles, which is around 4 hours for me. With battery save, it’s easily double that, at least in my short experience. The Karoo2 also doesnt have all the fancy metrics Garmin has – this is been beat to death so I’m not commenting on this. There are other ways to get all this if it’s important to you. NO unit is perfect, and after many years of hit and miss with Garmin (my Garmin Edge 500, 1030 and Fenix 6 were/are awesome, but my Edge 800 and Touring were garbage), I am happy with the current feature set Hammerhead has at this time. They have pushed at least 3 updates since I started with subtle changes in the UI, so I am hoping they continue the dev and add some of the things others have asked. Is the UI/display perfect? No, I still think there can be some work done to better manage the screen space. As it is, I still can see the map better than my 1030 and it’s been reliable for the devices I use.
So far I’m like the Hammerhead 2 more so than the Garmin 520 it replaced. Is there a method of synching your phone again if it drops off in the middle of a ride or does not synch before you start, without ending your ride?
Hi Ray, any idea what’s next for Wahoo and Garmin beyond the Roam and 830? I’m in the market for a new unit and don’t want to buy a Roam or 830 only to find new ones on the market a month later. Thanks!
Not sure. Historically speaking we’ve seen what used to be the Sea Otter timeframe (mid-April and the two weeks that follow) be popular for launching bike computers from all brands – in fact, the Hammerhead Karoo 1 was even launched during that timeframe years ago.
This April/May would see it as 2 years for both the Garmin and Wahoo units, which is on-par with a typical Garmin release cycle (Wahoo is more variable). That said, COVID kinda messes up all release cycles these days.
Ok, tested the Karoo2 for the first time today, NO Notifications, nothing…. (mentioned also in the HH-Forum)
Followed all the Settings and rights for the App in my Smartphone but nothing at all.
Rides will not show up in the Dashboard and not will be uploaded to komoot or Strava.
But display is outstanding.
Will try to follow the tips in the HH Forum and will do a Factory Reset, perhaps Notifications will work then.
I had the same problem (android/xiaomi phone) if android uninstall the companion app from the phone and cancel the karoo pairing from bluethoot devices. Intall the last week karoo update. install the companion app with the right privileges and removing energy savings. Then follow the procedure in HH site.
in my case it works with every notification,,,,
I use an iPhone and the notifications work. It actually works better than my old Garmin Edge 1000. I’ve seen the Karoo disconnect from the iPhone at times, but the Edge 1000 did it too. The karoo was displaying all of the notifications on my iPhone. News, Zwift Companion, News alerts, Weather alerts, etc. It was overwhelming and disabled these on the Karoo. It’s now configured to notify me of Messages (SMS and iMessage), missed calls, incoming calls, and voicemail messages.
I’m not sure if it’s iOS or Karoo updates, but removing the pairing from my iPhone and Karoo then repairing it has improved the connection reliability.
Hey Ray… any chance you will cover the numerous bugs that plague this device? I mean its just horribly buggy and basically makes it useless for serious training. There are numerous power recording issues that have been identified yet a fix is not even close.
I think you need to very cautiously recommend this product that carries a premium price for being a Beta tester.
I have had the Garmin Edge 1000 for years now and still it remains a great unit doing exactly what all newer devices are claiming to do. Once you have a Garmin watch and Edge you are kind of locked into the Garmin Eco a bit like when you buy into Apple. It’s great to read a review but after all the years I have had the Edge there is still no reason to move on
Great review as always.
Battery life is a joke for the year 2021 – I have it since October and am very disappointed. To get to 12h you basically have to turn of all sensors and turn down screen brightness to the point where the screen is barely visible.
My unit dies always around 7-8h with 2 sensors paired and the occasional swipe to a different data screen making it impossible to use for summer grand-fondos.
Contacted hammerhead and they answered. “just swipe less, turn down screen brightness and dont re-route.” Funny because that’s the whole point of buying a top-notch head unit: So you got a great display, so you got nice data screens to check your training and to be re-routed back to the route when you are off it.
I love the karoo 2 but as somebody who enjoys 150-200km rides regularly I can not use it. I already lost a big ride when I was in Mallorca because the unit died which is a bummer. Battery safe mode is unpleasant to use as the unit wakes up too late when you are approaching a turn.
Overall I am sad I bought into the hammerhead ecosystem. People warned me to wait it out and stick with Garmin or get a Wahoo. I should have listened….this is a great unit. if you want to ride less than 5h only…otherwise you will get nervous about finding your way home or loosing data.
its 2021…..battery on my GPS should be my last worry.
I wonder how the Israel Start-Up Nation cycling team will deal with the battery life issue during longer races? It might drive Hammerhead to use more creative and efficient software development and extend the battery life.
Yup, I discussed battery life in the review – and also got the same roughly 8 hours.
I asked Hammerhead about it, and they said that from all the data they’ve gathered, people are actually getting closer to spec on this than me (…or what appears to be all other users in the comments here).
Not sure what to say there, but I did outline it as a concern in the review.
Hi there, very informative review, I went ahead and got one, and loving it so far!
One question, I don’t have HR monitor – I use garmin 735 watch wrist HR for run training. Is there anyway to connect the 735 to the karoo so the unit can display my ride HR from my watch? So far I cant find a way to do it, tried via Bluetooth menu, but my they don’t find each other to pair.
Probably not possible, but just thought I would ask!
Pre-orded 2 devices – the first one git finally delivered, however the 2nd device I was asked to check out suddenly in EUR instead of USD. Support is sluggish and unresponsive. It’s a nice product, but customer service is from hell. Stay away.
Hammerhead support has been good for me so far. This was for technical questions and not purchase questions. However, they replied with an answer within a day.
I just placed an order for a K2 (largely based on your review, thank you). I have a question which support at Hammerhead sidestepped, so I’m hoping you can help. On the head units I’ve had in the past, including the Wahoo Element Bolt, use of a hub mounted speed sensor is required. Without the speed sensor the speed reading on the head unit fluctuates a lot even when the bike holds a steady speed. How does this work on the K2? Is a speed sensor necessary for reliable speed readings? Or can I do without one and keep things just a little simper?
Accidently chipped the glass on the Karoo 2.
Reply from Hamerhead
“Unfortunately, we do not have any repair options. We have an industry-leading crash replacement policy and are able to offer a certified(new) unit for $249”
So it will cosy $249 to fix a screem. This will be the price for any out of warenty repairs as this one is as it is acidental damage
Hey John, that sucks! If you’re a Strava Premium member living in the US (some states excluded), UK or AU there is a free Strava Premium Perk from Sundays Insurance that offers up to $600 device damage coverage. link to strava.com
How does the Karoo compare to Garmin for when you go off course? I know you discuss it a bit, but this is my main complaint against my Garmin 830. When I miss a turn, or make a wrong turn, it is very hard to get back on course. I have had times where I spend 10 minutes at an intersection trying to figure out which way to go. Does Karoo do this better?
Jeffrey, I upgraded from my Garmin 830 for this very reason. I live in TX, so perhaps your mileage will vary, but it almost instantly gives you a new route – instead of my Garmin, which would try and have me re-trace my path to get back on route, or wait until I landed on it again on my own.
When I missed a turn, the Karoo2 leads me directly to the next point in the Route, no “Please turn over” as I’ve seen even in the 1030Pus.
For me, the Karoo is perfect.
Very happy.
I’m interested that you don’t feel more strongly about how superior the UX is on this device? Even simple things such as swiping across screens, is many times faster on the Karoo. Personally this matters much more than fringe features. And I suspect many others don’t use these. More universal features like auto ride upload, strava KOMs, data field selection and look, all these strike me as at par or superior.
Garmin doesn’t seem to have made substantive attempts to improve user experience in many years, while embedded devices and their capabilities have changed massively (not much improvement in my view since ~2012, just contrast with todays phones with the iPhone 5 and Galaxy S3). For the price of a 1030, you could get a very capable modern phone. Their priority seems to be elsewhere, and to me this seems misguided.It’s just interesting and surprising to me to not really see much negative press for Garmin units, even though they have been plagued with usability and quality issues since I started using them (with a 705).
Hammerhead manages to bring head unit tech up to near present, with a capable CPU, decent screen, ability to scroll without having to doubt whether the unit is locked up, or you just need to wait a few more seconds, and USB-C. And it’s 2/3rds the price of a 1030. That and what look to me like quite a bit of recent development from their team, and a better android backbone are big deals. Is it just that the Garmin drawbacks are well understood, and folks are used to it?
The UX on the Karoo is good, but it’s also super limited too. So in a sense, they haven’t had to deal with the problems of having more features, and it largely shows. We saw that best with the re-routing pieces once adding in Varia radar as I showed above, it became a dumpster fire of UI confusion.
I’d argue most of Garmin’s UI dumpster is pre-ride. Once in a ride, it’s very good. Pre/post-ride, the menus are just endless and mostly confusing.
But I don’t think comparing to an Edge 1030 phone makes much sense. Those phones won’t stand-up battery-wise for what a Garmin Edge 1030 does, nor feature-wise. You’re paying for software and an ecosystem here, more than hardware features. While one can barely cobble together the features of a lower-end Garmin on a phone with numerous apps, it’s a mess.
As for features, those are all person to person, but a lot of people do value a lot of the Garmin features – especially once you start talking cross-device capabilities. Hammerhead is doing great here, but you’re ultimately investing in their routing interface. That, at present, is their main jam. Yes, they’re building up capabilities of things like structured training – but if one were to do a deep-dive into that and compared to Wahoo/Garmin/Stages, we’d quickly see it’s not even close. And that’s fine for a lot of people. If you’re just pulling TrainingPeaks workouts and don’t need anything beyond that, it’s all good.
As for an Android backbone being better, that’s tricky. It has the *potential* to be better. But right now it appears to be hampering their battery life comparative to their competitors. Additionally, the core benefit/reason for Android is being able to unlock 3rd party apps. That’s getting closer, but in order to be a game-changer it can’t just be one app. It has to be a slew of major apps that majority chunks of the endurance cycling population use – reason to switch in other words.
Finally, as for talking about Garmin negatives, I often talk about the stability of their platform – including one rather large post here: link to dcrainmaker.com
But also in most other posts. At the same time, anyone who has used Garmin for a long time knows it’s definitely getting better and more stable. I think their shift towards open-beta everything has really helped there. It’s not perfect, but it’s a heck of a lot better than two years ago.
I’m a SW engineer in the mobile/embedded device space, which is why is why I drew the comparison with phones. I just meant that relatively, mobile processors are making substantial improvements yearly (driven by flagship phone product cycles) – and Edge devices are not keeping up with these hardware improvements.
For me, the in-ride performance (and sluggish activity profile selection) is what primarily bothers me. During a ride, my most common operation is scrolling the data pages, and this is extremely sluggish on recent Garmins. I just compared the units I have around, and this to me is a critical flaw in the newer platform of Garmins (I’m curious whether the 1030 Plus is better?). All of the added features and complexity in the data fields (and this is without IQ Apps) seem to cause it to choke when switching screens. This “scroll speed” regression over generations (800->810->820/1030) is indicative to me of the features over performance mindset that I’m highlighting. The Karoo can scroll as fast as your finger can, the new Garmins can only handle about 1 screen a second, and get far behind on user input (and buffer it, so the device cannot be controlled until it finishes processing)
Also anecdotally, operations like loading saved routes is much faster on the Karoo, but haven’t measured it in a controlled way.
Stability wise, I think Garmin has made significant improvements. The 705, 500, and 800 were particularly bad, and I lost too many of my long rides. I don’t have an issue on the newer devices.
For Android benefits, apart from 3rd party software – my thinking is that this will allow Hammerhead to leverage the stability, performance and feature set of a tried and true mobile OS, which should massively cut required resources and test effort. This makes such things as the whole new development platform that Garmin made for IQ Apps are not necessary.
For battery life – I do enough 10+ hour rides that I always carry supplemental batteries (and always needed to with my Garmins also), which makes this less of an issue. I would be curious on a fair comparison though, with most all features turned on the battery life seems to be quite sufficient.
My Karoo 2 arrived yesterday and took it for it’s first outing this morning.
Very impressed indeed. The UI/UX is everything that a Garmin Edge should have been years ago.
This is a very interesting review (as usual) but Karoo 2 beeing an Android phone, I don’t get what makes it superior to an average high end Samsung with Strava, Komoot and such installed ?
It’s just about buying a second phone to look geeky or do I miss something ?
I really like the K2 so far. A couple of issues I have:
My phone disconnects many times during a ride along with an audible notification
Sometime when I upload a ride to Strava or attempt to, it takes a long time after the screen acknowledgment for it to show up on Strava. Other times its instant?
Has anyone else come across this?
I’m also having issues getting notifications from my iPhone X. K2 says my device is connected, but some messages come through and others randomly do not. Uploads to Strava worked fine for a while, then they stopped working altogether for a couple of days and now seem to be working again. Connections to Ride With GPS seem reliable so far. I’m on the fence about keeping or returning. It’s definitely better for my nav needs than the Element Bolt it’s replacing (the Bolt was buggy in similar ways BTW). But… Some really dumb software decisions in the K2 IMO. Why is the map position cursor smack in the middle of the map and not in the lower 3rrd–does anyone care where they’ve already been? Why only one map in a profile? Why is it so difficult to change profiles mid ride? Why do the smaller roads disappear when you zoom out on the map–why zoom out if not to look at the roads? Yeah–so I may return, but I wonder–is there actually anything better out there for someone who wants great navigation above all else?
Had this behavior with K2 and the Huawei 40 Pro Plus due to lacking of Google Services, so Notifications and Pairing has been a nightmare.
But now with the Pixel 5 it is working without any problem at all, stable reliable Pairing, all Notifications on the Screen.
Hello
I’m wondering about ordering a Karoo 2 but something upsets me.
I usually do often Audax, so the battery (amount of time on a single charge) life seems very very short, but I can live with an external battery pack.
But the Karoo being a smartphone, it’s battery lifespan life will likely be short (I have Garmins several years old) and the battery life been short I’ll have to charge it often that will reduce the battery lifespan
so my question : can the battery be easily replaced when it dies or becomes to weak (likely a few years based on a usual phone battery lifespan) ?
The 830 is not designed to have the battery replaced so it’s not easy or straightforward. If your batter is bad, consider a warranty claim. If it is out of warranty coverage, you can exchange it for a refurbished unit, which will have a new battery and be indistinguishable from new for something like $150
I just bought a K2. My biggest concern is elevation accuracy. A route i do often gets double the elevation on K2. Instead of 1800feet it shows as 3775 feet. The same happens on every ride for every route i take. I have calibrated both manually and using gps and no success. I saw on their blog this is a known issue they claim they are working on because they use the barometer to do elevation but months after those posts they are clearly not there. I am leaning towards returning it. Does anyone else have this issue or know how to fix it?
Does the Karoo 2 have the hardware to dynamically adjust screen brightness based on exterior light brightness? I don’t see an option in the menu layout. I’ve had to increase the screen brightness to near max to see easily see the screen in the summer sun.
Now you can see your in-ride data black over a white background. We’ve tweaked almost every element of the ride experience in Light Mode to improve daylight visibility. You can change between Dark and Light Mode in your Karoo’s display settings.
Have you re-tested the battery life on the Karoo 2 using the white background? I was able to significantly reduce the screen brightness using the white background.
No, I haven’t. But, it’ll probably work it’s way back into the rotation here soon, so I’ll be able to give that a whirl (since, I’d much prefer the white background anyway).
Between the Elemnt Roam and Karoo 2, both in their current versions, which one comes across as the better unit for navigation? I’ve got a Wahoo Kickr for indoor training so I’m considering the Roam but Karoo2 seems to have a brighter display with a higher resolution. Touchscreens and clunky interface steered me away from Garmin Edge devices (heard/saw too many complaints) – is the Karoo 2 going to be the same?
Note : I’m a Wahoo user (and a happy one) not a Karoo user
Note 2 : what follows is MY ay of using the Wahoo not the only one, anyone can tell you the exact opposite without been wrong
Usually when a bikecomputer states that it has navigation capabilities it means that the whole process is made directly on the bikecomputer. With the Wahoos things are a little bit different
Basically navigation on the Wahoos (both Bolt and Roam) are in two parts : the bikecompter and the smartphone
You define what you want to do and where you want to go with your smartphone (and Komoot in my case) and send it (one click) to the bike computer that follows the instructions (and is brilliant in this job). The Roam provides some basic capability but the wahoo ecosystem relies on this duo bikecomputer/samrtphone .
You can use a Roam in a more classical way but in this case you’ll quickly find the navigation capabilities weak compared with a Garmin (and I suppose the comparison with a Karoo will be even worse for the Wahoo).
Thanks! I just got the Karoo 2 – had ordered one to try it out and it just got delivered. Sucks that I don’t have a Roam for a side-by-side comparison. I tend to keep my phone with me when biking – in case I run into an issue – so the phone + bike computer combination works fine for me. Once the course has been loaded, it appears both units have similar navigation capabilities – Karoo 2 display is beautiful but then again I’ve not tried the Roam.
My concerns (at the moment) are battery life, being able to re-route and back to start.
Garmin is pretty much out for me – too clunky – I have a Fenix 5 Sapphire and pressing 19 buttons to load a course to is far less appealing than doing something on an app (or even online). I’ve seen Edge 830 users struggle with glare in daylight, unit freezing and not being able to swipe to get to a different screen. A coworker summed it up nicely, “each time we go for a ride, the Garmin users are the last ones of the pack because they can’t get their bike computer to work” – that’s enough warning for me!
I switched from a Wahoo to the Karoo 2. So far it’s a big improvement, but I did have the Element Bolt, not the Roam. I can probably count on my fingers the amount of times in >2 years of ownership that my Bolt started up, found all the sensors, automatically linked to my phone and successfully uploaded the finished rides to Strava and GPS. Typically one, two and sometimes all these essential (to me) functions failed nearly every ride. The Karoo is not perfect, but it’s much better in that regard. I get about 120 miles out of a charge and typically my rides are less than that so the battery is sufficient. If I’m going further I’ll bring a battery and usb cable. The mapping and nav work quite well for me on the K2, but I’m still frustrated by the decision to place the cursor or position marker smack in the middle of the map which means half the map is wasted showing where I’ve been. It would be way better if they placed it at the bottom of the page, like any automotive GPS.
The tile options are most definitely mind-boggling. However, the workout tile and lack of trainer control via % resistance is the exact opposite–very limited and non-existent.
What apps exist that could be sideloaded for syncing custom workouts (Xert only allows by Power not HR) and controlling trainers?
Question for people who use the Karoo for triathlon: How do you work around the sensor connection going to sleep and not reconnecting? If I turn on the Karoo and leave my bike racked for the swim, when I get back the “sleep” function has lost connection with my Quark, and when I get on my bike to start the bike leg, it doesn’t re-find the power meter. I would prefer to monitor my watts during my half and full distance races!
I’m really interested in this as well. I was shocked on my first ride that I needed to go to the sensors setting in order to re-establish the connections.s
I keep looking at all the new gps units. Can you address screen visibility? I live in bright sunny Texas and am a bit visually impaired and ride a recumbent so my unit sits at a bit of a forward tilt. Screen of my old Garmin 1000 gets washed out easily. Are there any GPS units that can be larger text or brightern for us old blind folks?
I use it on my road bike and haven’t had any issues with brightness – In fact I find it brighter than other units and use it at lowest brightness setting.
I was a bit disappointed to learn that there’s no analysis besides GPS and sensor data in the post-ride statistics. There’s several published methods on calculating calories using heart – wahoo even publishes theirs: link to support.wahoofitness.com
I’m wondering if I should return the unit and get a Wahoo Roam instead. I’ve asked their support/dev team if there’s an plans to include this in future updates – no word yet but that would be a very welcome addition.
I don’t recommend any Wahoo device. Their firmware and apps have become increasingly buggy. Hammerhead and Karoo 2 are, without a doubt, a better company with better product. There are things like analysis and 3rd party connections that need improving, but those are easy to workaround. Open a free Garmin or TrainingPeaks account and upload your fit files there.
Thanks, I use Garmin Connect already – have a Garmin Fenix that I use for other activities – but uploading the fit files doesn’t calculate calories. Just created a TP account – seems to work there!
Dc. Once again your site is better than the manufacturer. Quick I bought a Karoo 2 to replace my dying Garmin 810. The new Karoo 2 is awesome and love it.
Quick Question;
Can my old ride history from my Garmin 810 be imported to my new Karoo 2? I probably have a couple hundred rides on it. Or can my ride data be exported from the Garmin website and imported as a single file to the hammerhead website and then synced to the unit?
Is there a “new files” folder when you connect to a computer? if it was garmin you could copy the .fit files from your previous head unit and paste them into the new files folder.
Can anyone please confirm if the turn by turn guidance now includes a map graphic when you are on a data field screen? It didn’t when this review was made. You had to be on the map screen.
I need a brief map graphic when approaching the turn (like garmin) and this is the main thing holding me back from switching over. Thanks
Hi, I have one and so far I’ve never have the map screen pop up when approaching a turn. You do get instructions on the bottom of the screen – if you click (touch the screen) I think it brings up the map again (I’ll check the next time I go biking).
Thanks. I’d really like to see a graphic when i’m approaching a turn and without touching the screen. Another solution would be if you can have a screen with usual data fields and a smaller map. When i’m navigating i like to see various ride and navigation stats, so dont want to just have a map screen. Otherwise im really keen on this unit.
You can overlay a few data fields on the map page – see the profile layouts (map layouts at the bottom of the page) – link to support.hammerhead.io. There is a very audible beep when you’re approaching a turn. The cues may be turned on or off in the settings but the beep remains.
You’re welcome! Having seen other units with my friends, I’m happy to recommend it. I got it as a trial but decided to stick with it. It’s a really slick device – the mount is rock solid, beep is very audible, interface is fast and responsive (including rerouting) and having both a touchscreen and physical buttons makes it quite convenient on wet/humid days. The cons: no companion mobile app, lack of post-ride analytics, not being able to add an address as a destination on the device itself (you can select on the map though) and I don’t have a good way of fixing my front bike light anymore (might be just my bar though). Beats the competition hands down when it comes to navigation (imo) and I don’t think there’s any unit out there that lets you input an address on the device itself.
For post ride analytics, uploading to TrainingPeaks worked for me – I mostly care about heart rate and calories (using heart rate date since I don’t have a power meter/crank). I own a Garmin Fenix watch (for other sports), and tied into the Garmin platform for workout summaries and calendar etc. There’s no direct integration/uploads to GarminConnect so I have to upload rides manually.
You can see some of my other questions/comments that talk more about these features.
If you have a k-edge mount you can get a 3D printed insert from racewaredirect.co for about $12. Then you can have your light on a bottom mounted GoPro mount. I have a couple and they work great.
Totally agree that the iPhone integration is a huge fail. I have to manually connect to my phone almost every ride. A lot of times I just don’t bother and do without the phone connection.
My H2 still takes forever to link up with my DI2 and 50% of the time it does not auto connect to my Iphone. It’s pretty annoying that its so hit and miss on connections.
Given that the Karoo 2 is built on top of Android, I’m interested in the following
1). Do Karoo 2 updates provide updates to the underlying Android OS?
2). What are your thoughts on Karoo 2 being built on top of Android 8, which was released back in Auguste, 2017 – 4 years ago?
3). Is there any way, would there be a benefit, to upgrading the underlying Android OS to v11?
I’m vacillating between buying a Karoo 2, or waiting for the Garmin Edge 1040 (or whatever the 1030+ successor will be called). I’m leaning towards the Karoo 2, but I’m concerned about security issues with the underlying Android OS.
Yeah, I don’t follow the Android platform update scene as tightly, though countless devices are made on older versions of Android. As usual, there’s always a risk profile with older versions in terms of patches and such. Though, the attack vectors are far less here than most other Android phones, in the way you interact with them. Meaning, an attack here basically requires something that allows direct access to the device from the internet without any user action.
The overwhelming vast majority of platform attacks come from the user opening or doing something (even if the platform should have protected them), which allows an exploit. In this case, as a normal user, the platform is only opening a single app. So the risk is less.
Ultimately, for most users, I don’t see any reason to consider whether or not its Android to be honest. It literally has no bearing on the end user experience of the device (in fact, arguably for things like phone notifications, it made it worse with the Karoo 1, due to all sorts of technical challenges there). The only normal user benefit to date has been better graphics and responsiveness, though, that could have been achieved on other embedded systems at a higher cost for a smaller company.
App development, such as Xert’s integration, was something that was put forth as a reason to be on Android. But given Xert developed for Garmin first years ago, I think it’s far to say that using the Android base wasn’t really something that sped up development for other companies in a market changing way. Maybe down the road it will though.
Anyways, again, I wouldn’t let Android vs Not drive any decisions here (unless you want to screen record. :) ) – instead, I’d focus on features.
Has anyone had issues of power meter dropouts during a ride? I mean, constant as in every 2 minutes or so and sometimes it just disconnects and you have to go to the Sensors page to reconnect everything? I have a Stages Power Meter and just got the Karoo 2 last week and then is something that is really annoying me. What’s the purpose of a bike computer if most of your ride was done with GPS distance and time and that is it. Everything else is incorrect because you had over 50 dropouts on a 1hr 30min ride. I never had this issue with my Garmin Edge 820. I want to like this computer because the display is big and easy to see but the inconsistent ANT+ Power Meter connectivity is a deal breaker if it continues.
Make sure that you are on the latest software version because the Ant+ connectivity was improved recently. That said, I have never had any PM dropout problems with my Power2max PMs on three different bikes.
Make sure that you are on the latest software version because the Ant+ connectivity was improved recently. That said, I have never had any PM dropout problems with my Power2max PMs on three different bikes.
I do have the latest software update with Hammerhead. I am trying the method of unpairing everything and pair just the Stages Power Meter first to see if that works. Hopefully it does or I will be sending this back.
I’ve had to do a master reset to my unit after a few of the upgrades. All of your data screen configurations will be downloaded after you setup the hammerhead login. You’ll need to manually pair all of your sensors again.
Wahoo ELEMNT Roam offers ANT+ E-Bike support. It works for sure with all Specialized Turbo e-bikes equipped with TCU or TCD-w, and with all Giant e-bikes equipped with RideControl ONE remote. ELEMNT Roam takes many parameters from the e-bike connected as sensor, such as Speed, Distance, Cadence, Rider’s Power, e-bike Battery %, e-bike Assistance Mode, and e-bike Battery Range.
This article should be updated, as it is misleading in this respect.
– It seems like the Karoo 2 does NOT integrate with Garmin Connect?? I read this article and searched the comments for “Garmin Connect” and from what I gather, when I am done with a ride, the Karoo 2 does NOT send the ride data to Garmin Connect?? That seems odd. This is 2021, so I figure I am misunderstanding this. *head scratch*
– Is there still no integration from Karoo 2 with Final Surge? I know Final Surge isn’t as popular as Training Peaks, but I’ve used Final Surge for a couple years, for cycling and running, and you sure can’t beat the price (free for athletes – a fee for coaches) :)
I briefly got my hands on a Hammerhead Karoo 2 because a friend got one. I only had about 5 minutes pressing buttons and going through screens. I always love a new gadget, and I like good brands that aren’t the most popular. The Karoo 2 felt good and looked good, and the screens were pretty smooth. It felt polished.
My Wahoo Bolt is still going strong and the only ‘feature’ I really wish it had was proper re-routing. But if I am being honest with myself, I don’t do any urban riding, and I rarely do any type of riding where I have to input a destination and might get lost along the way if I don’t have a cycling head unit there to save me. hehe.
Garmin connect is only for Garmin headunits / cycling computers. You can export the fit file from the Hammerhead Dashboard or Strava then manually import into Garmin Connect. Garmin hasn’t built any integration with competitors products and Garmin Connect.
– It looks like Final Surge does integrate with Strava. Do you have your Hammerhead Karoo sync’ing to Strava? If so, you can connect Final Surge with Strava and solve this issue.
The Hammerhead website only publishes 4 and 5 star reviews. Notice that there are no reviews with ratings below that. I purchased one and gave it 2 stars and my review does not show up.
Hi DCR,
Great review thank you. I am having a serious look at the Karoo2 before Garmin unveils its very expensive competition next year. Having owned an Edge 800/810/1000 & Explorer … I am looking forward to something different. Someone mentioned “why not use a phone?”, well my thought process is to use the Karoo2 with my second data SIM card (200 Gb, €15 with SFR Red) and wear my Apple Watch with eSim. Best of both worlds or worst? We’ll see! Just at 62, I need to see the darned things attached to my new tadpole trike next month; I might have missed mentioning the spinal cord tumour that manifested itself at Dax on the way to Santiago di Compostela whilst riding a steel Mercury with Rohloff (so heavy) 6 years ago! This year finally put paid to my 2 wheel adventurers due to a lack of stability on bike whilst sober, my wife explained that my local boulangerie & Café had ratted me out to her on numerous occasions, they thought it was funny but that I was going to come a cropper. It was always a coin toss whether I remained upright on braking/slow turns or getting leg to move when unclipping; never Ming the leg that would stop working just as I needed it (you know, when that obvious hill jumps out at you whilst in wrong gear). The gendarmes are certainly happier. My new steed will be a Azub Ti-Fly with Shimano EP8 & Rohloff (back to manual which I prefer, my Rose Stepthru had an eRohloff which my wife has taken with alacrity), motor to help offset my poor muscle retention post-op. Sounds depressing laying it out, but it isn’t … I still go out most days (unless raining or too windy in winter) with a smile on my face. Just glad to smell and observe nature; whether it is raptors, persons or boar (sometimes both 🧐😂). Sportivement, soon to be Bike2Trike (or Big Vern)
I have just bought a K2 and I am quickly finding the things it doesn’t do, rather than the things it does do.
It may seem minor but it really annoys me that you cannot display a compass heading (eg NE, SW etc) as a data field. Yes there is a compass heading displayed on the map but that’s not always easy or convenient to read. I enjoy long distance touring and like to know quickly what direction I’m heading in so a data field display on the primary page is important to me.
People have been asking Hammerhead to provide this in their data fields for more than 2 years but there has been no movement.
The routing is pretty good but seems no better than my Garmin 830.
I suspect I will be sending my K2 back within my free 42 day ‘assessment’ period – a very good aspect of the unit if you buy direct from Hammerhead.
We’ve added two new data fields: Heading, and Lap Normalized Power®. Heading displays your current direction of travel (cardinal and intercardinal directions), and Lap Normalized Power® displays the Normalized Power® of the current lap.
Hi Gilbert
I’m impressed but sadly your change is too late for me. I returned the Hammerhead and have bought a Garmin Edge 1030 plus which works well for me. However I was impressed with the Hammerhead and suspect I will try it again when the 1030 becomes ‘past it’.
Thankyou
Roger Leary
Late to the game but I know people read this review long past its publish date. A key feature missing from the Hammer Head K2 and 1 is the ability to use the cue sheet from tools such as Ride with GPS. This is a huge deficiency for sports such as Randonneuring or organized tours where the organizers add very useful custom cues to their routes. Yes, you can add POI’s but you can’t get information on them and the route planners for these events use the custom cue feature. On both the Garmin and Wahoo products these custom cues pop up on your screen similar to a turn-by-turn cue. Examples would be; event controls, SAG stops, aid stations, water/food locations, lodging, best coffee/pastry shops, dangerous section etc. Many of my Randonneuring friends have returned their units when discovering this feature doesn’t exist.
Great tech but warranty work is absolutely terrible.
I would wait till they are fully integrated with sram.
Their support has zero idea about customer service. And forget about shipments. If you paid duty the first time expect to be lectured on why you will get hit with duty again.
I placed warranty issue on April 3. It’s now April 23 and still no unit and I received message that I need to pay duty now.
The season in North America started for races and I’ve been without a head unit for 3 events and I’m not even a serious rider.
They definitely know how to get excitement but back end support which none of the social media influencers experience don’t see this.
Last I checked it was (unless something has changed recently). I have multiple Karoo units tied to my account and they all upload happily regardless of which one I grab.
it seems Hammerhead is not listening at all to its users. Just asked them about a possible pop-up map before turns. Got this answer:
“I completely understand that the ability to switch to the map screen automatically in the event of a turn could be a valuable enhancement for us to add. I have added your vote for these feature requests while forwarding it to the Product team.
This feature is not in the immediate plans as of now but if we receive more requests from the riders for the same feature, the product team will prioritise it. I am sorry that I do not have a concrete timeline to share with you right now.”
So they replied and added your vote to the feature request. They prioritize feature dev based on the number of votes and deliver the most popular. I think this is a fantastic answer. I have had my Karoo2 shortly after it started shipping, and Hammerhead has delivered a bunch of enhancements and features on a pretty regular basis – MUCH more than Garmin did when I had my Edge 1030. Is it perfect? No. Have they added new features and fixed bugs better than Garmin? No question.
It seems the people at Hammerhead’s do listen. Pop-up maps are here! This is what they just posted:
“Hi All,
We have now introduced Switch To Map: when following a route or navigating to a Pin, Karoo can now automatically switch to your map screen when approaching a maneuver. Turn this feature on from Turn-By-Turn Settings in your Profiles.
See the help article here for more information on how this feature works.
Thank you!”
Can anyone help me. Recently switched to Karoo 2 from wahoo elemnt. Pioneer power meter broadcasting fine to elemnt through ant +. Now on Karoo 2 doesn’t see power meter at all through ant + or Bluetooth. Help ? So frustrating !
Sounds like you’re in Pioneer ANT mode, which is a private mode that only works with Pioneer bike computers, and the Wahoo ELEMNT series (using an integration Wahoo did). Just two weeks ago, Shimano also released a Connect IQ app that works with it, but even that has significant limitations in that it won’t broadcast proper power.
You can go back from Pioneer ANT mode to regular ANT+ mode, which will work with the Karoo 2 (and other bike computerS).
I have noted you can also give your own comments on each ride . But can you put pictures on each ride in that section . I know of course that you can put the pictures somewhere else. Thanks
There are rumours around reddit for a potential Karoo 3 coming in 2023.
I´m looking for a new headunit and torn between a Edge 1040 and Karoo 2. Wait for a potential new release or
buy? Any thoughts from your side @DCRainmaker?
@voiture balais
DCR won’t be able to answer as he deals with all GPS’s, however my thoughts for you if it’s not too late.
I buy a GPS for navigation, not as a glorified bike computer and the K2 is much better than the 1040. You can actually see the navi line (yellow with chevrons) and the line where you have been (brown), so you can easily follow the route back. The 1040 is no where near as clear. The re-routing is also better and the K2 doesn’t give up, unlike the 1040.
Worse of all the 1040 still comes up with “Route calculation error” which was a bug-bear on the 1000 and 8 years later is still there. There is also another bug where it asks you if you want to cancel the route of which the only way out is a power-cycle.
As for glorified Bike computer the 1040 is not, Google for “1040 and Gradient Lag” – 35 forum pages of moaning how bad it is. Also the temp is 3-7C too high. The Cadence also keeps registering up to 10s after you stop pedalling with values of 1-10 RPM, nullifying any averages.
The 1040 ClimbPro only works if you are navigating, K2 Climber works all the time.
Garmin Support is a waste of time, Hammerhead is amazing, always a quick and full answer. The upgrades for the K2 come regularly and the support page fully lists all updates, unlike Garmin.
The Pro’s for the 1040 are, of course, the battery life and Garmin Connect (calendar & reports). The alerts are also better, although I had a violent crash and there was no notification.
I agree with DCR on K2 battery life, about 8hrs, which is not much if you are out for weekend without the ability to charge (battery-pack needed).
When I get back from a prolonged trip I will be sending my 1040 back. If there is a K3, I will update pretty quickly even though my K2 is not yet a year old.
I have a Karoo 2 but tempted by the 840/1040 due to the training and recovery side of things, which Hammerhead has not addressed at all with the Karoo 2.
I have a Karoo 2 on trial after abandoning my Garmin Edge Explore. I have synced it to my Ride with GPS and all the routes which I made on RWGPS appear instantly on my Karoo 2 (via WiFi), which is impressive. However, I need to be able to put .gpx and .tcx files from third parties on the Karoo, and at present I cannot do that, neither can I put them onto my RWGPS. I have attached a screen grab of the result when I try to load a third party route onto my Hammerhead dashboard. I have contacted Hammerhead support, but they say that the files which I am trying to load do load OK at their end, so I am not sure where to go with that.
If you have any suggestions I would be most grateful.
best regards, David
Does this Karoo 2 provide spoken navigation instructions – as an example – “Turn in 50 meters on Jackson street” ? Even if its only through a headset connected to your phone similar to a Garmin 830 is what I’m interested in at a minimum. If it gives the spoken directions directly from the device, that’s even better. TIA
There is a lot to love about this computer. I’m halfway though my 45-day trial and will probably keep it. However, given it has been fielded 3+ years it still has a remarkably high amount of bugs and quirks. Connecting to the app, speed sensor over rides vs complementing the gps, forgetting all Strava segments, charging fussiness. I’ve found works around to all these (with help from VERY responsive customer service) but not climb/descent inaccuracy. Consistently 25% high on all rides, compared to Garmin, Wahoo and Strava. The elevation seems to be spot on, but the climb calculations are 25% high at all points on the ride. I have a local 400 ft hill and finish it with 500 feet of climb. I correct on Strava after the rides so end up with good data, but I’d rather have good data while riding.
My biggest headache is the speed sensor lag. I stopped using an external speed sensor since it has a 6-10 second lag. The GPS-based speed tracking is very responsive.
Seems like elevation and grade inaccuracies are still present after purchasing brand new unit. Today’s ride measured 4x greater elevation than strava. It is obvious that the sensor is just too sensitive. I did a 6″ bunny hop on purpose on a flat stretch of road and the elevation gained and the grade increased and decreased accordingly. Same happens with potholes and there are many. There needs to be some smoothing or threshold activation. When I talked to HH support they said that they don’t know if it’s a software or hardware issue. But it’s been months that it has been flagged. Wanted to exchange it but they said that there isn’t any guarantee new unit won’t have same elevation problems.
Similar problem here. My climbs consustently measure 25% high, so I just carry the correction in my head while riding and correct every ride in Strava. Related, the gradient meaurement is erratic jumping+/- 8% every second. It’s a meaningless. I loved the device at first, but after finding all the bugs over 6 months, I don’t recommend it .
Bugs: all messages display twice and can’t be cleared. Connecting the app requires first connecting to BT audio in addition to regular BT (customer service believes this is specific to my Pixel phone).
Rather than filling in GPS gaps, the speed sensor supercedes GPS data for distance and elevation. The unit records the route, but shows no distance ore elevation (fix is to not use the sensor)
Others are short comings rather than “bugs”.
Strava is my biggest beef. Strava text and graphics are tiny, and poorly contrasted to the orange graphic making it mostly unusable. Also does not display current PR or segment ETA like Garmin and Wahoo do. When I reset the unit after a recent SW update, it took three rides for all my Strava segments to reload. Occasionally the unit will hang up on a previous Strava segment, saying I’m off segment and not display the segment in current on.
When using a route, time to next destination is h:m but no seconds.
Plus the trouble with the climb/gradient calculation I noted previously. IMO those are pretty big problems for a $400 unit that been in the field for 4 years combined with a short battery life, the Karoo2 is a bad value.
Dropped my Karoo 2 on the floor in my office and now have a cracked display… Do they repair Karoos? I really don’t want to buy another one since the hardware is ancient. I’d either wait for a Karoo 3 or buy a Garmin 1040.
Again, another review of a bike computer with navigation and there is no description of what happens when the rider goes off course. Is Karoo as stupid as Garmin and directs the rider back to the point of deviation?
“Is Karoo as stupid as Garmin and directs the rider back to the point of deviation?”
Neither Garmin or Hammerhead direct you back to point of deviation. They direct you to the next most logical point of continuance. That’s been that way for many many many years.
I’ve noticed the Karoo 2 takes up to 8 seconds to report speed changes from a hub based Wahoo or Garmin speed sensor. Can anyone else replicate it?
Simple test. Spin the wheel, wait for the Karoo to report the speed, stop the wheel from spinning then count the seconds before the speed is 0 mph/kph.
Can’t wait to see a hands-on review of this.
I’m getting a bit frustrated by my Karoo 2 and they have no chance of me upgrading unless the following things are vastly improved.
1. Battery life.
2. Raindrop rejection/touchscreen when wet.
3. Ride data available on the device.
1. Battery life is more like 8 hours, not only is this a lot less than what they advertise, but is laughably less than what the latest Garmins offer. I think auto-brightness would be an easy way to make a big difference, this should be easy to add to an Android device.
2. This is infuriating, when it starts to rain the most common thing is for the ride to pause or for it to try to reroute to a point on the map the rain has tapped. Once it is wet, it is quite difficult to even lock the screen, as this requires swiping down and over etc. Easier use with gloves would also be good.
3. There is so little data available to look at on your rides. Part of what Hammerhead says about their lack of smartphone app is that the device IS the app. Well if that is the case, when you look at your rides, all you see is Avg Speed, Max Speed, Ascent, Descent, Max Elevation. Once I needed to find what time I left work on a previous day, so looked at my Karoo. I had to go to Strava to find it, Why can’t I see data on time started, time finished, Strava segments, etc. You see how you did on a climb straight away, why not when you have finished your ride?
I just purchased a Karoo 2 and had high hopes for this unit. The screen resolution is really nice.
But after 12 days / 6 rides its bricked. Won’t charge and won’t come back on. I updated all the software and firmware and was on the latest version as far as I can tell. I found several other people with the same issue on both Reddit and the Hammer Head forum. I am super disappointed.
As the above user stated my first ride in the rain caused chaos on the touch screen. There is a way to lock the screen mid ride with the external buttons but sense it was so new I could not remember how to do it and I ended up with with 2 rides with a bunch of laps (lesson learned). During the ride I lost the ability to swipe the data screens which seemed to be changing with every rain drop. Also there is no way to disable to the touch screen until you start a ride which is kind of annoying if you know there is a chance of rain.
Another big deal for the mountain bikers out there is there is no Trail Forks overlay integration. I never even got to try a mountain bike ride because the unit bricked 12 days after I purchased it.
I am on the road for two weeks and a Garmin 840 is on the way. Upon arrival I will just sync it with the Garmin App and all my old Garmin 530 settings and sensors will port over. I got a solid 5 years out of the 530, what finally did in the Garmin 530 was rain getting in as the top screen was starting to delaminate.
I hope Hammerhead will make this right and I get a chance to really try out the Karoo 2 long term and get a better idea how it really works. The data screen and map graphics are really the best. But the supporting software and website has a way to go. I see there is a Karoo 3 out that has a phone app but it seem the Karoo 2 can not connect.
I swim, bike and run. Then, I come here and write about my adventures. It’s as simple as that. Most of the time. If you’re new around these parts, here’s the long version of my story.
You'll support the site, and get ad-free DCR! Plus, you'll be more awesome. Click above for all the details. Oh, and you can sign-up for the newsletter here!
Here’s how to save!
Wanna save some cash and support the site? These companies help support the site! With Backcountry.com or Competitive Cyclist with either the coupon code DCRAINMAKER for first time users saving 15% on applicable products.
You can also pick-up tons of gear at REI via these links, which is a long-time supporter as well:
Alternatively, for everything else on the planet, simply buy your goods from Amazon via the link below and I get a tiny bit back as an Amazon Associate. No cost to you, easy as pie!
You can use the above link for any Amazon country and it (should) automatically redirect to your local Amazon site.
While I don't partner with many companies, there's a few that I love, and support the site. Full details!
Want to compare the features of each product, down to the nitty-gritty? No problem, the product comparison data is constantly updated with new products and new features added to old products!
Wanna create comparison chart graphs just like I do for GPS, heart rate, power meters and more? No problem, here's the platform I use - you can too!
Think my written reviews are deep? You should check out my videos. I take things to a whole new level of interactive depth!
Smart Trainers Buyers Guide: Looking at a smart trainer this winter? I cover all the units to buy (and avoid) for indoor training. The good, the bad, and the ugly.
Check out
my weekly podcast - with DesFit, which is packed with both gadget and non-gadget goodness!
Get all your awesome DC Rainmaker gear here!
FAQ’s
I have built an extensive list of my most frequently asked questions. Below are the most popular.
You probably stumbled upon here looking for a review of a sports gadget. If you’re trying to decide which unit to buy – check out my in-depth reviews section. Some reviews are over 60 pages long when printed out, with hundreds of photos! I aim to leave no stone unturned.
I travel a fair bit, both for work and for fun. Here’s a bunch of random trip reports and daily trip-logs that I’ve put together and posted. I’ve sorted it all by world geography, in an attempt to make it easy to figure out where I’ve been.
The most common question I receive outside of the “what’s the best GPS watch for me” variant, are photography-esq based. So in efforts to combat the amount of emails I need to sort through on a daily basis, I’ve complied this “My Photography Gear” post for your curious minds (including drones & action cams!)! It’s a nice break from the day-to-day sports-tech talk, and I hope you get something out of it!
Many readers stumble into my website in search of information on the latest and greatest sports tech products. But at the end of the day, you might just be wondering “What does Ray use when not testing new products?”. So here is the most up to date list of products I like and fit the bill for me and my training needs best! DC Rainmaker 2024 swim, bike, run, and general gear list. But wait, are you a female and feel like these things might not apply to you? If that’s the case (but certainly not saying my choices aren’t good for women), and you just want to see a different gear junkies “picks”, check out The Girl’s Gear Guide too.


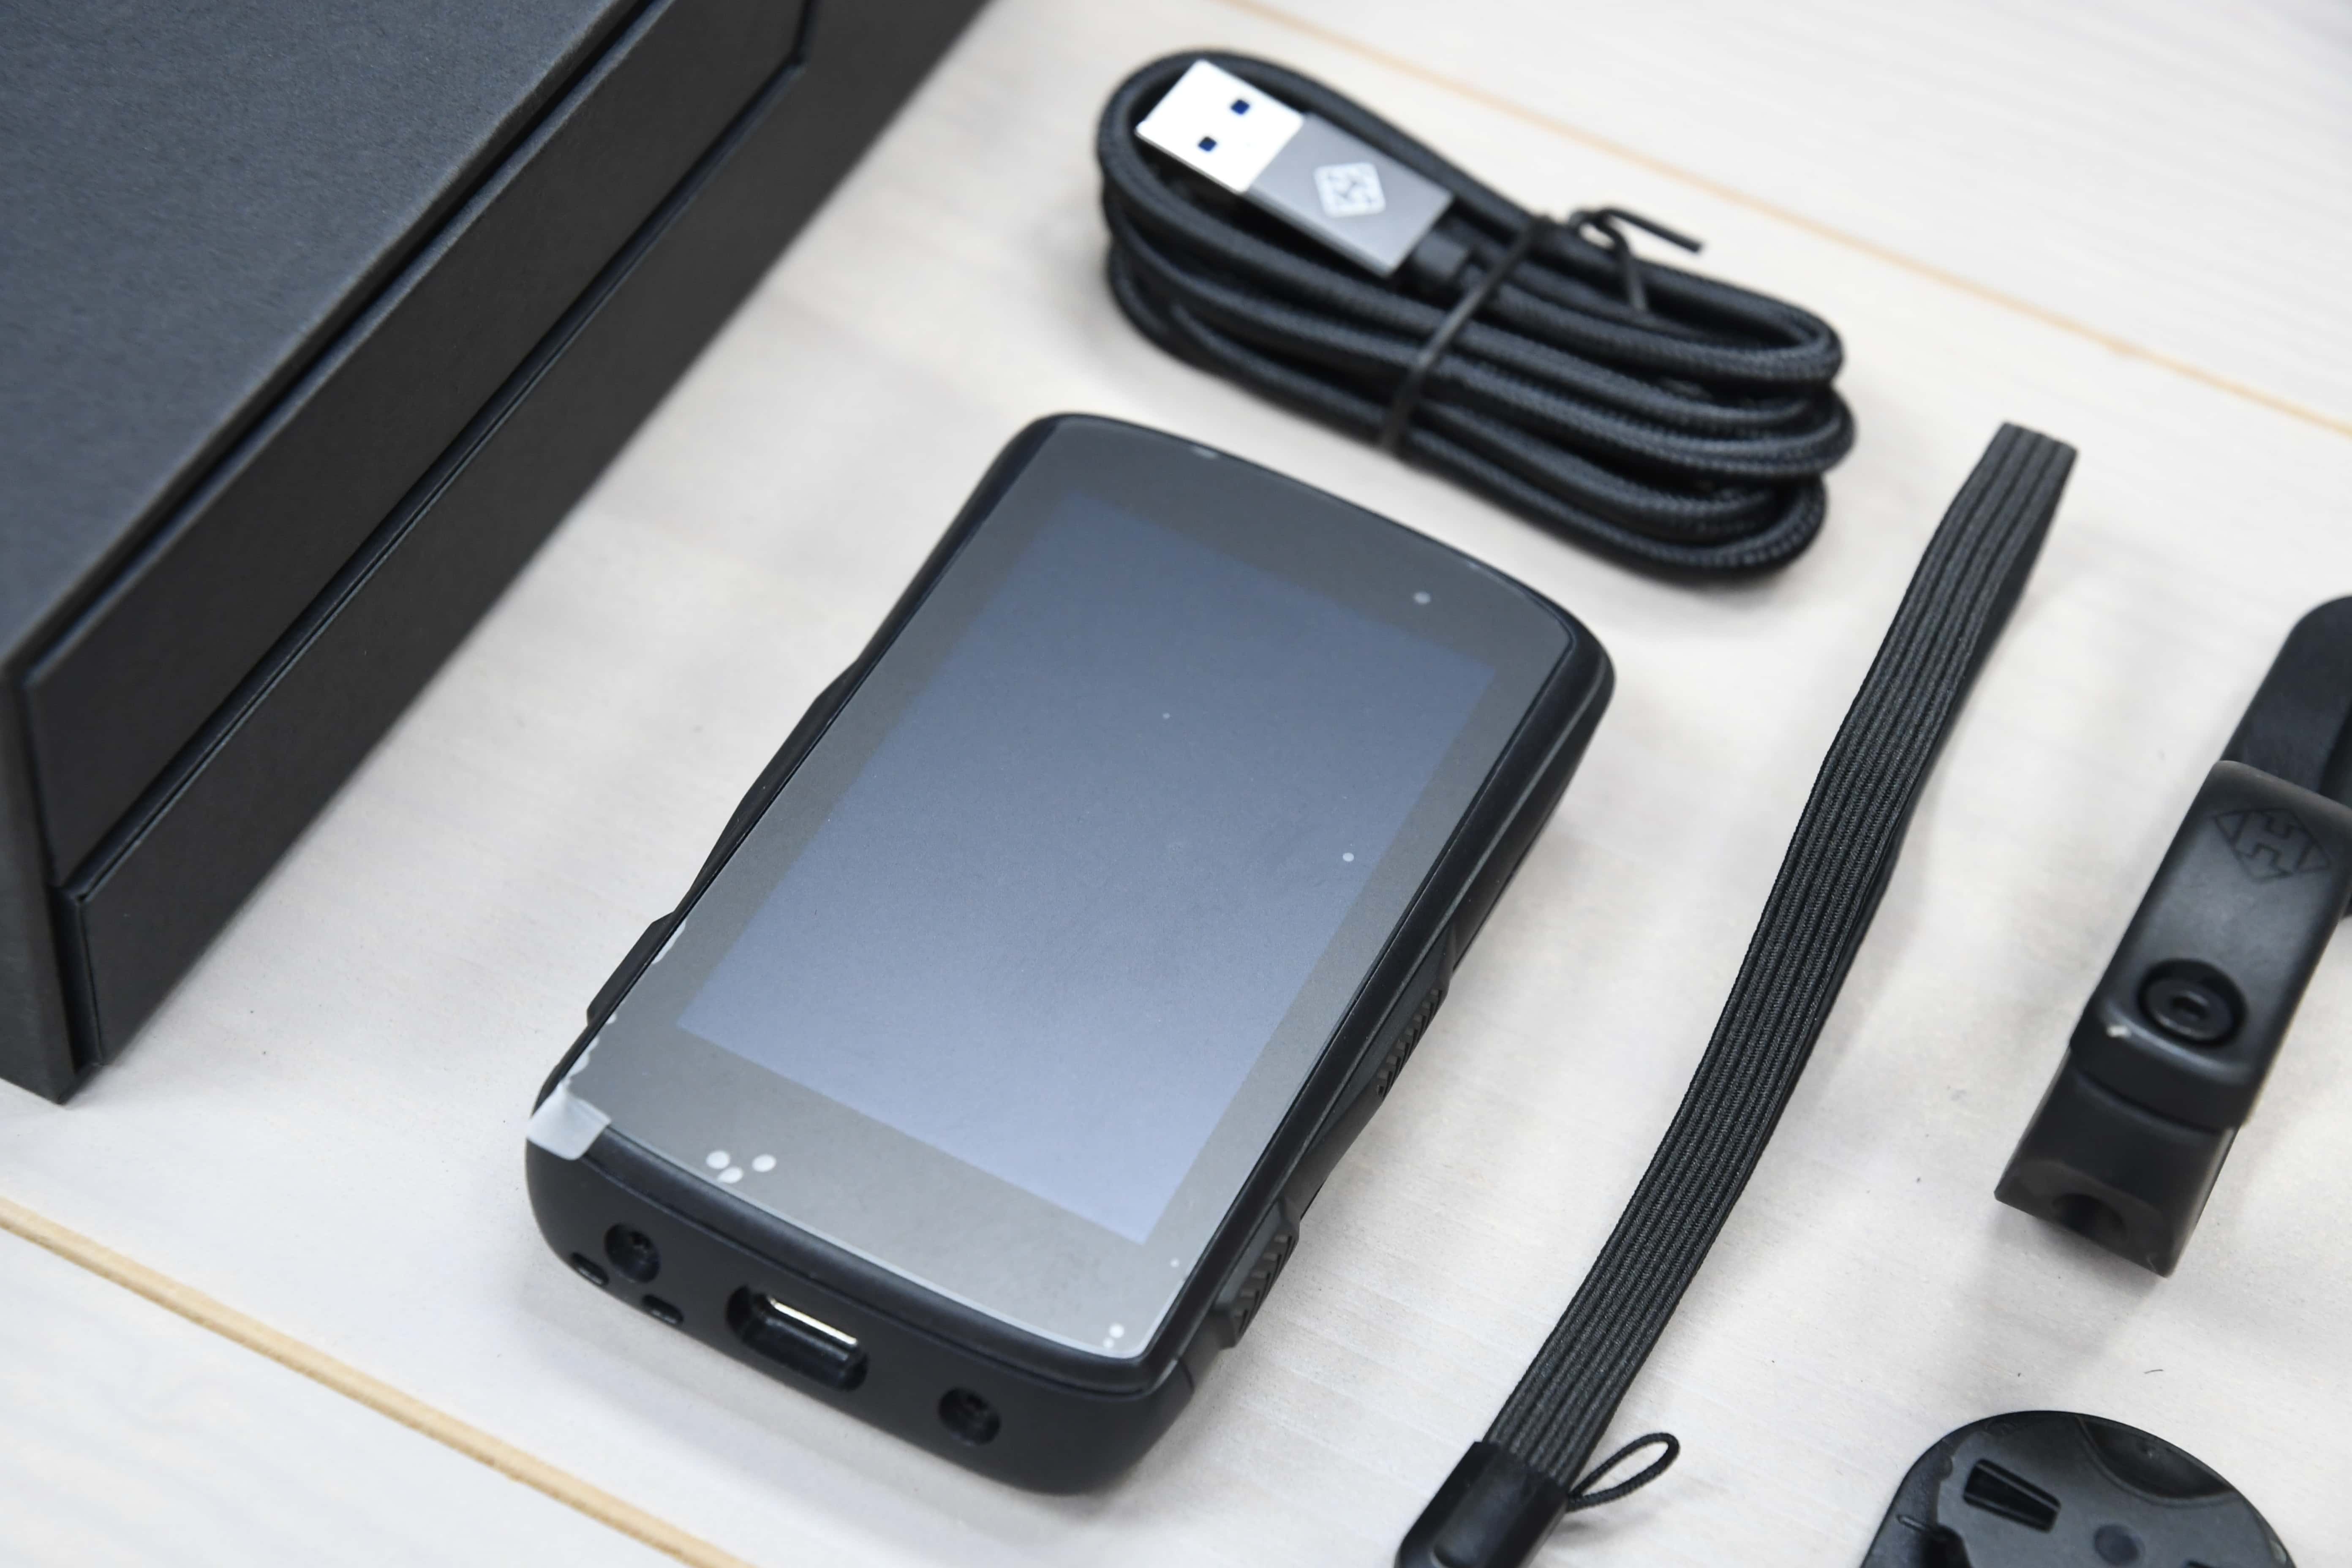
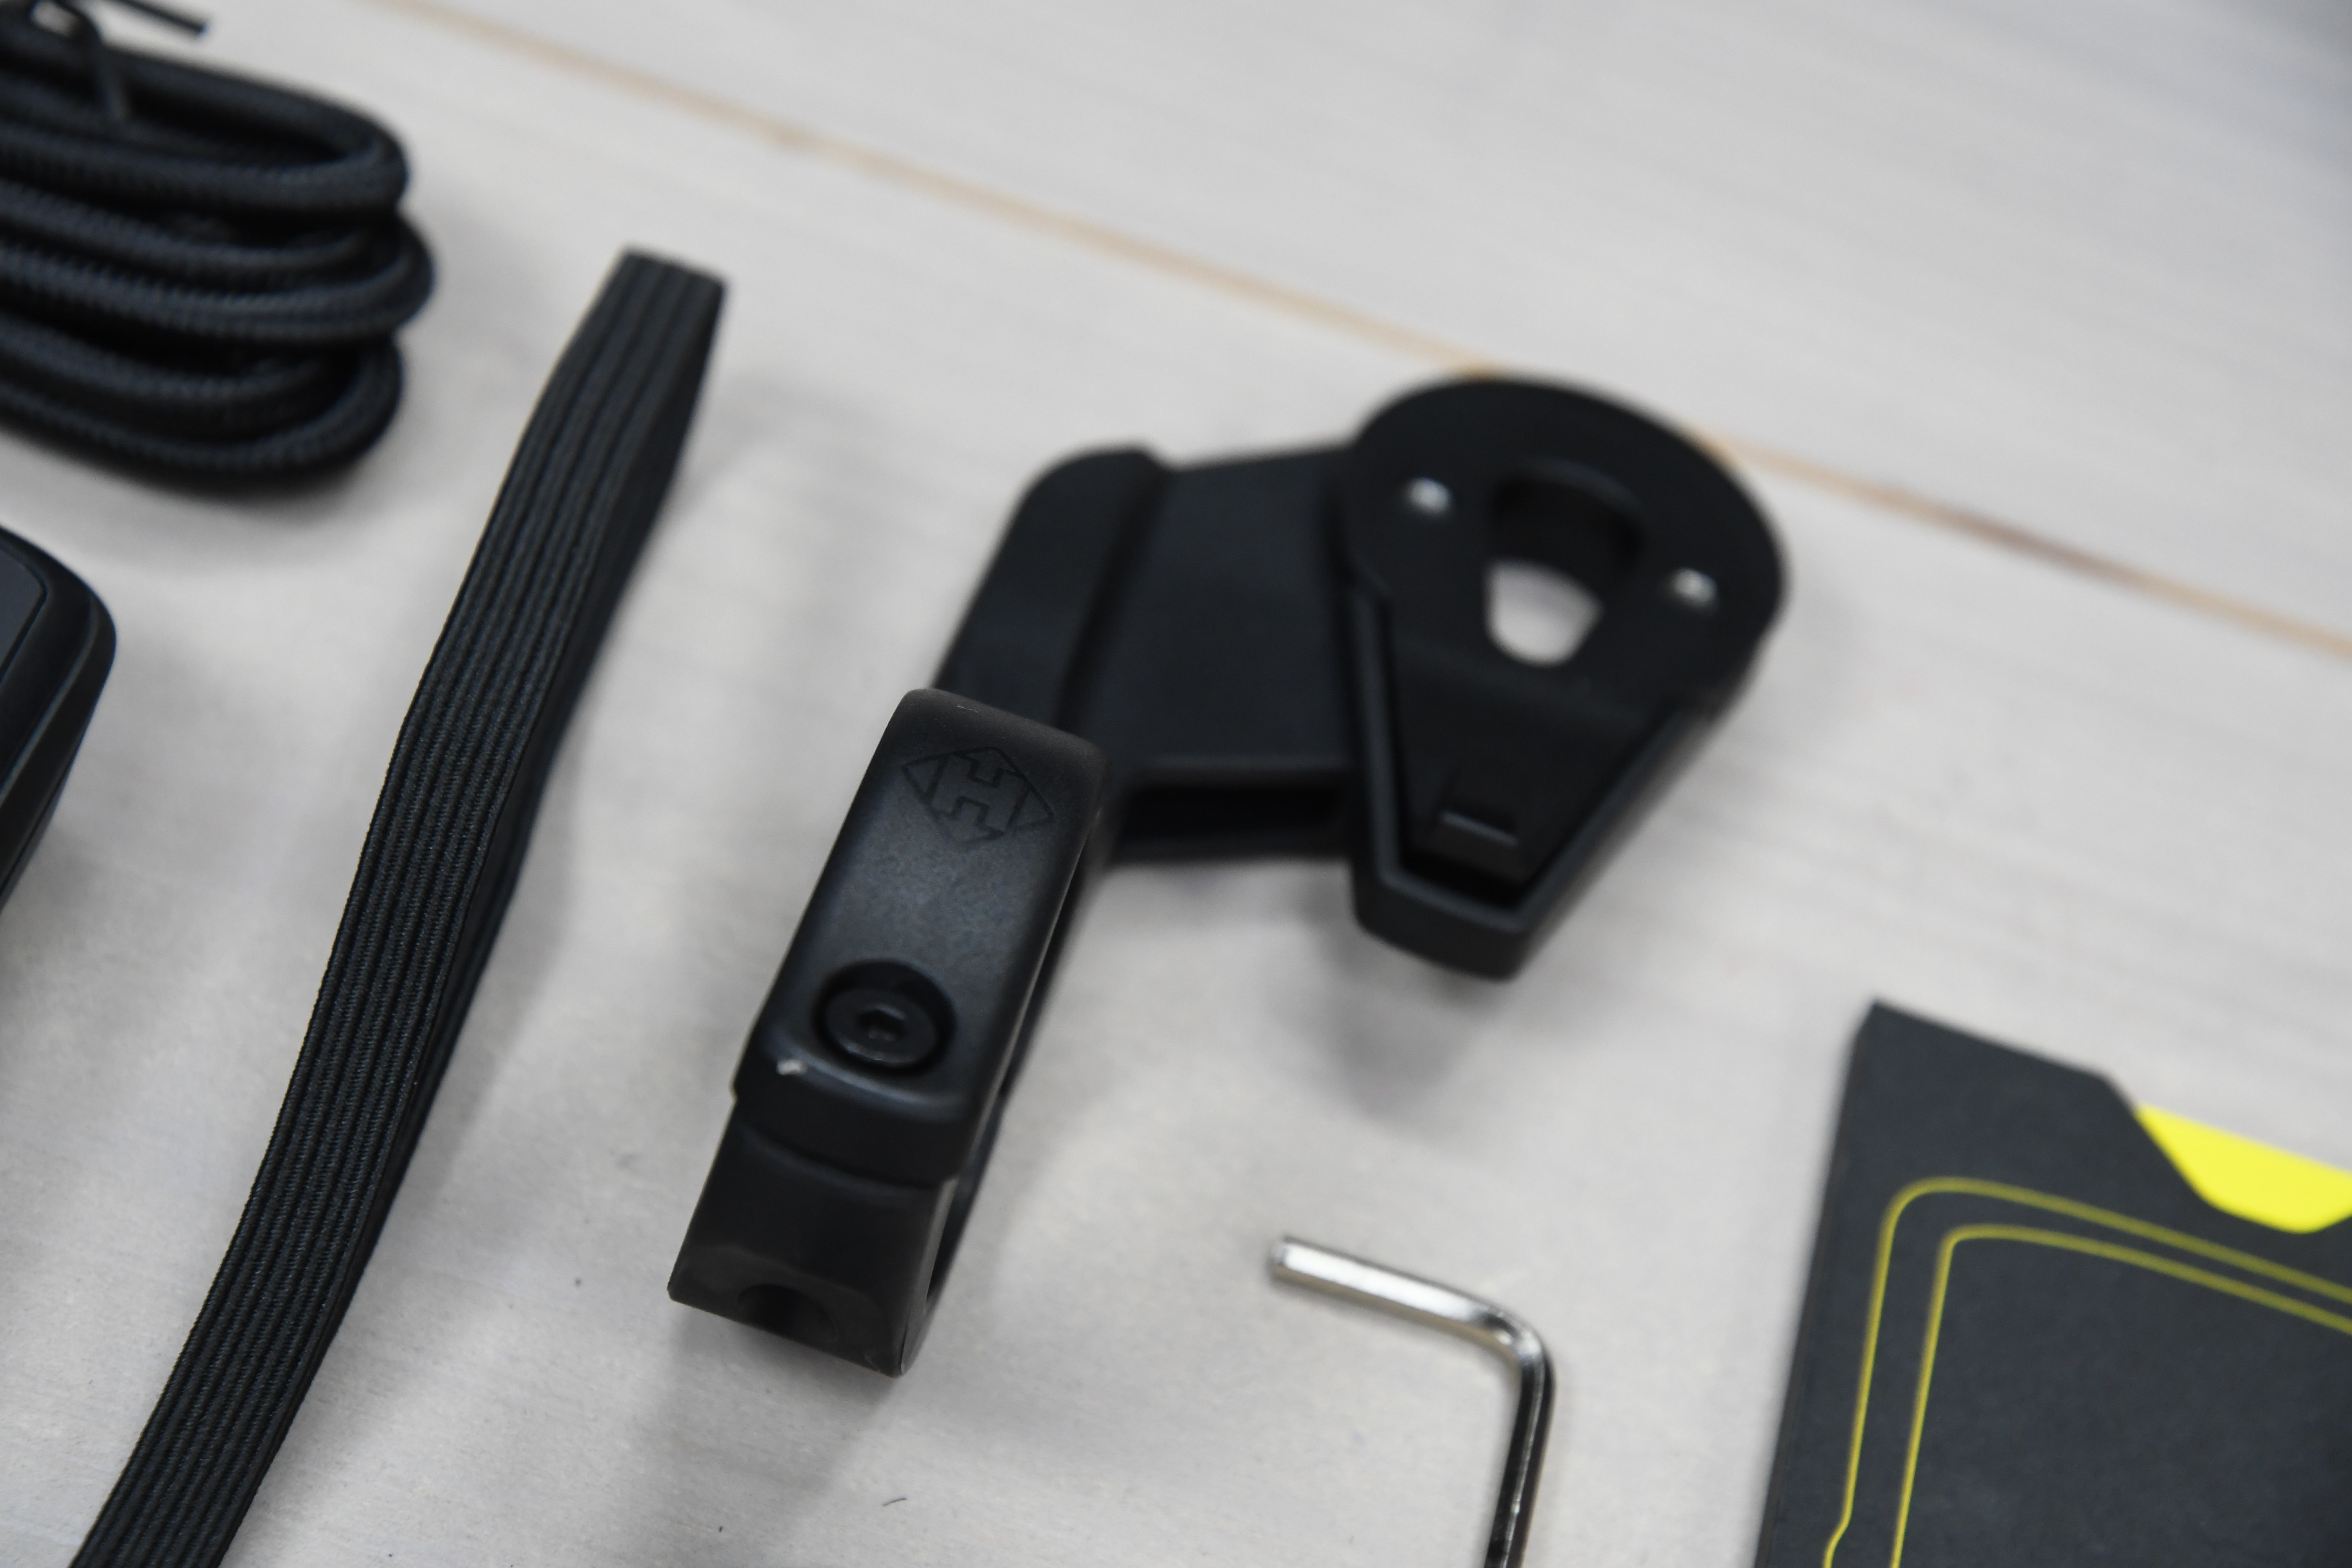

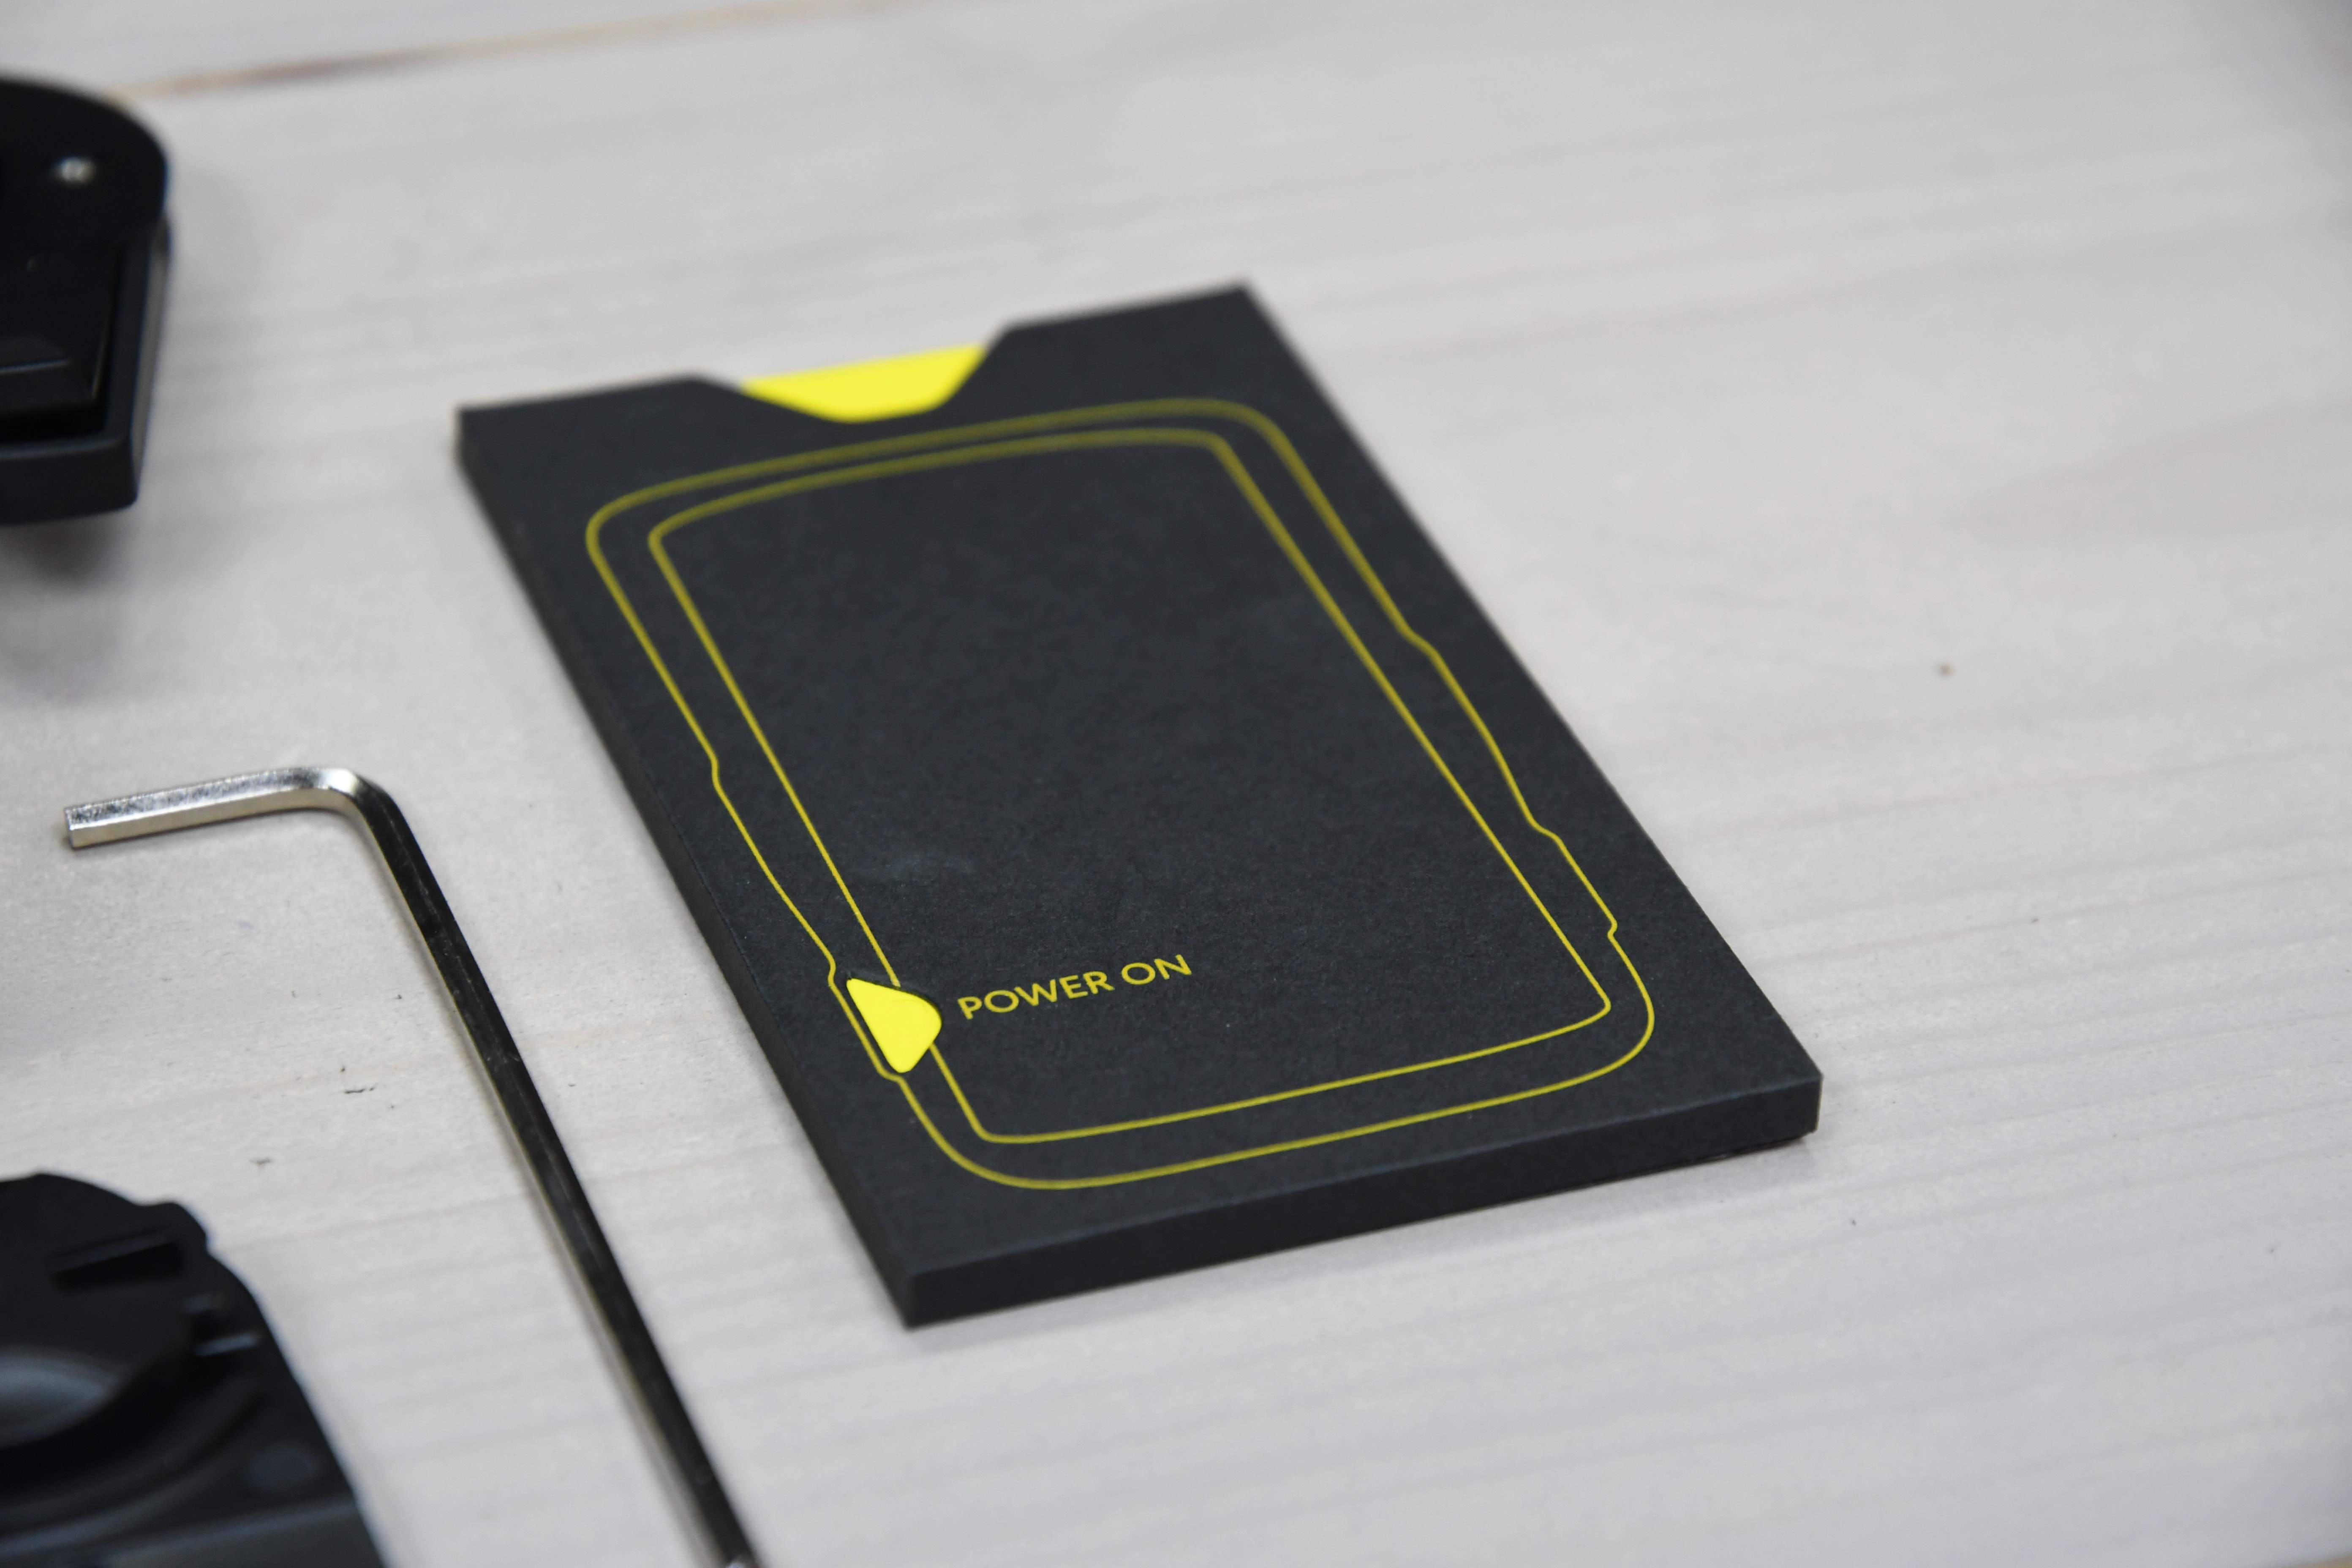


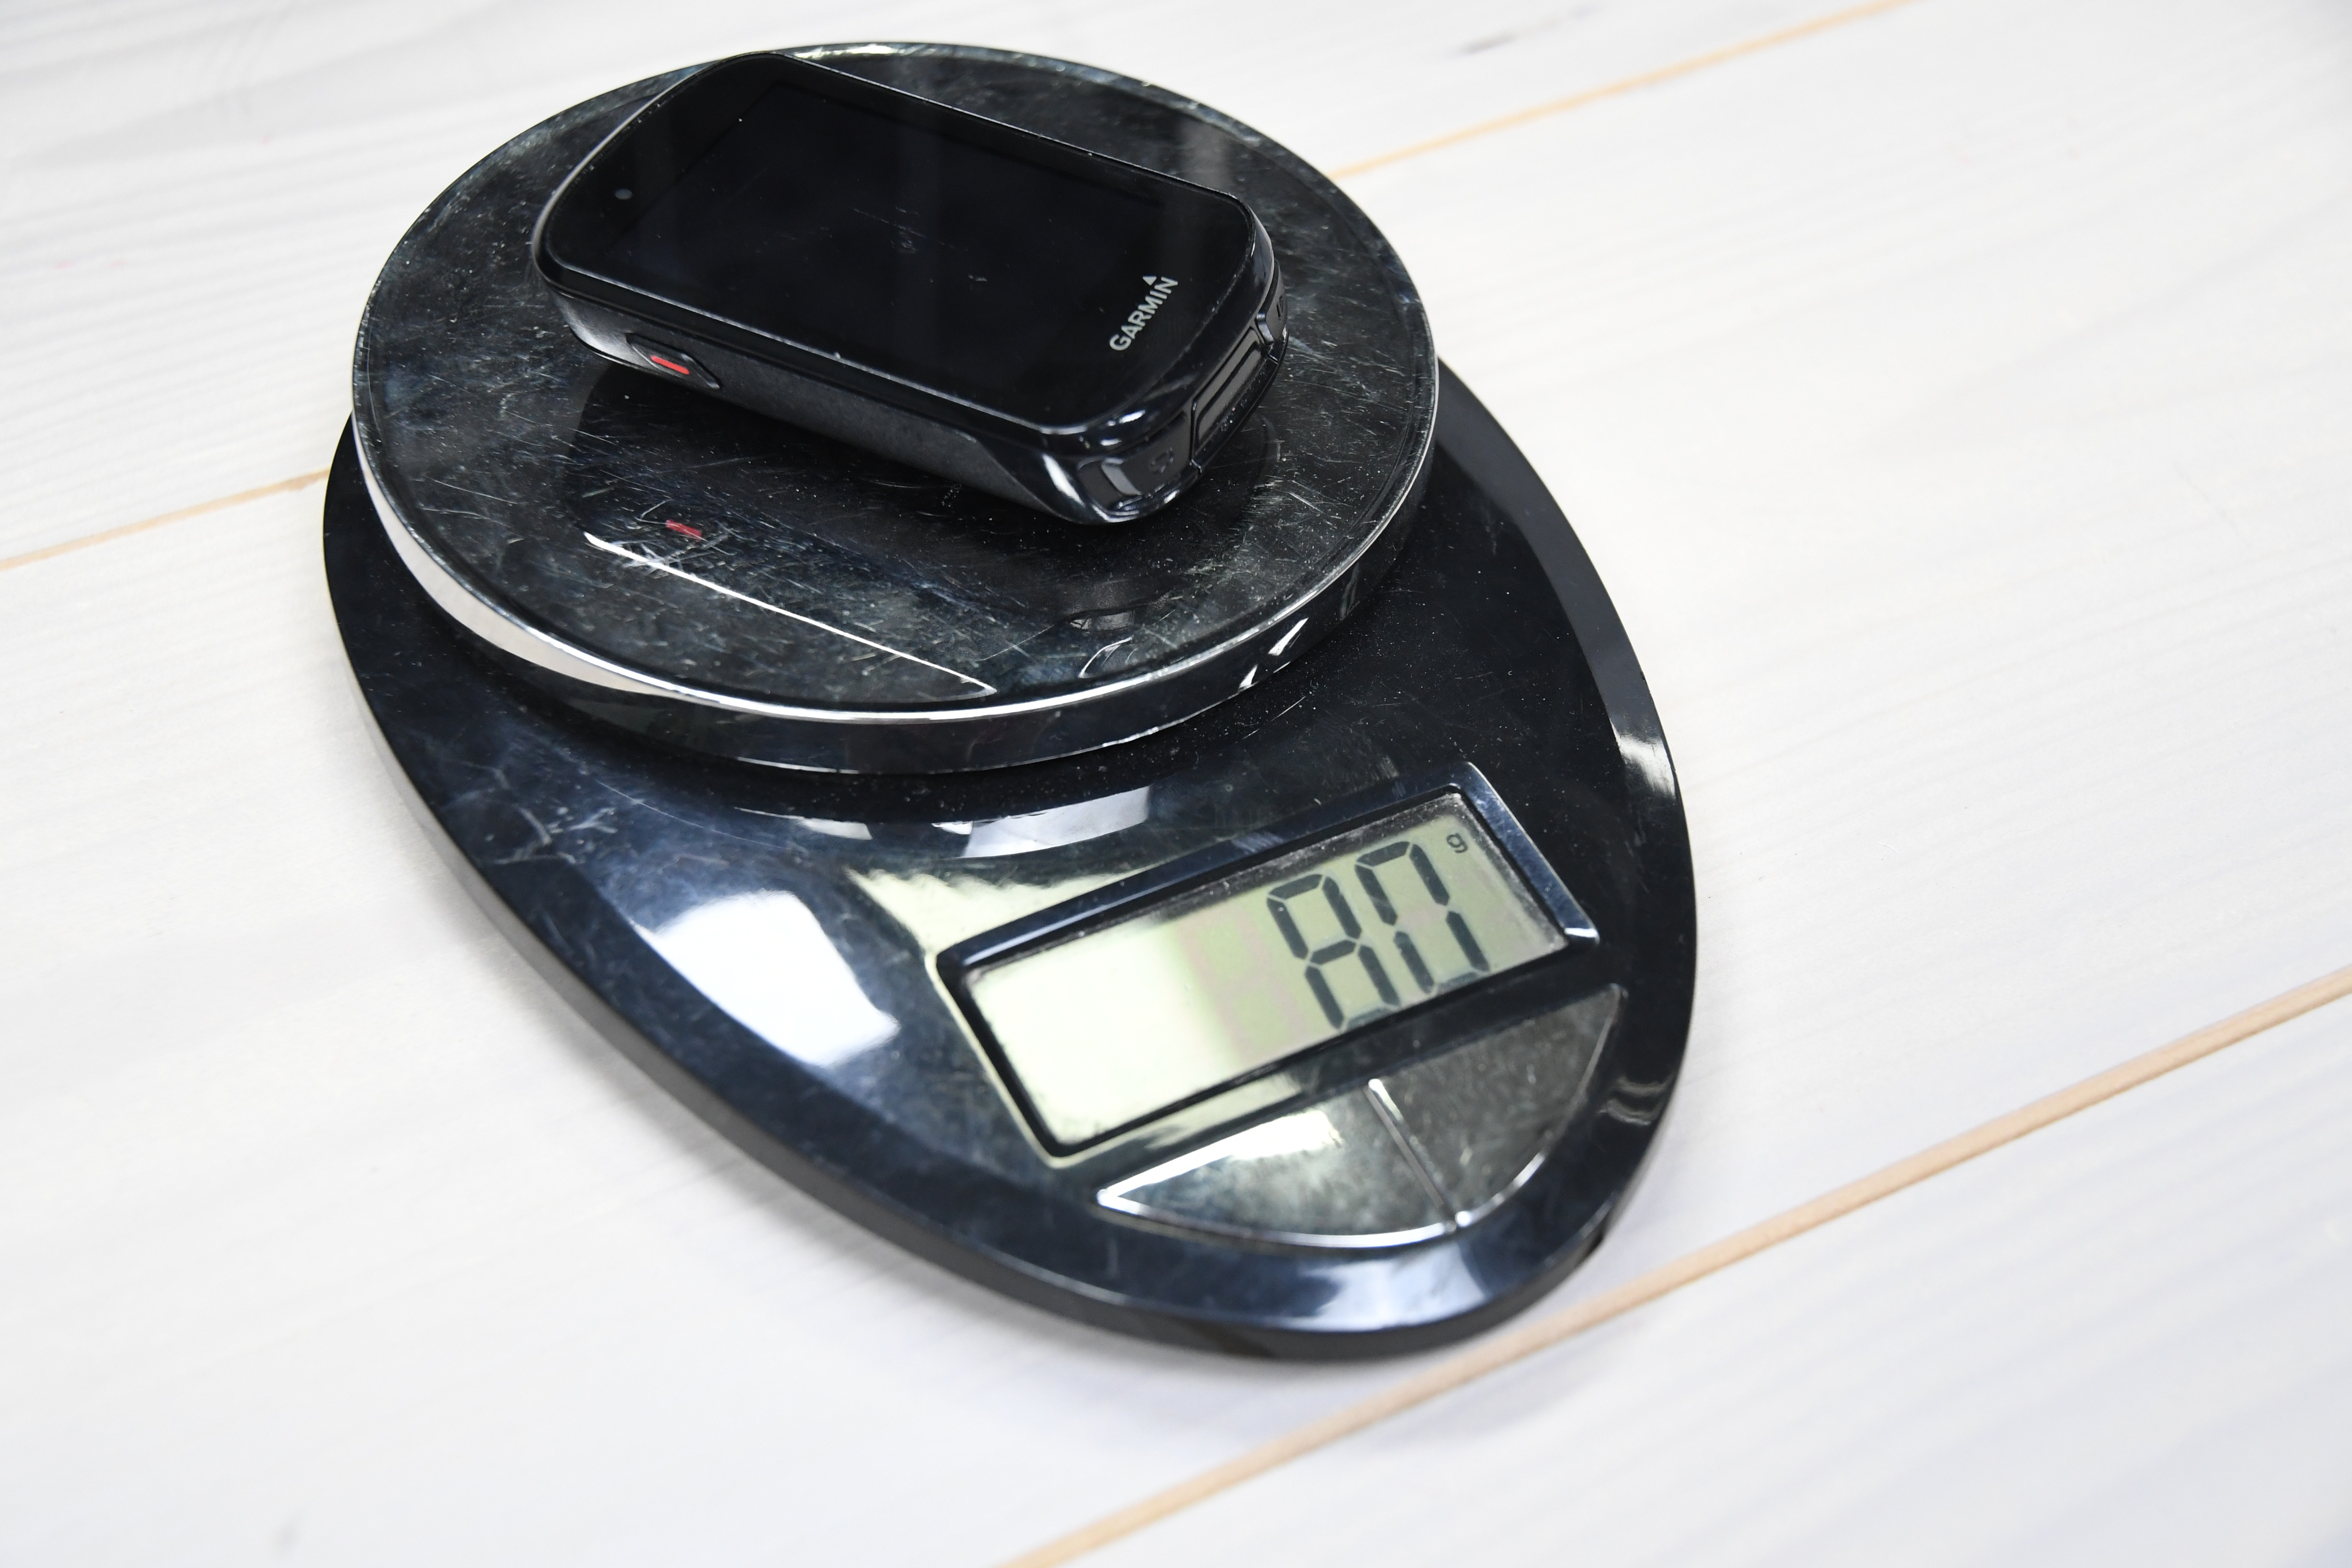
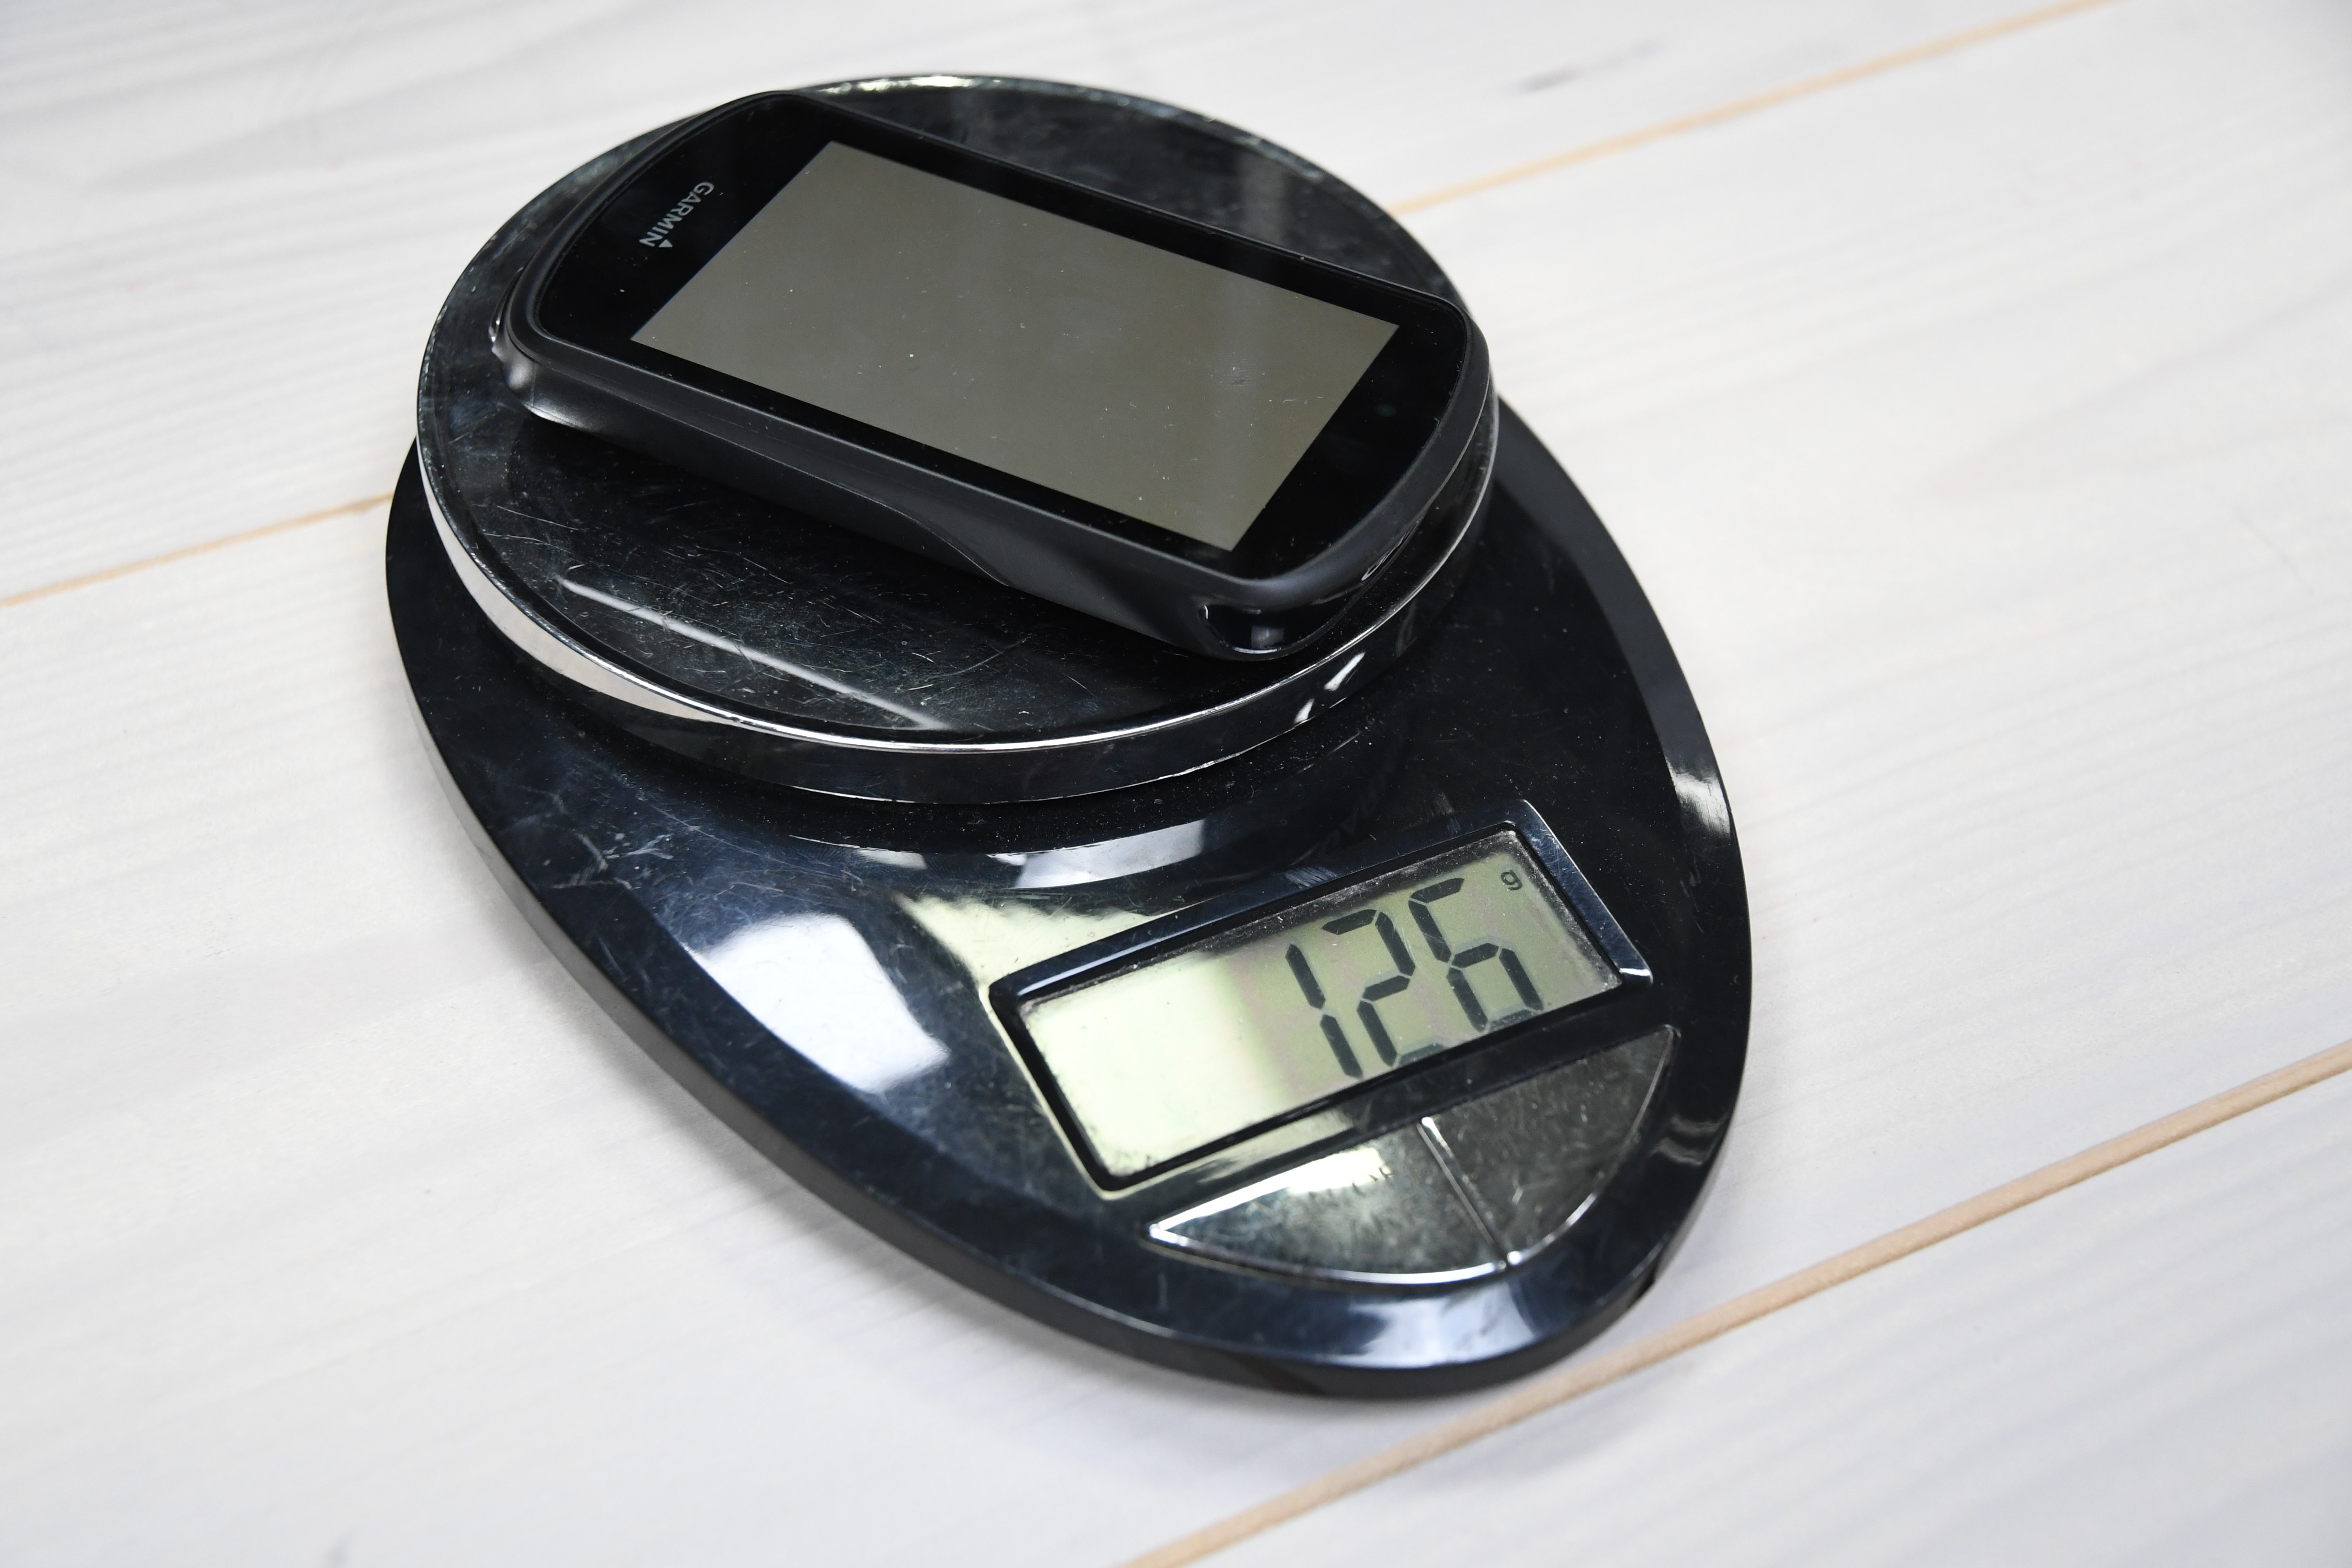
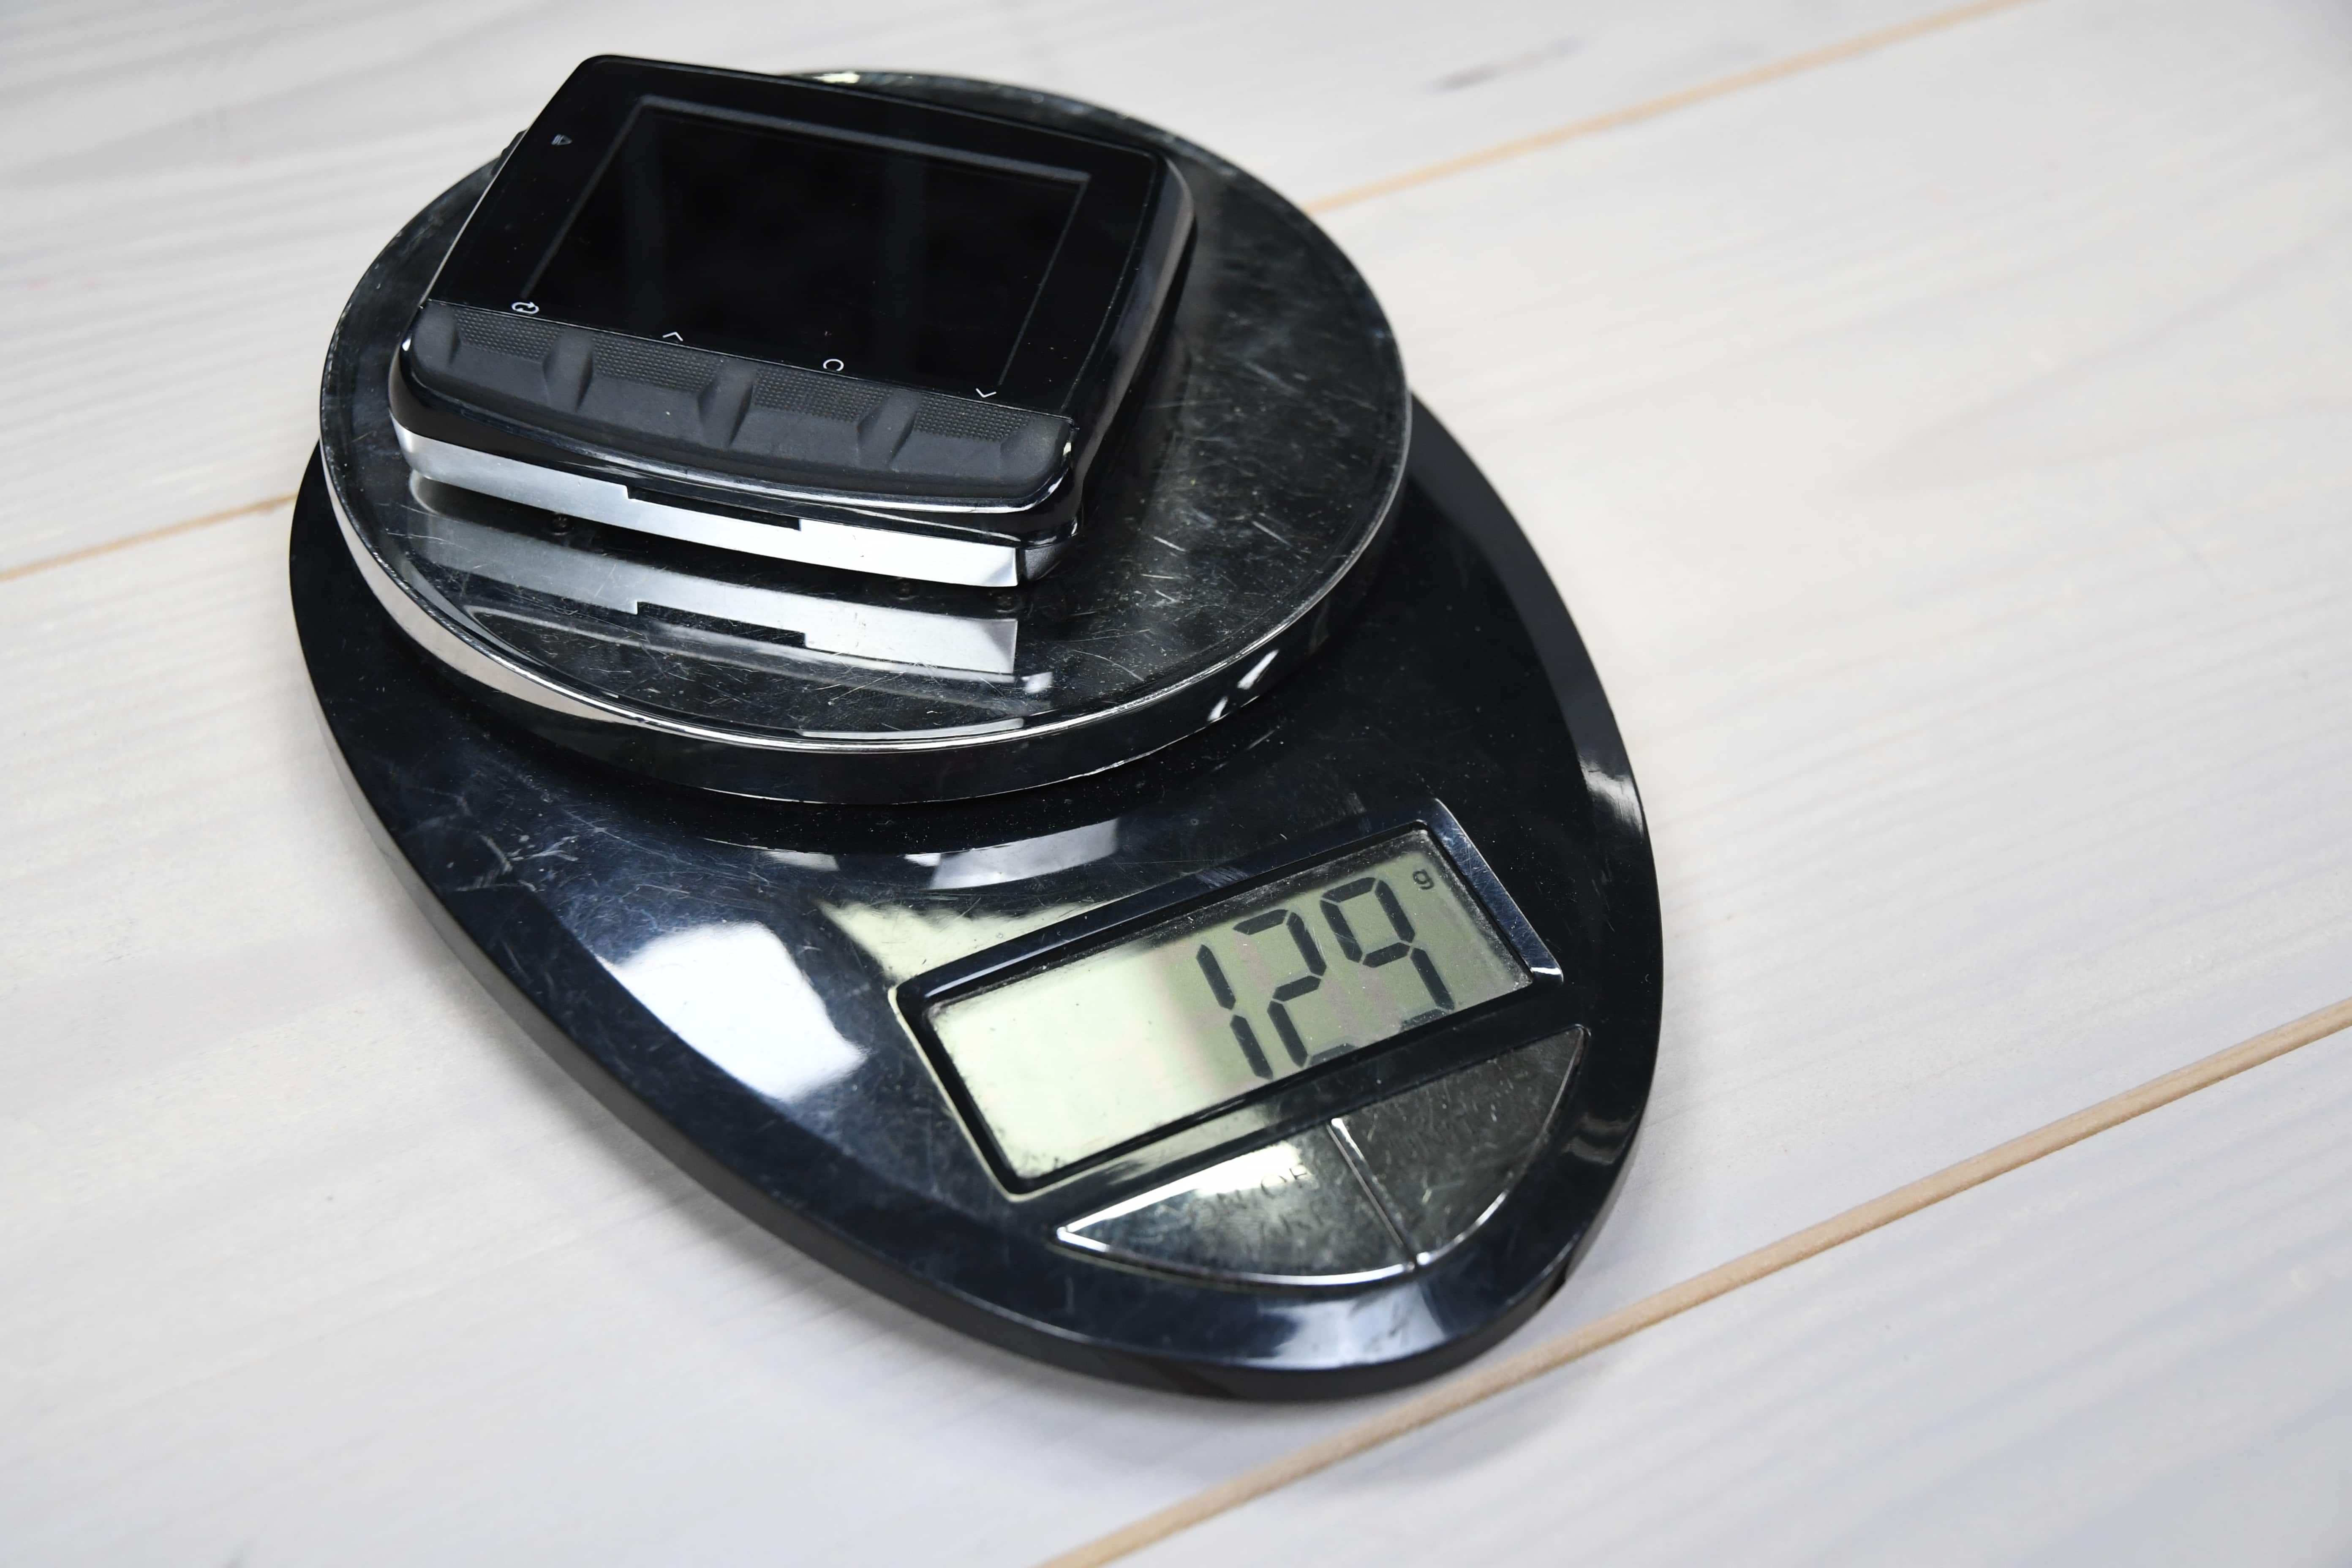
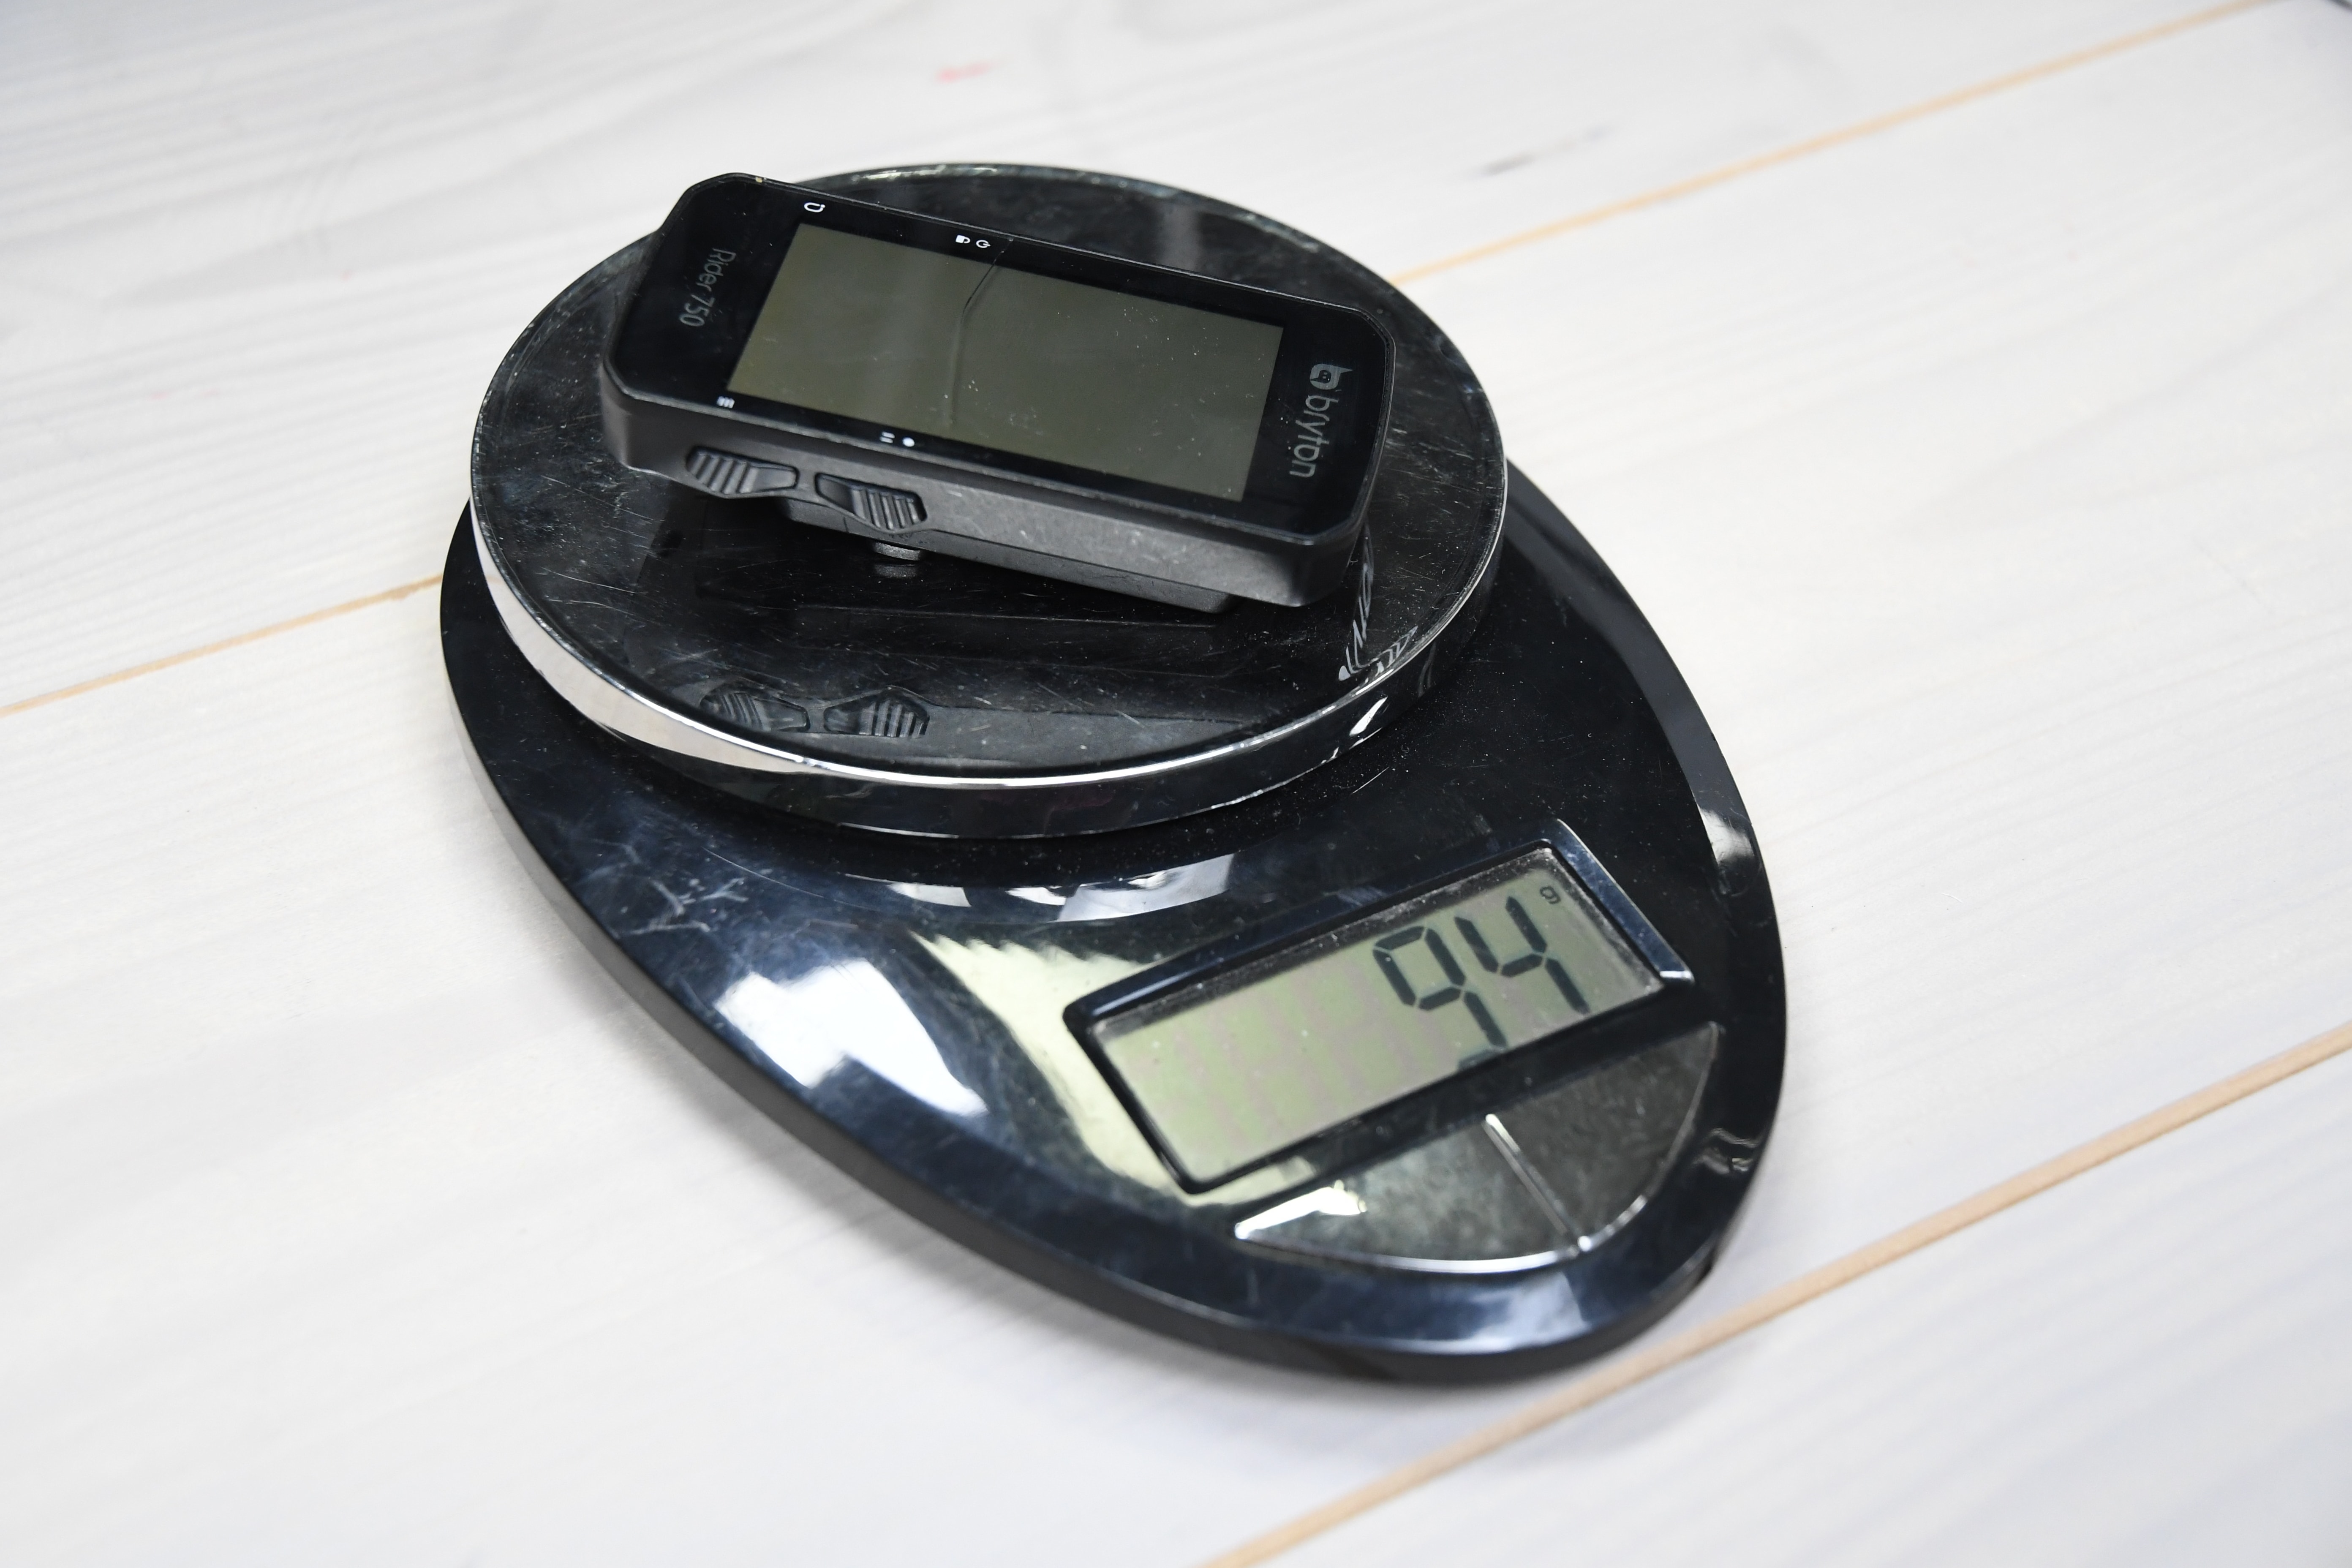

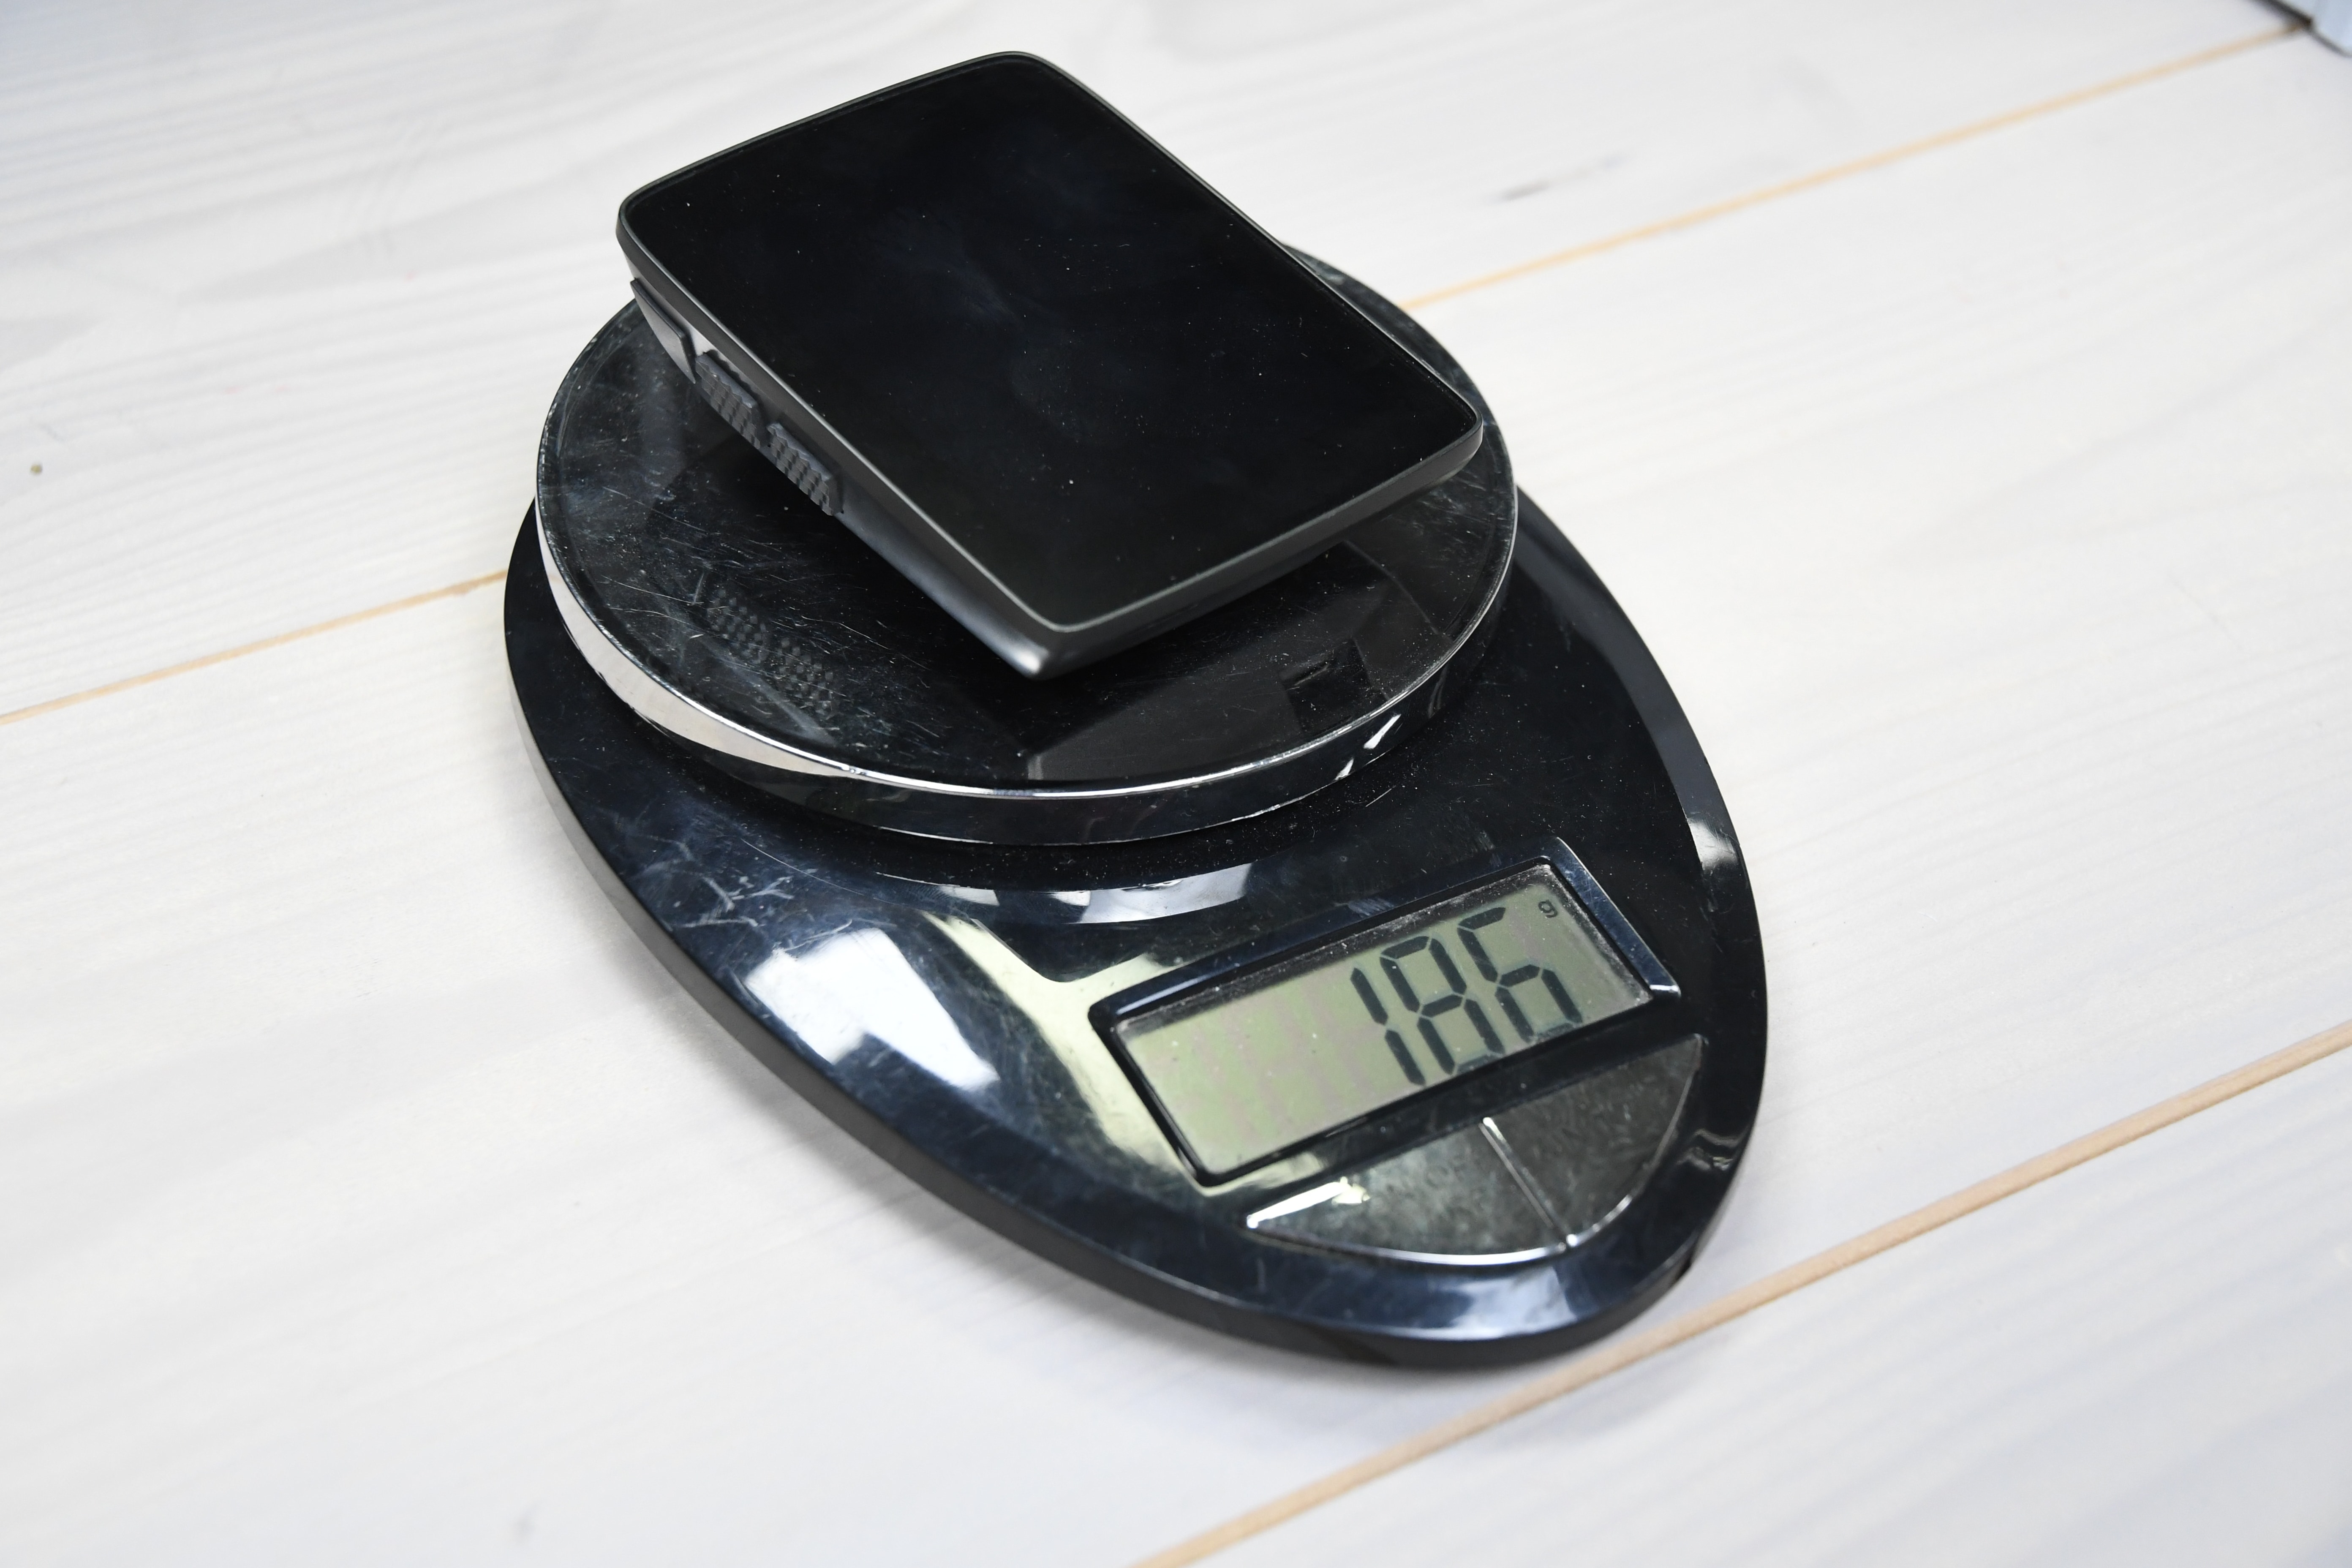


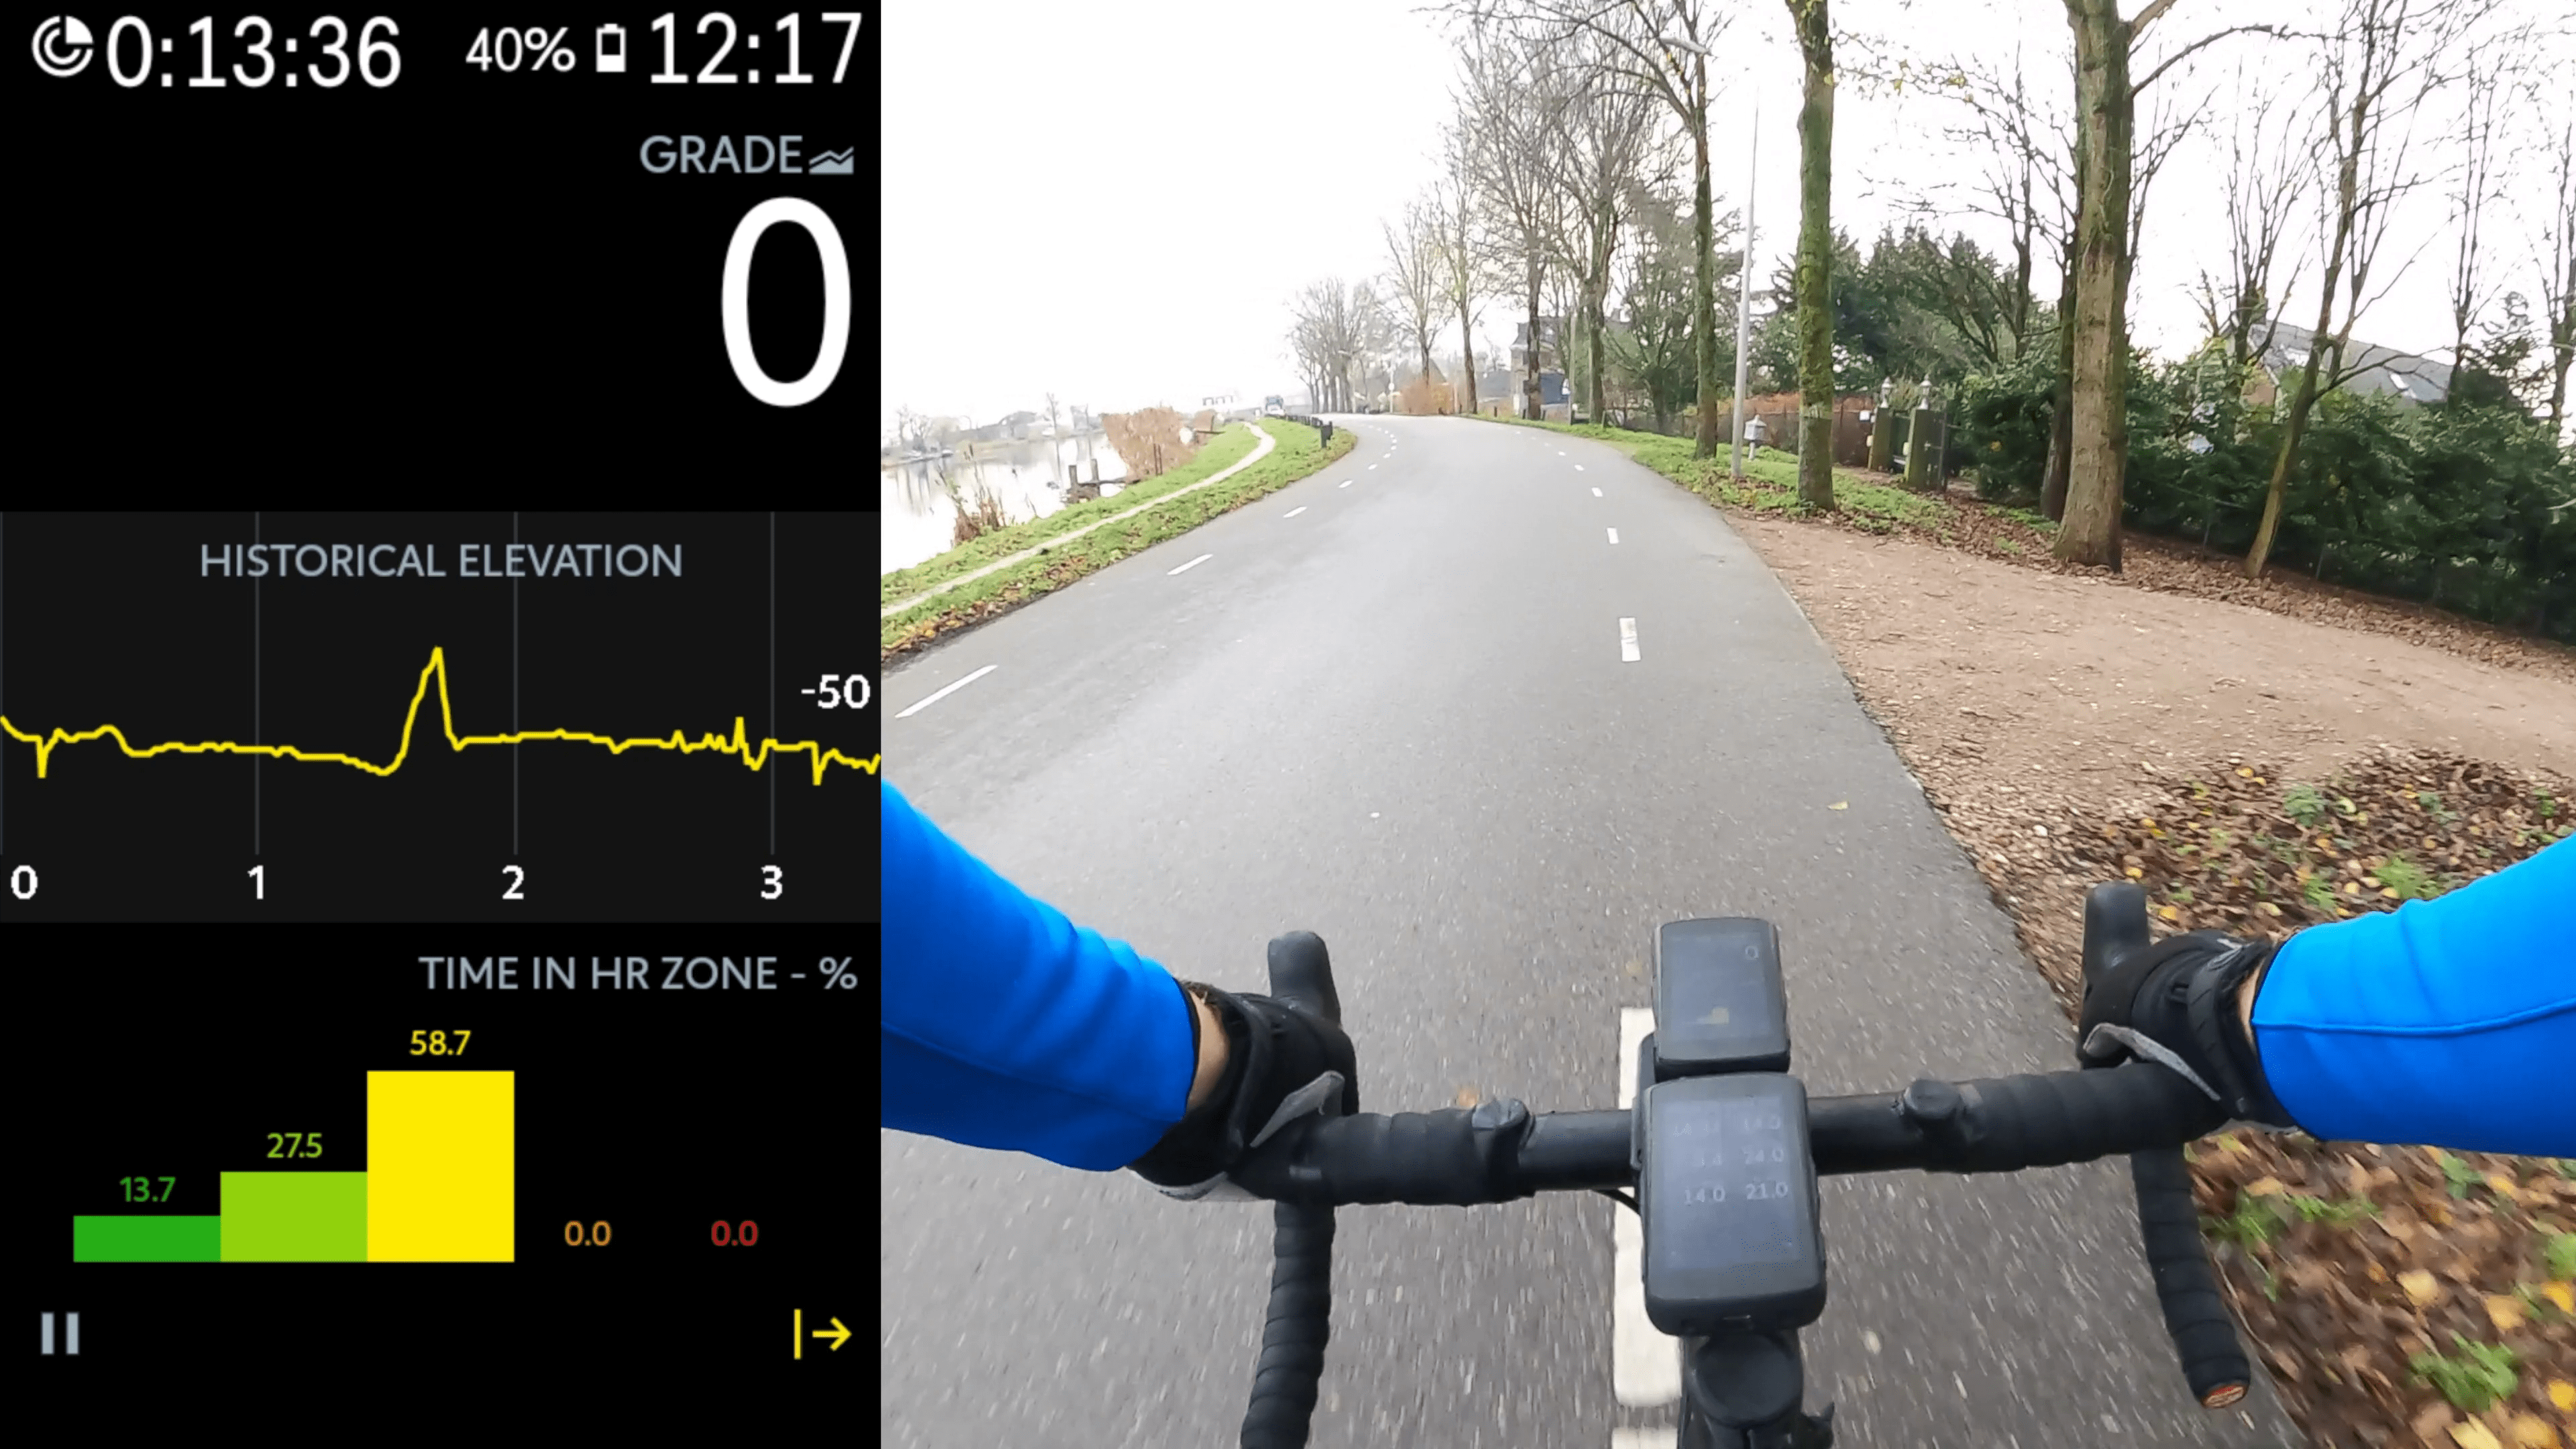
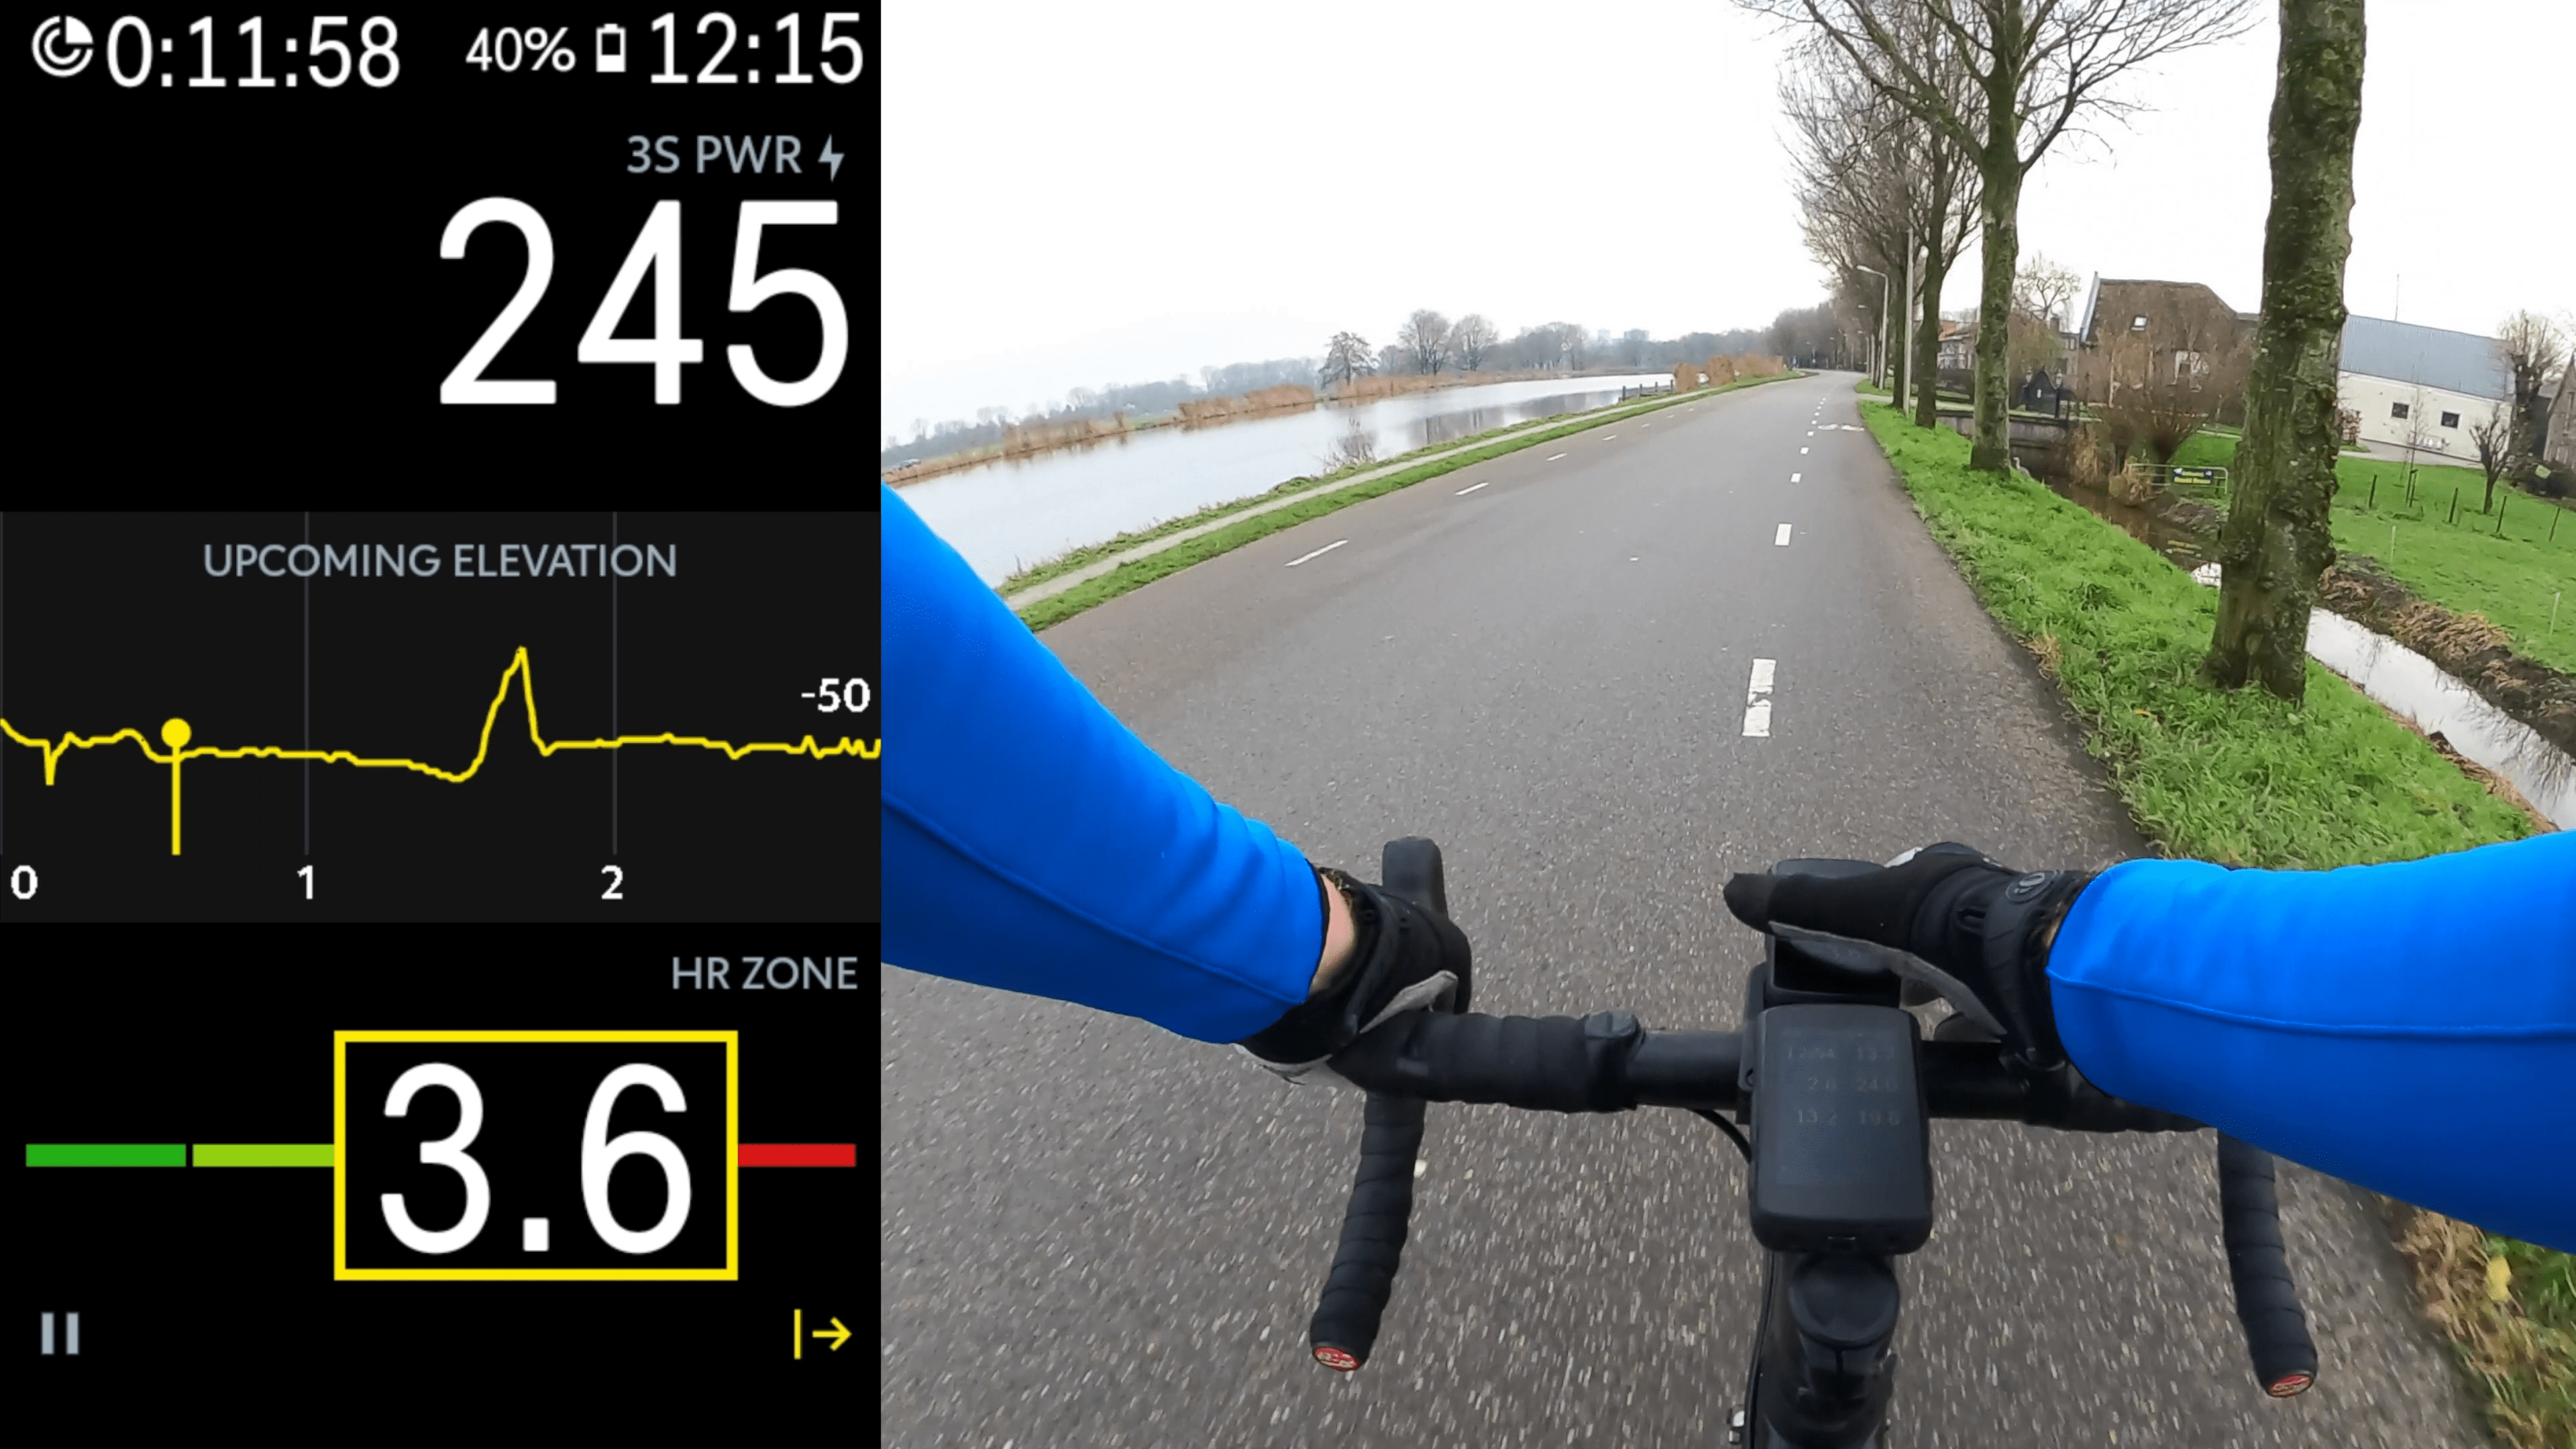
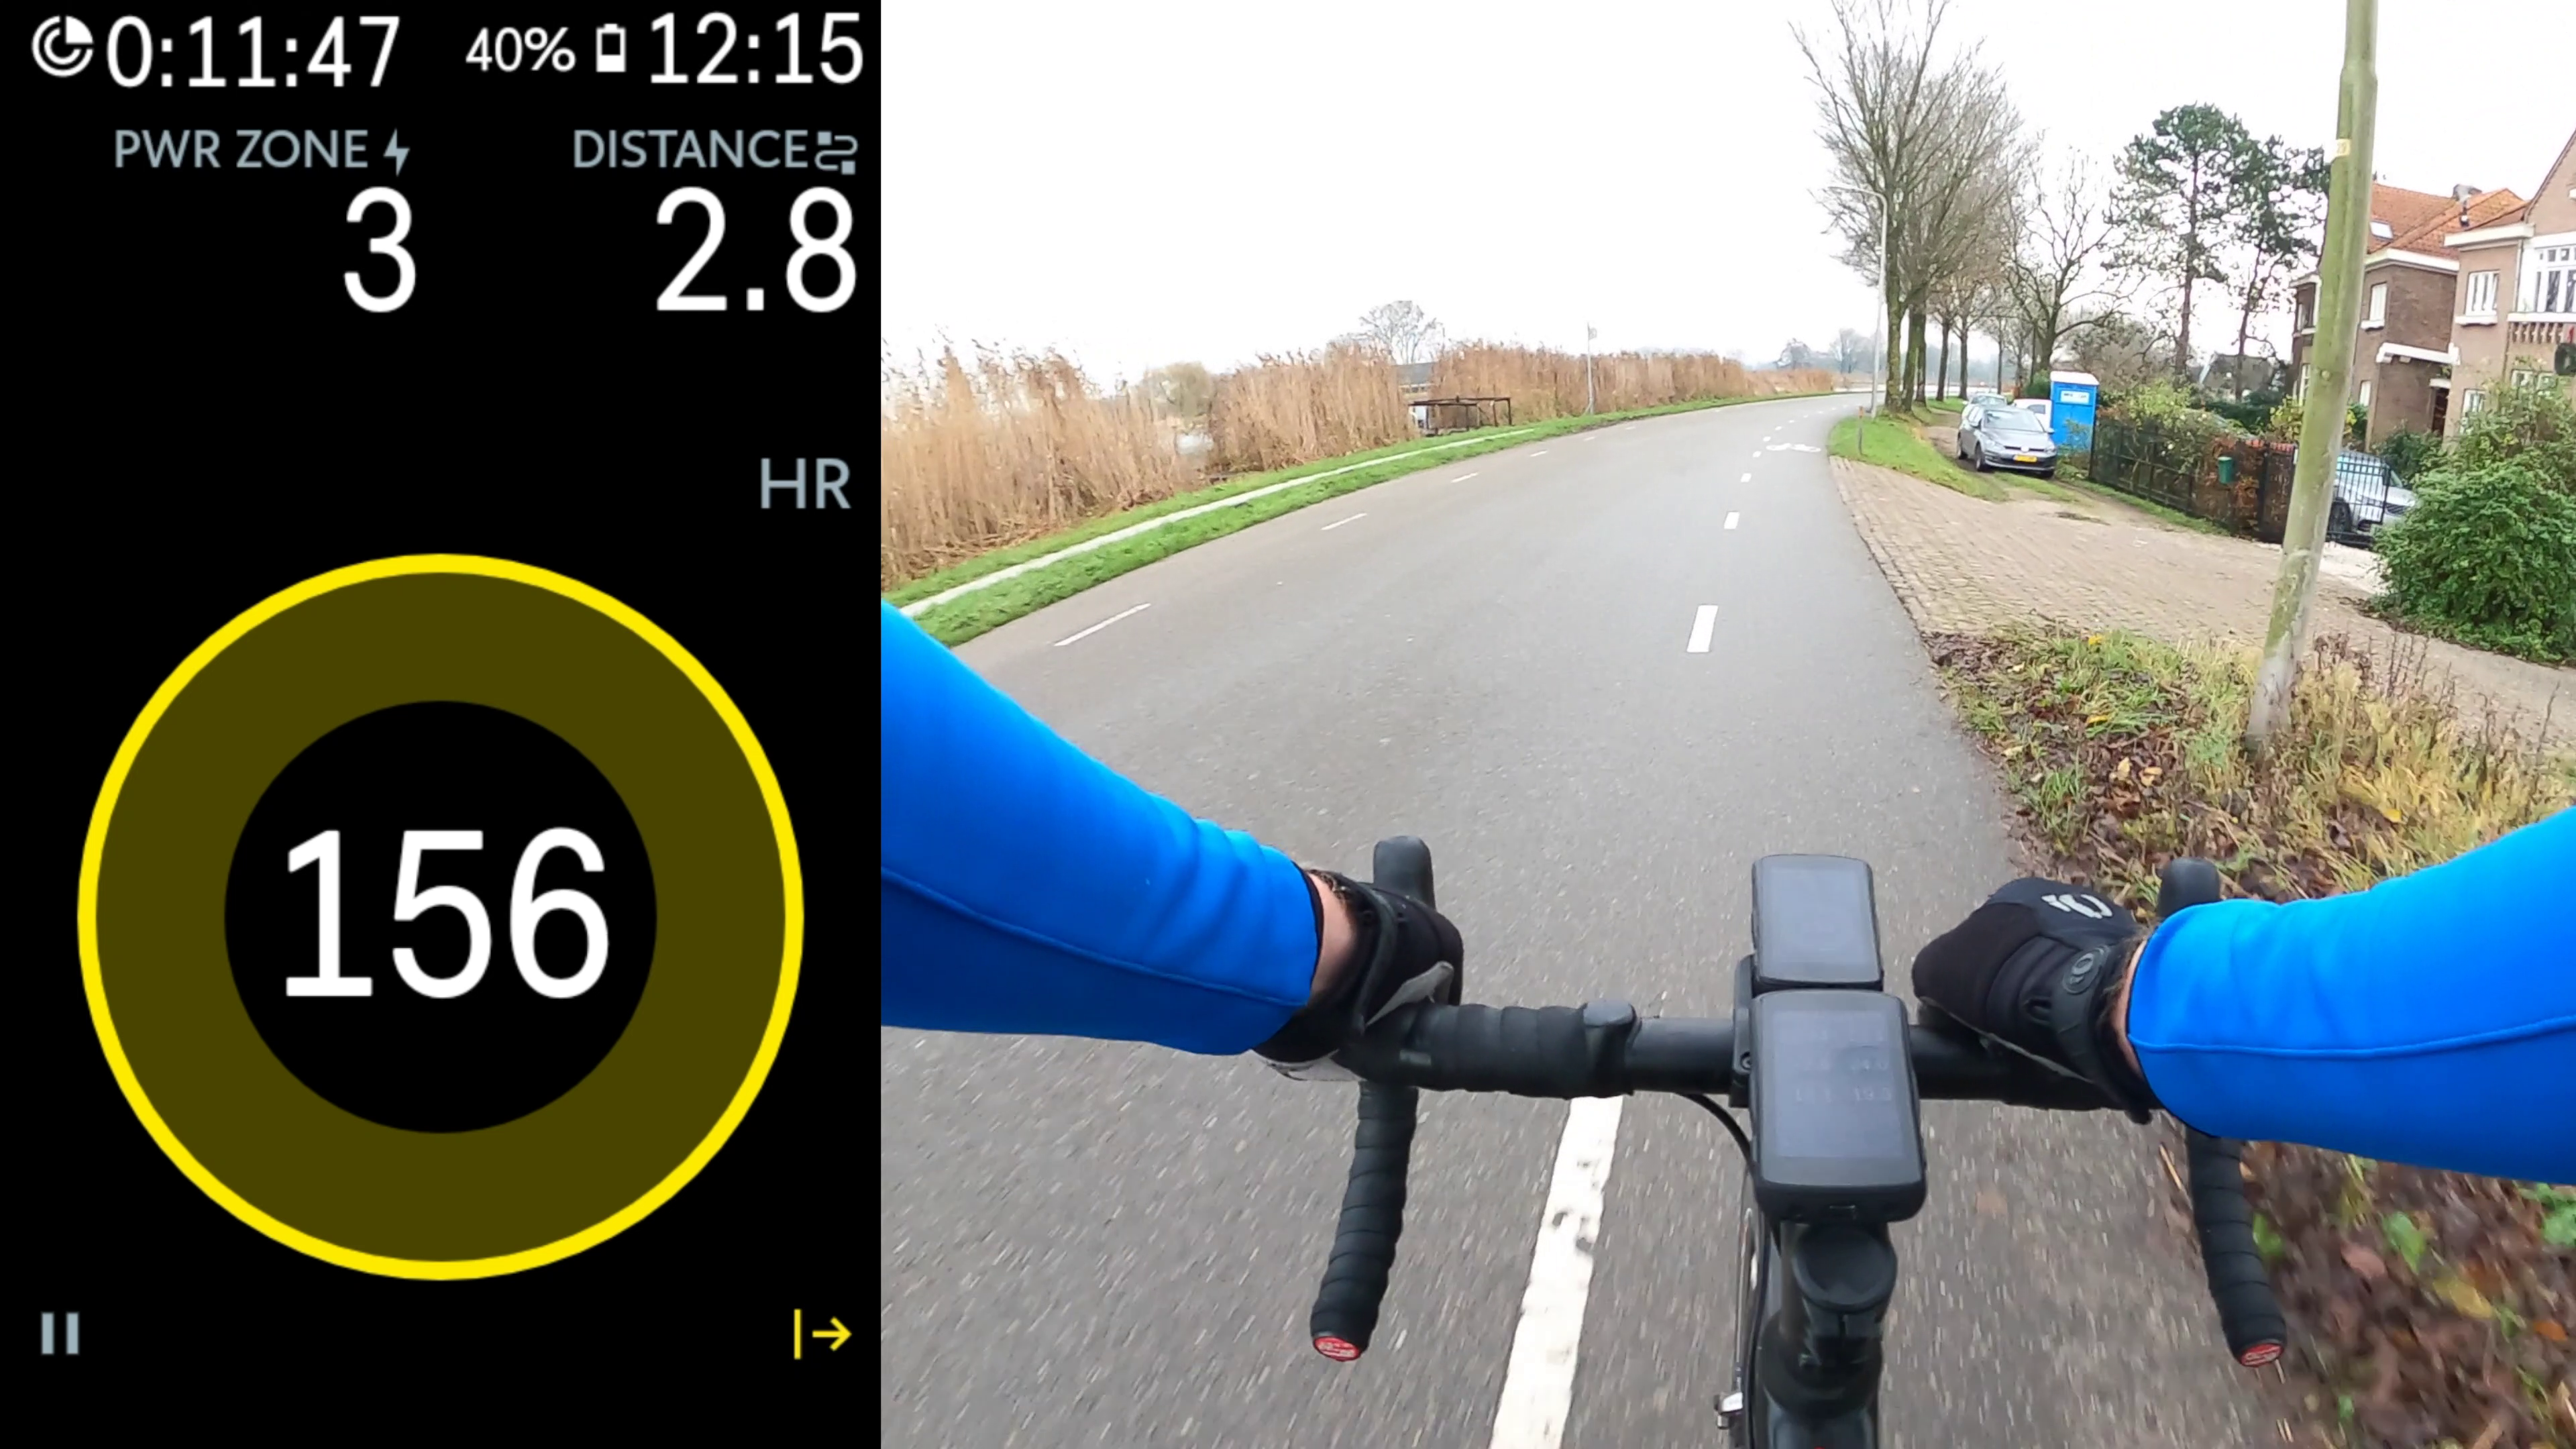


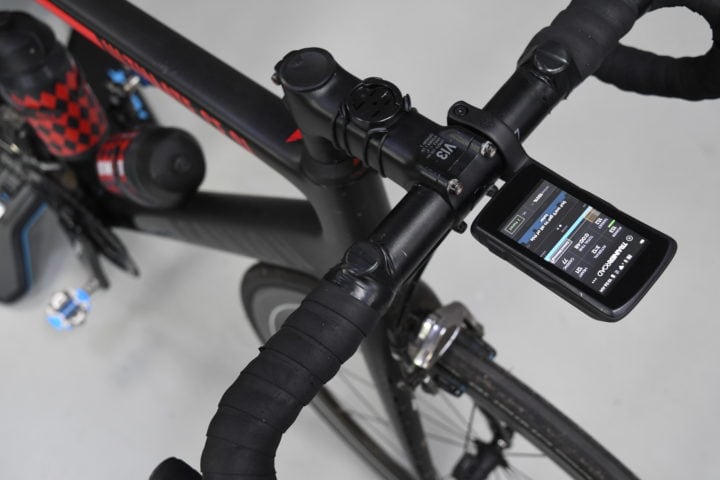 ):
):


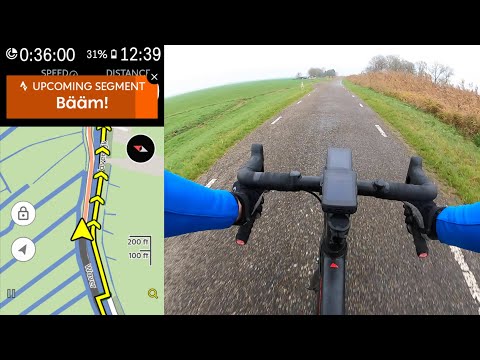


All bike computers should have nacho cheese alerts
That’s the spirit!
Do you think the upgrade program from Karoo 1 is worth the deal?
Not really. But not for the reasons you might think. Rather, mostly cause I’d expect it’s pretty easy to sell a Karoo 1 for more than $120, thus, you can put that cash in your pocket.
On the flip side, the easy button of taking their deal means you don’t have to deal with the logistics of it. So if you’ve got a friend that wants to give you $150 for it – obviously, take that. But if you have to list/sell/ship/etc it for $150, it’s probably not worth the extra $30 (on a $400 purchase).
Great stuff as always Ray. I’m going to do my usual and point out a typo though. “But I used to be in the camp of upload and call it done – so I can apricate that.” — should be “appreciate”.
But I do really like apricots!
?
At least I learned a new word
apricate (ˈæprɪˌkeɪt)
vb
1. (intr) to sunbathe or bask in the sun
2. (tr) to expose to sunlight
Collins English Dictionary – Complete and Unabridged, 12th Edition 2014 © HarperCollins Publishers 1991, 1994, 1998, 2000, 2003, 2006, 2007, 2009, 2011, 2014
Zwift companion app is so amateur hour. I want to run Zwift on it. LOL.
Its probably worth a mention that any new pre-orders have gone up 17% as of now. I’ve been trying for three months to pre-order at the £306 price, but they’ve only been accepting email notification requests. Now you can buy a gift card at £359. Sounds like the Elon Musk rule of economics for self driving cars, “buy now or expect the price to go up further.”
Hmm, is that just the UK price? The USD price has stayed the same at $399.
My pre-order from the UK was £301.88 (plus an indeterminate %age of tax). The price has now jumped to £359 (plus even more %age tax). I cancelled my pre-order as I couldn’t get an answer to what would be the final cost, in fact I heard nothing from the moment they took my money. No promised ‘behind the scenes’, no updates, no browser configuration, nothing.
It’s also came up in EUR.
Am I wrong? I seem to remember to have signed up for an email notification so that I can order in time for the holidays. I supposed they meant the winter holidays. Now I got the notification that I can pay up and preorder for end of March. Bollocks :(
I think the £359 price now includes tax, so there’s nothing more to pay when it gets to the UK. Back when I bought the first Karoo they did a similar additional charge to cover taxes, so this is nothing unexpected.
Hammerhead’s Pre-Order FAQs now say:
“Note: To reflect the price of the Karoo 2 in a format more commonly used outside the United States, we are now including all taxes and VAT in the listed price”
My UK pre-order email says “When your Karoo 2 is close to shipping, we will notify you to return to checkout to apply this deposit toward your complete purchase ($399 plus tax and duties)”. And £359 is £300ish (~=$399) plus 20% VAT. So a £306 Karoo 2 was never an option.
I vote to be able to add our own cycling drone shots to the screen intro. Wait, I don’t get a vote?
I vote them make a beeper-driven them song to go with it. While admittedly it’d totally ruin that moment, it’d be Gameboy like hilariously awesome.
“There’s nothing like it display-wise on the market today.”
How does the resolution compare to your average smartphone screen?
Does the anti-glare coating makes a big difference?
Nothing like it display wise on the market? What about the Dash. Way brighter and more readable. Also has a lot of cool widgets like the power and hr wheels, color coded elevation, heart rate, and power graphs. Route creation doesn’t exist on device but following a downloaded route works fine. I practically never need on the fly routing.
Nah, the Stages Dash isn’t in the same league when it comes to the display. Brighter…maybe? I’d have to do some side by side tests (or, dig out the specs).
But the Karoo has much of those same charts, just looking slightly differently/style. I do agree that Stages has a far better elevation chart. And I think in general Karoo has kinda missed the boat on elevation plotting potential here…but…sounds like some things are in the queue there.
Now, as far as readability for someone with less than optimal eyes, I would actually agree that Stages gives you more flexibility there. Certainly you can reduce data fields on the Karoo 2 and increase the size, but that readability doesn’t necessarily extend to everything. If you watch my UI video you can see a good example of that with the waypoints (it’s towards the end). This is an impossibly small screen to read/interact with while riding.
Also, minor addendum – my eyesight is generally excellent, better than 20/20 – so if I’m complaining about something being tough to read… ;)
My eyesight 15 years ago was better than 20/20. However, my reading vision has deteriorated has deteriorated to the point that I need large and bright fields to be able to read them. Even with bifocal sunglasses. That is why the Dash is what I use now- Wahoo and Gamin (both of which I have) are too dim and small for me to read most of the time..
Circling back to my question —
Hammerhead’s website says “Karoo 2 has the largest color spectrum and twice the pixel density (292PPI) of its closest rival” but how does that compare to the average smartphone screen?
If you run Komoot or RWGPS on your phone mounted next to a Karoo 2 and compare the same map area, is there noticeable difference other than screen size?
You can search for the PPI on different phones pretty easily. A few numbers from the top end: iPhone 11 is 326. 12 is 460. Samsung S20s & Note are in the 500+ range. But I think the screen resolution is only noticeable to a point and refresh rate + power use become more important than PPI. I can’t do a comparison yet personally, but I’d say 292 is in the ballpark of the ‘average’ smartphone screen. Different apps will scale graphics differently so even if the PPI is close they may look different. More importantly the phone screen will be larger & show more of whatever is being displayed at the same scale.
What is their limit for the number of starred strava segments they support for strava live segments? (I can give you a script that uses the strava api to star and then unstar a large number of segments in order to test.)
Not sure if you’ve seen this already, but per Strava: “You can sync up to 100 starred segments and view 100 nearby segments”
link to support.strava.com
That said, I read somewhere on a karoo forum that strava enforces a restriction on their API which limits the number of segments that can be pulled at a time. It sounded like hammerhead was looking into expanding… might need to be multiple ‘pulls’ from strava to manage it (maybe based on location?) so we’ll see. Sounds like you might be able to expand on how feasible that would be for hammerhead based on the API.
Thanks for that link, I had not seen it. (I had seen something about a much lower limit before the karoo 2 was released). Sad to see they have the same 100 limit as Garmin. Wahoo units have no limit on segments, so it must be possible to use the api in that way.
As a frequent user of the public strava api (the one used for live segments is not public) you frequently need to make multiple requests and obey rate limits to get the data you want. It’s a basic thing you need to do to use the api, so it shouldn’t be too hard for Karoo to do when using the non-public api as well hopefully.
I’d be happy to read any links on the karoo forum that have more details or info on this matter.
Thanks again for the info!
This is the thread. I don’t want to read too much into the support rep’s reply, but it sounds like they don’t want to risk annoying Strava with a big data pulls, but there may be room for improvement if they are more selective. I don’t really need more than 100 live segments per ride, so if it could figure out which of my starred are nearby that may be a work around. Let the others be stale. Understand that wahoo supports more, but I don’t think they are pulling more than just my best time and the KOM time. Karoo seems to also pull best efforts from some followers and maybe more data on segment progress so each call could be double the data. I’m not sure how the units show ahead/behind… it could be real progress which would be a lot more from the API or making some assumptions based on speed and doing a calculation.
link to support.hammerhead.io
“As of now, it has been limited and couple of reason being Strava are very conservative with how much load we are allowed to place on their API because they support a lot of other head units doing the same thing. We also want to ensure everyone can use the Live Segment experience on Karoo, we have to enforce a cap at some value to distribute that API load across our growing user base.”
Thanks for the link.
Wahoo compares progress point-to-point, not based on average speed. So they are pulling more than just two times per segment.
From that comment it sounds like strava is giving hammerhead a total maximum daily number of api requests that they need to split between their users (“distribute that API load across our growing user base”). This is how users of the public api work as well, a per-day limit per app regardless of the number of users of the app (with the option to try to contact strava to ask for a daily limit increase, which I hear can be challenging). For public apps, ie developers that don’t have any special relationship and aren’t paying strava this seems reasonable. For a company which does have a special relationship with strava (they have access to this private live segment api at the least), and for which they are very likely paying strava (Ray has reported previously how everybody but Garmin has to pay strava for live segments), this seems like a silly way to run things on Strava’s part. Strava should scale the limit with the number of users.
Gotcha. So that point to point data would be pulled for the wolf and carrot (lol) in addition to your best and the Kom/QOM. But i think you’re right, it sounds like the limit is requests not data size.
I agree that it seems like poor scalability on strava’s end. With live segments being a premium feature for which I already pay strava to use, there shouldn’t be a limit. Feels like double dipping to also charge hammerhead/wahoo/polar/etc to pull data that the user already paid to access. If they want to enforce a limit on frequent redundant requests or crappy use of the api then fine, but not legitimate traffic for a premium user.
Does it support ANT+ Cycling Dynamics? I would find that a useful addition to you comparison table for all the units.
No ANT+ Cycling Dynamics support at this time. But I do agree, it’d make a good addition to the table. There’s a host of changes I want to make in those charts, so I might roll them in there. Some of the data fields are getting a bit stale as time moves on.
Not sure how much userbase there is for Varia Radar vs Varia Vision HUD, but it would be valuable to include that in the table too – this may be one of the ways to motivate Karoo to add suport.
For me personally – this is one of the few showstoppers when deciding between Garmin and Karoo (the other one would be climbpro and maybe cycling dynamics).
Yeah, I think that one might be a bit niche to be honest. With no other company supporting it aside from Garmin to my knowledge these days, and even Garmin seemingly not caring about it – I fear it’d be one of those line items that somewhat unnecessarily skews every chart towards Garmin for something almost nobody uses. :(
Tried side loading Xert Player on Karoo 2 yet?
No, I haven’t tried that yet.
Maybe I’m not too knowledgeable about cycling, being more into running, but if the big advantage of this unit is that it has a screen as nice as your iPhone, why not just use your iPhone as your cycling computer ? You are probably taking it with you anyway ?
That is a legitimate question. In principle you could use an iPhone/Android as a cycling computer, but in practice this would be annoying for a number of minor issues:
* Lock screen – you don’t want to have to unlock your phone repeatedly during a ride. But if you disable the lock screen, you have to do that before every ride and remember to enabled it after every ride. Bike computers don’t have a lock screen, and if you leave it unlocked, it’s not a security risk because you’re not keeping anything important in a bike computer (like access to your bank accounts and email)
* Phone screens can’t be left on for hours without running down the battery. I’m not sure about Karoo, but Wahoo has reflective displays that can stay on without the backlight, and use very little battery
* User interface – phone apps assume that you’re sitting still and can totally focus on tiny UI elements on the screen to operate the app. Bike computers are designed to be operated while riding, where you have to pay attention to the road/trail so you don’t crash
d you can buy a new one. iPhone claims to be water resistant, but you can’t rely on it.
* Strava app sucks at recording data from sensors. They had it for years, then they said it keeps crashing and they don’t feel like fixing it, so they removed that function entirely. Then they added it back years later, but I think it’s limited to what it can do.
* The Strava app is more limited in general. I don’t think it has workouts.
* Battery – it’s good to have a bike computer that gets recharged in the garage and is fully charged for your next ride. With your phone, it’s easy to end up in a situation where you forgot to charge it, and now you’re starting a 6-hour ride with 15% battery
Nik & Robert,
if You want to start cycling with a “device” the best and most cost effective way is to use Wahoo Fitness app. I’ve used it on an iPhone but it’s also made for Android. App is free and it works. Design is clear and functional. Without spending any $ You have speed, distance, workout time, route and maps if You connect it with Strava you will have calculated power (post ride).
– If You want to step it up – go for Bluetooth cadence sensor
– then go for a heart rate monitor
– then go for a power meter
– shave legs at some point ;-)
my only issue with the Wahoo Fitness app as a “cheap” bike computer is that I can’t connect two Magene sensors at once (those are speed/cadence combos) and that the speed readings while using GPS have a massive lag… and I would like to see apple watch integration for HR readings.
But If You want to start somewhere it’s no-brainer.
Nik and Marcin did a great job of outlining things. It’s funny, I almost started down that path in the intro of the video, but ended up cutting it. It’s sorta like politics.
Still, the one argument that I think a lot of people overlook aside from all the hardware things noted correctly above – is just the cohesiveness of a phone as a bike computer.
Generally speaking, most phone cycling apps are focused on one thing. Meaning, recording a ride, or Strava, or perhaps navigation, or perhaps structured training. There are very few though that do it all. So you end up with this hodge-podge of apps trying to get one cohesive unit. Is it impossible? Of course not, but that’s part of what you’re paying for.
The ability for example (with the Karoo or others), to load up a navigational course, and then decide to add a structured workout to it, and still also pair sensors…plus of course the better mounting/battery life/etc… things.
I also use Wahoo Fitness app with iPhone and noticed that it overestimates the elevation gain quite significantly. But if you then connect to Strava, you will finally get the correct number there.
I definitely agree on the battery point. That’s the biggest reason as far as I’m concerned to have a dedicated bike computer.
For me though, I had been a preorderer for the Karoo 2 that I cancelled. It came down to the fact that I found a phone app that is ‘good enough’ combined with the fact I want to make some other bike-related purchases instead. It took a long time to find a good app on Android (so many of them suck), but I finally found a free app called Jepster that I really like (and for what it’s worth, zero affiliation with the developer). With that I miss Strava Live Segments and I miss turn-by-turn directions, but again, it’s saving me money I can put to other uses for now.
But it’s intended as a bike computer app, which means that it avoids some of the pitfalls of small interface elements that you describe.
“There are very few though that do it all”
Do you plan to elaborate on that list at some point in the future?
The last time you attempted to something similar was Feb 2012. :)
Regardless of the cons there are plenty of folks interested in an app that can do everything.
How about a review focused on the best all-in-one cycling app for iOS and best app for Android?
Minimum requirements would be full sensor connectivity (ANT+ and/or BLE), GPS routing, and trainer control with workouts and what else? That will narrow down the candidates considerably.
Has it been 8 years? ;)
Yeah, I vaguely keep tabs on it. I think to some degree most roads lead to CycleMeter, RideWithGPS, or for more structured training Train2Peak or Final Surge. But I haven’t flushed out all the nuances with those.
And that’s ultimately where it gets sticky – the devil is definitely way deep in the details there on those apps. And many times the various documentation bits they have it woefully out of date.
It’s in my ToDoist list, but to be honest…so are some post ideas for products that have already been replaced by newer versions. :)
I would also add one little detail (which might be implicit in Nik’s points) – when you are on the trip and your navigation dies, you continue without it – no big deal (and if you get lost, you still can use the phone as a backup for orientation). But being on the trip with phone dead is a much more serious scenario in several aspects (security, emergency, group coordination etc etc).
Given that Hammerheads run on Android, do you think it’d be technically possible to wipe an old Android phone and load their software on it by means similar to the app sideloading you mentioned?
I get the software limitations of using my everyday phone; there are no apps out there that make sense. But I have a 2 year old phone I’m about to upgrade, maybe I can turn it into a 6.1″ Karoo 2+?
Certainly a bit late here but wanted to chime in that my app Cadence https://getcadence.app does all this: multiple Bluetooth sensors, turn by turn navigation, Apple Watch heart rate, screen customization, Garmin Varia support, power meter with pedal balance support, etc. I released in 2020 and am still under serious development. Working on elevation correction and activity cropping at the moment. Really trying to make a replacement for dedicated computers. Cheers!
So the summary says nothing about this device as a bike computer… Good? Bad? The best?
Some of us go straight to the summary and this time around the summary told me nothing…
Great review!
Can you confirm that you can sideload TrainerRoad and that it also works as intended?
Thnx,
Yes, I just sideloaded it and confirmed it works controlling a Tacx NEO 2T. I added a small section, and video, into the review towards the end of the The Basics section (but it’s faster to go to the next section and scroll up once): link to dcrainmaker.com
Is the sideloaded TR in your example any different than how an approved app would work in the future?
Why would a company like TR need the Karoo SDK if their Android app can run fine as is?
Couldn’t Hammerhead simply add approved apps to their own “store” so they install just like it works on an Android phone?
Informative review Ray. Did you happen to test with a Favero power meter? I’m curious because I’ve seen issues reported elsewhere of issues with the Favero Assioma Uno when paired over bluetooth (*). Since the software is unlikely very different between the Karoo 2 and the Karoo, I wonder if it will have the same issue. The reason I ask is because I’m looking to get my first bike computer and want to also get the Assioma Uno for use with my bike and my Peloton.
Thanks,
Sean
* link to support.hammerhead.io
Hi Sean – thanks for being a DCR Supporter!
I don’t think I’ve tried the Favero this round, and definitely not an Uno (since, I don’t have an Uno).
That said, two questions:
A) Why pairing on Bluetooth? I don’t mean that in a rude way – but just curious. My rule of thumb is *ALWAYS* pair power meters via ANT+. The reasoning is simple: The Bluetooth Smart Power Meter Device Profile is a dumpster fire. Not full-rage dumpster fire, but more minor dumpster fire. Like, trash can fire. As such, in turn, the implementation of that across the industry is also trash can fire, especially in pedals. It’s hard to blame any one company, because they’re all trying to play whack a mole fixing it for everyone else doing it wrong. There hasn’t been ANT+ power meter pairing issues in roughly a decade (and even then, it was just SRM).
B) What’s your toggle in the Favero App on ‘Zwift Compatibility’? I can’t remember for Uno, but I know for Duo if you’re going to BT pair it, you want that toggled to yes.
Cheers!
Well, in a desparate attempt to win yet another “for science!” badge you could temporarily downgrade a pair of Assiomas to left only in the app.
But the more meaningful answer should be a quick verification that the Karoo2 doesn’t somehow refuse ANT+ when there’s also a BLE signal.
Hi Ray thanks for the reply!
For A) That makes a lot of sense for always connecting power meters via ANT+. I’m new to using these sort of sensors (although I do use Stryd with my Fenix 6 Pro Solar) and so I am interested in how well the bike computer company supports features in general. Sometimes if one feature (BT pairing) is stuck in an issue tracker backlog there could be more issues. For B) I’ve not gotten the Favero yet. That’s next on my list!
Thanks,
Sean
Is WIFI dual band or just 2.4 Ghz?
Nacho cheese? Won’t buy..Karoo needs to add a Nacho Salsa sensor! ;P
Unfortunately the Nacho Salsa sensor is more expensive, due to detecting the multiple components of salsa. As such, it didn’t make the BOM.
Thanks for the review Ray!
One question – is it possible to separately configure uploads and downloads for platforms Karoo supports (e.g. only download routes from platform but not upload workouts to it)?
And the USB port placement is unfortunate – can’t be used to charge the unit while riding
I’m not seeing any obvious way to do that, though, maybe you could do it as part of the permissions you grant from each platform (for example revoking a subset of permissions)?
That said – on the unit itself you can choose which platforms you push the workout to each time. So for example I can select to not push to TP or Strava, which is pretty cool.
Hey, is it possible to test the GPS (once more?) with a camera (Cycliq or GoPro) mounted right at the bottom of the mount and recording? What I’ve seen is recording cameras give out harmonic interference (due to high CPU cycles and bad RF isolation I’m assuming) and they mess up GPS signals, so in the Wahoo head units (tested with all three) the track becomes inaccurate and/or it lags, so it would show your position as of 3-4 seconds ago. I was wondering if that’s the case with this unit as well. Cheers!
I can try and remember on my next ride.
That said – I’m curious which action cam you have? I haven’t seen that issue on action cams since the GoPro Hero 5ish or so days.
And it’s partly because these days GoPro cameras don’t leave WiFi on. It’s only turned on after your phone tells it to turn on with Bluetooth Smart. Instead, Bluetooth Smart stays on for 8 hours from the last time you touch the camera/power off (it actually stays on for 8hrs after you power it off, unless you yank the battery). So it uses that to jumpstart WiFi.
Happens to me all the time with the newest Cycliq (FLY12CE) to the point that I consider stopping recording if I’m navigating an unknown/new route. Had similar issues with GoPro Hero8 but less IIRC. I’ve even gone to lengths to cover the back side of my Wahoo Roam with sticky alu tape to prevent that, but since I can’t ground it it’s next to useless (or maybe even making things worse).
It was happening on my first commute cam few years ago (a “Mobius Actioncam” + Elemnt Bolt at the time) which I had resolved by covering the inside of the camera with sticky copper tape and grounding it using the side of its USB mini connector. That cam had (still has, I use it as an under-saddle sometime) brilliant quality btw.
man you know I love your reviews but this one is hard to read af… one short paragraph then a picture over and over and over and over again – it is hard to have some sense of continuity while you read with that format. perhaps some people love it that way but for me just doesn’t work.
the unit is promising but I don’t feel like spending that type of cash over a proven wahoo/garmin unit. $250-299 then I will def give it a try.
Regarding the structured workouts. It seams that Karoo only imports workouts based on the calendar – so I understand it’s only upcoming workouts. So if I’m doing a sight seeing ride and I decide to do a 15 high impact interval run (that I haven’t planned for today) but I’ve done it already last week – it’s a no go ???
Correct. It’s kinda annoying. I noted it in the review, and also brought it up to Hammerhead. They said they understand the concern, but at the moment their focus is on onboard more partners, rather than making a repository/storage in the device for workouts.
Can you change the data field in the top left corner to something like current speed instead of the ride duration?
Great review however I must say you should really focus more on battery life (many people care) and less on GPS accuracy (few people care).
I included a chunk on battery life – including exact % burn rates that I’m seeing.
Interestingly, I rarely actually hear concerns about battery life in cycling GPS units – namely because it’s rarely an issue anymore. Most units get 10-20 hours without much of a problem. The Karoo 2 is definitely on the lower end of that as I noted.
Your estimate is 8 hours versus the claimed 12 hours but their number could be with limited sensors and all battery saving features enabled.
Since it’s Android based you could sideload a battery analyzer app and benchmark it if you really want to get technical. :)
I don’t even have to sideload anything – the DCR Analyzer does it for me. :)
Wahoo, Garmin, Hammerhead, and Stages files all write the battery level to the .FIT file each time it changes. So, we enumerate that in the DCR Analyzer. See attached pic from yesterday.
Interestingly, Hammerhead didn’t write the initial value for the first 30 minutes, but did after that. Not sure why. Typically speaking though, I don’t tend to focus on battery values for under 30-45 minutes, because things are still warming up and stabilizing. The longer the ride, the better the data.
Anyone using the DCR Analyzer can load their files to see battery burn rates. It’s fun!
link to dcrainmaker.com
Nice!
So if you wanted to you could charge up a pile of similar featured models from Wahoo, Garmin, Hammerhead, etc., ride the same route, then show the battery burn for each.
I say “you” because you’re the only one who has the pile of devices and mounts required. :)
Have you compared the battery life with/without the sim card?
I haven’t compared battery life yet with/without SIM (just without).
The weather looks pretty craptastic for the next couple days, but Sunday might actually be viable. My rough thinking is:
Hammerhead #1 – The Norm: Routing/Power meter/HR/Varia – 25% brightness
Hammerhead #2 – No Sensors: Just routing – 25% brightness
Hammerhead #3 – No Routing: Just sensors – 25% brightness
Hammerhead #4 – Clean: No routing/sensors/just GPS – 25% brightness
As for other units, virtually every ride I’ve ever posted on every other review actually includes the battery stats already in the GPS Accuracy section (if you click on the ‘More Data’ post). Notably on watch reviews you’ll generally see Edge/Wahoo stats in there too. My point is that while I’ll see if I can fit another 1-2 units onto my handlebars beyond those four, that I’ve pretty well established the battery burn rates for those other units.
Here’s a good random example of an Edge 530/830/1030Plus together on the same ride: link to analyze.dcrainmaker.com
They ranged from 4.67%/hour (Edge 1030 Plus) to 6.07% (Edge 530) to 7.59% (Edge 830). I would caution however that I wouldn’t overthink that random data point too much, because there’s a pretty darn (near 100%) chance that the backlight settings were different for all of them, and probably set to higher/always-on levels than not.
Is there a need for cycling computers when everyone is riding indoors? The integration between cycling computers and indoor cycling platforms is virtually nonexistent.
I agree with the comment about zwift’s companion app is terrible. No support for marking laps or customizing the data fields on the companion or desktop app.
I have a pending pre order for the Karoo 2 and thinking about canceling it. Ordering it in the spring / summer when riding safely outdoors is realistic.
If, for example, you care about the Firstbeat Metrics that the various Garmin devices offer, then you have to record on one of them along with doing your usual Zwift effort. Pushing the Zwift file alone to Connect won’t trigger the metrics to update, they have to come from a Garmin device.
If there was a subscription option to get the latest metrics online, then you could park the device and just use Zwift/TR/any of the other indoor apps. But that would hurt the hardware side of garmin as they tend to last for years without need of replacement (beyond a battery at the correct time). My 810 went from release back in 2013 to the Fall of 2019 when the touch screen utterly failed. My 5x is still going strong and looks like new after 3.5 years of daily wear, no need to replace it with the latest hotness.
I currently use a Garmin Edge 1000 and the only FirstBeat Metric available is the VO2MAX calculation. The Edge is turned off 98% of the time because it doesn’t receive the course information,etc from Zwift. It does report the grade, etc from the smart trainer and allows me to start/stop laps for workouts.
I would prefer that Zwift and cycling computer hardware companies would allow Zwift to send virtual GPS data allowing the headunits track on the course and show the course when uploading to Strava / Garmin Connect / etc….
“Is there a need for cycling computers when everyone is riding indoors?”
I use an Edge to run resistance-controlled workouts on the indoor trainer. It’s not a Zwift substitute, but it’s a Trainerroad substitute. Once they started charging $20/month on superfluous noncore features it just became too much.
The 1000 also gives you recovery time, main reason I use it indoor.
+1 for head unit driven indoor workouts. Target power in my case this off-season.
Personal preference, but I like to keep my indoor & outdoor configurations as similar as possible. Indoor riding for me is just practice for outdoor riding.
I have a pre-order and not entirely sure why I placed it. Probably as I just want to have a closer look at it which means, as funds are tight, it might go back within the 45 days.
I ride with a Fenix 6X and will use that to record my rides as it includes metrics that I don’t get from any other device, and probably won’t from the Karoo. I use Garmin Connect as my fitness tracking hub (steps, sleep, body metrics activities all in one place) and TrainerRoad as my indoor training option with their planning. For route following I use a Samsung S10 on a Quadlock mount and ipbike software. For me, the Samsung only has a few drawbacks and they’re not showstoppers. Battery life, screen touch and perhaps the risk of an expensive phone taking a hit in a crash.
Thanks for the review though.
You should trademark “take my money features”. That’s brilliant.
Maybe it’s just me, but I have sports tech fatigue on the “promise of more advanced features in the future”, post launch. Wahoo, Polar, Hammerhead, probably more — it’s becoming par for the course.
Even for suppliers who actually have met these promises, it causes me to lose interest at launch, thereby creating opportunity for a competing product to subsequently move in.
Admittedly easier said than done!
It’s a meme from Futurama…
Hi Ray,
I’ve been eagerly anticipating your full review as I am one of the earliest owners of the original Karoo (I’ll call it K1) and bought into Hammerhead’s vision because of the promised incredible mapping abilities. Two of my three biggest complaints with K1, size/weight and lack of a beeper have been solved with K2. My biggest complaint has been the short battery life. I can’t seem to get more than two hours of life out of my K1 no matter how many of the battery saving measures I activate on the unit. The support team at Hammerhead has no answers that increase battery life.
Your K2 review and your reply to Francis Bacon (comment #50) do allude to industry lagging battery life. In your comparison chart you note, “12 hours claimed,” battery life. The word “claimed” indicates to me that you may not believe that number. I think that Hammerhead claims 10 hour battery life for the K1, though I don’t recall the exact number at this moment. The issue is that I’m getting only about 20% of claimed battery life on the K1, even with battery saving measures enabled.
What do you think is the real world battery life of the K2? That answer will play a critical role in my decision on whether or not to buy a K2.
Correct. The database always lists ‘claimed’ time versus not. In this particular situation, given my testing results, I decided to add the ‘claimed’ descriptor, since it was substantially less than claimed. I usually only do that when I see substantial differences.
In my most recent test yesterday with multiple units, the unit that was ‘clean’ with no extra screen recording or such, averaged 12.46%/hour, thus, ~8hrs of battery life. This was on low-brightness (~20ish%) for the entire ride, and on a regular data field for the majority of the ride. It was paired to an ANT+ power meter, ANT+ HR strap, and ANT+ Varia radar. It was also navigating. And, the temperature was basically 0* to 2*C.
Most of my tests have been with screen recording enabled, which burns battery like nobody’s business, so I didn’t want to use those otherwise in my battery testing results. In those cases, with screen recording it averages about double that.
I’ll do some non-navigation-enabled battery tests side. I’ve got a small flotilla of units, and if the weather doesn’t suck, I’ll put a bunch on the handlebars to see which things impact it the most. Though, typically speaking cold weather is one of those things that does indeed largely impact battery.
Finally, these days it’s very difficult to do accurate battery life testing in a ‘garden’ type setting, where you just leave it there overnight or whatever. Units and GPS subsystems now know to go into a sleep/lower power state when not moving, and they can also lower power to other systems when an accelerometer detects lack of movement. Plus, lack of movement means no navigation prompts, etc… ANT+ sensors is however easy to test overnight with an ANT+ simulator.
Ray,
I and I’m sure many others will thank you if you can validate this battery issue and bring it to Hammerhead’s attention. The Karoo is simply not a viable solution for serious riders until it has a realistic minimum battery life of 5 or 6 hours.
Plus one on only getting two-ish hours from a K1, one hour if it’s cold, with many attempts to rectify via support and resets. Now I duct tape a lipstick sized battery to my stem and have it charge all ride. Since I primarily use the device for navigating backroads and ‘gravel’ exploration, this is a really big problem, and also why, as a K1 pre-order person, I did not pre-order the 2.
Megan, As much as I would like to because of the K2’s feature set and usability I have been holding off on upgrading to the K2 as well. I really need to have an acceptable battery life prior to buying the K2.
Thank you Ray, for this extensive review. i love reading it. Now i’m more convinced to wait for the K2 and send my K1 back.
Killer review, as always! The Strava Live segments look especially awesome.
Really wanting this for Mountain Biking – does the Karoo map system include a lot of mtb trails? Does sideloading the Trailforks app work pretty well / have you been able to test that at all? I’ve heard mixed reviews.
Cheers!
I wish that Hammerhead would acknowledge that for some of us, the SIM card / WiFI requirement for syncing is a reason not to buy this product. I just don’t see any reason why I would want a bike computer that needs a SIM card to sync rides when I’m in the parking lot, when others (like ELEMNT) can just sync using your phone. It’s not like I ride anywhere and not have my cell phone on me.
SIM cards come with expenses and monthly fees, and the cellular modem and antenna in the Hammerhead to support it must come at a cost, both regulatory and hardware wise, that they’d be able to make a cheaper product that didn’t support cellular.
Someone explain the reason why they persist with SIMs, that doesn’t include the phrase “well SIM cards are cheap in my country”, because syncing via phone costs me $0.
Perhaps Ray or someone from Hammerhead will offer their insights. Early in his review DC did mention that Bluetooth sync is targeted for 2021 so at least that specific functionality gap may go away.
A company attempting to challenge an incumbent like Garmin has a few different ways of going about it. It is possible the Karoo team views the ‘droid base and built-in cellular as pivotal in their plans to differentiate themselves from the competition. Otherwise the major appeal is the display & UI aesthetics.
Tethering to a phone app for in-ride networking is certainly a viable alternate choice. Going that route does somewhat permanently commit resources to refreshing the app on the phone vendor’s schedule. Some of that is unavoidable if you provide any kind of companion app at all. Many successful companies are able to do so, but perhaps the Hammerhead decision makers aren’t enthusiastic about that for the moment.
There are enough dead spots in my phone carrier’s coverage that a data-only plan on another carrier for a cycling computer would be useful to me. I would like to think cellular dead spots are getting smaller & more rare though.
I wonder if you can just hotspot the Karoo to the phone to create a “permanent” wifi connection?
Yes you can.
Been there, done that. :thumbsup:
The K2 has a physically smaller screen than the K1, but higher resolution… In your opinion, does the increased resolution compensate (or better) for the physically smaller screen size of the K2? i.e. Is the K2 easier, harder, or the same to read versus the K1?
Super review, Ray. For workouts, is their any hint as regards to integration with Today’s Plan?
Any mountain bike specific features here? Not looking for Garmin style flow reading, but trailforks maps, or other off-road talk recognition?
Against my better judgement, I put in a pre-order with the rationale that it would be easier to get out of an order than get in line at the last minute. I finally jumped ship when they sent the email about delays.
The Karoo, and it sounds like the Karoo 2, is a hard one to place. They’re not doing anything terribly inventive with their platform, but they’re also not doing anything especially substantive. It’s miles behind Garmin on features, with only a good screen as your reward for making the compromise (and I will say that the screen, while “better quality” was never easier to see than the Garmin’s when out riding, especially before they optimized their layouts and made their maps higher contrast). I do think the mapping is excellent, but I have a hard time making that endorsement too strongly since it’s never worked reliably for me.
In truth, the things the Karoo does well are nice-to-haves while it lags behind everywhere that matters. And Garmin could just as easy throw a screen of this quality into their devices – I’d wager it makes up less than $5 of the Karoo/Karoo 2’s cost, and Garmin would get it even cheaper. The reason they don’t do it is because it causes all the problems that Hammerhead has with the Karoo: you get into an arms race using a huge amount of battery power to run it. The end result is a device that has a high-capacity battery and powerful processor with nothing to show for it in terms of battery life and features. Just a big and heavy device wasting all its power on its screen and OS. It’s not a compromise any cyclist would make.
That’s the problem they have to solve – not just slamming a cheap smartphone screen into a bike computer. But honestly, I don’t have faith in this company, and frankly I just don’t like them after their behavior during the Karoo launch. They lied to their own customers then and have pathologically lied ever since, even about things that really don’t matter. Hell, that line above about “we’re not selling more until spring for very smart reasons” is such an obvious obfuscation of the fact that they were waiting for the money from the first batch to come in before they could produce a second batch.
I wonder if you can just hotspot the Karoo to the phone to create a “permanent” wifi connection?
Yes, you’ve always been able to do this from the original Karoo. Having a wifi hotspot running on your phone might be a big battery drain though. Personally I use a free sim from Three(UK) that gives 200MB a month, which is fine for uploads/routing.
Is it possible to use the sim on the karoo and generate an hotspot from there to connect other devices?
I’m trying to find a solution to not bring the phone with me…
Hi,
Are there any options to double for hiking.
Is there a hiking profile or something like that?
Thanx for the review.
The Karoo maps are pretty incredible for hiking too. As a mt biker, I’ve gotten myself into trouble by following hiking trails I can see on the Karoo, so I started using it to discover hiking routes too. It’s really great!
Not sure I see anything pivotal with the K2 to lift me off my Wahoo Elemnt… don’t get me wrong, the nav screen, rerouting tech is nice, but that’s not *that big a deal* to get one now… Considering they still have/need to grow before they’re evenly competitive – and incorporate some must-have innovation (whatever that might be!), I’m guessing it’s still a waiting game…
I have now some weeks the Karro2, and my experience is good.
Also i use a SRM PC8, Element Bolt and my wife a Garmin Edge 1030….
So i know what the difference between Software and Features….
Normaly i used the SRM PC8 for the Training Races and Marathons.. and there you know the Profile and Streets, so i missed nothing like Navigation or map.
But with our Covid Situation we do a lot Routed Cycling tours but with the SRM PC 8 NO WAY….
The Element bolt is small, light und easy to use…. but the Display is also small !
So i do a Pro Order for the Karoo2…. don’t talk the Price…. :-)
The first impression from the Karoo2 Display is WOW… also the Zoom IN OUT Option in the Map is realy great.
At this side. The maps here in Bavaria are very detailed.. als very small single Trails in the woods, and the new street that opens 2 week ago is also in the map !
The Hammerhead Support answers normaly in one day… and the have a nice to find FAQ
Strava Segments Function is nice AND you can see all marked Segments from you in the map when you ride.
Battery Lifetime for me is at the moment OK
I ride at the moment 1-3h and i lose 7-10% per hour at 0 Degrees with Powermeter, Speedsensor, Heartrate and Phone connected… and with 10-35% Display brightness… i wait for the summer time too see the difference.
At the Moment i can touch the Display with my gloves, but this varies with the gloves.
But you can use the Buttons for switching the Display and ZOOM IN and OUT.. !
The Upload to Strava and TP is very fast, also to download the routes from komoot is very cool….
And now the small Problems in my eys:
When you Upload your ride to Strava, the AVG W and NP is always smaller then in the overview…
z.B. you ride 210W AVG then says Strava 185W AVG ….
With this “Problem” i’m in contact with STRAVA and HAMMERHEAD….
Then my SRM PC8 have the same AVG Power like the Karoo2… so what ?
Both have 1sec Record Time an include 0W for calculation AVG Power…
At TP both looks right like the file from the SRM PC 8 and Karoo2.
And the Starting Time is a little bit to high at the Karro2, but it have the GPS right away.
The SRM PC8 starts faster gut you have to wait 3-5 Minutes for a good GPS Signal….
Also a ClimbPro Feature from the Garmin will be nice to see at the Garmin….
But the Karoo2 shows at routing the upcoming Elevation with zoom Option… this is more than nothing.
Also nice will be a Small / medium / Large Font for the Datafields at the Map Overview.
Ok, that’s my Experience for the first Time with Hammerhead Karoo2
Thanks
Thanks Ray! I was waiting for that review.
I am looking for a cycling computer mainly for navigation in 2021. What would be better:
Garmin edge 1030 plus or Karoo 2?
After reading your review I have mixed feelings. What would you choose?
I think ultimately they’re pretty different beasts (though, at current pricing, an Edge 1030 -non-Plus) is only $60 more on Amazon.
Still, I think the Karoo 2 would largely struggle to compete against an Edge 1030, just as just about every other bike computer would struggle to compete against it feature or functionality wise. The main advantage the Karoo series has over the Edge 1030 (or any Garmin device) is simply the beauty of the routing/mapping/navigation screens, as well as speed. Though practically speaking the routing/navigation accuracy in my experience tends to be better on Garmin’s platform.
As noted, there are other nuances between them that are worthy to consider Karoo, but against an Edge 1030 that’s a pretty tough battle for anyone but Garmin themselves.
+1 on pass… not just cause of the 2nd string tech, but because it price point would suggest its competitive or better than the 1st string (Garmin, Wahoo, etc)…
Thanks Ray.
I was holding off on the Edge 1030 deals, waiting to see what Hammerhead does. With about half my rides off-road, it looks like there’s a real downside to Karoo in terms of map support. It seems that at this point the reaon for Karoo 2 instead of original Edge 1030 are potential updates (HH seem to be adding features over time), side-load apps that add functionality, and the world wide maps (although not as good for off-road). I was really hoping this would be an easier choice, but at $450 the 1030 is hard to compete with
Is this not like comparing Windows (Garmin) and Mac (Hammerhead)? I would argue, this is no longer a feature comparison but a generational one. I’ve had a 1030, then switched to a Roam, then switched back to a 1030+ hoping Garmin would have ironed out their software bugs and generally improved the OS. Unfortunately, my hope was unfounded – the Edge 1030+ was released with software 2.20 that wouldn’t even work out of the box and needed a Beta installing just to synch with an iPhone. And whilst I enjoyed the Roam more with its iPhone App, over the spring and summer, Wahoo dropped the ball on their own updates killing Strava integration for weeks on end and well as activity synching.
The reason I’m switching to Hammerhead is not because its got a better screen, its because its got a more modern platform underlying it. It seems to me to be a generational leap. And whilst the Garmin may have more ticks on its list, I want something that is better for the 90% of the reason I use it. My only concern so far, having not yet received my Karoo 2 is whether Live Track is good enough. It’s a feature I value as a critical safety capability – but that is easily fixed. Meanwhile, Garmin requiring multiple bluetooth sessions with the iPhone that have rarely worked reliably for multiple generations of product would seem to be a much more complex engineering challenge to resolve. And, judging by what both Wahoo and Garmin are doing elsewhere in their product portfolio, its seems they are tied aggressively to their ageing software, trying to sweat out and stretch a code base across head units and watches, when it might have been better to retire it and start afresh.
Live track is critical to me, too, so that my wife can track my rides in case something goes wrong. Works “ok” with Wahoo, sometimes the tracking stops updating, but at least it’s just a link she can view in a browser. If I understand Hammerhead’s implementation, the person viewing the live track needs to register for a hammerhead account to even see it… That’s just dumb. I don’t want to have to ask my wife to have yet another account for something, or friends I might send a link to to track bigger rides.
Pass
I’ve just put down my $$$ for a Karoo 2. I was tossing up between sticking with Garmin – the only brand of cycling computer I’ve used – and testing out the new kid on the block. I went with the Karoo 2 as a) it looks like a really good unit, the graphics look very clear for my failing eyes, and b) I’m a bit over the Garmin ecosystem and clunky menu structure. I have to admit it was a close call between the Garmin 530 and the Karoo 2, but I’d really like to see the Hammerhead platform succeed and drive some real change in the head unit market.
Oh, and thanks for the review and videos!
Finally got notified to complete my pre-order for the Karoo2 and decided to purchase it. Looking forward to it and thanks for the detailed review which helped me to make an informed decision.
Sean
Great write up. I just received the pay up and we will ship email! I believe I read in your summary that it will link with electronic drivetrains? So my AXS & DI2 info will be available on screen? I don’t suppose my hood buttons on the DI2 will toggle screens like my Garmin though? Thank you!
I think I’m in the late December pre order group so I’m watching for an email soon as well. Your gear info should show on the karoo and the Di2 hood buttons are used to navigate screens, zoom the map, etc. That was one of the features I needed to confirm before ordering.
link to support.hammerhead.io
Hi Ray,
Thanks for your in depth review. I’ve had my Karoo 2 for over a month now and it seems to be working fine. Some little annoyances as you have detailed. The most significant issue for me was on my last ride, I got the red ‘Ride not recording’ banner. Not had this before and I hadn’t touched it and I was moving. I stopped and it auto paused and went away, as soon as I started again, it came back. I pressed on the banner itself and it went away and appeared to continue recording. My Strava output shows that it wasn’t recording during this time, so just a straight line. Annoying! If you or hammerhead figure this one out, can you update us please.
Thanks
My understanding is that it’s tied to auto pause, but also, there was some conversation that it had to do with going off-route. I’d have to dig into my notes on that one.
Is there any integration between Zwift or Zwift like services and hammerhead?
I mean activity synchronization between Zwift and Zwift like services and Hammerhead.
No, unfortunately nothing of that nature at this point.
I don’t know if that’s on Zwift or Hammerhead as a blocker. My guess would be Hammerhead would need to request it from Zwift, but given that Hammerhead doesn’t really have a platform that’s designed to track training at large (beyond just looking at quick ride data), I’m not sure there’s a huge incentive to do so.
True. I had the same thought later. It would be nice to use the Hammerhead Dashboard as a consolidation point for activities. I guess Strava will be my activity consolidation point.
True. I had the same thought later. It would be nice to use the Hammerhead Dashboard as a consolidation point for activities. I guess Strava will be my activity consolidation point.
Im growing increasingly frustrated with Hammerhead and their customer services team.
I made the final payment for my Karoo2 over 2 weeks ago and in spite of several emails to the support team still do not know when I am going to receive my unit.
The standard response seems to be “soon”. This is the response I received today “Your final order for Karoo 2 is intact. We are aiming to ship your unit as soon as possible and you will be getting a separate email including the tracking details as soon as it has been shipped. We are almost there!!”.
I know they are a small company and can tell they are struggling with the logisitics around this product launch but come on guys! The units were originally due to be shipped in October!?!
This is rapidly taking the shine off of the whole purchase experience.
Totally agree with this… I’m in the same boat final order payment 2 weeks ago and now crickets…
If you were buying a bike computer today, and primary use case is navigation, would you buy this over a Garmin 830?
IMO, nav with the great screen is it’s big selling point over other products. This is exactly why I went with the K2 over another 1030. Triathlete . com also reviewed the karoo 2 and said essentially the same:
“If navigation and “geography”—things like elevation, routes, and turn-by-turn directions are important to you, there isn’t a better computer out there.”
Though not nearly as good a review as DC’s, it came to the same conclusion as Ray did – the display and nav are it’s strong points.
Thanks, Mark!
I agree with all you say. I think my main hesitation is (1) the battery life; and (2) the comments of others that suggest Hammerhead is very much experiencing growing pains – the comments remind me of a lot of comments re kickstarter projects. There also seems to be a lot of promises about features that WILL be added, and I tend to be in the camp of not buying products based on promises but rather on the product as it ships today. Product features do have a way of being cut and de-scoped. And looking at the Karoo 2 side by side on Ray’s chart today compared with Wahoo Roam and Garmin 830, it just doesn’t tick as many boxes for the same price.
That said, it does look like a terrific screen and although the UI is a “dumpster fire” in places, it looks better than most others. It’s really hard to resist the allure of that screen. :)
For me, I’m looking for something that helps me navigate the large city I live in but don’t know very well by bicycle, and can stretch for use on bike packing excursions to small towns outside of my city when the weather’s nice. I don’t generally ride more than 8 hours, so the battery should be fine in the first case, but in the second case it would be nice to have something that can take you a full day (16-20 hours). I tend to carry a small battery pack to recharge my phone in my bag already, so perhaps using it to charge the Karoo 2 on a long bike packing trip isn’t a big deal. But it would be so much better if I could keep that battery for my phone and get 16-20 hours from the Karoo 2.
I have to say, I’m getting sour on tech companies and batteries generally. Garmin’s work on solar with the Instinct watch lineup this year is a direction I’d love to see all tech hardware companies move towards. All this movement to reduce the size of bezels…. but imagine if the bezels on the Wahoo Roam, for example, were solar charging strips… it could probably have unlimited battery life. That’s a win for the user and the planet.
You summed up my exact issue w/ the K2 and what is making my decision hard: you are buying what it CAN be, not what it currently is. Unlike you, I do have faith in the company. They are a young company finding their way. And I think they have shown that they are committed to making major improvements. But it will take a couple of years to make up the difference, and the battery life isn’t great. What happens after a few years when the software finally catches up, 6 hours or less?
I have a pre-order. But I’m pretty sure I will cancel it and get the 830. The K3 should be amazing though :)
Did you do that? Very impressed so far with the K2, now that I have it.
It looks like I should be getting mine in January. Karoo 2 software supports structured workouts imported from my Training Peaks account. I’m planning on also getting a Kickr Core smart trainer for the ANT+, FE-C type with ERG mode to execute my workout. I’ve primarily been using TrainingPeaks for running plans and I’m not keen to simulate manually that on our Peloton. The only thing I need to work out is whether my Shimano HG50, 9-speed, 11-34t cassette on my Specialized bike will work with the Kickr. So I will need to research that some more.
Thanks for the review – very nice. I pre-ordered a Karoo 2 on Oct 16th and was just notified with the following status:
“Your order falls into Batch G [you can see all Batch shipment updates here], meaning that our website will open for you to complete your pre-order the week of January 18th, and you should expect to receive tracking for your Karoo 2 the week of January 25th.”
First, this seems like a very good update – unlike what others have experienced that received very vague updates. Good job Hammerhead! Secondly, I’m moving forward with my purchase because its strengths around nav and display. As a ride leader, I will use this to follow routes made with RideWithGPS and that’s about it. I have a Fenix6 that I use for all my hiking, running, cycling etc activities which connects my Assiomo, HR and speed/cad sensors. I don’t use the watch for nav cause it basically sucks due to screen size. However, I do have a Garmin light, so I am hoping Hammerhead adds support for ANT+ lights. it is really nice to be able to control the light with the headunit like I did with my 1030 (which was recently stolen). I have been using my smartphone with RWGPS for nav, but the battery life is simply unacceptable. I really do not want my phone involved with my activities so I can use it for phone stuff like calling the wife and taking pictures – a dead battery is not good if I have a mechanical and need a ride.
Honestly, I’m a bit pissed off I even bothered pre-ordering. I put mine in on August 25th, just a little too late to make the first batch, but still within the first day or two that pre-orders were even possible.
I assumed there would be delays, and that’s not really a big deal to me, it’s winter time, riding outside is a crapshoot right now anyways. Then I saw the email about the 75% off jersey offer, and thought, well, at least that’s a nice way to reward all the people who pre-ordered so early. But no. The whole pre-order option is completely open again, so there is absolutely no advantage to me, despite having put down a deposit four months ago. If I order now, I still get the Garmin adapter, and can also get the jersey offer. What the hell was the point of putting in a pre-order in August then? I haven’t completed my order, because honestly, this is already leaving a bad taste in my mouth, what a crappy way to treat people who put money down early.
On top of that, when I put in my pre-order, the price was 399 USD, the pre-order deposit was 99 USD, and I was charged 85.04 EUR, which led me to assume that the price would be 399 USD in the end for me here in Germany. But no, the price is now 399 EUR, which converts to 485 USD. Yes, there’s about 50 EUR VAT that needs to be covered, but if they can’t figure that out during the time of pre-order, then they shouldn’t bother doing sales outside of the US. Is the thing worth 485 USD? I think I’d rather have my pre-order money back, and wait until some of the long-term reviews start coming in. If TrainerRoad integration doesn’t make it, I don’t want it anyway.
Regarding the woeful interface to pause/stop/resume, perhaps suggest to them that any button press that results in a confirm/cancel response should see the confirm/cancel buttons places totally elsewhere on the screen. This avoids problems with double tapping.
And while we’re at it, avoid contextual words like “confirm/cancel” and make them actually describe the ultimate action being directed: “End recording”, “Continue recording”, etc….
Wait, so the only way to get at your data is via uplink to their web site (in the way Polar does it)?? That’s HORRIBLE. That means if they have internet issues, or business issues (go bankrupt), you have an expensive brick. That’s just *HORRIBLE*.
It’s one of the many reasons that I’ll never buy a Polar product again. They’ve had multi-day server issues that holds the unit and my ride data hostage. With my Garmin and Bryton units, at least I can grab my data via direct USB connections.
You can still access it. If you turn on USB MTP mode on the unit, then it’ll surface as a USB drive. The .FIT files are located in: k2\Internal shared storage\FitFiles
Now, Hammerhead could make this slightly easier pretty easily by offering a more easily accessible toggle to turn on MTP mode (and have it stay on). But if ya need it, it’s there with a few extra taps.
Oh, very good, thanks. “USB” isn’t included in the “Data Transfer” section of the comparison chart. “It was on dcrainmaker, so it must be true.” ?
Yeah, so at a basic level it’s not by default, so you have to toggle developer options, then toggle on USB to enable it. Technically silly easy (literally just tapping a small of times). So didn’t think about it there.
Will add it in. Thanks!
I just got my Karoo 2 so I’m sort of clueless. Where are the “Developer Options”? I don’t see it in settings.
Thanks
Go to settings, then About, and tap on Build Number a bunch of times quickly.
Yes they should do this – easy option to enable USB file transfer – the tap on Build version hidden “developer options” –> USB options through Android should not be the only way you change the USB composition on K2.
OK, so I’ve done it. Pressed the Order Button. Does anyone know roughly what kind of data usage this thing really has using a SIM? I really value Live Track capabilities.
Lets say you do 100 miles per week and then get home to do the data upload where its hooked up to Wifi. What is it actually sending/receiving? What kind of data plan have others bought to use this feature? THANKS!
I decided to follow through with my pre-order. I’m in the last group aka late January. Hammerhead has been making steady improvements with each software release. I hope Hammerhead will add more integration with online services, improve battery life, add Phone data tethering using Bluetooth, and correct some of the UI oddities.
link to hammerhead.io
The main reason I’m switching from Garmin 1080 is the syncing with phone and computer. Garmin has just been to inconsistent. Did you find any issues syncing this with Strava and other sites? I had just been waiting for something to sync better and offer Varia Radar capability. I don’t train or do anything else so hoping this is a good move.
I didn’t see any sync issues, but then again, there’s no Bluetooth to Karoo 2 sync at all. The only sync is via WiFi, today anyway (sometime in 2021 they’ll add Bluetooth Sync).
Like you, I’ve long since hated the Garmin Edge sync process (specifically the Edge, compared to other Garmin devices). But my WiFi sync pretty much works without fail, and is how I tend to sync most of my test fleet of Edge devices for recording power meter/trainer comparisons, etc… these days.
So in essence, if you compare those two aspects (WiFi sync vs WiFi sync), it’s a wash. Where the Karoo 2 is far better on WiFi sync though is the ability to do maps and such via WiFi, versus Garmin’s USB connection only there.
Coming from both Wahoo Roam and Garmin Edge 1030, it’s really a new kind of bike computer. Recieving mine a few days ago, I did already several rides with.
Screen is amazing, UI, design, … As granfondo and ultra rider, I’ll see if it can hold 200 to 400k (14-15h) as my Roam and 1030 did (powerbank need?)
But to be clear, this computer is like your first smartphone .. a non return to old technologies ?
I paid 380€ … just a few more than a Roam
I have done a ton of research, looks like the only Normalized Power you can display is for the full ride? not for the current lap. Can you confirm that?
Hey Ray, any recommendation on best site(s) to download apk’s for the Karoo2 ?
Also.. i do have the Zwift apk downloaded to my computer, and figured out how to access the Karoo2 directory via USB; however, there’s no system folder access nor a folder by default that would be used for sideloaded apps. Where did you load your Zwift companion to on your Karoo?? Thanks!!
No need to reply, figured it out.
Hello William or DCR, can you send me some instructions on how to sideload the zwift companion app to the KAROO 2
And can you tell me if it is then possible to use the wristheartrate broadcast function of the garmin Fenix 5x to send thru the companion app to Zwift ?
You can actually follow my Peloton instructions if you want, they’re virtually identical: link to dcrainmaker.com
The only difference is instead of tapping the about box 10 times, you’ll tap the build number 10 times.
And of course, instead of downloading the main Zwift app, just download the companion app (it’s more simplified and you can follow the TrainerRoad section but swap it out for the Zwift Companion app).
On the Fenix 5X, it broadcasts via ANT+, not Bluetooth Smart. I don’t believe Zwift Android allows ANT+ connections, only BLE: link to support.zwift.com
Thanks, but might the Karoo not function as a bridge for ANT+ ? I do see my Fenix 5X HR broadcasted to the Karoo, and might the companion app then send it to Zwift
An important question:
Are those rubber buttons on its side? much like garmin’s? Then it will crack in 2 yrs in the sun. ?
So I was told that I was in Batch E by Hammerhead. I pre-ordered in August and completed payment in December. Batch E was supposed to ship by end of last week. But I then got an email that I’m now in Batch H. It’s a bit disheartening that for their second bike computer they haven’t figured out how to manage orders properly. At this point I’m going to cancel my order. I note they changed their email from allowing me to cancel ahead of time or return it in 45 days to just return it in 45 days. Since I’m leaning toward getting a Tacx I may rethink my choice and go for an Edge of some sort.
Sean
Fwiw for people, you can see batch tracking here: link to support.hammerhead.io
Essentially it says all batches will ship within 11 days – January 29th – unless there’s batches not on that sheet, but that seems unlikel.
I was Batch F. Got my tracking number last Thursday. Unit is here today. Can’t complain. I do know that shipments to some other regions were delayed.
Hi Ray,
FYI. My Karoo 2 came with 2, rubber, USB-C protector plugs. See the attached photo. Seems lame to me. I’ll probably lose them within an hour.
Yeah, I was wondering about that too. Seems like a poor solution. Pretty much every other head unit in the world has some sort of integrated charging port cover. :(
Good news. I got in touch with Support and they corrected my order and it is now shipping. Looking forward to using it with my new bike, Giant Contend AR 1 (2021) which I picked up today!
Sean
10 minutes, first ride….One left. Wont bother using them now.
Thorough review as always, but a couple of questions… you comment that for navigation the Karoo2 is best in class but spend most of the navigation section of the view ranting about what it does wrong. What is good about Karoo2’s navigation? Also what approach does it take to re-routing when if you get off route – re-join farther on or route back to divergence point? Can you select preferred method?
I’m not sure where I said it’s “best in class”? I said “the overall navigation and display experience is unlike anything else out there” – which, it is. There’s nothing like it. It doesn’t mean though that it’s the best in class from a navigation perspective.
I’d suggest re-reading the Navigation section again, noting where I discuss importing or routes for example, or overlays of Strava Live Segments on routes, or speed of re-routing. I also discussed exactly what happens when you go off-course.
Ah, well yeah, I suppose “unlike anything else out there” could be a bad thing too, but it IS a tiny bit misleading n’est pas? And actually, I read the review, a couple of times and again just now, and all I really see is complaining about phantom turns (which all units experience and none handle well IME) and lack of clarity about buttons etc. Honestly, I also don’t see how Strava segments quality as “navigation” either. Strava segments don’t get me from Point A to Point B in a strange town or put me back on route if I make a wrong turn. Maybe more time discussing features like in most past reviews and bit less trying to be clever/obtuse?
“Maybe more time discussing features like in most past reviews and bit less trying to be clever/obtuse?”
I thought I was pretty clear. Sorry.
Thanks, but might the Karoo not function as a bridge for ANT+ ? I do see my Fenix 5X HR broadcasted to the Karoo, and might the companion app then send it to Zwift?
The problem is that the Zwift companion app doesn’t bridge ANT+ signals, only BLE signals.
Now…there may be other ANT+ to BLE Android apps. I’m almost certain there are, I just haven’t looked anytime recently. In which case, that would solve it.
So here’s what sucks about the Karoo and is pretty much a deal breaker (or while I’ll be sending mine back, should have read this first)
1. No crash detection? Really?
2. In this day and age, why not include a front camera for crashes or whatever, cost is actually close to zero.
3. Is anyone really going to buy a SIM card in the US and spend $10 a month in charges?
4. It would be clever if they could take a beast of a road ride or gravel ride and replicate on smart trainer.
1) I find crash detection a PITA. Especially for mountain biking.
2) No head unit has a camera. Seems like a funny reason to point a finger at Karoo for this, By this logic you shouldn’t have ANY head unit.
3) I’ll get a SIM card. It would be nice to have tracking without needing to remember to start something on my phone. Another option would be to use my phone as a wifi hotspot.
4) That’s on the roadmap.
I finally got a Karoo 2 since they added a beeper. That was death for me for Karoo 1. After using it for a couple of weeks I am happy. The screen is easy to read. Setup of data screens is easier than any other unit I have used. So far, so good. No major issues for my. Does it have every single feature that Garmin has? Nope. But I never use 95% of them anyway.
How can I control the Indoor Trainer (like Wahoo Kickr Core) without a workout from TrainingPeaks.com? Is it possible to manually control the Watts or %?
I have been using my Karoo for a little over a year. Shortly after purchasing I noticed I was not getting Calories.
I posted on the Hammerhead forum and was told Karoo does not give you calories. Unless you add a separate power meter.
Numerous requests have been made to add this feature but Hammerhead has stated they have no plans to do so.
I have no idea why this is not make clear in there marketing. Or how company serious about fitness would design a computer but omit this metric.
In any case potential owners should be aware.
Todd
I think Strava can calculate your calorie burn based your heart rate.
I looked in my Strava and do not see calories. Where would I find calories?
Go to the activity on the right-hand side should be a button for “Show More”. This should show you the high-level details for your ride including calories burned.
Not there.
I checked both the Android app and the website.
Do you have a power meter or are you paying for a Stava account?
Do you have this section in the screen capture? Can you share what your activity lists?
Gil,
your stats show power so you must be using a power meter.
My whole point here is that the Karoo does not provide calories without spending another $500-$1000 for additional hardware, aka a power meter.
There’s a few scenarios going on here.
1. On-unit calorie estimates <– Only available through a power meter
2. Post-ride calorie estimates through Strava
Strava can be a web of sub menu's etc. I tried to provide some direct links to what's referenced above.
Strava estimates your power output with or without an actual power meter. Virtually every unit or website can do it based on pure PM data. Training Peaks can estimate is based on the HR too. Strava can guess your power output without an actual power meter.
1. Add your bike to your Strava profile (My Gear) with a realistic weight.
2. Add your personal body weight when you're fully suited up for a ride (bottles, etc)
3. Make sure your cycling computer records every second vs smart recording
Supporting Links:
Calorie Calculation: link to support.strava.com
How Strava Calculates Power: link to support.strava.com
How to Get Power for Your Rides: link to support.strava.com
Random website: link to optimistminds.com
“Or how company serious about fitness would design a computer but omit this metric.”
A company serious about fitness will also know that guesstimating your calories is borderline worthless. Even adding in heart rate data, it’s still going have an error of 10-20%, so what’s the point of bothering with it? A power meter will allow the Karoo to calculate actual work done and energy expended based on wattage, which allows for a relatively accurate calorie count. You need a way to measure energy being used, if you don’t measure that, there’s no way to get a meaningful calculation. This applies to any fitness tracker, not just the Karoo.
Dwayne,
Polar has been doing it for decades and they are considered the gold standard when measuring such data.
The fact is everyone has been doing it for decades and continues to. There must be some value there.
Gil,
Are you an employee of or affiliated with hammerhead?
I am beginning to get the impression you are trolling.
From hammerheads own staff
“As of now, our calculations are based on Training Peaks and calories are calculated based on the Power. We do not have immediate plans to change the calculation but I will definitely bring this up in the Product meeting.”
This was almost a year ago now. Just after the Karoo was released.
You can read this as Karoo does NOT Calculate Calories
LMAO. No I’m in no way affiliated or employed by Hammerhead. I’m just a guy that’s trying to figure out a way to get you calorie estimates one way or another. Karoo doesn’t do it and thought Strava could be used as a method to get you some calorie burn information. I use my calorie burn info with myfitnesspal and appreciate your need for it. Karoo was a dead end. I tHought strava could solve the problem. Why swim upstream…
While I’m not affected (power meter). It sucks for people who don’t have a PM and Karoo could license the FirstBeat algorithm like others and put it on the Karoo.
Dwayne is right. Some companies do the HR calorie estimates good and a lot do it terribly.
Todd,
I’m just a fellow cyclist trying to help figure out a method to get you calorie burn information. I do not work for or affiliated with Hammerhead. I thought Strava could help since the Karoo doesn’t support it.
Cheers
Okey doke…sorry, late to this party.
I think everyone is right, albeit with different perspectives. Gil is correct that many companies do calorie burn crappily, with only a few doing it really well. And among the best that is often easily wrong due to so many aspects. No company claims to be 100% perfect for every human in this area.
That said, I would agree that not providing any basic calorie data at all (for non-power meter users) does seem like a miss, especially given either licensing those algorithms or even providing relatively rudimentary calorie burn metrics using well understood equations would be an assumed baseline for a $400 device (since most $50 activity trackers do that as well).
Cheers!
Heartrate is a poor indicator of calories burned because it is a lagging indicator. Your heart rate goes up a few seconds after you increase effort and the lasts too long when you are winded at the end of the effort. Buy the Assioma Favero pedals, they are excellent and reasonable PLUS you can move them from bike to bike. I’m amazed what my Apple watch estimates versus my powermeter pedals.
Hope this helps you Todd. I read where Strava will calculate a calorie burn but you have to add your weight to your profile page.
I don’t see any value beyond total KJ output. Which is indeed provided by the K2. People should do their research and understand the mechanisms involved, beyond that? It doesn’t seem like algorithmic estimates are helpful here.
It seems to me that by having a SIM card you can both upload the ride and have live tracking without the use of a cell phone. Are these the main advantages or are there more? Also, since this is not an American made product, does a CDMA sim card say from Verizon function in this unit?
Sean,
I don’t think CDMA uses SIM cards. A GSM/LTE/NG(5G) SIM card from Verizon should work if the unit supports the appropriate radio bands and protocols.
How do you actually go about getting a SIM card working (besides going to the Verizon store)? Does Verizon even work? It’s not in the Karoo approved list. Do I need to ask for anything special from Verizon? Once I have the card what do I do (besides sticking it into the Karoo)? Is there setup or configuration that I need to do?
This topic is , in my opinion, poorly covered in the manual.
I think you can order it. Verizon doesn’t use odd radio frequencies and should be widely supported. Do you have a link for the Karoo 2 that outlines which wireless protocols (LTE, 3G HSPA, etc) and radio frequency bands it supports?
link to verizon.com
HH just responded to my ticket asking which LTE bands the Karoo 2 supports.
We support LTE bands 2,3,5,7.
What do you think to the charge portal covers? Just received my Karoo2 this afternoon and in a small ziplock bag were two little rubber bungs for covering the charge portal. Slightly worried I’ll lose them as they aren’t attached to the unto itself like my old garmin 1030
Not a fan. My Karoo 2 just shipped (on time per the schedule) and this is a bit funky IMO.
Apparently it’s waterproof without those plugs. I suspect it’s more for dust, dirt, and mud fouling up the connector. Still I think the little flaps on wahoo (and garmin?) are a better solution.
Me too. I am pretty sure that they will eventually fall out during a ride or I will lose them
The unit is waterproof without them. Phones don’t need them, so I don’t think they are actually necessary. Not 100% sure though. Hmmm
Found this on the Hammerhead Page
Hello,
Great review, but I’m still wondering about Di2 compatibility. I now have the Karoo2 and have been unable to set it to beep an alert when the next shift will cause a chainring shift in S2 mode, as my Garmin 1030 does. I don’t think the Karoo2 can do that. Not sure.
My Karoo 2 arrived today and will test this tomorrow. The karoo does have a data field for Di2 gear position and didn’t see it listed in the audio alerts section.
Albert,
I just checked. The Karoo doesn’t notify you that the next shift will result in a chainring shift like the garmin. My Edge 1000 does it. I found it useful and helped me not be surprised by a shift.
Gilbert
Hey folks!
Just a quick note that a few of you have asked recently via here in the comments and the contact form, for instructions on how to side-load Android apps on your Karoo. So…I wrote it up:
link to dcrainmaker.com
Enjoy!
Great video, thanks! Question – does it look like uploads go direct from the device to Strava, or do they go via a Karoo server? Obviously Karoo isn’t as big a company as the likes of Garmin or Wahoo, so if Karoo and their servers went away tomorrow, I’m wondering whether the ability of the device to sync my workouts would be affected.
Obviously when I said “Karoo” isn’t as big a company, I meant Hammerhead :)
It goes via their servers.
That said, the Karoo writes the files locally, so at worst you could upload those files manually from the device.
Great, thanks ?
Does it still require Karoo servers to upload a ride? I thought perhaps the unit would upload directly to strava as it has a wifi connection. If not, that should be improved. Curious as the Garmin Connect downtime issue last year left many convinced that there was no way to transfer their ride files…when of course USB was always available. This is an opportunity for HH to differentiate.
Can anybody comment on the following?
1. How does Trailforks sideloading look?
2. How does MTBProject sideloading look?
3. Can I keep those apps running in the backaround or foreground and toggle between them and the built in system while riding and recording rides with the default OS?
4. Does the Karoo do anything special with OSM (OpenStreetMap) “TRAILS” that have tags for cycling or mountain biking? Meaning, do they stand out on the maps better than horse / hike trails in a congested area?
I’m really considering selling my Garmin based on the improvements made here, but I need to know those options for MTB work. Sure, it’s a pain with a Garmin to do custom maps, but it *is* possible. Aside from that, I don’t care about or use Garmin’s training metrics on the 830. I got it for navigation, which it kind of sucks at.
I also wonder about this. With my old Garmin I use custom maps, like the one based on mtbmap.no which gives me color-coded trail difficulty for mountain biking – basically for any European country (I would just need to tell my friend to generate it if I want to visit a country not yet listed). Screenshot examples at mtbmap.no/garmin :)
I’d probably try Karoo 2 if it could do this.
Great review, thank you !
You mention the option of turn by turn voice navigation using a bluetooth headset. Have you tried it? It would be great to hear how that sounds and looks on one of your ‘on the bike’ video’s.
Is there a way to discard a ride vs always saving it?
Annoying I agree. All it seems we can do is save it and then delete it with a swipe from the ride page.
I did my first ride with the Karoo 2 tonight. It was an indoor ride which eliminated the possibility of testing the navigation features and Strava segments.
It’s good, but different. I set up a profile that mirrors my Edge 1000 data pages. Again this eliminates the ability to test the advanced Karoo visualization features.
The good:
amazingly clear screen
fast page changes
Karoo 2 & Karoo mount hold my iPhone running Zwift companion app great! It would fall with the Garmin Edge 1000.
I do like the karoo native mount. Again different than the Garmin quarter turn, but prefer it.
Setup was pretty easy
The So-So:
Battery… The % of battery life is listed on the top. While the garmin is hidden under a menu. It felt like the battery drained faster, but could be me staring at the battery percentage field.
It doesn’t have Di2 Syncho Shift warnings like the Garmin. Nothing like a front gear change at the wrong time to scare something out of you.
The buttons for pause and stop ride are annoying, but I’ll adapt. Counterintuitive swapping positions as Ray mentioned…
Other:
It shows you all of your iOS notifications. Not just messages. A little too much information.
I wish the larger data fields would be center justified vs right justified.
I still have a lot of tuning to do with the data screens and exploring the Karoo unique features. Hammerhead could have an amazing head unit if they resolve some of the annoying missing features and minor UI improvements.
Correction: You can disable notifications from your other iOS apps.
Go to: Settings –> Phone Pairing –> Uncheck other apps.
Available settings:
Messages
Calls
Voice mail
Other apps <– I disabled this option. No need for companion app notifications to show up on my phone and head unit or breaking news alerts.
My first ride tonight. I agree with most of your comments. The biggest annoyance I found was I’m using a old kickr (no cadence) I have a old ant+ garmin cadence / speed combo on the bike that’s on the kicker because I still ride it outside occasionally. As such, I can have cadence, or I can have speed. I cannot have both. No matter what configuration I seem to try with pairing sensors / kicker ie ant+ or bluetooth, I just cannot have both yet.
I guess I just need to pick up separate sensors or a new one that has multiple channels.
p.s. I don’t need “speed” on an indoor trainer, its just that I noticed I can’t get it figured out
I’ve done a few additional trainer rides and tinkered more with the Karoo 2 and Dashboard.
The good:
– The various graphical animations for the data fields are surprisingly useful and not a gimmick. I use them for my interval training now.
– Unit appears to be very stable (no crashes). I’ve adjusted the settings while recording a ride without it crashing or any weirdness.
The bad:
– I turned off Location (aka GPS) for indoor rides which causes issues with the Hammerhead Dashboard and syncing to Strava or 3rd party platforms. You can still sync an activity, but it requires you to tell it to sync with 3rd party platforms. Hammerhead is aware and working on the issue.
– The pausing and ending a ride user interface is frustrating. I realize they revised this area because users were discarding a ride when trying to save the ride. I don’t care. The unit is completely functional but this area of the UI workflow is aggravating.
The “other”:
– Hammerhead finally answered my question about LTE Band coverage and updated their support site with the information.
– The Hammerhead Dashboard is very basic. Its primary functions are managing routes and syncing to 3rd party platforms. It does not offer the analysis capabilities of Garmin Connect. I’m a Strava subscriber (MAKE STRAVA GREAT AGAIN!) which does offer some of the analysis features.
– Hammerhead doesn’t have data fields for Last Lap Power/HR/etc, but it’s on their to-do list.
– The Karoo doesn’t offer any of the advanced (First Beat) fitness metrics (VO2MAX calculation, etc). I thought this would be an annoyance, but it’s turned into a big who cares for me. The Karoo supports all of the licensable Training Peaks metrics (TSS, IF, etc). These I care about… Honestly, I want Hammerhead to focus on the head unit since there’s a healthy ecosystem of companies doing analysis. Why re-create the wheel? Spend those development hours on head unit features.
We just need Strava to use the Training Peaks metrics and have a common language across all devices and websites.
One last random piece of information for the weight weenies.
The Karoo 2 weighs 16.2 grams more than my Garmin Edge 1000, but the Karoo 2 mount weighs less than my old Garmin mounts.
Garmin Edge 1000 weighs: 115.78 grams
Karoo 2 weighs: 131.98 grams
Garmin mount weighs: 38.11 grams
K-Edge mount weighs: 50.26 grams
Karoo 2 mount weighs: 33 grams
I’ve had the opportunity to use the Karoo 2 outside and more indoor rides. Plus Hammerhead has released a few software updates during this time.
Overall. I like the unit and selling my Garmin Edge 1000 and K-Edge Garmin XL mount.
Good:
– I love the mini and/or full banner telling me when is the next turn. (mini has the direction and distance and the full banner adds the street name)
– Strava Live Segments overlap is nice.
– Navigation is solid and so is the presentation of the information
– Hammerhead fixed the annoying lap and ride pause buttons back to a logical order. I’m happy and sure everyone else is happy about this change.
– Integration with Strava, etc is painless. Love it
– I’ve had zero issues with sensor dropouts
Bad:
– I still want to be able to discard a ride. I’m sure this will return in a future software update
– I’d like to see a chart outlining how to conserve battery life. I haven’t had an issue with battery life.
– A prompt to calibrate my power meter after it’s discovered.
– Can take a moment to discover all of your sensors after they wake up.
– Lap button behavior can vary based on your data screen. Super annoying when you’re doing intervals and trying to get a lap to start/end.
– Wish it would use Bluetooth tether to my phone for data (not using my phone’s hotspot)
Is it possible to use the Karoo as a hotspot?
I’d like to then connect an apple watch to the hotspot and avoid bringing a phone with me…
Should I buy a Garmin Edge 1000 or the new Karoo 2? I am looking for a bike computer with good navigation and cycling stats (which would be a step up from my Garmin watch).
I forgot to mention I am looking for a good price!
I have a Garmin Edge 1000 and bought a Karoo 2 for the navigation. The Edge 1000 wouldn’t maintain a tight enough lock within cities and the map would be impossible to read. Yes, I reduced the number of POI to help the situation without much success. The Edge 1000 is slow when typing in new addresses, etc. It’s fine if you load up a route, but changing the destination on the flow is insanely frustrating.
It’s cold outside and haven’t had a chance to test the Karoo 2 navigation functionality. Plus my travel schedule has reduced since COVID-19.
My personal opinion is skip the Edge 1000. Buy a Karoo 2 or Edge 1030 or 1030 Plus. The 1030 is older and I opted for the navigation and speed of the Karoo 2.
Does this help?
I really wanted to like the Karoo 2. Really I did. I’m all about devices based on commodity OSes and hardware. I was almost OK with the lack of support for ANT+ lights, but a single ride with the terrible color choice for the dashboard (and no way to change it) sealed it for me as being unusable. On a positive note, I found out that my Garmin 520 has been under reporting my climbing by about 28%.
I was annoyed to see that Hammerhead had removed the ability to unlock the bootloader with a semi-recent update.
I requested and RMA over 2 days ago and still haven’t heard back from them, either.
Really enjoyed this and all other reviews!
Can/will you share what screen recording software you side load onto your K2?
Also wondering then what video editing software will accept the output data from the screen recording software.
Will this then work as a viable alternative to the clunky process of editing in Garmin’s non-supported VIRB software to overlay ride metrics onto GoPro footage?
Thanks!
I use AZ Screen Recorder. It produces standard files that just work in any editing software I throw at it.
Here’s the sideload instructions: link to dcrainmaker.com
For me when I combined my GoPro + screen recording, I just did it in Final Cut Pro, simply laying the two clips together. But any video editing app will work. My only tip on doing this is to audibly record the elapsed time timer on your GoPro as the screen recording is happening (or even better, hold up the Karoo in front of the GoPro for 2-3 seconds), so you can get time sync. But since I often start/stop the GoPro numerous times during a ride, every time I start it, I’ll just audibly count whatever the timer is for 2-3 seconds, and sometimes do a swipe or two, to sync on.
Fantastic, thank you so much!
I received Karoo2 yesterday and today decided to return it…sreen is nowhere near smartphone quality, it is slow and not accurate. Biggest issue is map quality, hard to see track type and cycling route network is absent, at least from Poland’map. I cannot plan route on the device unless i have internet connection. Even then it is useless. Locus Pro on small phone is so much better! All these cycling oriented Gps units are so bad at navigation.
I have my Karoo 2 and actually thought the map and nav was great and very legible to follow. Much easier to see with my old eyes than my Garmin 1030.
I moved from Locus to Karoo2 and difference in map detail, colors, track type is massive. I have to go back to using phone unfortunately. You would have to see how 4 inch phone with Locus is much better, contrast, detail, speed, planning route, custom screen with font size and color adjustments…and phone with Locus costs 100 Eur, if only battery life was better…
I’m unable to upload rides directly to the HH Dashboard unless I use Karoo or RidewithGPS, am I missing something? I would have thought I’d be able to use the Karoo eco system without a third party app. Can anyone advise? Thanks :-)
How hammerhead uses their Dashboard is different than garmin connect, Strava and other websites.
It does appear to be a consolidation point for all of your rides. It’s more of a console where you manage routes, sync to other platforms, select which maps you want to log onto your Karoo, etc. Strava, garmin connect and other websites are aggregation points for all of your activities whether you used the Karoo or didn’t use it.
It took me a moment to realize the limit nature of the hammerhead dashboard and accept it. My Zwift Rides don’t show up on the hammerhead dashboard but show up on Strava. Unless I’m dual recording on the Karoo and on Zwift then the Karoo recording shows up on the dashboard and gets pushed out to Strava and other websites.
Does this help?
Correction: It doesn’t appear to be a consolidation point…
Correction: It took me a moment to realize the limited nature…
It seems there are some of us who are very much interested in this device –
*IF* it sideloads Trailforks or MTBProject smoothly.
Can someone who owns the Karoo 2 confirm this, and if it can run simultaneous to the native device software?
I tried loading Trailforks and seems to run smoothly. However, the GPS does not seem to be picked up in the app and gives the following strange error message.
Thank you for, as usual, a thorough and useful review of the Karoo 2. More useful than Hamerhead’s online instructions.
I wonder if you have encountered the problem of a ride not saving to the device. I have only had the Karoo2 for a week, and this happened in yesterday’s hills ride. I managed to get into the folder which holds the “fit” files and download yesterdays’ “fit” file to my PC, then manually load it to Strava where is shows.
But it is annoying not to have the ride on the device as it should be. There seems to be no way to import the file to the device. So far Hammerhead has not responded except with a generic response, that is as useful as a hip pocket in a singlet.
Peter JAMES-MARTIN
Hazelwood Park, South Australia
Hmm…
To clarify though, was it that the ride didn’t upload to the site, or that the ride is entirely missing on both device and site?
I really like the idea of the Karoo 2. Having struggled with Garmin for years I have been looking forward to a reliable device with a really good screen that performs well. I’ve watched the videos of how well it integrates with Strava and have been looking forward to building new routes that will take me to new places and then uploading them quickly and easily to the device then getting out there and riding. I have to say that my experience with the device to date has fallen disappointingly short of this.
I spent an hour trying to upload a route from Strava to the device yesterday. I had to open up the laptop in the end and even then the route didn’t appear on the device. Why? Eventually I found out that it wasn’t logged into my Hammerhead account. I kind of stumbled into this.
The device downloaded the latest software update whilst I was struggling with it. When I got out on the ride, it didn’t seem like the device completely knew where I was. The directions it was giving me weren’t quite right. Almost a turn or two behind where I was. Then it repeatedly returned to the home screen. I could still hear it beeping. I had to keep stopping and taking my gloves off to try and fix it. I guess you can probably use the buttons but it isn’t obvious which buttons you should press. They aren’t labelled. I could have done with zooming in on the map but again it isn’t obvious when you are out on the bike how you do that? I also notice that its quite unresponsive. You press a button and are never quite sure whether it is doing something. Eventually I gave up and switched it off. I used my Garmin watch to ride a route that I know. Definitely not the experience I have invested in
Is there a simple user manual that will explain to me how to use the Karoo2 properly?
Another thing I wanted to try was Strava segments. But when I try and enable this feature it tells me that I need a Strava summit subscription. Now Strava Summit doesn’t even exist anymore! I have a full Strava subscription and am logged into it from the Hammerhead account so what more do I need to do?
I am feeling quite disillusioned with the Karoo2 so far. Its at the point where I just don’t trust it and find it so frustratingly difficult to use that I am reluctant to switch it on. If I have a couple of hours for a ride I don’t want to be spending half that time struggling with a head unit.
Are there any head units or even generic gpx trackers that have a higher than 1hz recording interval? Is it possible karoo hardware is capable of more?
1hz really just doesn’t cut it in many tight/twisty mountain biking trails.
Genuinely curious, how is 1 sample/sec not a high enough rate? If you’re doing 40 km/h, that’s 11.1 m/s, and at that speed, I can’t imagine you’re changing direction fast enough to really need a higher sampling rate. The critical part is being able to get an accurate GPS fix in a wooded area, which will make much more of a difference than sample rate. As they say, garbage in, garbage out, sample rate is just how fast you collect the garbage.
I was super hopeful that I was going to love the Karoo 2- given that its speciality was supposed to be navigation.
Here are some thoughts I posted on the Karoo boards as well:
As a very recent Karoo 2 buyer, I already voiced a few things that I like and things that I think are needed badly like:
-ability to discard, rather than save a ride (I don’t want to go to Strava etc to delete rides- and I prefer not to do manual uploads)
-ability to calibrate elevation data through location information and where I am on the map
-no analysis whatsoever on the HH Dashboard
-no support for smart bikes
-no support for cycling dynamics
-no upcoming features roadmap
I did my first ride today- a 46km ride to Epping forest in London
link to dashboard.hammerhead.io
I was very underwhelmed by some aspects of what was, supposedly, the best part of Karoo- the navigation experience.
-The Karoo lost GPS on a few occasions and my location was stuck on the map for a few minutes at a time.
-No ability to resume later
-All connected sensors (earphones, HR band and Assioma Duo power meter) got disconnected during the midway break and failed to reconnect; I was unable to reconnect my earphones as only the sensors menu is accessible during a ride?!
-Found it difficult to keep reaching for the Karoo to try and get it to follow my location instead of zooming out- why not come up with something similar to the Edge remote?
-The unit doesn’t zoom in when approaching a complex intersection
-Doesn’t go back to the map screen when I need to make a left/right turn- requiring the user to reach for the screen at a time when they should be focusing on the road
Very strange Hammerhead make an offer of 399usd then change to 399eur when voucher comes in. Which is a price increase of some 20%. When swapping in K1 suddenly price is 120usd again? Seems like currency play to the disadvantage of European buyers.
All righty, just completed my 3rd ride and about 200 miles with my Karoo 2. Overall, I really like it. Coming off a Garmin 1030 which was stolen, I’m glad I choose the Karoo2 to replace it. Some random observations… As others have reported, I also couldn’t figure out a way to delete a ride from the unit after I finished. I just do this from Strava now. This is not big deal for me since I upload all my rides private anyway, and change the privacy, after changing the ride name and loading pics, etc. For connected devices, I connected my Galaxy S10 phone, Assiamo power pedals and Fenix 6 watch for heart rate. For nav, which is my primary purpose for the head unit, I build routes using RideWithGPS and sync them to my hammerhead account. All of these things worked flawlessly. In fact, the seamless connectivity with Strava and RWGPS is really a great selling point of the Karoo2. After building the ride in RWGPS and pinning it, it just shows up in the route section. Super easy. My HRM or pedals never disconnected and the nav was perfect. The phone disconnected if it was in power save mode however. YMMV apparently as others mentioned connectivity issues, but I did not experience these. Regarding the display: Does it auto-zoom when coming to a turn? It didn’t, but it does list the name of the street, the distance to the turn and direction along the bottom as you near the turn. You also can manually zoom very easily, even with gloves, using the screen. On my last ride, a 73mi ride on road, it never missed a turn or misled me. Maybe I’m lucky or live in an area where the maps are good. Don’t know. I also was originally concerned that going to a smaller screen than the Garmin 1030 was going to be a problem, but my old man eyes actually like the display better. The yellow line to follow the route, the underlying map itself, the quality of the display and the always-on distance to next turn is great. As far as battery life, I was able to get through my 73mi ride using nav and connected devices as long as I was in battery save mode. This mode keeps all the features working, as far as I can tell, but shuts the screen down until you hit a button on the unit, you are coming up to a turn, or there is some notification like a message or a phone disconnect message. In battery save mode, I’m pretty sure I could get through a 120+ mile ride not prob. If I turned battery save off, and left all the radios on (WiFi, BLTE, ANT+) with the screen always on, I think it’d be closer to 50-60 miles, which is around 4 hours for me. With battery save, it’s easily double that, at least in my short experience. The Karoo2 also doesnt have all the fancy metrics Garmin has – this is been beat to death so I’m not commenting on this. There are other ways to get all this if it’s important to you. NO unit is perfect, and after many years of hit and miss with Garmin (my Garmin Edge 500, 1030 and Fenix 6 were/are awesome, but my Edge 800 and Touring were garbage), I am happy with the current feature set Hammerhead has at this time. They have pushed at least 3 updates since I started with subtle changes in the UI, so I am hoping they continue the dev and add some of the things others have asked. Is the UI/display perfect? No, I still think there can be some work done to better manage the screen space. As it is, I still can see the map better than my 1030 and it’s been reliable for the devices I use.
Fantastic review. You convinced me that Karoo 2 is good to buy, over Garmin. As always, great job on your very thorough review. It’s the best!
So far I’m like the Hammerhead 2 more so than the Garmin 520 it replaced. Is there a method of synching your phone again if it drops off in the middle of a ride or does not synch before you start, without ending your ride?
press the bottom right button for 3 seconds and juggle the menu, then return to the idle activity
Hi Ray, any idea what’s next for Wahoo and Garmin beyond the Roam and 830? I’m in the market for a new unit and don’t want to buy a Roam or 830 only to find new ones on the market a month later. Thanks!
Not sure. Historically speaking we’ve seen what used to be the Sea Otter timeframe (mid-April and the two weeks that follow) be popular for launching bike computers from all brands – in fact, the Hammerhead Karoo 1 was even launched during that timeframe years ago.
This April/May would see it as 2 years for both the Garmin and Wahoo units, which is on-par with a typical Garmin release cycle (Wahoo is more variable). That said, COVID kinda messes up all release cycles these days.
Thanks!
What have you decided to do? Will you wait? I am in same position as you are.
Ok, tested the Karoo2 for the first time today, NO Notifications, nothing…. (mentioned also in the HH-Forum)
Followed all the Settings and rights for the App in my Smartphone but nothing at all.
Rides will not show up in the Dashboard and not will be uploaded to komoot or Strava.
But display is outstanding.
Will try to follow the tips in the HH Forum and will do a Factory Reset, perhaps Notifications will work then.
I had the same problem (android/xiaomi phone) if android uninstall the companion app from the phone and cancel the karoo pairing from bluethoot devices. Intall the last week karoo update. install the companion app with the right privileges and removing energy savings. Then follow the procedure in HH site.
in my case it works with every notification,,,,
I use an iPhone and the notifications work. It actually works better than my old Garmin Edge 1000. I’ve seen the Karoo disconnect from the iPhone at times, but the Edge 1000 did it too. The karoo was displaying all of the notifications on my iPhone. News, Zwift Companion, News alerts, Weather alerts, etc. It was overwhelming and disabled these on the Karoo. It’s now configured to notify me of Messages (SMS and iMessage), missed calls, incoming calls, and voicemail messages.
I’m not sure if it’s iOS or Karoo updates, but removing the pairing from my iPhone and Karoo then repairing it has improved the connection reliability.
I use an iPhone and the notifications work. It actually works better than my old Garmin Edge 1000. I’ve seen the Karoo disconnect from the iPhone at times, but the Edge 1000 did it too. The karoo was displaying all of the notifications on my iPhone. News, Zwift Companion, News alerts, Weather alerts, etc. It was overwhelming and disabled these on the Karoo. It’s now configured to notify me of Messages (SMS and iMessage), missed calls, incoming calls, and voicemail messages.
I’m not sure if it’s iOS or Karoo updates, but removing the pairing from my iPhone and Karoo then repairing it has improved the connection reliability.
Hey Ray… any chance you will cover the numerous bugs that plague this device? I mean its just horribly buggy and basically makes it useless for serious training. There are numerous power recording issues that have been identified yet a fix is not even close.
I think you need to very cautiously recommend this product that carries a premium price for being a Beta tester.
Hi Joe-
I discussed the specific bugs I saw in the review.
I didn’t see any power recording issues with my files though (which…are included in the review too).
Cheers
I’ve got it working,
Downloaded latest Version of the App, 1.5.0 and re-Paired the device, now the rides are online, dashboard and Komoot as well.
Too early, now it stopped again to show notifications….
I have had the Garmin Edge 1000 for years now and still it remains a great unit doing exactly what all newer devices are claiming to do. Once you have a Garmin watch and Edge you are kind of locked into the Garmin Eco a bit like when you buy into Apple. It’s great to read a review but after all the years I have had the Edge there is still no reason to move on
Great review as always.
Battery life is a joke for the year 2021 – I have it since October and am very disappointed. To get to 12h you basically have to turn of all sensors and turn down screen brightness to the point where the screen is barely visible.
My unit dies always around 7-8h with 2 sensors paired and the occasional swipe to a different data screen making it impossible to use for summer grand-fondos.
Contacted hammerhead and they answered. “just swipe less, turn down screen brightness and dont re-route.” Funny because that’s the whole point of buying a top-notch head unit: So you got a great display, so you got nice data screens to check your training and to be re-routed back to the route when you are off it.
I love the karoo 2 but as somebody who enjoys 150-200km rides regularly I can not use it. I already lost a big ride when I was in Mallorca because the unit died which is a bummer. Battery safe mode is unpleasant to use as the unit wakes up too late when you are approaching a turn.
Overall I am sad I bought into the hammerhead ecosystem. People warned me to wait it out and stick with Garmin or get a Wahoo. I should have listened….this is a great unit. if you want to ride less than 5h only…otherwise you will get nervous about finding your way home or loosing data.
its 2021…..battery on my GPS should be my last worry.
I wonder how the Israel Start-Up Nation cycling team will deal with the battery life issue during longer races? It might drive Hammerhead to use more creative and efficient software development and extend the battery life.
link to israelcyclingacademy.com
Yup, I discussed battery life in the review – and also got the same roughly 8 hours.
I asked Hammerhead about it, and they said that from all the data they’ve gathered, people are actually getting closer to spec on this than me (…or what appears to be all other users in the comments here).
Not sure what to say there, but I did outline it as a concern in the review.
Hi there, very informative review, I went ahead and got one, and loving it so far!
One question, I don’t have HR monitor – I use garmin 735 watch wrist HR for run training. Is there anyway to connect the 735 to the karoo so the unit can display my ride HR from my watch? So far I cant find a way to do it, tried via Bluetooth menu, but my they don’t find each other to pair.
Probably not possible, but just thought I would ask!
Yup, you can just use ANT+ broadcasting. Here’s a quick how-to post: link to dcrainmaker.com
Brilliant Thanks a lot!!
Pre-orded 2 devices – the first one git finally delivered, however the 2nd device I was asked to check out suddenly in EUR instead of USD. Support is sluggish and unresponsive. It’s a nice product, but customer service is from hell. Stay away.
Hammerhead support has been good for me so far. This was for technical questions and not purchase questions. However, they replied with an answer within a day.
Also for me. Had a email response within a day.
Thanks as always, Ray!
Would you go with an Edge 530 (which may be due to an update soon based on historical release cycles) or Karoo 2?
I just placed an order for a K2 (largely based on your review, thank you). I have a question which support at Hammerhead sidestepped, so I’m hoping you can help. On the head units I’ve had in the past, including the Wahoo Element Bolt, use of a hub mounted speed sensor is required. Without the speed sensor the speed reading on the head unit fluctuates a lot even when the bike holds a steady speed. How does this work on the K2? Is a speed sensor necessary for reliable speed readings? Or can I do without one and keep things just a little simper?
Accidently chipped the glass on the Karoo 2.
Reply from Hamerhead
“Unfortunately, we do not have any repair options. We have an industry-leading crash replacement policy and are able to offer a certified(new) unit for $249”
So it will cosy $249 to fix a screem. This will be the price for any out of warenty repairs as this one is as it is acidental damage
Hey John, that sucks! If you’re a Strava Premium member living in the US (some states excluded), UK or AU there is a free Strava Premium Perk from Sundays Insurance that offers up to $600 device damage coverage. link to strava.com
How does the Karoo compare to Garmin for when you go off course? I know you discuss it a bit, but this is my main complaint against my Garmin 830. When I miss a turn, or make a wrong turn, it is very hard to get back on course. I have had times where I spend 10 minutes at an intersection trying to figure out which way to go. Does Karoo do this better?
Jeffrey, I upgraded from my Garmin 830 for this very reason. I live in TX, so perhaps your mileage will vary, but it almost instantly gives you a new route – instead of my Garmin, which would try and have me re-trace my path to get back on route, or wait until I landed on it again on my own.
Thank you Dallas. This was my concern. If you make a wrong turn at an intersection will it tell you to go back?
It will if that’s the fastest route. Though, it’ll also show you an alternate route if you decide not to turn around.
When I missed a turn, the Karoo2 leads me directly to the next point in the Route, no “Please turn over” as I’ve seen even in the 1030Pus.
For me, the Karoo is perfect.
Very happy.
I’m interested that you don’t feel more strongly about how superior the UX is on this device? Even simple things such as swiping across screens, is many times faster on the Karoo. Personally this matters much more than fringe features. And I suspect many others don’t use these. More universal features like auto ride upload, strava KOMs, data field selection and look, all these strike me as at par or superior.
Garmin doesn’t seem to have made substantive attempts to improve user experience in many years, while embedded devices and their capabilities have changed massively (not much improvement in my view since ~2012, just contrast with todays phones with the iPhone 5 and Galaxy S3). For the price of a 1030, you could get a very capable modern phone. Their priority seems to be elsewhere, and to me this seems misguided.It’s just interesting and surprising to me to not really see much negative press for Garmin units, even though they have been plagued with usability and quality issues since I started using them (with a 705).
Hammerhead manages to bring head unit tech up to near present, with a capable CPU, decent screen, ability to scroll without having to doubt whether the unit is locked up, or you just need to wait a few more seconds, and USB-C. And it’s 2/3rds the price of a 1030. That and what look to me like quite a bit of recent development from their team, and a better android backbone are big deals. Is it just that the Garmin drawbacks are well understood, and folks are used to it?
The UX on the Karoo is good, but it’s also super limited too. So in a sense, they haven’t had to deal with the problems of having more features, and it largely shows. We saw that best with the re-routing pieces once adding in Varia radar as I showed above, it became a dumpster fire of UI confusion.
I’d argue most of Garmin’s UI dumpster is pre-ride. Once in a ride, it’s very good. Pre/post-ride, the menus are just endless and mostly confusing.
But I don’t think comparing to an Edge 1030 phone makes much sense. Those phones won’t stand-up battery-wise for what a Garmin Edge 1030 does, nor feature-wise. You’re paying for software and an ecosystem here, more than hardware features. While one can barely cobble together the features of a lower-end Garmin on a phone with numerous apps, it’s a mess.
As for features, those are all person to person, but a lot of people do value a lot of the Garmin features – especially once you start talking cross-device capabilities. Hammerhead is doing great here, but you’re ultimately investing in their routing interface. That, at present, is their main jam. Yes, they’re building up capabilities of things like structured training – but if one were to do a deep-dive into that and compared to Wahoo/Garmin/Stages, we’d quickly see it’s not even close. And that’s fine for a lot of people. If you’re just pulling TrainingPeaks workouts and don’t need anything beyond that, it’s all good.
As for an Android backbone being better, that’s tricky. It has the *potential* to be better. But right now it appears to be hampering their battery life comparative to their competitors. Additionally, the core benefit/reason for Android is being able to unlock 3rd party apps. That’s getting closer, but in order to be a game-changer it can’t just be one app. It has to be a slew of major apps that majority chunks of the endurance cycling population use – reason to switch in other words.
Finally, as for talking about Garmin negatives, I often talk about the stability of their platform – including one rather large post here: link to dcrainmaker.com
But also in most other posts. At the same time, anyone who has used Garmin for a long time knows it’s definitely getting better and more stable. I think their shift towards open-beta everything has really helped there. It’s not perfect, but it’s a heck of a lot better than two years ago.
Thanks for the thoughtful response.
I’m a SW engineer in the mobile/embedded device space, which is why is why I drew the comparison with phones. I just meant that relatively, mobile processors are making substantial improvements yearly (driven by flagship phone product cycles) – and Edge devices are not keeping up with these hardware improvements.
For me, the in-ride performance (and sluggish activity profile selection) is what primarily bothers me. During a ride, my most common operation is scrolling the data pages, and this is extremely sluggish on recent Garmins. I just compared the units I have around, and this to me is a critical flaw in the newer platform of Garmins (I’m curious whether the 1030 Plus is better?). All of the added features and complexity in the data fields (and this is without IQ Apps) seem to cause it to choke when switching screens. This “scroll speed” regression over generations (800->810->820/1030) is indicative to me of the features over performance mindset that I’m highlighting. The Karoo can scroll as fast as your finger can, the new Garmins can only handle about 1 screen a second, and get far behind on user input (and buffer it, so the device cannot be controlled until it finishes processing)
Scroll Speed
Edge 800 2.5 screens / s
Edge 810 1.75 screens / s
Edge 820 21.3 ~1 screen /s
Edge 1030 ~1 screen /s
Karoo 2 3-4+ screens/s
Also anecdotally, operations like loading saved routes is much faster on the Karoo, but haven’t measured it in a controlled way.
Stability wise, I think Garmin has made significant improvements. The 705, 500, and 800 were particularly bad, and I lost too many of my long rides. I don’t have an issue on the newer devices.
For Android benefits, apart from 3rd party software – my thinking is that this will allow Hammerhead to leverage the stability, performance and feature set of a tried and true mobile OS, which should massively cut required resources and test effort. This makes such things as the whole new development platform that Garmin made for IQ Apps are not necessary.
For battery life – I do enough 10+ hour rides that I always carry supplemental batteries (and always needed to with my Garmins also), which makes this less of an issue. I would be curious on a fair comparison though, with most all features turned on the battery life seems to be quite sufficient.
My Karoo 2 arrived yesterday and took it for it’s first outing this morning.
Very impressed indeed. The UI/UX is everything that a Garmin Edge should have been years ago.
Why karoo is not Egnos enabled? Egnos is free and improves GPS corrections. Most receivers are Egnos enabled or the chipset are egnos compatible
Se puede configurar en Español ?
No, no other languages besides English at this point. From an update of theirs four months ago: link to support.hammerhead.io
Hello
This is a very interesting review (as usual) but Karoo 2 beeing an Android phone, I don’t get what makes it superior to an average high end Samsung with Strava, Komoot and such installed ?
It’s just about buying a second phone to look geeky or do I miss something ?
I really like the K2 so far. A couple of issues I have:
My phone disconnects many times during a ride along with an audible notification
Sometime when I upload a ride to Strava or attempt to, it takes a long time after the screen acknowledgment for it to show up on Strava. Other times its instant?
Has anyone else come across this?
I’m also having issues getting notifications from my iPhone X. K2 says my device is connected, but some messages come through and others randomly do not. Uploads to Strava worked fine for a while, then they stopped working altogether for a couple of days and now seem to be working again. Connections to Ride With GPS seem reliable so far. I’m on the fence about keeping or returning. It’s definitely better for my nav needs than the Element Bolt it’s replacing (the Bolt was buggy in similar ways BTW). But… Some really dumb software decisions in the K2 IMO. Why is the map position cursor smack in the middle of the map and not in the lower 3rrd–does anyone care where they’ve already been? Why only one map in a profile? Why is it so difficult to change profiles mid ride? Why do the smaller roads disappear when you zoom out on the map–why zoom out if not to look at the roads? Yeah–so I may return, but I wonder–is there actually anything better out there for someone who wants great navigation above all else?
Had this behavior with K2 and the Huawei 40 Pro Plus due to lacking of Google Services, so Notifications and Pairing has been a nightmare.
But now with the Pixel 5 it is working without any problem at all, stable reliable Pairing, all Notifications on the Screen.
Hello
I’m wondering about ordering a Karoo 2 but something upsets me.
I usually do often Audax, so the battery (amount of time on a single charge) life seems very very short, but I can live with an external battery pack.
But the Karoo being a smartphone, it’s battery lifespan life will likely be short (I have Garmins several years old) and the battery life been short I’ll have to charge it often that will reduce the battery lifespan
so my question : can the battery be easily replaced when it dies or becomes to weak (likely a few years based on a usual phone battery lifespan) ?
Thanks
follow up after a search, it seems I’m not the only one with this concern :
link to support.hammerhead.io
Same with Garmin, so nothing to blame HH for
The 830 is not designed to have the battery replaced so it’s not easy or straightforward. If your batter is bad, consider a warranty claim. If it is out of warranty coverage, you can exchange it for a refurbished unit, which will have a new battery and be indistinguishable from new for something like $150
That joke on apricots and the “?” As a response made my day ;-)
I just bought a K2. My biggest concern is elevation accuracy. A route i do often gets double the elevation on K2. Instead of 1800feet it shows as 3775 feet. The same happens on every ride for every route i take. I have calibrated both manually and using gps and no success. I saw on their blog this is a known issue they claim they are working on because they use the barometer to do elevation but months after those posts they are clearly not there. I am leaning towards returning it. Does anyone else have this issue or know how to fix it?
Should be solved in one of the latest updates.
Does the Karoo 2 have the hardware to dynamically adjust screen brightness based on exterior light brightness? I don’t see an option in the menu layout. I’ve had to increase the screen brightness to near max to see easily see the screen in the summer sun.
Ask and you shall receive…
INTRODUCING LIGHT MODE
Now you can see your in-ride data black over a white background. We’ve tweaked almost every element of the ride experience in Light Mode to improve daylight visibility. You can change between Dark and Light Mode in your Karoo’s display settings.
link to hammerhead.io
Great review as always. Nearly there so I’ll stick with my G1000 but later it might be a choice between the 1030+ and the K2.
Ray,
Have you re-tested the battery life on the Karoo 2 using the white background? I was able to significantly reduce the screen brightness using the white background.
No, I haven’t. But, it’ll probably work it’s way back into the rotation here soon, so I’ll be able to give that a whirl (since, I’d much prefer the white background anyway).
is the absence of Bluetooth connectivity and the missing mobile app not a disadvantage for the Karoo 2 device?
The Karoo does support bluetooth and the integration with the iPhone is fine. I get all of the notifications, etc.
I wish it would use the iPhone for data via bluetooth this is annoying.
Between the Elemnt Roam and Karoo 2, both in their current versions, which one comes across as the better unit for navigation? I’ve got a Wahoo Kickr for indoor training so I’m considering the Roam but Karoo2 seems to have a brighter display with a higher resolution. Touchscreens and clunky interface steered me away from Garmin Edge devices (heard/saw too many complaints) – is the Karoo 2 going to be the same?
Note : I’m a Wahoo user (and a happy one) not a Karoo user
Note 2 : what follows is MY ay of using the Wahoo not the only one, anyone can tell you the exact opposite without been wrong
Usually when a bikecomputer states that it has navigation capabilities it means that the whole process is made directly on the bikecomputer. With the Wahoos things are a little bit different
Basically navigation on the Wahoos (both Bolt and Roam) are in two parts : the bikecompter and the smartphone
You define what you want to do and where you want to go with your smartphone (and Komoot in my case) and send it (one click) to the bike computer that follows the instructions (and is brilliant in this job). The Roam provides some basic capability but the wahoo ecosystem relies on this duo bikecomputer/samrtphone .
You can use a Roam in a more classical way but in this case you’ll quickly find the navigation capabilities weak compared with a Garmin (and I suppose the comparison with a Karoo will be even worse for the Wahoo).
Thanks! I just got the Karoo 2 – had ordered one to try it out and it just got delivered. Sucks that I don’t have a Roam for a side-by-side comparison. I tend to keep my phone with me when biking – in case I run into an issue – so the phone + bike computer combination works fine for me. Once the course has been loaded, it appears both units have similar navigation capabilities – Karoo 2 display is beautiful but then again I’ve not tried the Roam.
My concerns (at the moment) are battery life, being able to re-route and back to start.
Garmin is pretty much out for me – too clunky – I have a Fenix 5 Sapphire and pressing 19 buttons to load a course to is far less appealing than doing something on an app (or even online). I’ve seen Edge 830 users struggle with glare in daylight, unit freezing and not being able to swipe to get to a different screen. A coworker summed it up nicely, “each time we go for a ride, the Garmin users are the last ones of the pack because they can’t get their bike computer to work” – that’s enough warning for me!
I switched from a Wahoo to the Karoo 2. So far it’s a big improvement, but I did have the Element Bolt, not the Roam. I can probably count on my fingers the amount of times in >2 years of ownership that my Bolt started up, found all the sensors, automatically linked to my phone and successfully uploaded the finished rides to Strava and GPS. Typically one, two and sometimes all these essential (to me) functions failed nearly every ride. The Karoo is not perfect, but it’s much better in that regard. I get about 120 miles out of a charge and typically my rides are less than that so the battery is sufficient. If I’m going further I’ll bring a battery and usb cable. The mapping and nav work quite well for me on the K2, but I’m still frustrated by the decision to place the cursor or position marker smack in the middle of the map which means half the map is wasted showing where I’ve been. It would be way better if they placed it at the bottom of the page, like any automotive GPS.
Ray,
Does the Karoo 2 support using the Di2 ancillary buttons to switch between screens / start intervals?
Yes. I use it to switch between screens.I’d have to check about the intervals (laps).
Great Review as always. Would you recommend the karoo2 over the roam, coming from a wahoo element?
After importing a workout, is there a way to control the trainer in non-ERG, i.e. % Resistance or Level (0-10)?
The tile options are most definitely mind-boggling. However, the workout tile and lack of trainer control via % resistance is the exact opposite–very limited and non-existent.
What apps exist that could be sideloaded for syncing custom workouts (Xert only allows by Power not HR) and controlling trainers?
Hello All–
Question for people who use the Karoo for triathlon: How do you work around the sensor connection going to sleep and not reconnecting? If I turn on the Karoo and leave my bike racked for the swim, when I get back the “sleep” function has lost connection with my Quark, and when I get on my bike to start the bike leg, it doesn’t re-find the power meter. I would prefer to monitor my watts during my half and full distance races!
Thanks–
Meg
I’m really interested in this as well. I was shocked on my first ride that I needed to go to the sensors setting in order to re-establish the connections.s
I keep looking at all the new gps units. Can you address screen visibility? I live in bright sunny Texas and am a bit visually impaired and ride a recumbent so my unit sits at a bit of a forward tilt. Screen of my old Garmin 1000 gets washed out easily. Are there any GPS units that can be larger text or brightern for us old blind folks?
I use it on my road bike and haven’t had any issues with brightness – In fact I find it brighter than other units and use it at lowest brightness setting.
I was a bit disappointed to learn that there’s no analysis besides GPS and sensor data in the post-ride statistics. There’s several published methods on calculating calories using heart – wahoo even publishes theirs: link to support.wahoofitness.com
I’m wondering if I should return the unit and get a Wahoo Roam instead. I’ve asked their support/dev team if there’s an plans to include this in future updates – no word yet but that would be a very welcome addition.
I don’t recommend any Wahoo device. Their firmware and apps have become increasingly buggy. Hammerhead and Karoo 2 are, without a doubt, a better company with better product. There are things like analysis and 3rd party connections that need improving, but those are easy to workaround. Open a free Garmin or TrainingPeaks account and upload your fit files there.
Thanks, I use Garmin Connect already – have a Garmin Fenix that I use for other activities – but uploading the fit files doesn’t calculate calories. Just created a TP account – seems to work there!
I can down load free Open Source maps and drop them on to my Garmin Oregon 600. No need to subscribe to any forum. Can I do the same with the Karoo 2?
Dc. Once again your site is better than the manufacturer. Quick I bought a Karoo 2 to replace my dying Garmin 810. The new Karoo 2 is awesome and love it.
Quick Question;
Can my old ride history from my Garmin 810 be imported to my new Karoo 2? I probably have a couple hundred rides on it. Or can my ride data be exported from the Garmin website and imported as a single file to the hammerhead website and then synced to the unit?
Is there a “new files” folder when you connect to a computer? if it was garmin you could copy the .fit files from your previous head unit and paste them into the new files folder.
Can anyone please confirm if the turn by turn guidance now includes a map graphic when you are on a data field screen? It didn’t when this review was made. You had to be on the map screen.
I need a brief map graphic when approaching the turn (like garmin) and this is the main thing holding me back from switching over. Thanks
Hi, I have one and so far I’ve never have the map screen pop up when approaching a turn. You do get instructions on the bottom of the screen – if you click (touch the screen) I think it brings up the map again (I’ll check the next time I go biking).
Thanks. I’d really like to see a graphic when i’m approaching a turn and without touching the screen. Another solution would be if you can have a screen with usual data fields and a smaller map. When i’m navigating i like to see various ride and navigation stats, so dont want to just have a map screen. Otherwise im really keen on this unit.
You can overlay a few data fields on the map page – see the profile layouts (map layouts at the bottom of the page) – link to support.hammerhead.io. There is a very audible beep when you’re approaching a turn. The cues may be turned on or off in the settings but the beep remains.
@Gautam – thanks again, that’s exactly the information i was looking for !
You’re welcome! Having seen other units with my friends, I’m happy to recommend it. I got it as a trial but decided to stick with it. It’s a really slick device – the mount is rock solid, beep is very audible, interface is fast and responsive (including rerouting) and having both a touchscreen and physical buttons makes it quite convenient on wet/humid days. The cons: no companion mobile app, lack of post-ride analytics, not being able to add an address as a destination on the device itself (you can select on the map though) and I don’t have a good way of fixing my front bike light anymore (might be just my bar though). Beats the competition hands down when it comes to navigation (imo) and I don’t think there’s any unit out there that lets you input an address on the device itself.
For post ride analytics, uploading to TrainingPeaks worked for me – I mostly care about heart rate and calories (using heart rate date since I don’t have a power meter/crank). I own a Garmin Fenix watch (for other sports), and tied into the Garmin platform for workout summaries and calendar etc. There’s no direct integration/uploads to GarminConnect so I have to upload rides manually.
You can see some of my other questions/comments that talk more about these features.
If you have a k-edge mount you can get a 3D printed insert from racewaredirect.co for about $12. Then you can have your light on a bottom mounted GoPro mount. I have a couple and they work great.
Has anyone noticed that with the latest update you are no longer able to clear iPhone notifications? This is a huge step backwards
Totally agree that the iPhone integration is a huge fail. I have to manually connect to my phone almost every ride. A lot of times I just don’t bother and do without the phone connection.
My H2 still takes forever to link up with my DI2 and 50% of the time it does not auto connect to my Iphone. It’s pretty annoying that its so hit and miss on connections.
Ray,
Given that the Karoo 2 is built on top of Android, I’m interested in the following
1). Do Karoo 2 updates provide updates to the underlying Android OS?
2). What are your thoughts on Karoo 2 being built on top of Android 8, which was released back in Auguste, 2017 – 4 years ago?
3). Is there any way, would there be a benefit, to upgrading the underlying Android OS to v11?
I’m vacillating between buying a Karoo 2, or waiting for the Garmin Edge 1040 (or whatever the 1030+ successor will be called). I’m leaning towards the Karoo 2, but I’m concerned about security issues with the underlying Android OS.
Yeah, I don’t follow the Android platform update scene as tightly, though countless devices are made on older versions of Android. As usual, there’s always a risk profile with older versions in terms of patches and such. Though, the attack vectors are far less here than most other Android phones, in the way you interact with them. Meaning, an attack here basically requires something that allows direct access to the device from the internet without any user action.
The overwhelming vast majority of platform attacks come from the user opening or doing something (even if the platform should have protected them), which allows an exploit. In this case, as a normal user, the platform is only opening a single app. So the risk is less.
Ultimately, for most users, I don’t see any reason to consider whether or not its Android to be honest. It literally has no bearing on the end user experience of the device (in fact, arguably for things like phone notifications, it made it worse with the Karoo 1, due to all sorts of technical challenges there). The only normal user benefit to date has been better graphics and responsiveness, though, that could have been achieved on other embedded systems at a higher cost for a smaller company.
App development, such as Xert’s integration, was something that was put forth as a reason to be on Android. But given Xert developed for Garmin first years ago, I think it’s far to say that using the Android base wasn’t really something that sped up development for other companies in a market changing way. Maybe down the road it will though.
Anyways, again, I wouldn’t let Android vs Not drive any decisions here (unless you want to screen record. :) ) – instead, I’d focus on features.
Ray,
Thanks for the thoughts. Working in the enterprise software industry probably makes me more paranoid than most about security vulnerabilities.
Now if I only knew if / when Garmin was going to release the Edge 1040 (or whatever the 1030+ successor will be called)
Interesting response from Hammerhead support:
We will not move forward with Android major version changes with existing products.
There are certain limitations to the support of the chipset providers around supporting such a move. You will see this with Android smartphones too.
Upcoming products will see updated full versions of android.
Has anyone had issues of power meter dropouts during a ride? I mean, constant as in every 2 minutes or so and sometimes it just disconnects and you have to go to the Sensors page to reconnect everything? I have a Stages Power Meter and just got the Karoo 2 last week and then is something that is really annoying me. What’s the purpose of a bike computer if most of your ride was done with GPS distance and time and that is it. Everything else is incorrect because you had over 50 dropouts on a 1hr 30min ride. I never had this issue with my Garmin Edge 820. I want to like this computer because the display is big and easy to see but the inconsistent ANT+ Power Meter connectivity is a deal breaker if it continues.
Make sure that you are on the latest software version because the Ant+ connectivity was improved recently. That said, I have never had any PM dropout problems with my Power2max PMs on three different bikes.
Make sure that you are on the latest software version because the Ant+ connectivity was improved recently. That said, I have never had any PM dropout problems with my Power2max PMs on three different bikes.
I do have the latest software update with Hammerhead. I am trying the method of unpairing everything and pair just the Stages Power Meter first to see if that works. Hopefully it does or I will be sending this back.
I’ve had to do a master reset to my unit after a few of the upgrades. All of your data screen configurations will be downloaded after you setup the hammerhead login. You’ll need to manually pair all of your sensors again.
Gilbert
Wahoo ELEMNT Roam offers ANT+ E-Bike support. It works for sure with all Specialized Turbo e-bikes equipped with TCU or TCD-w, and with all Giant e-bikes equipped with RideControl ONE remote. ELEMNT Roam takes many parameters from the e-bike connected as sensor, such as Speed, Distance, Cadence, Rider’s Power, e-bike Battery %, e-bike Assistance Mode, and e-bike Battery Range.
This article should be updated, as it is misleading in this respect.
Thanks! Product database updated to include that firmware update.
Thank you!
Yo my fellow riders, 2 questions:
– It seems like the Karoo 2 does NOT integrate with Garmin Connect?? I read this article and searched the comments for “Garmin Connect” and from what I gather, when I am done with a ride, the Karoo 2 does NOT send the ride data to Garmin Connect?? That seems odd. This is 2021, so I figure I am misunderstanding this. *head scratch*
– Is there still no integration from Karoo 2 with Final Surge? I know Final Surge isn’t as popular as Training Peaks, but I’ve used Final Surge for a couple years, for cycling and running, and you sure can’t beat the price (free for athletes – a fee for coaches) :)
I briefly got my hands on a Hammerhead Karoo 2 because a friend got one. I only had about 5 minutes pressing buttons and going through screens. I always love a new gadget, and I like good brands that aren’t the most popular. The Karoo 2 felt good and looked good, and the screens were pretty smooth. It felt polished.
My Wahoo Bolt is still going strong and the only ‘feature’ I really wish it had was proper re-routing. But if I am being honest with myself, I don’t do any urban riding, and I rarely do any type of riding where I have to input a destination and might get lost along the way if I don’t have a cycling head unit there to save me. hehe.
Garmin connect is only for Garmin headunits / cycling computers. You can export the fit file from the Hammerhead Dashboard or Strava then manually import into Garmin Connect. Garmin hasn’t built any integration with competitors products and Garmin Connect.
– It looks like Final Surge does integrate with Strava. Do you have your Hammerhead Karoo sync’ing to Strava? If so, you can connect Final Surge with Strava and solve this issue.
The Hammerhead website only publishes 4 and 5 star reviews. Notice that there are no reviews with ratings below that. I purchased one and gave it 2 stars and my review does not show up.
Not shocking. Their warranty process is brutal.
Avoid at all costs. Going back to garmin as they get warranty process and pain of no head unit.
Hi DCR,
Great review thank you. I am having a serious look at the Karoo2 before Garmin unveils its very expensive competition next year. Having owned an Edge 800/810/1000 & Explorer … I am looking forward to something different. Someone mentioned “why not use a phone?”, well my thought process is to use the Karoo2 with my second data SIM card (200 Gb, €15 with SFR Red) and wear my Apple Watch with eSim. Best of both worlds or worst? We’ll see! Just at 62, I need to see the darned things attached to my new tadpole trike next month; I might have missed mentioning the spinal cord tumour that manifested itself at Dax on the way to Santiago di Compostela whilst riding a steel Mercury with Rohloff (so heavy) 6 years ago! This year finally put paid to my 2 wheel adventurers due to a lack of stability on bike whilst sober, my wife explained that my local boulangerie & Café had ratted me out to her on numerous occasions, they thought it was funny but that I was going to come a cropper. It was always a coin toss whether I remained upright on braking/slow turns or getting leg to move when unclipping; never Ming the leg that would stop working just as I needed it (you know, when that obvious hill jumps out at you whilst in wrong gear). The gendarmes are certainly happier. My new steed will be a Azub Ti-Fly with Shimano EP8 & Rohloff (back to manual which I prefer, my Rose Stepthru had an eRohloff which my wife has taken with alacrity), motor to help offset my poor muscle retention post-op. Sounds depressing laying it out, but it isn’t … I still go out most days (unless raining or too windy in winter) with a smile on my face. Just glad to smell and observe nature; whether it is raptors, persons or boar (sometimes both 🧐😂). Sportivement, soon to be Bike2Trike (or Big Vern)
Hi and thank you for an amazing review!
How do you find it compared to Sigma Rox 12? is it worth upgrading from Rox 12 to Karoo 2?
I have just bought a K2 and I am quickly finding the things it doesn’t do, rather than the things it does do.
It may seem minor but it really annoys me that you cannot display a compass heading (eg NE, SW etc) as a data field. Yes there is a compass heading displayed on the map but that’s not always easy or convenient to read. I enjoy long distance touring and like to know quickly what direction I’m heading in so a data field display on the primary page is important to me.
People have been asking Hammerhead to provide this in their data fields for more than 2 years but there has been no movement.
The routing is pretty good but seems no better than my Garmin 830.
I suspect I will be sending my K2 back within my free 42 day ‘assessment’ period – a very good aspect of the unit if you buy direct from Hammerhead.
Disappointed.
Ask and you shall receive…..
link to hammerhead.io
New Data Fields
We’ve added two new data fields: Heading, and Lap Normalized Power®. Heading displays your current direction of travel (cardinal and intercardinal directions), and Lap Normalized Power® displays the Normalized Power® of the current lap.
Hi Gilbert
I’m impressed but sadly your change is too late for me. I returned the Hammerhead and have bought a Garmin Edge 1030 plus which works well for me. However I was impressed with the Hammerhead and suspect I will try it again when the 1030 becomes ‘past it’.
Thankyou
Roger Leary
BTW. I do not work or affiliated with Hammerhead/SRAM. Just a cyclist that’s also a technology person.
Gilbert
Hey,
Given the fact that the autonomy of the device can be an issue for some (me included), what do you think of the twonav Cross?
Best,
Stéphane
Late to the game but I know people read this review long past its publish date. A key feature missing from the Hammer Head K2 and 1 is the ability to use the cue sheet from tools such as Ride with GPS. This is a huge deficiency for sports such as Randonneuring or organized tours where the organizers add very useful custom cues to their routes. Yes, you can add POI’s but you can’t get information on them and the route planners for these events use the custom cue feature. On both the Garmin and Wahoo products these custom cues pop up on your screen similar to a turn-by-turn cue. Examples would be; event controls, SAG stops, aid stations, water/food locations, lodging, best coffee/pastry shops, dangerous section etc. Many of my Randonneuring friends have returned their units when discovering this feature doesn’t exist.
Great tech but warranty work is absolutely terrible.
I would wait till they are fully integrated with sram.
Their support has zero idea about customer service. And forget about shipments. If you paid duty the first time expect to be lectured on why you will get hit with duty again.
I placed warranty issue on April 3. It’s now April 23 and still no unit and I received message that I need to pay duty now.
The season in North America started for races and I’ve been without a head unit for 3 events and I’m not even a serious rider.
They definitely know how to get excitement but back end support which none of the social media influencers experience don’t see this.
BUYER BEWARE on warranty issues.
Never again!
Do you know if it’s possible to run the Karoo 1 (on my bike I use to go to work) and Karoo 2 (default road bike) from the same account?
Last I checked it was (unless something has changed recently). I have multiple Karoo units tied to my account and they all upload happily regardless of which one I grab.
Thanks, that makes life a big easier.
it seems Hammerhead is not listening at all to its users. Just asked them about a possible pop-up map before turns. Got this answer:
“I completely understand that the ability to switch to the map screen automatically in the event of a turn could be a valuable enhancement for us to add. I have added your vote for these feature requests while forwarding it to the Product team.
This feature is not in the immediate plans as of now but if we receive more requests from the riders for the same feature, the product team will prioritise it. I am sorry that I do not have a concrete timeline to share with you right now.”
Very disappointing, to say the least.
So they replied and added your vote to the feature request. They prioritize feature dev based on the number of votes and deliver the most popular. I think this is a fantastic answer. I have had my Karoo2 shortly after it started shipping, and Hammerhead has delivered a bunch of enhancements and features on a pretty regular basis – MUCH more than Garmin did when I had my Edge 1030. Is it perfect? No. Have they added new features and fixed bugs better than Garmin? No question.
Fantastic answer? People were asking HH this already over a year ago. They then responded in the same way.
It seems the people at Hammerhead’s do listen. Pop-up maps are here! This is what they just posted:
“Hi All,
We have now introduced Switch To Map: when following a route or navigating to a Pin, Karoo can now automatically switch to your map screen when approaching a maneuver. Turn this feature on from Turn-By-Turn Settings in your Profiles.
See the help article here for more information on how this feature works.
Thank you!”
Can anyone help me. Recently switched to Karoo 2 from wahoo elemnt. Pioneer power meter broadcasting fine to elemnt through ant +. Now on Karoo 2 doesn’t see power meter at all through ant + or Bluetooth. Help ? So frustrating !
Sounds like you’re in Pioneer ANT mode, which is a private mode that only works with Pioneer bike computers, and the Wahoo ELEMNT series (using an integration Wahoo did). Just two weeks ago, Shimano also released a Connect IQ app that works with it, but even that has significant limitations in that it won’t broadcast proper power.
You can go back from Pioneer ANT mode to regular ANT+ mode, which will work with the Karoo 2 (and other bike computerS).
Thanks ray. That worked ! Except now it connects and then drops out 5 seconds later. Frustrated !
I have noted you can also give your own comments on each ride . But can you put pictures on each ride in that section . I know of course that you can put the pictures somewhere else. Thanks
Garry
There are rumours around reddit for a potential Karoo 3 coming in 2023.
I´m looking for a new headunit and torn between a Edge 1040 and Karoo 2. Wait for a potential new release or
buy? Any thoughts from your side @DCRainmaker?
@voiture balais
DCR won’t be able to answer as he deals with all GPS’s, however my thoughts for you if it’s not too late.
I buy a GPS for navigation, not as a glorified bike computer and the K2 is much better than the 1040. You can actually see the navi line (yellow with chevrons) and the line where you have been (brown), so you can easily follow the route back. The 1040 is no where near as clear. The re-routing is also better and the K2 doesn’t give up, unlike the 1040.
Worse of all the 1040 still comes up with “Route calculation error” which was a bug-bear on the 1000 and 8 years later is still there. There is also another bug where it asks you if you want to cancel the route of which the only way out is a power-cycle.
As for glorified Bike computer the 1040 is not, Google for “1040 and Gradient Lag” – 35 forum pages of moaning how bad it is. Also the temp is 3-7C too high. The Cadence also keeps registering up to 10s after you stop pedalling with values of 1-10 RPM, nullifying any averages.
The 1040 ClimbPro only works if you are navigating, K2 Climber works all the time.
Garmin Support is a waste of time, Hammerhead is amazing, always a quick and full answer. The upgrades for the K2 come regularly and the support page fully lists all updates, unlike Garmin.
The Pro’s for the 1040 are, of course, the battery life and Garmin Connect (calendar & reports). The alerts are also better, although I had a violent crash and there was no notification.
I agree with DCR on K2 battery life, about 8hrs, which is not much if you are out for weekend without the ability to charge (battery-pack needed).
When I get back from a prolonged trip I will be sending my 1040 back. If there is a K3, I will update pretty quickly even though my K2 is not yet a year old.
I have a Karoo 2 but tempted by the 840/1040 due to the training and recovery side of things, which Hammerhead has not addressed at all with the Karoo 2.
I have a Karoo 2 on trial after abandoning my Garmin Edge Explore. I have synced it to my Ride with GPS and all the routes which I made on RWGPS appear instantly on my Karoo 2 (via WiFi), which is impressive. However, I need to be able to put .gpx and .tcx files from third parties on the Karoo, and at present I cannot do that, neither can I put them onto my RWGPS. I have attached a screen grab of the result when I try to load a third party route onto my Hammerhead dashboard. I have contacted Hammerhead support, but they say that the files which I am trying to load do load OK at their end, so I am not sure where to go with that.
If you have any suggestions I would be most grateful.
best regards, David
Have you tried renaming the files to something more simple – it might be struggling with the dashes and underscores. GPX works fine on my Karoo.
Does this Karoo 2 provide spoken navigation instructions – as an example – “Turn in 50 meters on Jackson street” ? Even if its only through a headset connected to your phone similar to a Garmin 830 is what I’m interested in at a minimum. If it gives the spoken directions directly from the device, that’s even better. TIA
It does not do voice guidance. Only the new Garmin Edge computers do that.
There is a lot to love about this computer. I’m halfway though my 45-day trial and will probably keep it. However, given it has been fielded 3+ years it still has a remarkably high amount of bugs and quirks. Connecting to the app, speed sensor over rides vs complementing the gps, forgetting all Strava segments, charging fussiness. I’ve found works around to all these (with help from VERY responsive customer service) but not climb/descent inaccuracy. Consistently 25% high on all rides, compared to Garmin, Wahoo and Strava. The elevation seems to be spot on, but the climb calculations are 25% high at all points on the ride. I have a local 400 ft hill and finish it with 500 feet of climb. I correct on Strava after the rides so end up with good data, but I’d rather have good data while riding.
My biggest headache is the speed sensor lag. I stopped using an external speed sensor since it has a 6-10 second lag. The GPS-based speed tracking is very responsive.
Karoo 2 on sale at the Hammerhead website for $259. Should we expect a new version soon?
Seems like elevation and grade inaccuracies are still present after purchasing brand new unit. Today’s ride measured 4x greater elevation than strava. It is obvious that the sensor is just too sensitive. I did a 6″ bunny hop on purpose on a flat stretch of road and the elevation gained and the grade increased and decreased accordingly. Same happens with potholes and there are many. There needs to be some smoothing or threshold activation. When I talked to HH support they said that they don’t know if it’s a software or hardware issue. But it’s been months that it has been flagged. Wanted to exchange it but they said that there isn’t any guarantee new unit won’t have same elevation problems.
Similar problem here. My climbs consustently measure 25% high, so I just carry the correction in my head while riding and correct every ride in Strava. Related, the gradient meaurement is erratic jumping+/- 8% every second. It’s a meaningless. I loved the device at first, but after finding all the bugs over 6 months, I don’t recommend it .
Please elaborate what “all the other bugs” are other than the elevation calculations.
Bugs: all messages display twice and can’t be cleared. Connecting the app requires first connecting to BT audio in addition to regular BT (customer service believes this is specific to my Pixel phone).
Rather than filling in GPS gaps, the speed sensor supercedes GPS data for distance and elevation. The unit records the route, but shows no distance ore elevation (fix is to not use the sensor)
Others are short comings rather than “bugs”.
Strava is my biggest beef. Strava text and graphics are tiny, and poorly contrasted to the orange graphic making it mostly unusable. Also does not display current PR or segment ETA like Garmin and Wahoo do. When I reset the unit after a recent SW update, it took three rides for all my Strava segments to reload. Occasionally the unit will hang up on a previous Strava segment, saying I’m off segment and not display the segment in current on.
When using a route, time to next destination is h:m but no seconds.
Plus the trouble with the climb/gradient calculation I noted previously. IMO those are pretty big problems for a $400 unit that been in the field for 4 years combined with a short battery life, the Karoo2 is a bad value.
i like your approach of things
c,est surement une bête question mais comment pour arrêter le gps car j’ai finir ma sortie
Dropped my Karoo 2 on the floor in my office and now have a cracked display… Do they repair Karoos? I really don’t want to buy another one since the hardware is ancient. I’d either wait for a Karoo 3 or buy a Garmin 1040.
Again, another review of a bike computer with navigation and there is no description of what happens when the rider goes off course. Is Karoo as stupid as Garmin and directs the rider back to the point of deviation?
If you get off course, K2 actually does the correct thing and takes you back to the course. Much better than my old Garmin.
Once of track mine creates a new route to the destination not back to the original route. Is there as setting for that?
“Is Karoo as stupid as Garmin and directs the rider back to the point of deviation?”
Neither Garmin or Hammerhead direct you back to point of deviation. They direct you to the next most logical point of continuance. That’s been that way for many many many years.
Hi,
I hope this is okay to post here. There is a referral program code sharing thread in the r/Karoo subreddit: link to reddit.com
Anybody sharing one, is given a 25$ discount code and the one using the referral code is getting a free heart rate monitor.
I guess this is a very nice deal :)
Who ever is the first to find this. Enjoy your heart rate monitor :)
Greets,
Andreas
Ray or anyone,
I’ve noticed the Karoo 2 takes up to 8 seconds to report speed changes from a hub based Wahoo or Garmin speed sensor. Can anyone else replicate it?
Simple test. Spin the wheel, wait for the Karoo to report the speed, stop the wheel from spinning then count the seconds before the speed is 0 mph/kph.
Received a new update today with German language, so it’s English, Spanish and German now.
And French since April 18
Karoo 2 is out of stock and this is on Hammerhead’s website. Looks like the Karoo 3 release is coming soon.
Can’t wait to see a hands-on review of this.
I’m getting a bit frustrated by my Karoo 2 and they have no chance of me upgrading unless the following things are vastly improved.
1. Battery life.
2. Raindrop rejection/touchscreen when wet.
3. Ride data available on the device.
1. Battery life is more like 8 hours, not only is this a lot less than what they advertise, but is laughably less than what the latest Garmins offer. I think auto-brightness would be an easy way to make a big difference, this should be easy to add to an Android device.
2. This is infuriating, when it starts to rain the most common thing is for the ride to pause or for it to try to reroute to a point on the map the rain has tapped. Once it is wet, it is quite difficult to even lock the screen, as this requires swiping down and over etc. Easier use with gloves would also be good.
3. There is so little data available to look at on your rides. Part of what Hammerhead says about their lack of smartphone app is that the device IS the app. Well if that is the case, when you look at your rides, all you see is Avg Speed, Max Speed, Ascent, Descent, Max Elevation. Once I needed to find what time I left work on a previous day, so looked at my Karoo. I had to go to Strava to find it, Why can’t I see data on time started, time finished, Strava segments, etc. You see how you did on a climb straight away, why not when you have finished your ride?
What would others like to see?
Elevation data seems to be inflated by at least 10 to 20 % on most rides.
I still won’t go back to a Garmin even if there’s no Karoo 3 any time soon just because Navigation sucks on Garmins.
I just purchased a Karoo 2 and had high hopes for this unit. The screen resolution is really nice.
But after 12 days / 6 rides its bricked. Won’t charge and won’t come back on. I updated all the software and firmware and was on the latest version as far as I can tell. I found several other people with the same issue on both Reddit and the Hammer Head forum. I am super disappointed.
As the above user stated my first ride in the rain caused chaos on the touch screen. There is a way to lock the screen mid ride with the external buttons but sense it was so new I could not remember how to do it and I ended up with with 2 rides with a bunch of laps (lesson learned). During the ride I lost the ability to swipe the data screens which seemed to be changing with every rain drop. Also there is no way to disable to the touch screen until you start a ride which is kind of annoying if you know there is a chance of rain.
Another big deal for the mountain bikers out there is there is no Trail Forks overlay integration. I never even got to try a mountain bike ride because the unit bricked 12 days after I purchased it.
I am on the road for two weeks and a Garmin 840 is on the way. Upon arrival I will just sync it with the Garmin App and all my old Garmin 530 settings and sensors will port over. I got a solid 5 years out of the 530, what finally did in the Garmin 530 was rain getting in as the top screen was starting to delaminate.
I hope Hammerhead will make this right and I get a chance to really try out the Karoo 2 long term and get a better idea how it really works. The data screen and map graphics are really the best. But the supporting software and website has a way to go. I see there is a Karoo 3 out that has a phone app but it seem the Karoo 2 can not connect.