Back last month when I posted my ‘Saint Malo Fort Swimaround’ post, a number of folks asked about the swim buoy I was using to increase my visibility.
It confused me at first, because I thought I had posted a review on it. Because in my brain, I had gone to the lake and taken photos of both the Safer Swimmer and the Swim It device at the same time on the same day. Yet somehow, I never actually posted the review of the Safer Swimmer. I had even edited the photos and outlined it. Go figure. So, here’s said review.
The Safer Swimmer is designed to increase your visibility in openwater. Essentially, it’s keeping you from getting hit by a boat. Or at least, reducing your chances. I had bought the device way back in July of last year before heading to Eurobike. It seemed like an interesting idea, especially when paired with the My Swim It device. Two vaguely similar devices to check out.
So with that, let’s get into things!
Unboxing:
This is officially the first unboxing I’ve done from a dock. But hey, it made for pretty pictures. It comes in a thick plastic resealable bag. Though, after I opened it I just stash it in my wetsuit bag.
Looking at the back of the bag you can see the waist strap hanging out inside:
Taking everything out we have a grand total of three parts: The buoy itself, some instructions you’ll probably ignore, and the strap that connects you to said buoy.
Looking at the bag, if you unroll it, it’s actually fairly long. Keep in mind you’ll end up rolling a portion of it back up again to make it watertight.
And just like that, the unboxing unbagging is complete. Officially the shortest unwrapping section I’ve ever written.
Setup and Configuration:
Ok, now that you’ve got your stuff all laid out on the dock, you’ll probably be looking at the instruction sheet:
No, you’re not allowed to use it. 21 seconds from now you’ll see how silly simple this is.
First, take the bag, and stick anything you want in it. Keys, cell phone, money, sandals, clothes, a small duck (it will float of course). Anything. It’ll stay dry.
Next, close the bag and lay the two clips flat out to their side. Simply start to roll the end pieces in a couple of times.
Then fold in on itself and snap it tight.
Ok, you’re done with the bag.
Now, the strap.
This one’s tough: It involves taking the little clip thing, and clipping it on the strap.
Again, you’re now done with that section.
Finally, we get to blow the bag up. No, not MythBusters style. We don’t want to destroy the thing.
Instead, with your hot air.
You’ll see the red nozzle on top. Simply blow into it.
It’ll only take a few seconds – less than you think really, to get it all filled up. The tube is designed to be one-way, so it just fills up the sack. There’s a small cap if you’d like though.
With that, you’re ready to swim!
Swimming with it:
The strap is designed to go around your waist, and then let the bag drag behind you on the surface of the water. So go ahead and tighten it up. Not too tight that it’s restrictive, but enough so that it doesn’t slide off your body. Because of the slight angle that it will be behind you pushing slightly up, it actually takes less tightness than it would if you were standing on dry land.
With that, go jump in the water:
You’ll notice it’ll float up behind you, which is ideal. If it’s under the surface, than adjust the strap a bit so it’s not underwater somehow while you’re treading water.
As you swim you’ll see it drags behind you, roughly above your thighs:
It pretty much stays completely out of the way. I never hit it with my arms/hands:
You can see it actually hangs out in a bit of a wake behind you. If you look at the below picture you can see it’s not breaking the water, rather, riding my wake.
Once you’re done swimming, come on back to dry land:
From there you can go ahead and remove the clips and take out your stuff inside.
Visibility:
I’ve used the buoy on a number of swims now, for the sole reason of increasing visibility. That’s what this unit is for, it’s not a lifesaving device – it’s purely designed to keep you from being run over by a boat. And a secondary reason of making you visible to others watching.
To demonstrate this, I’ll give two examples. The first is taken from a dock last summer by The Girl. It shows me swimming out. Remember that I’m wearing a red swim cap. In all these photos I’m actively swimming from left to right (or right to left) – thus from this angle making me as big as possible (6+ feet of potential visibility).
Note in these photos how difficult it is to actually see me. I’m not actually that far away, especially in terms of a high-speed boat. And The Girl is standing on a dock that’s also elevated 3+ feet off of the water.
As you can see, the ONLY thing visible here is the buoy. Beyond that, I pretty much disappear. Further note the water is near perfectly still. Toss in a bit of light chop and I’m completely invisible.
Now, let’s look at another situation. This swim from last month. This photo was taken from a still camera on a balcony far away – a couple hundred yards perhaps.
In this case, I’m clearly visible. Partly because of my wake, and partly because of the buoy + me.
But, here’s the real question. Did you notice there’s actually a second swimmer out there at the same time? Look at the slightly cropped shot below:
Yup, he was going the opposite way. Kinda crazy.
Safer Swimmer vs The Swim It
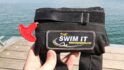
You may remember last fall I reviewed The Swim It (also called MySwimIt). The goal of that product is more as a life-saving device. It’s a small pouch that you wear on your thigh and can pull a red handle in the event of some sort if personal emergency.
But here’s the really important thing to understand: These are totally different products, for different purposes. The ONLY thing they have in common is that there’s water involved. The two products are no more similar to each other than comparing either to a bathtub rubber duck.
Here’s the goals of all three:
Safer Swimmer: Increase visibility of you in the water, both to boaters as well as those spotting on shore. Ancillary benefit is a dry place to store stuff.
The Swim It: Provide a safety blanket in the event of some sort of personal emergency – i.e. cardiac event, panic attack, etc…
Giant Rubber Duck: Ok, I’ll be honest, nobody’s sure why that was there all winter. But he was – dutifully protecting the giant bathtub behind him (pool).
Which one would I choose? Well, obviously the duck. But if he wasn’t available, then it’s definitely for me the Safer Swimmer. The reason being that if I’m openwater swimming I really want to be seen. That’s my primary concern. It’s not that drowning isn’t a concern, but that’s far less of a concern than getting hit by an errant boat (or windsurfer, kite-boarder, whatever).
In the case of my swim in Saint Malo, the buoy served a secondary benefit of allowing The Girl to watch me from shore. She could easily spot where I was and keep an eye on me.
Summary:
Ultimately, the Safer Swimmer is about keeping you from getting killed by a boat. It doesn’t have anything to do with making you faster, or getting more data out of your training efforts (though, I have heard of people successfully putting GPS watches inside to get cleaner GPS tracks). While it can indeed support the weight of a person in the water, I wouldn’t focus on that as a benefit.
For me, the whole thing fits so easily inside my wetsuit bag, that it’s now become a standard part of it. If I’m swimming openwater and not in a race, it’s simply there. There’s just no reason not to use it unless I’m in a restricted area where no boats are coming in and the ‘territory’ is relatively small.
From a feel standpoint, I just don’t notice the bag dragging behind me. I thought I would, but I simply don’t. Perhaps if I was a ‘world class’ swimmer, I would notice it. But even as an age-group triathlete who tends to be at the pointy end of the pack, I’m simply not feeling it.
Overall I can’t really think of any cons to the unit. It’s durable and does what it says it does. Simple and straightforward to use, nothing unnecessary.
As always, feel free to ask any questions below – I’m happy to help answer them!
Found this review useful? Here’s the super easy no-pain way you can help support future reviews! Read on…
Hopefully you found this review useful. At the end of the day, I’m an athlete just like you looking for the most detail possible on a new purchase – so my review is written from the standpoint of how I used the buoy. The reviews generally take a lot of hours to put together, so it’s a fair bit of work (and labor of love).
As you probably noticed by looking below in the comments, I also take time to answer all the questions posted in the comments – and there’s usually quite a bit of detail in there as well. Thus, if you use Clever Training (at left) to pickup the device, you’ll save 10% on your entire order, and if the order ends up more than $75US, you’ll get free shipping within the US. Oh – and you’ll really help support the site! Just add coupon code DCR10BTF to the checkout page. Thanks for reading!
And as always, feel free to post comments or questions in the comments section below, I’ll be happy to try and answer them as quickly as possible. And lastly, if you felt this review was useful – I always appreciate feedback in the comments below. Thanks!
I swim, bike and run. Then, I come here and write about my adventures. It’s as simple as that. Most of the time. If you’re new around these parts, here’s the long version of my story.
You'll support the site, and get ad-free DCR! Plus, you'll be more awesome. Click above for all the details. Oh, and you can sign-up for the newsletter here!
Here’s how to save!
Wanna save some cash and support the site? These companies help support the site! With Backcountry.com or Competitive Cyclist with either the coupon code DCRAINMAKER for first time users saving 15% on applicable products.
You can also pick-up tons of gear at REI via these links, which is a long-time supporter as well:
Alternatively, for everything else on the planet, simply buy your goods from Amazon via the link below and I get a tiny bit back as an Amazon Associate. No cost to you, easy as pie!
You can use the above link for any Amazon country and it (should) automatically redirect to your local Amazon site.
While I don't partner with many companies, there's a few that I love, and support the site. Full details!
Want to compare the features of each product, down to the nitty-gritty? No problem, the product comparison data is constantly updated with new products and new features added to old products!
Wanna create comparison chart graphs just like I do for GPS, heart rate, power meters and more? No problem, here's the platform I use - you can too!
Think my written reviews are deep? You should check out my videos. I take things to a whole new level of interactive depth!
Smart Trainers Buyers Guide: Looking at a smart trainer this winter? I cover all the units to buy (and avoid) for indoor training. The good, the bad, and the ugly.
Check out
my weekly podcast - with DesFit, which is packed with both gadget and non-gadget goodness!
Get all your awesome DC Rainmaker gear here!
FAQ’s
I have built an extensive list of my most frequently asked questions. Below are the most popular.
You probably stumbled upon here looking for a review of a sports gadget. If you’re trying to decide which unit to buy – check out my in-depth reviews section. Some reviews are over 60 pages long when printed out, with hundreds of photos! I aim to leave no stone unturned.
I travel a fair bit, both for work and for fun. Here’s a bunch of random trip reports and daily trip-logs that I’ve put together and posted. I’ve sorted it all by world geography, in an attempt to make it easy to figure out where I’ve been.
The most common question I receive outside of the “what’s the best GPS watch for me” variant, are photography-esq based. So in efforts to combat the amount of emails I need to sort through on a daily basis, I’ve complied this “My Photography Gear” post for your curious minds (including drones & action cams!)! It’s a nice break from the day-to-day sports-tech talk, and I hope you get something out of it!
Many readers stumble into my website in search of information on the latest and greatest sports tech products. But at the end of the day, you might just be wondering “What does Ray use when not testing new products?”. So here is the most up to date list of products I like and fit the bill for me and my training needs best! DC Rainmaker 2024 swim, bike, run, and general gear list. But wait, are you a female and feel like these things might not apply to you? If that’s the case (but certainly not saying my choices aren’t good for women), and you just want to see a different gear junkies “picks”, check out The Girl’s Gear Guide too.