
Back in November I posted a mention of doing some research for a new bike that I wanted to build. This included the components as well as my general thinking on it. Finally, a month or so later, I’ve completed that mission and figured it was time to share the results, details, and odds and ends.
Before we get too deep into the parts, the most important thing to understand is that this bike will be a testing workhorse, and it’s designed with that in mind. I eschewed fancy parts like aero handlebars or aero seat posts for compatibility with a wider number of accessories that show up on my doorstep daily.
The goal of this bike was to act as my primary testing platform for cycling, targeted at things like power meters, bike computers, trainers, action cameras, and so on. I’ve got other bikes, but I’ve been finding it more and more difficult to have enough bikes for the number of power meters in test (since I typically like to test power meters over a longer period like 2-3 months in varied conditions).
In any case, I dive into all those details down below. With that, let’s begin.
(Oh, and PS – nothing here is sponsored by any manufacturers. I decided my own parts and then paid for them, along with a handful of parts Clever Training helping out on.)
Deciding on parts:

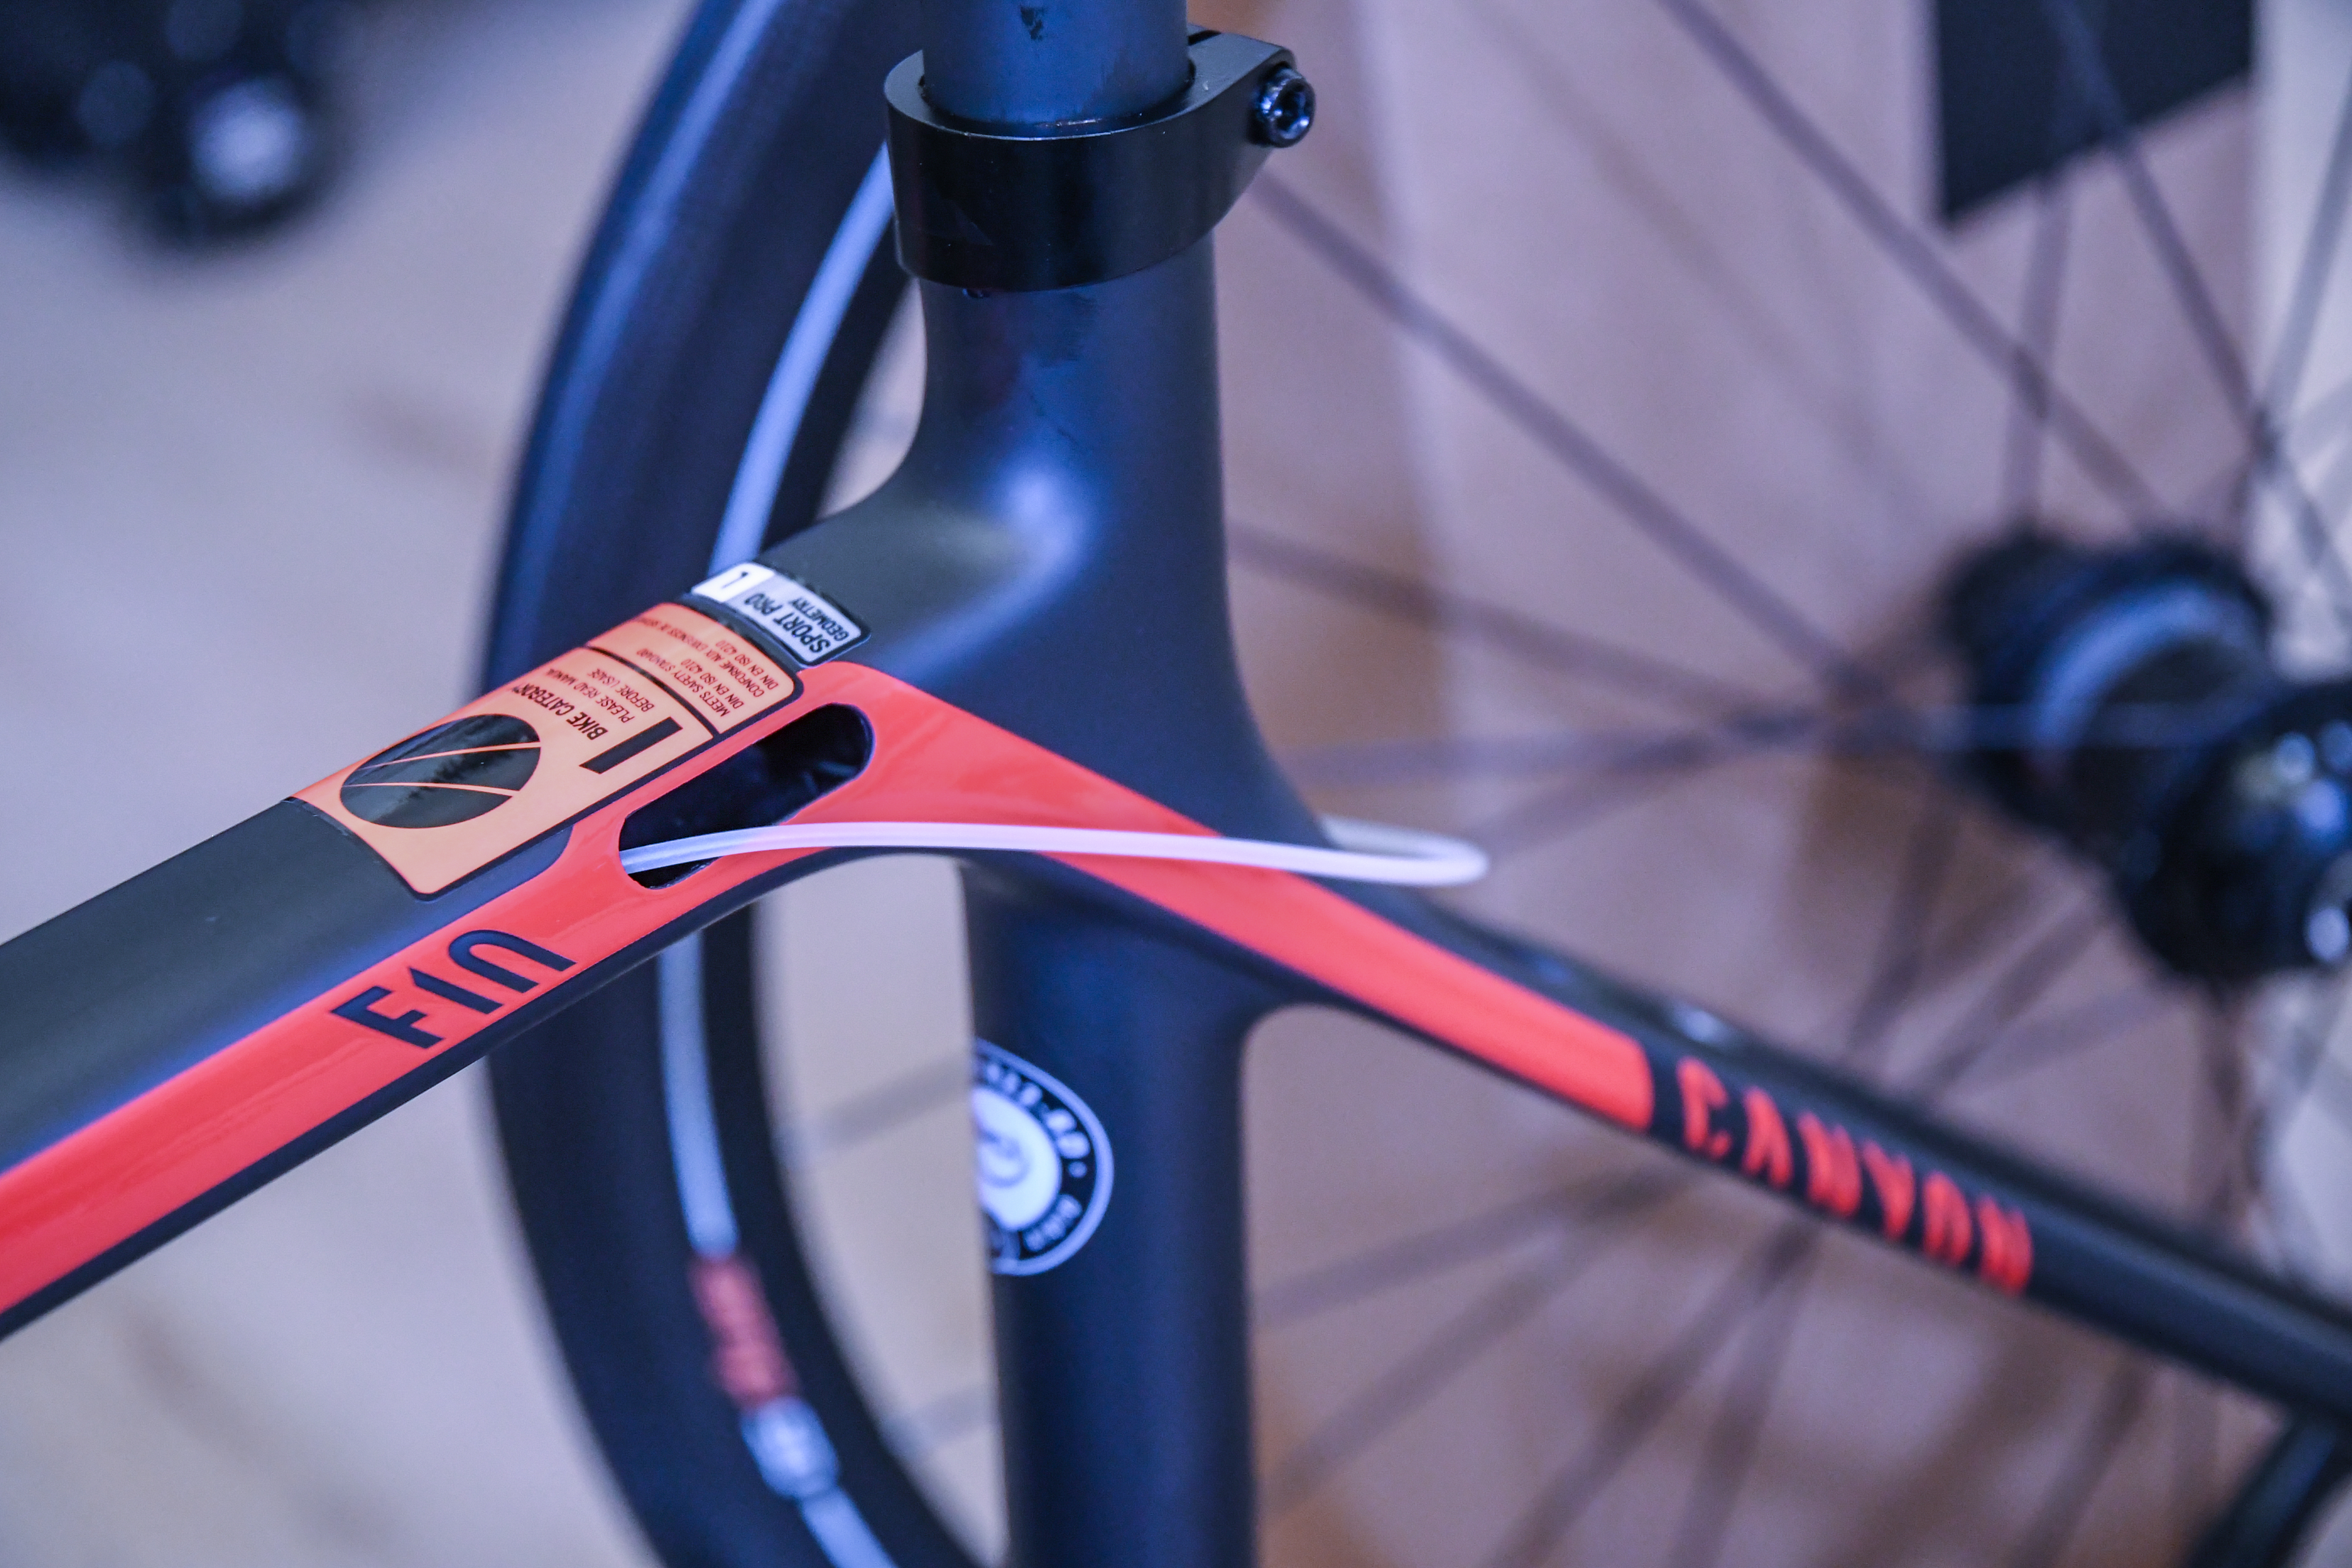
Starting with the frame, I’d been eyeing a Canyon bike for quite some time, largely because the pricing was right and the frames actually looked good. I had a chance to ride one a bit this past summer at Eurobike during an unrelated demo event and was pretty happy with things.
At the same time, despite being a bit of a bike tech snob – I’m actually not a huge bike frame snob. Perhaps that comes from constantly riding so many different loaner/rental/whatever bikes for product testing that I’ve become numb to it. As long as things fit, I’m good. And actually, half the time they don’t fit and as long as the ride is under a few hours I can deal with it.
Still, some might want to know how and why specifically I selected the frame I did. The process of elimination was simple. Here were my requirements. As you’ll see, they’re very ‘business’ driven:
A) I didn’t want disc brakes: I actually do want disc brakes, but I have too much interoperability and swapping of things to want to deal with incompatibilities down the road. Non-disc was simpler for last-second changes.
B) I need normal handlebars: Too many bike computer mounts don’t work with aero-focused road handlebars. While I get that’s a ‘fun’ challenge for compatibility, I don’t really have the time when a new product comes in to go off and find a custom mount on tight timelines. Be it action cameras, bike computers, bike lights, or so on. I just want it to work. Yes, I totally get that you can swap out handlebars, but I hate ‘spending’ money on frames that include them only to ditch them.
C) I wanted electric shifting support: By that I mean I didn’t want a bunch of extra holes that were unnecessary for wireless shifting of eTAP. On Canyon’s frames, they have mechanical and electric versions of each.
D) I didn’t really want to spend a crapton: Everything is relative, I’d be spending far more on the other components of the bike than the frame.
Thus, if you look at the various carbon road frames (non-disc variants), here was my shorthand process of elimination, starting with the most expensive to cheapest:
Ultimate CF EVO: Too much – 3,299EUR.
Aeroad CF SL: Not bad – still it’s 2,699EUR and comes with aero handlebars to ditch.
Ultimate CF SL ELECTRIC 2018: Not bad actually, 1,999EUR, though still would need to swap handlebars.
Ultimate CF SL Electric 2017: Now we’re talking. 1,199EUR, no handlebars to ditch.
Endurace CF SL ELECTRIC: Also not bad – 1,299EUR.
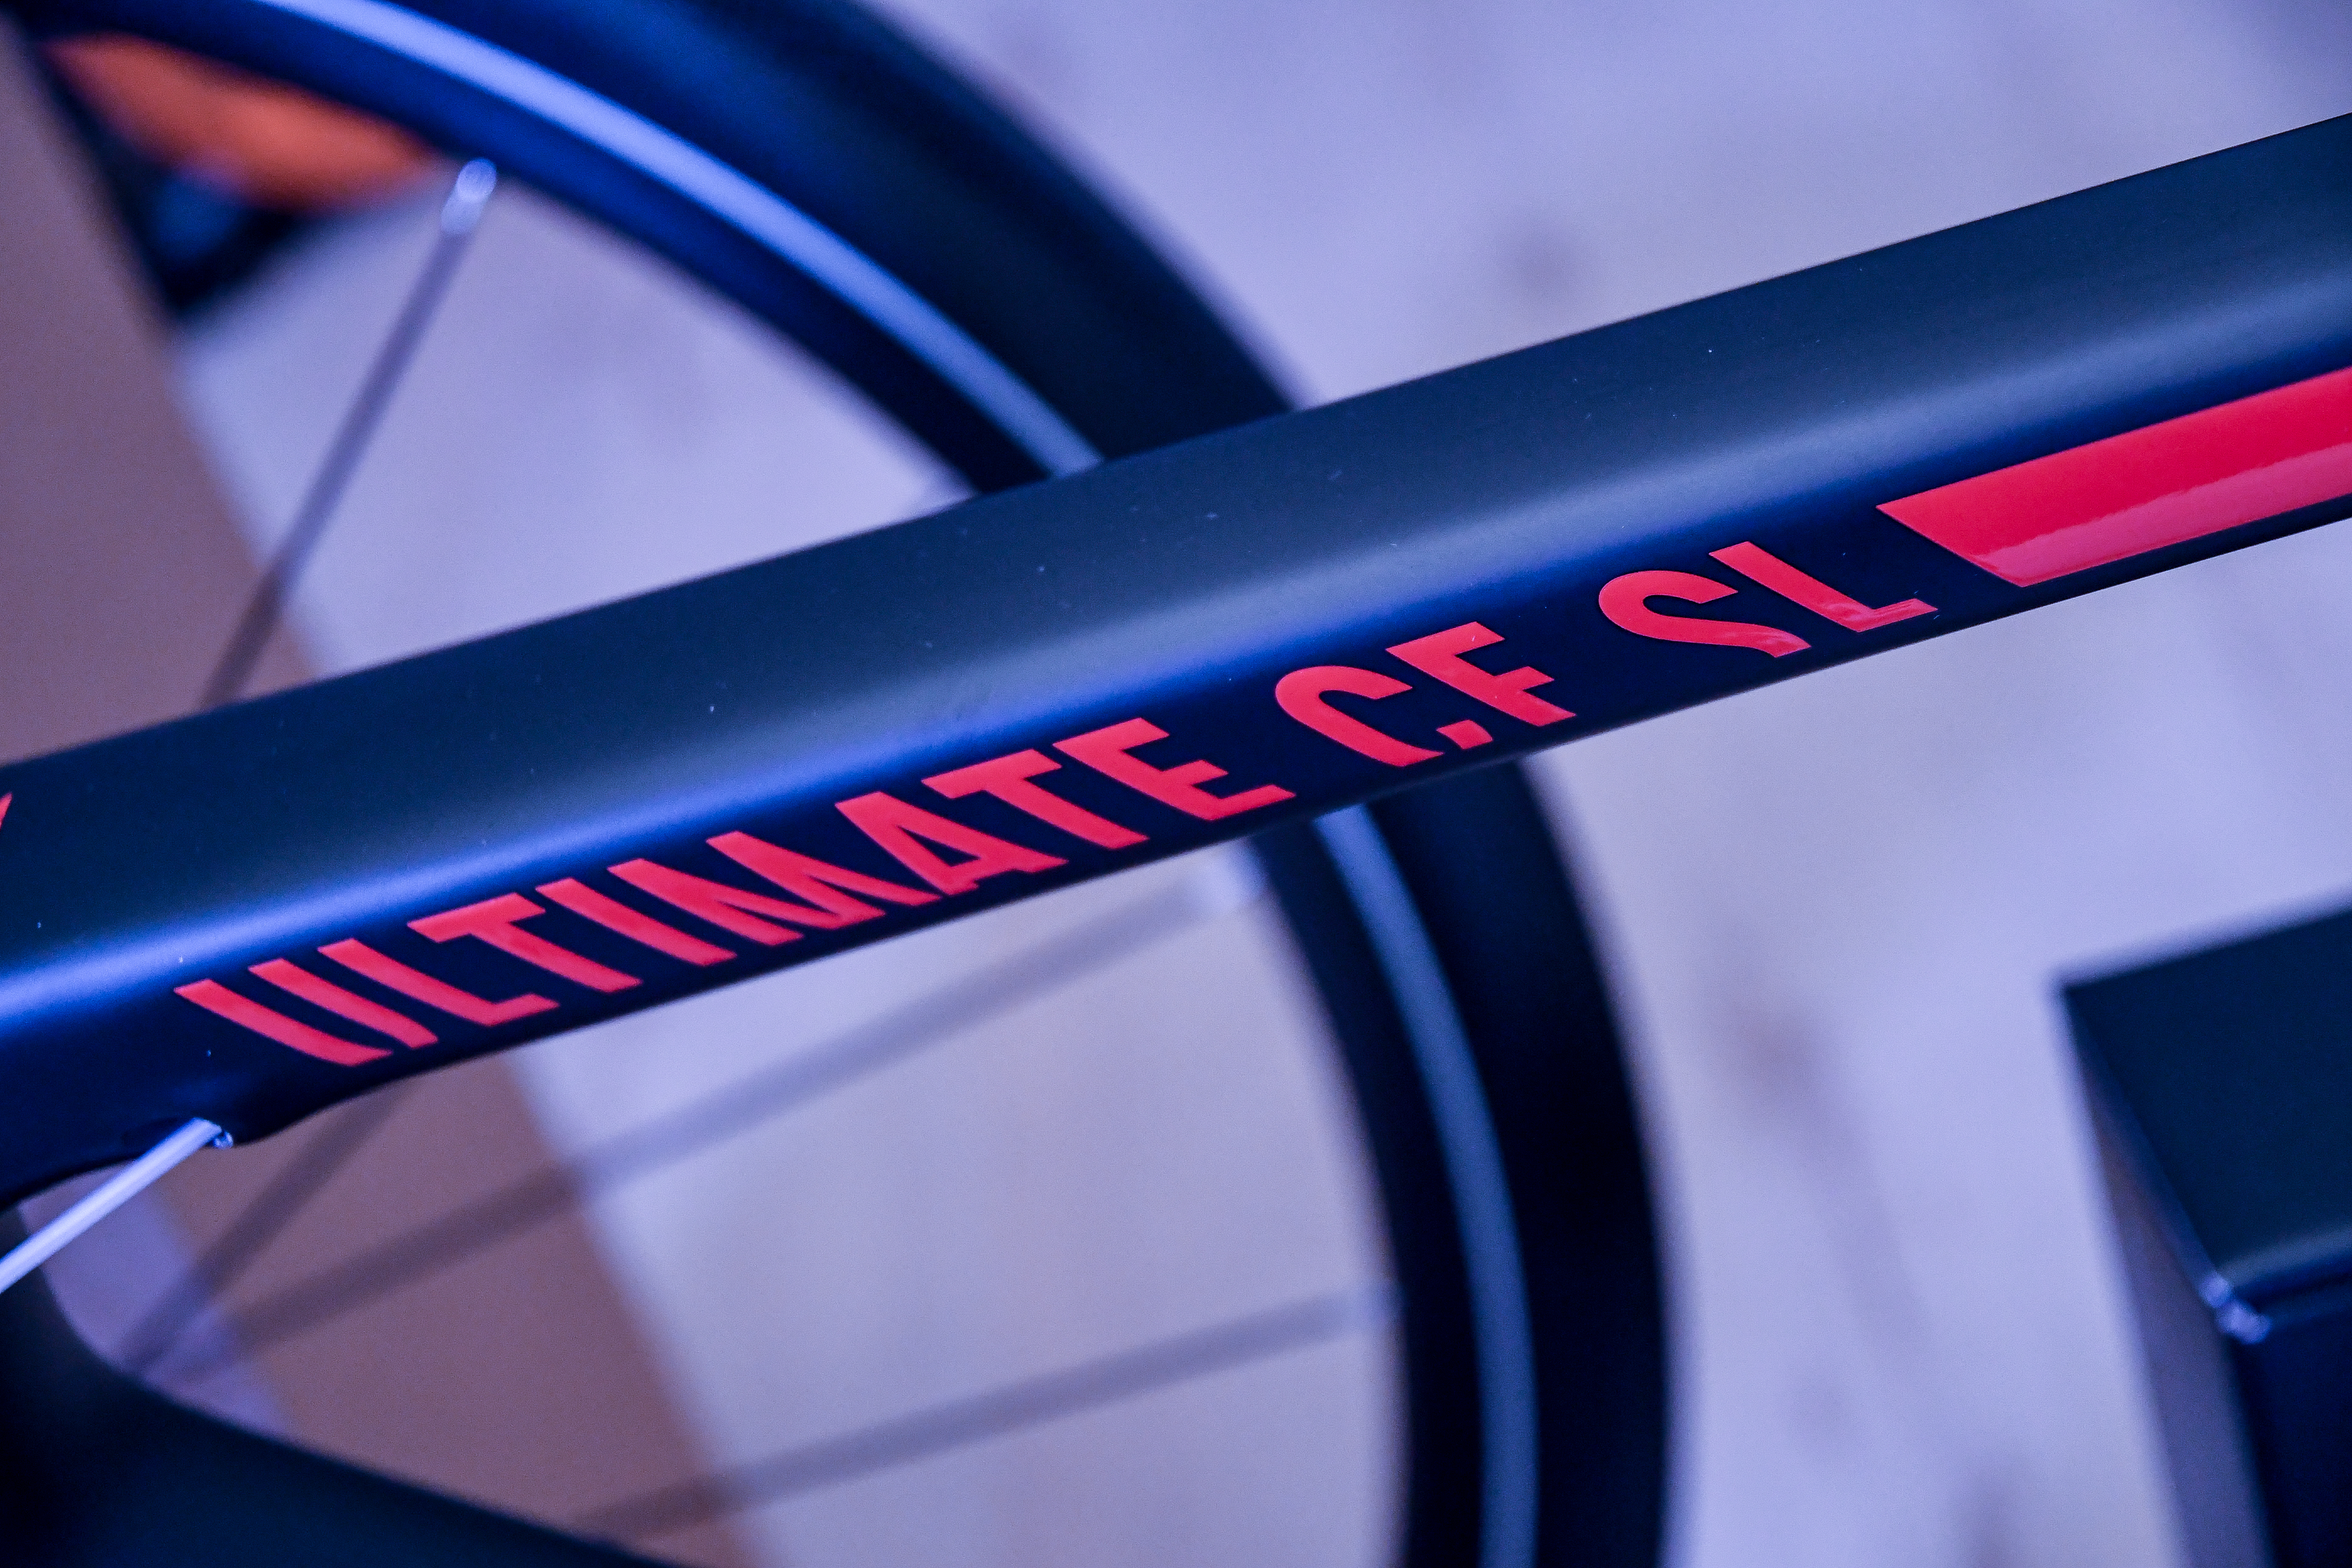
All of which had me settle on the CF SL 7.0 – for a mere 1,199EUR (in the last week or two it’s now risen in price to 1,599EUR):

The nice part here with this frameset is that it includes the front fork as well as the seat post. All of which make for one less thing to purchase.
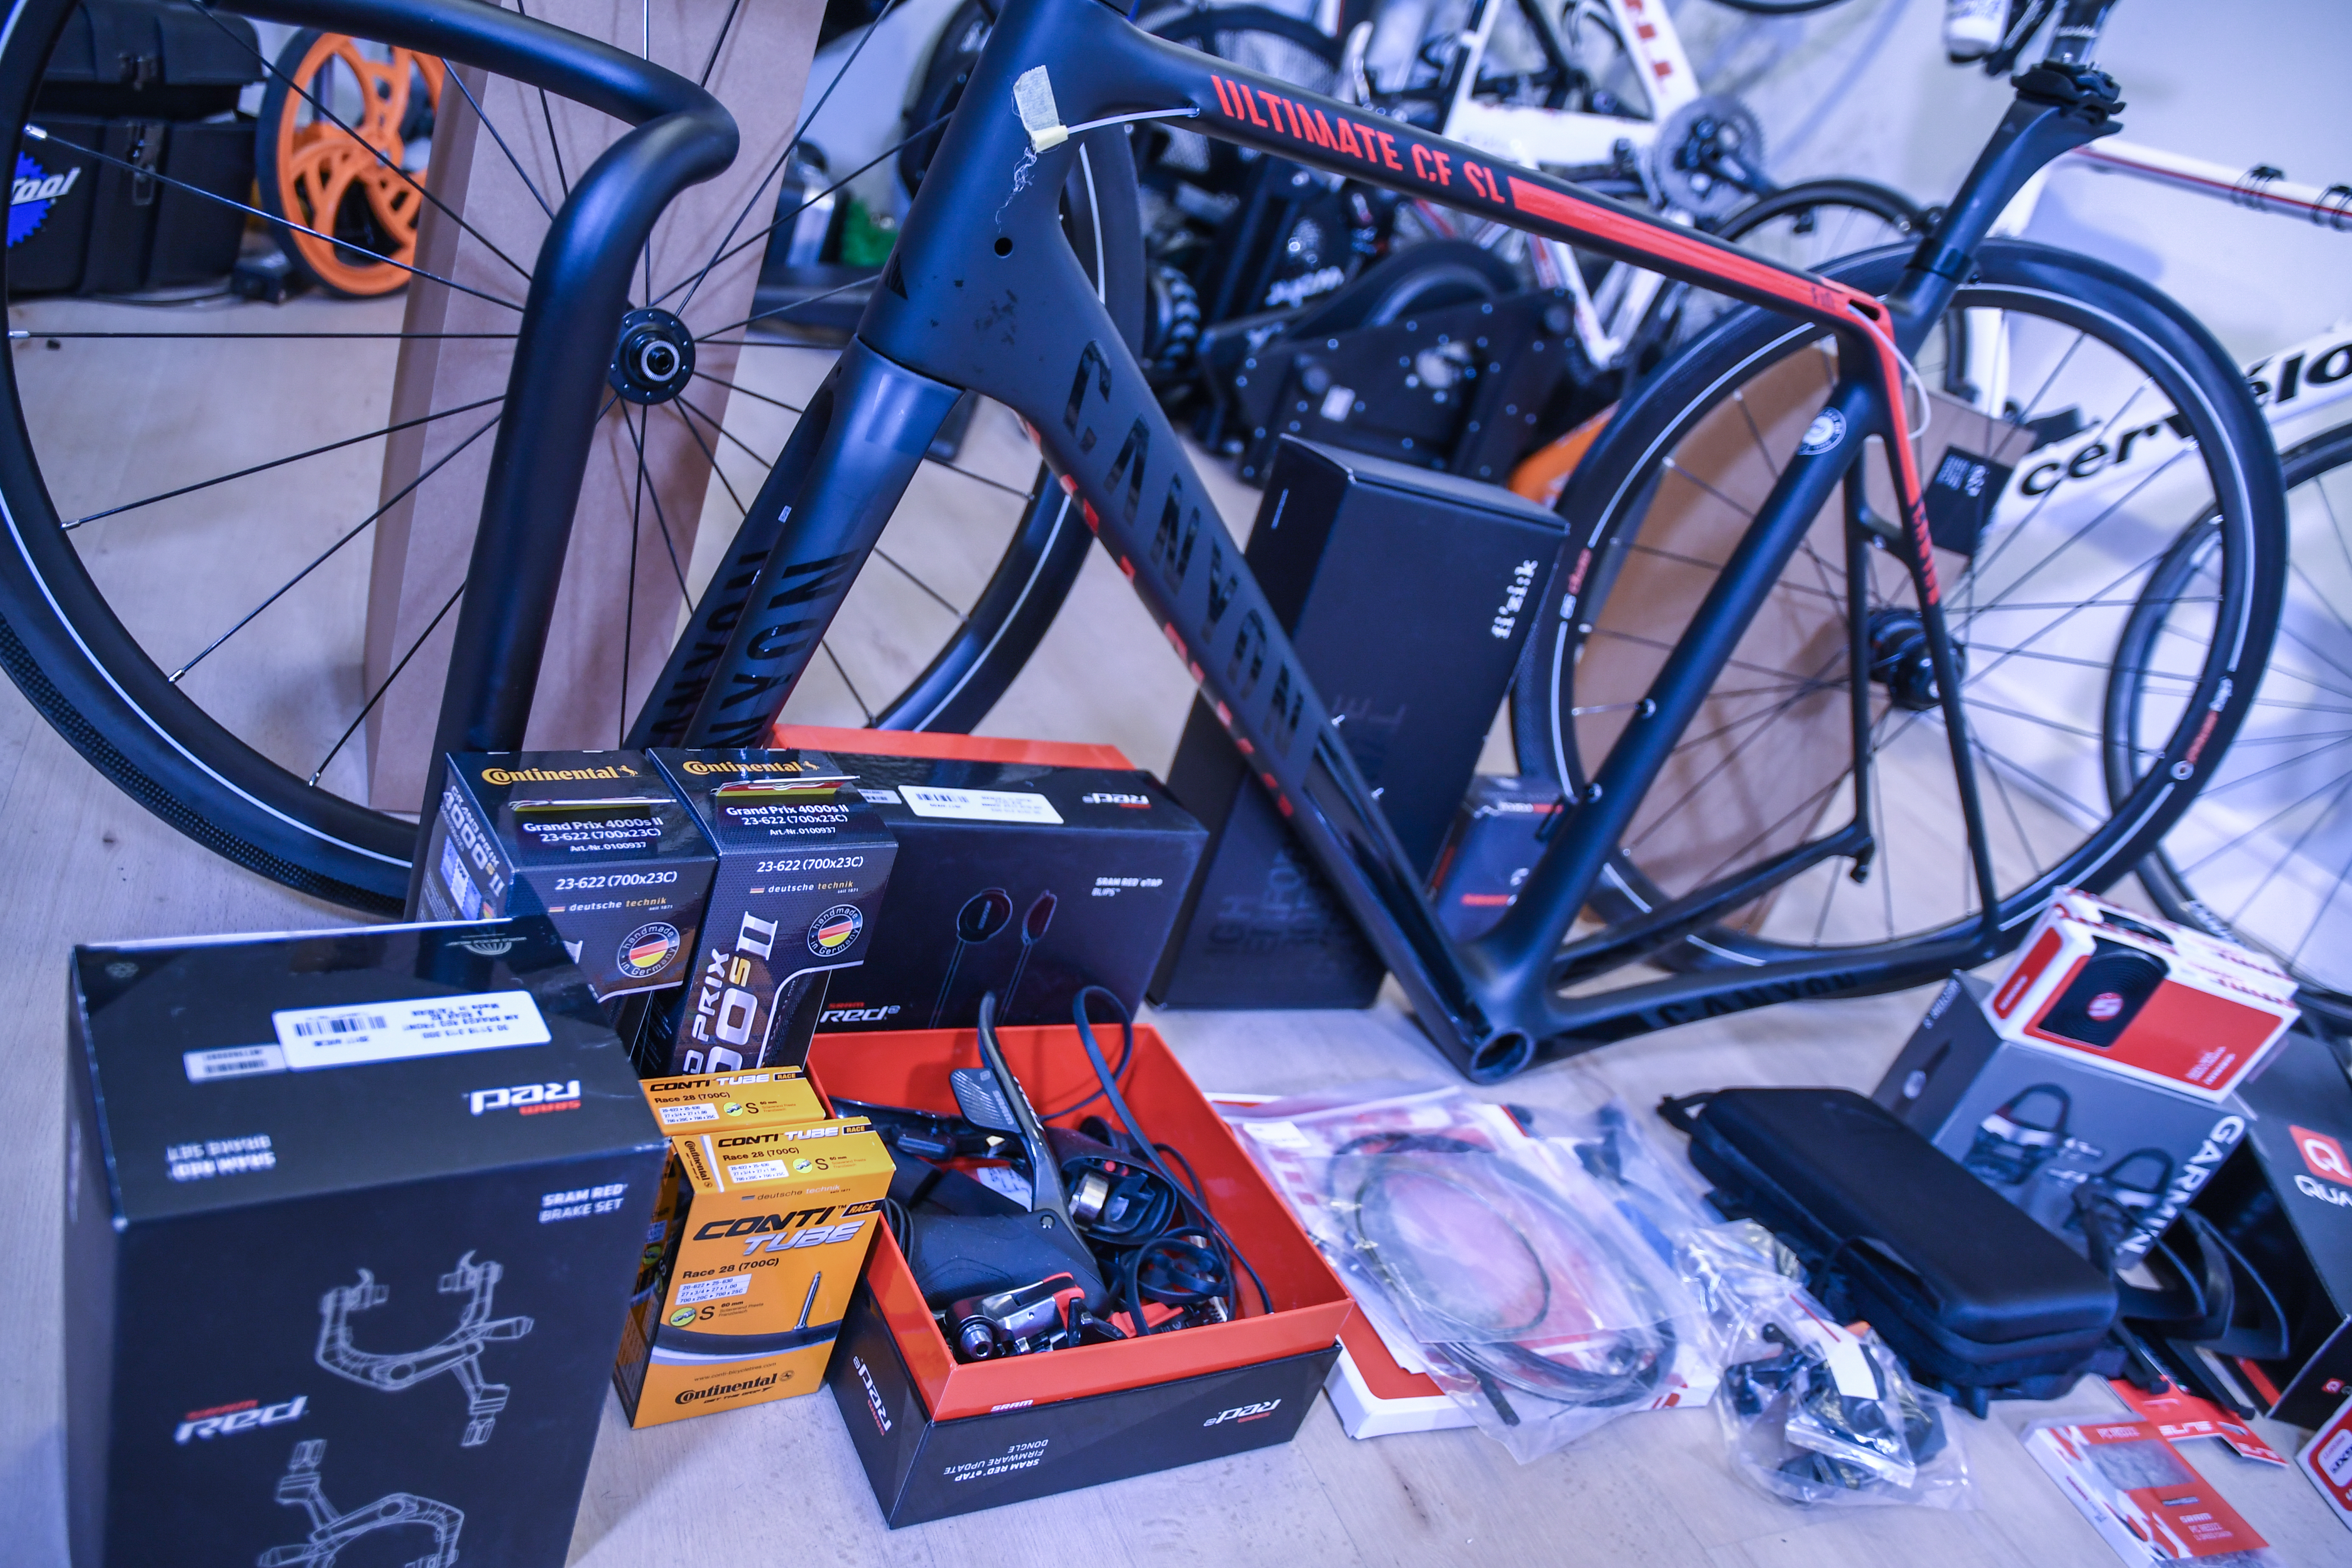
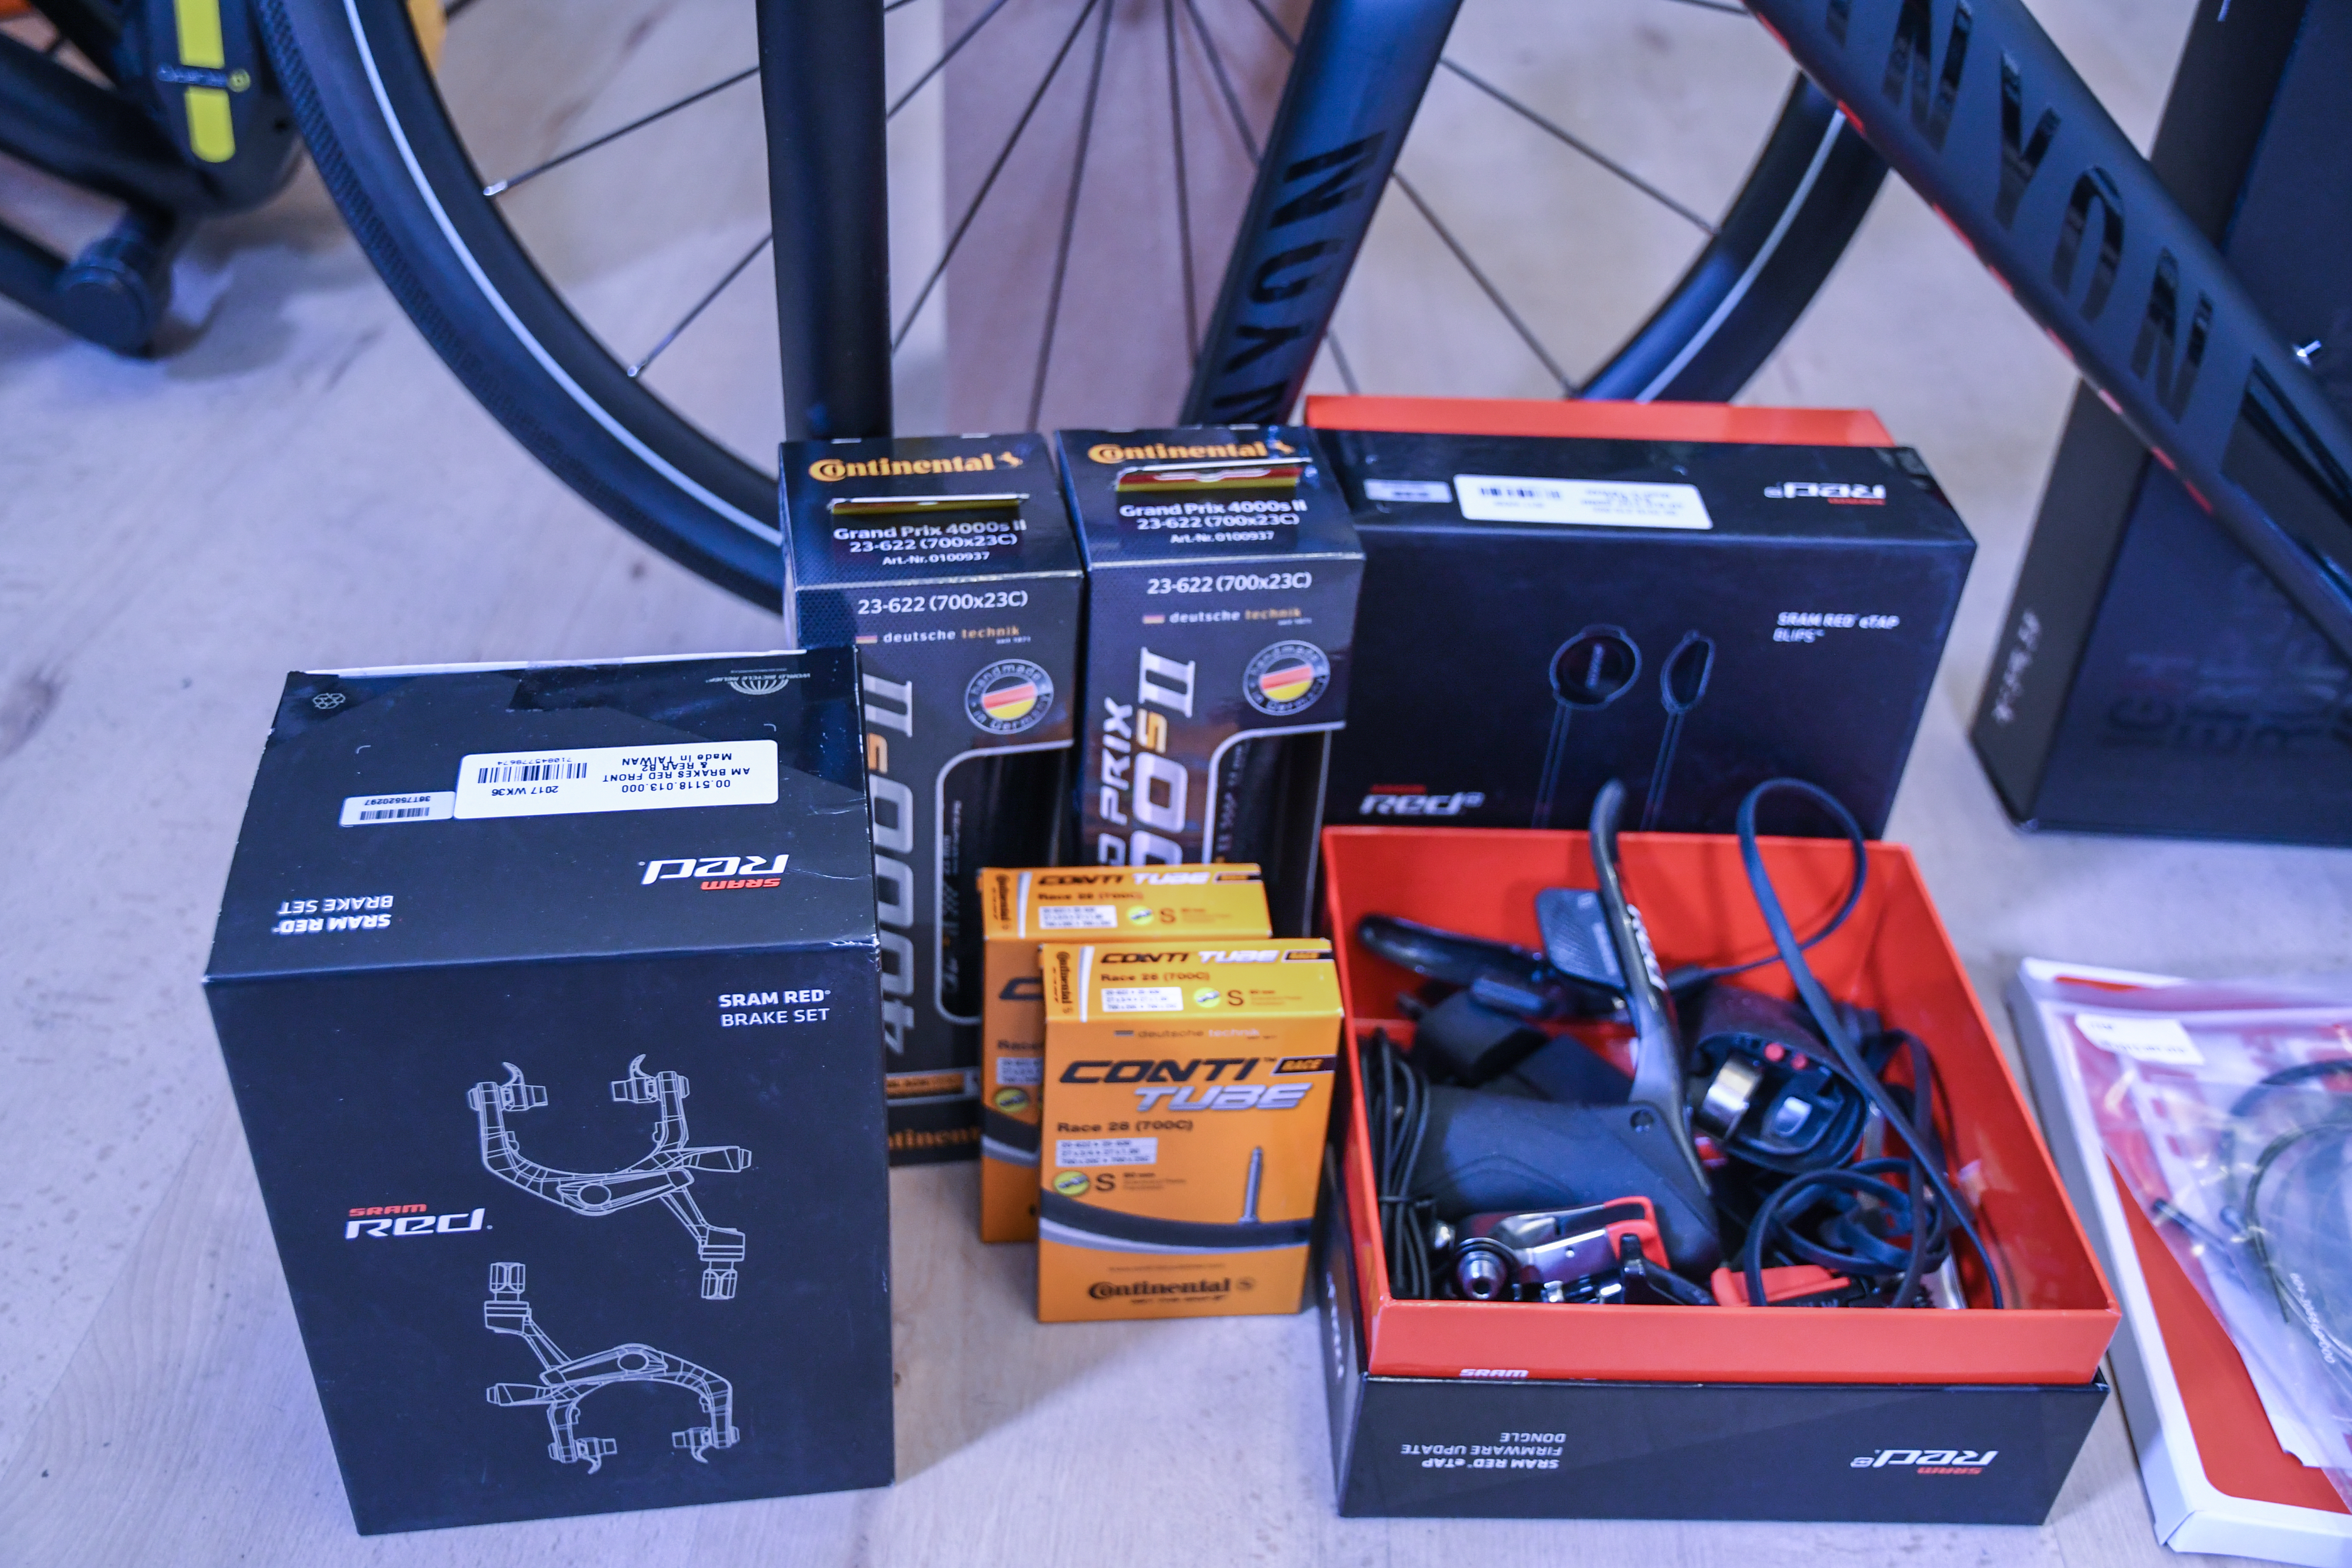
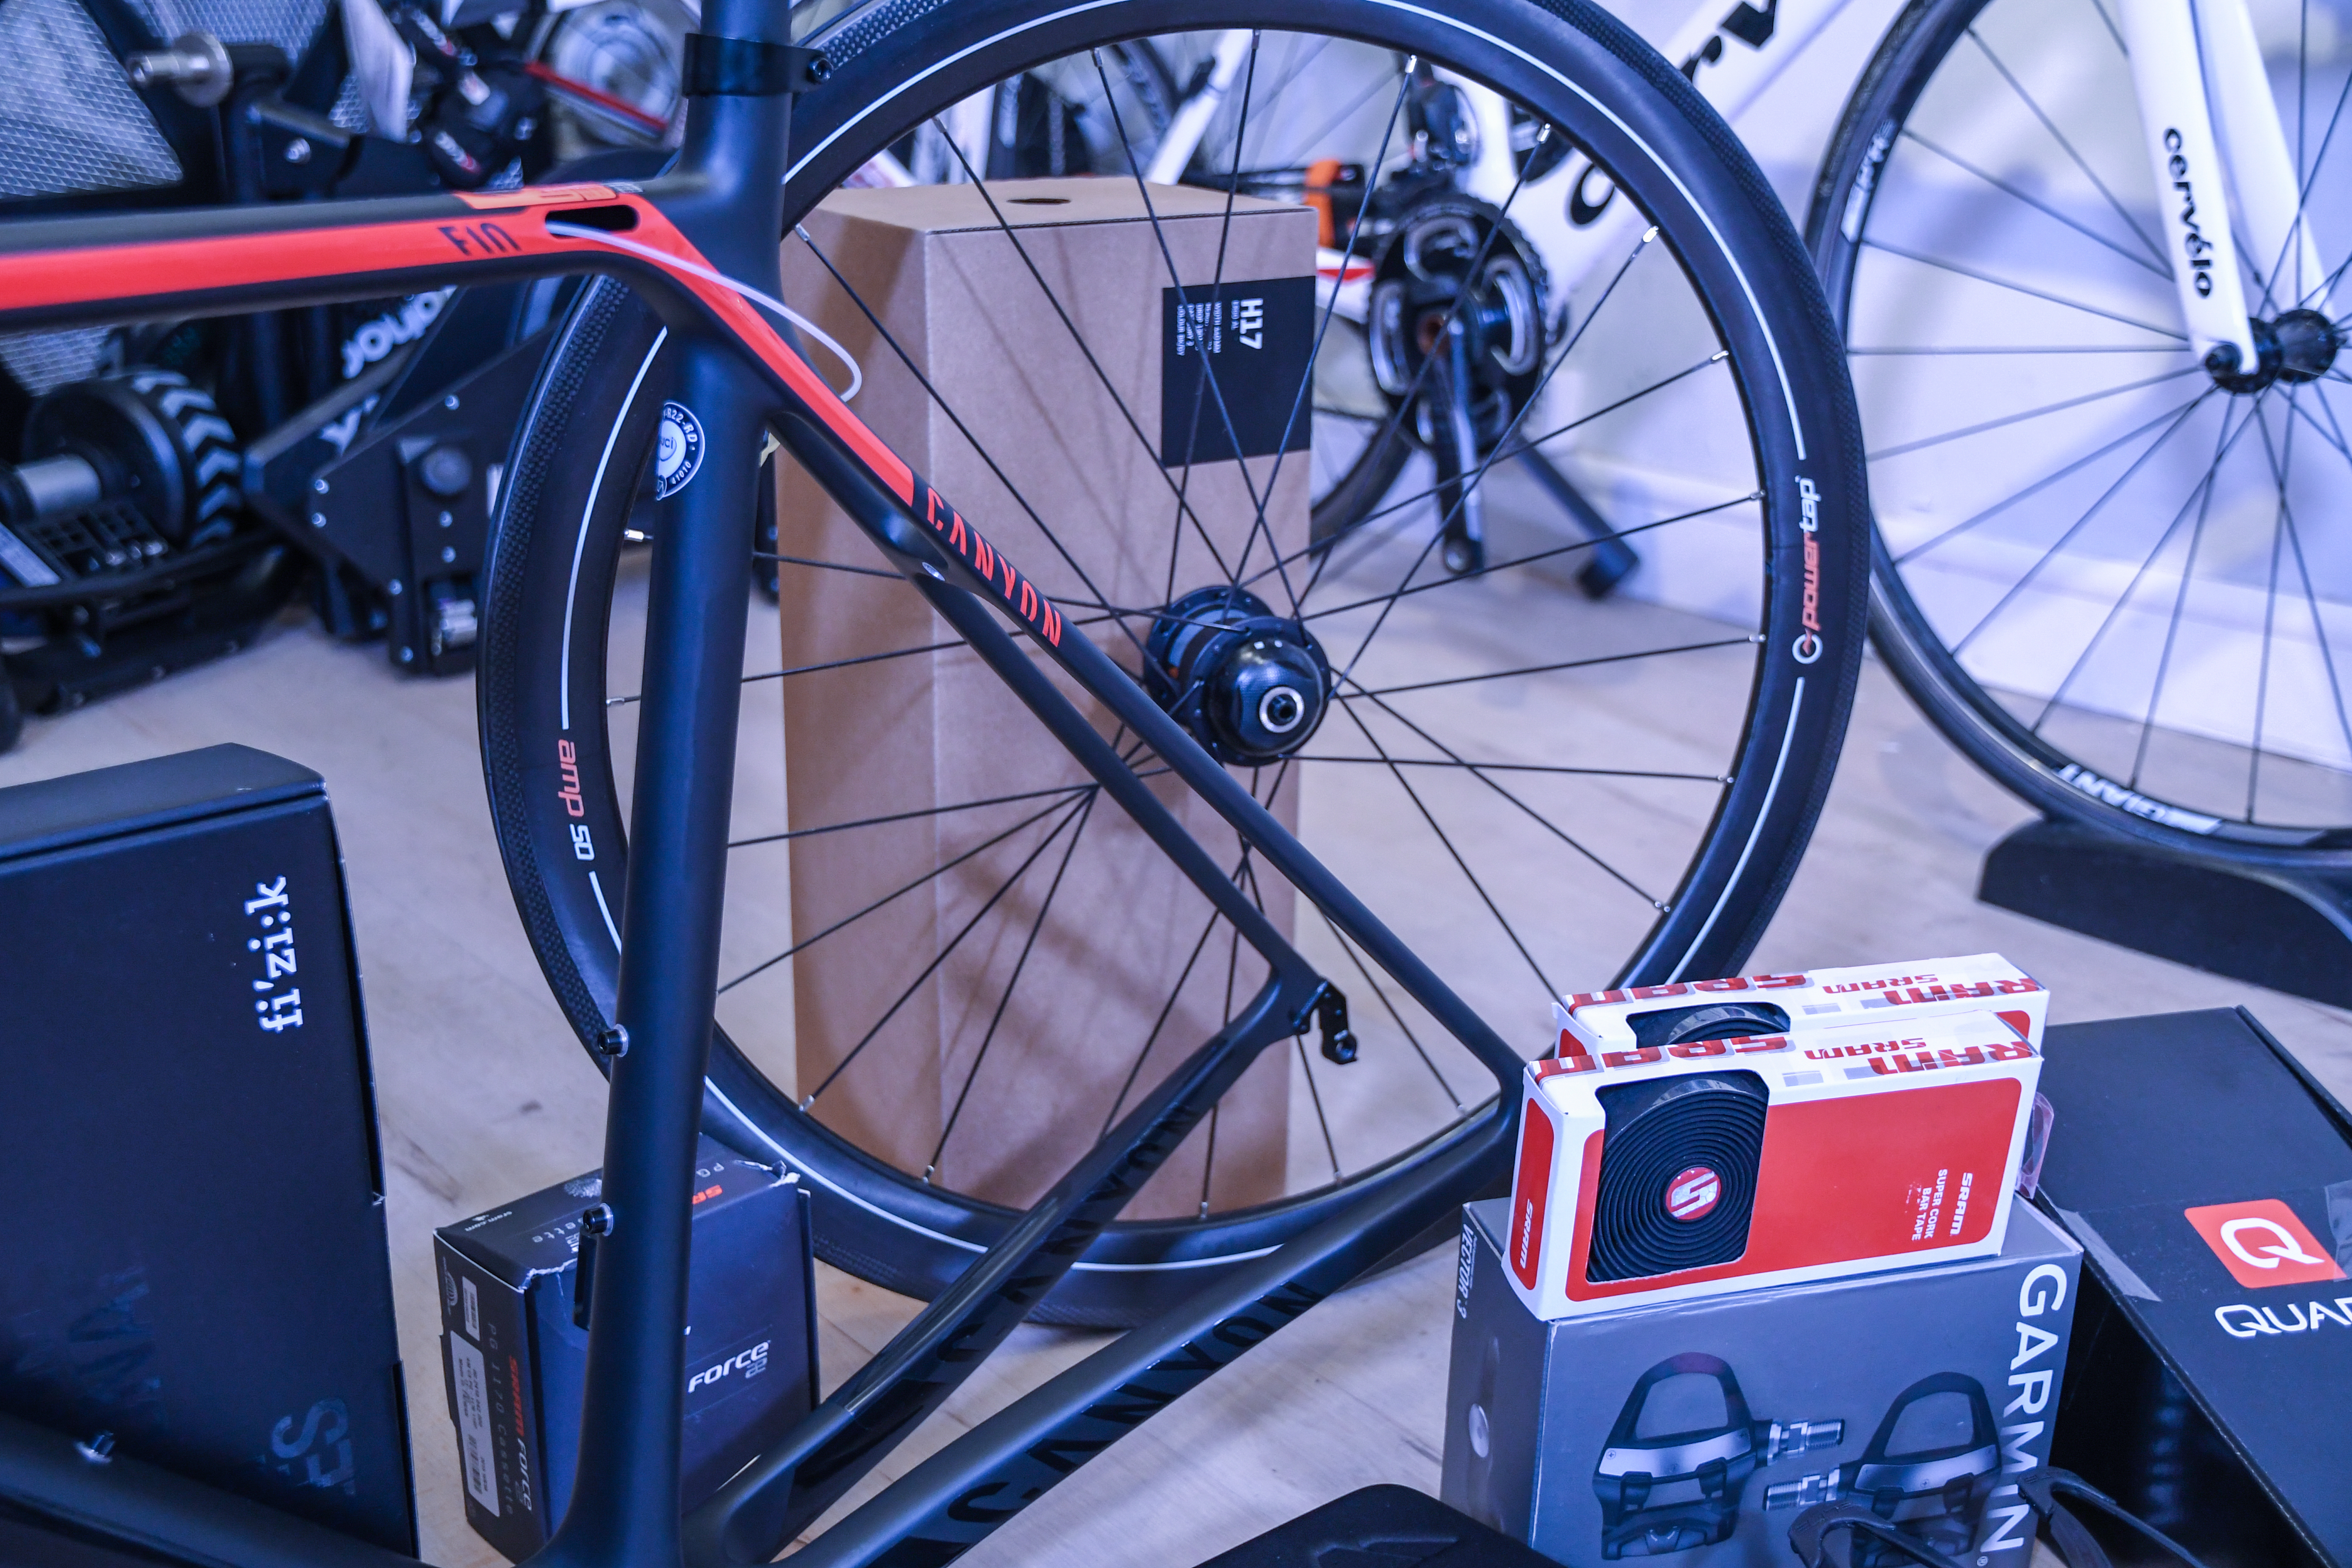
With the core frame decision out of the way, let’s talk about everything else. But first, a quick table of all the parts that went into the bike:
DCR 2017 Bike Build Components
| Part | SKU/Product Name | Linkage |
|---|---|---|
| Frame | Canyon Ultimate CF SL Frameset Electric | Source/Link |
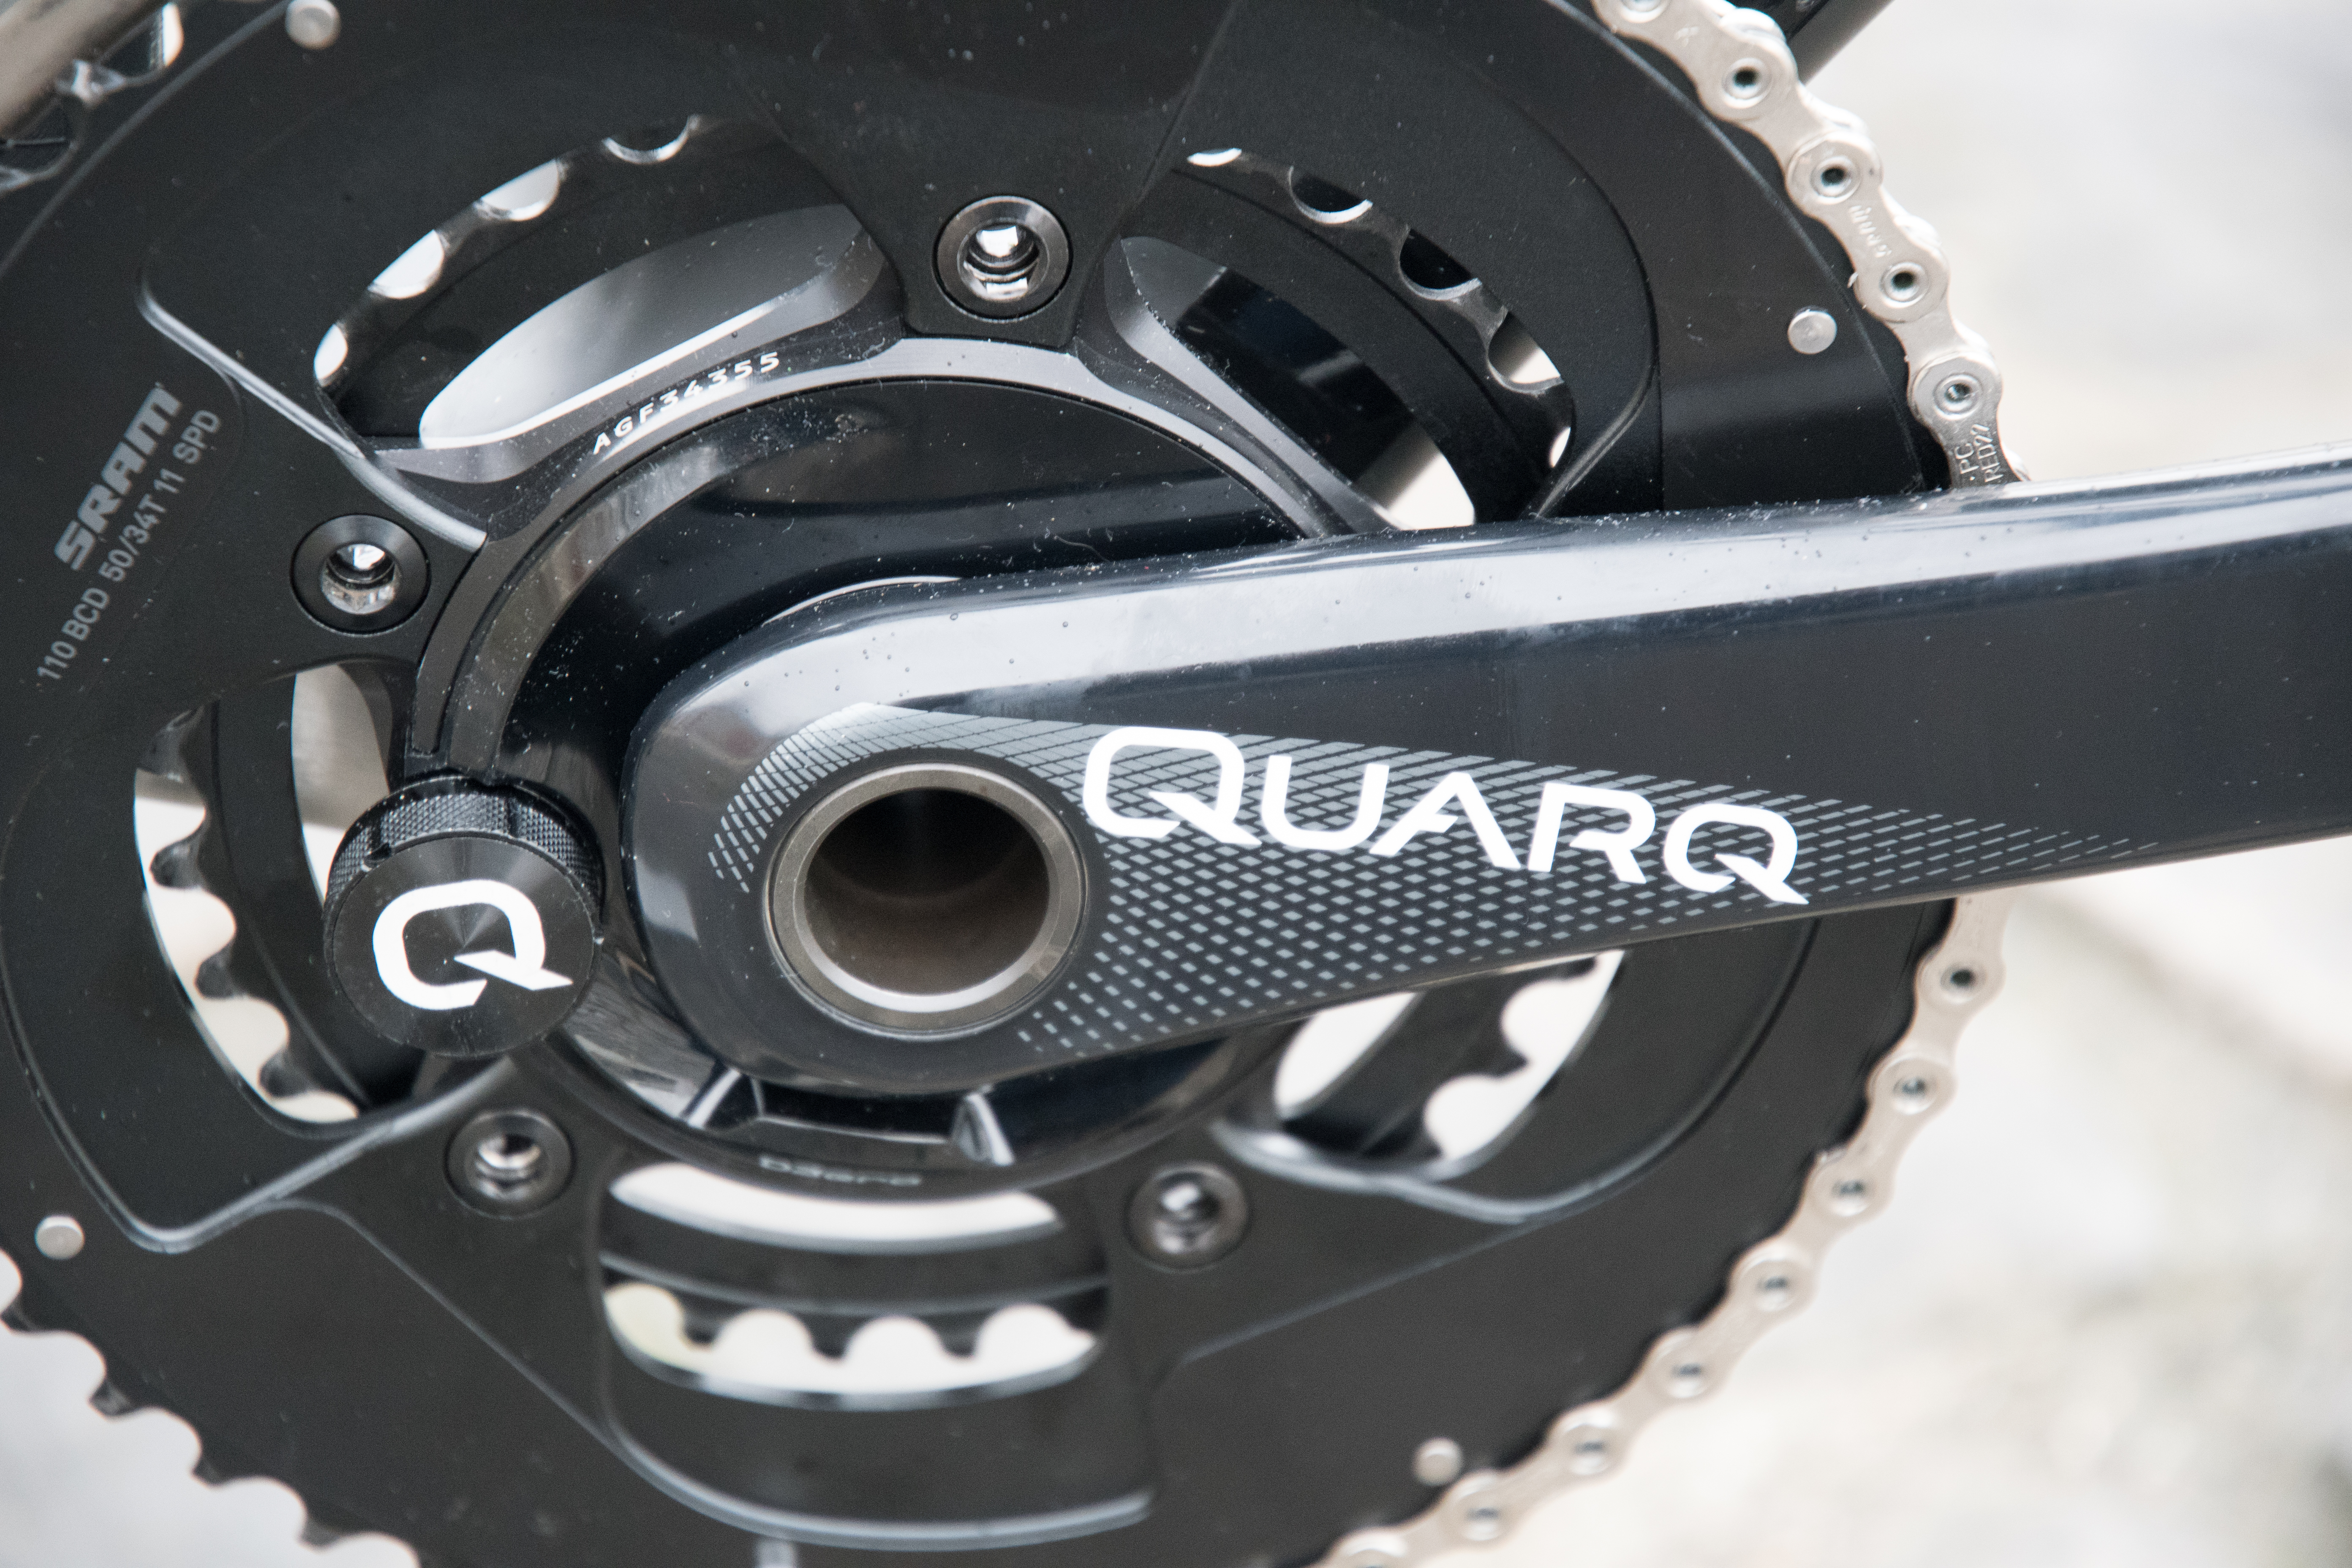
| Crankset | Quarq Dzero Carbon 110BCD HB GXP 175MM | Source/Link |
| Chainrings | SRAM FORCE 22 11-SPEED CHAINRINGS 50T | Source/Link |
| Chainrings | SRAM FORCE 22 11-SPEED CHAINRINGS 34T* | Source/Link |
| Bottom Bracket | SRAM BB GXP TEAM PRESSFIT ROAD BB86 | Source/Link |
| Cassette | SRAM PG1170 11-SPEED Cassette | Source/Link |
| Pedals | Garmin Vector 3 | Source/Link |
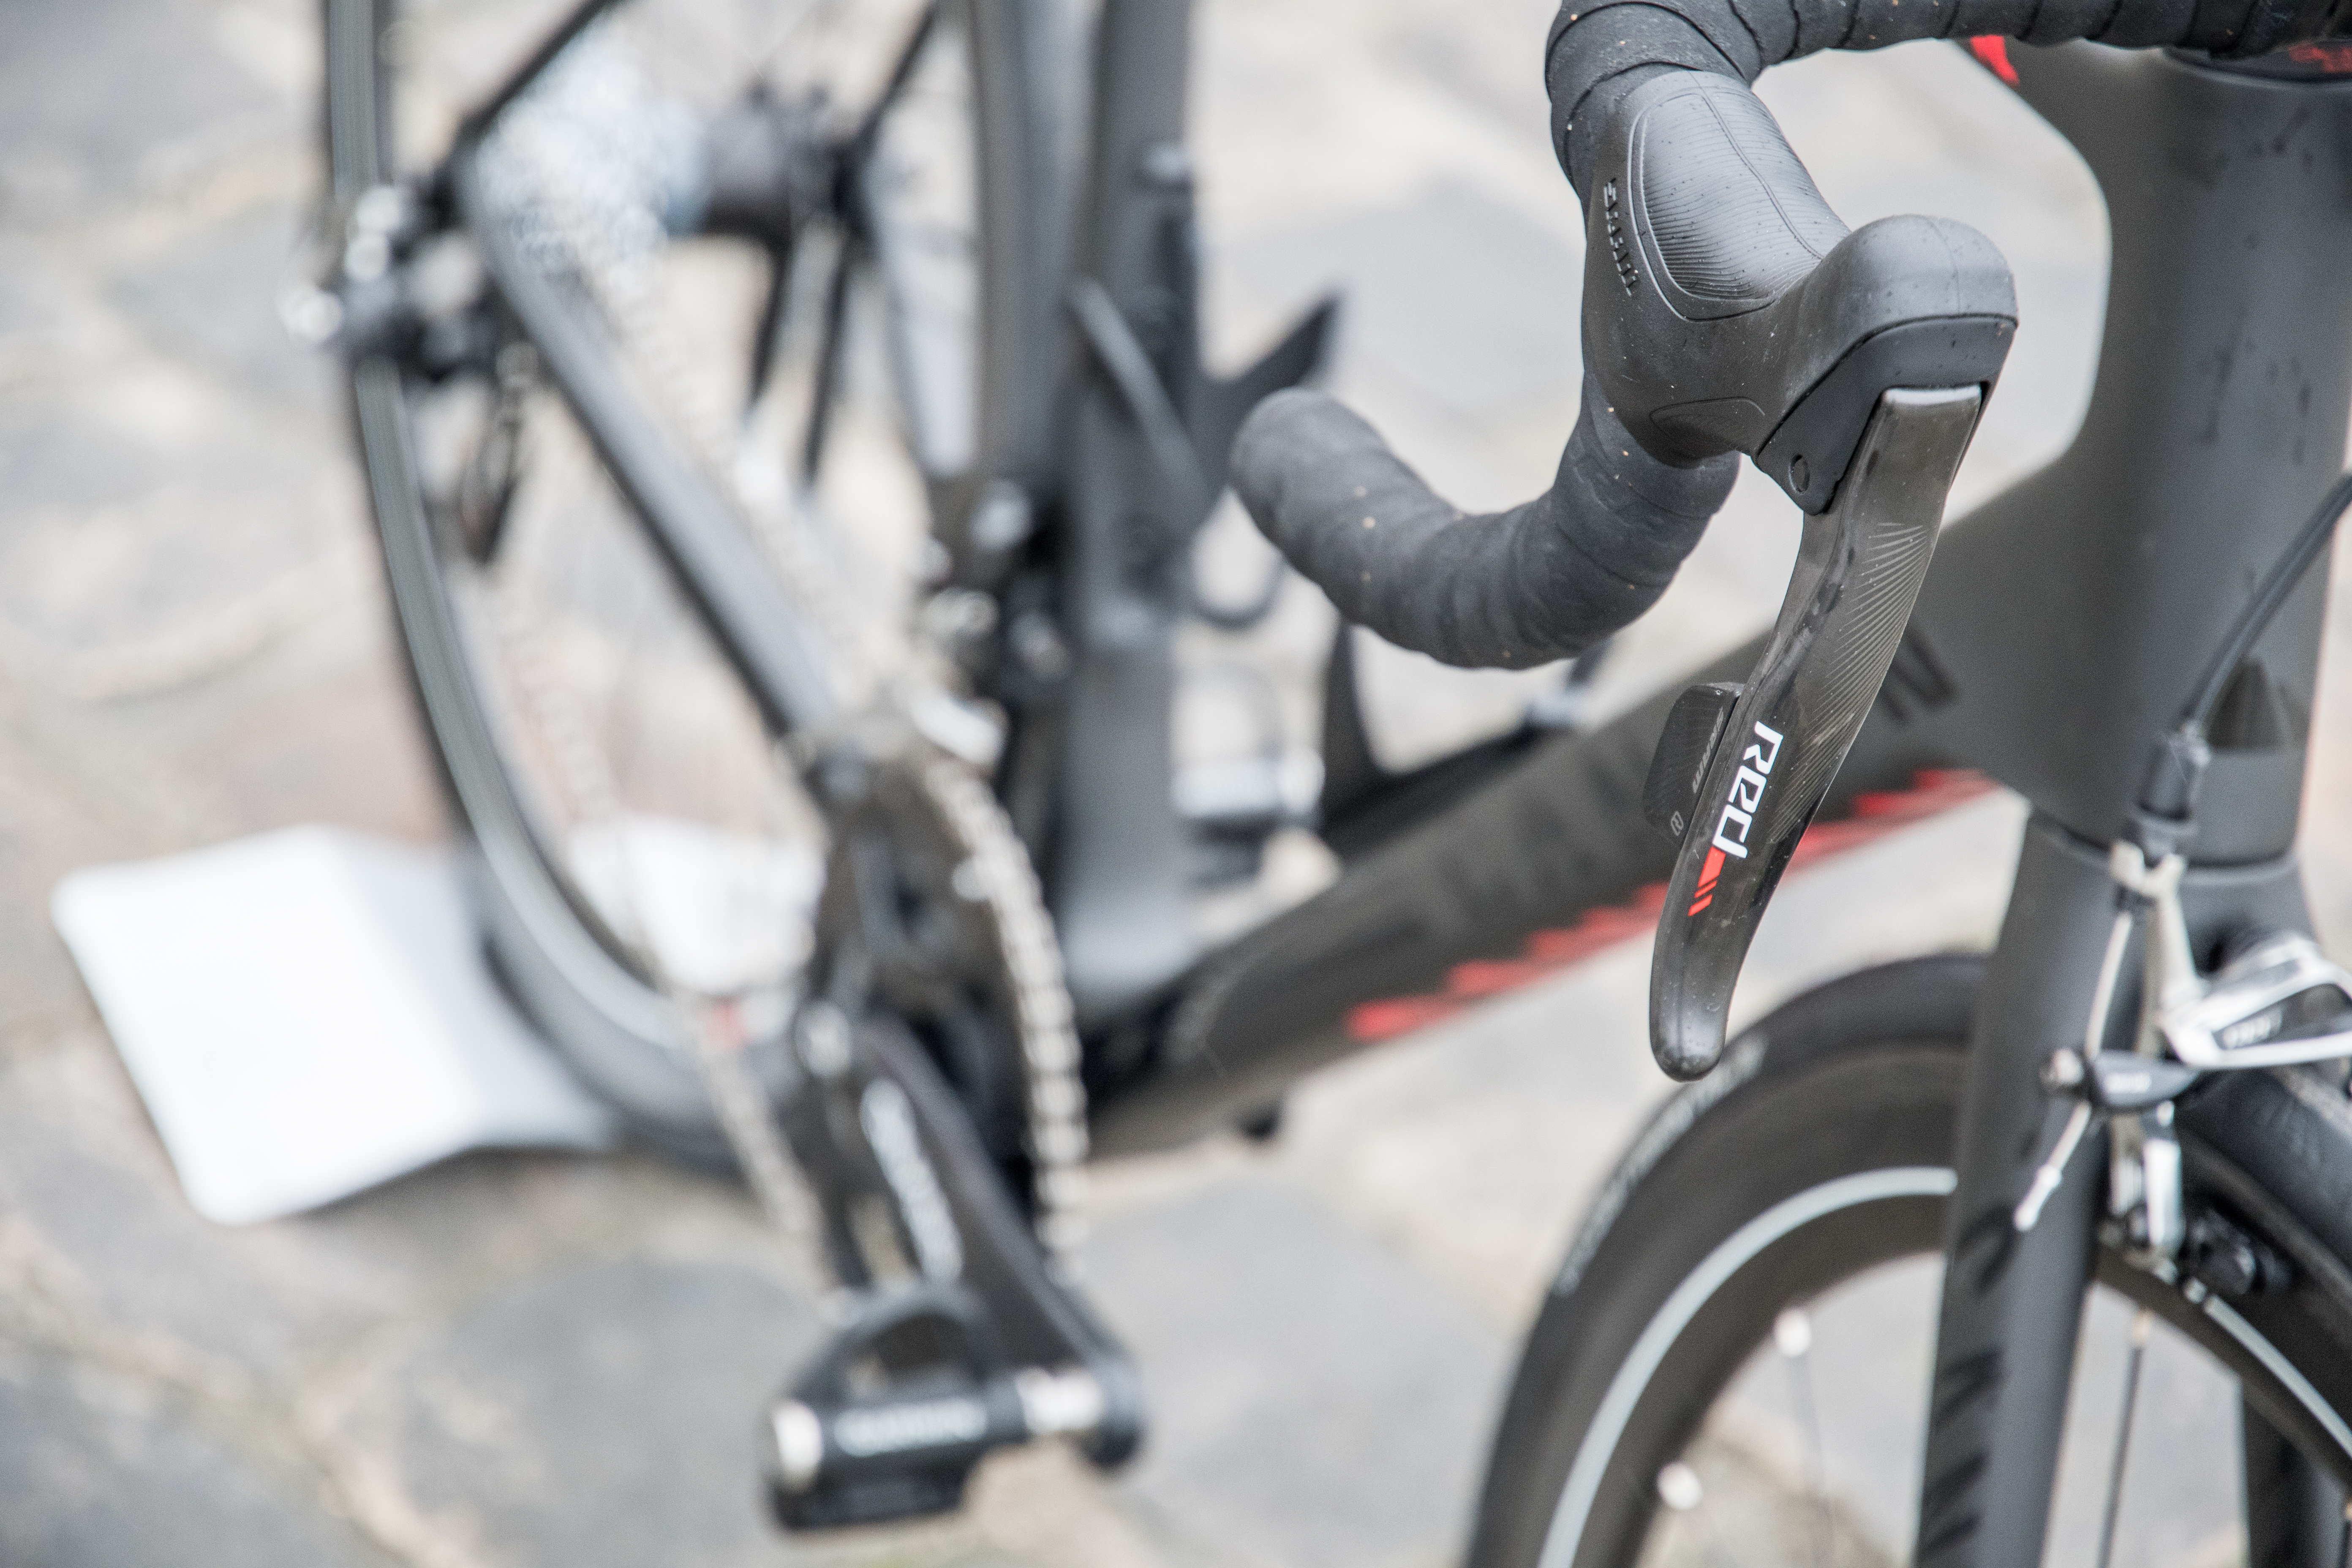
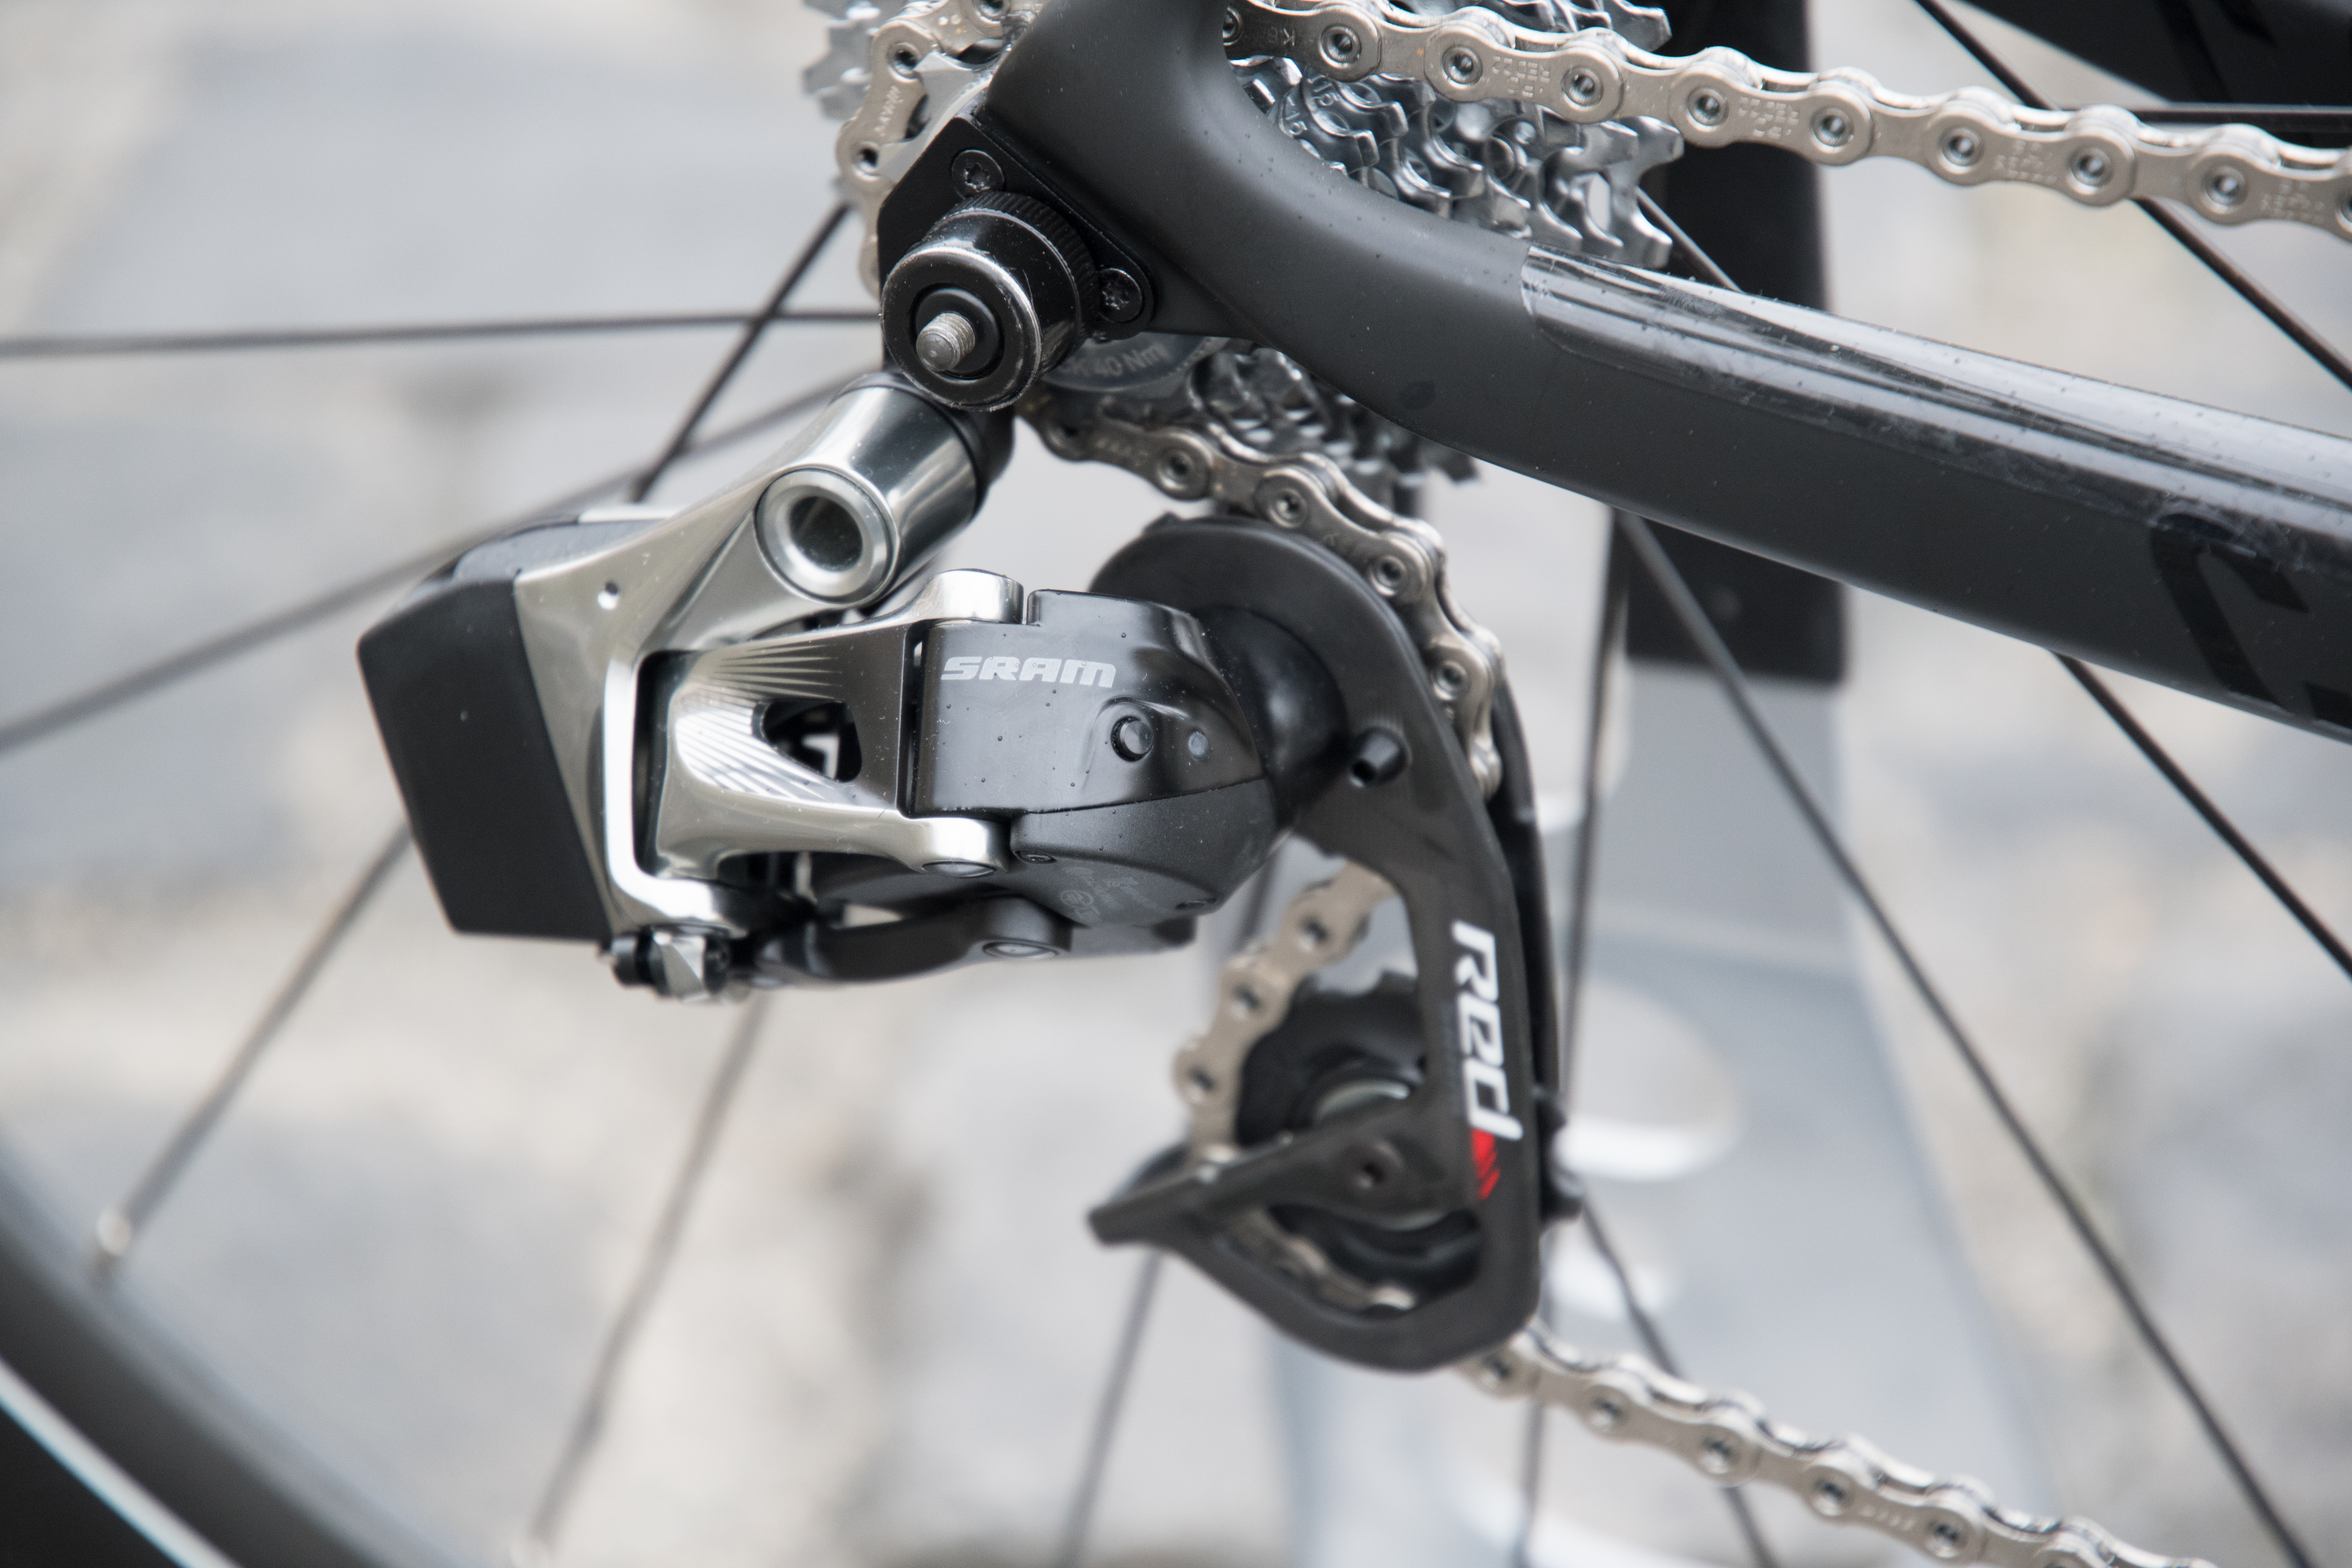
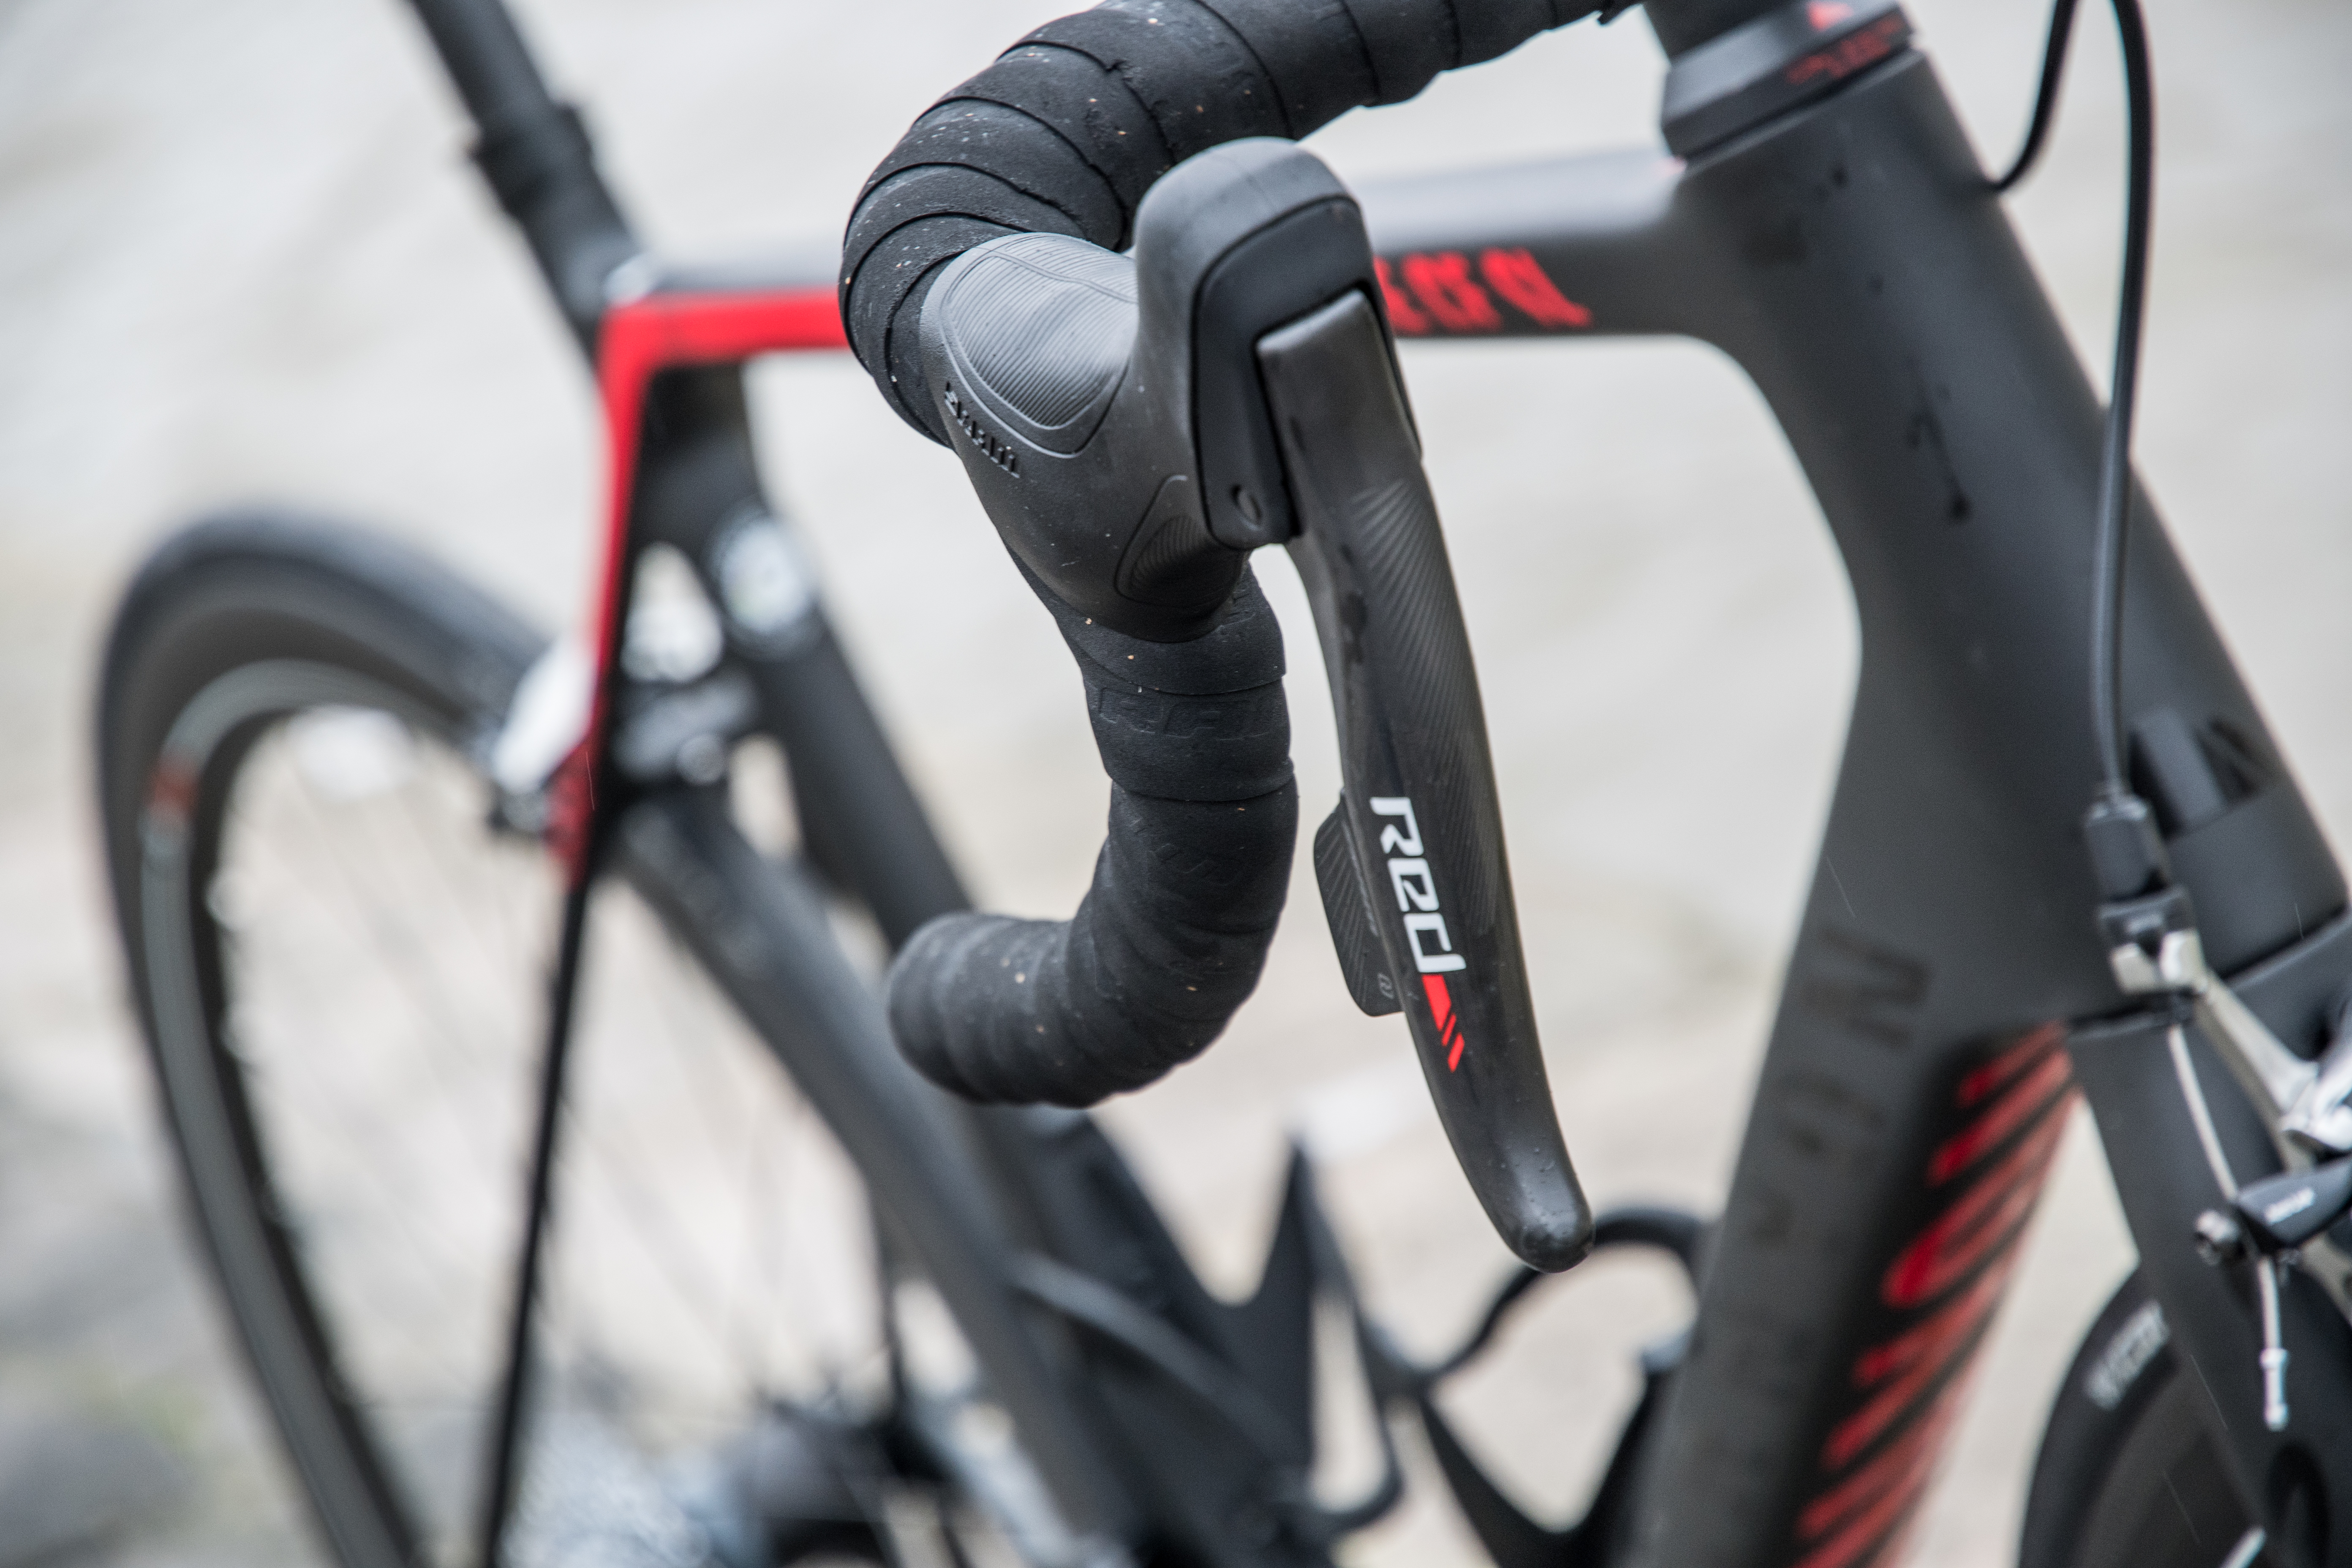
| Shifting | SRAM RED ETAP ROAD | Source/Link |
| Shifting Extras | SRAM RED eTAP BLIPS PAIR | Source/Link |
| Chain | SRAM RED 22 Chain | Source/Link |
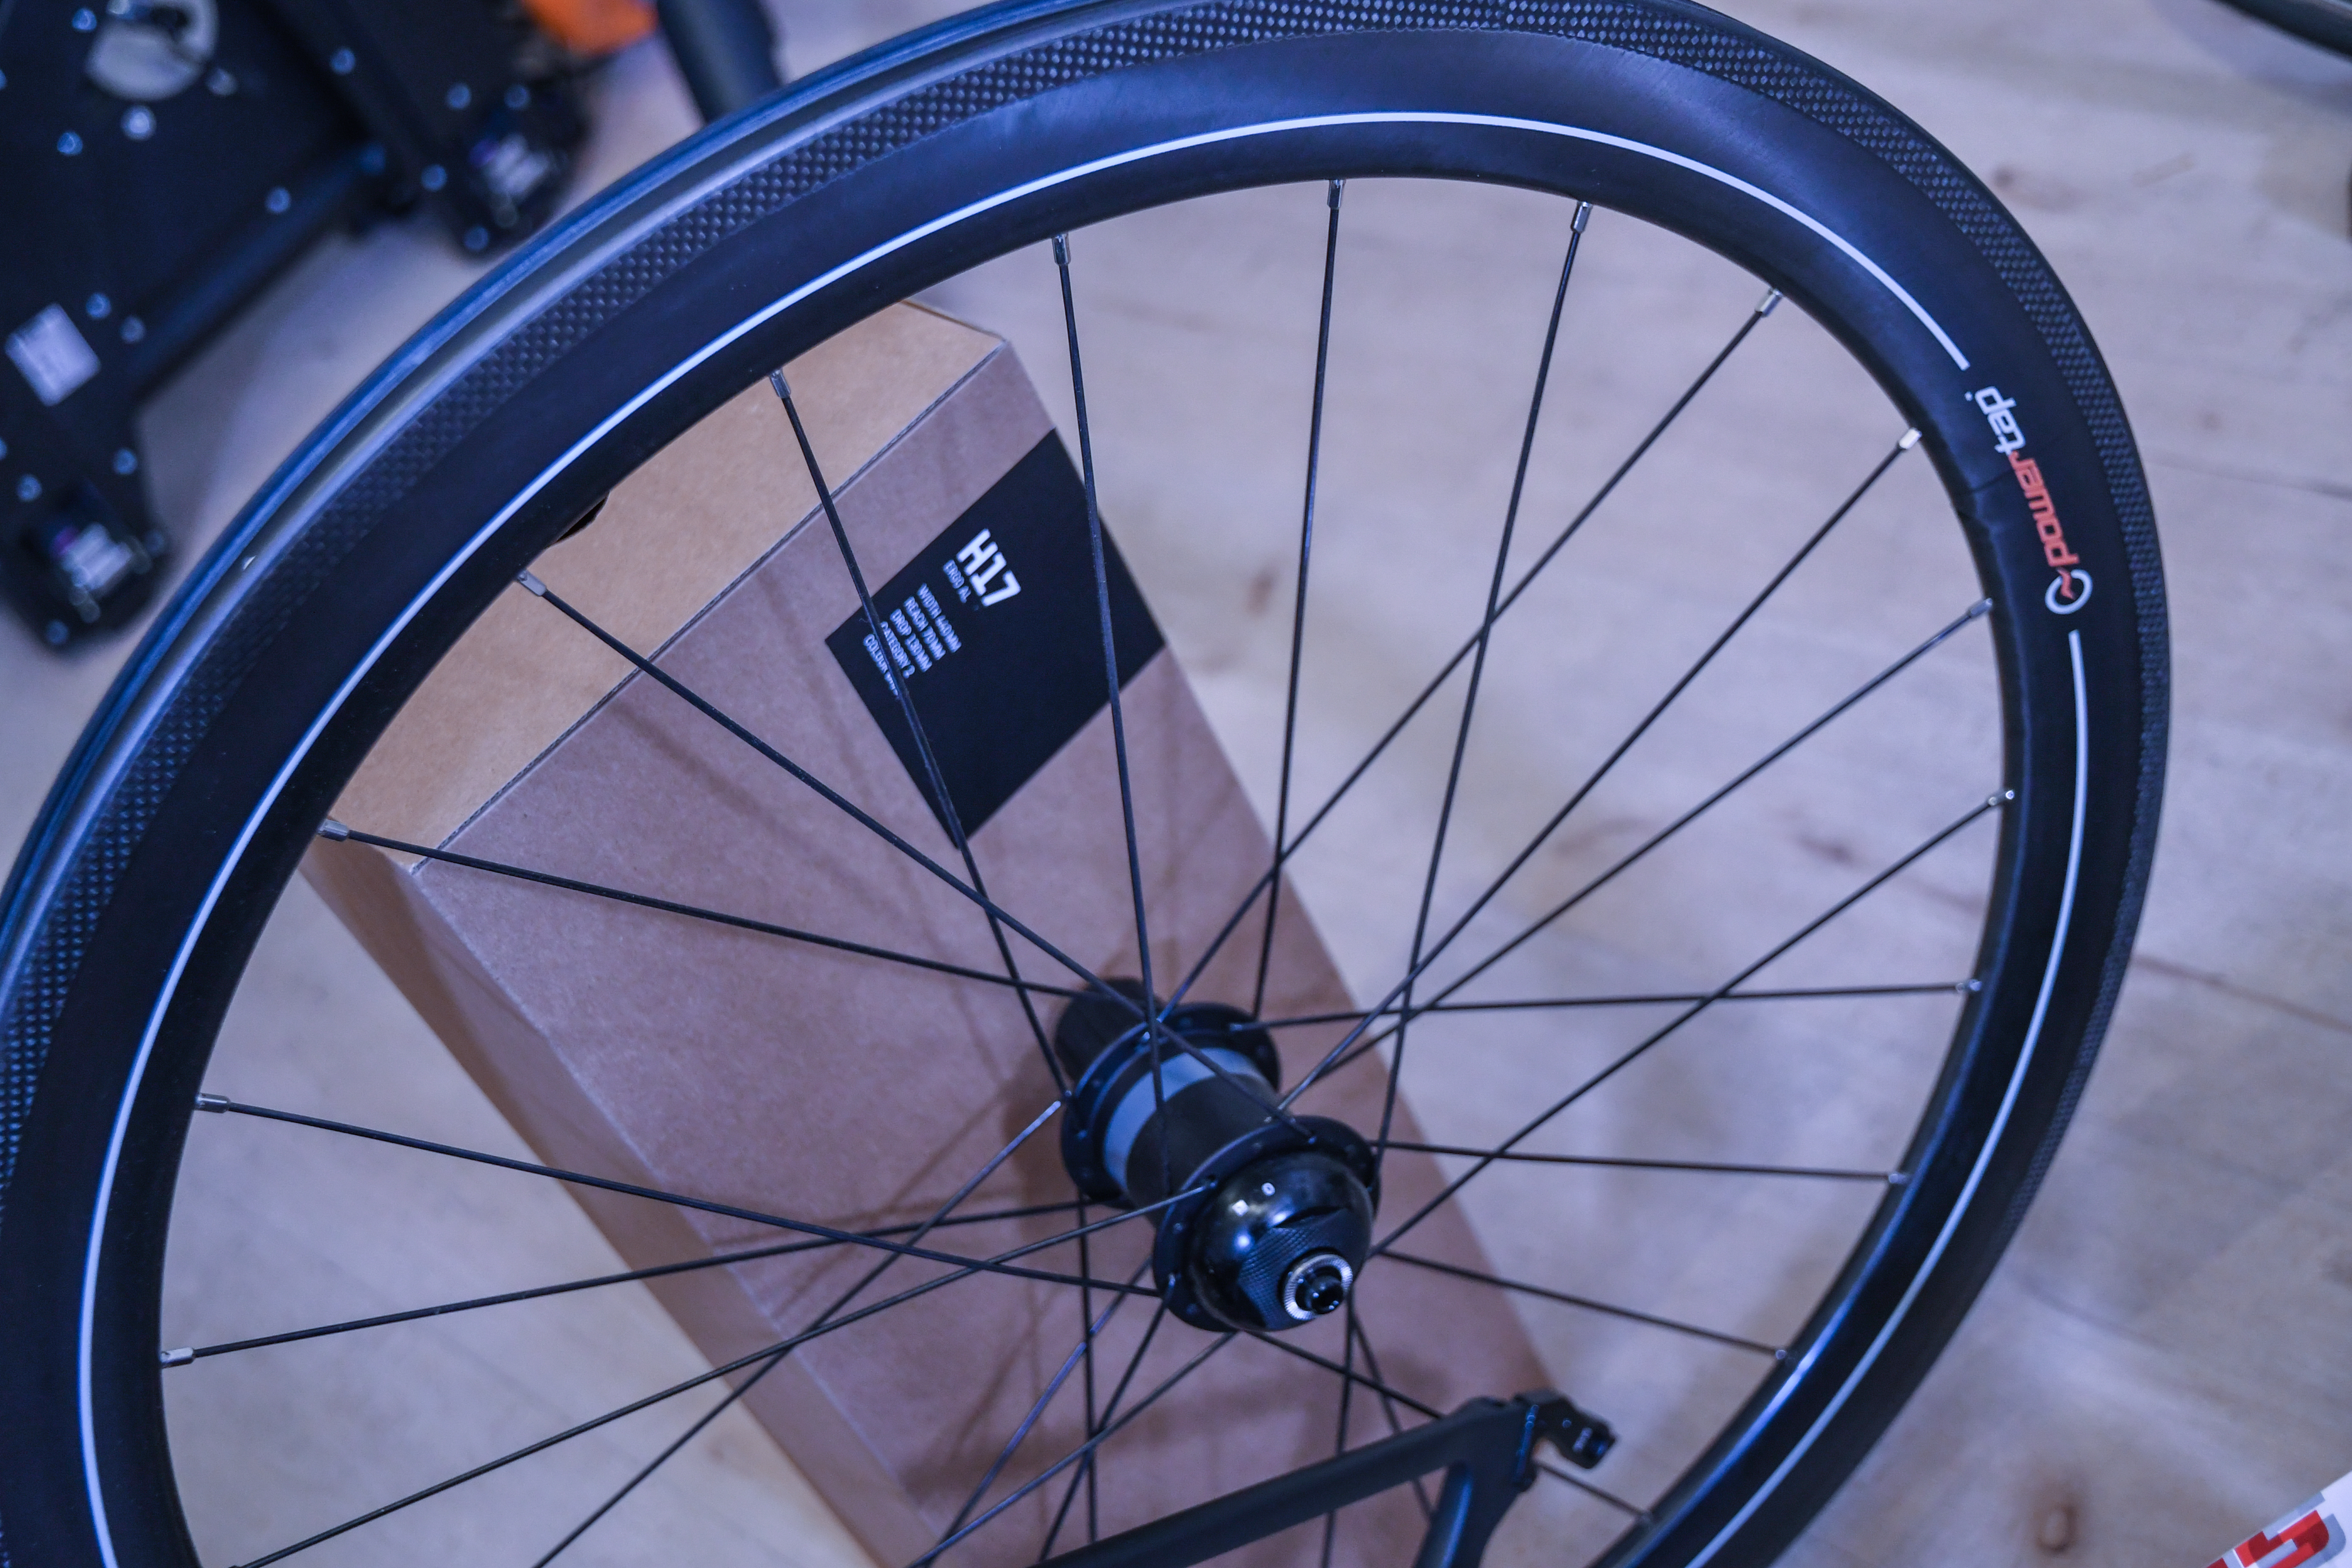
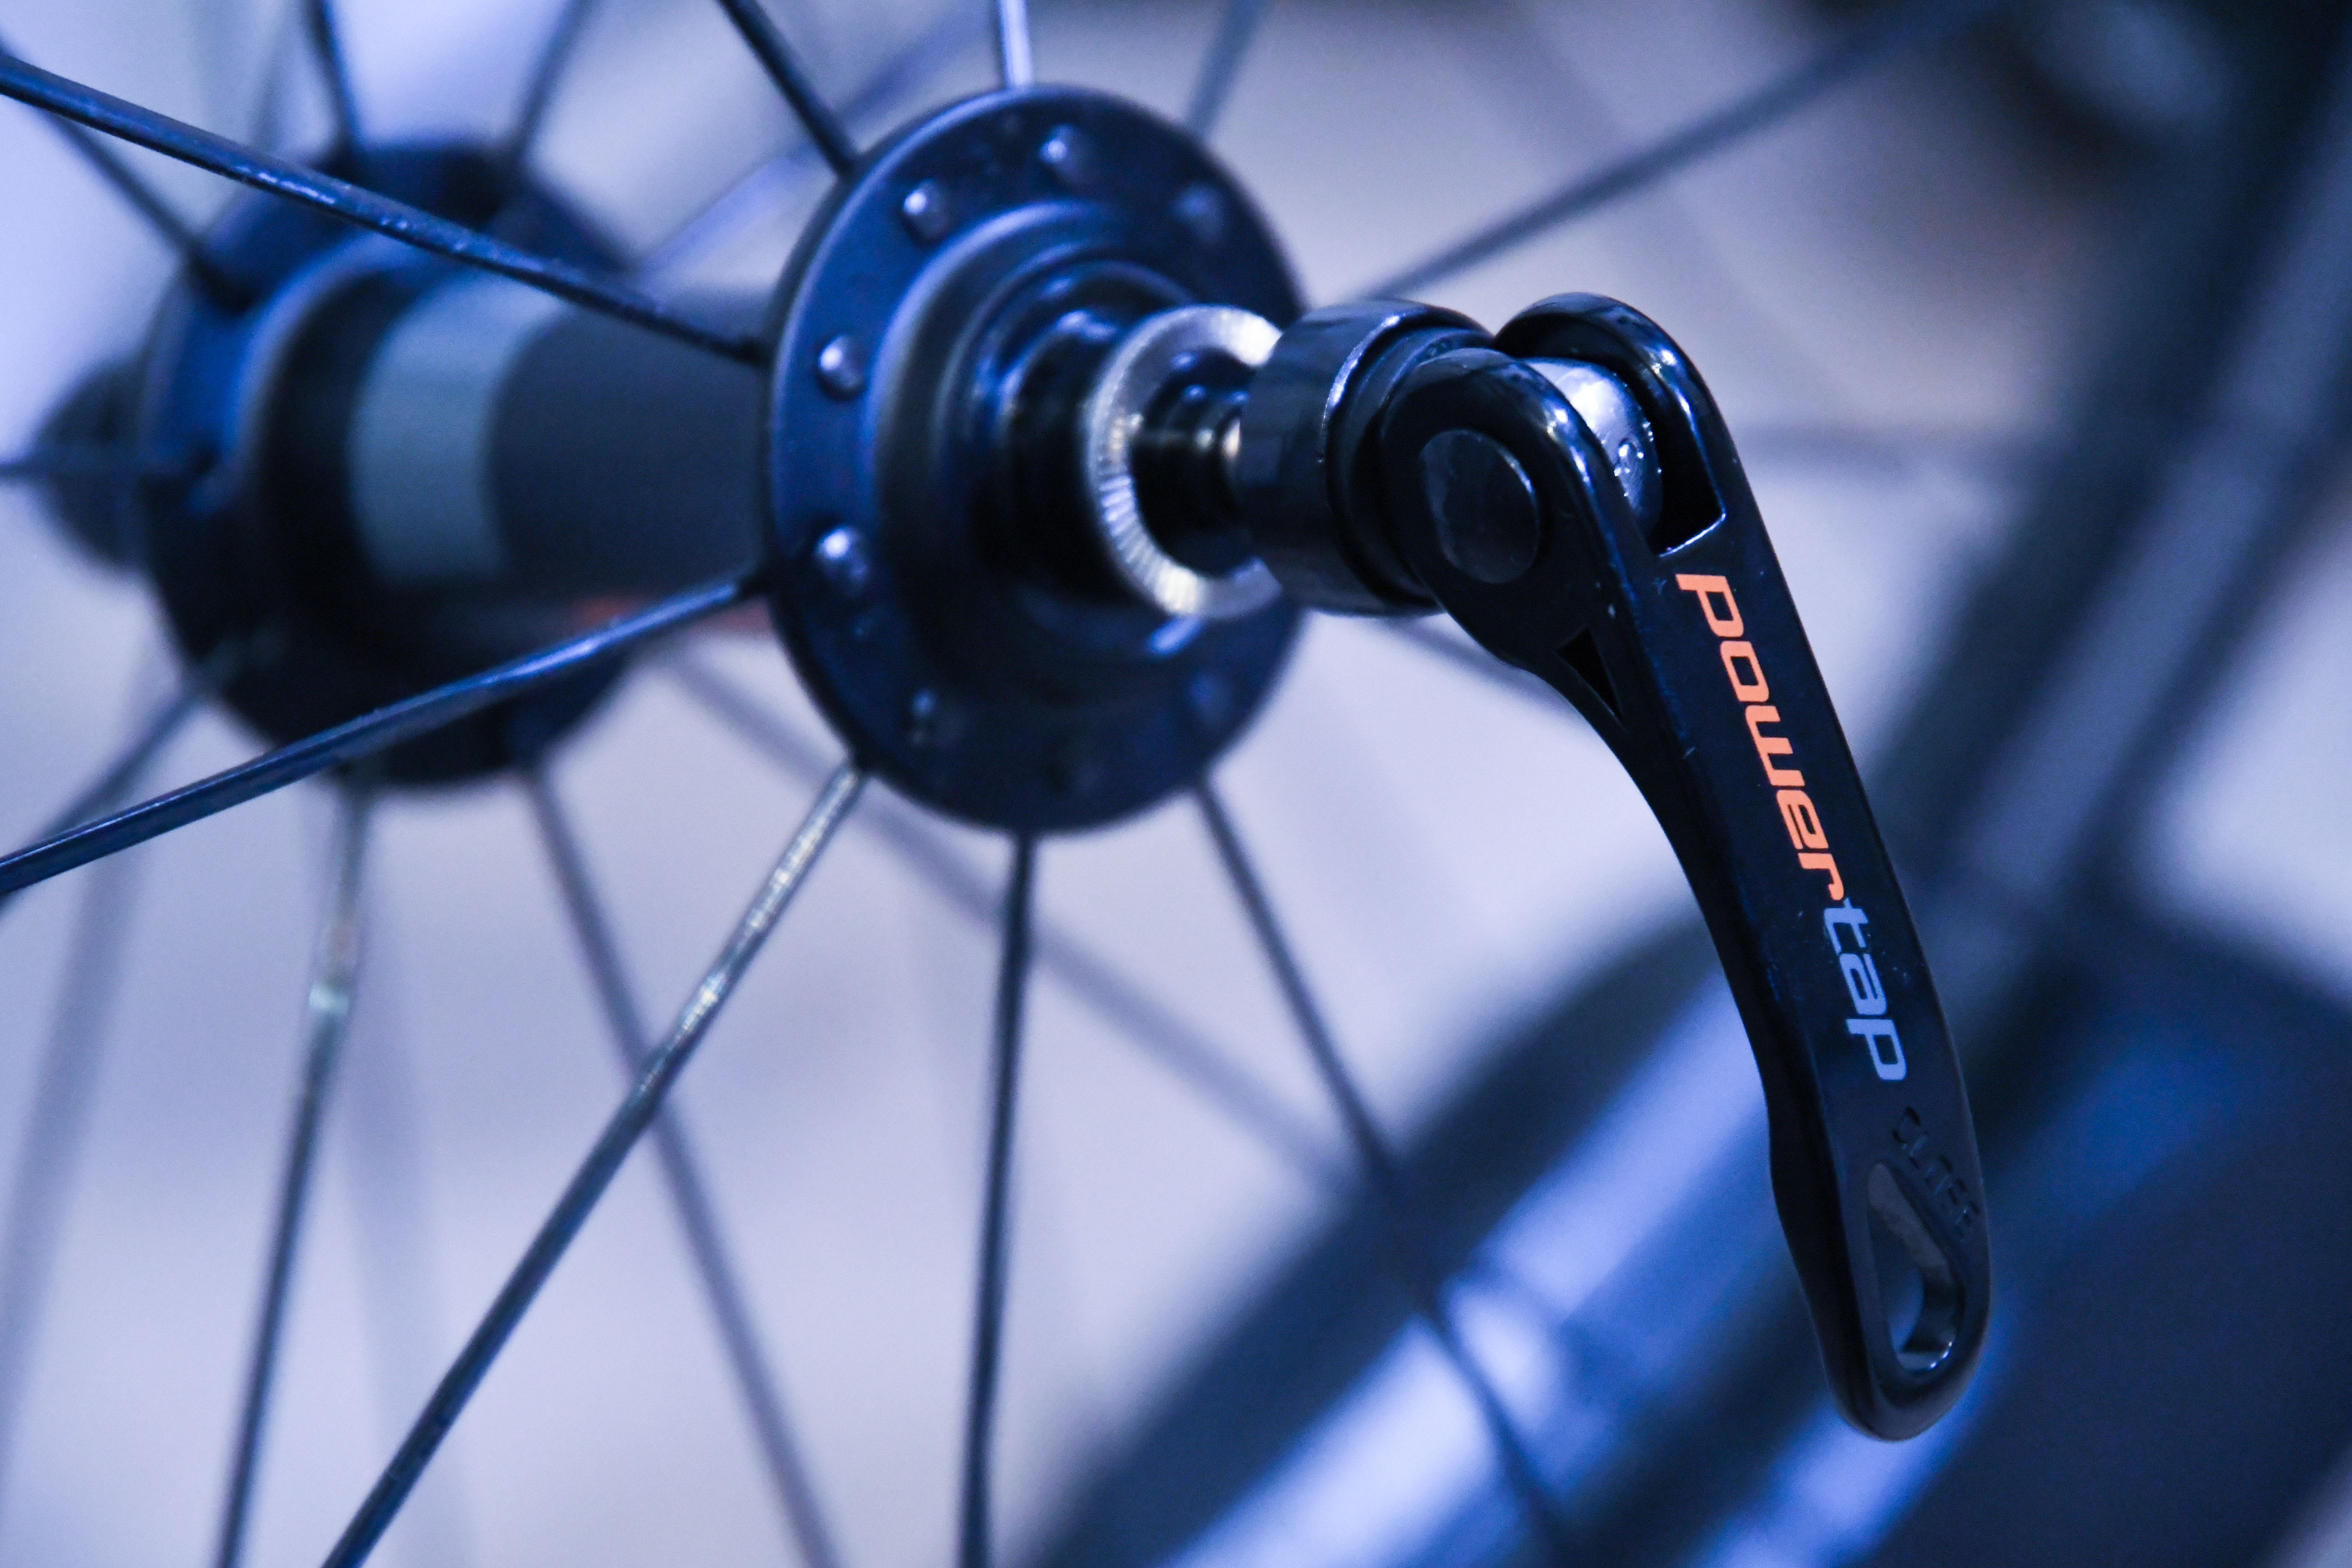
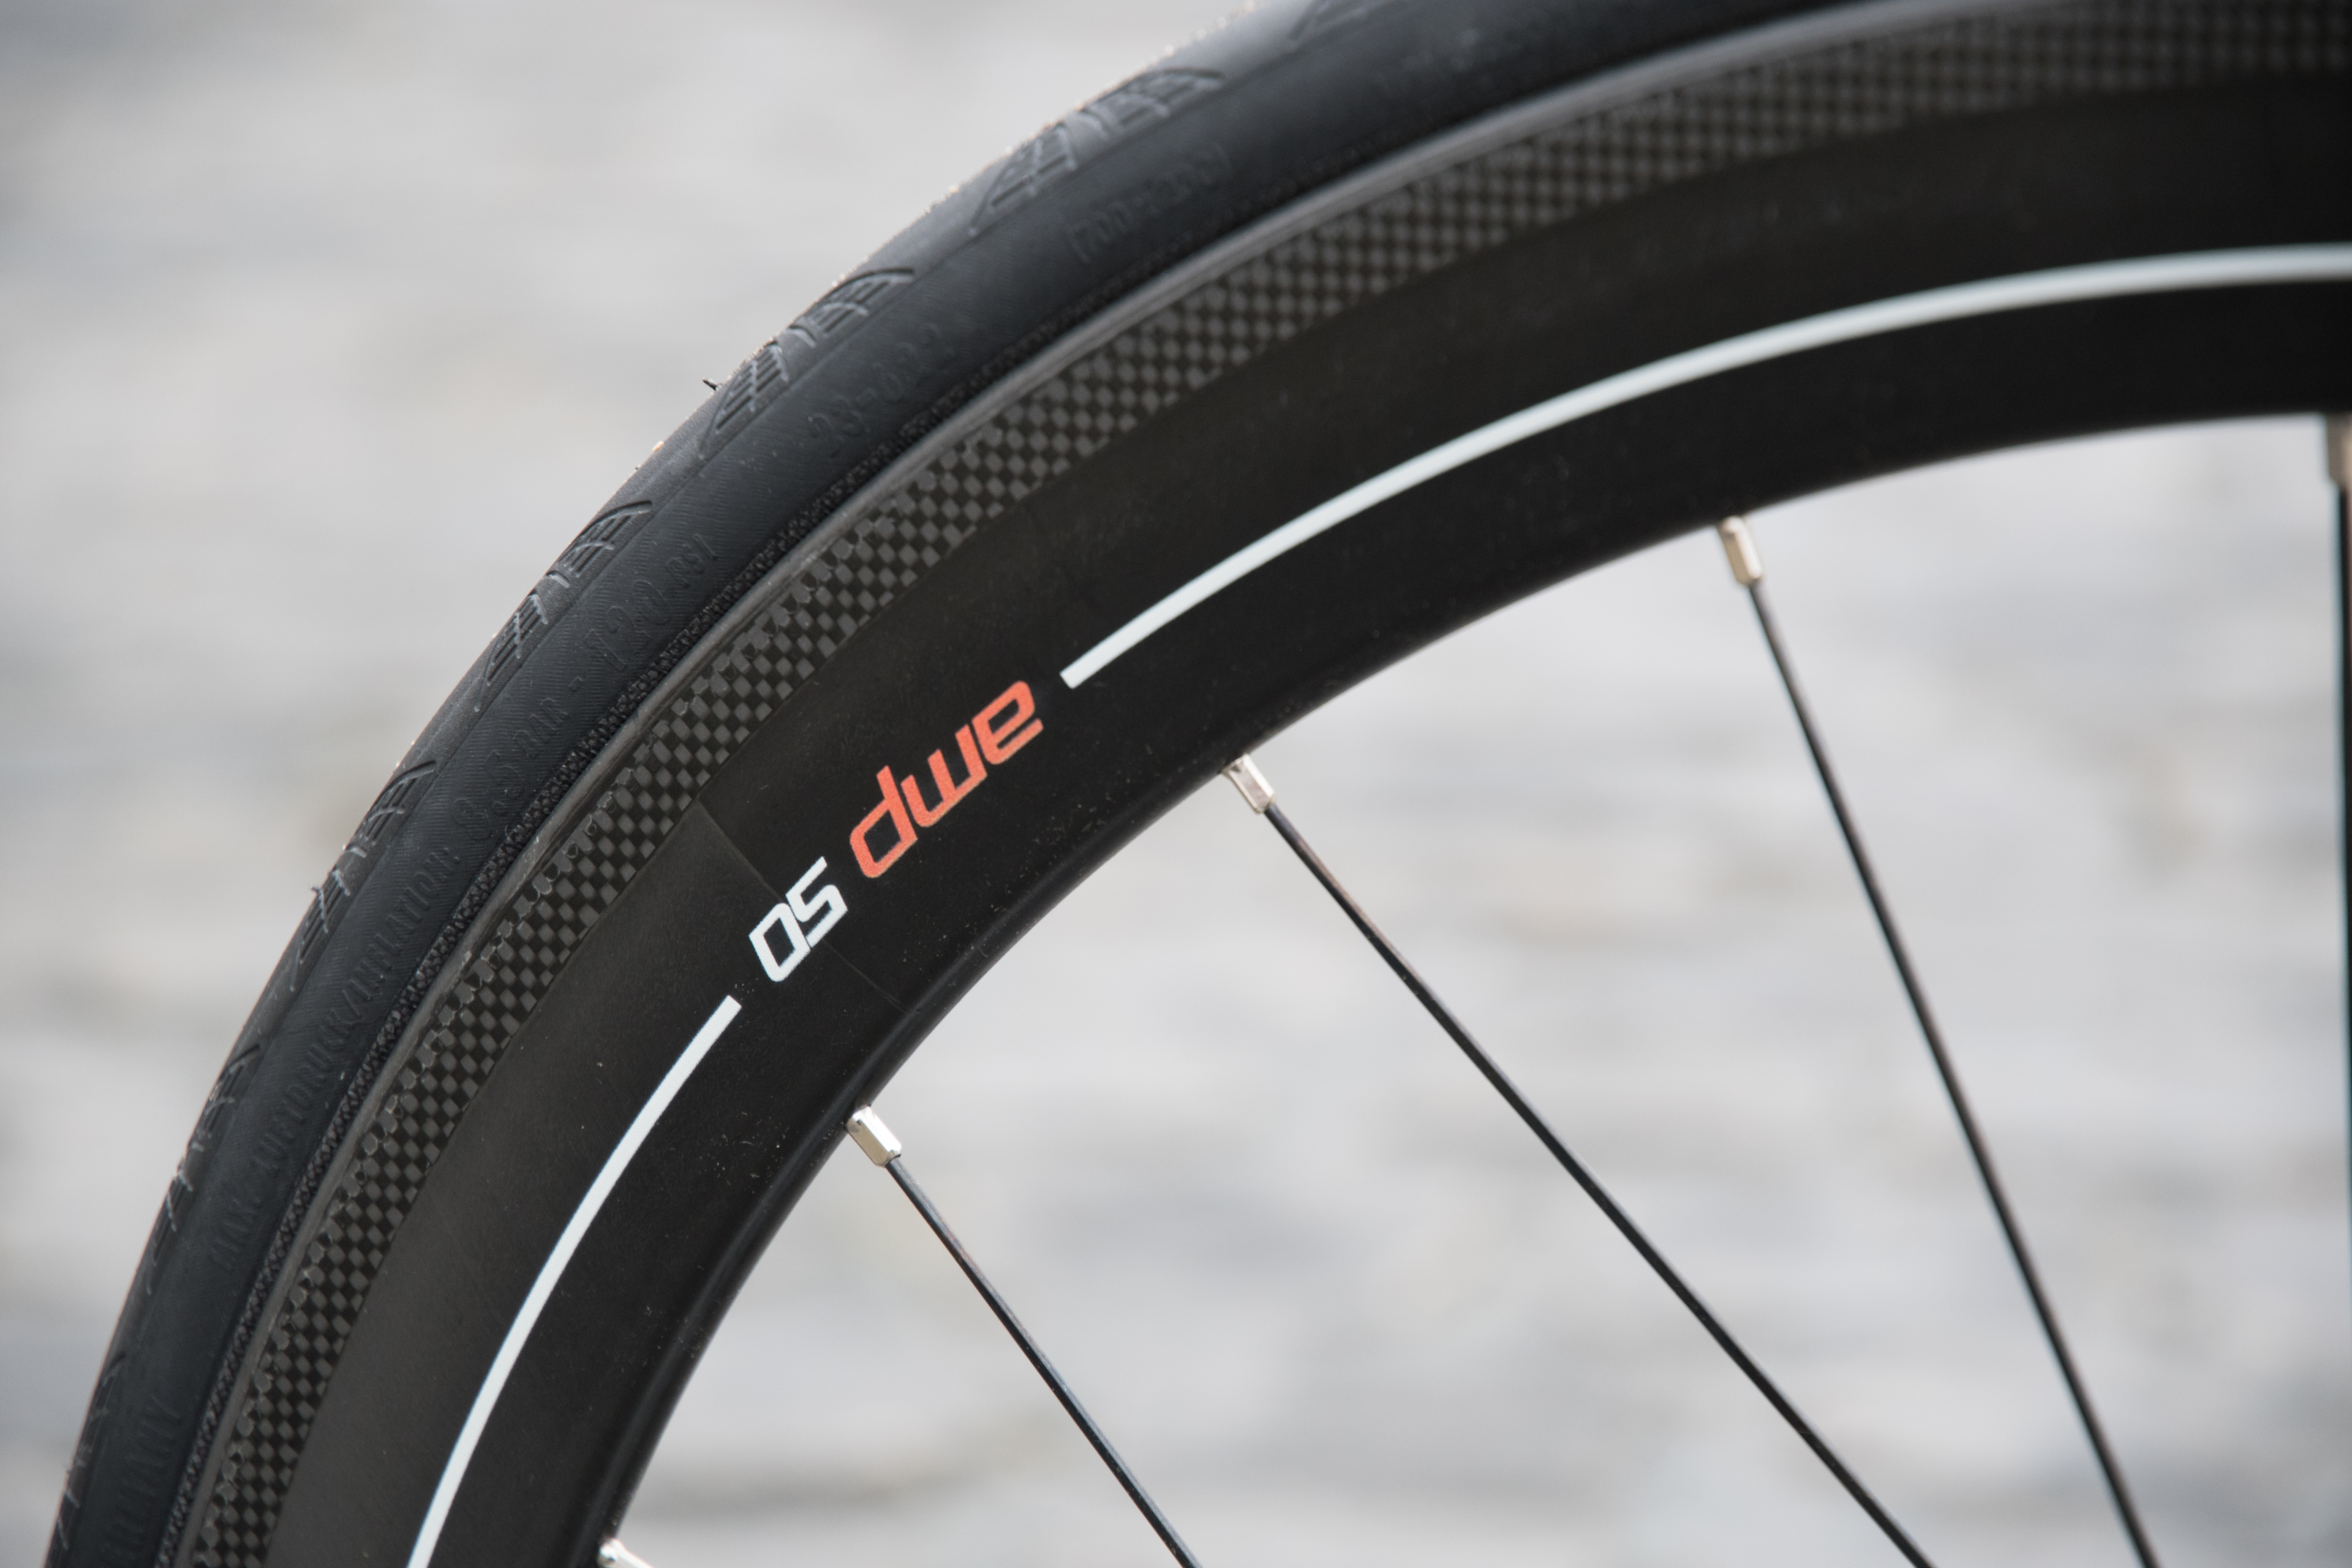
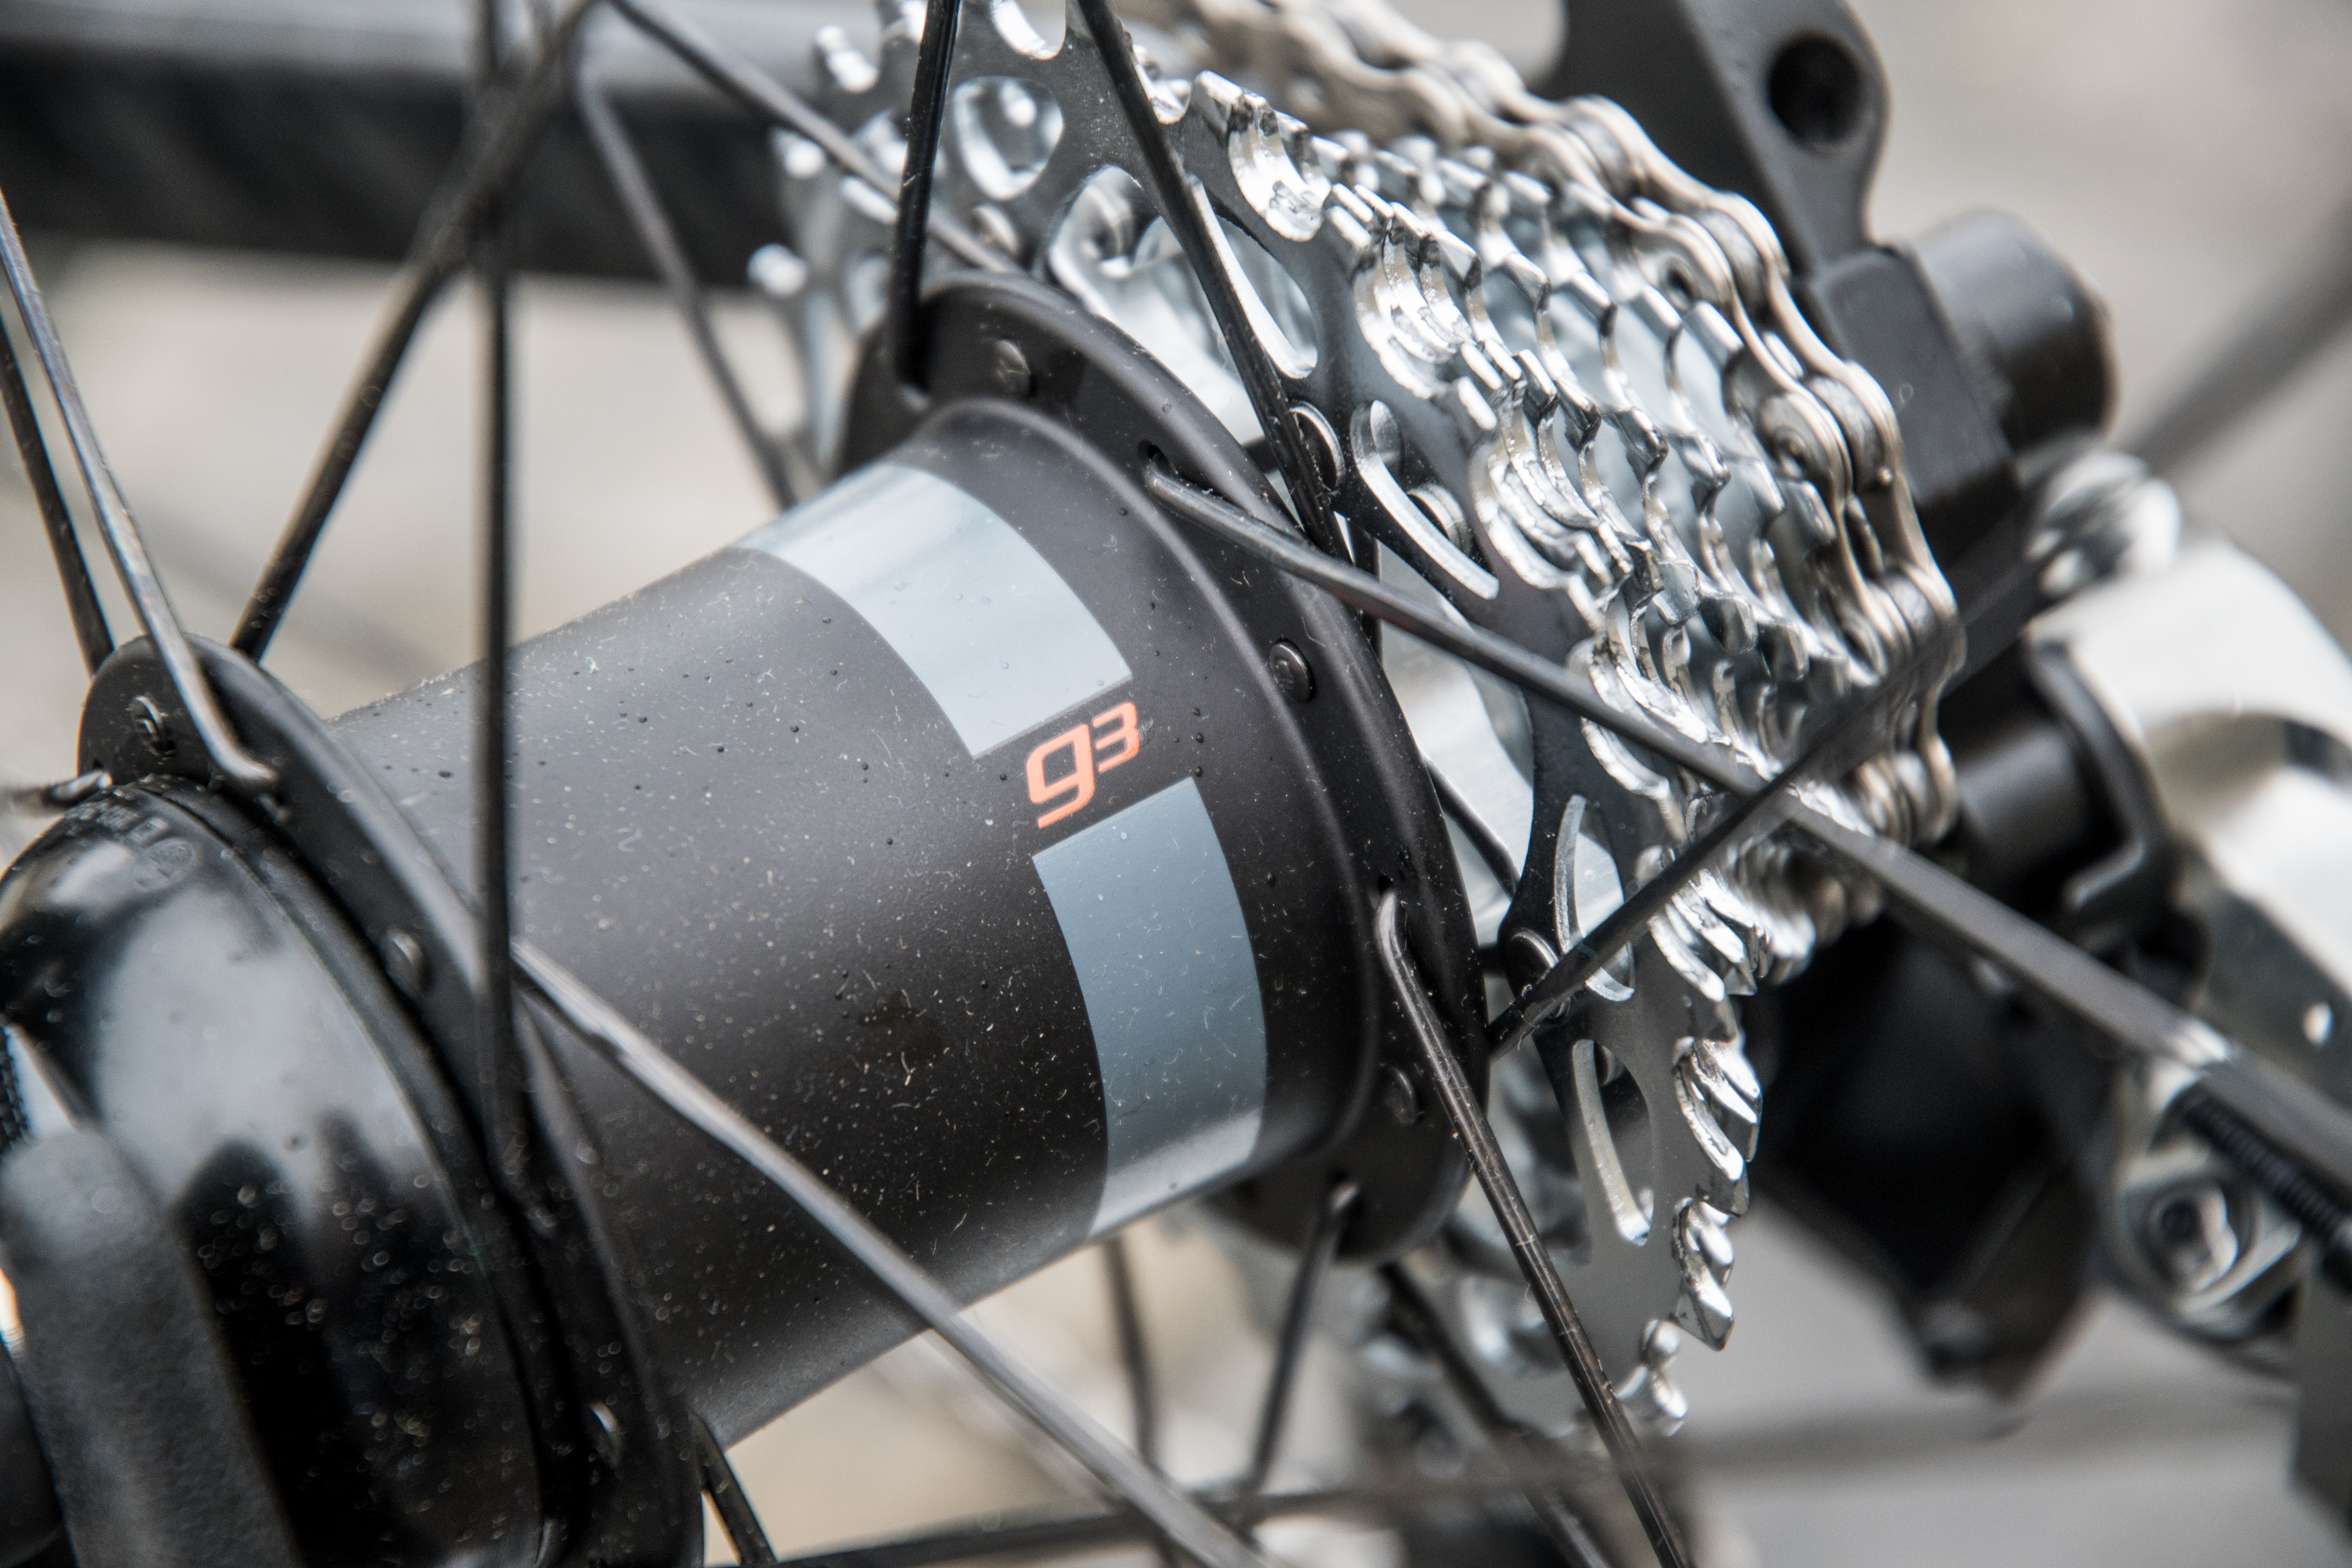
| Wheels + PT Hub | PowerTap G3 AMP 50M Carbon Clincher | Source/Link |
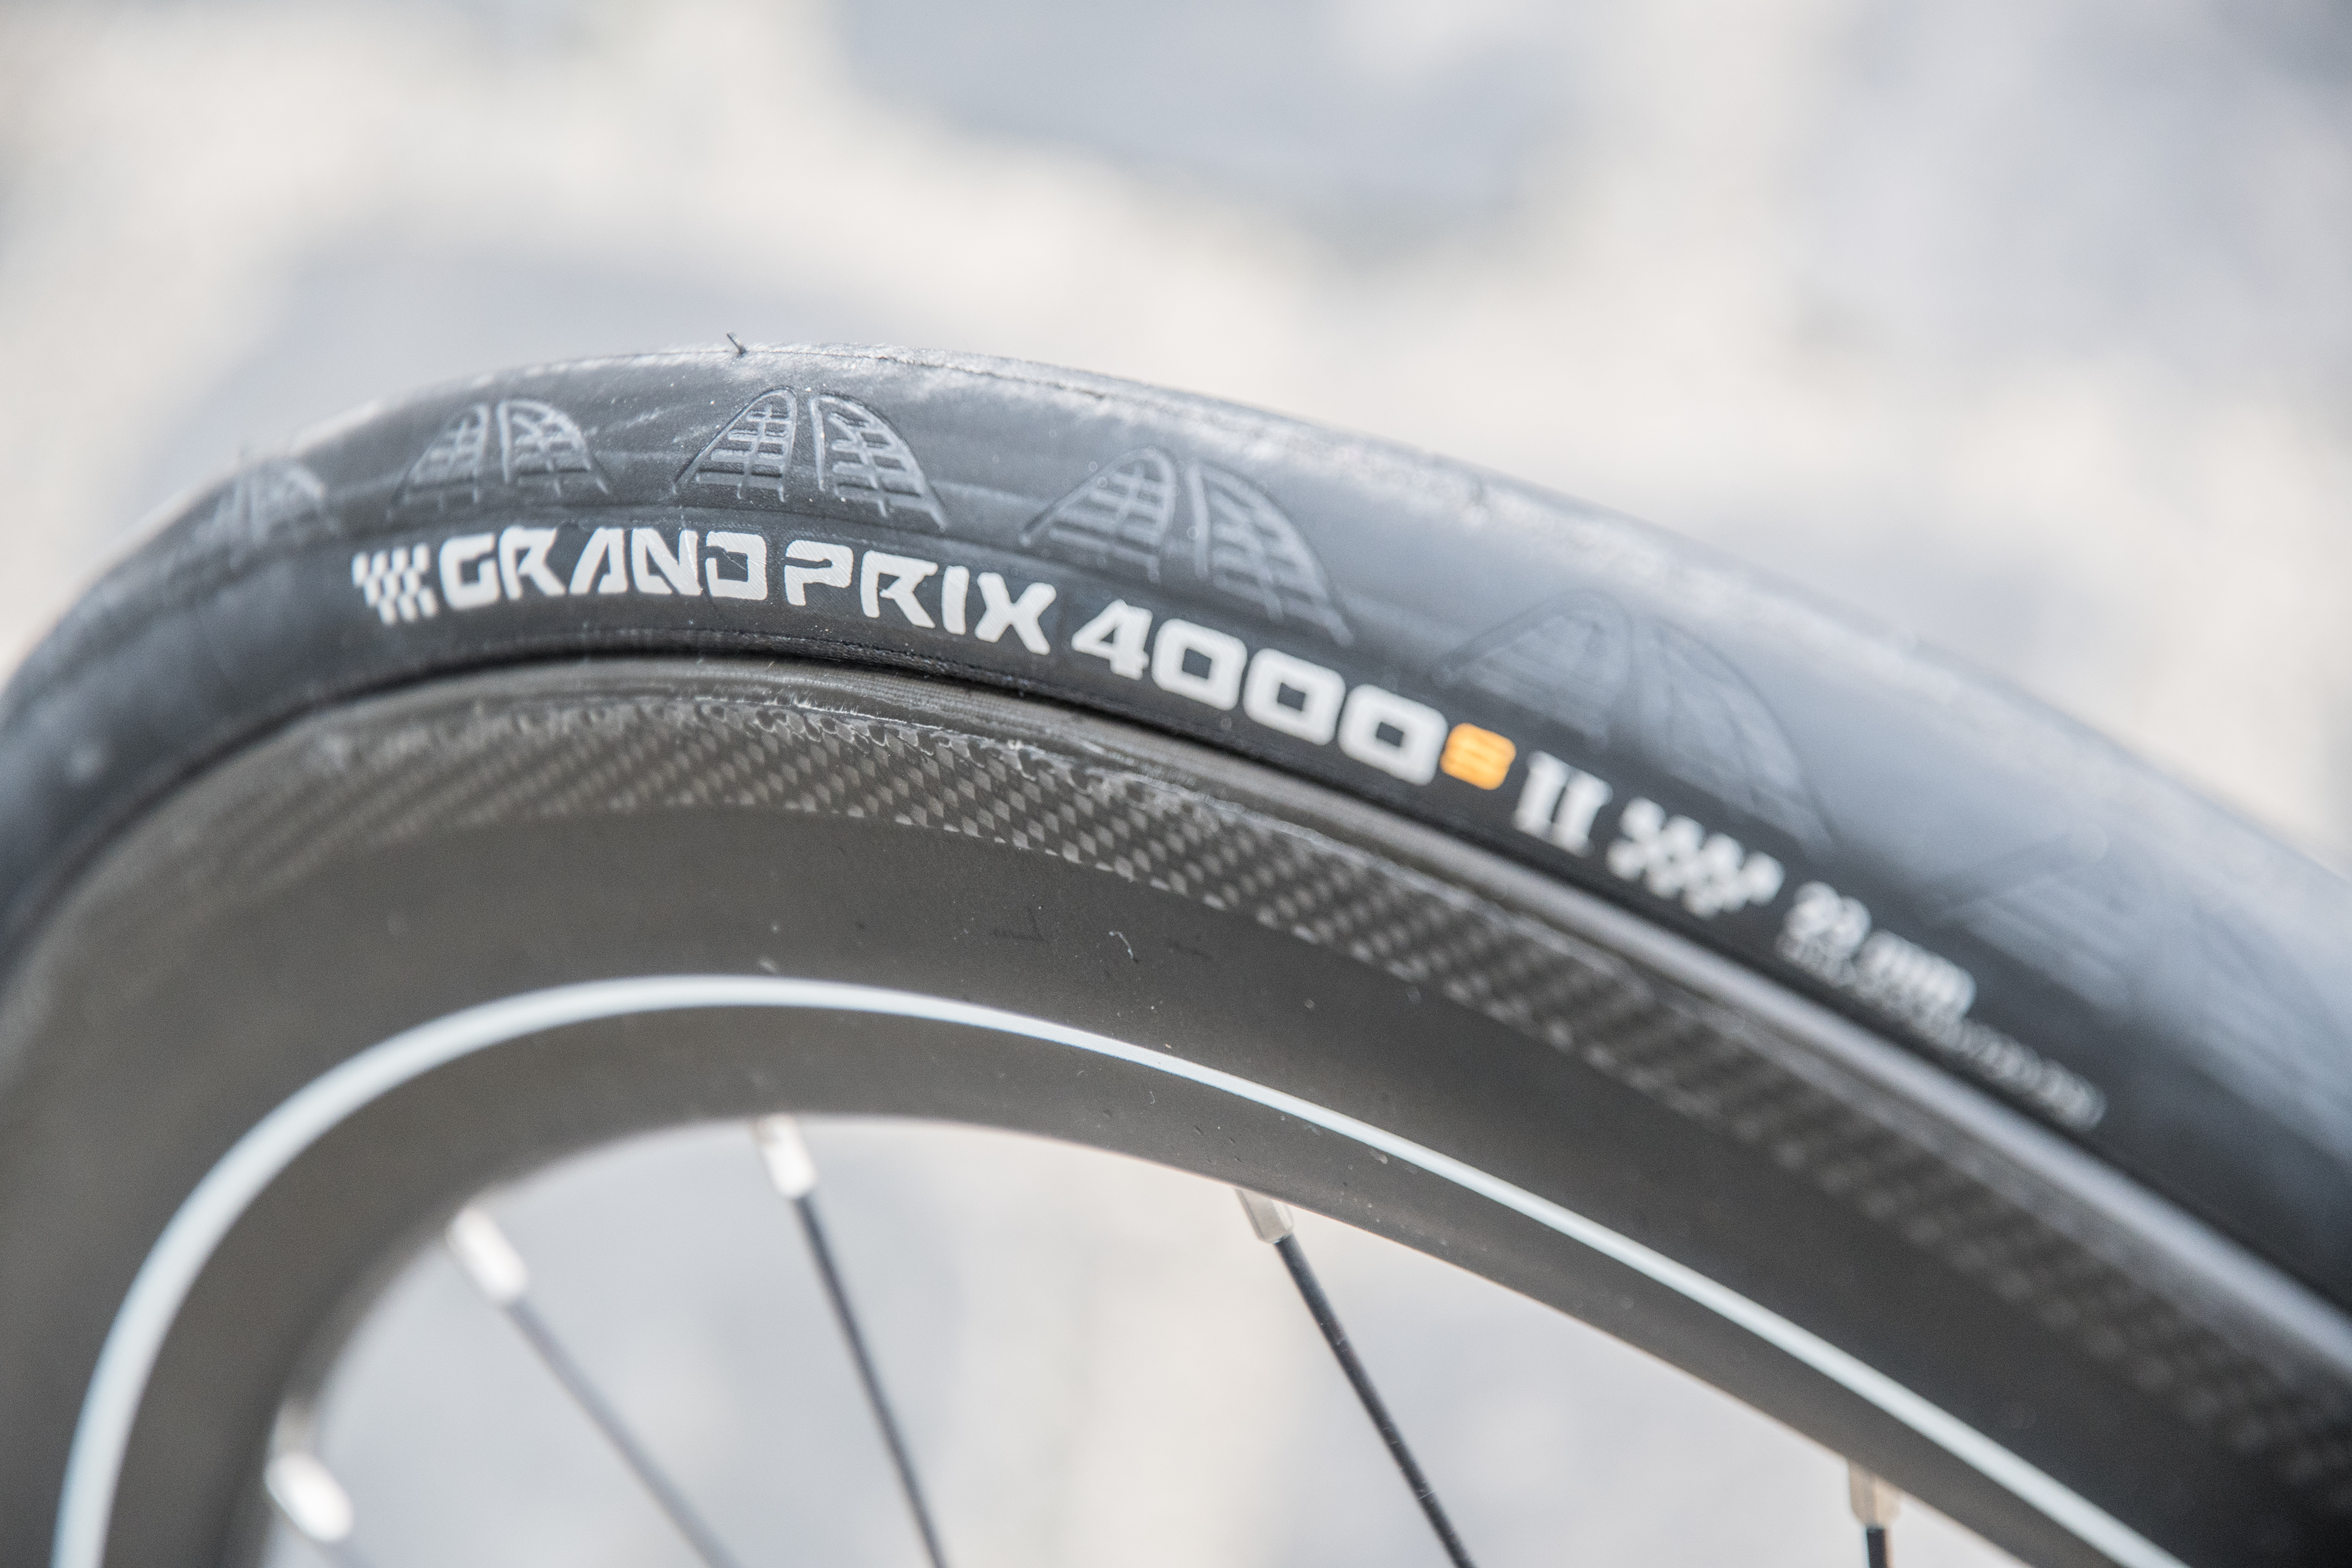
| Tires | Continental Grand Prix 4000s II | Source/Link |
| Tubes | Whatever was sitting in my big bin of tubes | - |
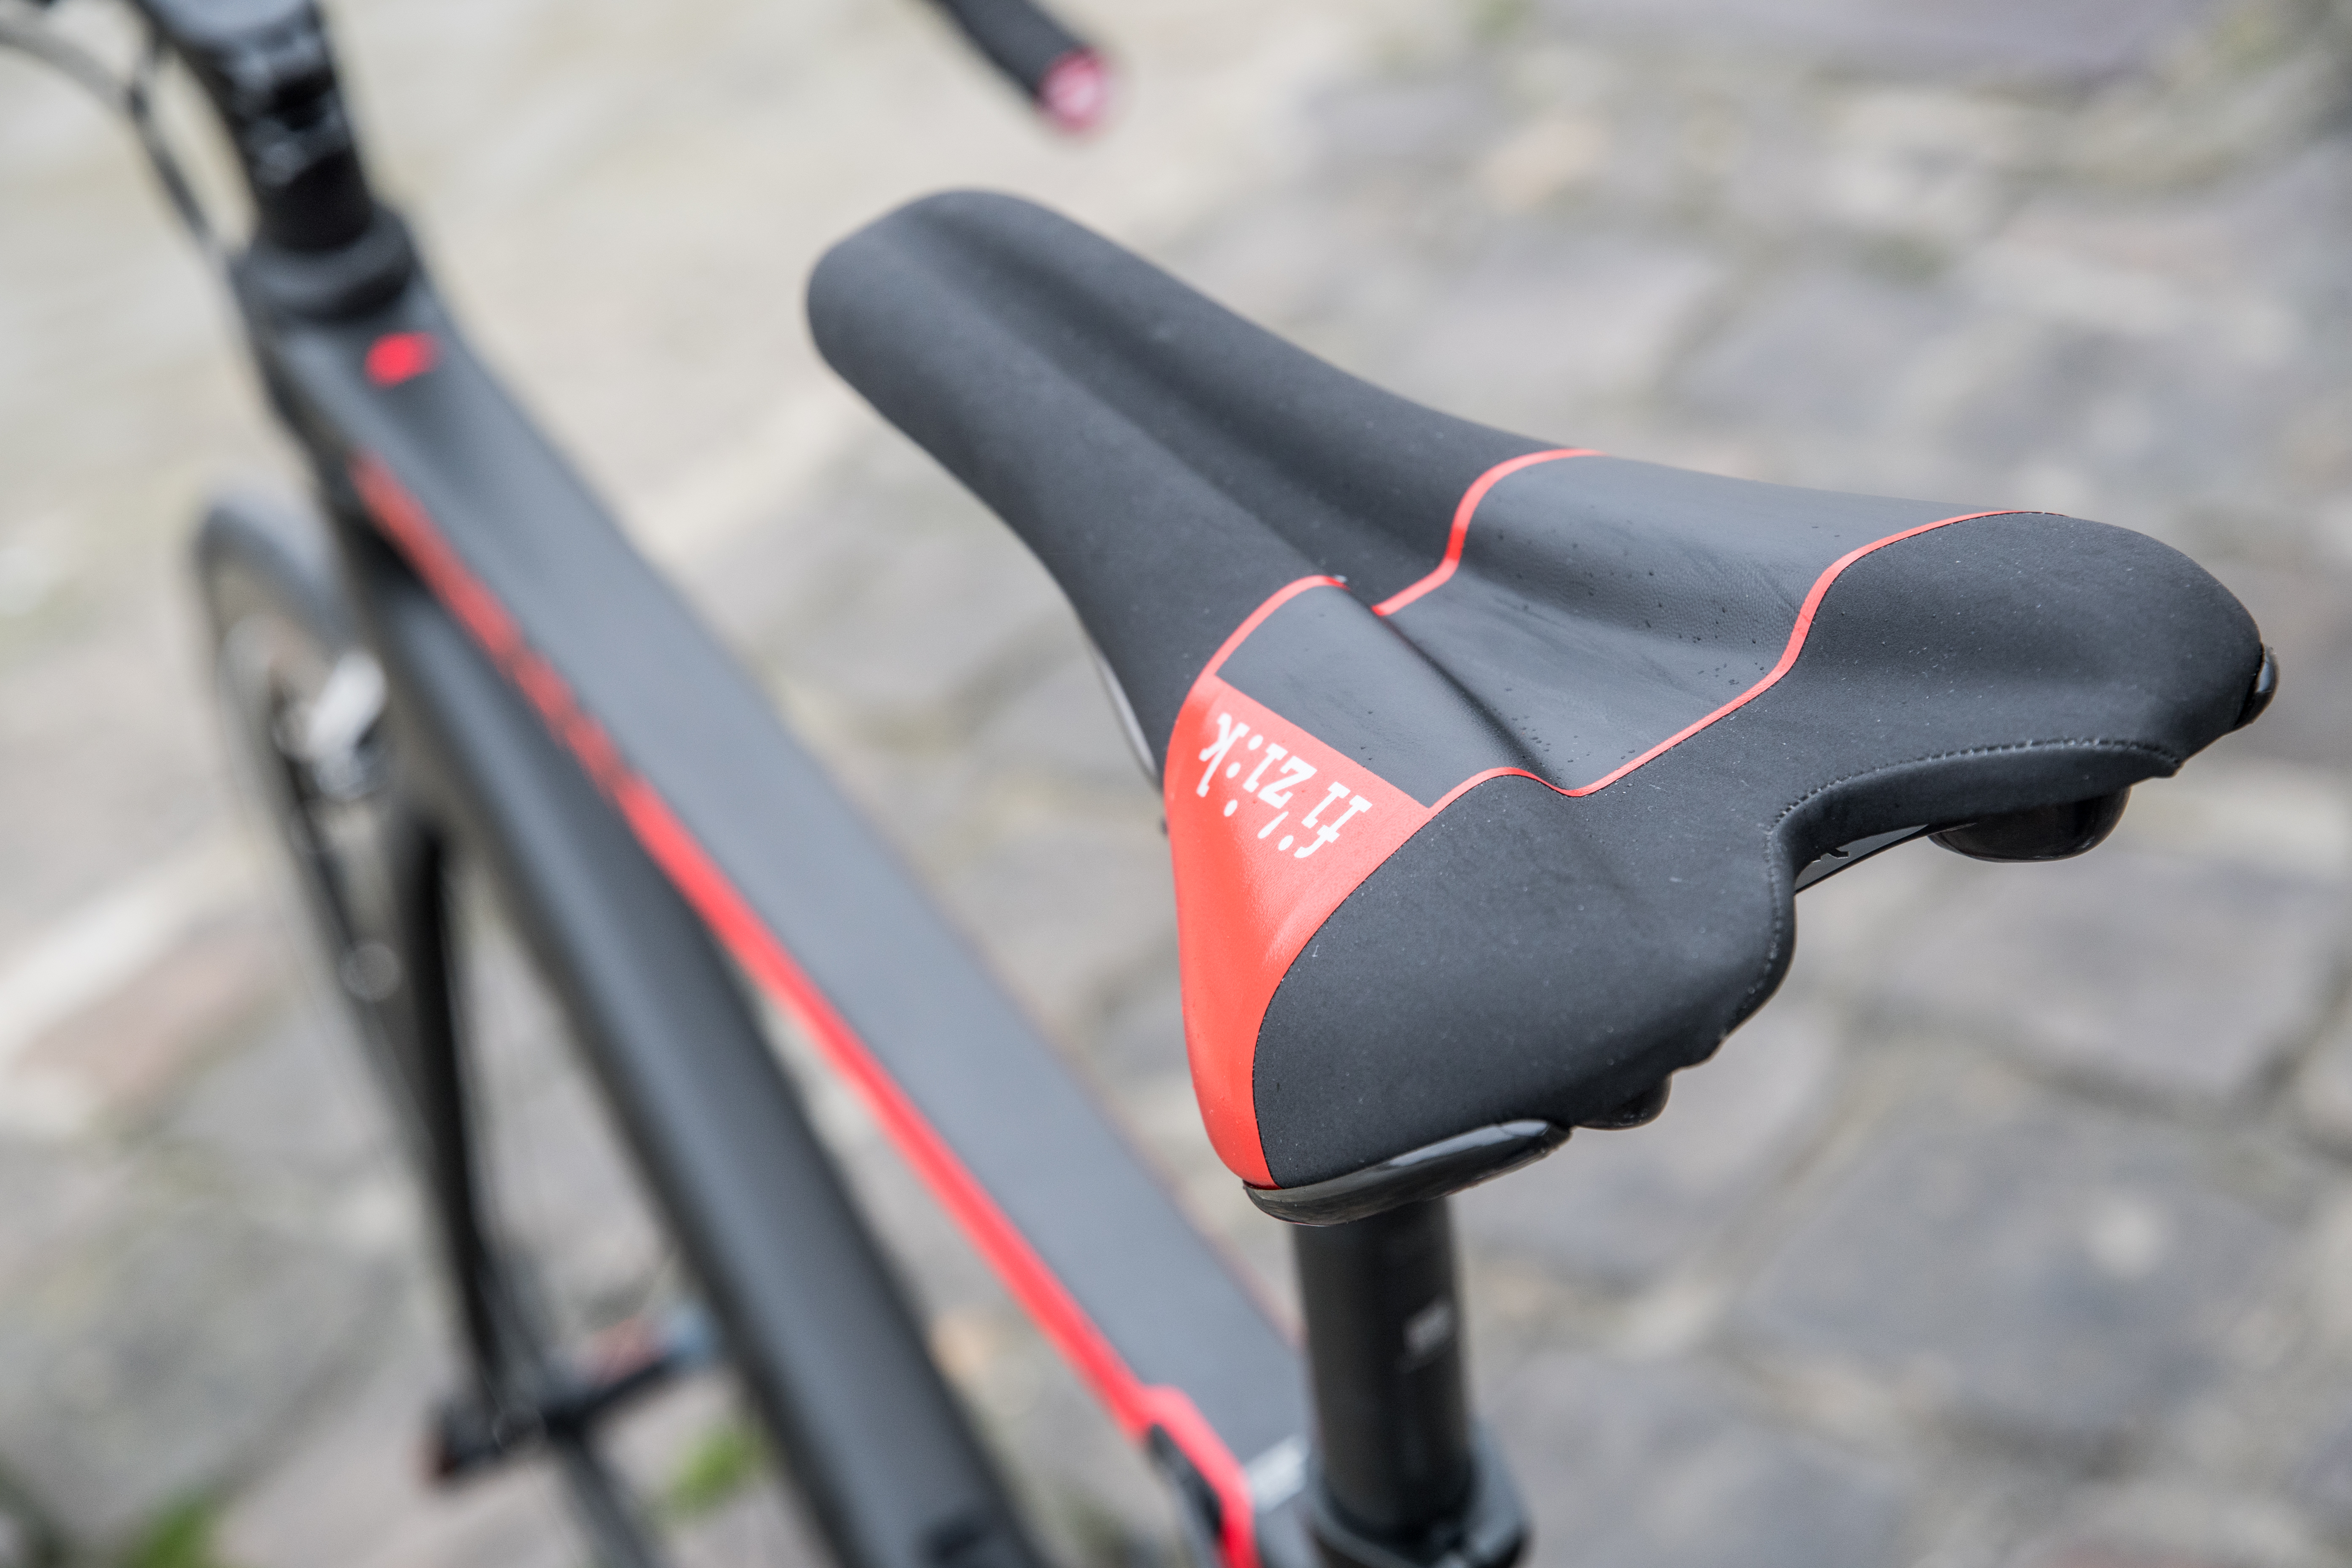
| Seat | Fizik Aliante VSX | Source/Link |
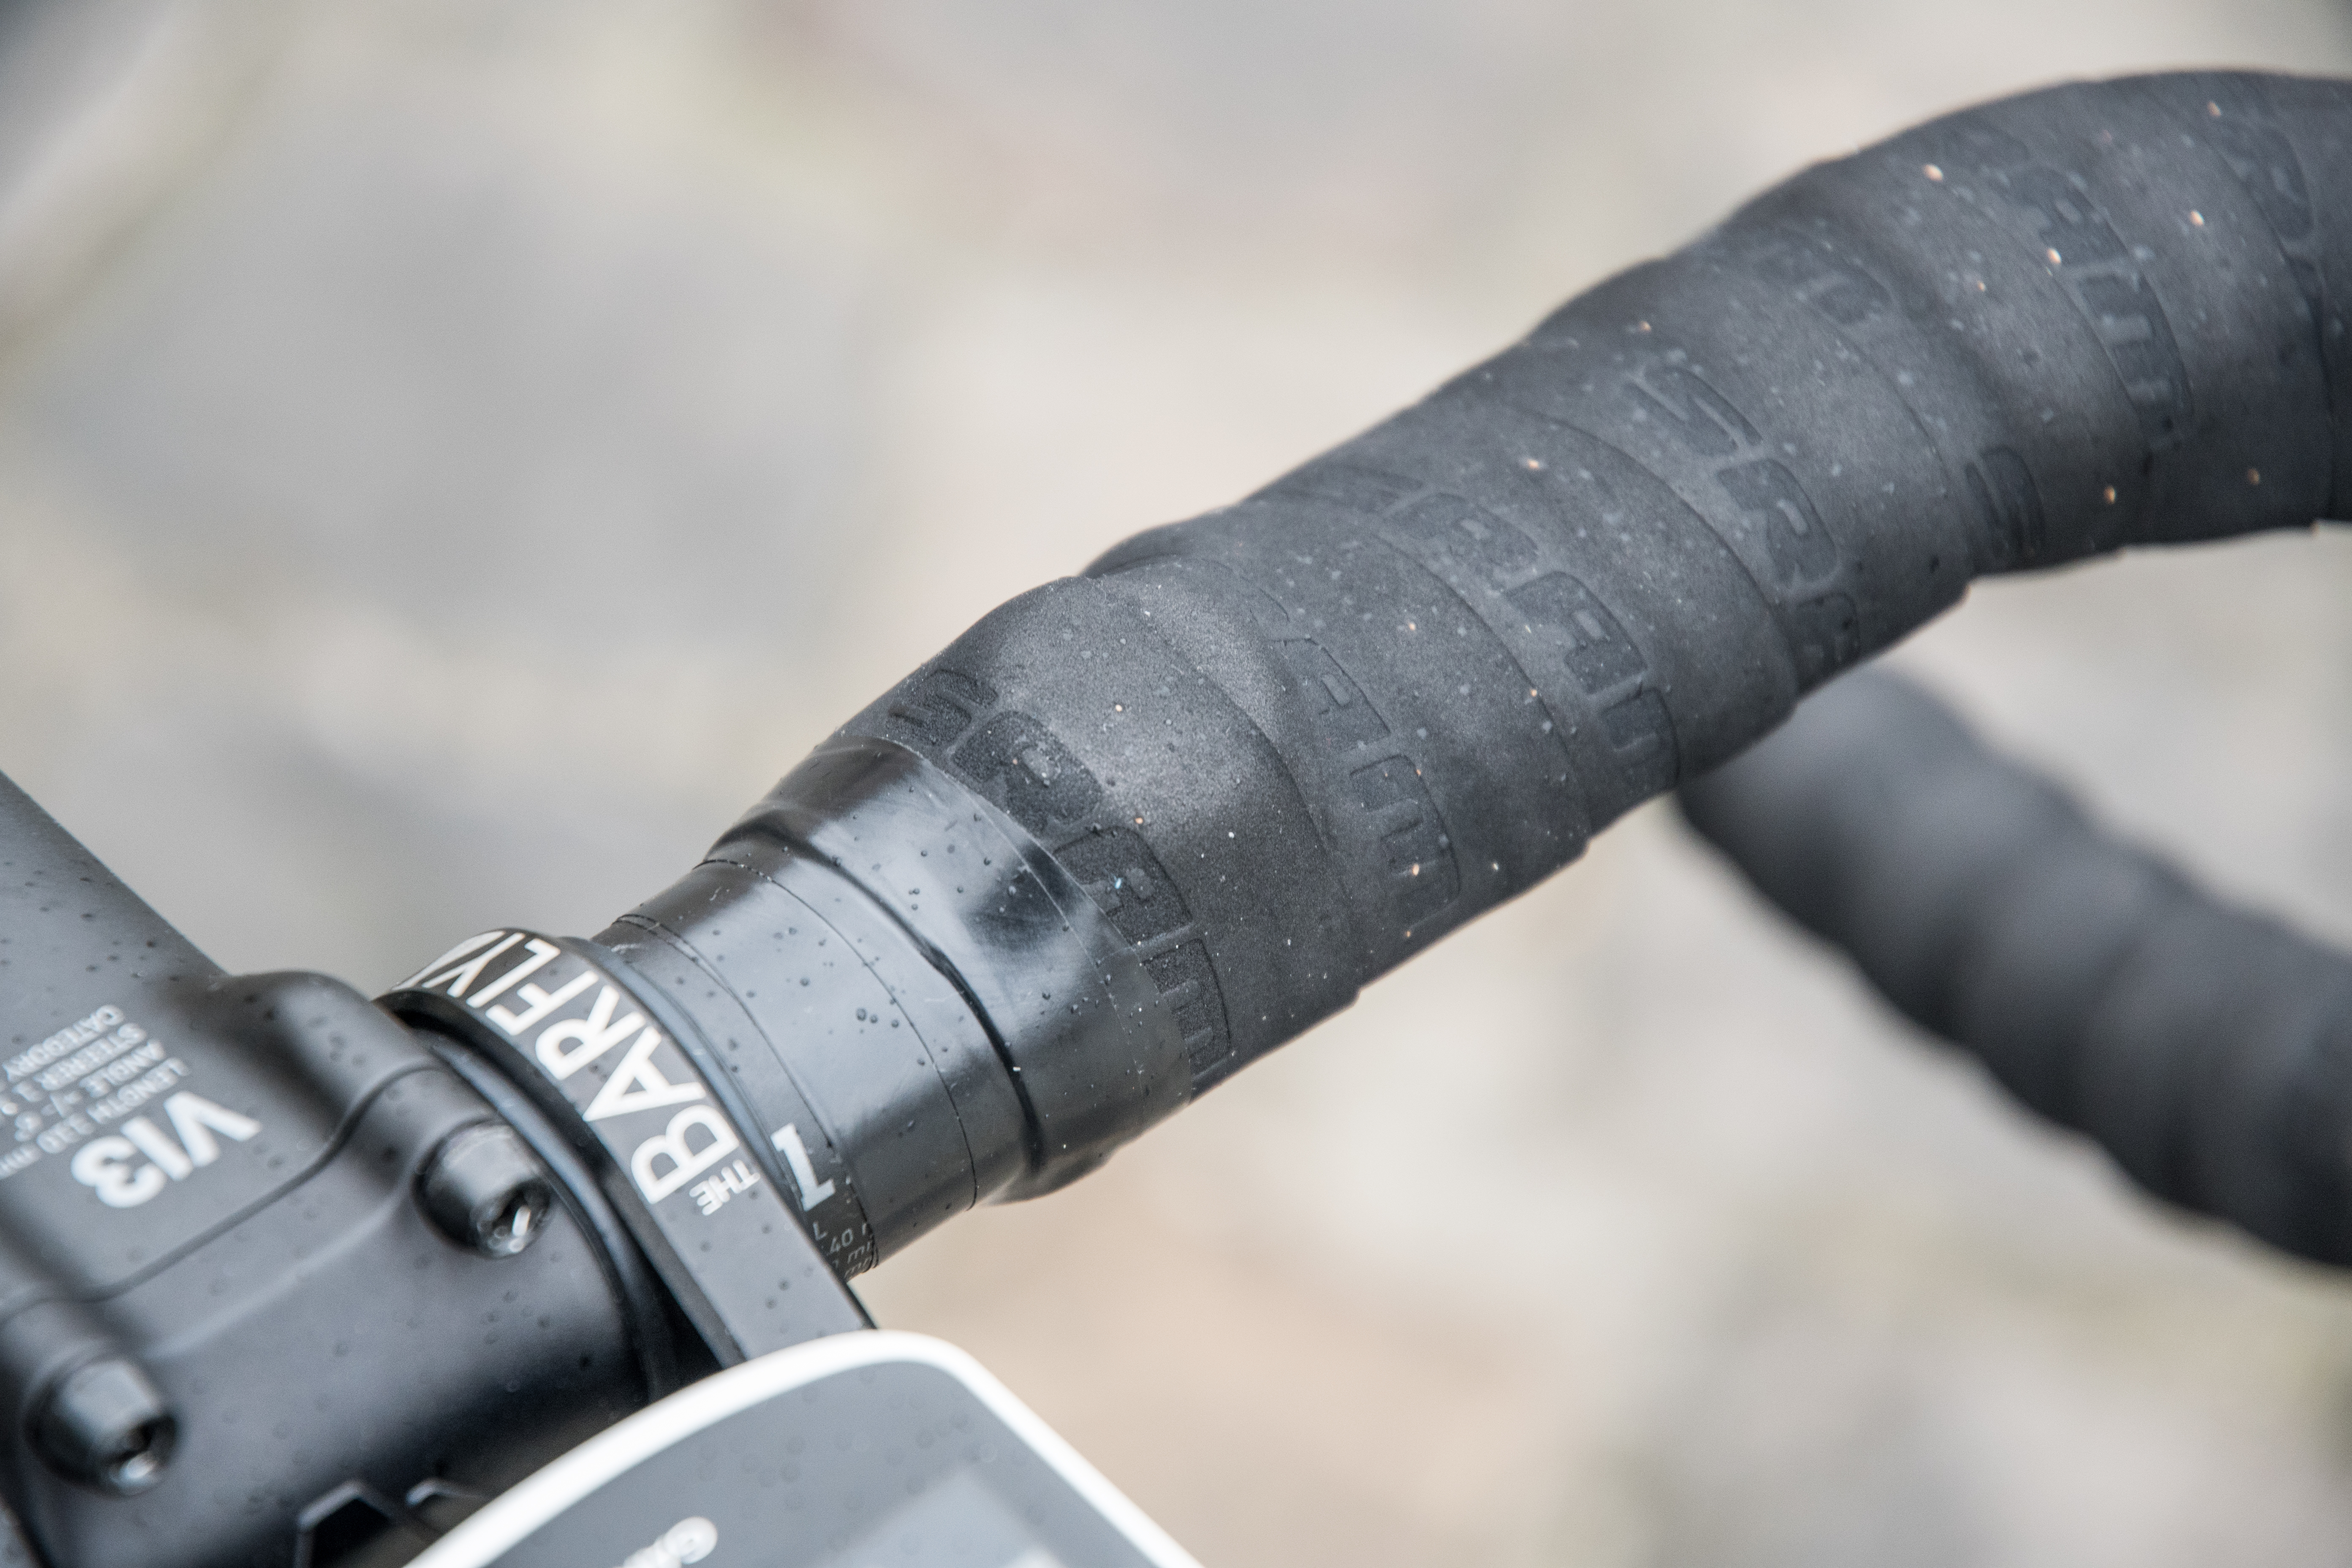
| Handlebars | Canyon H17 ERGO AL Handlebar Black/White | Source/Link |
| Handlebar Tape | SRAM Supercork Bar Tape (already have it) | Source/Link |
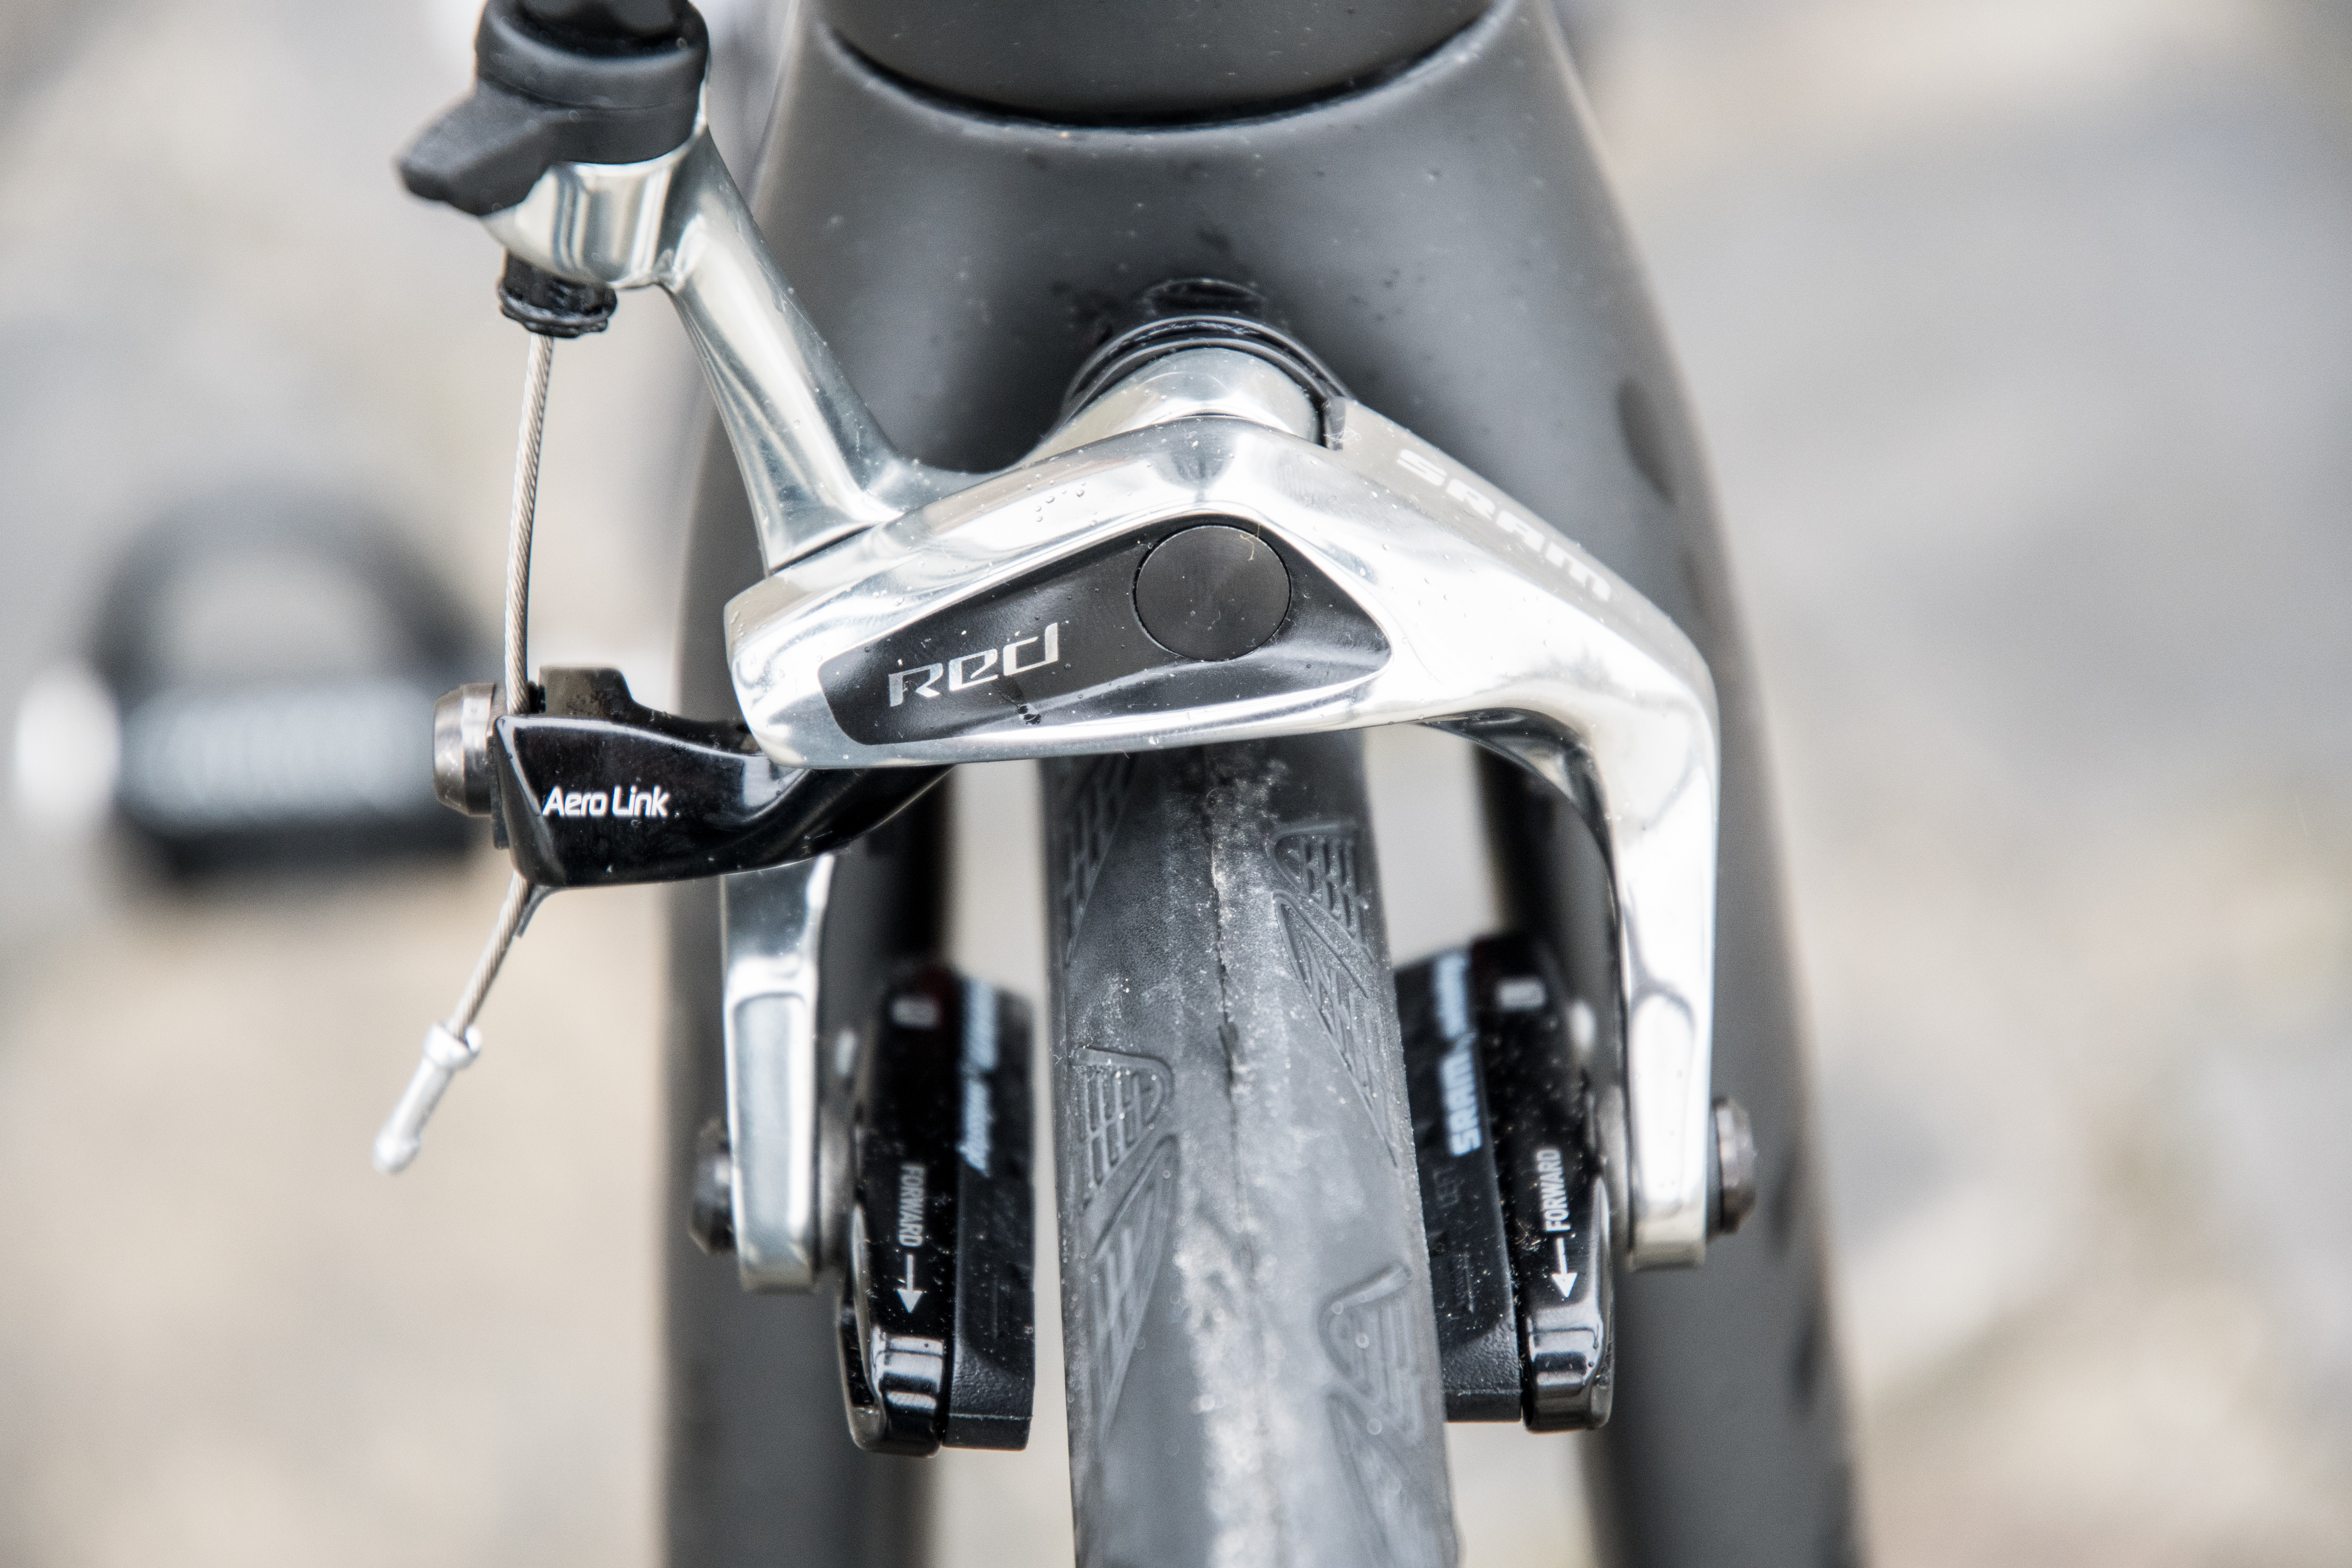
| Brakes | SRAM RED AERO LINK BRAKE SET | Source/Link |
| Bottle Cages | Elite Custom Race Cage Black (x2) | Source/Link |
Now let me dive into why I selected each and every part:
Wheels: This was actually the easiest decision. I wanted a PowerTap wheelset since I often use that as one of the baseline power meters in testing.
Crankset: Like the wheelset, this was also pretty simple. I wanted a crank spider based power meter that I could leverage with other units for power meter testing easily (especially if other units were like WatTeam that were glue-on to the crank arms). That roughly narrowed things down to the Quarq DZero, Power2Max NG, and PowerTap C1. With the C1, that’d be two PowerTap products on the bike, so I wanted some diversity, thus giving me Quarq and Power2Max. Both are incredibly similar, so it really just came down to Clever Training stocking Quarq and not Power2Max (and thus a deal there).
Shifting: I wanted electric shifting for sure, since many bike computers have integration there. And since my triathlon bike (Cervelo P3C) has Shimano Di2, I decided to go for some diversity and went with SRAM RED eTAP here. Plus, between the two systems, I prefer eTAP since it doesn’t take a PhD in factory logistics to figure out all the darn parts you need like Di2.
Chainrings: The FORCE 22 ones are basically the ones that SRAM recommends for the RED lineup, so I just went that direction. I’d note that these are actually really hard to track down in Europe when you get to the nuances of things. Only a handful of retailers actually had them, go figure.
Bottom Bracket and Chain: For the BB, I wanted lots of flexibility with existing crank arms that I had floating around. Simple as that. And the chain? Just to match the RED shifting pieces. Simple as that.
Cassette: My best interweb research seemed to indicate this was the matching cassette for the groupset I was putting together, so, off I went. I was mostly following this page on SRAM’s site.
Brakes: Simply picked these to match the SRAM RED groupset. Again, keeping like across the board here.
Tires: I wanted something not too pricey, but not a horrible penalty from a rolling resistance standpoint. So for that I turned to Tom Anhalt’s famed test list, which is kinda legend in this area. These specific Conti’s ranked near the top of the list.
Pedals: From a power meter test setup standpoint, if I were testing a crank based power meter (such as the Stages LR or Shimano R9100 units that are sitting next to the bike to get installed), I’d want another pedal based power meter to use here. That basically leaves me with the Favero Assioma, PowerTap P1, and Garmin Vector 3. The PowerTap P1’s could mean two PowerTap products at once, so I skipped that. And the Vector 3 units already transmit Cycling Dynamics, so when 3rd parties start to support that, I can validate it this way.
Saddle: As a general rule of thumb I don’t like switching saddles, but when adding another bike to the stable you don’t have the option to just move it to the new bike. So I kinda pulled an option out of my ass here and just picked something that looked to match the bike and by the same brand as some of my other saddles. Again, tech is my thing, not saddles.
Handlebars: As I noted above, I didn’t want aero handlebars, and once you put on the eTAP shifters and bar tape and such, there’s really almost nothing anyone cares about here. So I just picked the Canyon H17’s because it was one less thing to order from somewhere else.
Handlebar tape: At some point long ago I had purchased a few packages of the SRAM bar tape that were sitting unused, so I just used that.
Bottle Cages: They looked pretty, and were available on Amazon France. It’s kinda that simple.
Phew!
So there ya have it, why I did what I did. Obviously, there’s a million and one ways to build a bike, this was just sorta how I got to where I got to. The changing of the frame to a different brand wouldn’t have really changed much in the way of components too much to be honest, save the handlebar I bought from Canyon. I’d have just then bought a different nondescript handlebar instead.
With that, let’s dive into building it up.
Putting it together:

Let me start with two important notes:
1) I’ve never built a bike from scratch before
2) This probably looks like it takes longer than it does
Of course, both of those notes are somewhat misleading. True, I’ve never built a bike from scratch before, but I’m constantly tearing apart bikes to put new test components on. So while I’d fail at every aspect of being a bike mechanic, I can roughly stumble my way around a new/clean bike setup as long as I’ve Google’d or YouTube’d enough.
The second is that the entire install process from start to finish would have taken probably about 3-4 hours tops. Some of my time was spent photographing things for this post, and then some slight delays for waiting for missing parts (I lost a tiny pack of eTAP screws to attach the front derailleur when I got the eTAP parts a year ago) and/or dealing with slightly incorrect parts (I stupidly got the non-hidden bolt chainring for the hidden bolt crankset). Still, it was all surprisingly simple to put together.
Here’s a gallery of boxed parts where I started from. The only exception is the eTAP box, which I got a year ago and had been sitting around the Cave consolidated into a single mini box (to see the gigantic box it comes in, check out my full post here).


Next, I didn’t have a terribly logical order. I just sorta did different pieces as I felt like doing them, somewhat spread over the course of a week or so in between doing other unrelated tasks. Again, total time was 3-4 hours, and if I wasn’t taking pictures I could probably knock it all out in under 3 hours.
The very first thing I did was put the cassette on the rear wheel. I started here because for whatever reason I don’t have a bike stand and instead just use a trainer as a bike mechanic stand (I used to have two stands, but I’m not sure where they went when we moved to Paris over 5 years ago). So, I needed wheels on the bike to work with it.


Next, with that solved, I went for installing the chainrings on the Quarq DZero. This is a task that shouldn’t have taken more than a few minutes, but as I noted above I stupidly ordered the non-hidden bolt chainrings for the hidden bolt crankset. There’s basically two options, and it doesn’t much matter which option you choose as long as they match.


Suffice to say, this took a heck of a lot longer since tightening the bolt is immensely more complex this way. Someday I’ll swap it out for the right chainrings since chainrings are cheap (so it doesn’t have two tiny stubs sticking out), but today was not that day.


Next, I plopped the saddle on the frame. Actually, technically I did that before I finished the chainring situation, because I was frustrated with that.


Then it was off to put the handlebars on the stem:


Next, I put the two front shifters on the handlebars (because doing so was silly simple and I was still annoyed with my crankset situation).

Then it was back to the crankset region to install the bottom bracket.


With that in place, I slid the Quarq into the bottom bracket:

From there it was off to install the derailleurs. I started with the front one and got it all aligned and hooked up:

Then it was back to the rear one to connect that:

Along the way I paired them to the front shifters (since they’re all wireless). Funny enough, I actually used my SRAM RED eTAP In-Depth Review to remember which buttons to press.
With hardware installed, I decided to shift gears and install the brakes. I did this just because. Not because there’s any logical reason. In theory, most people probably would have then installed the chain and got shifting perfected, but I’m not most people…nor a bike mechanic.

The front brake went on quick and easy:

And then did the rear:

Seriously, dead simple.
Then I went ahead and threaded the brake cable using the small tube provided within the bike frame:


After which I cut some brake cable housing to cover the gaps at both the front and rear of the bike:

Boom, done with that! I’d say the measure five times and cut once (or 5 more times) process of the brake cabling and housing was the most time-consuming part. Mostly because I was so cautious that I kept on slowly cutting only a tiny bit at a time to make it perfect (without cutting too much).

Next, it was time to get the chain installed, which only took a second or two after removing a couple links. I then spent a bit of time perfecting the shifting.


Then I plopped on my pedals:


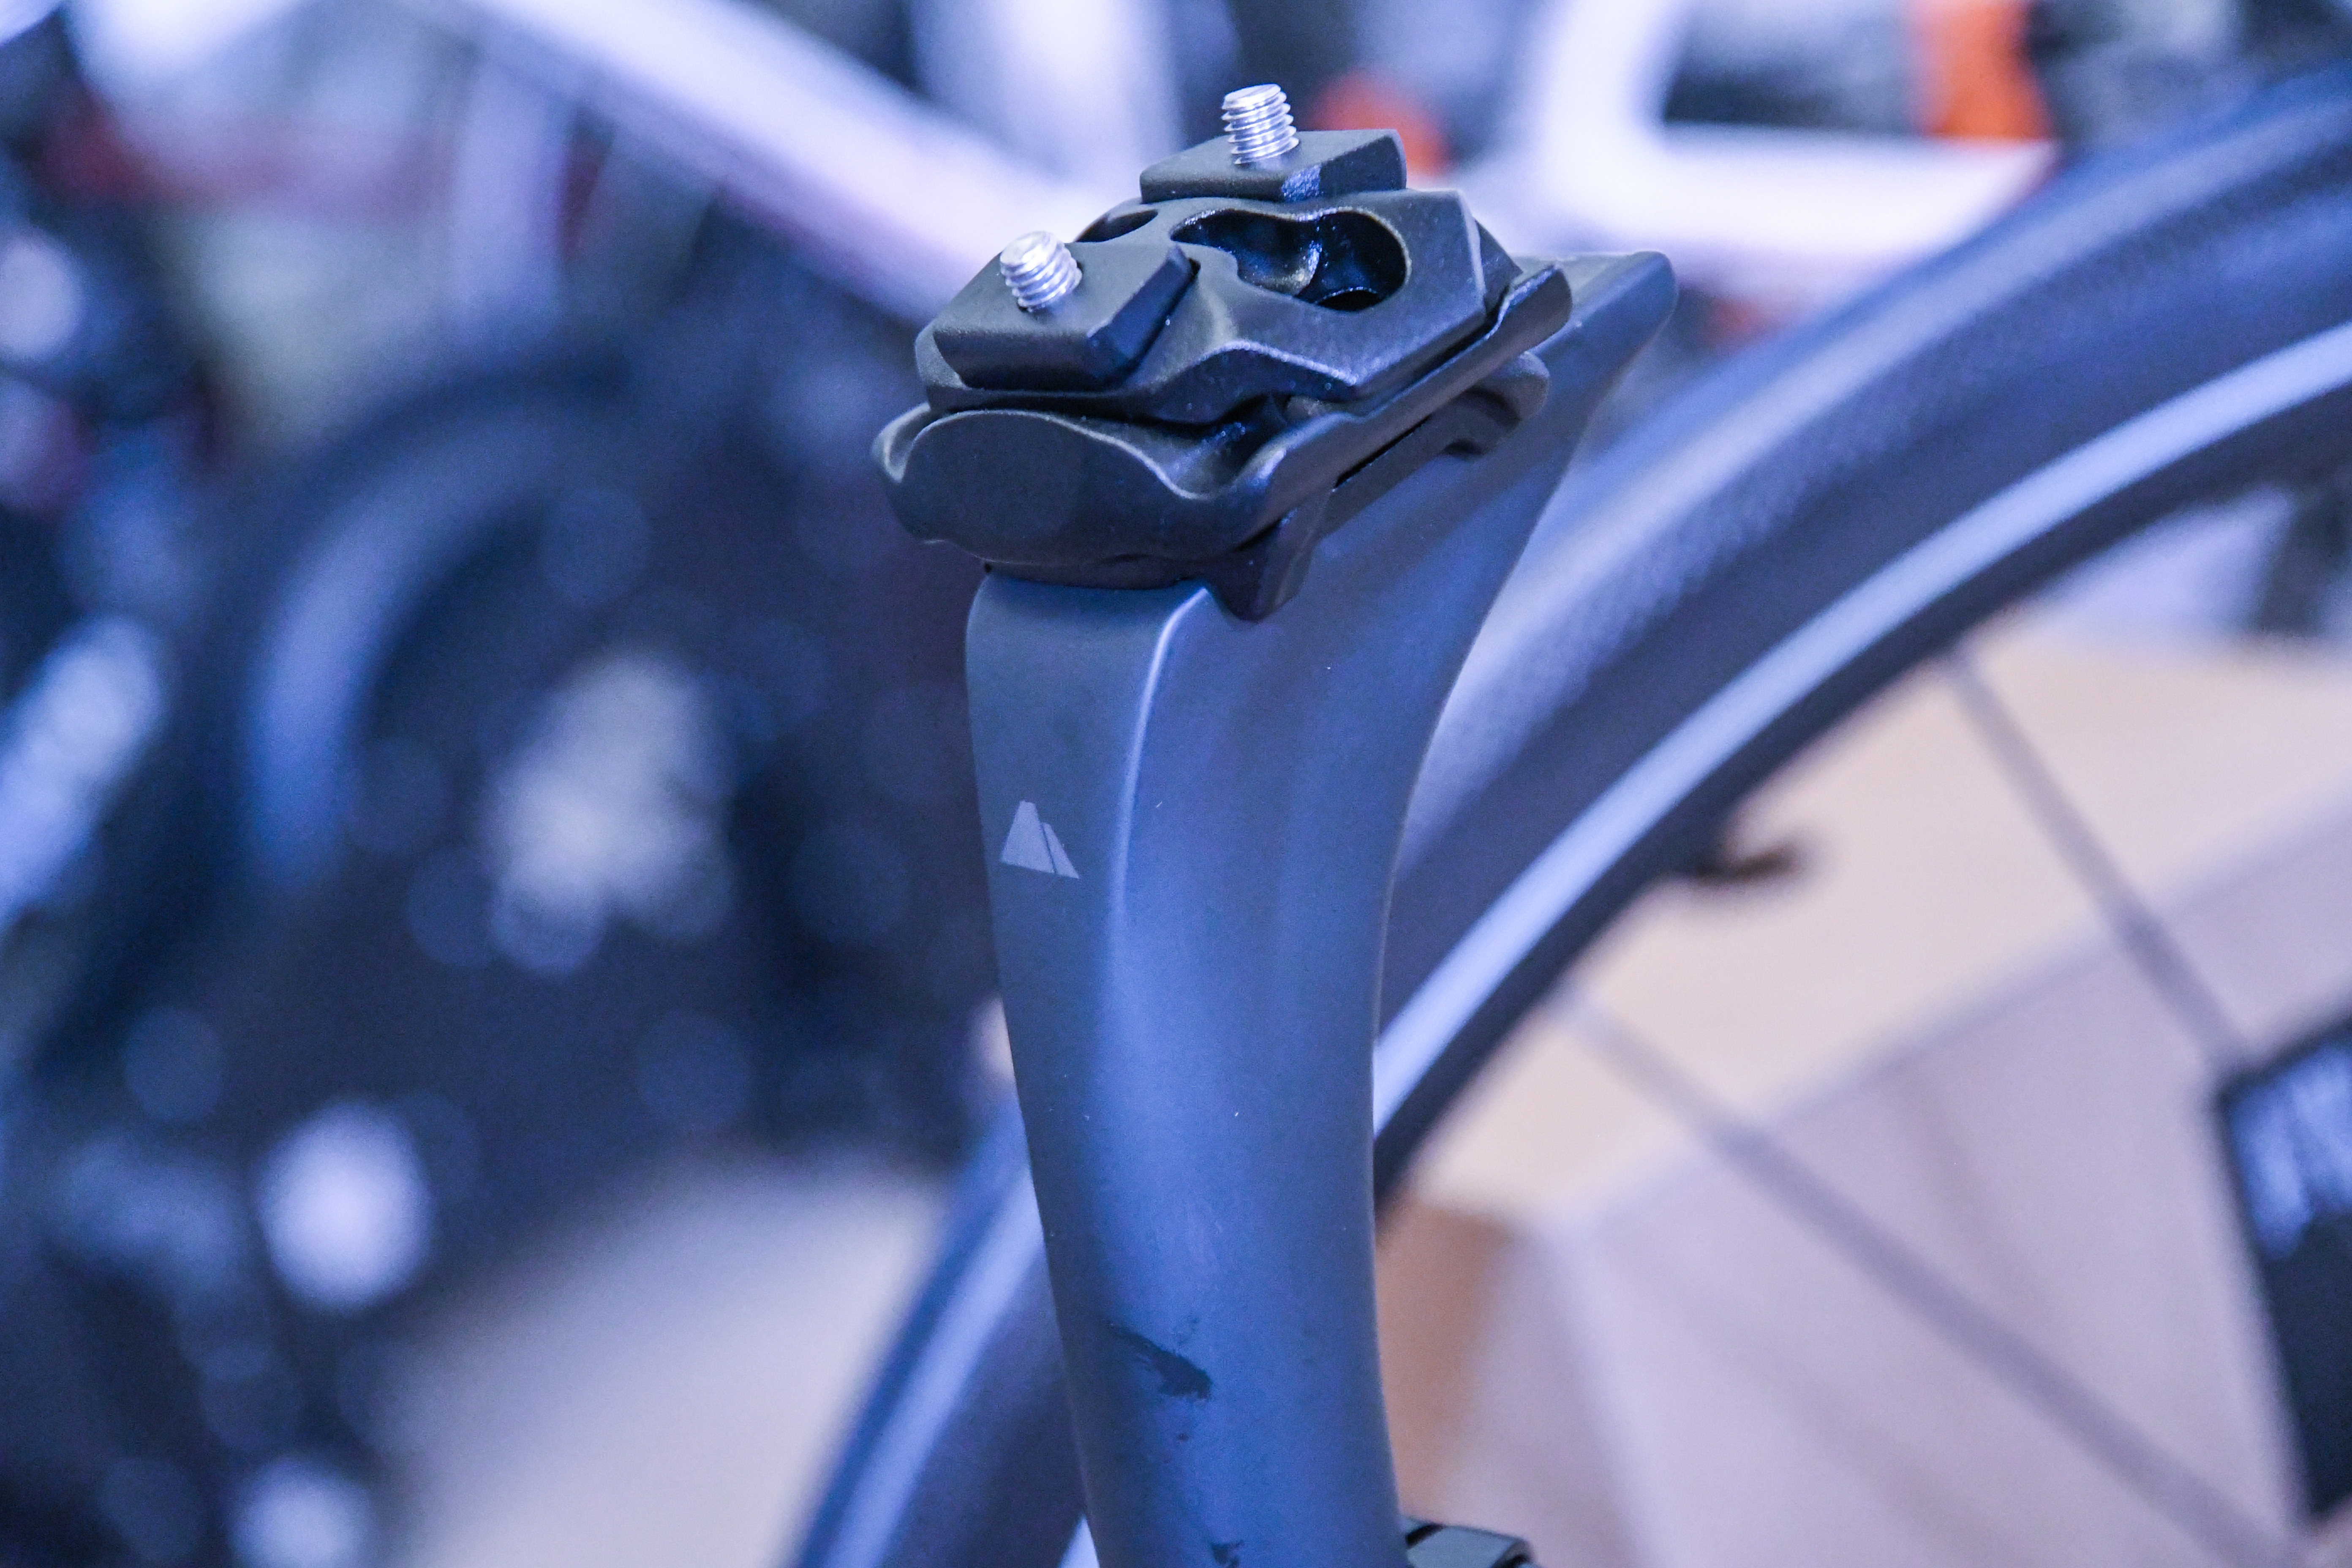
After that was all set, I went ahead and got the SRAM RED eTAP blips all aligned on the handlebars. These allow you to shift while your hands are on the tops of the bars, such as climbing. They’re two tiny little buttons that you put under your bar tape.

Oh, speaking of which, I installed the bar tape. Sorry, I randomly don’t have pictures of that.
From there the last thing to do was install the two water bottle cages:

And thus, I was done!

Since I was building the entire trainer on a KICKR SNAP, it was pretty easy to transition for casual hand-driven tests of the components to jumping on the bike and throwing down some wattage. Anytime I make big/meaningful changes to a bike (especially in the shifting/crankset/wheels arena), I like to toss it on a trainer and make sure it doesn’t implode (or explode) on me. Thus, Zwift it was for the initial test run:

With that, let’s head outside.
The Final Result:

Of course, somehow it rained for like 18 straight days, and I certainly didn’t want my first ride to be in the rain before I had a chance to get some proper photographs. Nonetheless, here’s some obligatory bike porn:


And how’s it perform? So far so good!
The shifting is really damn precise, love it. And everything is still in the super quiet phase, it feels like it just floats along. I realized above a bit later after I took the pretty pics I need to slightly adjust the brake pads (both the angle and adjust the centering on the front ones). But overall, I’m pretty happy with how things turned out!
Of course, I’m not exactly a bike reviewer. I’m a tech reviewer. And since I’ve already reviewed all of the tech seen on this bike, none of it is really all that ‘new’ to me. And the bike itself, while perfectly great – isn’t really something I cover from a review standpoint. My review would roughly be: It rolls well when I pedal.
With that – thanks for reading, and stay tuned to see this bike in plenty of posts down the road as it performs its duties in the role of chief rolling test machine!
Have a good week, and welcome to 2018!
FOUND THIS POST USEFUL? SUPPORT THE SITE!
Hopefully, you found this post useful. The website is really a labor of love, so please consider becoming a DC RAINMAKER Supporter. This gets you an ad-free experience, and access to our (mostly) bi-monthly behind-the-scenes video series of “Shed Talkin’”.
Support DCRainMaker - Shop on Amazon
Otherwise, perhaps consider using the below link if shopping on Amazon. As an Amazon Associate, I earn from qualifying purchases. It doesn’t cost you anything extra, but your purchases help support this website a lot. It could simply be buying toilet paper, or this pizza oven we use and love.


