
Back in November I posted a mention of doing some research for a new bike that I wanted to build. This included the components as well as my general thinking on it. Finally, a month or so later, I’ve completed that mission and figured it was time to share the results, details, and odds and ends.
Before we get too deep into the parts, the most important thing to understand is that this bike will be a testing workhorse, and it’s designed with that in mind. I eschewed fancy parts like aero handlebars or aero seat posts for compatibility with a wider number of accessories that show up on my doorstep daily.
The goal of this bike was to act as my primary testing platform for cycling, targeted at things like power meters, bike computers, trainers, action cameras, and so on. I’ve got other bikes, but I’ve been finding it more and more difficult to have enough bikes for the number of power meters in test (since I typically like to test power meters over a longer period like 2-3 months in varied conditions).
In any case, I dive into all those details down below. With that, let’s begin.
(Oh, and PS – nothing here is sponsored by any manufacturers. I decided my own parts and then paid for them, along with a handful of parts Clever Training helping out on.)
Deciding on parts:

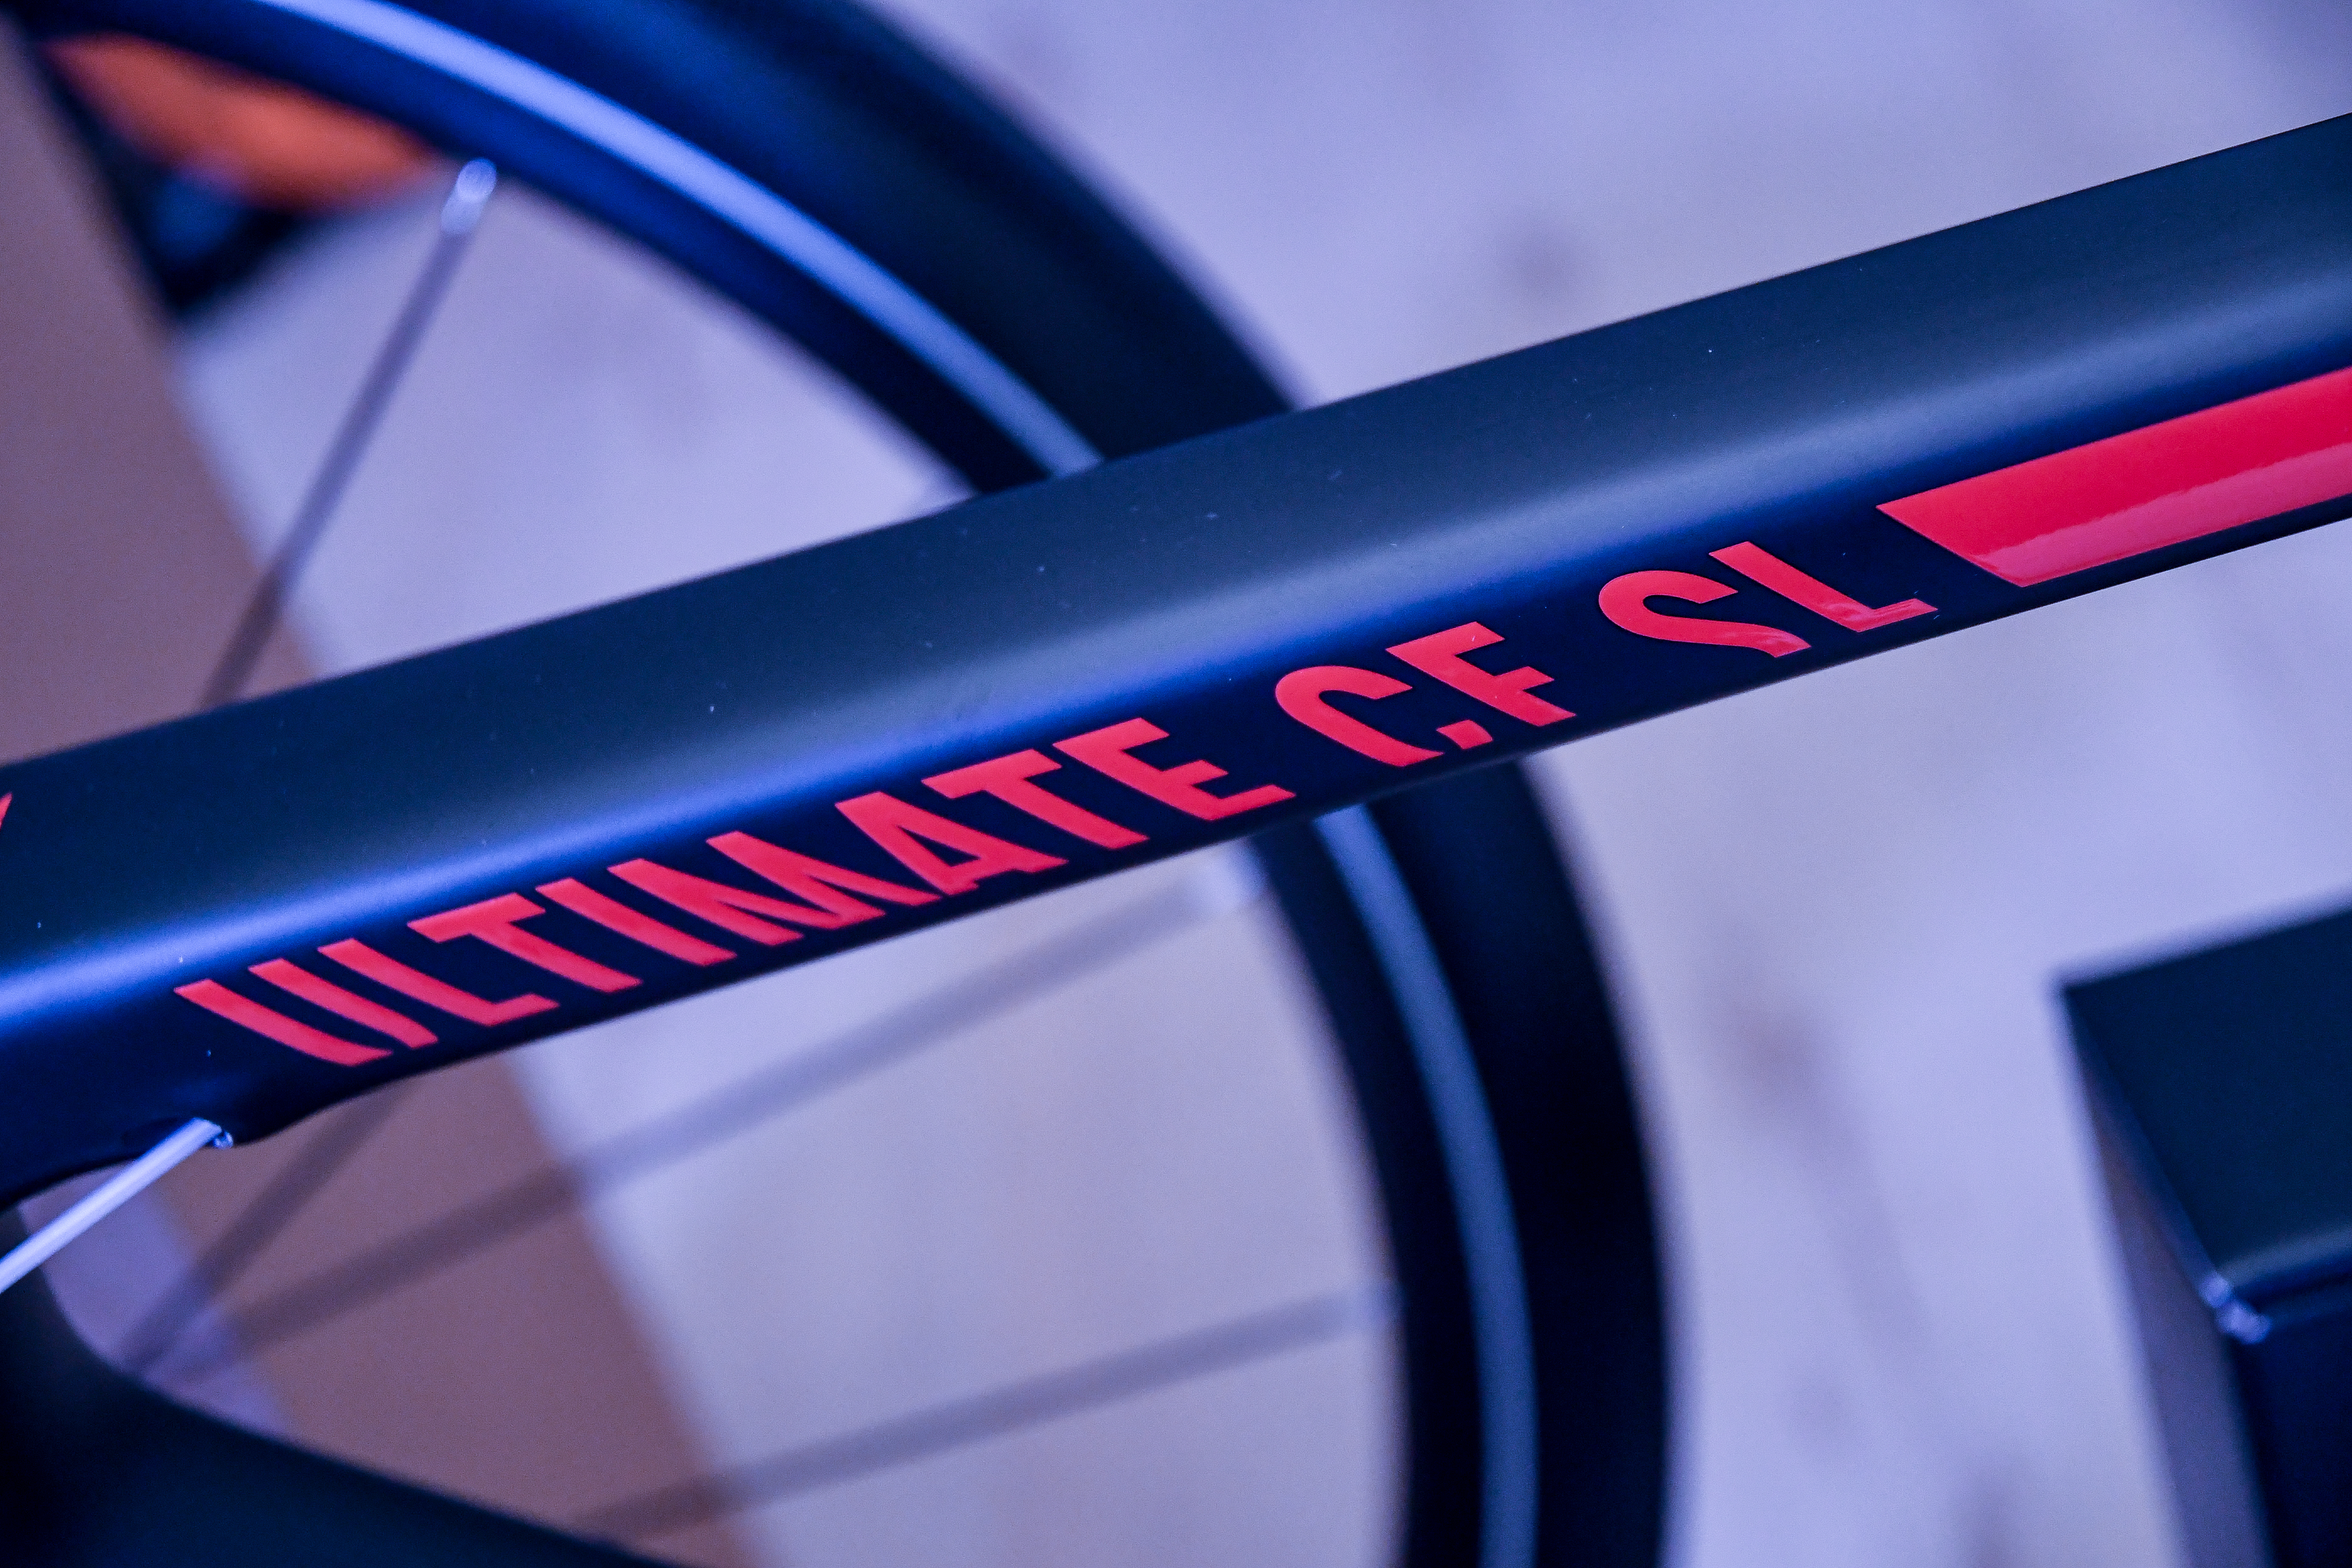
Starting with the frame, I’d been eyeing a Canyon bike for quite some time, largely because the pricing was right and the frames actually looked good. I had a chance to ride one a bit this past summer at Eurobike during an unrelated demo event and was pretty happy with things.
At the same time, despite being a bit of a bike tech snob – I’m actually not a huge bike frame snob. Perhaps that comes from constantly riding so many different loaner/rental/whatever bikes for product testing that I’ve become numb to it. As long as things fit, I’m good. And actually, half the time they don’t fit and as long as the ride is under a few hours I can deal with it.
Still, some might want to know how and why specifically I selected the frame I did. The process of elimination was simple. Here were my requirements. As you’ll see, they’re very ‘business’ driven:
A) I didn’t want disc brakes: I actually do want disc brakes, but I have too much interoperability and swapping of things to want to deal with incompatibilities down the road. Non-disc was simpler for last-second changes.
B) I need normal handlebars: Too many bike computer mounts don’t work with aero-focused road handlebars. While I get that’s a ‘fun’ challenge for compatibility, I don’t really have the time when a new product comes in to go off and find a custom mount on tight timelines. Be it action cameras, bike computers, bike lights, or so on. I just want it to work. Yes, I totally get that you can swap out handlebars, but I hate ‘spending’ money on frames that include them only to ditch them.
C) I wanted electric shifting support: By that I mean I didn’t want a bunch of extra holes that were unnecessary for wireless shifting of eTAP. On Canyon’s frames, they have mechanical and electric versions of each.
D) I didn’t really want to spend a crapton: Everything is relative, I’d be spending far more on the other components of the bike than the frame.
Thus, if you look at the various carbon road frames (non-disc variants), here was my shorthand process of elimination, starting with the most expensive to cheapest:
Ultimate CF EVO: Too much – 3,299EUR.
Aeroad CF SL: Not bad – still it’s 2,699EUR and comes with aero handlebars to ditch.
Ultimate CF SL ELECTRIC 2018: Not bad actually, 1,999EUR, though still would need to swap handlebars.
Ultimate CF SL Electric 2017: Now we’re talking. 1,199EUR, no handlebars to ditch.
Endurace CF SL ELECTRIC: Also not bad – 1,299EUR.
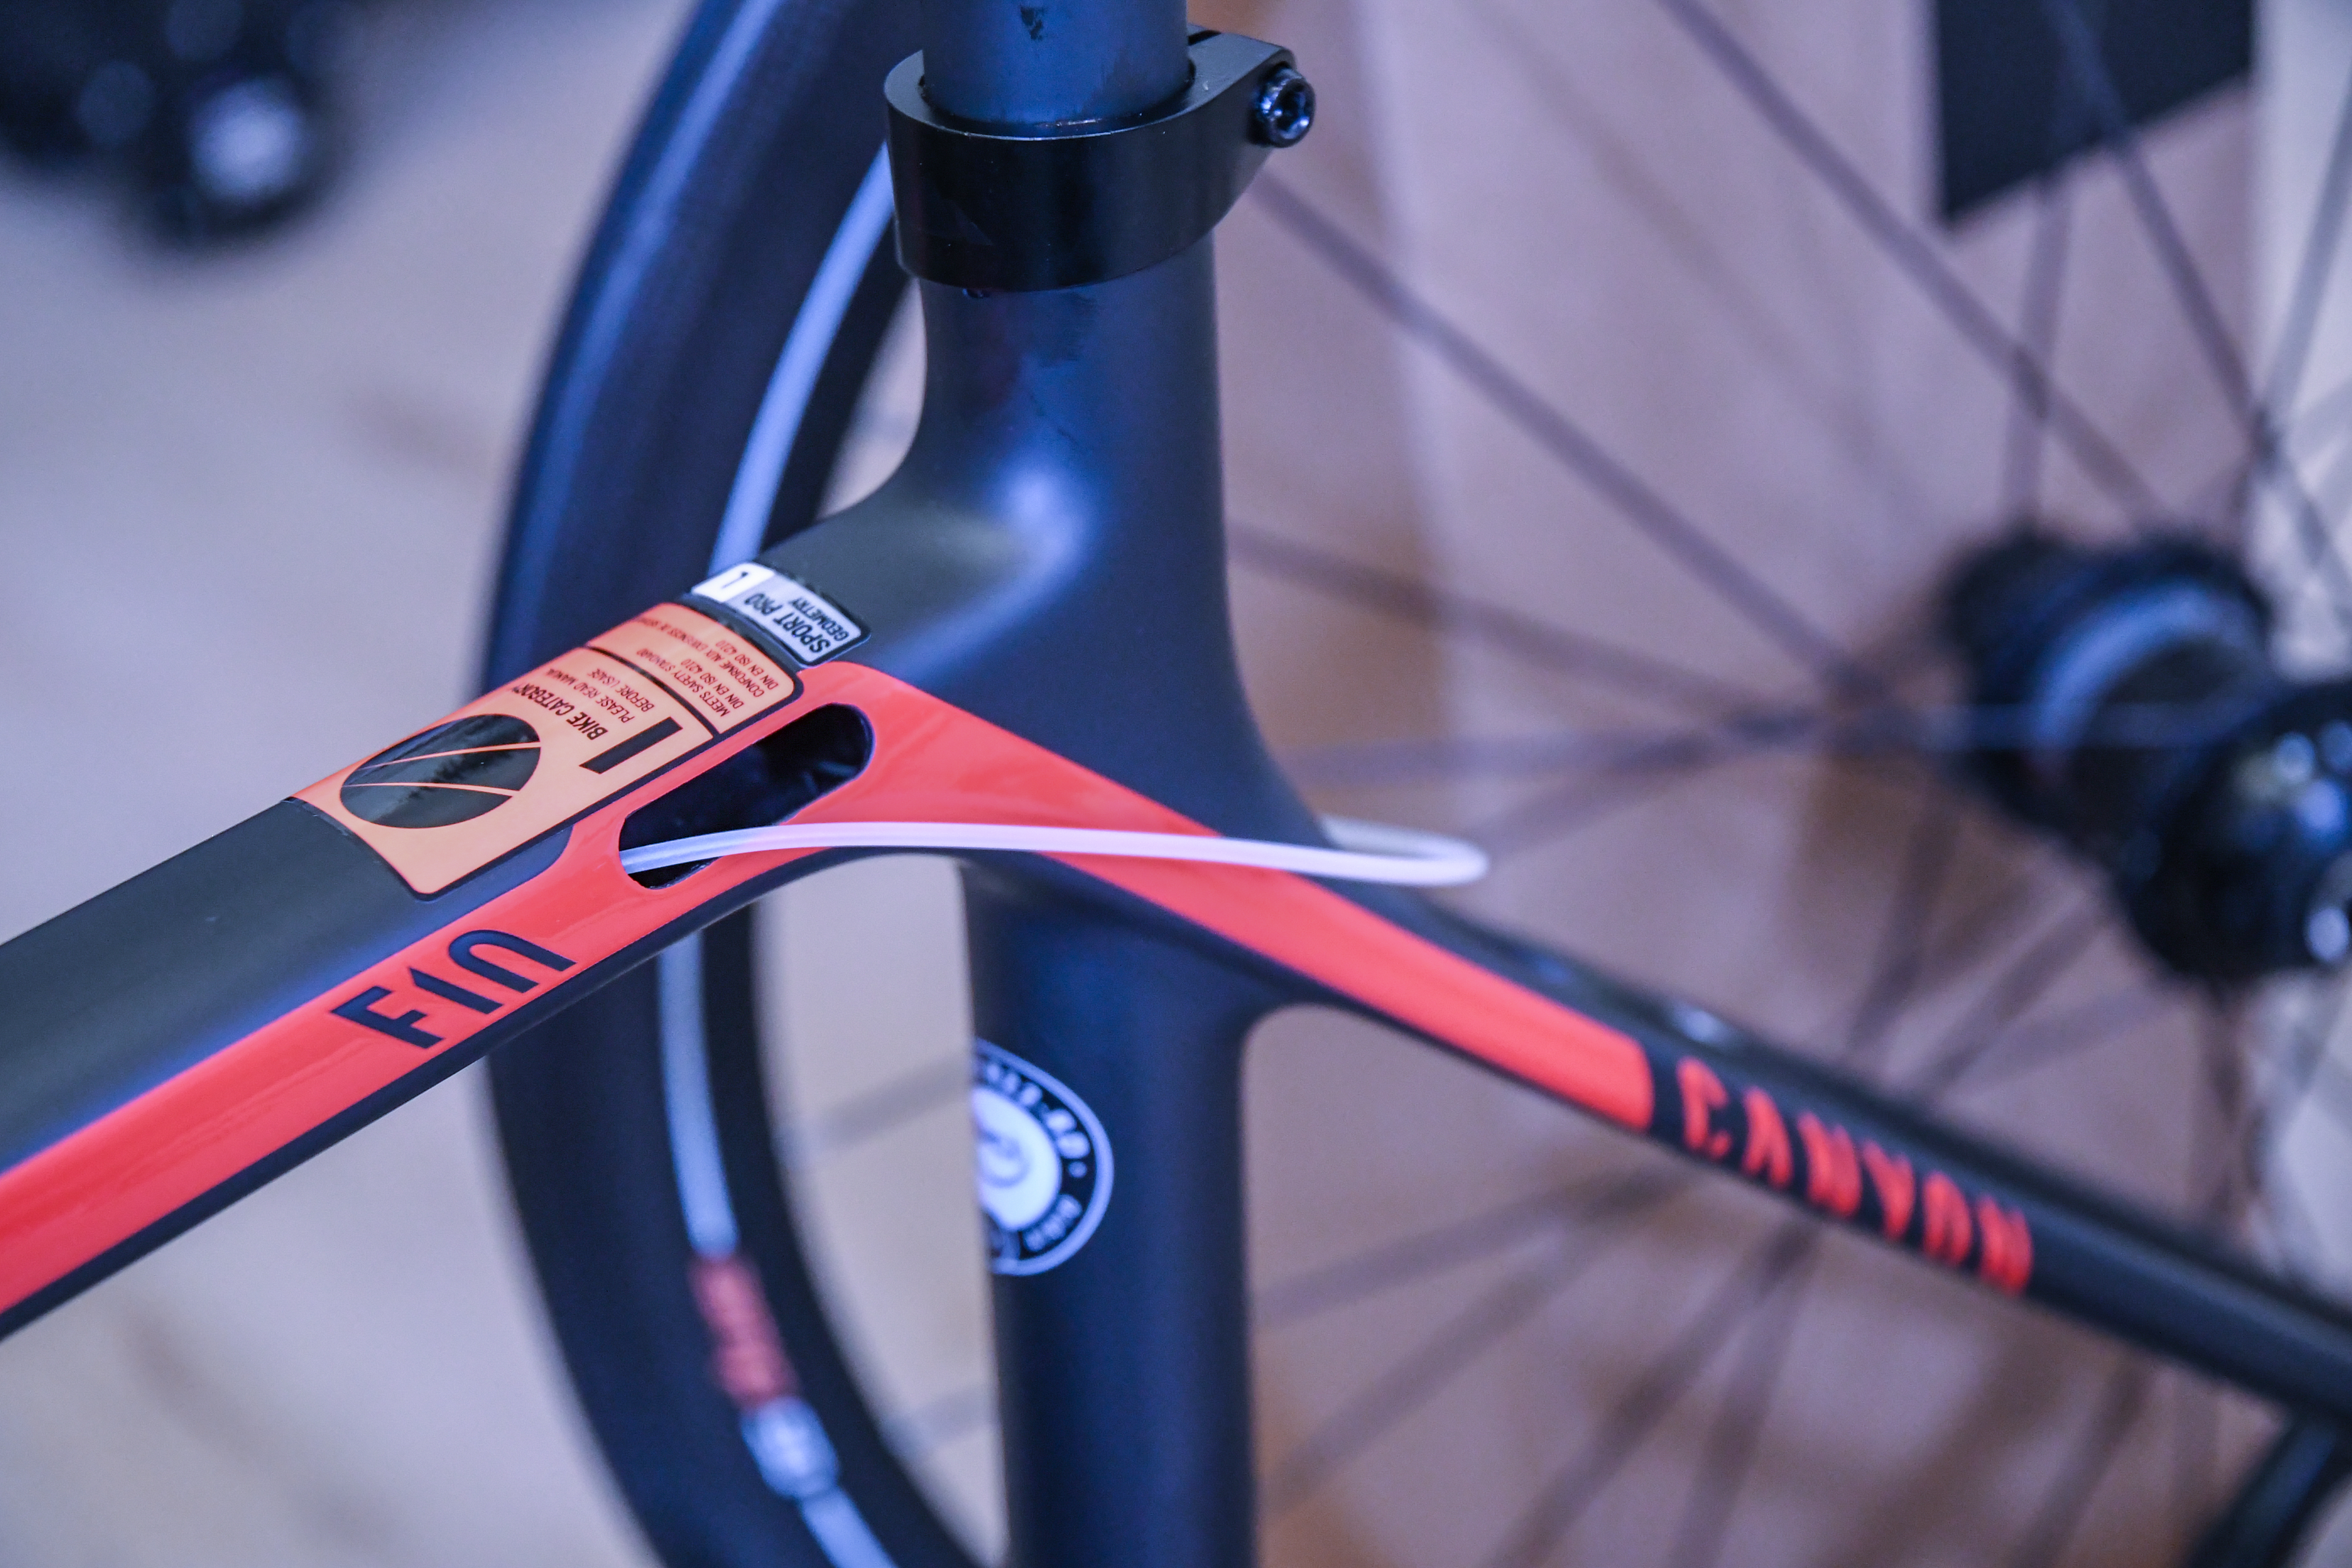
All of which had me settle on the CF SL 7.0 – for a mere 1,199EUR (in the last week or two it’s now risen in price to 1,599EUR):

The nice part here with this frameset is that it includes the front fork as well as the seat post. All of which make for one less thing to purchase.
With the core frame decision out of the way, let’s talk about everything else. But first, a quick table of all the parts that went into the bike:
DCR 2017 Bike Build Components
| Part | SKU/Product Name | Linkage |
|---|---|---|
| Frame | Canyon Ultimate CF SL Frameset Electric | Source/Link |
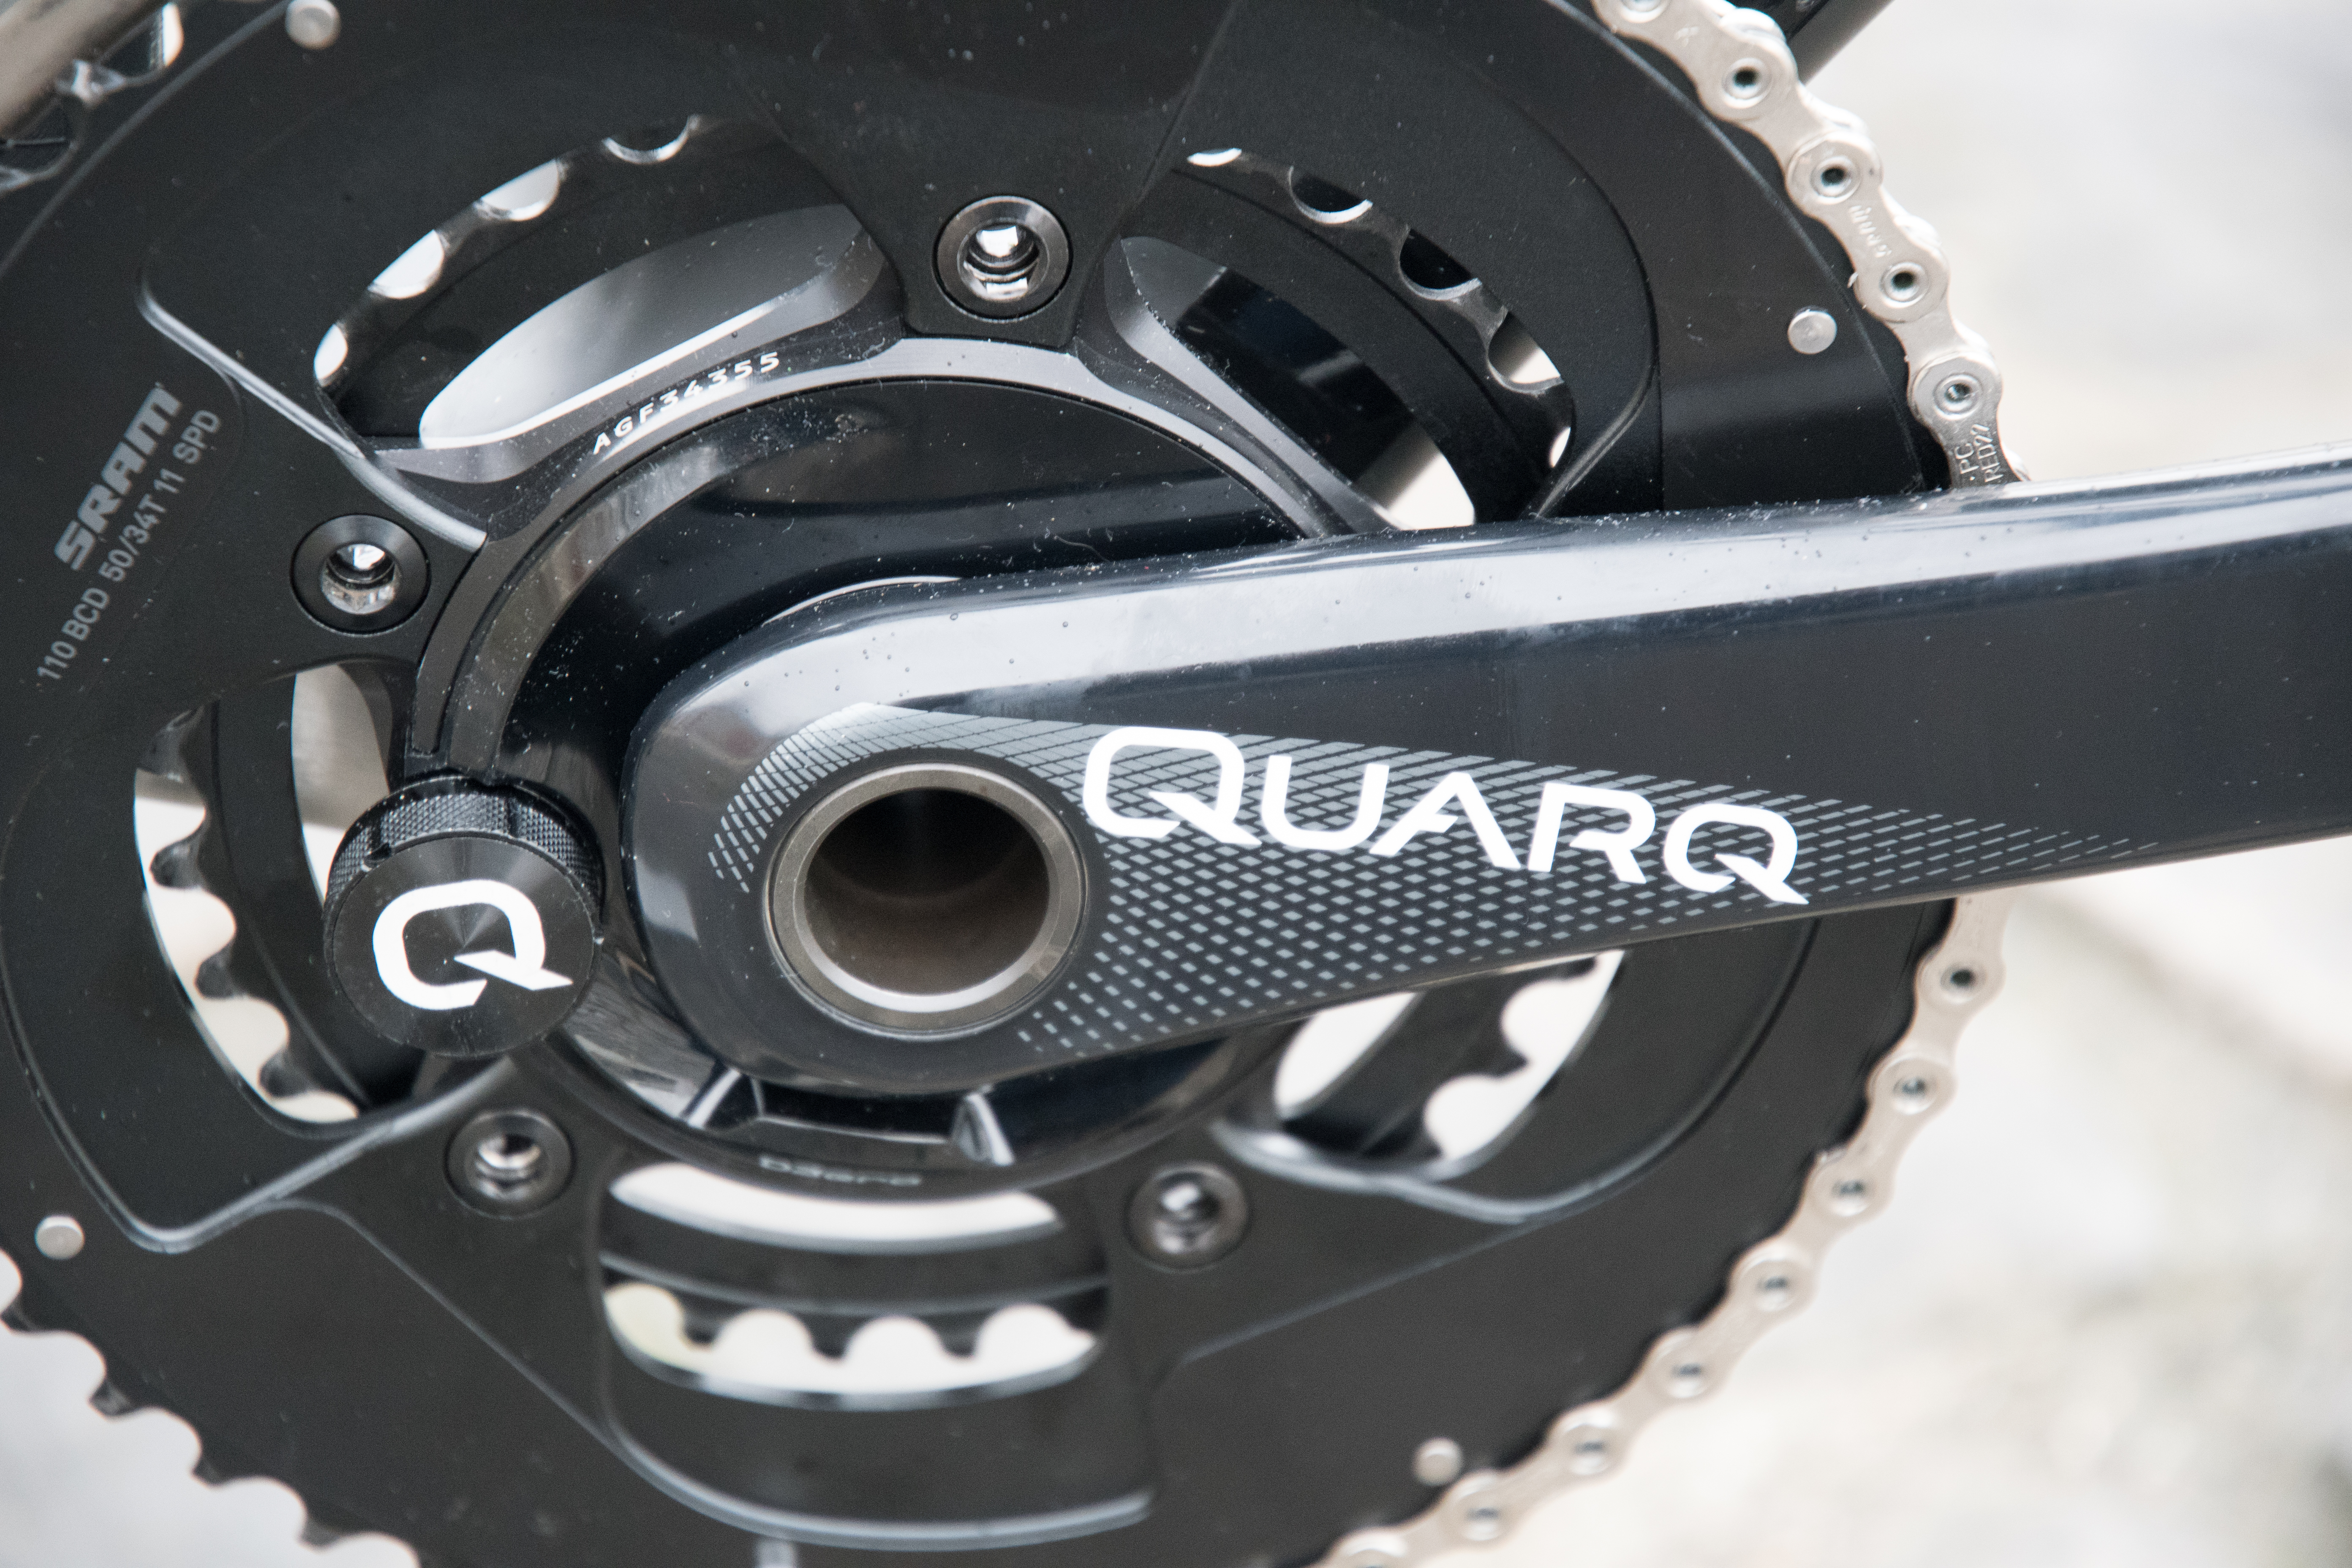
| Crankset | Quarq Dzero Carbon 110BCD HB GXP 175MM | Source/Link |
| Chainrings | SRAM FORCE 22 11-SPEED CHAINRINGS 50T | Source/Link |
| Chainrings | SRAM FORCE 22 11-SPEED CHAINRINGS 34T* | Source/Link |
| Bottom Bracket | SRAM BB GXP TEAM PRESSFIT ROAD BB86 | Source/Link |
| Cassette | SRAM PG1170 11-SPEED Cassette | Source/Link |
| Pedals | Garmin Vector 3 | Source/Link |
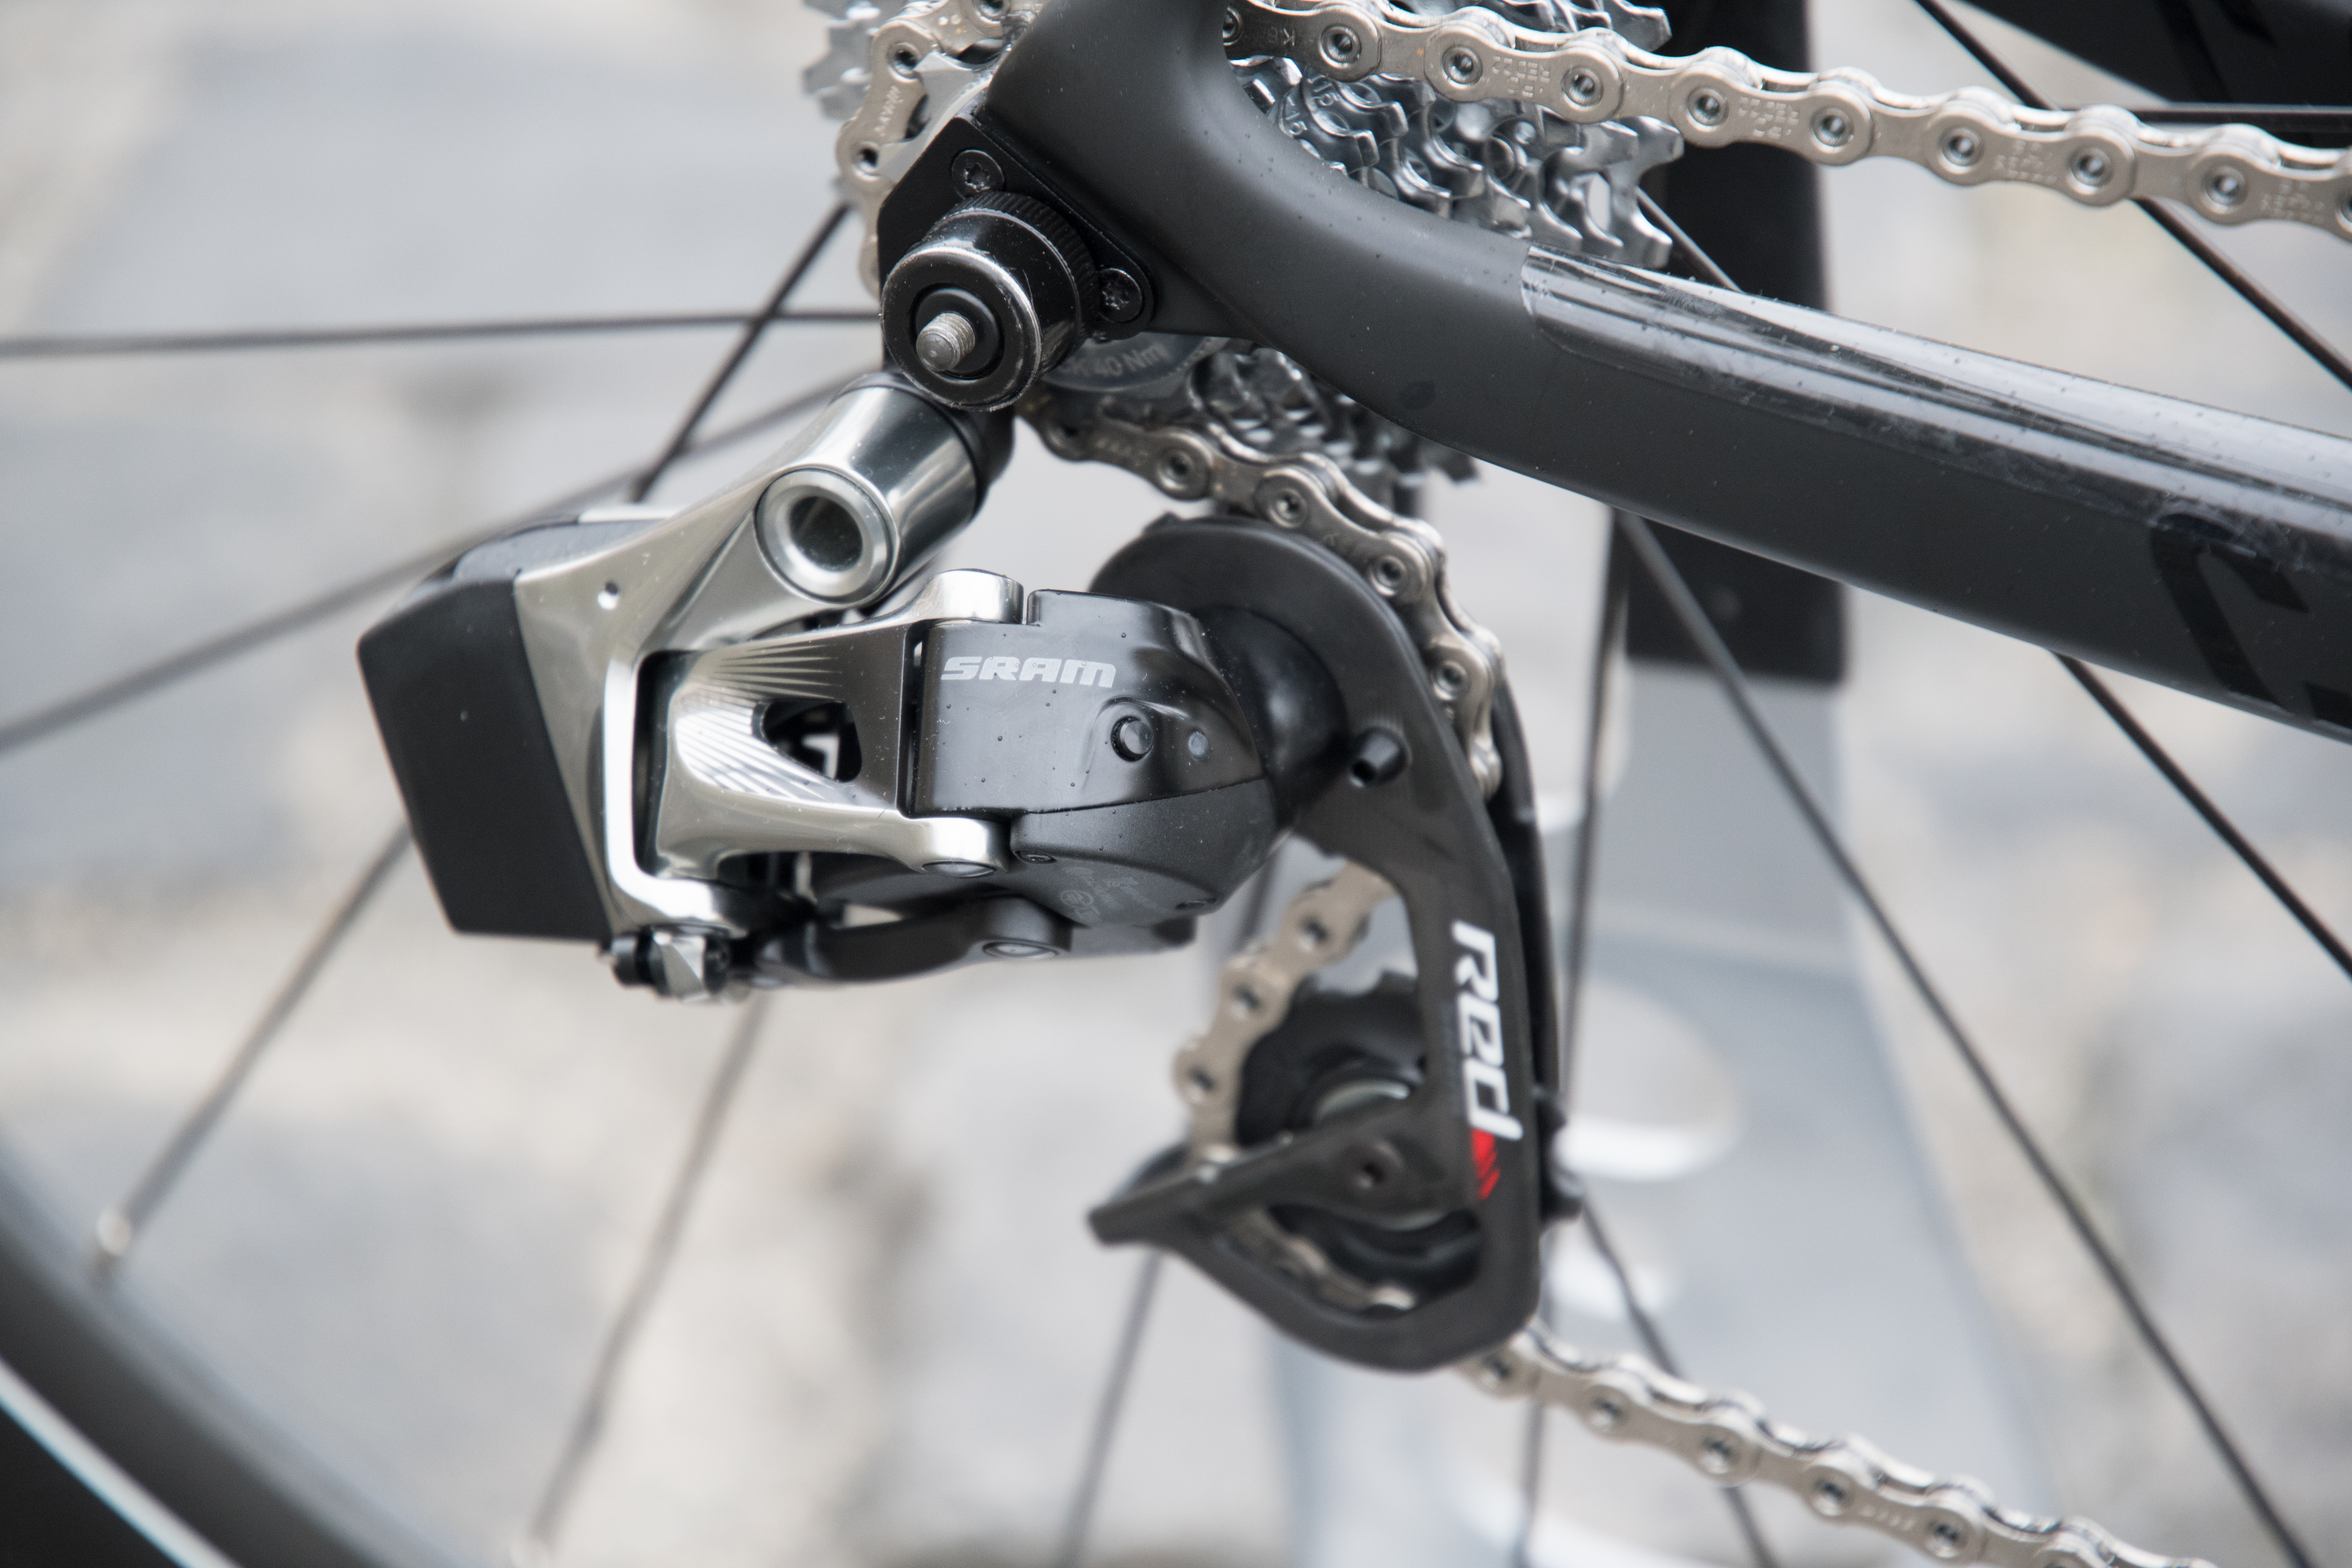
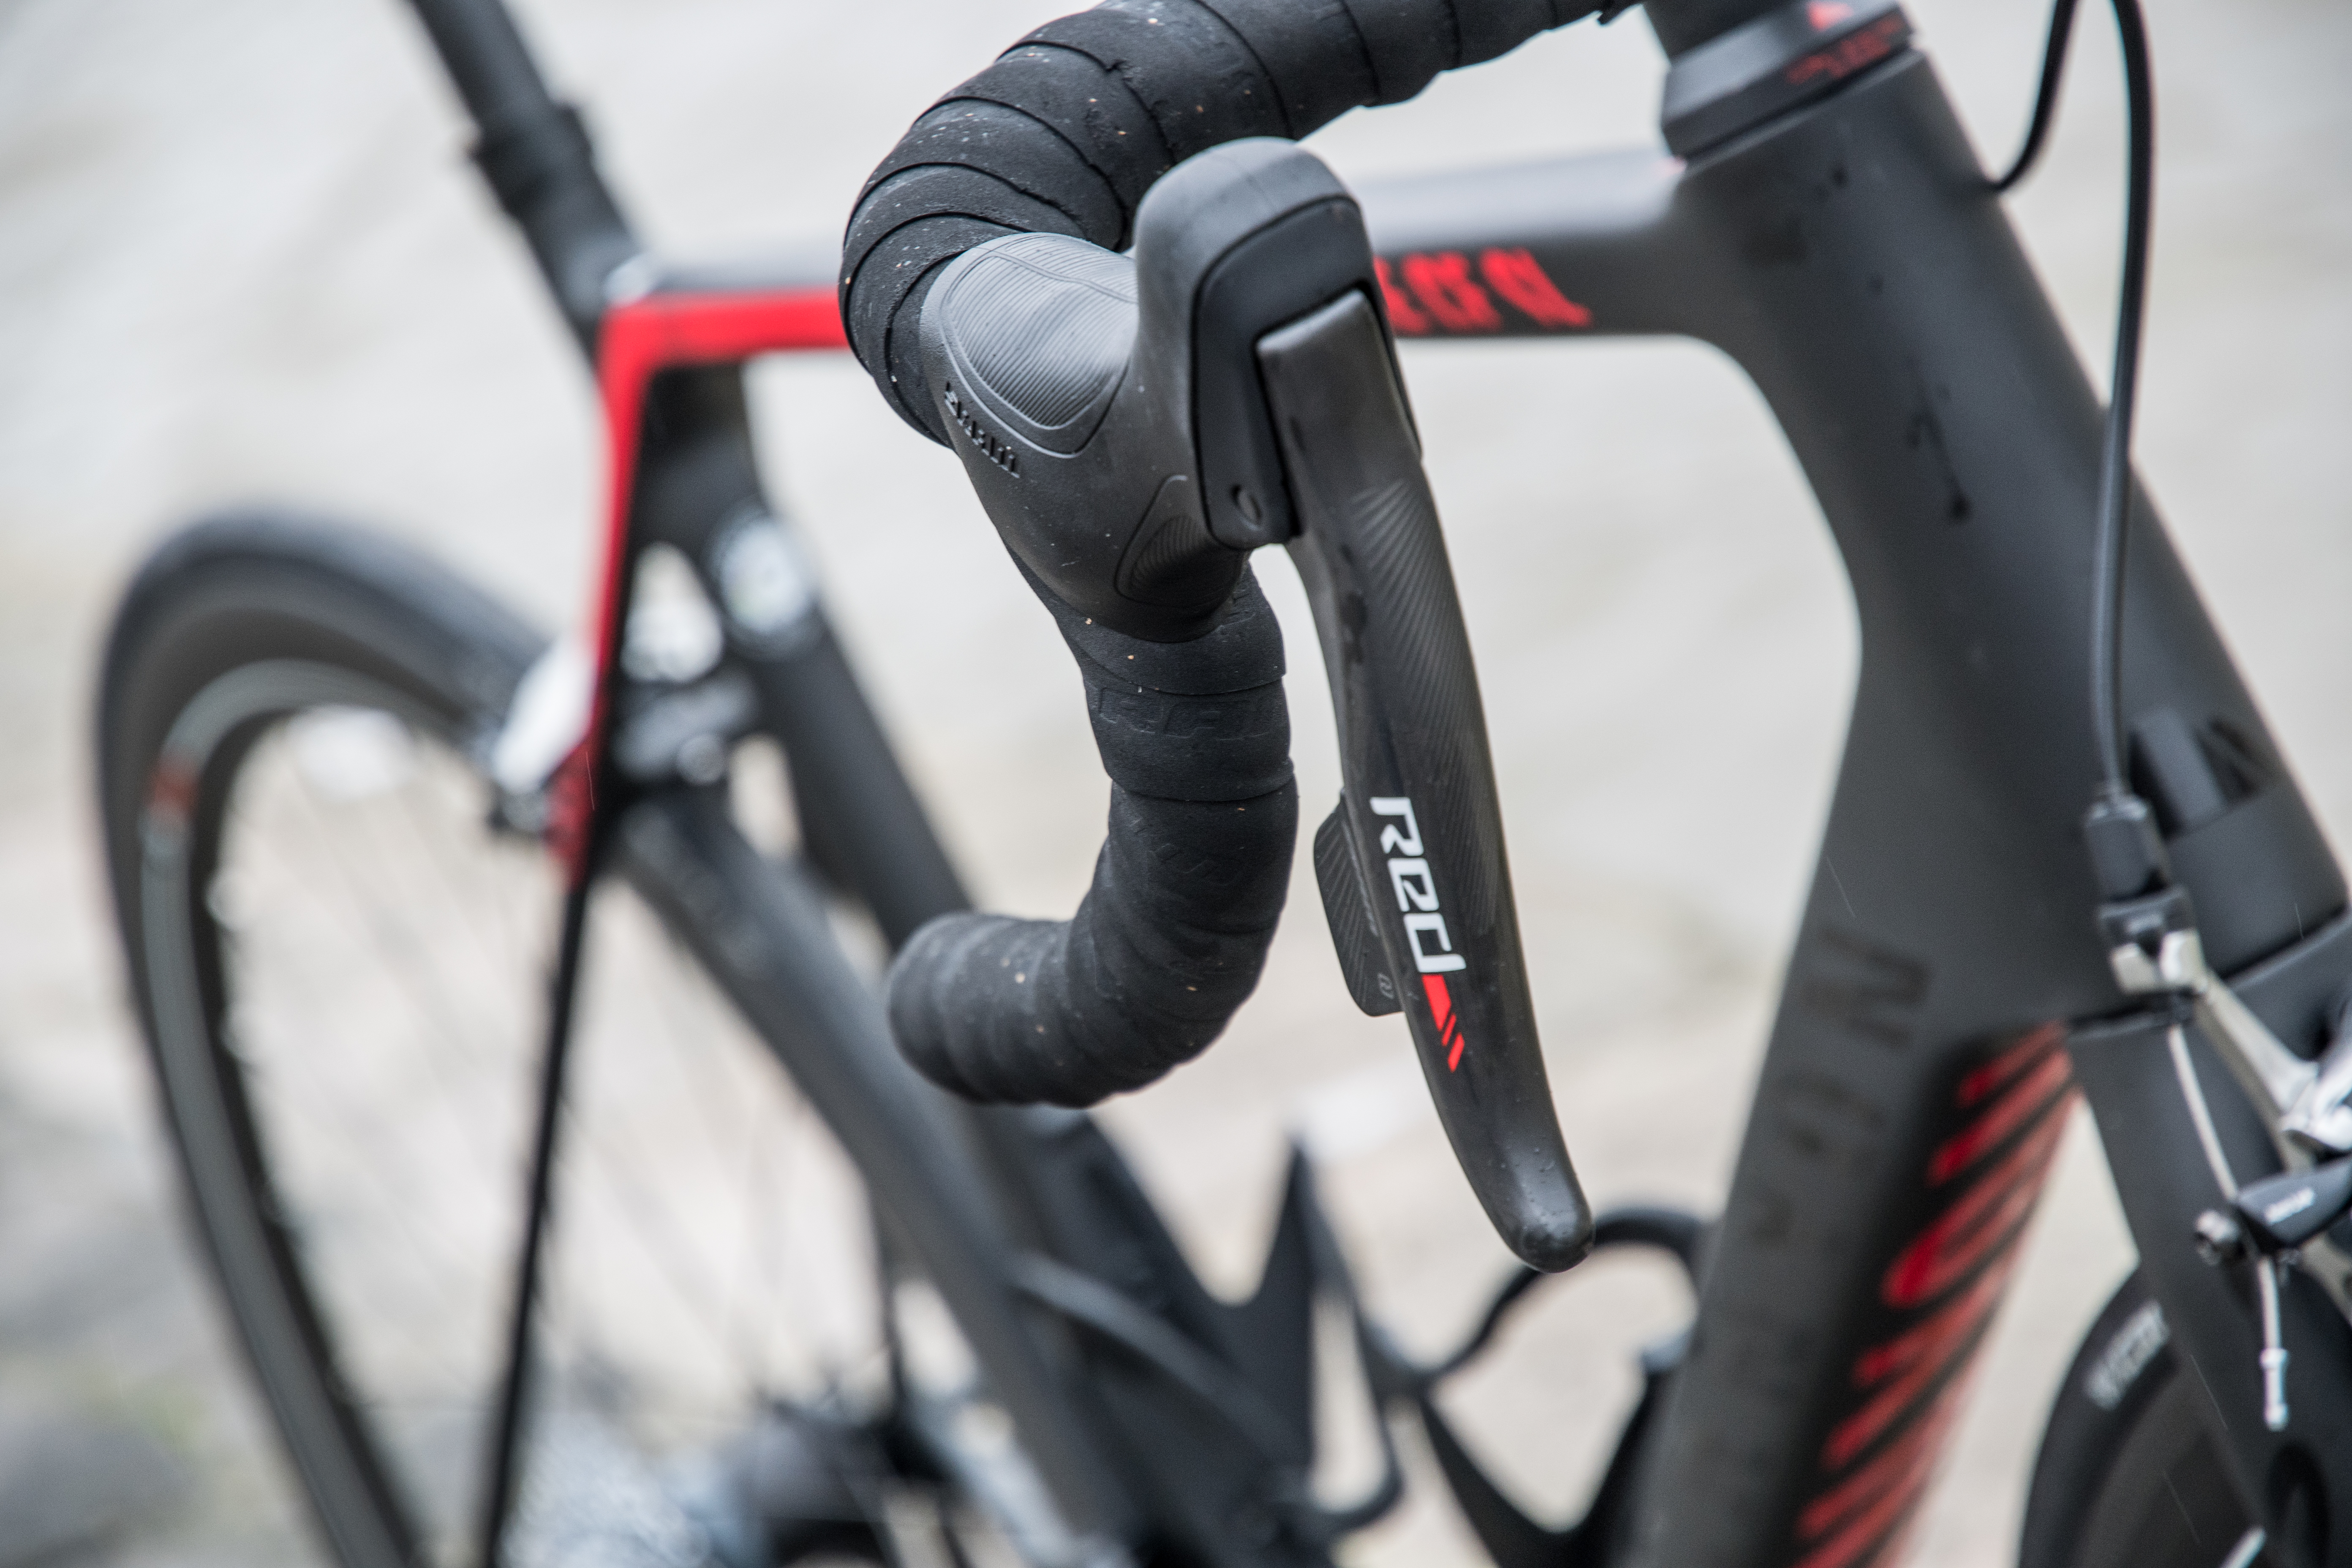
| Shifting | SRAM RED ETAP ROAD | Source/Link |
| Shifting Extras | SRAM RED eTAP BLIPS PAIR | Source/Link |
| Chain | SRAM RED 22 Chain | Source/Link |
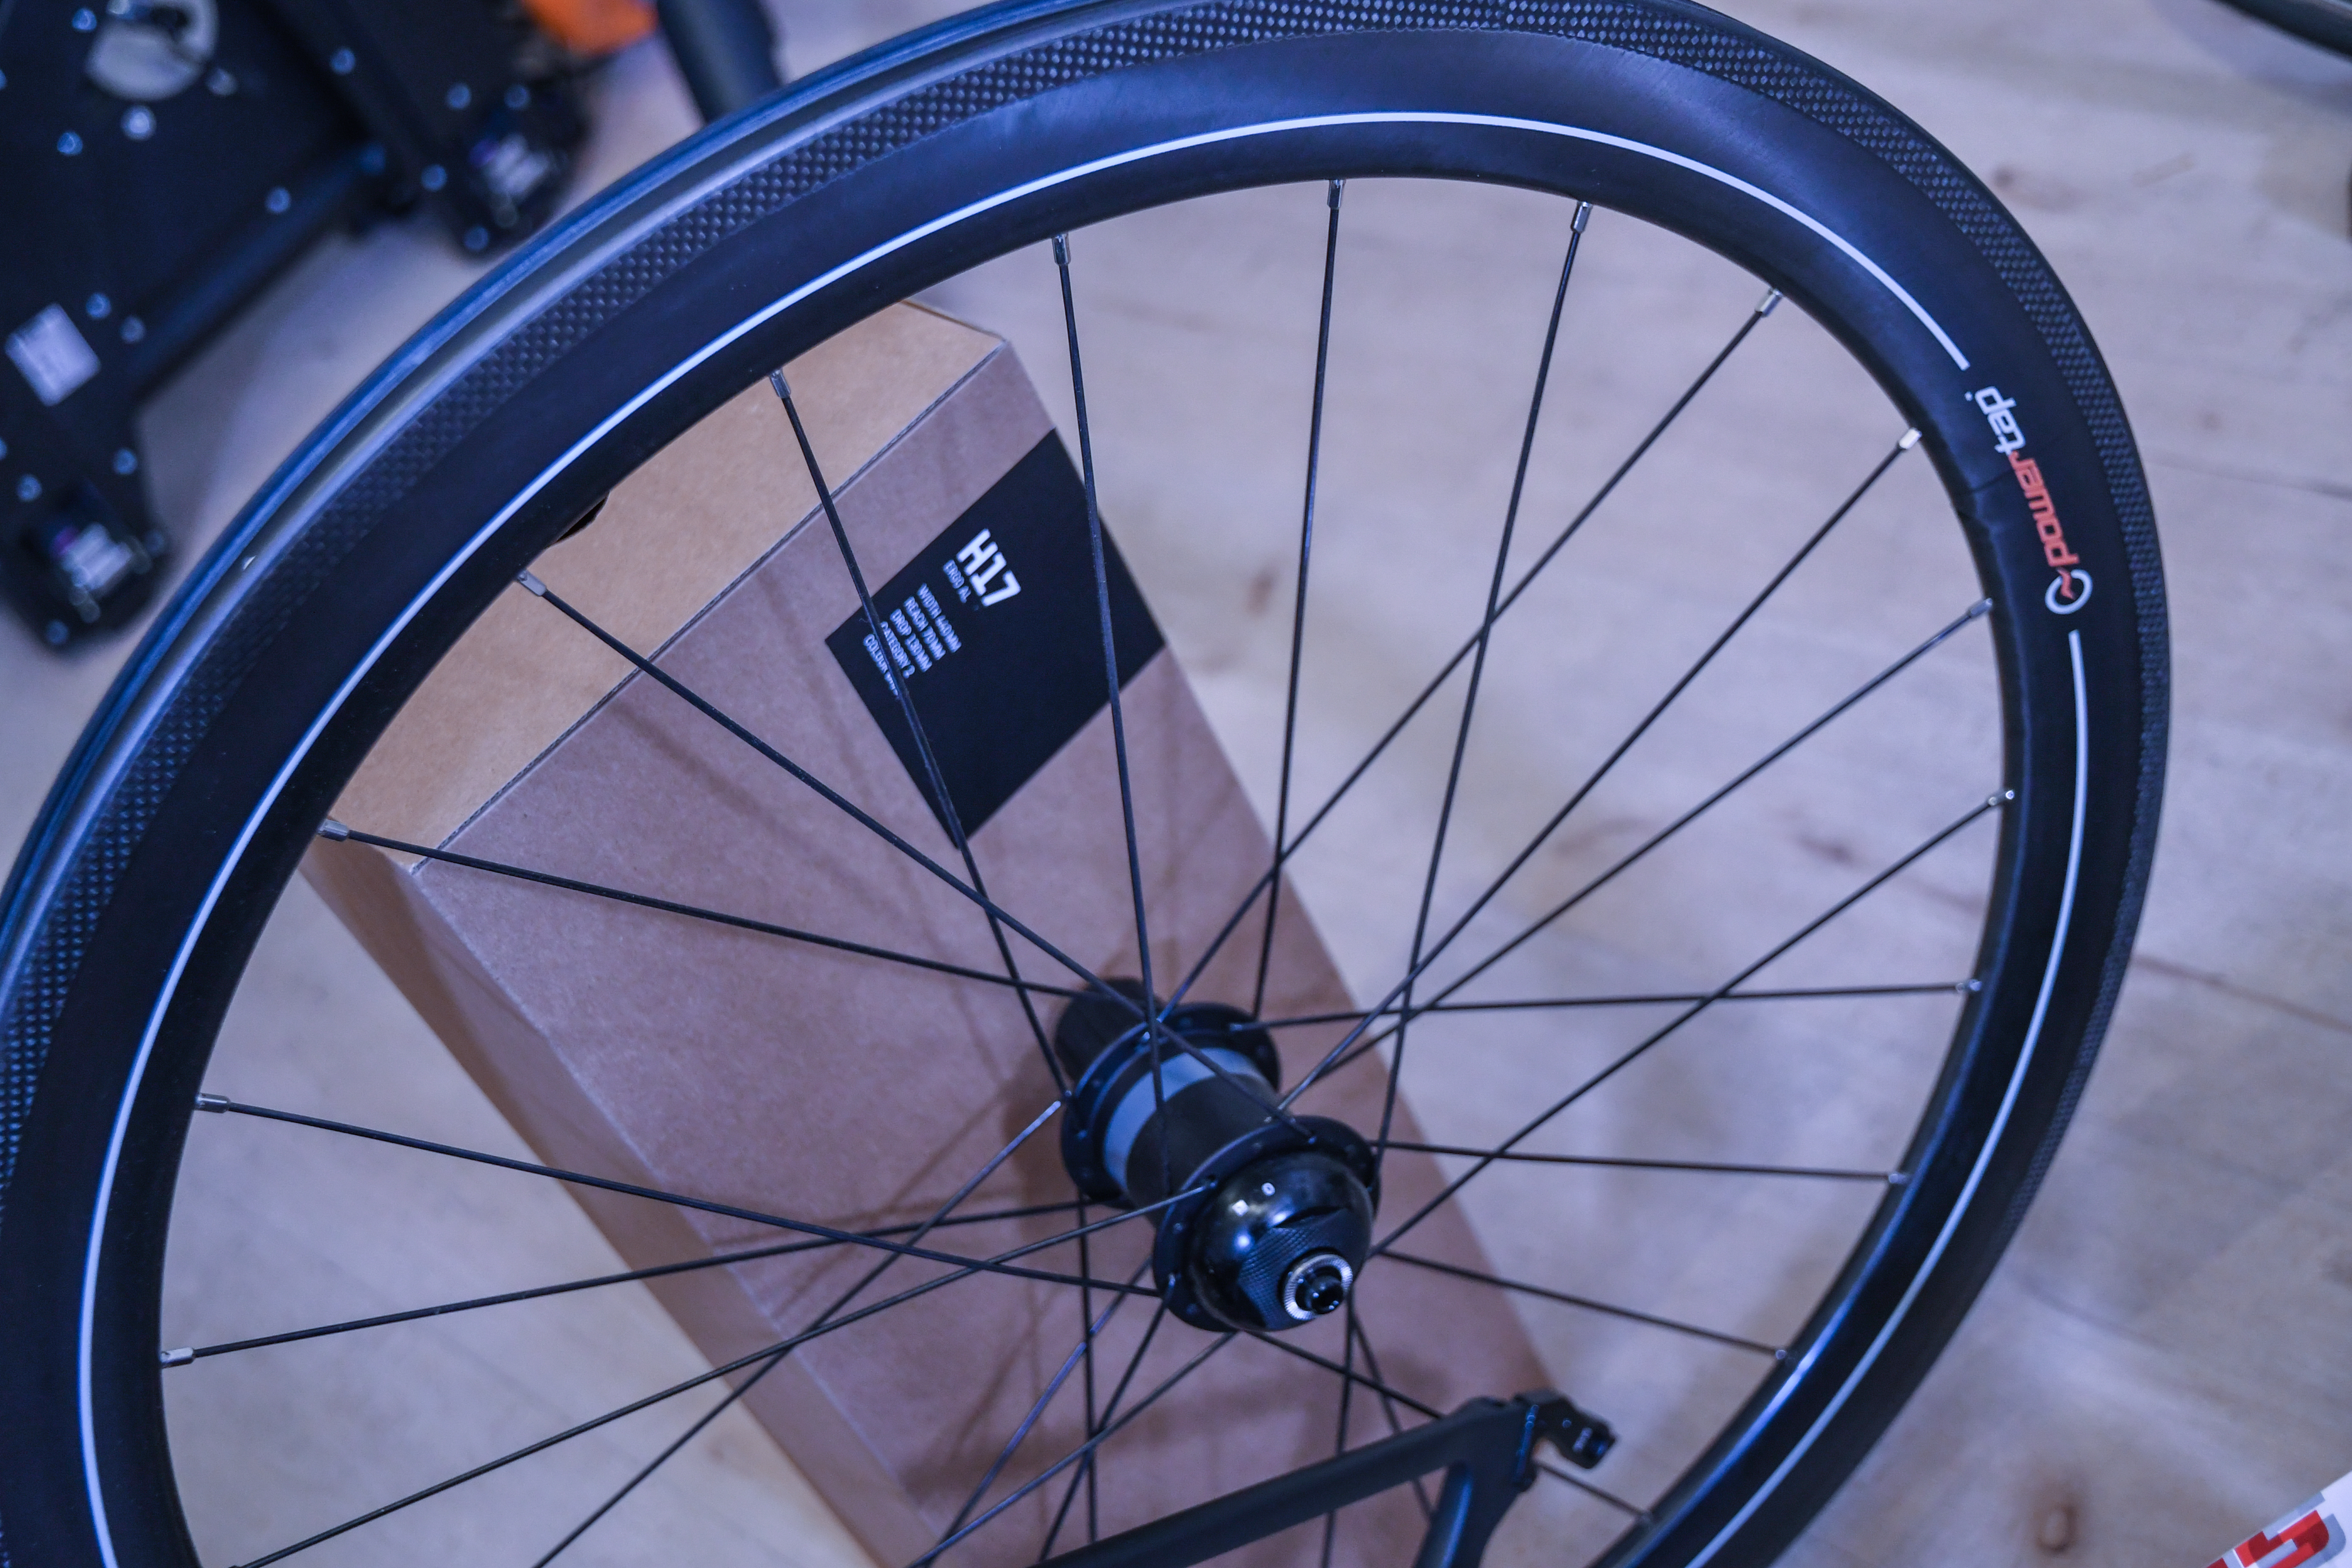
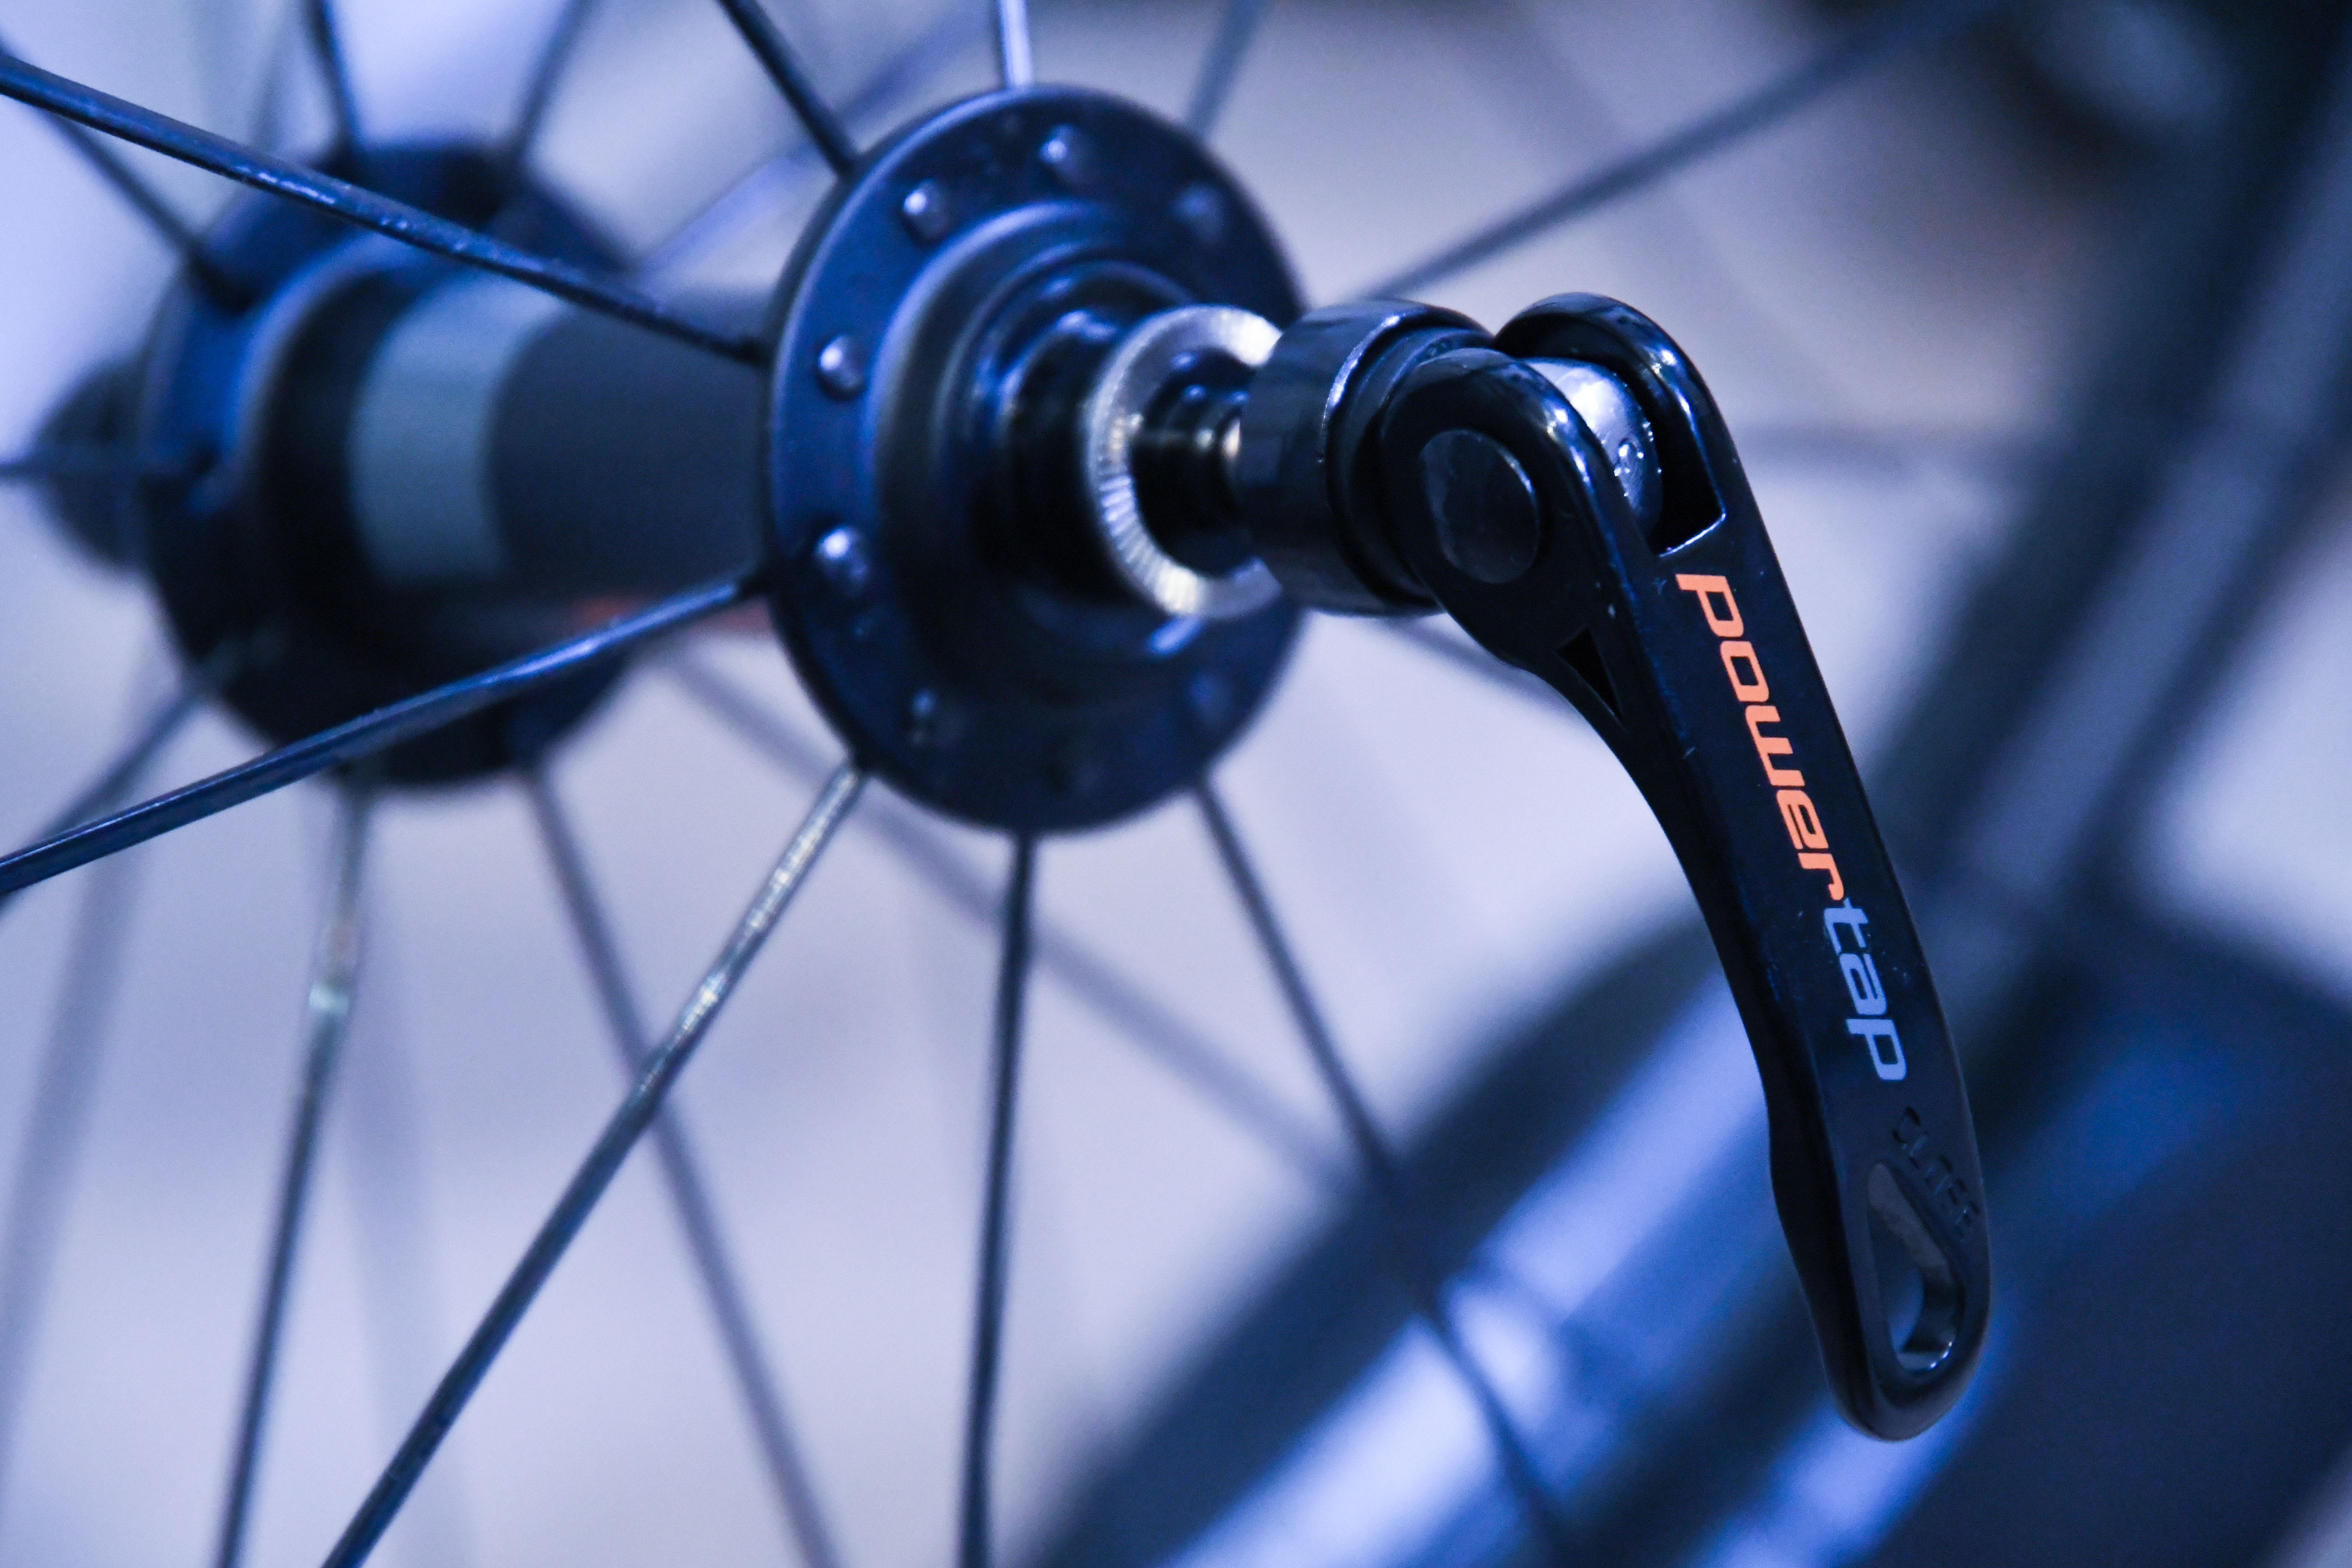
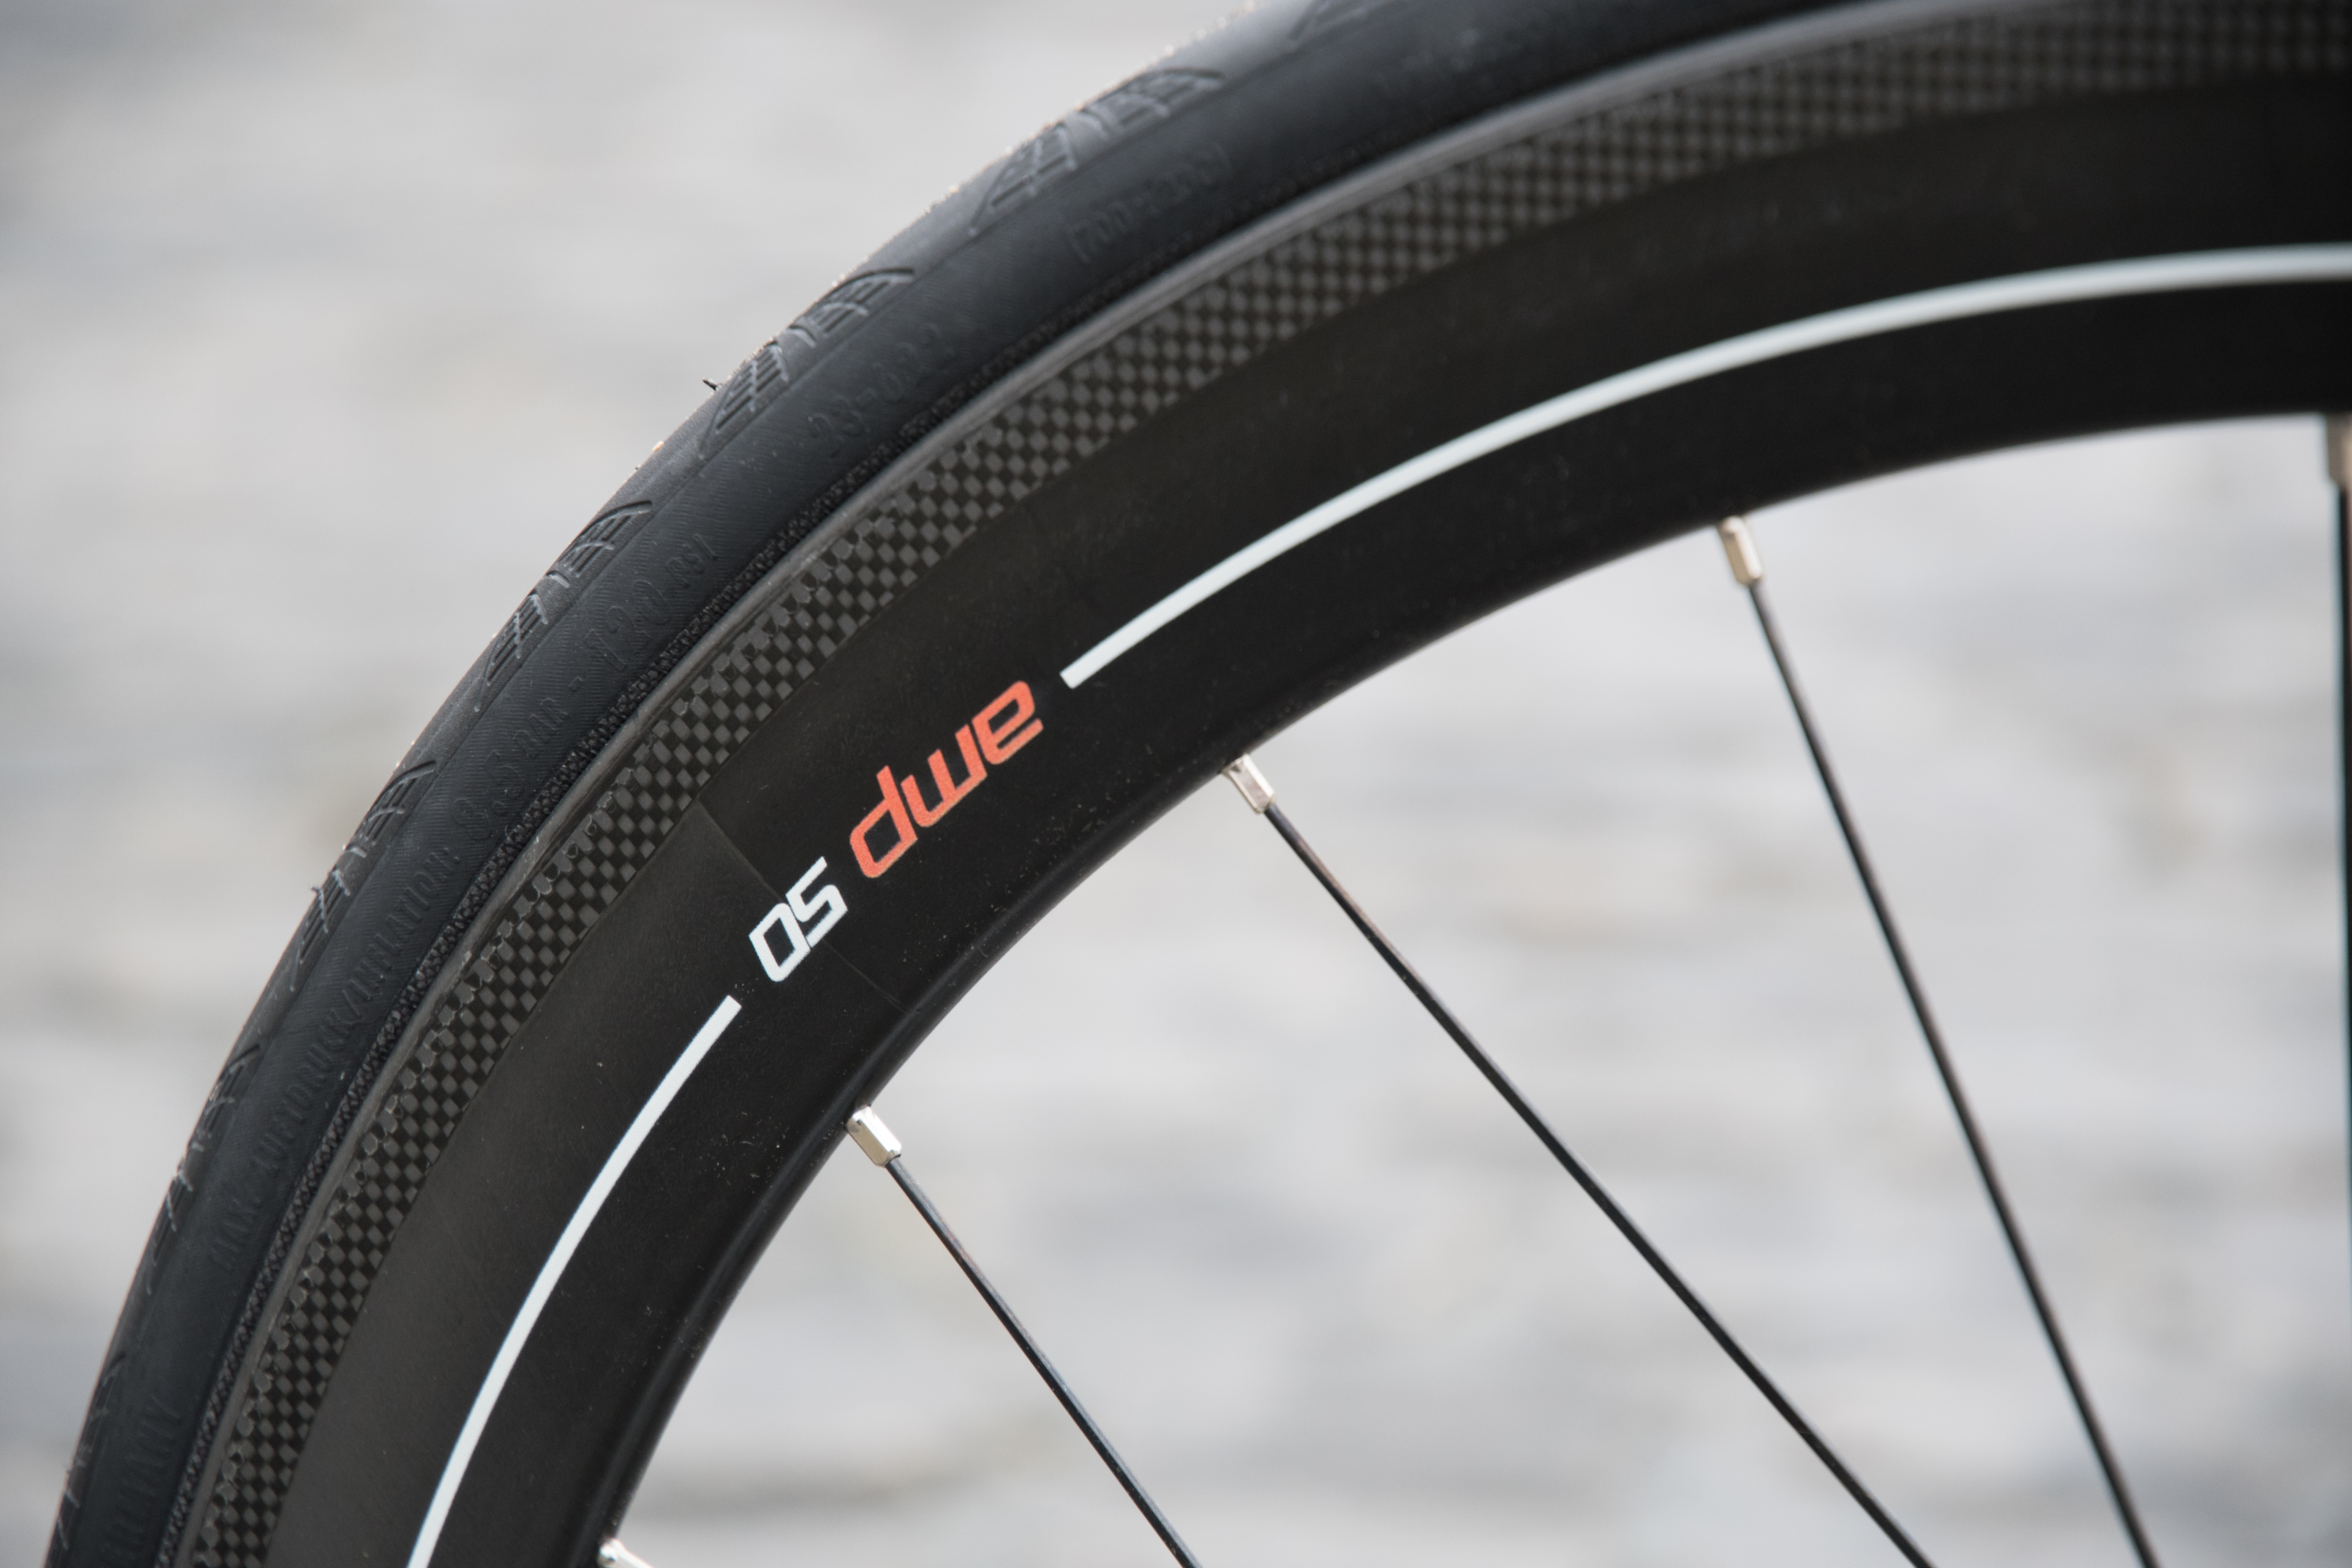
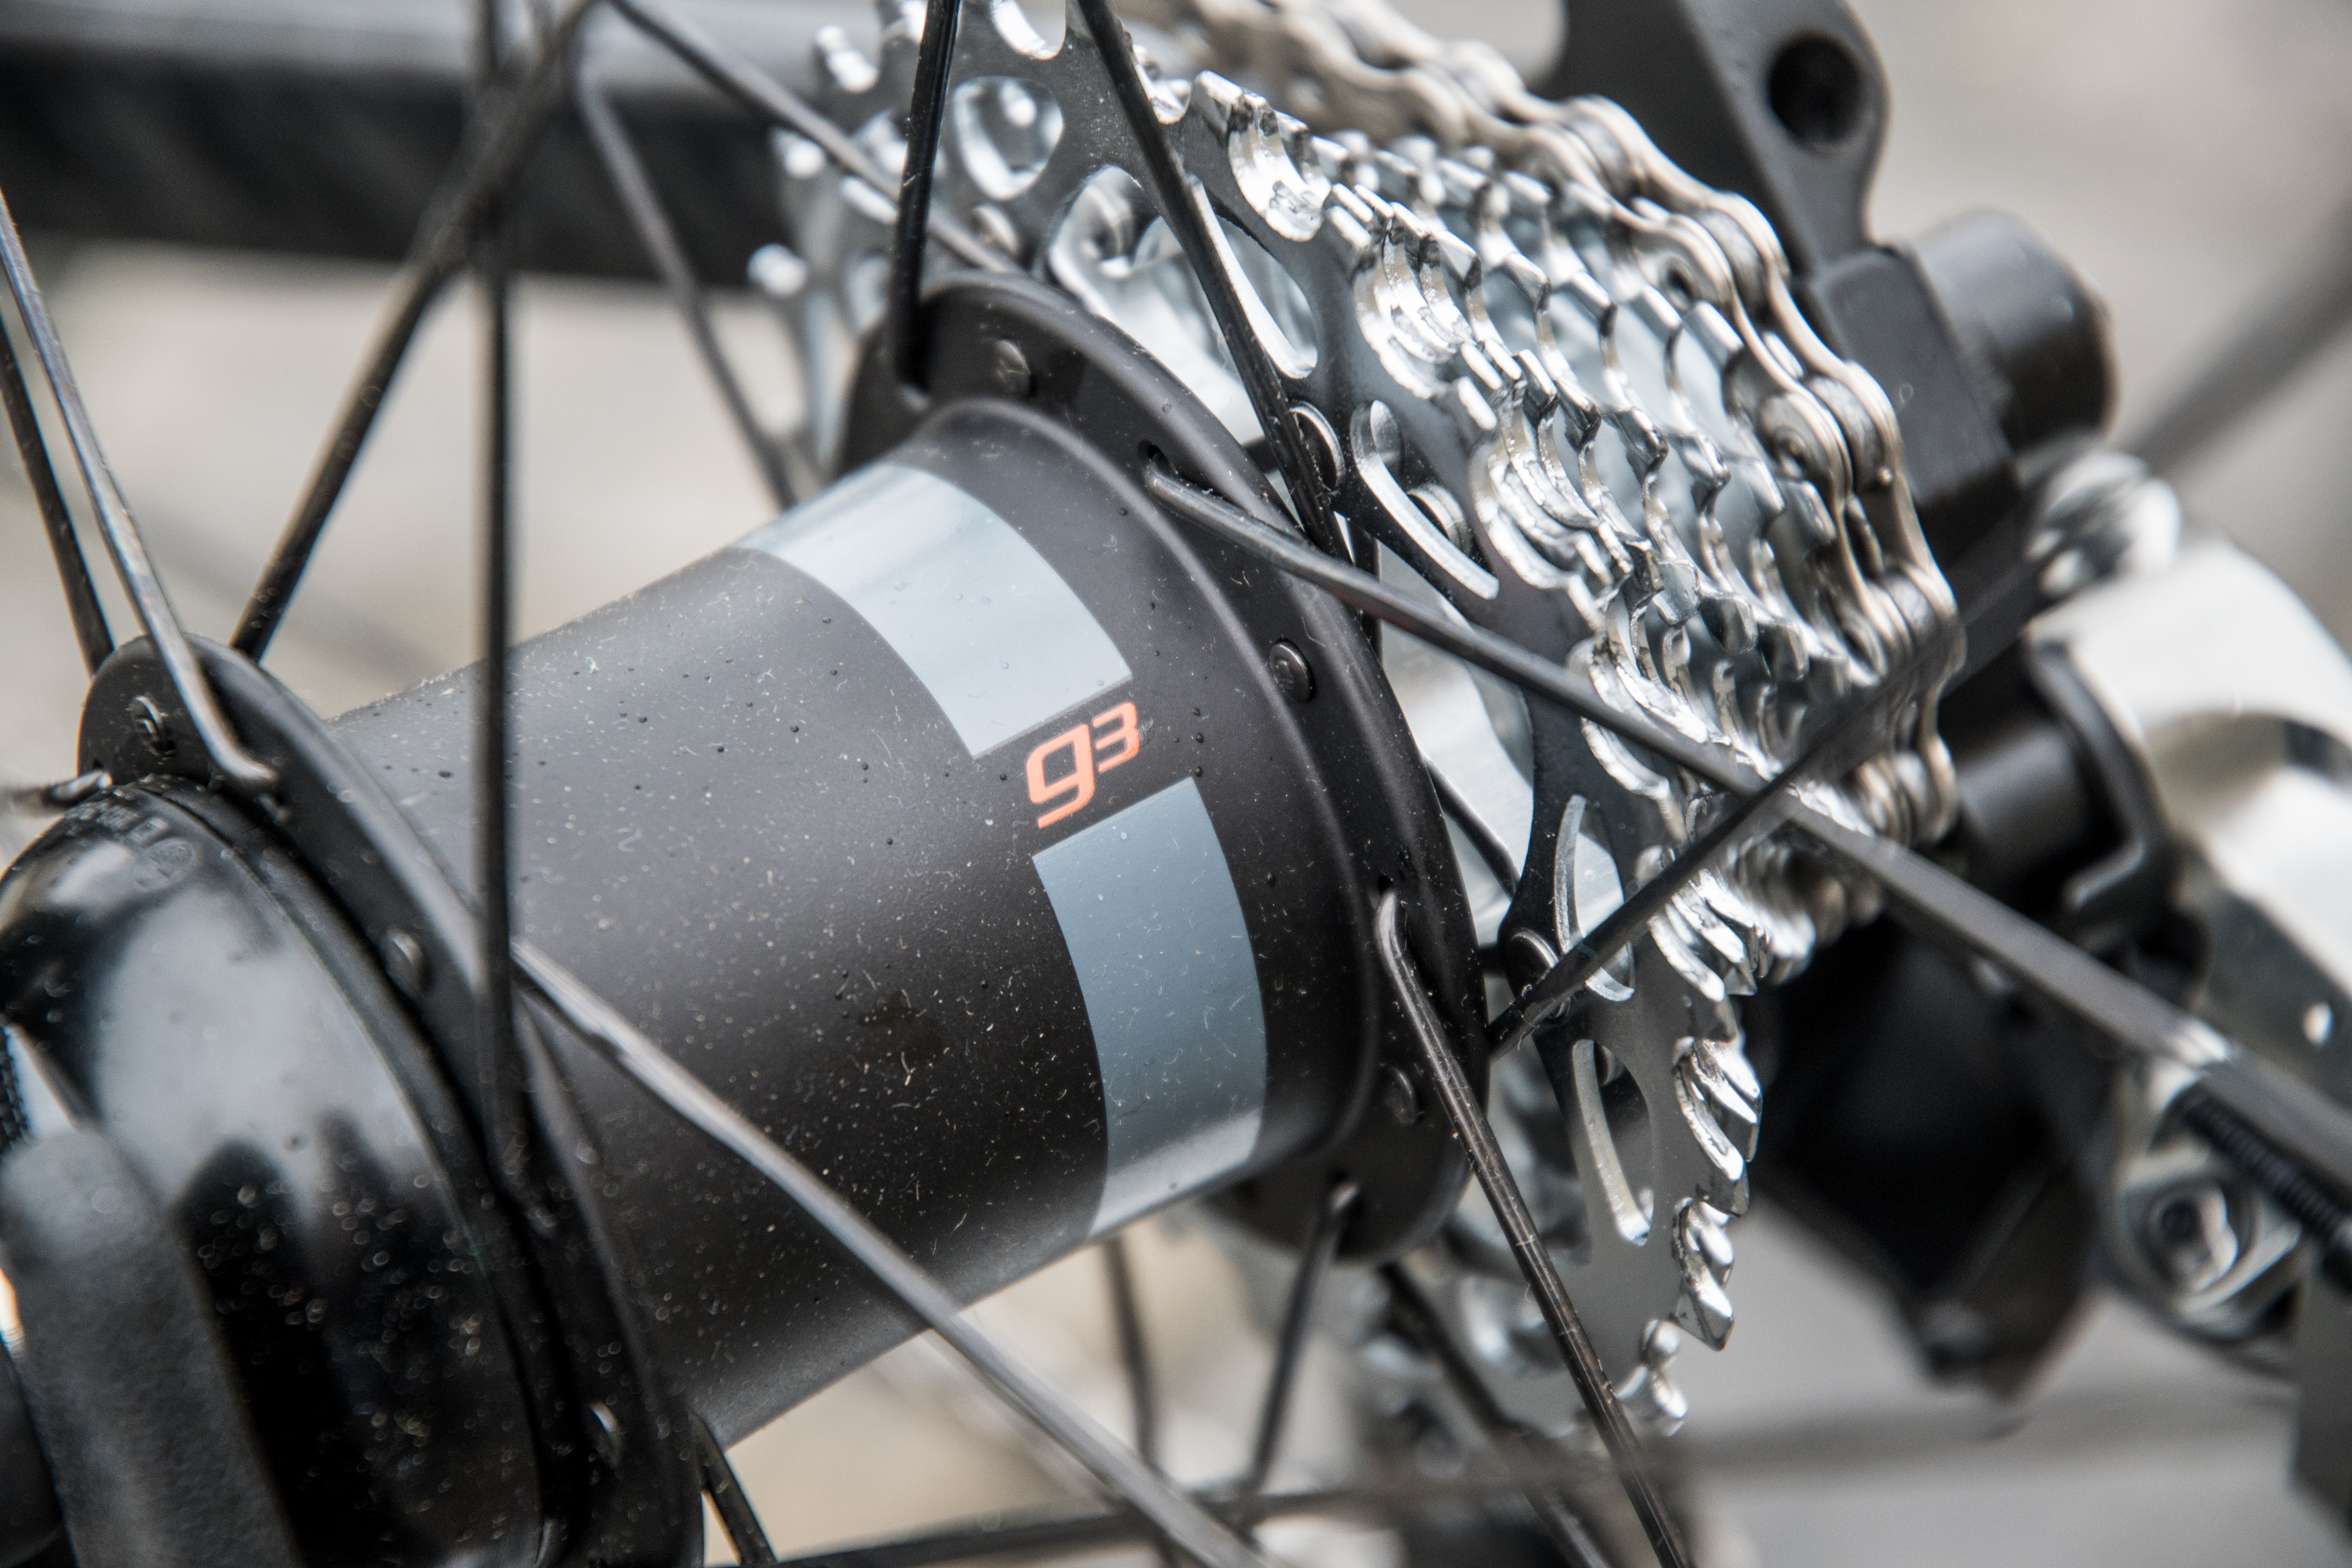
| Wheels + PT Hub | PowerTap G3 AMP 50M Carbon Clincher | Source/Link |
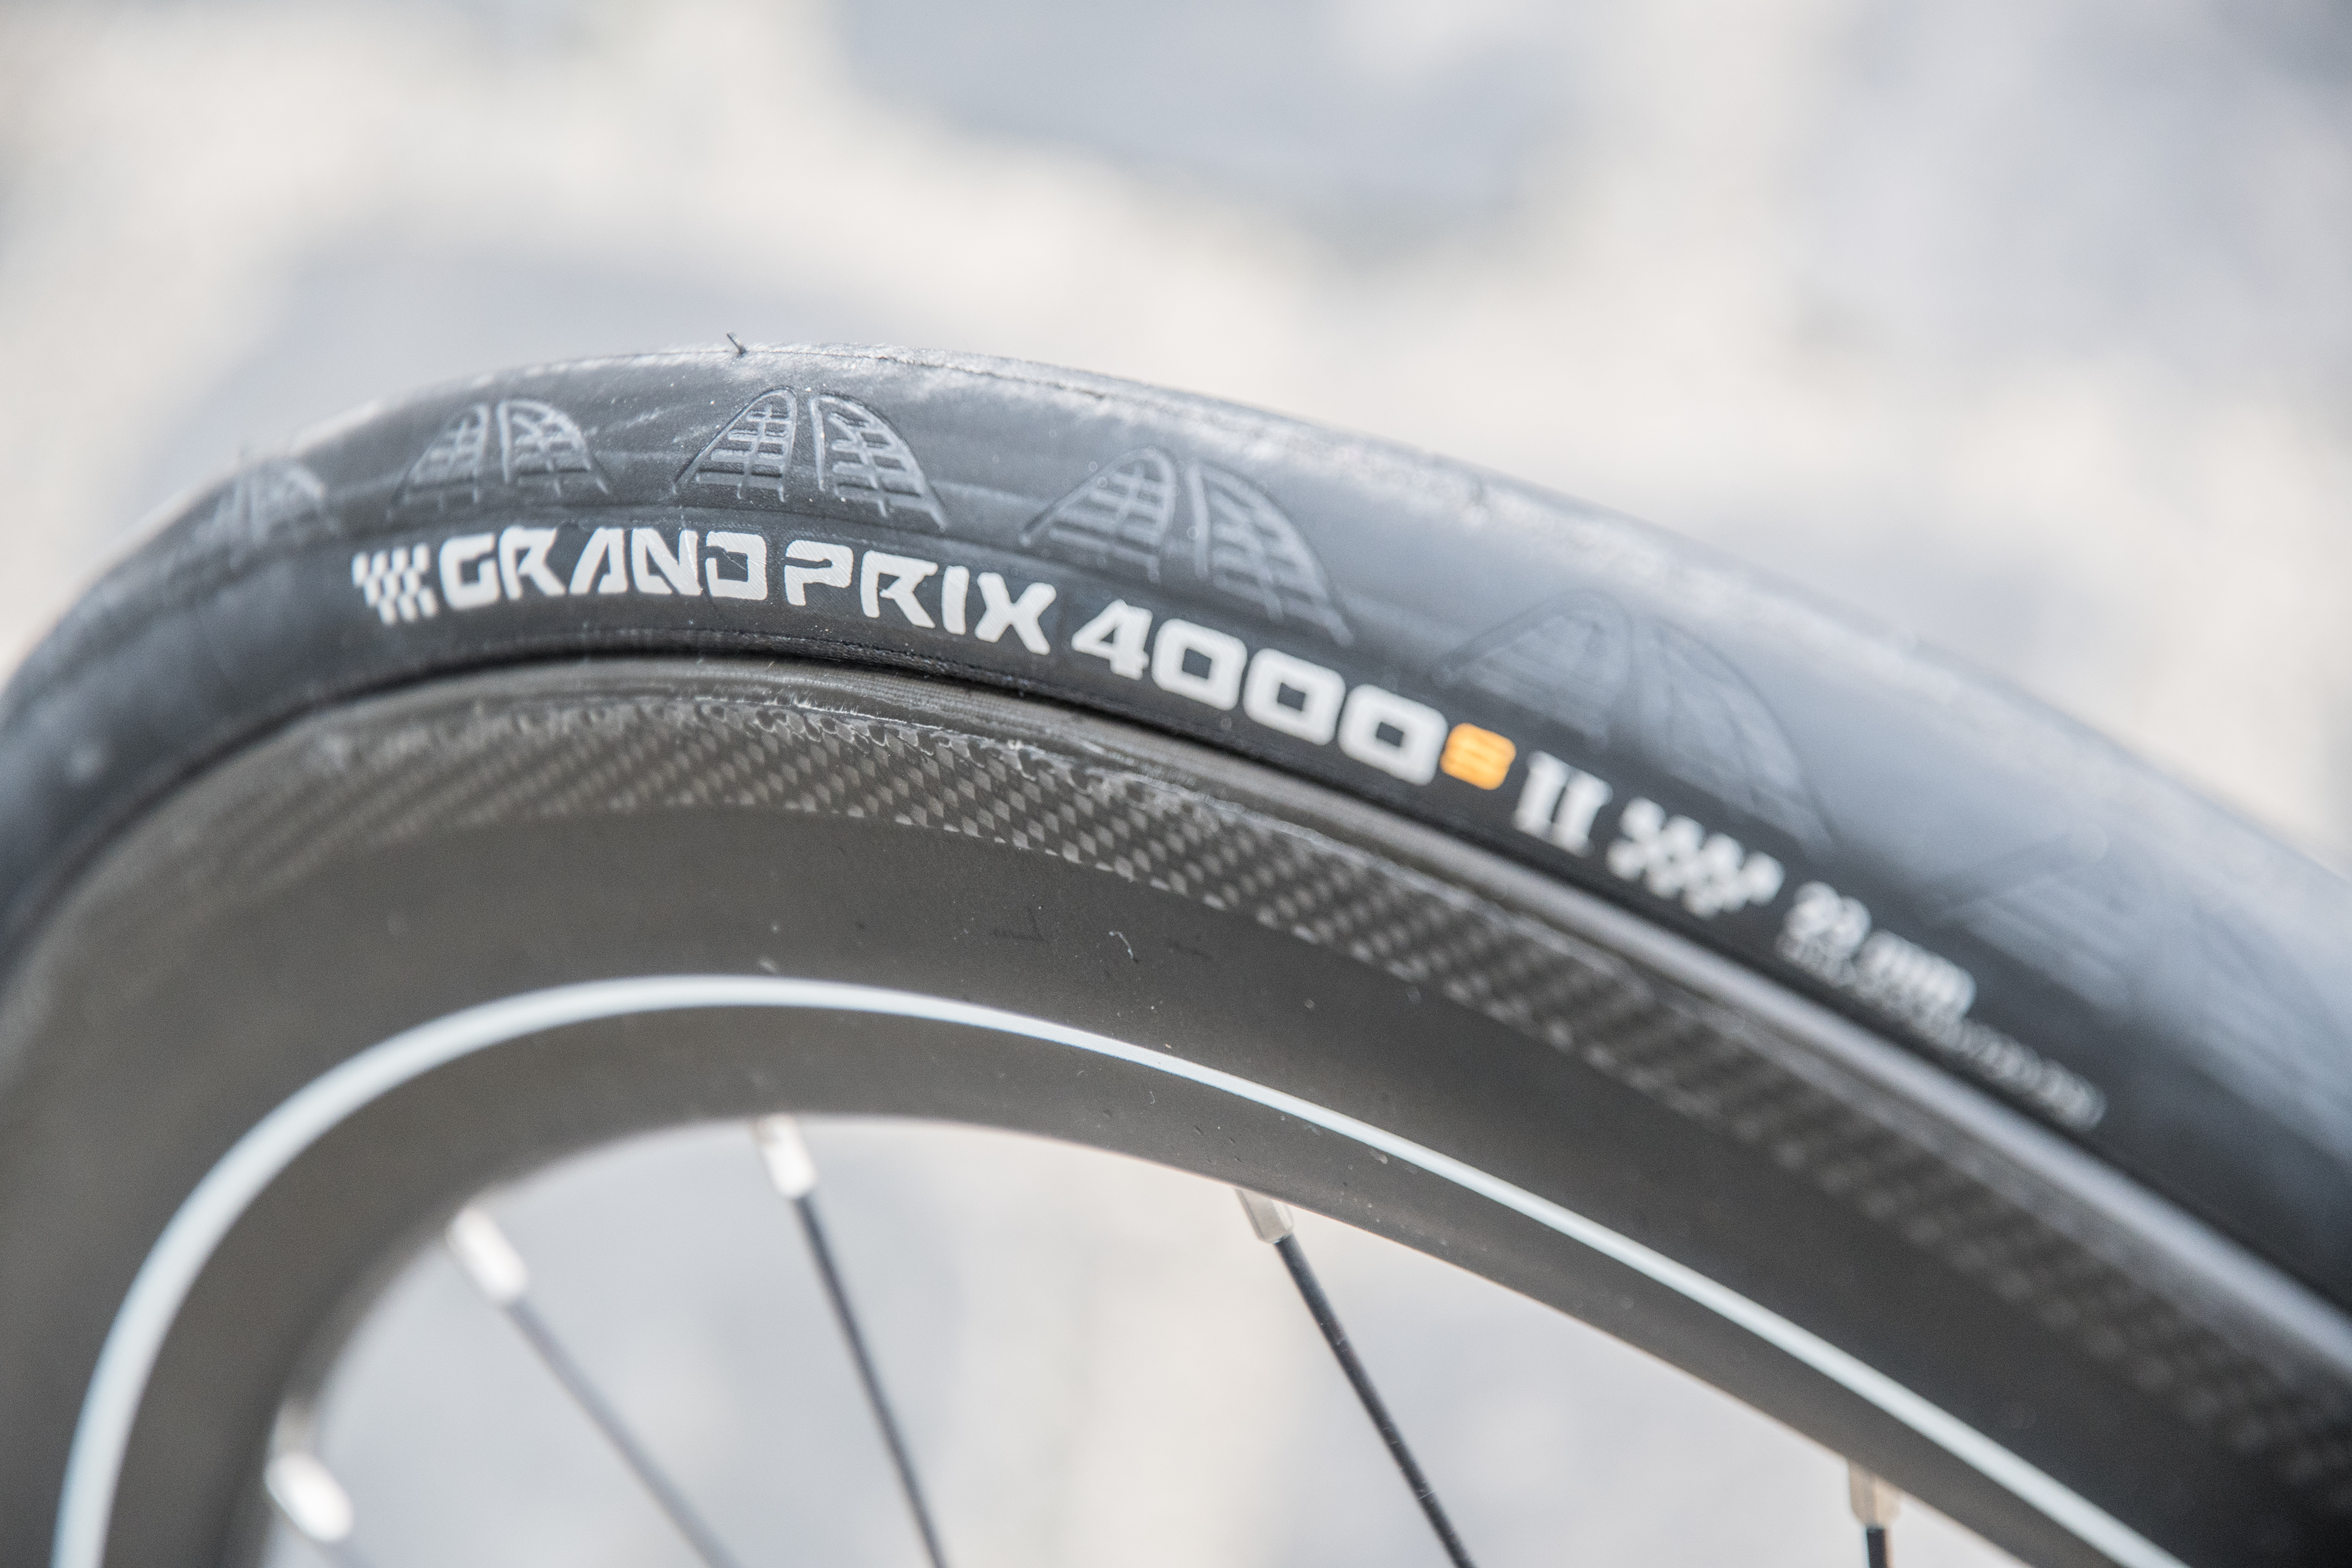
| Tires | Continental Grand Prix 4000s II | Source/Link |
| Tubes | Whatever was sitting in my big bin of tubes | - |
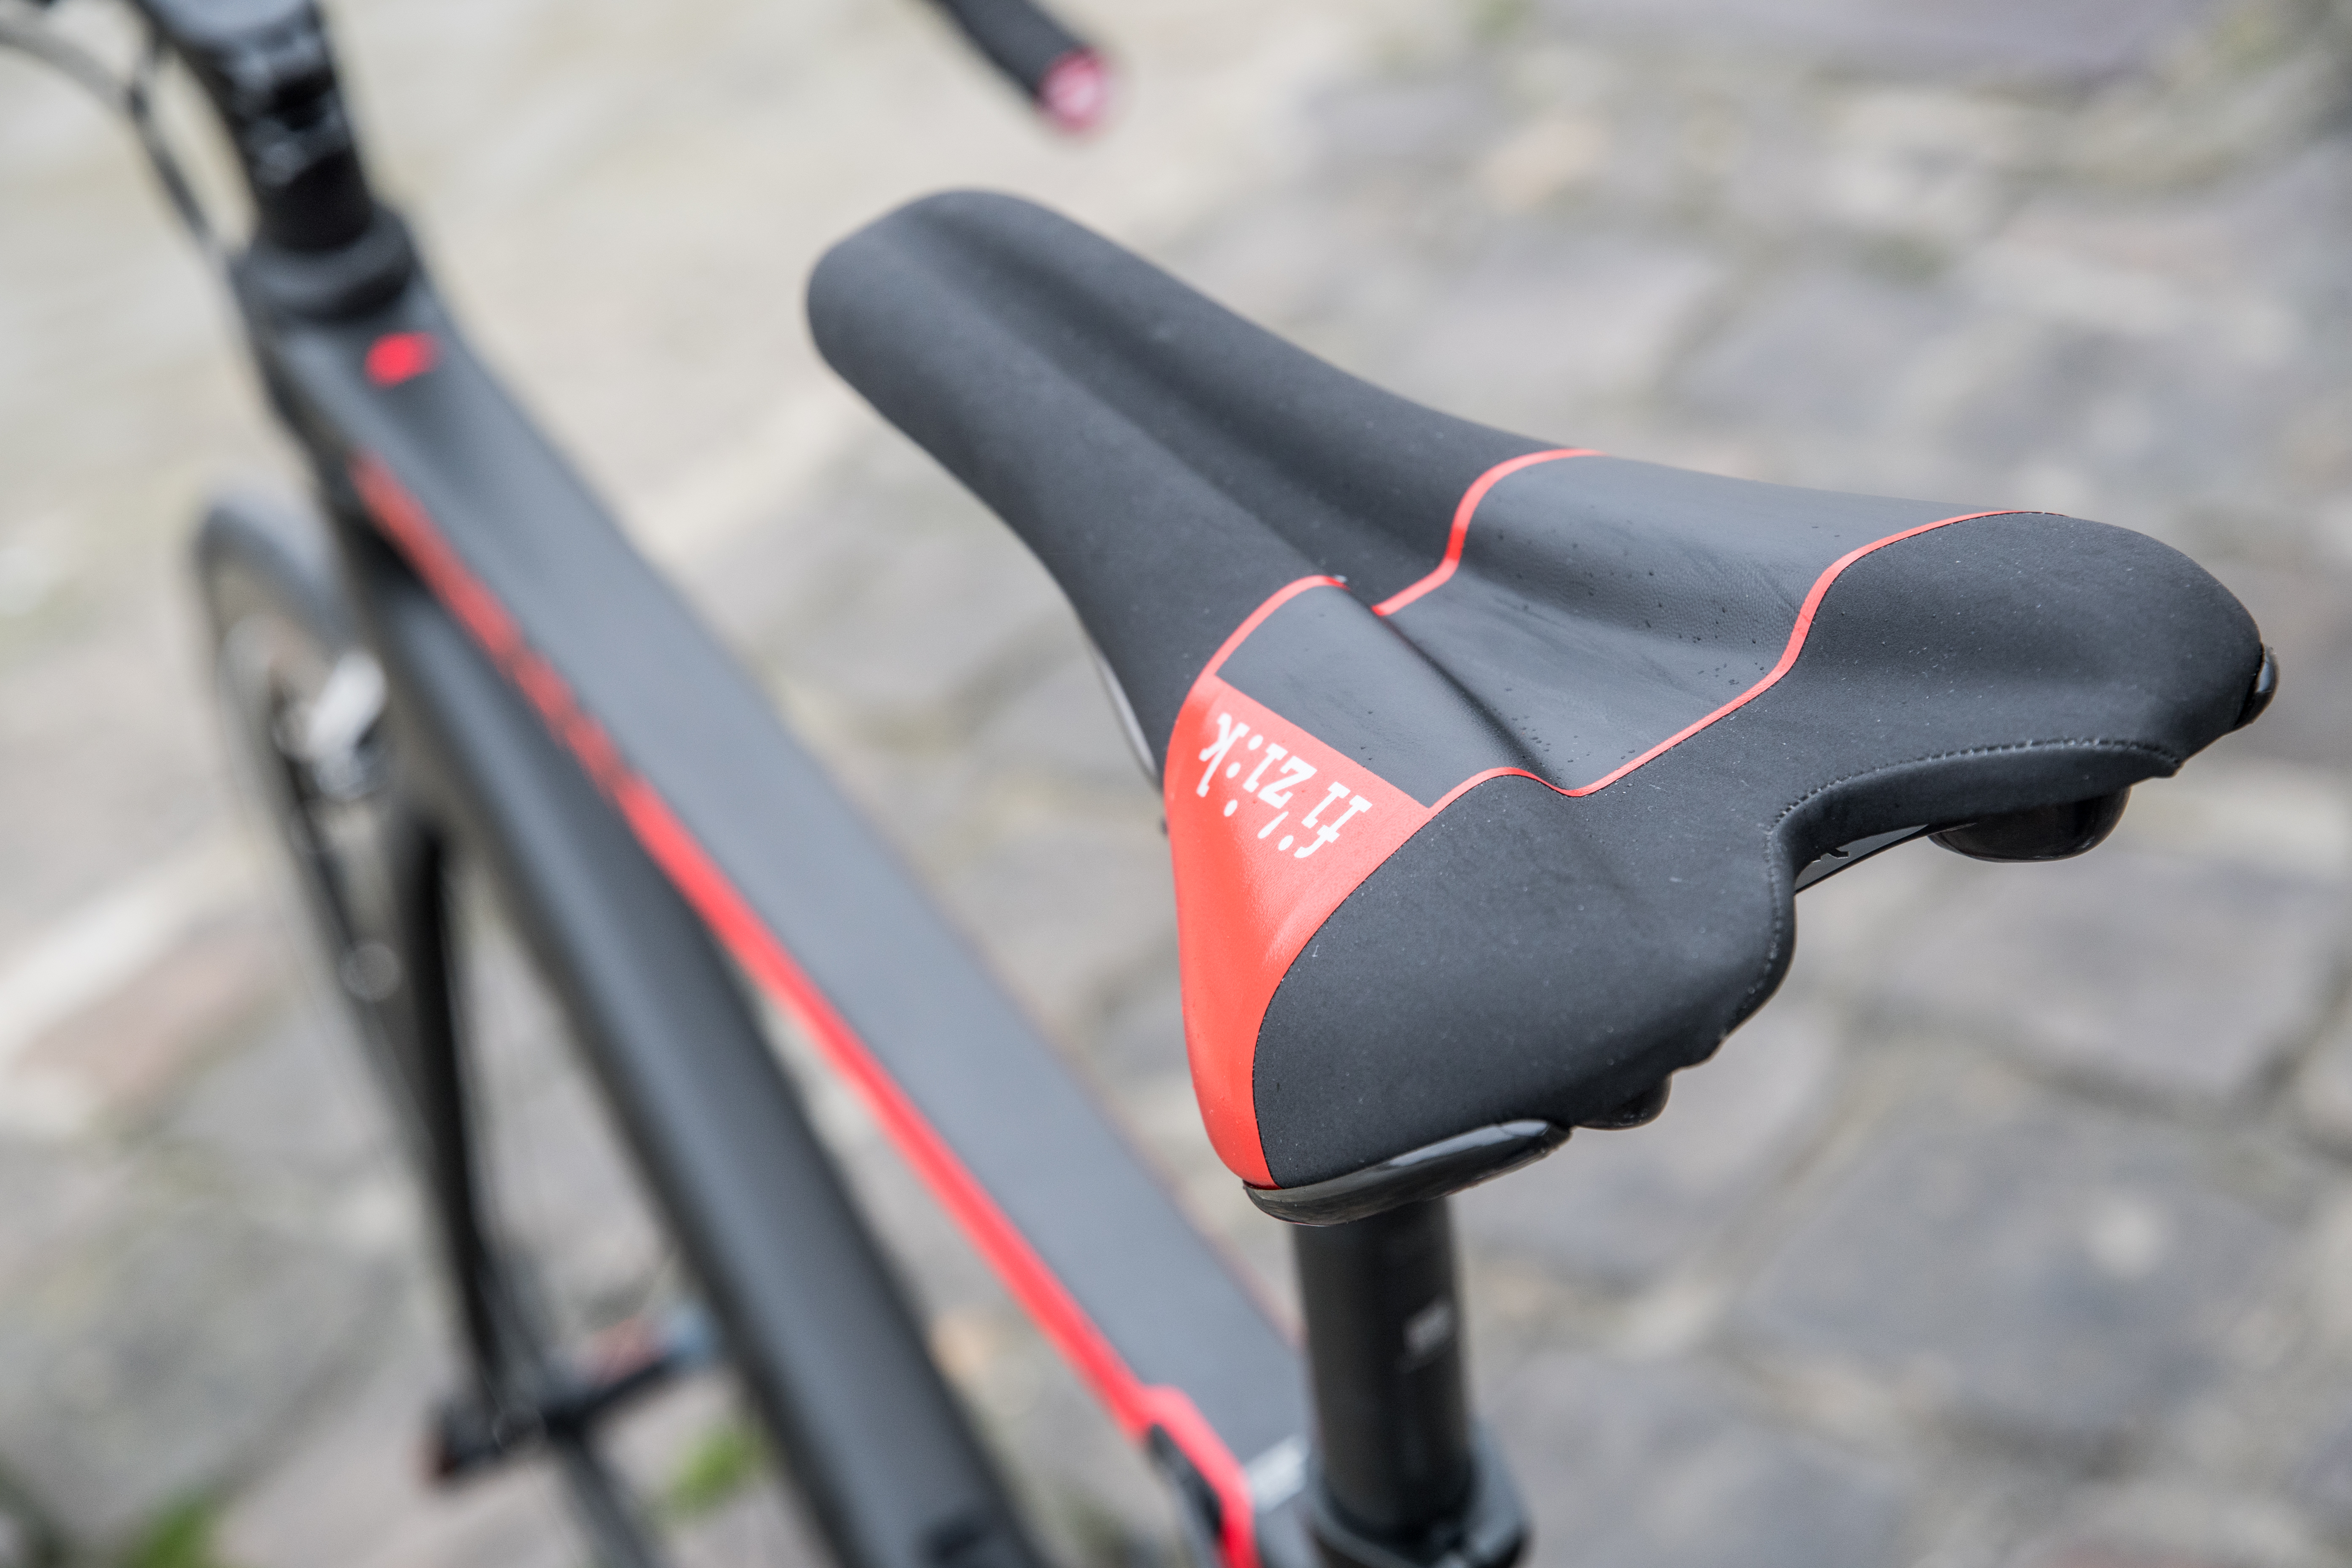
| Seat | Fizik Aliante VSX | Source/Link |
| Handlebars | Canyon H17 ERGO AL Handlebar Black/White | Source/Link |
| Handlebar Tape | SRAM Supercork Bar Tape (already have it) | Source/Link |
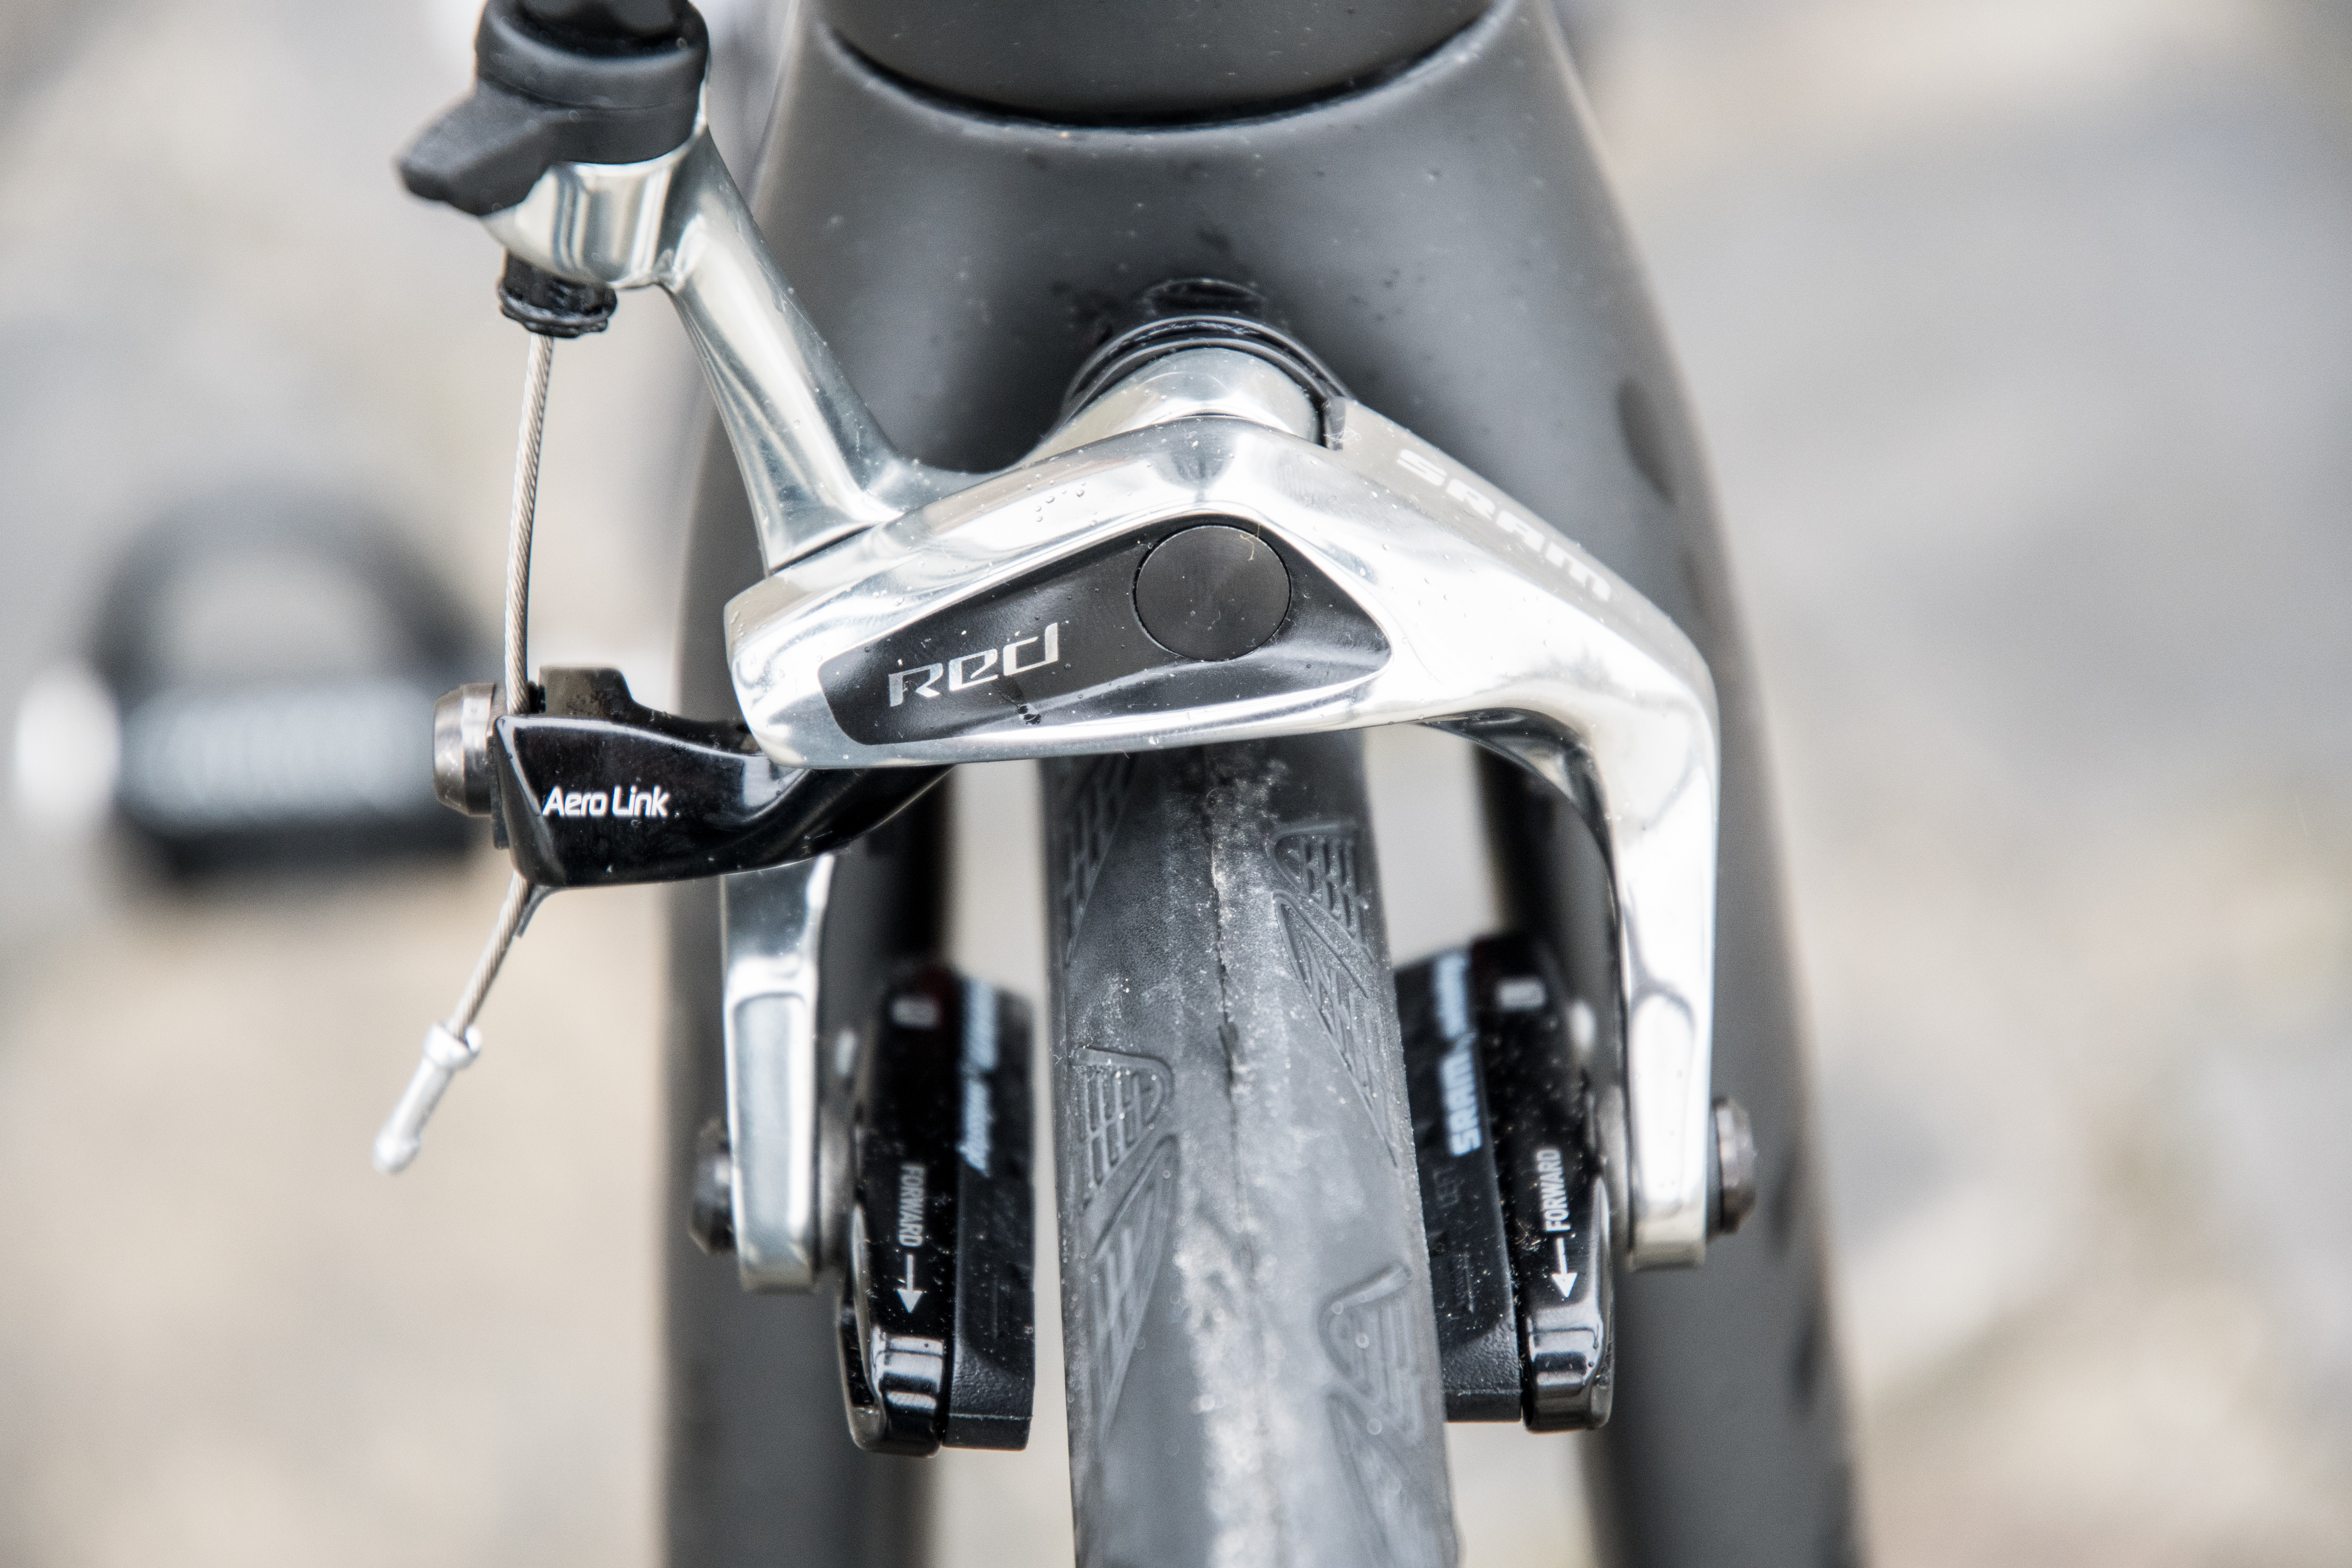
| Brakes | SRAM RED AERO LINK BRAKE SET | Source/Link |
| Bottle Cages | Elite Custom Race Cage Black (x2) | Source/Link |
Now let me dive into why I selected each and every part:
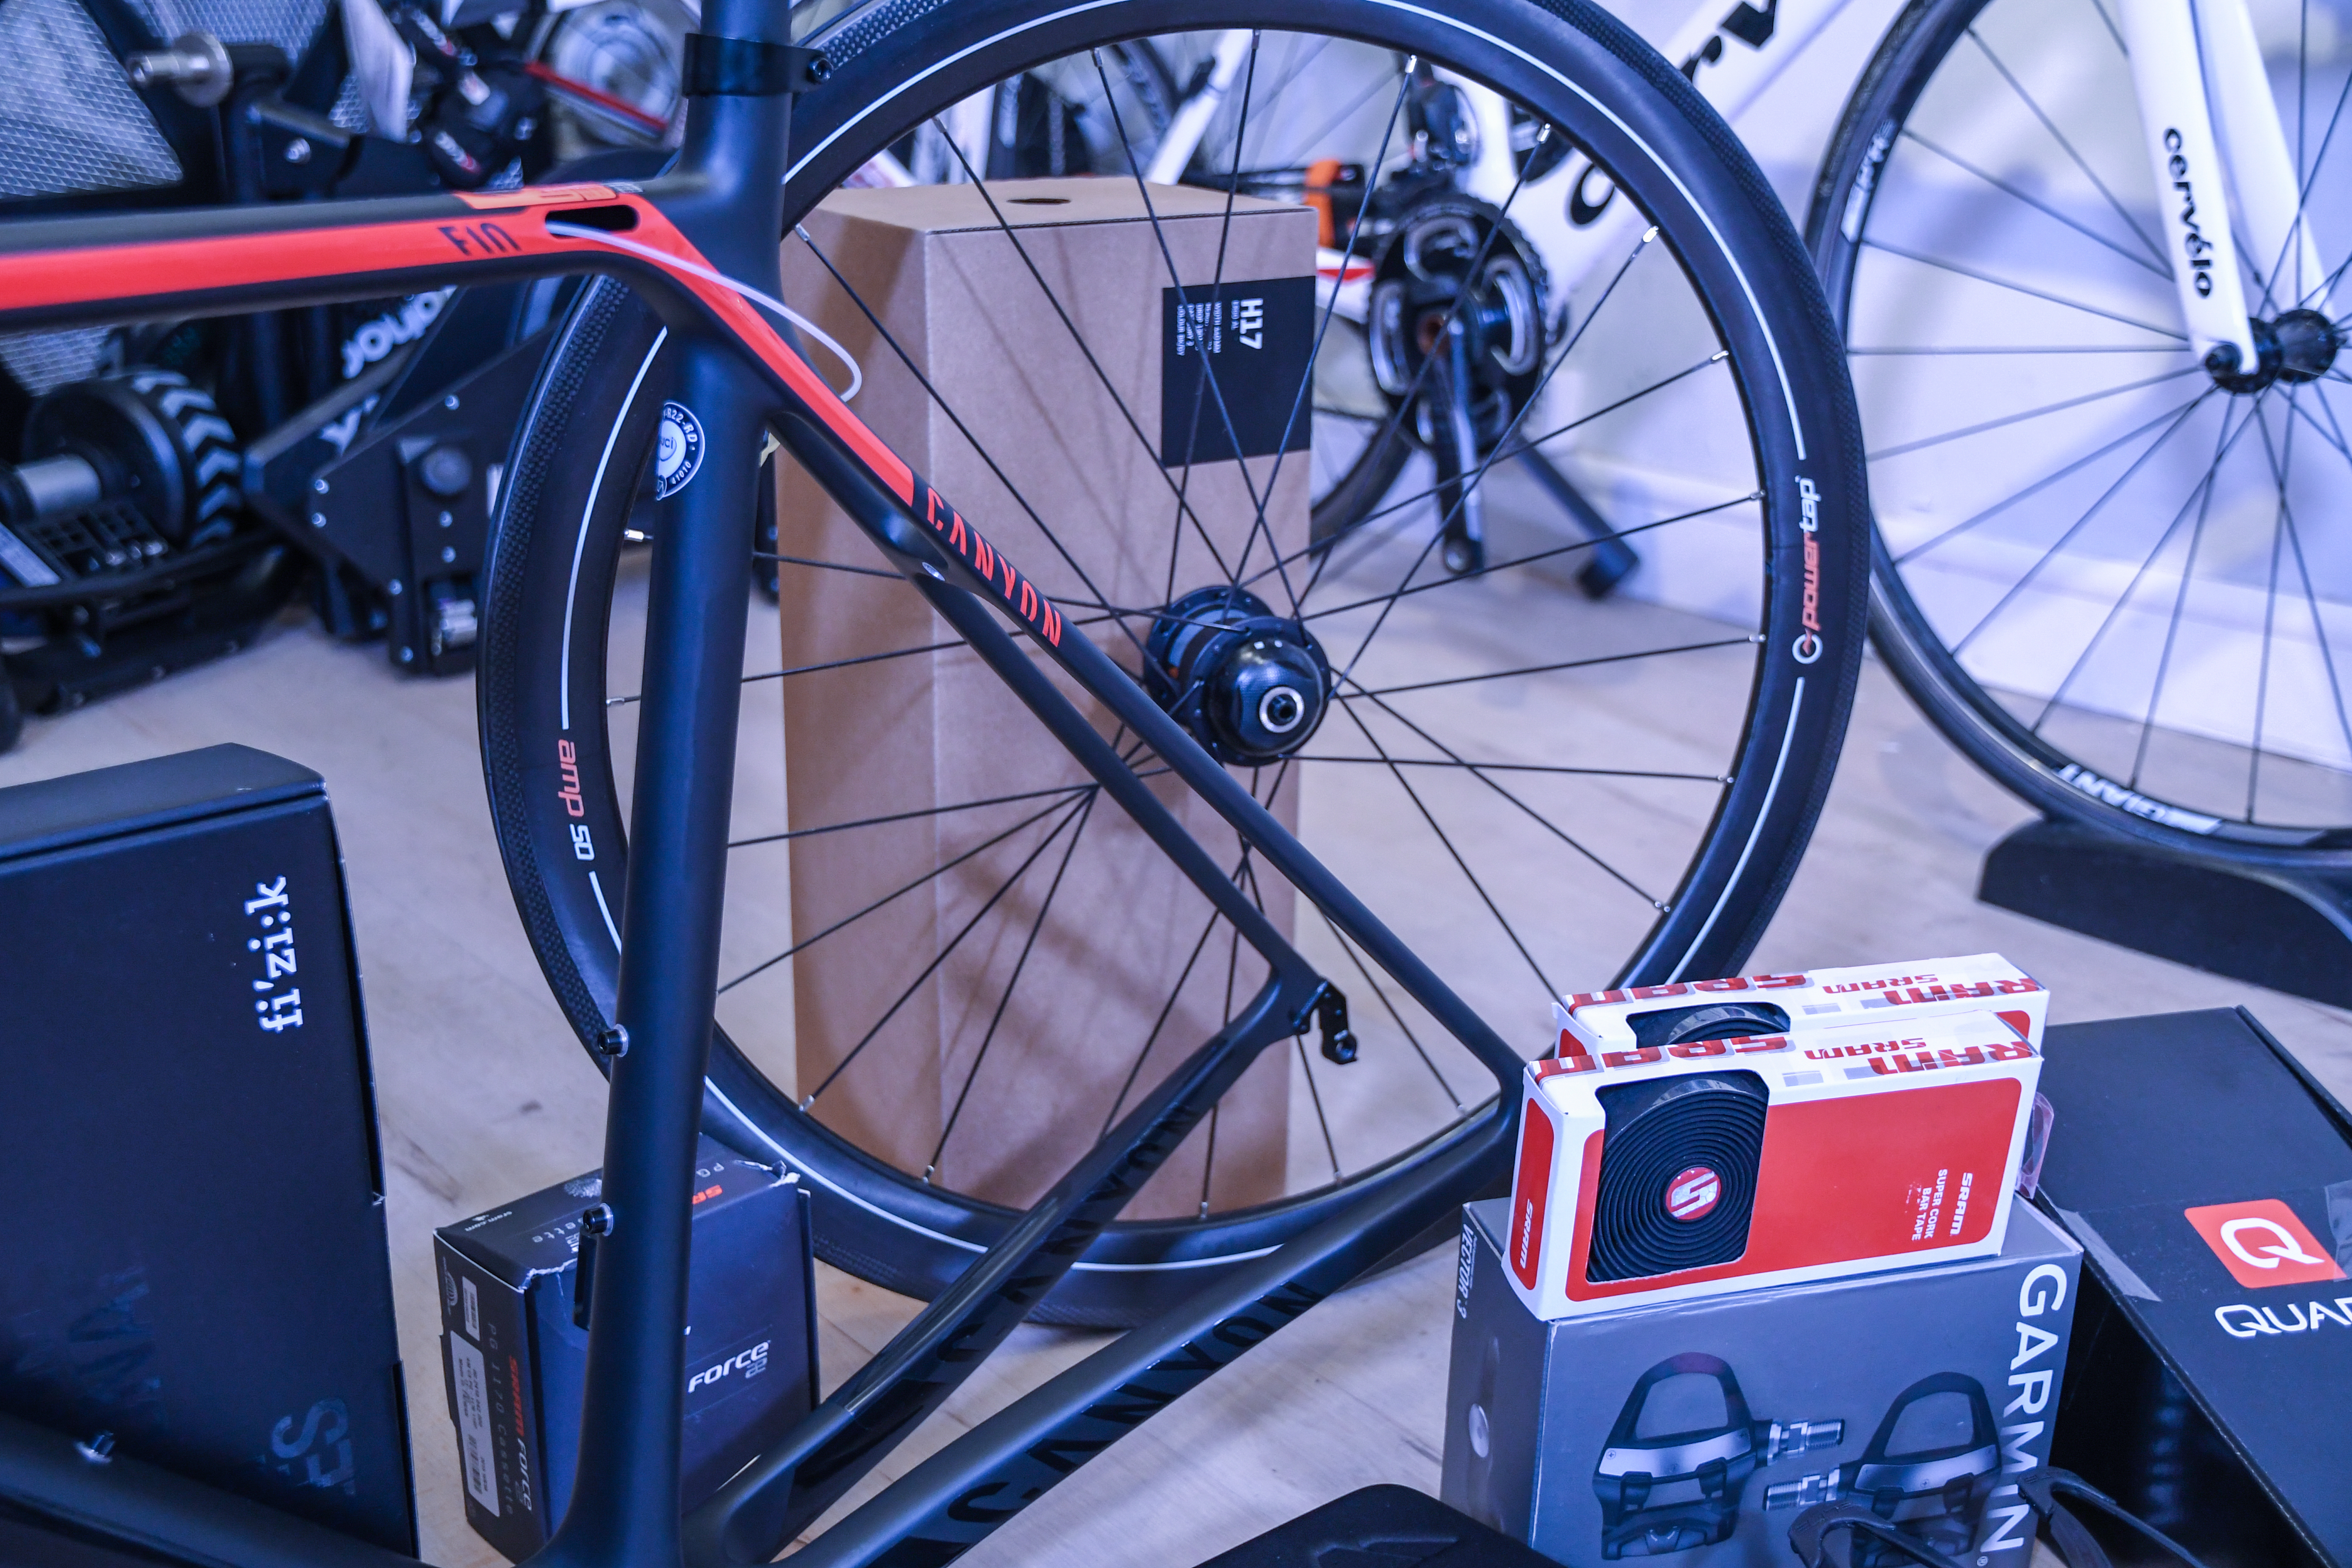
Wheels: This was actually the easiest decision. I wanted a PowerTap wheelset since I often use that as one of the baseline power meters in testing.
Crankset: Like the wheelset, this was also pretty simple. I wanted a crank spider based power meter that I could leverage with other units for power meter testing easily (especially if other units were like WatTeam that were glue-on to the crank arms). That roughly narrowed things down to the Quarq DZero, Power2Max NG, and PowerTap C1. With the C1, that’d be two PowerTap products on the bike, so I wanted some diversity, thus giving me Quarq and Power2Max. Both are incredibly similar, so it really just came down to Clever Training stocking Quarq and not Power2Max (and thus a deal there).
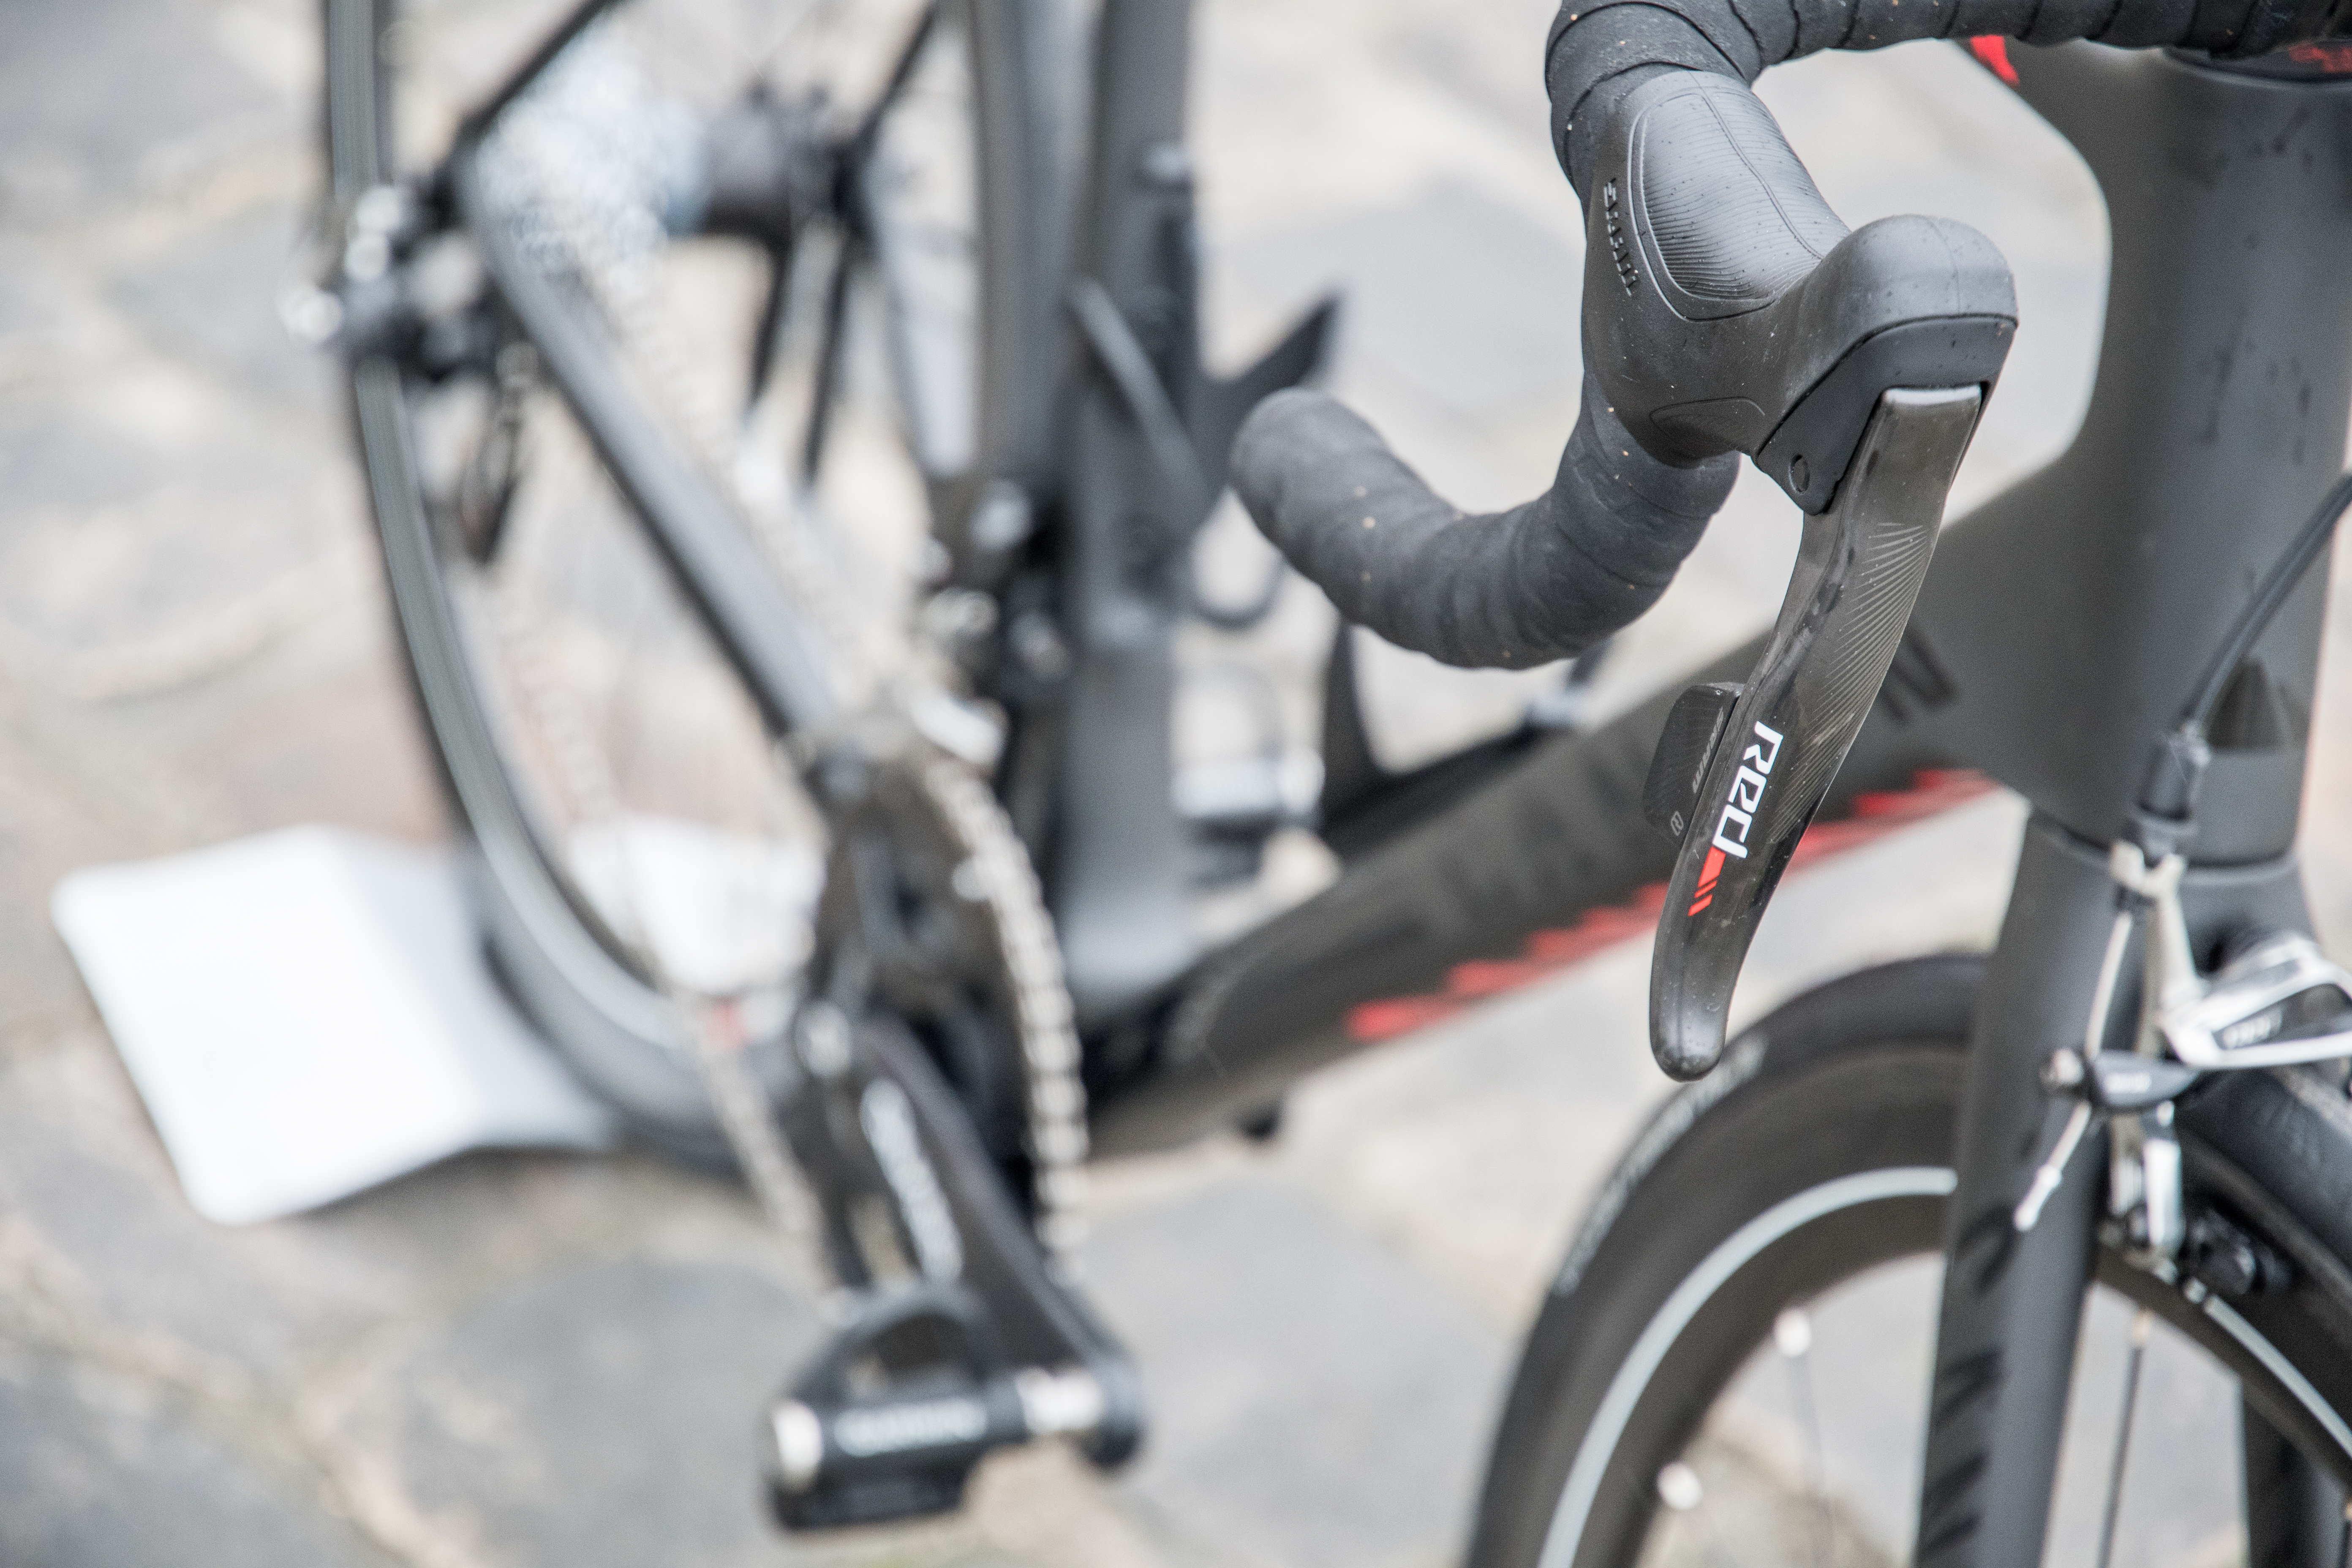
Shifting: I wanted electric shifting for sure, since many bike computers have integration there. And since my triathlon bike (Cervelo P3C) has Shimano Di2, I decided to go for some diversity and went with SRAM RED eTAP here. Plus, between the two systems, I prefer eTAP since it doesn’t take a PhD in factory logistics to figure out all the darn parts you need like Di2.
Chainrings: The FORCE 22 ones are basically the ones that SRAM recommends for the RED lineup, so I just went that direction. I’d note that these are actually really hard to track down in Europe when you get to the nuances of things. Only a handful of retailers actually had them, go figure.
Bottom Bracket and Chain: For the BB, I wanted lots of flexibility with existing crank arms that I had floating around. Simple as that. And the chain? Just to match the RED shifting pieces. Simple as that.
Cassette: My best interweb research seemed to indicate this was the matching cassette for the groupset I was putting together, so, off I went. I was mostly following this page on SRAM’s site.
Brakes: Simply picked these to match the SRAM RED groupset. Again, keeping like across the board here.
Tires: I wanted something not too pricey, but not a horrible penalty from a rolling resistance standpoint. So for that I turned to Tom Anhalt’s famed test list, which is kinda legend in this area. These specific Conti’s ranked near the top of the list.
Pedals: From a power meter test setup standpoint, if I were testing a crank based power meter (such as the Stages LR or Shimano R9100 units that are sitting next to the bike to get installed), I’d want another pedal based power meter to use here. That basically leaves me with the Favero Assioma, PowerTap P1, and Garmin Vector 3. The PowerTap P1’s could mean two PowerTap products at once, so I skipped that. And the Vector 3 units already transmit Cycling Dynamics, so when 3rd parties start to support that, I can validate it this way.
Saddle: As a general rule of thumb I don’t like switching saddles, but when adding another bike to the stable you don’t have the option to just move it to the new bike. So I kinda pulled an option out of my ass here and just picked something that looked to match the bike and by the same brand as some of my other saddles. Again, tech is my thing, not saddles.
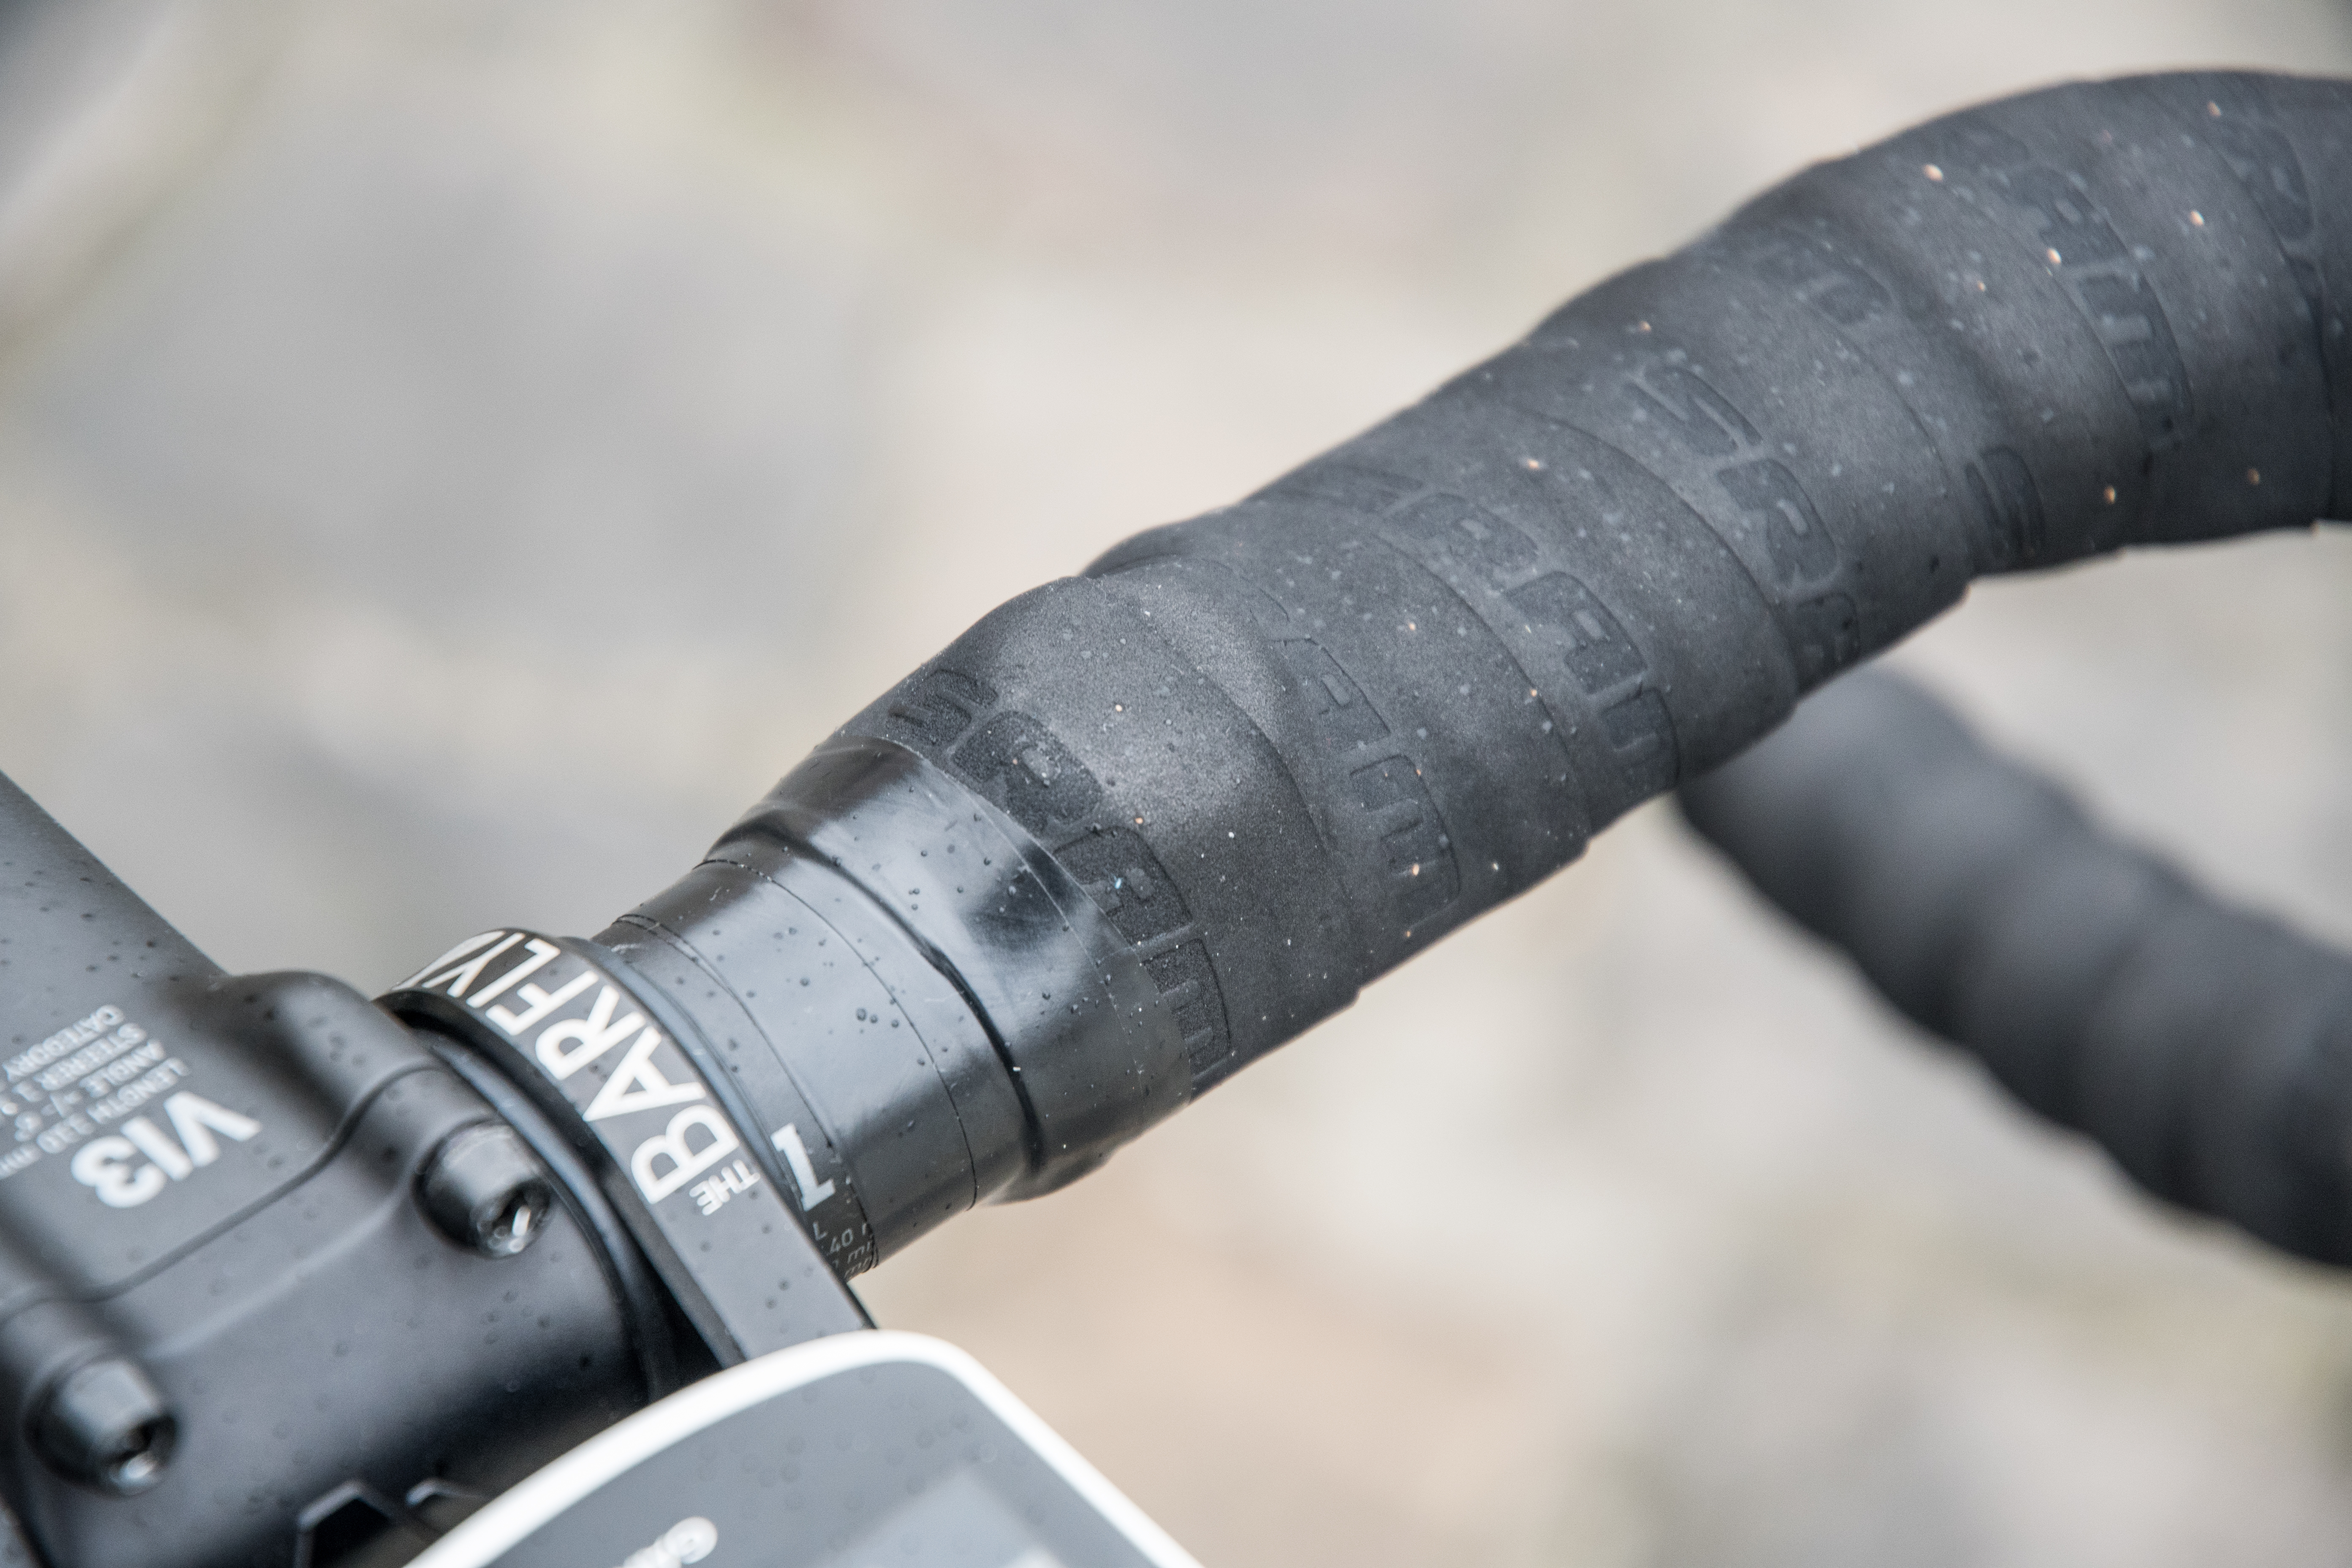
Handlebars: As I noted above, I didn’t want aero handlebars, and once you put on the eTAP shifters and bar tape and such, there’s really almost nothing anyone cares about here. So I just picked the Canyon H17’s because it was one less thing to order from somewhere else.
Handlebar tape: At some point long ago I had purchased a few packages of the SRAM bar tape that were sitting unused, so I just used that.
Bottle Cages: They looked pretty, and were available on Amazon France. It’s kinda that simple.
Phew!
So there ya have it, why I did what I did. Obviously, there’s a million and one ways to build a bike, this was just sorta how I got to where I got to. The changing of the frame to a different brand wouldn’t have really changed much in the way of components too much to be honest, save the handlebar I bought from Canyon. I’d have just then bought a different nondescript handlebar instead.
With that, let’s dive into building it up.
Putting it together:

Let me start with two important notes:
1) I’ve never built a bike from scratch before
2) This probably looks like it takes longer than it does
Of course, both of those notes are somewhat misleading. True, I’ve never built a bike from scratch before, but I’m constantly tearing apart bikes to put new test components on. So while I’d fail at every aspect of being a bike mechanic, I can roughly stumble my way around a new/clean bike setup as long as I’ve Google’d or YouTube’d enough.
The second is that the entire install process from start to finish would have taken probably about 3-4 hours tops. Some of my time was spent photographing things for this post, and then some slight delays for waiting for missing parts (I lost a tiny pack of eTAP screws to attach the front derailleur when I got the eTAP parts a year ago) and/or dealing with slightly incorrect parts (I stupidly got the non-hidden bolt chainring for the hidden bolt crankset). Still, it was all surprisingly simple to put together.
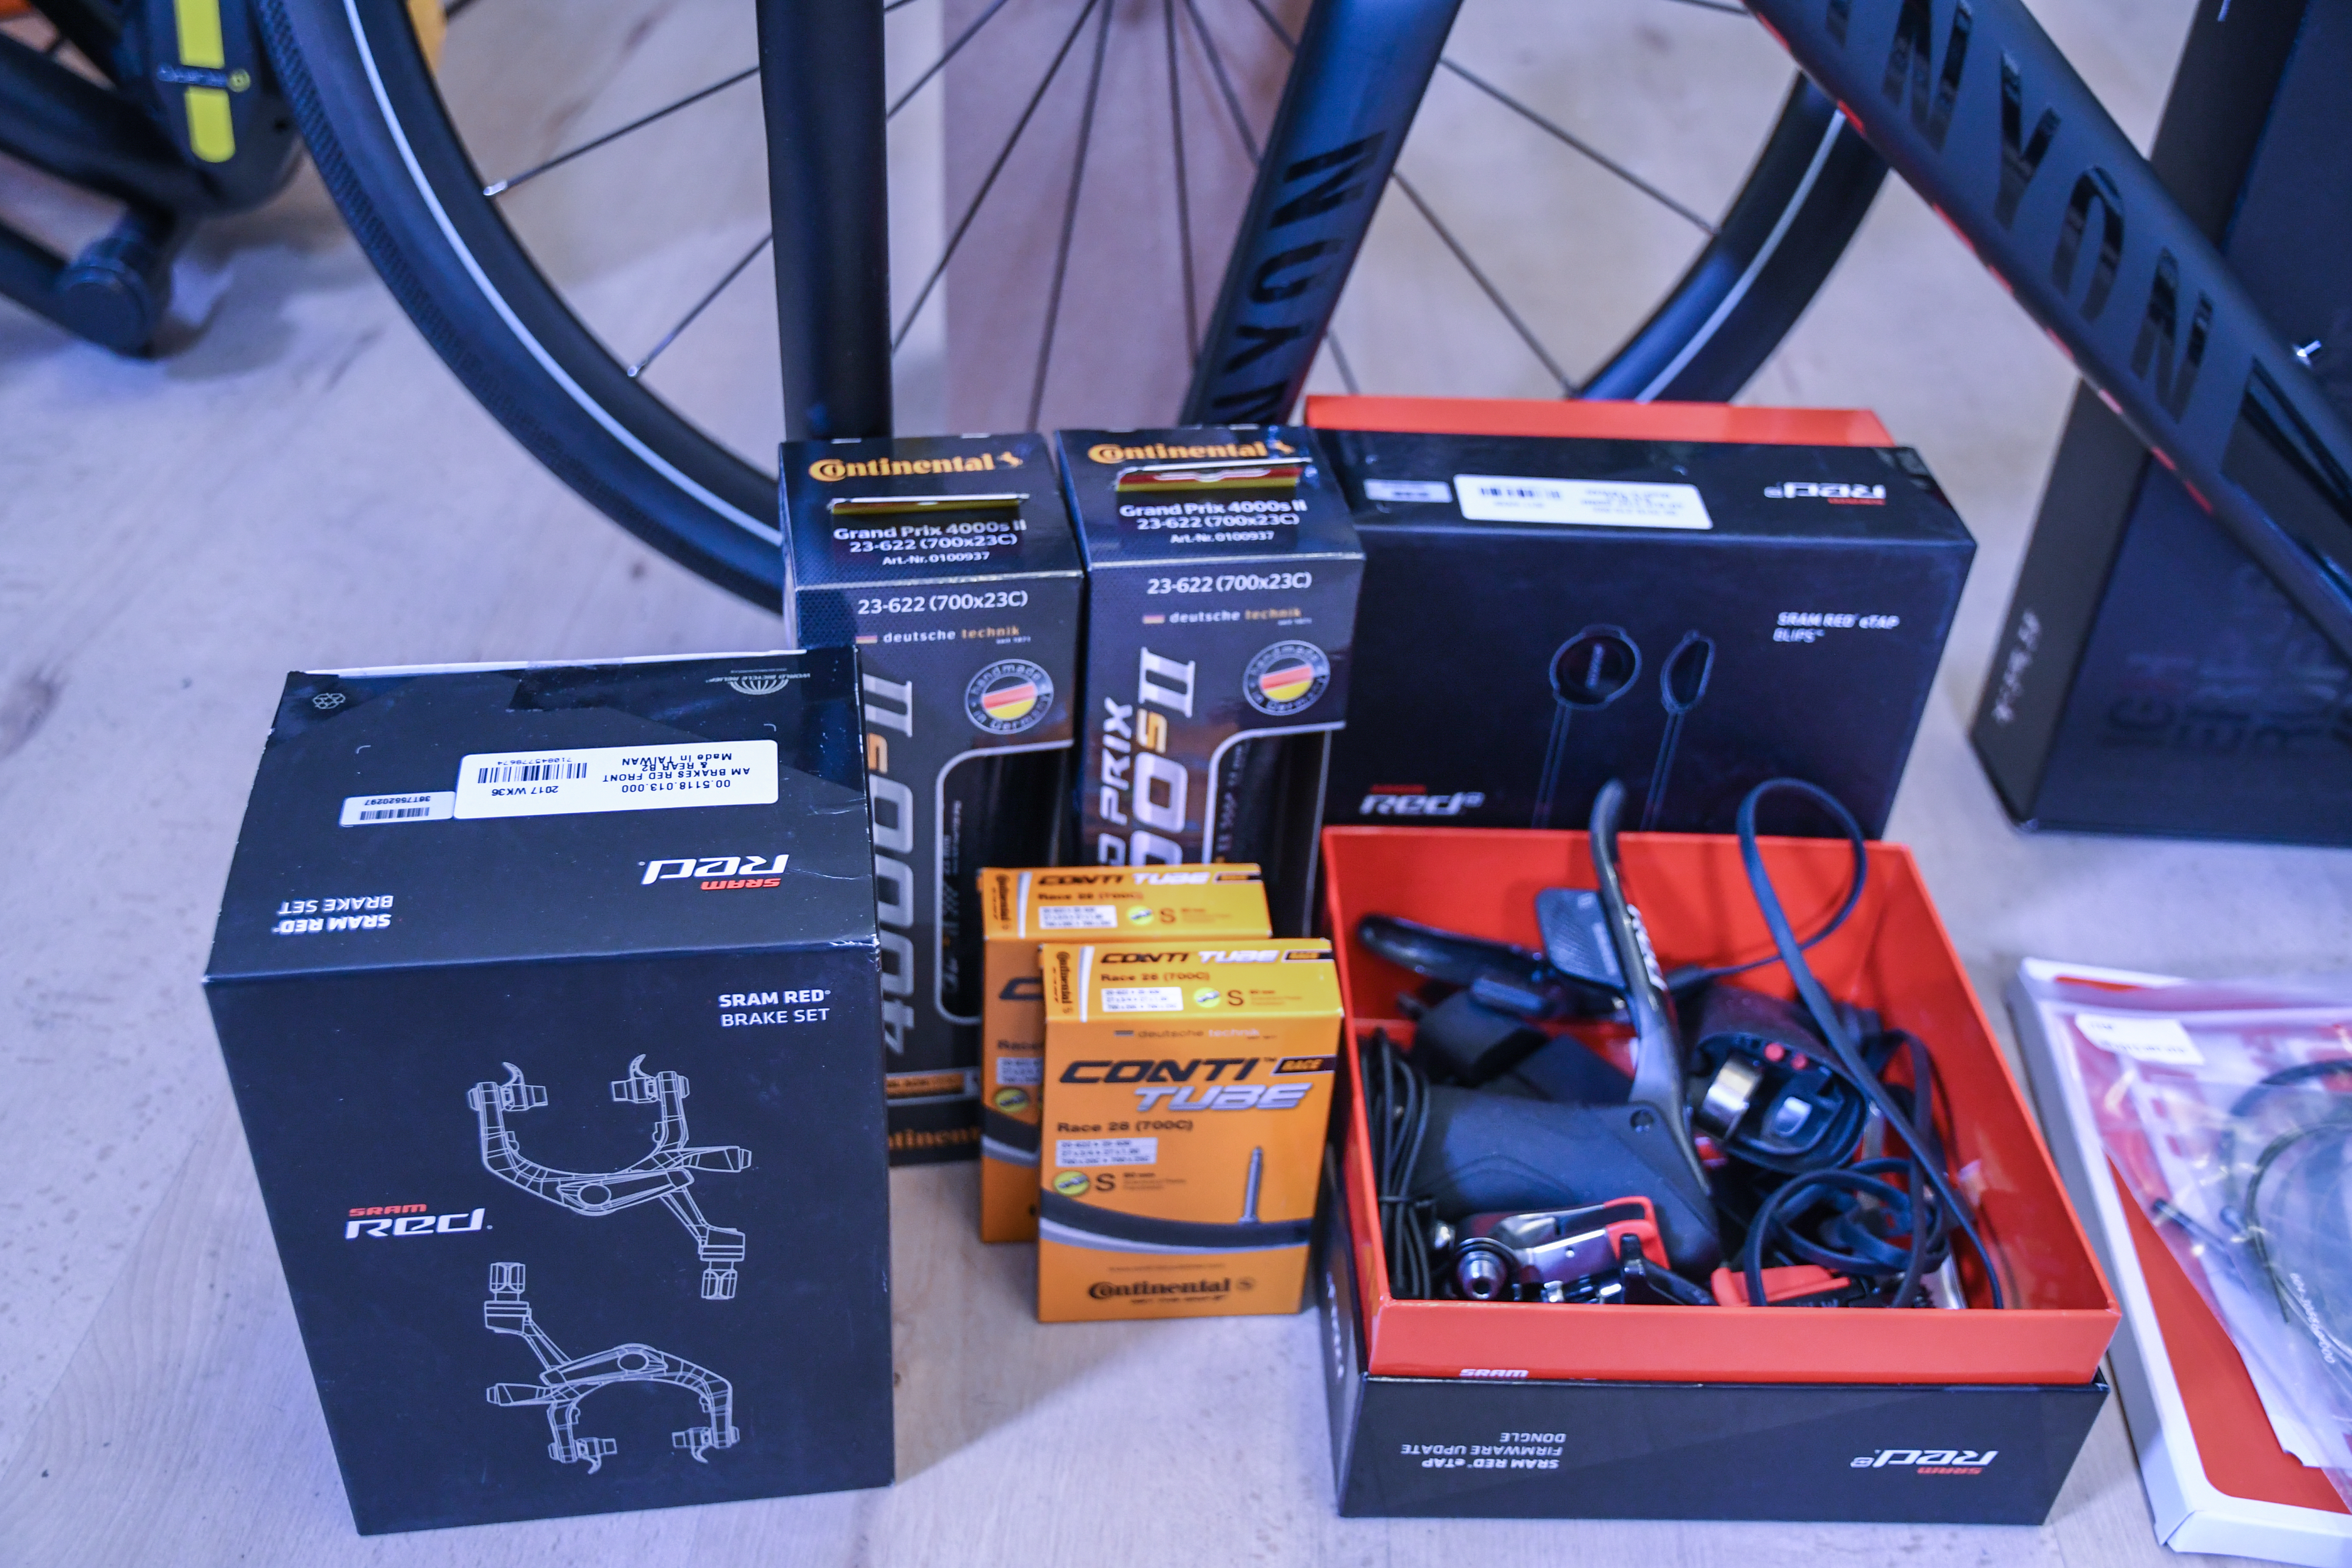
Here’s a gallery of boxed parts where I started from. The only exception is the eTAP box, which I got a year ago and had been sitting around the Cave consolidated into a single mini box (to see the gigantic box it comes in, check out my full post here).
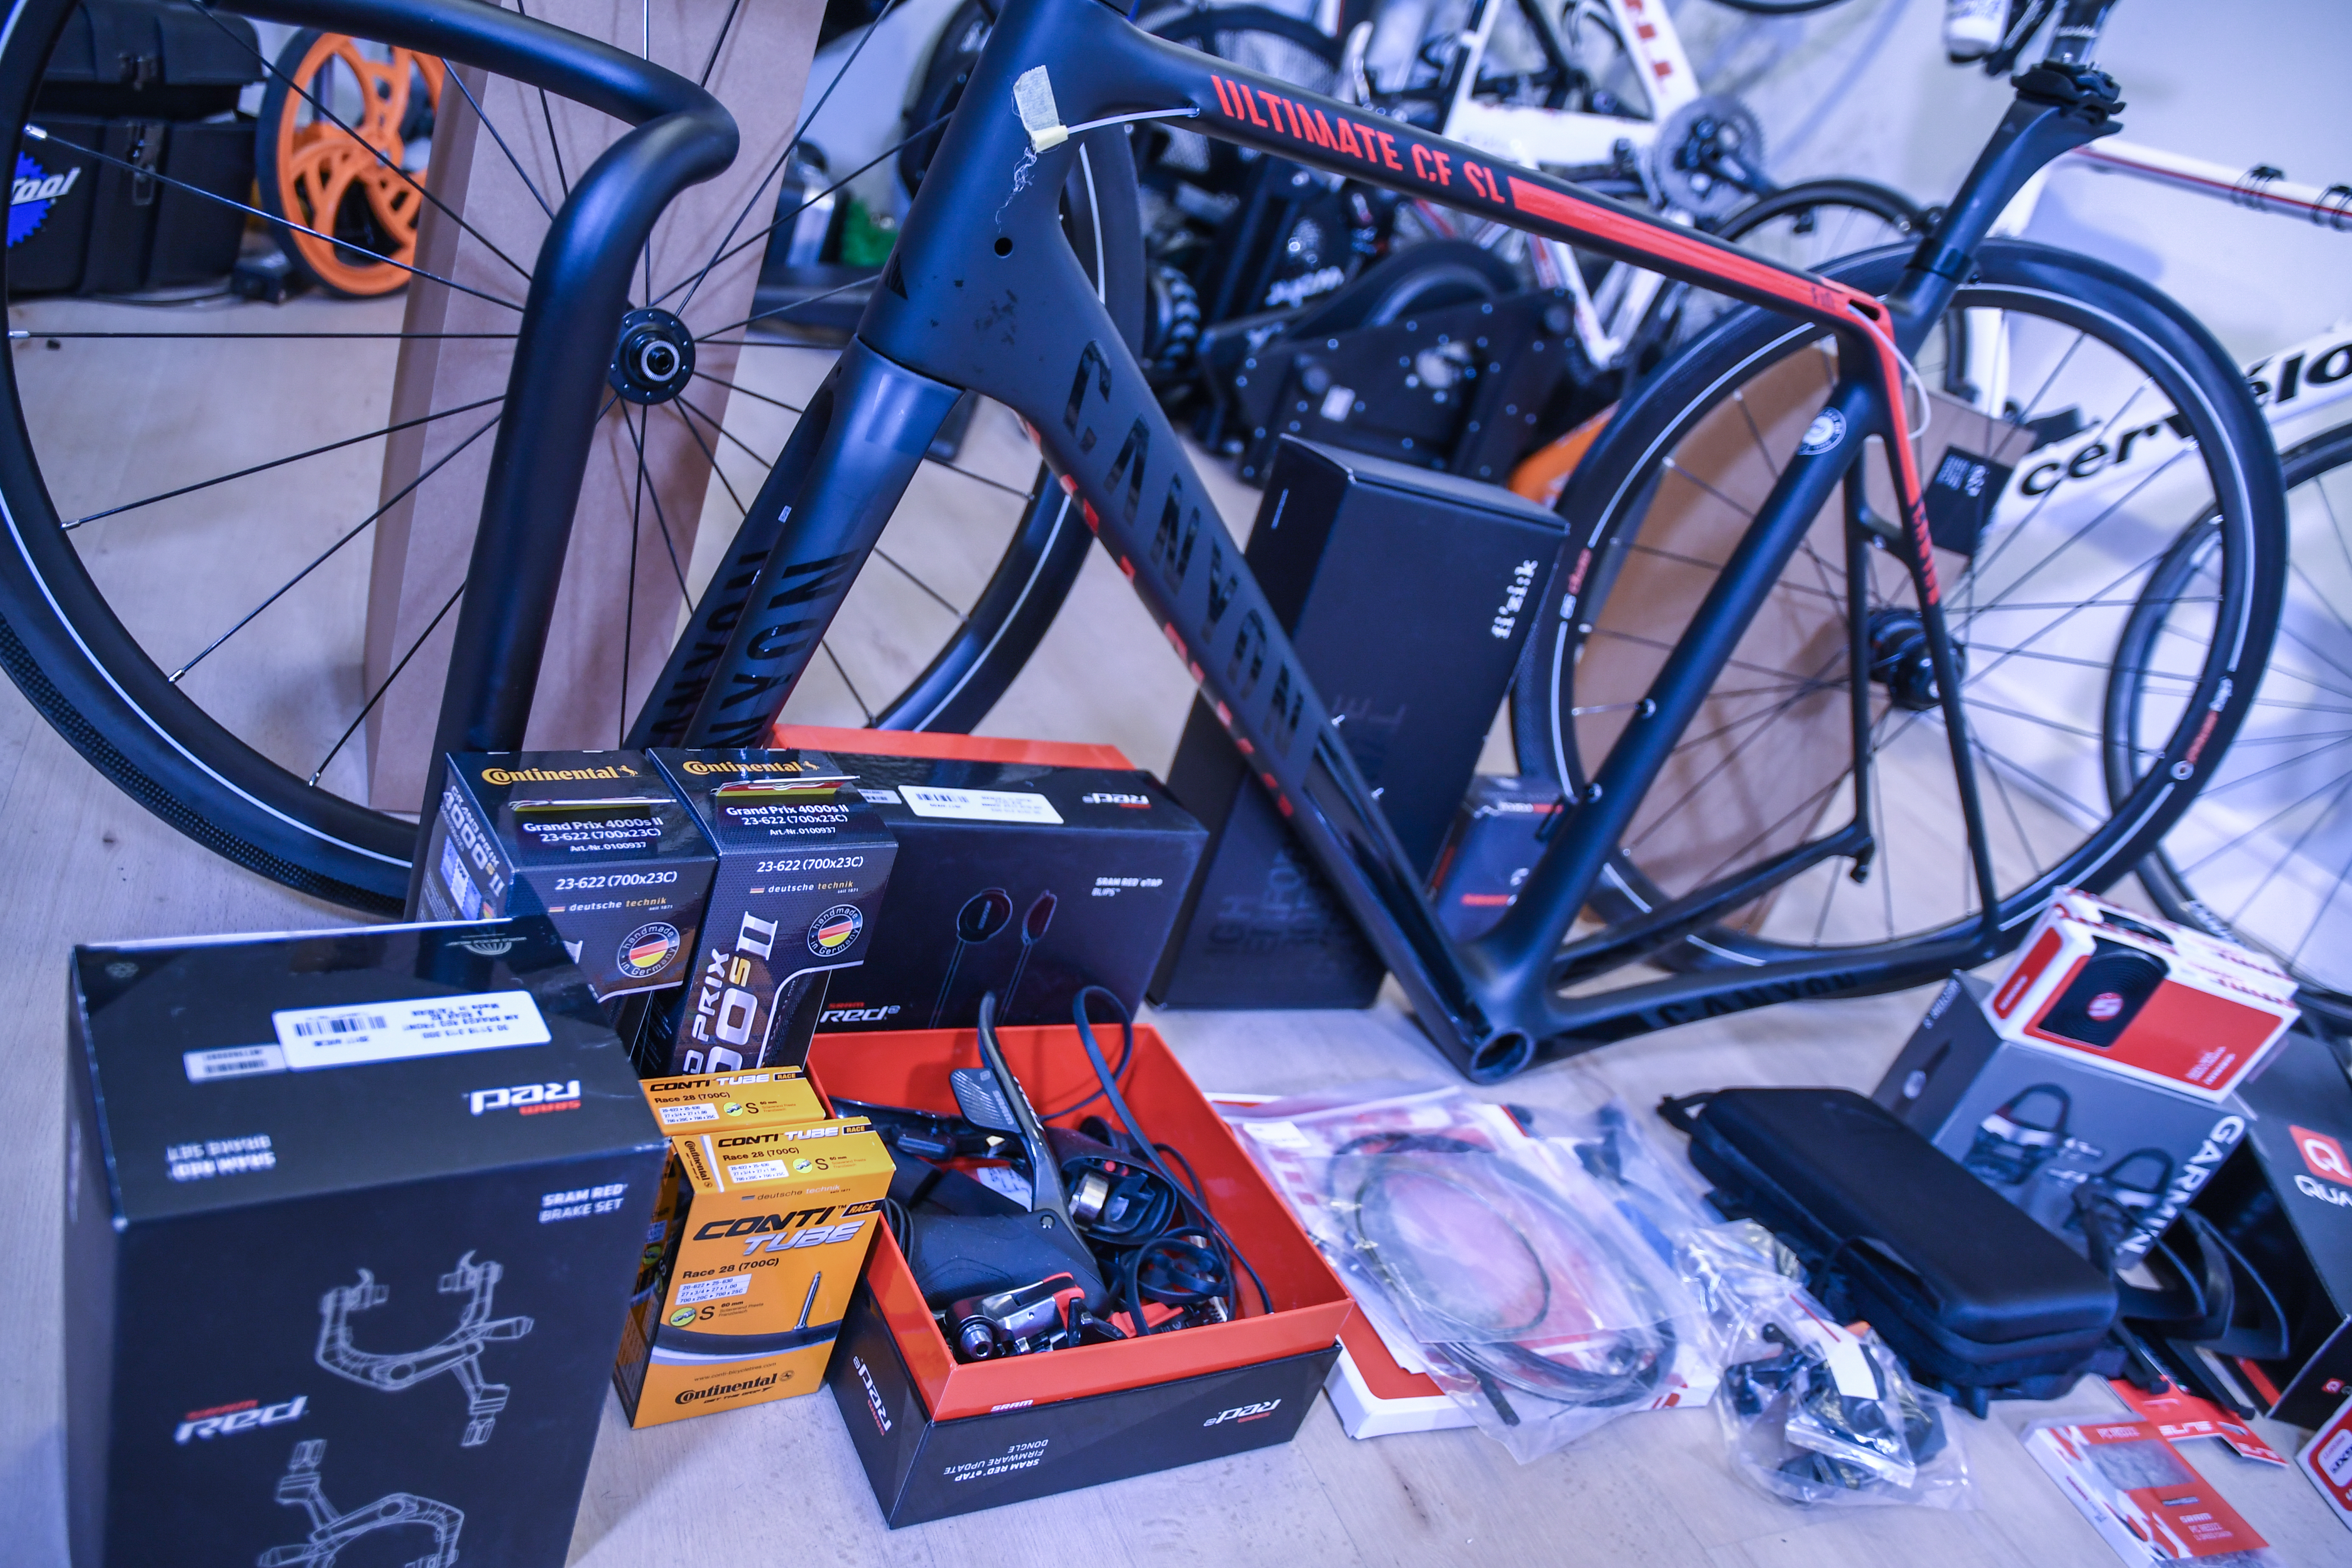


Next, I didn’t have a terribly logical order. I just sorta did different pieces as I felt like doing them, somewhat spread over the course of a week or so in between doing other unrelated tasks. Again, total time was 3-4 hours, and if I wasn’t taking pictures I could probably knock it all out in under 3 hours.
The very first thing I did was put the cassette on the rear wheel. I started here because for whatever reason I don’t have a bike stand and instead just use a trainer as a bike mechanic stand (I used to have two stands, but I’m not sure where they went when we moved to Paris over 5 years ago). So, I needed wheels on the bike to work with it.


Next, with that solved, I went for installing the chainrings on the Quarq DZero. This is a task that shouldn’t have taken more than a few minutes, but as I noted above I stupidly ordered the non-hidden bolt chainrings for the hidden bolt crankset. There’s basically two options, and it doesn’t much matter which option you choose as long as they match.


Suffice to say, this took a heck of a lot longer since tightening the bolt is immensely more complex this way. Someday I’ll swap it out for the right chainrings since chainrings are cheap (so it doesn’t have two tiny stubs sticking out), but today was not that day.


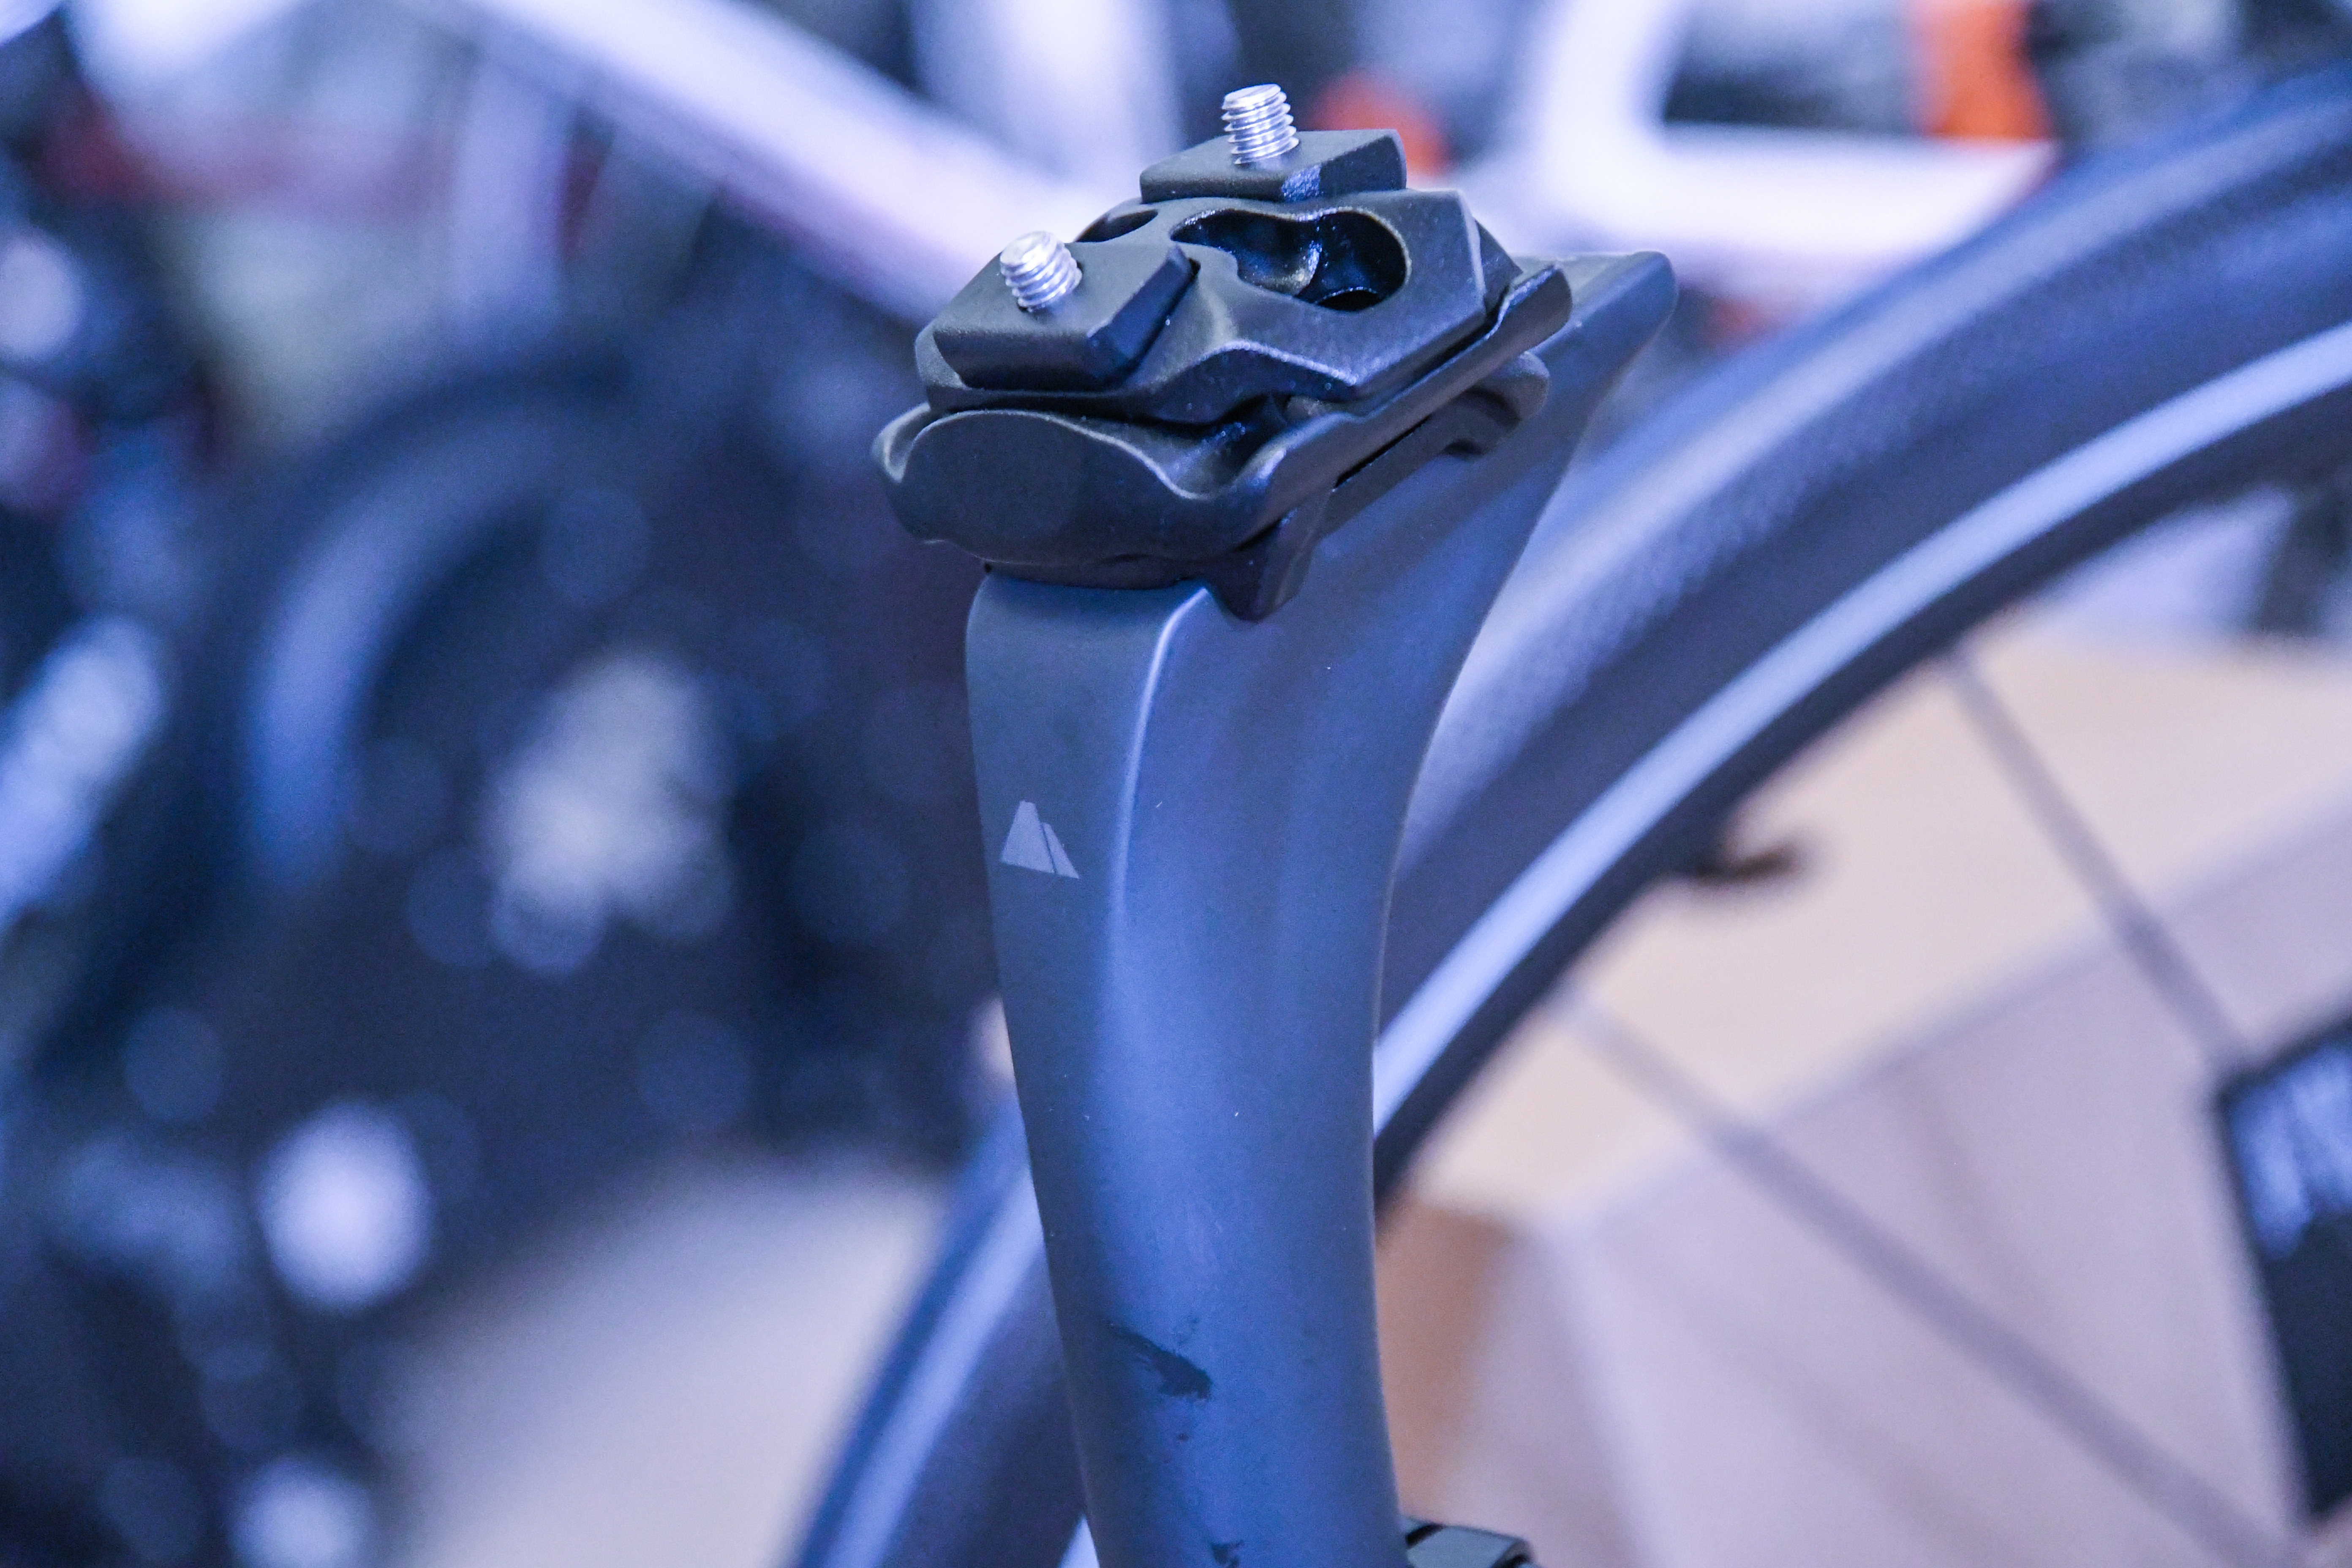
Next, I plopped the saddle on the frame. Actually, technically I did that before I finished the chainring situation, because I was frustrated with that.


Then it was off to put the handlebars on the stem:


Next, I put the two front shifters on the handlebars (because doing so was silly simple and I was still annoyed with my crankset situation).

Then it was back to the crankset region to install the bottom bracket.


With that in place, I slid the Quarq into the bottom bracket:

From there it was off to install the derailleurs. I started with the front one and got it all aligned and hooked up:

Then it was back to the rear one to connect that:

Along the way I paired them to the front shifters (since they’re all wireless). Funny enough, I actually used my SRAM RED eTAP In-Depth Review to remember which buttons to press.
With hardware installed, I decided to shift gears and install the brakes. I did this just because. Not because there’s any logical reason. In theory, most people probably would have then installed the chain and got shifting perfected, but I’m not most people…nor a bike mechanic.

The front brake went on quick and easy:

And then did the rear:

Seriously, dead simple.
Then I went ahead and threaded the brake cable using the small tube provided within the bike frame:


After which I cut some brake cable housing to cover the gaps at both the front and rear of the bike:

Boom, done with that! I’d say the measure five times and cut once (or 5 more times) process of the brake cabling and housing was the most time-consuming part. Mostly because I was so cautious that I kept on slowly cutting only a tiny bit at a time to make it perfect (without cutting too much).

Next, it was time to get the chain installed, which only took a second or two after removing a couple links. I then spent a bit of time perfecting the shifting.


Then I plopped on my pedals:


After that was all set, I went ahead and got the SRAM RED eTAP blips all aligned on the handlebars. These allow you to shift while your hands are on the tops of the bars, such as climbing. They’re two tiny little buttons that you put under your bar tape.

Oh, speaking of which, I installed the bar tape. Sorry, I randomly don’t have pictures of that.
From there the last thing to do was install the two water bottle cages:

And thus, I was done!

Since I was building the entire trainer on a KICKR SNAP, it was pretty easy to transition for casual hand-driven tests of the components to jumping on the bike and throwing down some wattage. Anytime I make big/meaningful changes to a bike (especially in the shifting/crankset/wheels arena), I like to toss it on a trainer and make sure it doesn’t implode (or explode) on me. Thus, Zwift it was for the initial test run:

With that, let’s head outside.
The Final Result:

Of course, somehow it rained for like 18 straight days, and I certainly didn’t want my first ride to be in the rain before I had a chance to get some proper photographs. Nonetheless, here’s some obligatory bike porn:


And how’s it perform? So far so good!
The shifting is really damn precise, love it. And everything is still in the super quiet phase, it feels like it just floats along. I realized above a bit later after I took the pretty pics I need to slightly adjust the brake pads (both the angle and adjust the centering on the front ones). But overall, I’m pretty happy with how things turned out!
Of course, I’m not exactly a bike reviewer. I’m a tech reviewer. And since I’ve already reviewed all of the tech seen on this bike, none of it is really all that ‘new’ to me. And the bike itself, while perfectly great – isn’t really something I cover from a review standpoint. My review would roughly be: It rolls well when I pedal.
With that – thanks for reading, and stay tuned to see this bike in plenty of posts down the road as it performs its duties in the role of chief rolling test machine!
Have a good week, and welcome to 2018!
FOUND THIS POST USEFUL? SUPPORT THE SITE!
Hopefully, you found this post useful. The website is really a labor of love, so please consider becoming a DC RAINMAKER Supporter. This gets you an ad-free experience, and access to our (mostly) bi-monthly behind-the-scenes video series of “Shed Talkin’”.
Support DCRainMaker - Shop on Amazon
Otherwise, perhaps consider using the below link if shopping on Amazon. As an Amazon Associate, I earn from qualifying purchases. It doesn’t cost you anything extra, but your purchases help support this website a lot. It could simply be buying toilet paper, or this pizza oven we use and love.


looks great – FWIW I put etap blips in the same position you have them on the tops of the bars…..I’ve since removed them as they didn’t quite fall under my thumbs when riding and they reduced the amount of space on the top of the bars.
Also agree that it’s not totally clear what chainrings to get – I ended up getting Sram Red (not force) as it was the ones recommended on the Quarq website (just cut and paste the SKU from: link to quarq.com) I did have to hunt around for them though (Amazon have them in the UK)
Totally on the chainrings. It’s the singular area SRAM could do a heck of a lot better. They get kinda close on the page I linked, but then fall short of being specific enough.
I haven’t fully decided on the Blips. I had them initially with a test bike a year or so ago for the original eTAP review. And they worked well, but I happened to be climbing a lot. Right now they’re kinda blocking some of my extra bike computers from being clustered together more closely. :-/
I removed my blips as well. Wasn’t realy using them on the flat roads of Denmark and found them hard to press under the tape.
But they will come back on when I head to the alps for the La Marmotte this summer though I will put them outside of the bar tape for easy install and removal.
Guys, nearly all Sram chainrings now come with TWO pins, one for the hidden bolt cranks, and one for the conventional 5 arm cranks. Just remove the one you don’t need. Great solution.
link to sram.com
I don’t see any grease being used, I am scared.
Fear not, I used it…just didn’t take pictures of it. :)
“Here was my requirements.”
Here were my requirements.
Yet another great post.
Have you installed a backup chain deflector for the keeping the chain from over-shifting off the inside chainring, or do you trust your front derailleur to behave responsibly? I would recommend something like the K-EDGE Road Braze-on Chain Catcher for extra insurance.
wise words with the chain catcher
mudguards and panniers anyone?
First self build: Am just going through the exact same process myself. Although I’ve found that subcontracting the wiring and drilling is definately the way to go. Although it leaves me with ‘yet another self-part-build’. I’ve also had to invest in a file to make the di2 junctions fit through the existing holes in the frame #BitOfAWorry
Yeah, I’ve been lucky in never really having issues with chain droppage, though totally would go for the K-Edge units if I added one. Perhaps down the road.
No mudguards/panniers on this one, primarily because it’s more of a training/racing bike than a day to day bike. Though, I do have a little clip-on ass-saver around here somewhere.
On the Di2 piece, I did the same when I put Di2 on my P3C, which wasn’t designed for it either. Looked at that whole situation and knew nothing good would come of me trying to figure it out. Handed it off to my friendly LBS man and he took good care of it all. :)
I’ve found chain-catchers to be more hassle than their worth. If you have your limit screws adjusted appropriately it should very rarely be an issue.
I used the K-Edge Braze-On one for a bit until I rode some cobbles and my chain still managed to ship itself off the inner-ring and in doing so managed to end-up underneath the chain-catcher. Once that happened, the chain-catcher did a great job of *preventing* me putting the chain back on and I had to get out a multi-tool to adjust it enough to allow the chain back through.
I ditched it straight after that and have very rarely had any issues.
I bought the eTap system after reading Ray’s review almost two years ago now, and I’ve put something like 10,000 miles on it so far. (I had one of the first production units ever, back when they only sold as a full set). Since that time, I have spoken with 3-4 other friends that have eTap on their bikes, and we all have a common issue with the initial setup. The chain tends to go off on the outside in the first 50 miles or so. Once you dial that in, you never have issues with chain drop either inside or outside. Curious if you had that issue at all Ray, either with your earlier test, or with this build? But, I’ve never ever heard of anyone dropping their chain to the inside with eTap, but of course this is anecdotal experience anyway.
I haven’t had any droppage problems yet on it. Though, since I just swapped to another crankset, I’ve gotta dial it in a bit, not perfect with the Stages LR (just a minor micromanagement needed).
I also had the chain drop off the outside when I initially got mine. Good to know I’m not alone.
Alway, always, always put a chain catcher on a carbon frame. Just because you’ve never had any problems or even if you’re a professional mechanic, the amount of damage a chain dropping under load can do to a bb cluster just isn’t worth the headache.
Two other bits; just about every bolt save bottle cages and rear derailleurs should be installed with a torque wrench (which you just might not have shown in your photos), and when setting up bars, I like to do them off the bike. This allows you to more perfectly balance the position of each brifter by setting them on a table so that you have four points of contact: both ends of the bar and both brifter tips and get the brifters dead center side to side. Also, I find it easier to flip the bars around this way to make cable installation easier (especially internal).
Otherwise build looks very nice, Ray.
I’ve used the SRAM chain keeper on my Red 22 mechanical for years. Has has never let me down. Mine came with the derailleur and I never had a need for anything else.
SRAM FDs come with a chain catcher, including eTap, do they not?
I’ve used both the aluminum Canyon chain catcher and made the switch to a Carbonice Stummer Eugen (which is a carbon fiber chain catcher). It perfectly blends in on my Canyon Ultimate CF SLX ….
Ray welcome to the Canyon club. :)
// Remo
Good stuff Ray
Will you still be riding your grey Giant Defy?
I have the exact same bike. Whenever someone flies past me on a super-duper bike, I always think ‘well if it’s good enough for Ray, it’s good enough for me’.
If it’s no longer good enough for you, it’s probably still good enough for me… but I will be less happy about it.
Yup, definitely still plan to!
And technically speaking, that Giant bike from a frame standpoint is more pricey than this Canyon. :)
First of all great job! I bougth a canyon bike Aeroad 8.0 and i’m really satisfied. Hope you will be too. :)
Also your bike looks fantastic! Keep up the good work.
While Canyon’s model naming is indeed unnecessarily confusing, in your pricelist you have listed all of the framesets as being SL grade when clearly the more expensive Ultimate is actually the stiffer and lighter SLX. (Actually the Aeroad should also have the SLX designation though here there is no cheaper SL version available.)
Also are you sure you ordered the wrong chainrings? In your photo it looks like your big ring has chain catcher pins on both sides, which from what I understand is how they’re supposed to be delivered as whichever pin ends up “unused” should be removable.
Yeah, definitely sure, only because in doing so it’s nearly impossible to install the chainrings, since it’s missing what’s a locking bolt below the crank arm. Thus, the other bolt would spin around freely.
I remedied that using the beer bottle opener within the Park Tool box. I’m serious. It worked perfectly.
Ahh, but then you simply have the wrong chainring bolts. The nut behind the crank arm should be a special version which is friction fit to the large chainring. But I’m sure you already knew all of this already so not sure why you’re blaming the ring and not the bolt…!
I really don’t understand why Sram insists on doing it this way. While there may (as claimed by Sram) be stiffness benefits on non-powermeter Red cranksets with integrated carbon spider, I can’t see it making any difference at all for powermeters and other cranks with separate spiders aside from being more of a hassle to install (even more of a hassle to remove if you want to keep the knurled nut).
When you buy SRAM chainrings, you do indeed buy two different SKU’s/models for HB or NHB. It’s just that as you noted, at the end of the day it’s basically just that little locking bolt piece which you can buy afterwards.
Had I bought the correct rings, then I wouldn’t have had to either fake the locking bolt, or go out and buy one.
SRAM’s newer chainrings can be used on HB or NHB. Just getting the correct bolts for them is the key. They have instructions on installing the “knurled edge chainring nut” on their website. If your chainring has two drop-pins or at least a second spot to move the pin to then its cross-compatible.
What is better feeling than buying a bike?
Building one from scratch… ;-)
…and eTap s not Garmin compatible, wheres Di2 is for sure… Just saying…
ETap was actually “Garmin compatible” before eTap existed. The ant+ shifting profile existed before shimano made its proprietary Shimano DI2 profile or Sram made etap. Additionally the remote control profile exists and is fully implemented by Garmin for remote control via groupset that isn’t Shimano DI2. I use it daily for controlling my Garmin.
I agree, my SRAM eTap gears show up on my Garmin 1000 just fine. Not “Di2” option in sensors, but “Gears”.
Care to share any thoughts on why you chose 23mm tires?
That would imply some level of thought as to why I selected them…
???? first of all a happy new year to your and yours Ray. I really enjoy your site for helping me choosing the right stuff, thank you for that. On choosing my tires, well that’s another ballgame ? so meet the Dutch: link to bicyclerollingresistance.com
Ah I see Corey W. mentioned the site already earlier this day?
Lol, give it another ten or so years and you might see where a 25mm tire comes in handy. Also noted the tire list was from 2013?! Still, the seat choice does make the bike pop. The Girl should at least give you credit for knowing how to dress a bike.
~Cheers
I had exactly the same question.
I have the same frame with new Ultegra rim breaks and I selected Conti 4Seasons:
25mm – front;
28mm – rear.
That is a really slick looking setup you have and it’s definitely inspired me to build one for myself. I really want to have a bike to ride on (for nice sunny days, to and from work, etc) and one to train one. Why? Mostly because I want to and I (probably) can.
And the final weight is… ?
I’ve gotta re dig up the video on that one…hmm…I swapped the Stages LR onto it today, so only have that weight (not sure it’d be much different than the Quarq).
Nice bike! I have exactly the same frame, as a full bike from Canyon with Ultegra DI2. I love it!
It is great bike, mine is Canyon Ultimate CF with Utegra Di2.
Ugh, to this day I still can’t see the practical reasoning behind SRAM/Quarq’s decision to make a hidden bolt variant of their power meter at all. 100% aesthetics and inconvenience (not to mention limiting!)
As my people say, Mazel Tov Ray (and happy new year). What configuration is your cassette? I’ve been using an 11/23 but am getting sick of climbing with it.
I thought even Pros are using 11-28 or 11-30. I used a 12-28 for a while and loved it.
I’m curious on the bottom bracket choice. I know you can’t exactly change cup sizes on a frame, but given that say, you _can_ fit a GXP crank on a BB30 frame, but _not_ the other way around, I would expect you’d go with a BB30 frame to ensure the widest compatibility of cranks.
Probably not a huge issue, but I can at least imagine a new/test crank based PM or something that only supports BB30 from the get-go, with GXP/BB368/etc coming later.
To become a real bike reviewer, just use the following trope: “This bike is laterally stiff yet vertically compliant for razor sharp handling and all day comfort. 4.5 out of 5 stars!”
Works for any bike.
Buy some “Derailleur hanger” for your Canyon frame, then you have, when you need.
Canyon has sometimes long delivery time for this little part. And like many frame builder the “Derailleur hanger” change often from year to year and from frame to frame.
Yup indeed! Already bought a couple just in case!
If it were not for baseline power with PowerTap, what wheelset would you lean towards on a reasonable build like this?
This site has a fairly large amount of tire rolling resistance info as well: link to bicyclerollingresistance.com (The Conti’s are a typically reliable performer.)
This is so refreshing but especially coming from someone with as much access to free stuff as you must. I built out two newly purchased used bikes this year, a TT and a roadie. I got buried under literature and videos trying to figure out what was truly “better”. Not to mention all the blog/vlog people clearly peddling their trade to score free stuff in exchange for “unbiased” reviews. You’ve always done so well with that stuff and this is another example. Ultimately, most of your decisions seemed to come down to “it looked good” or “it was easy”. That helps so many of us to not feel like cycling and triathlon is some rich person’s sport. Despite the vibey nature of both sports. Get something. Like it. Use it. No points for spending more. Thanks.
I’m buying my next bike in a few months, gonna wait until after ROSE brings out there next X-Lite, because it’s between that bike and the Canyon Ultimate CF SLX 8.0 DI2. I like the frame from the Canyon a bit more (well depends what the new x-lite will be) but Rose is so easy to choose what u want with the bike, and that’s not what u can do with a Canyon.
Good choice of frameset :). While in France last summer, I bought the Canyon Ultimate CF SL with the disc brakes and Di2. I rode all over the Pyrenness and love the bike. When I returned back to the US, I did change out the handlebars though to a spare carbon one I had laying around. Maybe my imagination, but I like it better than the Canyon AL handlebar. I’m using my old Vector 2 as I’m not in a hurry to upgrade to the Vector 3 yet.
Now I want a new bike….. (Actually, I do need one but was hoping to get another year out of my 5 year old bike).
You hit the nail on the head regarding Di2. My next bike will be Di2 (because I hate the shift speed of eTap) but it is ridiculous that Shimano doesn’t have some sort of easy calculator to tell you what you’ll need to add it to a frameset. I get it their primary focus is OEM markets and not cheapskates like myself buying it off wiggle (okay im probably going to cheapout and get ultegra mechanical) but as the market becomes more direct to consumer and more and more people get used to buying bikes online there is going to be more demand for customization (very similarly to how I can spec out a new car before a visit to the dealer).
calculator: that’s a good point.
shimano DO sell most of their kit to OEMs and as spares; so Di2 upgraders and self-builders/customisers are a small market and defiantely find it hard to know what components and wire lengths to buy for your specific frame/intended setup.
I’ve just tried to get my head around precisely the issue you raised (for my project). it was not easy and then you end up getting a few extra wires ‘just in case’ .
once it’s all done and dusted and working then it is mostly ‘obvious’. so when you are working out your shopping list you need to add a spary can of ‘Hindsight’. I can definately recommend that brand.
Nice build, Ray! What size is the frame, 56 or 58? Was it easy to determine the right size?
no bell…or air horn for the busy paris bike paths?
Maybe I missed it, but how did you end up with a 25mm setback seatpost when the picture on the Canyon website shows a straight seatpost?
Do you have any concerns about the headset bearings, in regards to availability of replacements? I have been looking at the Canyon AL and CF frames, and people complain about funny headsets being used with both. Leaning towards the AL frame because they use a slightly less funny headset bearing.
Don’t need new chainring for hidden bolt, just the part kit SRAM part #11.6218.017.000, SKU 710845762369. Basically just a knurled nut-sert that can be set into the ring from the outside with a chainring bolt and washer and then fully set when you torque the rings. The kit also includes spacers to use with a single ring setup. <$10 in USA.
Thanks! Indeed, on my to-do list to buy/install. Though, I’m pretty proud of using the beer bottle opener to install it the hard way…
Welcome to the community of self builders. ;-) You made a good choice with a road bike, and I am still in counselling for my first TT bike I did over over a decade ago.
Nice build, and I wish you many happy and safe KMs.
One minor comment for others, then I always make a point of cleaning the chain before installing. Not sure about SRAM stuff, but shimano ship them in some treacle paste to stop them rusting in transit that becomes a mare to get off the new cassette and jockey wheels once installed and run around. So dip in the chain degreaser before fitting and life is easier.
Just got my new bike on the road on 23 December. Murphey’s law meant it was raining in NZ summer, and so my second top tip is not to use brand new Pirelli velos as they are coated in the mould releasing gel – that get’s kinda scary at 65kph with brand new disk brakes….
Lovely Ray!! I am the proud owner of a new Canyon myself, a CF SLX Endurace.
Just to be clear, you bought only the frame from canyon? The 1,599€ CF SL 7.0 is the deal for the whole bike with mechanical Frame while you bought only the frame for electric shifting, which is 400 less? My opinion is if you would have wanted mechanical shifting the better deal would be to get the whole bike than only the frame.
Yup, just the frame.
Indeed, good catch, looks like the page I was loading reset to showing the full bike and not just the frame. perfect!
But totally agree, if you were getting mechanical shifting, then simply getting the full bike would definitely have been a solid deal.
Ray,
How did you find stack height on this bike?
I noticed that you kept your bars really high.
After Canyon Aeroad which has much more aggressive geometry, I could not ride it like this.
I had to lower all spacers to the minimum, than it is much closer to Canyon Aeroad.
Otherwise the bike is too slow in cross wind.
I just went with default for the moment, but I may end up tweaking things down the road in that department. I haven’t had a chance to really dial in the fit to my liking yet, so I didn’t want to go too far in dorking with stuff there.
Another great read from Ray!
I have just completed my first self-build. It started off as needing to replace the front mech on my old winter bike… But, after a few weeks of “research”, I had a full new groupset, titanium frame and power meter!
As mentioned above, it is not that hard to build it yourself. The hardest part was aligning the front mech (as my frame does not have a hanger, so I needed to position the mount myself). But YouTube (especially GCN) really help. It also made me laugh that Ray used his own review to help set up some of the components (as I am sure many of us have!!).
Putting your own bike together is really not that hard, and really satisfying. I am very pleased with the results.
Totally agree – I often double-checked things on GCN videos during the build. Heck, I even did so yesterday swapping a press-fit bottom bracket that I’ve done probably half a dozen or more times, just to be sure I wasn’t screwing something up.
I’d say as long as someone uses the parts table above as more of a quick checklist of the core parts you need (i.e. ‘Do I have brakes/chainrings/etc…?”), then you can likely build pretty easily.
About the only ‘gotchya’ is some of the tools required, like a Pressfit installation tool.
Just out of interest, which BB press tool did you use?
Just the stock Park Tools one (it’s in a big mechanics box I got). Here’s the exact tool though: link to amzn.to
But in looking around Amazon, there appears to be variants for a fraction the cost. This one is nice and all, but I think it’s like flying a 747 between San Francisco and Oakland.
Thanks…
Ray, I hope you made short video clips installing each components. Nice work! I am fidgety as well, I installed new shifters and brakes (though not needed but did it for smoothness of new ones) myself on my Trek bike.
Thanks!
I started a video about the build, including taping each component install. But after a few pieces, it was just such a massive time sink. :( I realized that some people do YouTube videos on bike builds that are 10-12 minutes per segment, taking upwards of 3-5 segments. Yikes!
I decided instead that I’d focus on photos for the post, and then probably do more of a wrap-up video/explainer for YouTube. Instead, focusing some of my video time on various products being announced over the next 0-10 days.
Sorry!
thanks Ray, its always pleasure reading all your blogposts including this one. This was something I was looking for sometime now. this one hit the spot.
Cool little post this one!
Going from previous posts, I expect you meant to link to another where you wrote “Funny enough, I actually used my SRAM RED eTAP In-Depth Review to remember which buttons to press.”
It’s a shame that you didn’t go with an aero post bike. A lot of manufacturers claim to be “aero post compatible” but it ends up wrapping half way round the post most of the time. Would be good if you could have called them out on it.
Maybe I missed it in this post or a previous one, but did you tally up the total cost? I’d be curious to see what the final number came in at and how that might compare to a)what you were hoping to spend, and b)what level of bike you could buy “off the shelf”. Thanks!
Rough guess: around 6,000 EUR including all three power meters.
Where did you get the Garmin pedals? I’ve never seen them actually for sale on the Garmin site yet.
Clever Training. They’ve been shipping them since late October or so.
I believe Garmin is withholding Garmin.com orders/etc for Vector until retailer demand has been fulfilled.
Right now they are saying “Early January” on the US side to ship. Hope that is soon!
If for CT, that’s just the date for new orders. I know they’ve been getting weekly shipments, and they briefly caught up a week or so ago, and then got slightly backordered again.
If for Garmin.com, not sure there.
Oops….didn’t even think to see if retailers had them.
They sent an email last night saying that are expecting a shipment middle of next week which should catch up on all backorders. Very excited to get them in my hands!
Wait. Don’t ride it. Noticed a serious problem with your tyres and wheels.
The tyre logos aren’t aligned with the valve stems.
You should never ride a bike in a state like that. Simply dangerous
;-)
More seriously, looks pretty sweet.
Oh, just in case there are any doubts:
Rule 40
link to velominati.com
New Years resolution is to always follow the rules…
Just out of curiosity are you using the garmin edge 1030 as the main gps cycle computer? how do you find yourself? I thought you were in the Wahoo Elemnt Bolt
Yeah, I suppose it technically is my ‘main’ one, in that it’s the one I primarily upload to Strava with.
But at the same time, I also ride with 2-3 other unit heads for testing (power meter data collection), including Edge 520’s and 820’s. I don’t use the BOLT because of some wonky sensor ID recording stuff that impacts how I collect power data (but wouldn’t impact any other human on earth except perhaps Shane Miller – GPLama).
I was also wondering about BB headaches as well (although is there really any getting around it for someone that routinely evaluates different PM-based cranks?).
Ray, I assume you’re going to have to knock out your freshly installed BB when it comes time to evaluate either the Shimano of Stages PMs (both 24mm, vs. 24/22mm GXP)?
Keep up the great work and enjoy your bike
Yeah, BB’s suck.
And indeed, already knocked it out for the Stages. Shame. Got a mere 3-4 rides on that BB before I killed it.
At least the Stages went in easy, and at least it’s the exact same as Shimano, so I’ll get a few months out of that one.
Hey All,
Thanks for the insight and feedback on HB vs NHB. SRAM chainrings with 2 pins are compatible with both HB and NHB as long as you orient them correctly.
For Hidden Bolt, you want to align the chainring so the catch pin and chainring bolt sit directly behind the crank arm (Left).
For Non-Hidden Bolt, the opposite catch pin (located in the gap of 2 chainring bolts) will sit directly behind the crank arm (Right).
This will do 2 things:
1. Ensure that there is a catch pin behind the crank arm, preventing a dropped chain from getting wedged
between the spider and crank arm.
2. Align all of the shifting ramps and pins correctly.
Michael H. is correct that you should have the knurled nut and a longer bolt for the Hidden bolt. If you are installing chainrings on a hidden bolt spider, click here link to quarq.com to see the document describing how to do this properly. All Quarq power meters should ship with the correct hidden bolt or non-hidden bolt kit. If one didn’t or you need an additional kit, contact us here: link to quarq.com
Cheers,
Ben C
Quarq Customer Service Rep
I would appreciate your opinion on the power tap g3 50/50 wheelset for a triathlete?
Looks great!
Incidentally, as my wife and I were stuck in Frankfurt a few days trying to make it back to the US with JFK a mess, on Monday we went to Koblenz with a friend of ours and visited the Canyon showroom there. Pretty awesome visit, my wife who is buying her first bike (and thought it would be neat if it was a Canyon), amazing space there.
I highly recommend the visit to anyone interested in checking out everything they have. Even though in the US we have a different set of options available (and I ended up purchasing our bike for her through Canyon US because of warranty issues).
Also good (and decently priced) cafe!
Love the build. I never liked those SRAM bottom brackets though. My CX bike uses a bb86 bottom bracket and upgrading to a Chris King press fit 24 was definitely worth it. As a bonus, it’s compatible with Shimano cranks too.
Have you tried the frame (Ultimate CF SL) with the Wahoo Kickr 2017? I am looking to buy an Ultimate CF SL Disc 8.0 but I’m having a hard time assessing compatibility for the frame (let alone the disc version).
Thanks!
Yup, plenty of rides on the KICKR 2017+CLIMB with it. Works perfectly!
Only the diisc frame fits the wahoo. Can you confirm that rim brake frame fits the neo 2t?
RIM brake fits Wahoo too, but depends on exact year model. See this: link to dcrainmaker.com
But yes, my 2016/2017 rim brake model also fits the full Tacx NEO range, including the NEO 2T (it’s what I did my review with).
Thanks for your reply. I can confirm he Canyon Ultimate CF SL 8.0 rim brake is not compatible anymore. I bought mine at the end of 2019 and it rubbed against my Kickr core. Only realised around the 10th session which fortunately had not cracked the frame. Only the paint came off.
Canyon explains that it is written somewhere on their website. I got the link from them and then tried to do it on my own from the homepage. Let’s be honest, who goes that deep into a website in the excitement on buying a new bike?! I reckon some of the sales rep would take a while before finding the info themselves. As it is only one model they should inform the clients on the product’s page. That’s just my opinion.
What annoys me is that they can’t even give me a proper answer for the Tacx Neo 2T. You would think following such issue with the Wahoo that they would have tried trainers all over or at least the top ones.
Anyone who’s got a Wahoo trainer be very careful if you’re thinking of purchasing a Canyon ultimate, rim brake. Actually, don’t do it.
Yup, Canyon only added the details/link in December 2019. So I’d push back to them on that. :-/
I have been thinking about building a Canyon Ultimate myself, and this looks pretty good.
Just wondering about the rear brake able guide on the frame, the hole cover so to speak.
Does this come with the frame? And is it just popped into the frame or did your glue it in or something.
Also asking because my cousin is having a pain with treading a new brake cable through to the rear, and is worried that cable guide will snap if he uses to much force.
Yup, comes with it, so nothing I had to do there (was taped to the frame and all).
What was the delivery time? Canyon, at least in the UK, used to have truly significant shipping delays that they have claimed to have solved.
Anyone able to chime into this?
Very late to the party. I know.
Less than a week in my case. I think about 1-2 days from order till ship, and then it arrived a day or two after that.
Hi,
I followed your built and decided to purchase the Powertap AMP 50. The power meter works fantastic; however, the quality of the rims is questionable. I had a failure on the front rim (bublling/folded open), I received warranty from Powertap. Weeks of riding on the replacement and the same failure happened on the wheel.
I was wonder how has been your experience on this wheels? have you had any issues?
HI,
Considering new bike and was eyeing Canyon for all the reasons mentioned above but read some reviews that maintenance and some proprietary parts give people a headache. I value your opinion on stashing my Tri electronics, hence I thought I ask. I remembered that you got the Canyon a while back and found this post. How is the longer term feel with the bike? And, have you had any issues with it worth mentioning?
If you have a sec to type two sentences, I would be very grateful.
Thanks,lex
Overall I’m pretty happy with it. My main gripe is the derailleur hanger is crap, and bends super easily. Buy a few extra when you buy your bike, else you pay more for shipping than the part itself. It’s crazy.
I never travel with less than two. If your bike even lightly tips over in the wind onto grass, it’ll bend and you’ll either need to carefully bend it back or replace it.
The other ‘on me’ thing is more the sizing. I probably should have gone with the next size up in frame. Thus the risks of buying a bike sight unseen online.
Beyond that – super happy with everything else!
Thank you for that.
Currently doing a similar build and this is very helpful.
A bit stuck on the BB – started adding it and at least 10mm to go but there is a loutish creaking as I tighten now and then. Should there be any ‘noises’ as you insert it? Ive got the proper tool and cups.
any pointers appreciated as its probably the scariest part of the build.