A year after the first edition, the new DJI Mavic Mini is out. Except, instead of calling it the Mavic Mini 2, it’s now shortened to just the Mini 2 – in line with other terminology changes DJI has been making in recent products. As I have been for years, I’m always on the lookout for the right drone to get the perfect shot while out doing riding, running, or even swimming. The Mini series has theoretically been the most appealing from a size standpoint – at a mere 249g, the magic number under 250g to avoid various legal restrictions in a number of countries. However, getting a drone to that weight comes with trade-offs, most notably ditching things like obstacle avoidance sensors.
Anyway, the new Mini upgrades the video resolution from 2.7K to 4K, adds in RAW photo support, a new QuickShot mode that I use for autonomous shots while cycling or running, plus a much better wireless transmission system. And atop that, another dozen or two more minor features I outline down in the next section. I wouldn’t likely say this is a drone that existing Mini users would rush out to upgrade to, rather, it’s designed to further entice non-drone owners into the fold.
As with last year, I’ve been digging into all the nuances of the new unit – testing out what works, and what doesn’t. What’s changed, and whether those changes have been executed well. DJI is typically a company that makes excellent products, but also one where a product tends to have weird feature gaps designed to upsell you on more expensive models. So I’ll dive into where those gaps exist here, helping you figure out what unit may (or may not) make sense.
Before we get into the weeds though, note that I was sent a media loaner unit to poke at. As usual, when I’m done it’ll get boxed up and shipped back to DJI. After that I’ll go out and pick up my own (if I decide it’s worth it or not), more on that later. With that, let’s get started.
What’s New:
Before we dive into the full review, let’s do a quick look at what’s new on the Mini 2 compared to the original DJI Mavic Mini released a year ago. While the new Mini 2 looks nearly identical from the outside, the reality is that internally it’s got a number of both software and hardware changes. Here’s the full distilled list:
– Added 4K Resolution
– Added RAW Photo Support
– Switched to OcuSync for better transmission
– Increased Drone Flying/Wind Speeds
– Added Digital Zoom Modes
– Changed everything to USB-C
– Switched to new controller (same as Mavic Air 2)
– Added DJI Smart Controller capability
– Increased battery life from 30 to 31 mins
– Added new panorama & 360 modes
– Added AEB photo mode
– Added additional Boomerang QuickShot mode
– Changed props and motors
– Now includes a new safety/travel strap
– Added front LED light (for spotting drone)
– Reduced weight further, down to 237-242g (varies slightly)
Pricing wise, we’ve also seen a very slight increase, from $399 up to $449, which seems somewhat fair given all the extra functionality. Though if history is any indicator, we often see the Mini series on sale – so I suspect once we get beyond the holidays we’ll see it a bit lower.
Unboxing:
For this unboxing I’ve got the DJI Mini 2 Fly More Combo, which is essentially the kit that comes with not just the drone/controller, but also two extra batteries (three total), as well as the charging hub that can charge three batteries in a row (sequentially). In general I rarely like buying bundles, but when it comes to drones, I almost always recommend the bundle, since the cost of the batteries will usually put you over – and you’ll likely want that triple charger for just getting back to your home/hotel room/etc and sticking all the batteries in and having them ready to go for the next morning without manually changing them around.
In any event, here’s the outside of the box and included travel bag:
Inside you’ll find the drone packed inside a carrying case. This is also officially the cleanest this will ever look:
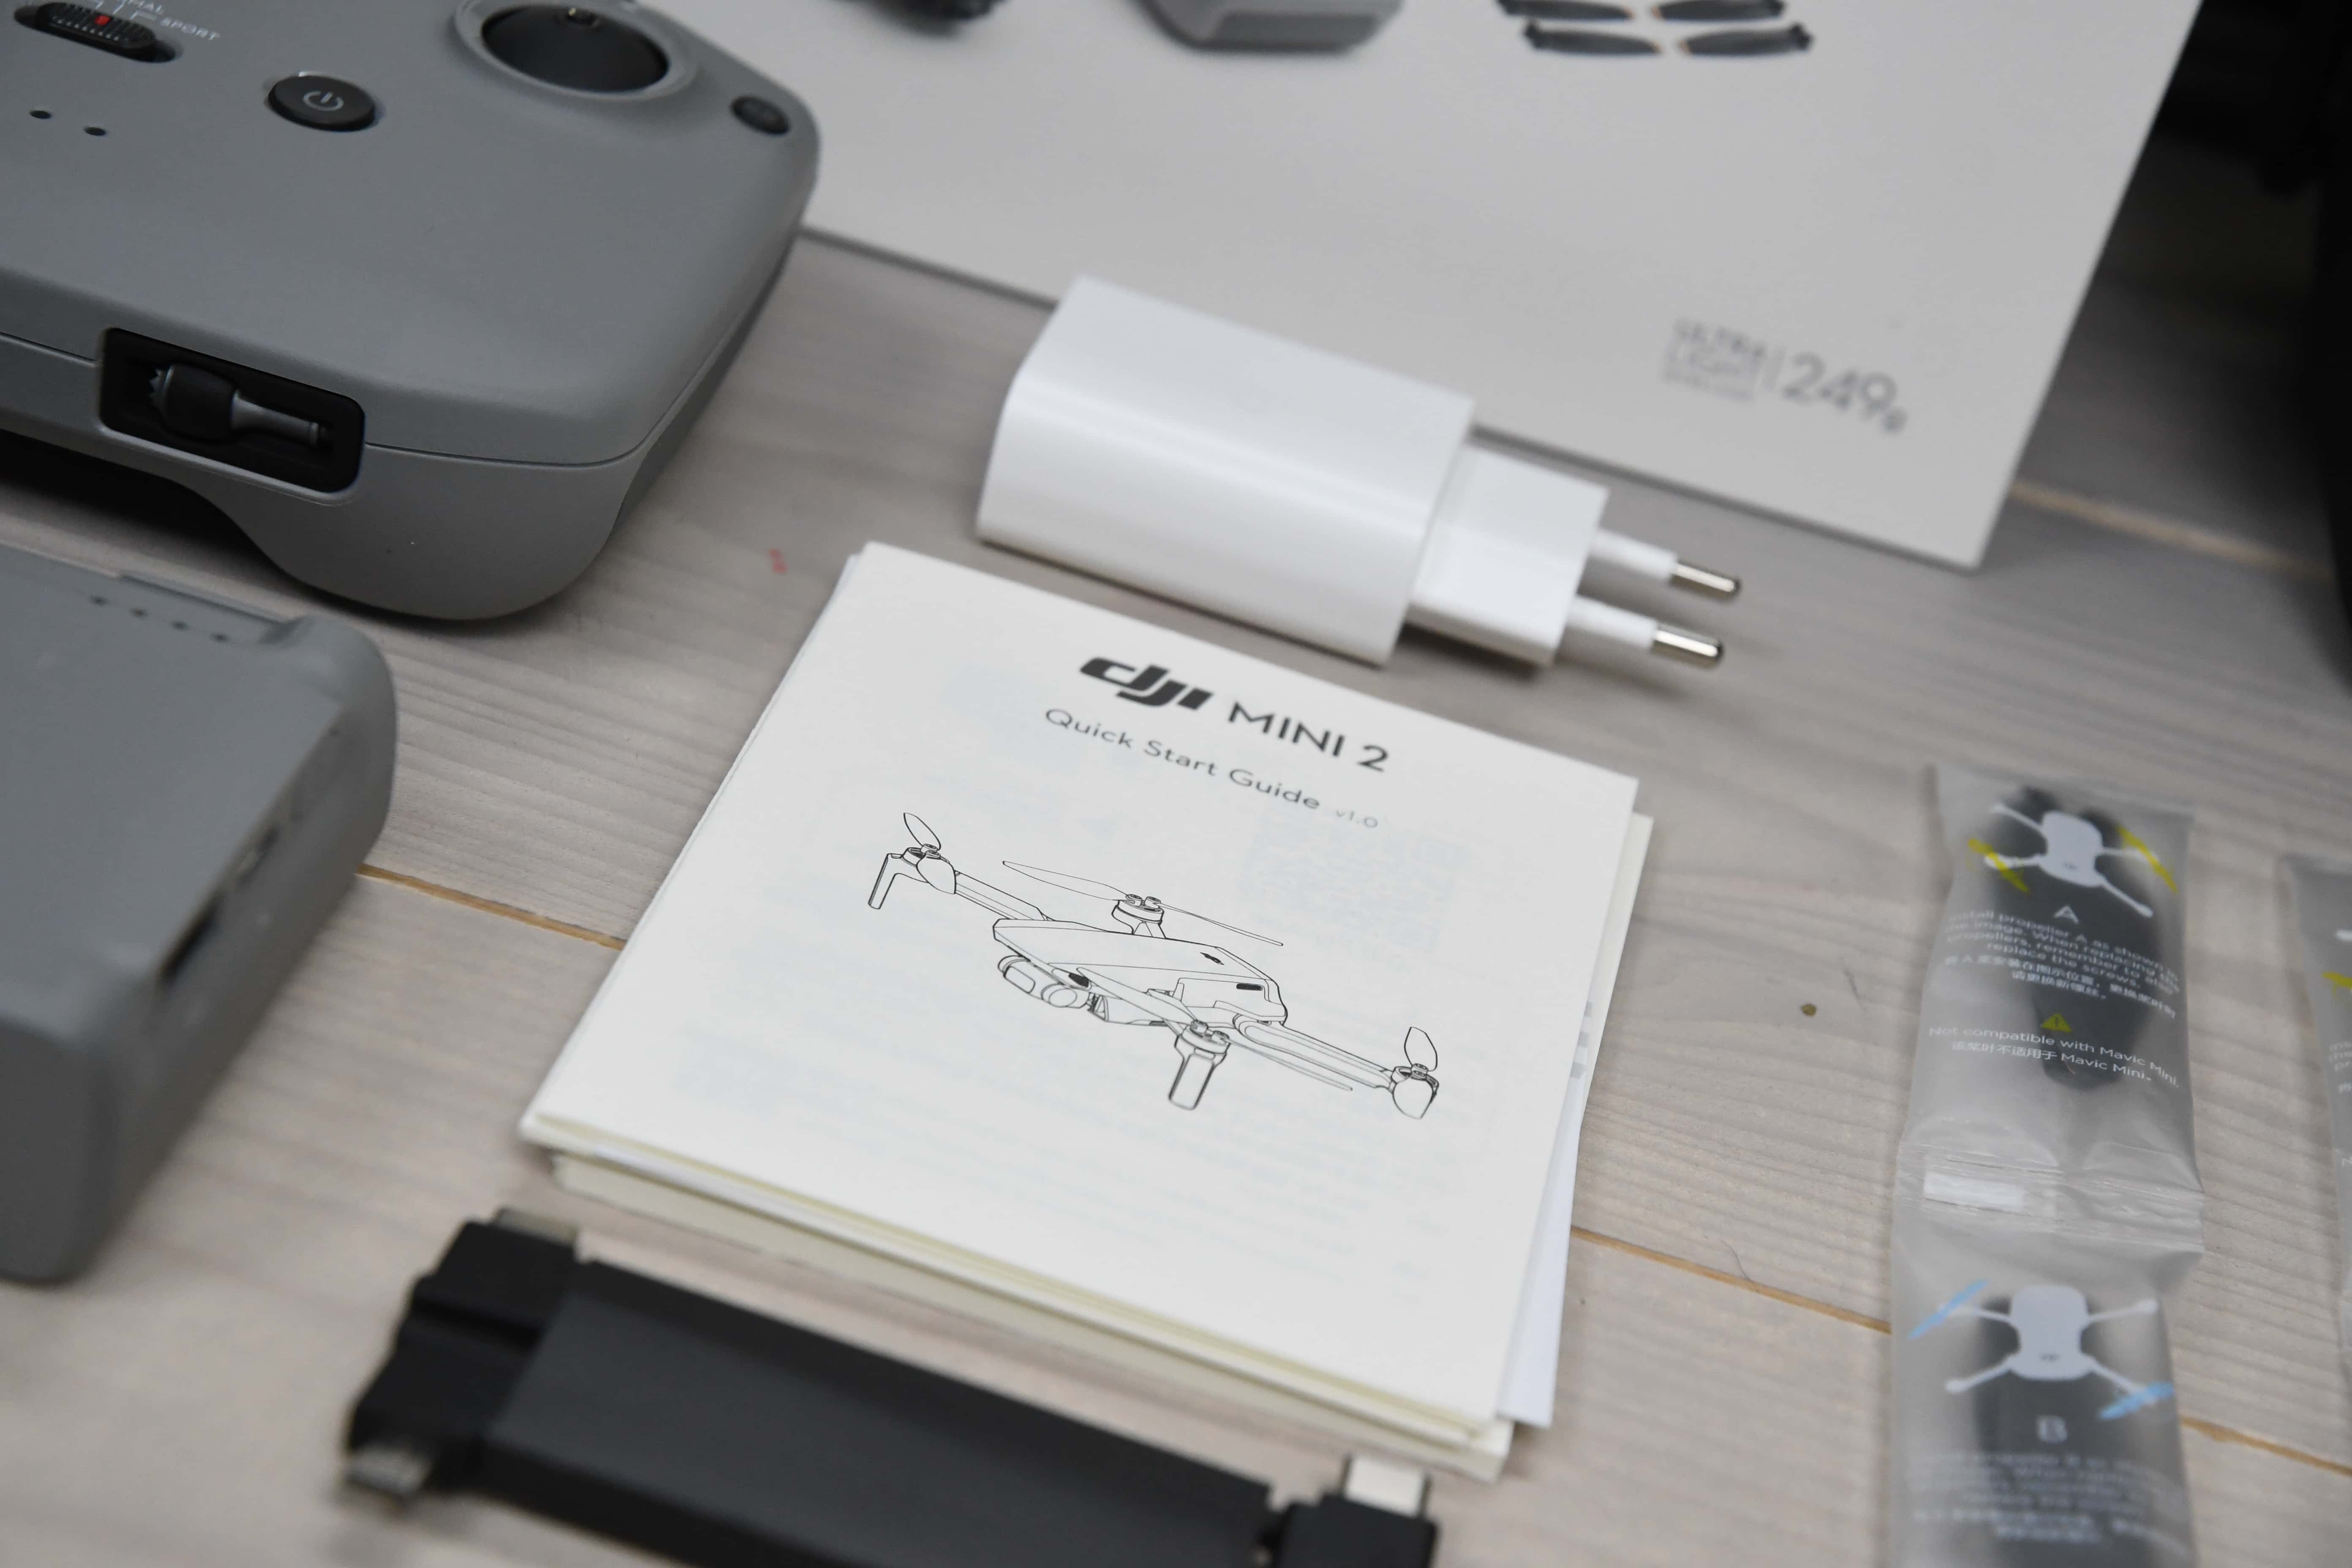
Here’s all the parts debagged and placed atop a table:
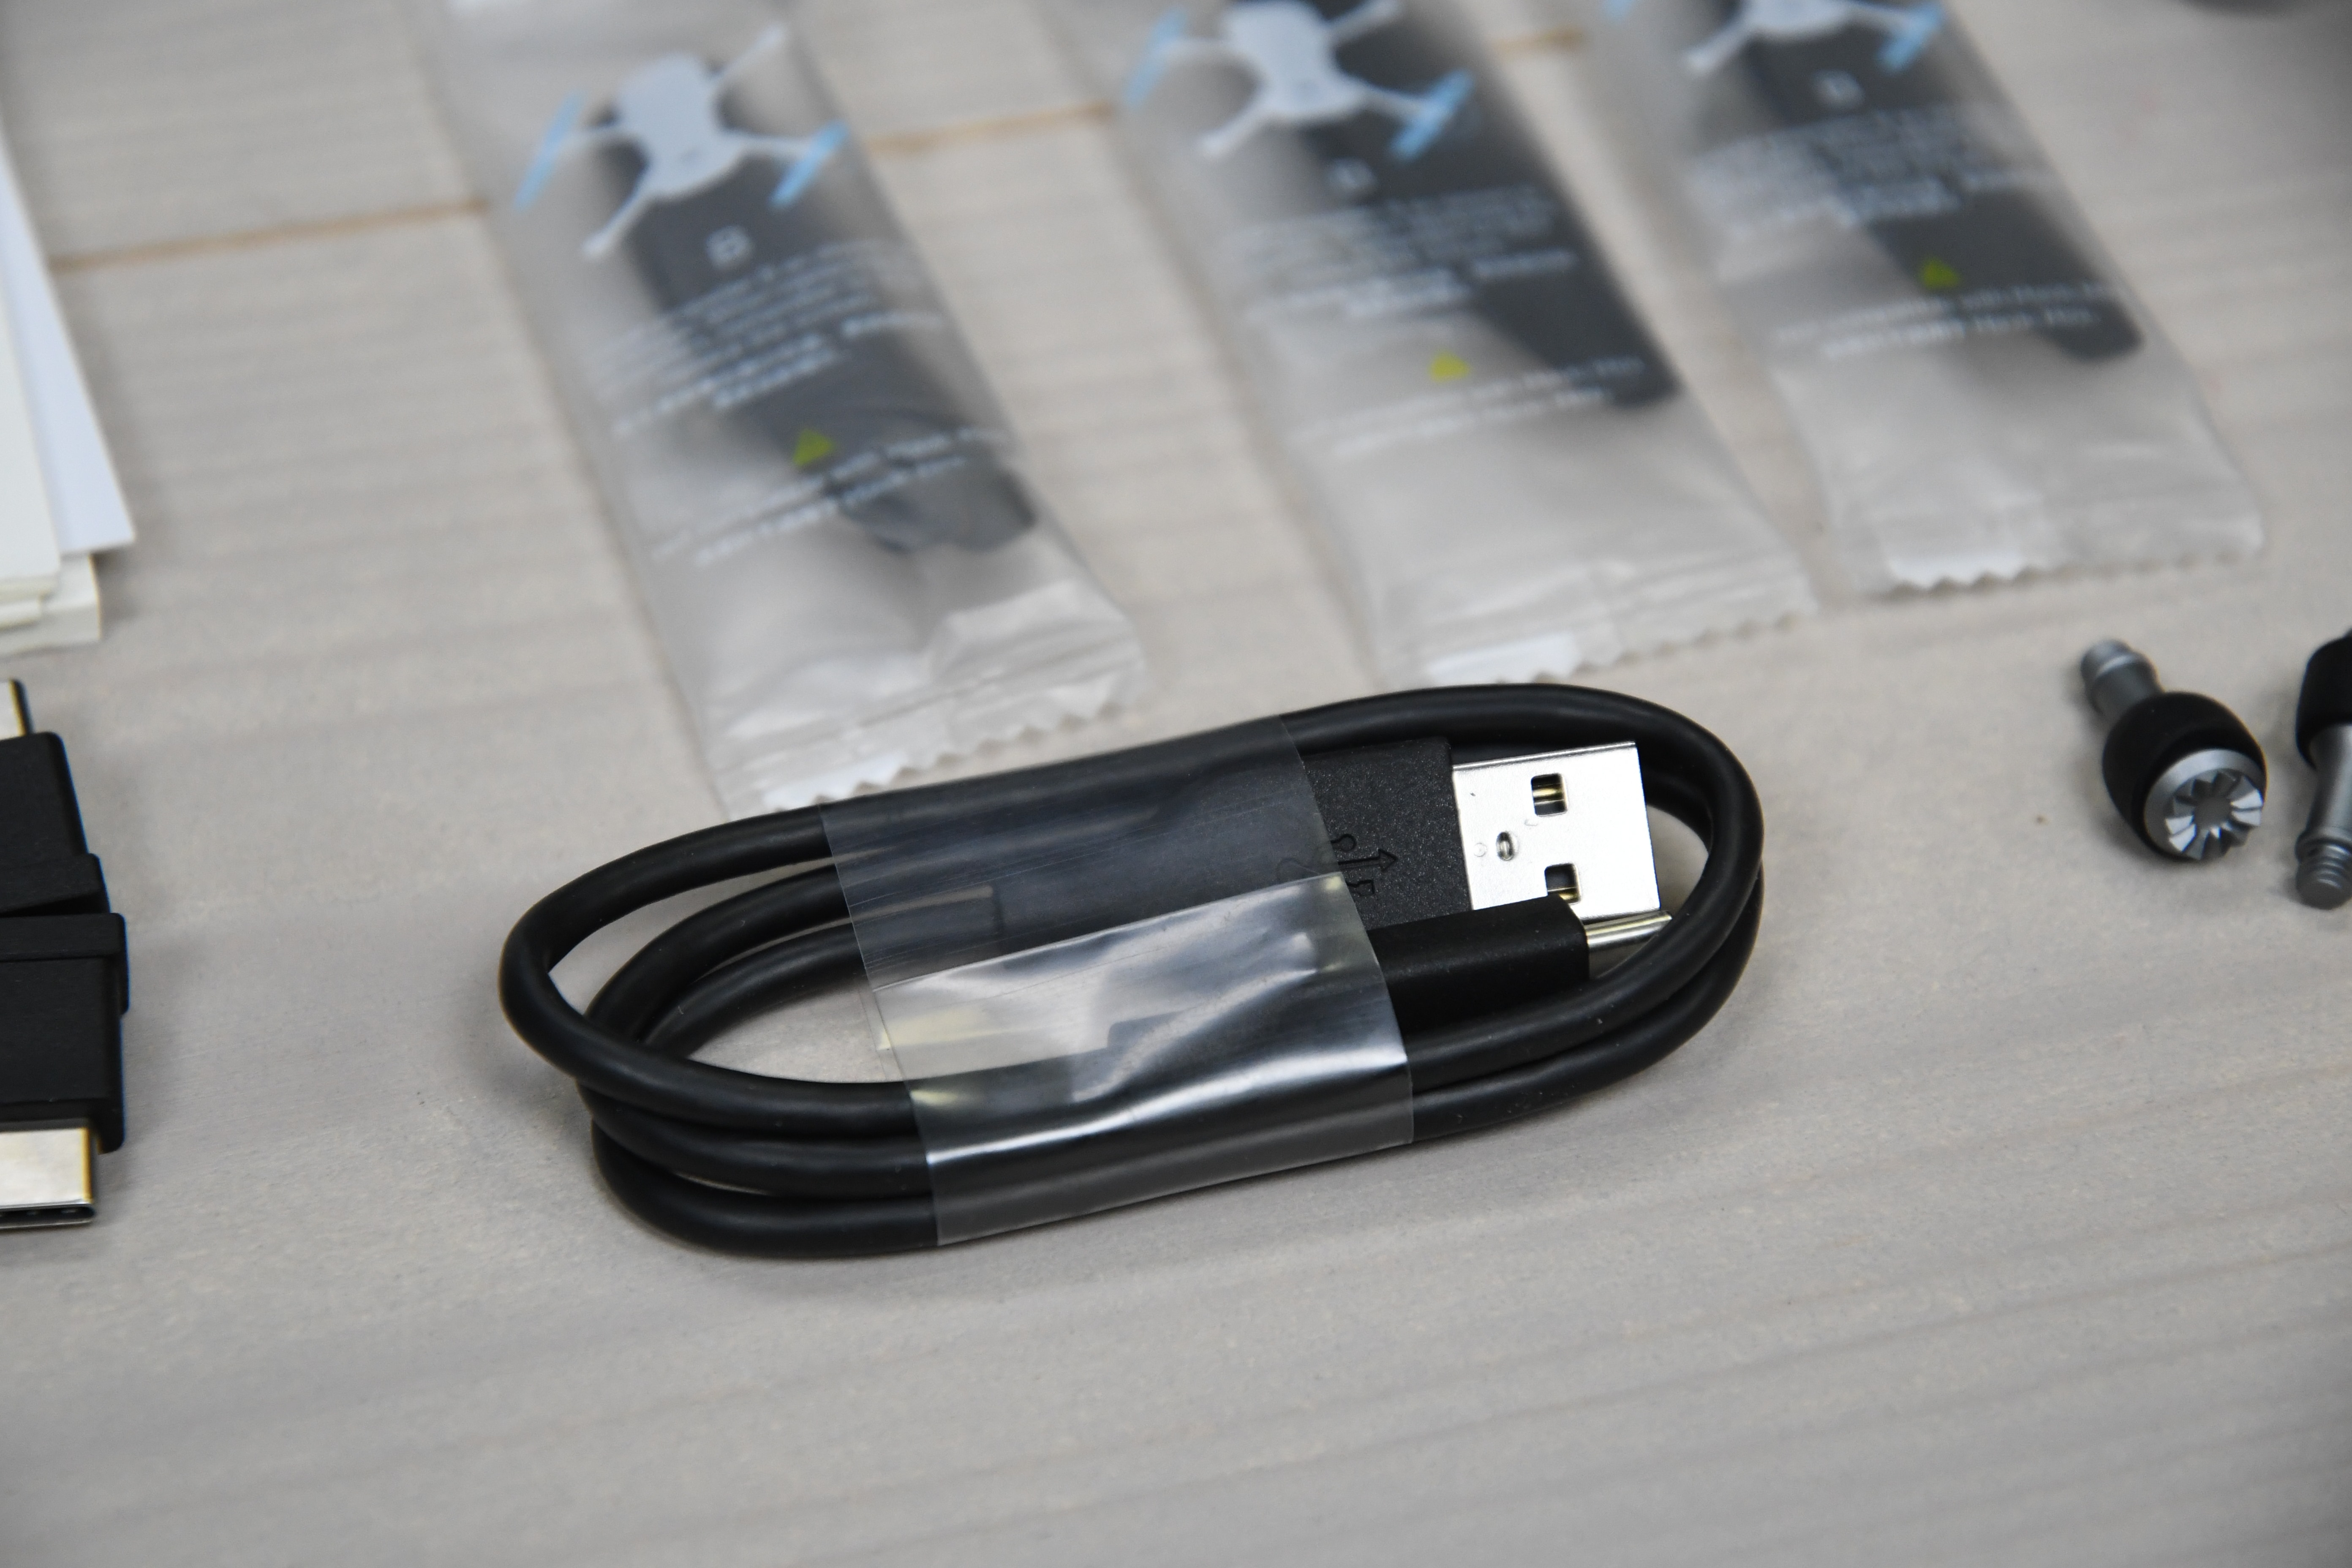
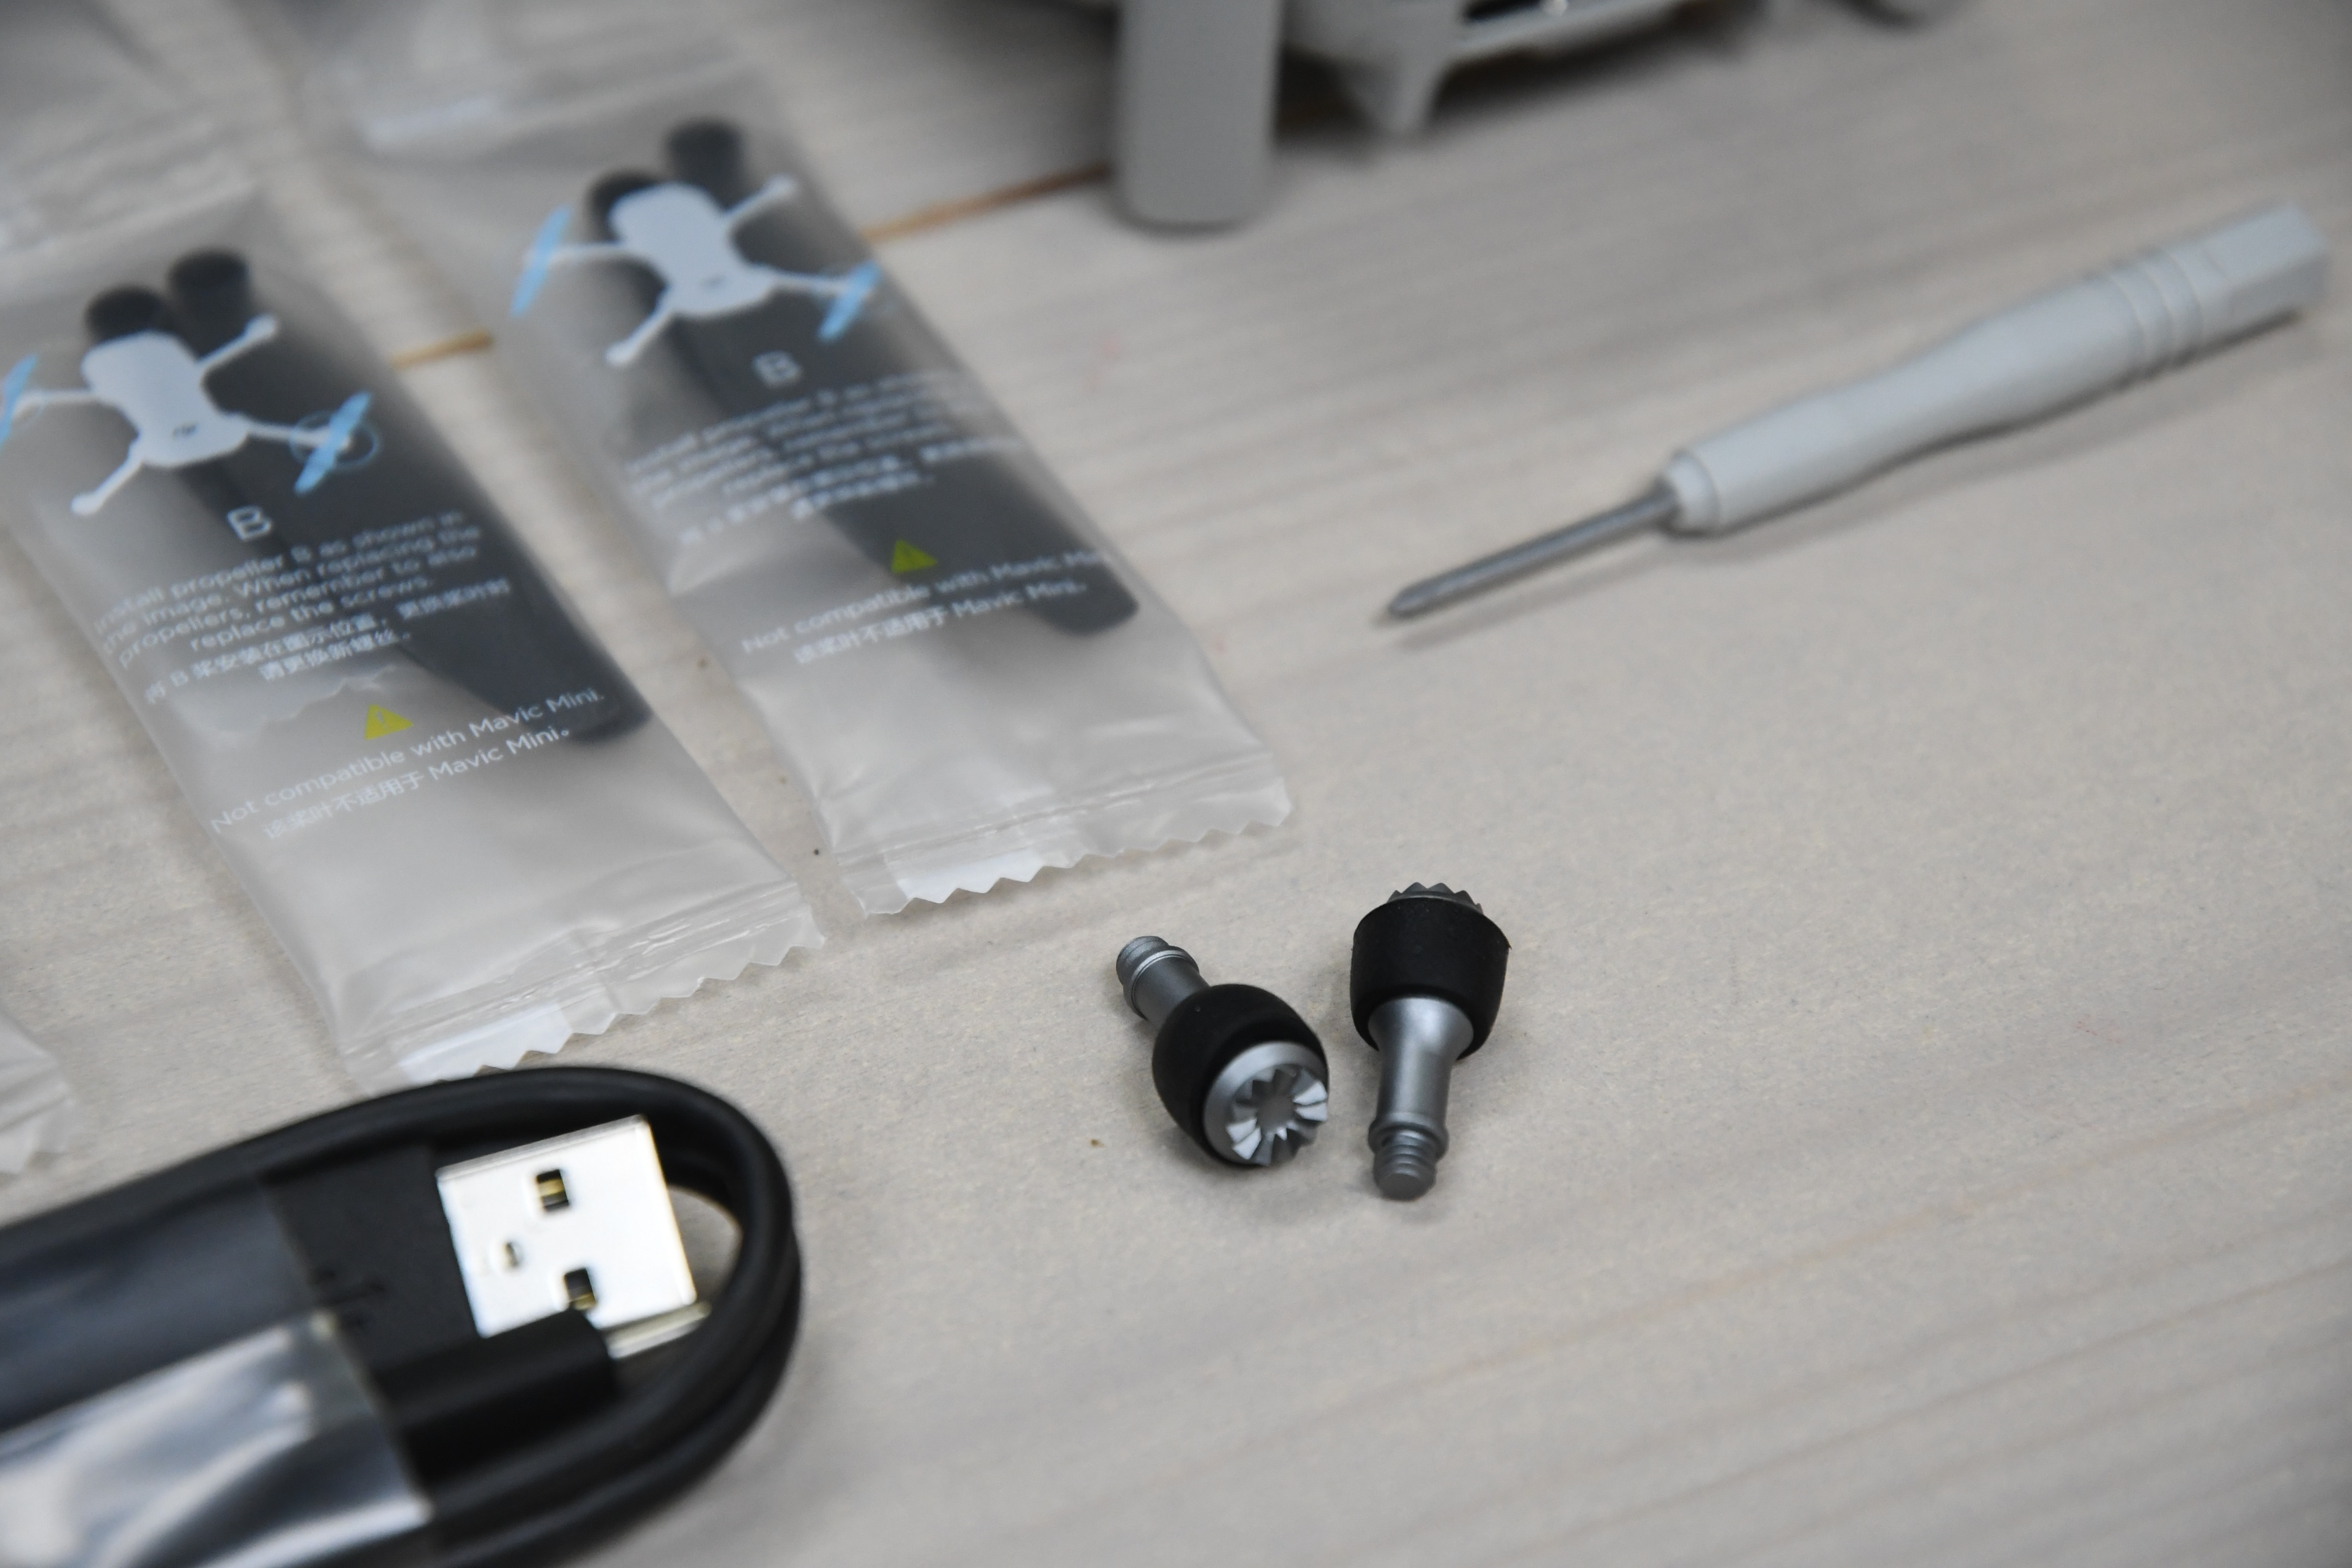
As you can see, you’ve got three sets of extra props, some paper manual stuff you’ll never read, the controller, the charging station, an extra set of controller joysticks (built into the controller), plus a power plug and a USB-C charging cable. Oh, and a screwdriver for changing props.
Here’s a little gallery of all those things up close:
Notably, the drone itself is actually sitting in a travel/storage strap:
I’m rarely a fan of extra baggage type accessories, but this is actually slightly more useful than I expected. Namely when you’re stuffing it into a bag (with the gimbal cover too), it keeps the props from getting caught on other clothes/etc… when you pull it out. I might actually use it more often. We’ll see…
With that, let’s get into the basics.
Drone Hardware Basics:
Before we dive into all the photo and video aspects, let’s just start with some of the basics around the hardware. Areas like the controller, batteries, and the drone itself. While the drone is very similar to the previous Mavic Mini, the controller is totally new – and more akin (nearly identical) to that of the new Mavic Air 2. That’s probably OK for most pilots, but is less ideal if you’re looking for a smaller footprint, since the controller is basically twice as big now.
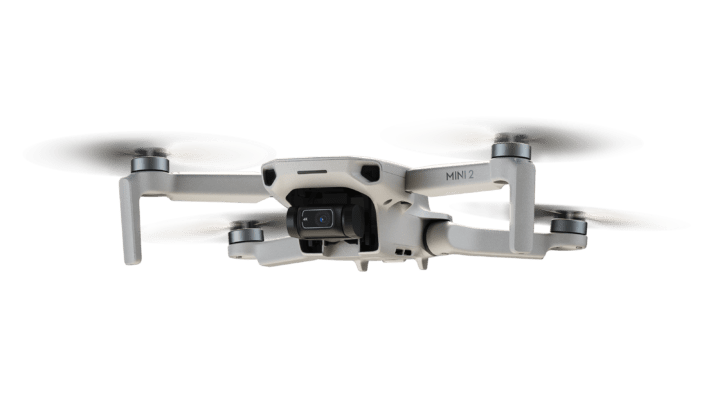
In any case, first up is the aircraft itself. It folds up into a small package about the width/length of an iPhone 11 Pro, and about the depth of a mouse. So – smaller than a shoe for sure.
Also it now includes a little prop strap securing system. It’s handy, as I noted earlier:
The four arms swing out to give the Mini 2 its full size. Two arms swing out horizontally, while the other two have more of a vertical ‘over/under’ type action:
And then, you can remove the plastic gimbal protector. While I don’t use this all the time during travel, I would recommend it in cases where you might have other things that could bonk into the gimbal with force. This is *BY FAR* the most sensitive point on the aircraft. Still, it’s way more resilient than it used to be in past drones.
Flipping the drone around, at the rear there’s the battery compartment, where the battery slides in. This is physically the same battery design as the Mavic Mini 1:
However, the batteries are very slightly different in terms of amperage. You can however use the Mini 2 charging system to charge the Mavic Mini 1 batteries – I tried that. Also, I tried swapping the two and I was able to fly just fine with a Mini 1 battery inside the Mini 2. Whether or not DJI chooses to block that down the road, I don’t know.
The downside to the Mini series batteries is that in order to save weight they skipped on a battery status indicator/LED light. So the only way to check the battery is in the larger charging dock, or by putting it in the drone. If you insert the battery into the drone and press the bottom button once, or put it on the charging kit base, and see the LED status there:
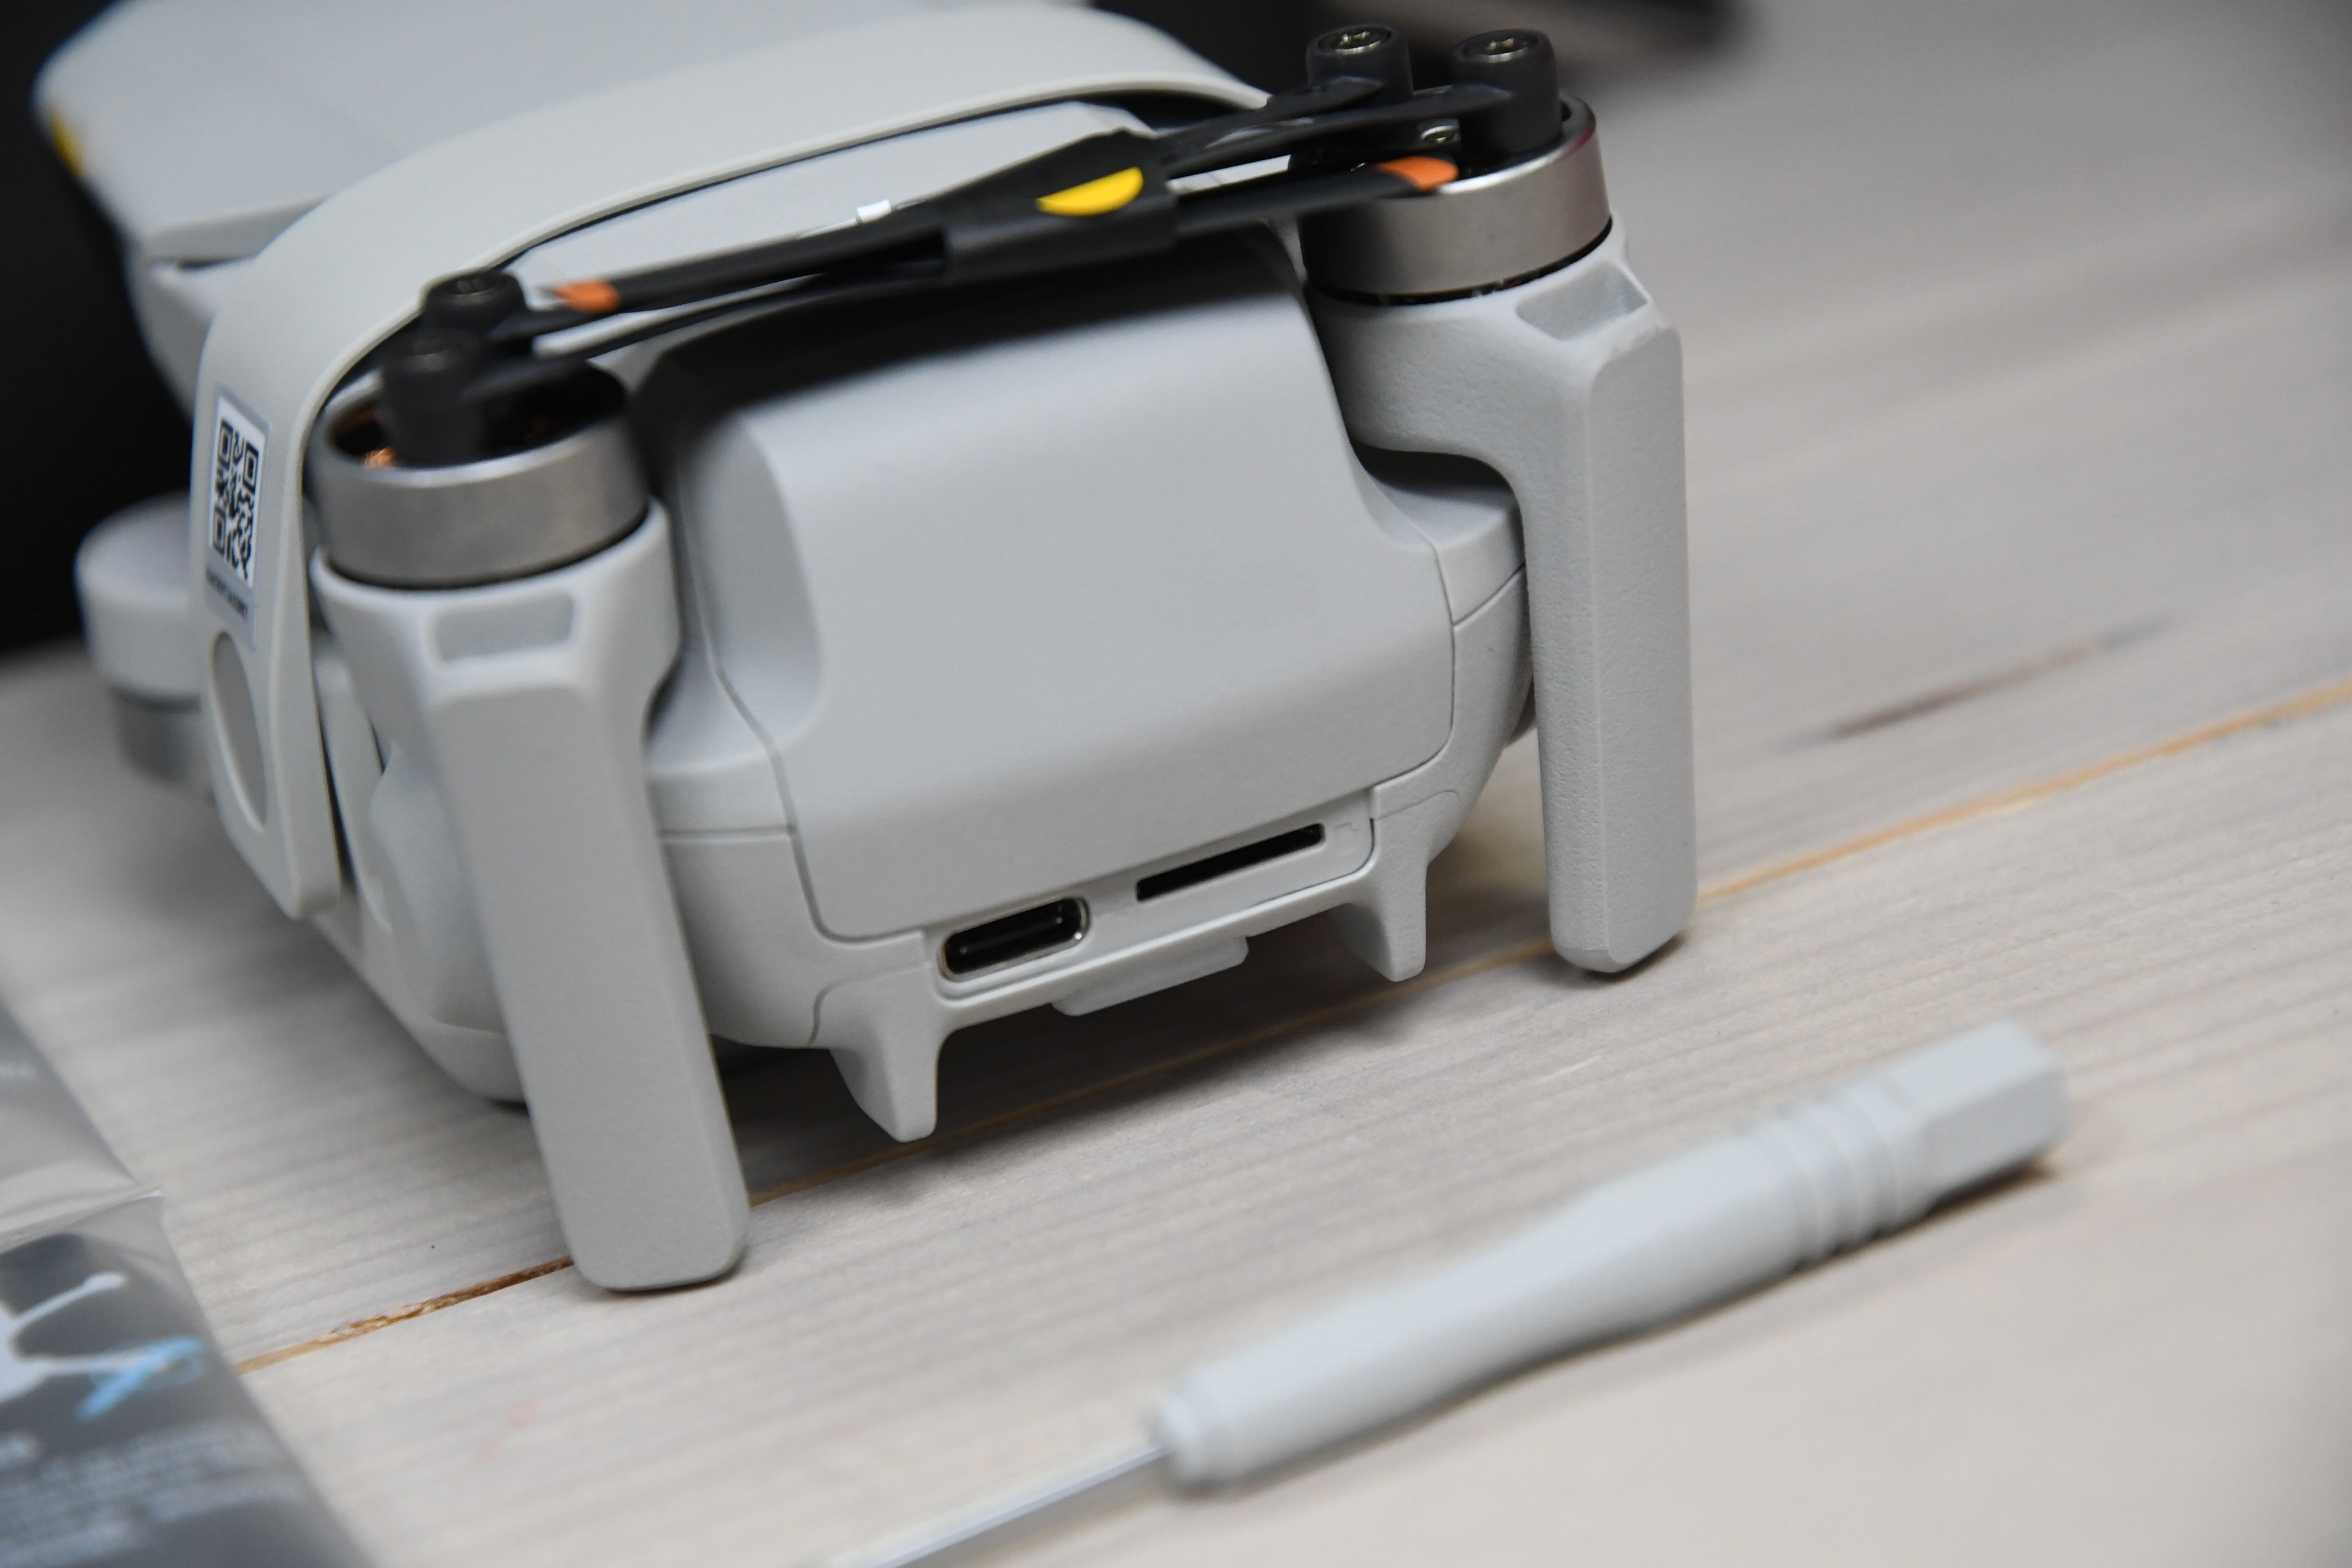
On the rear of the drone you’ll find a micro-SD card slot, as well as a new USB-C port. Previously it was micro-USB. You can charge the drone via USB-C (woot!), if you didn’t buy the separate battery charging station/bundle. You’ll need to stick your own micro-SD card in that slot, as it doesn’t come with one.
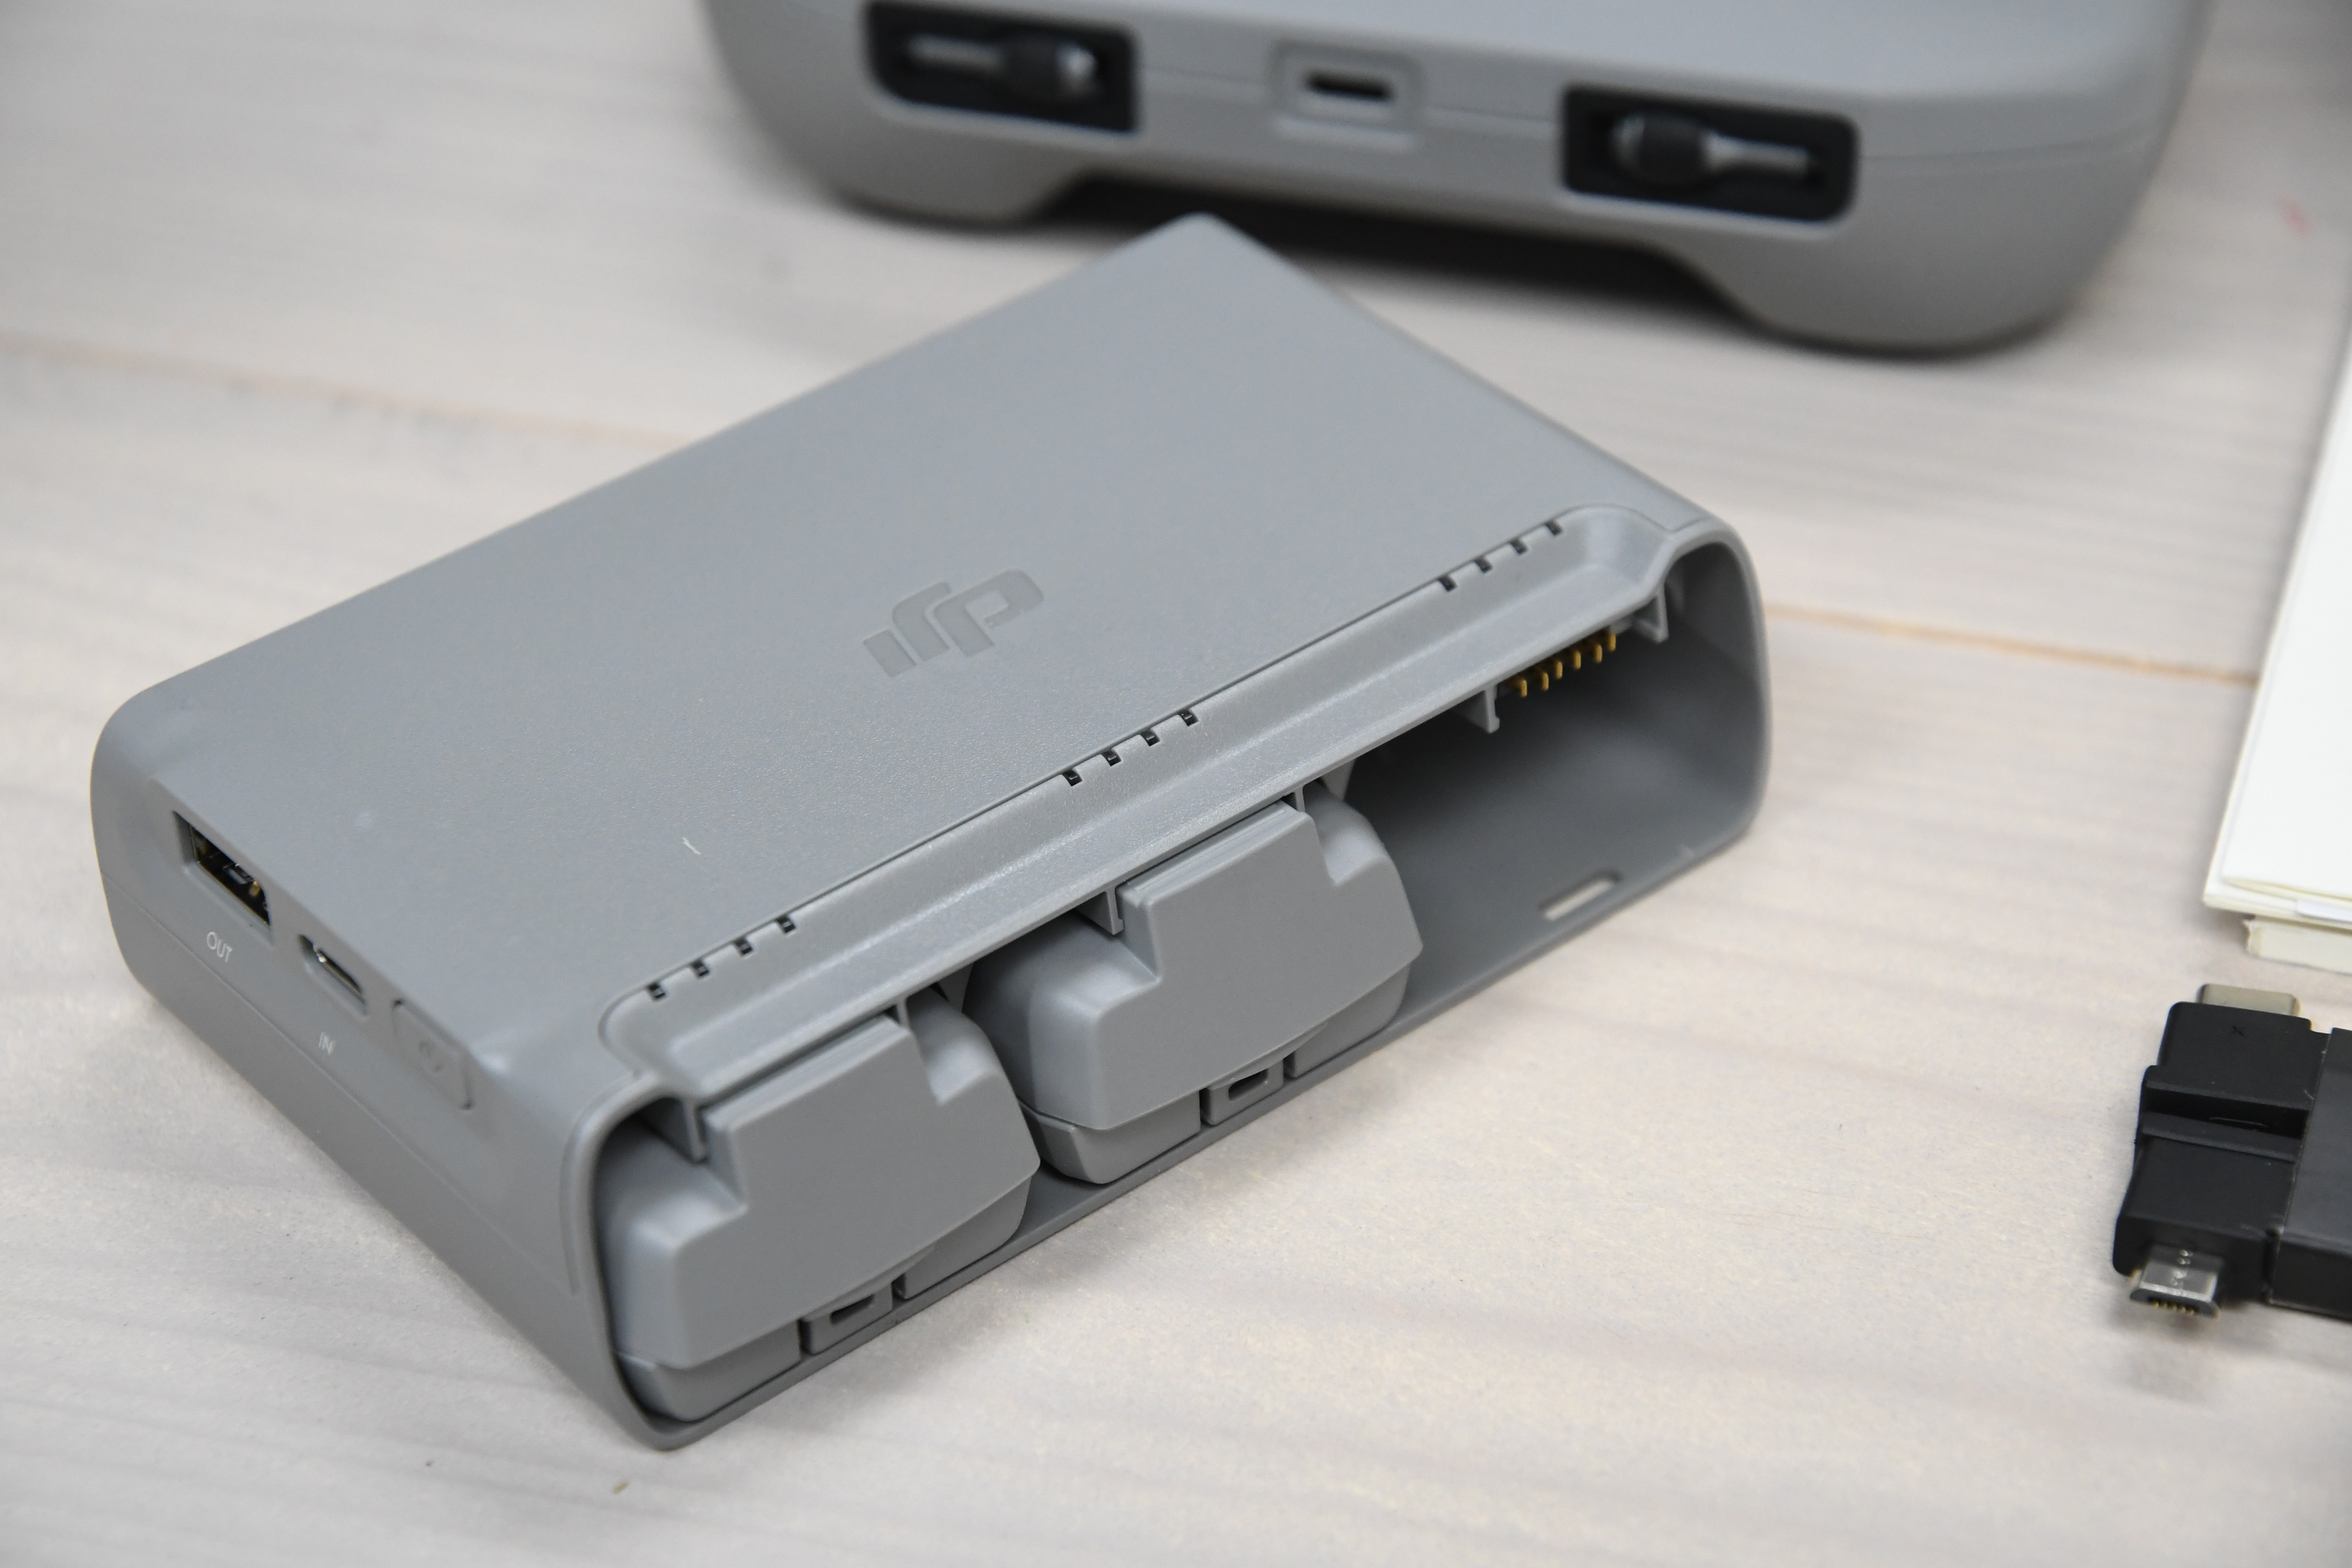
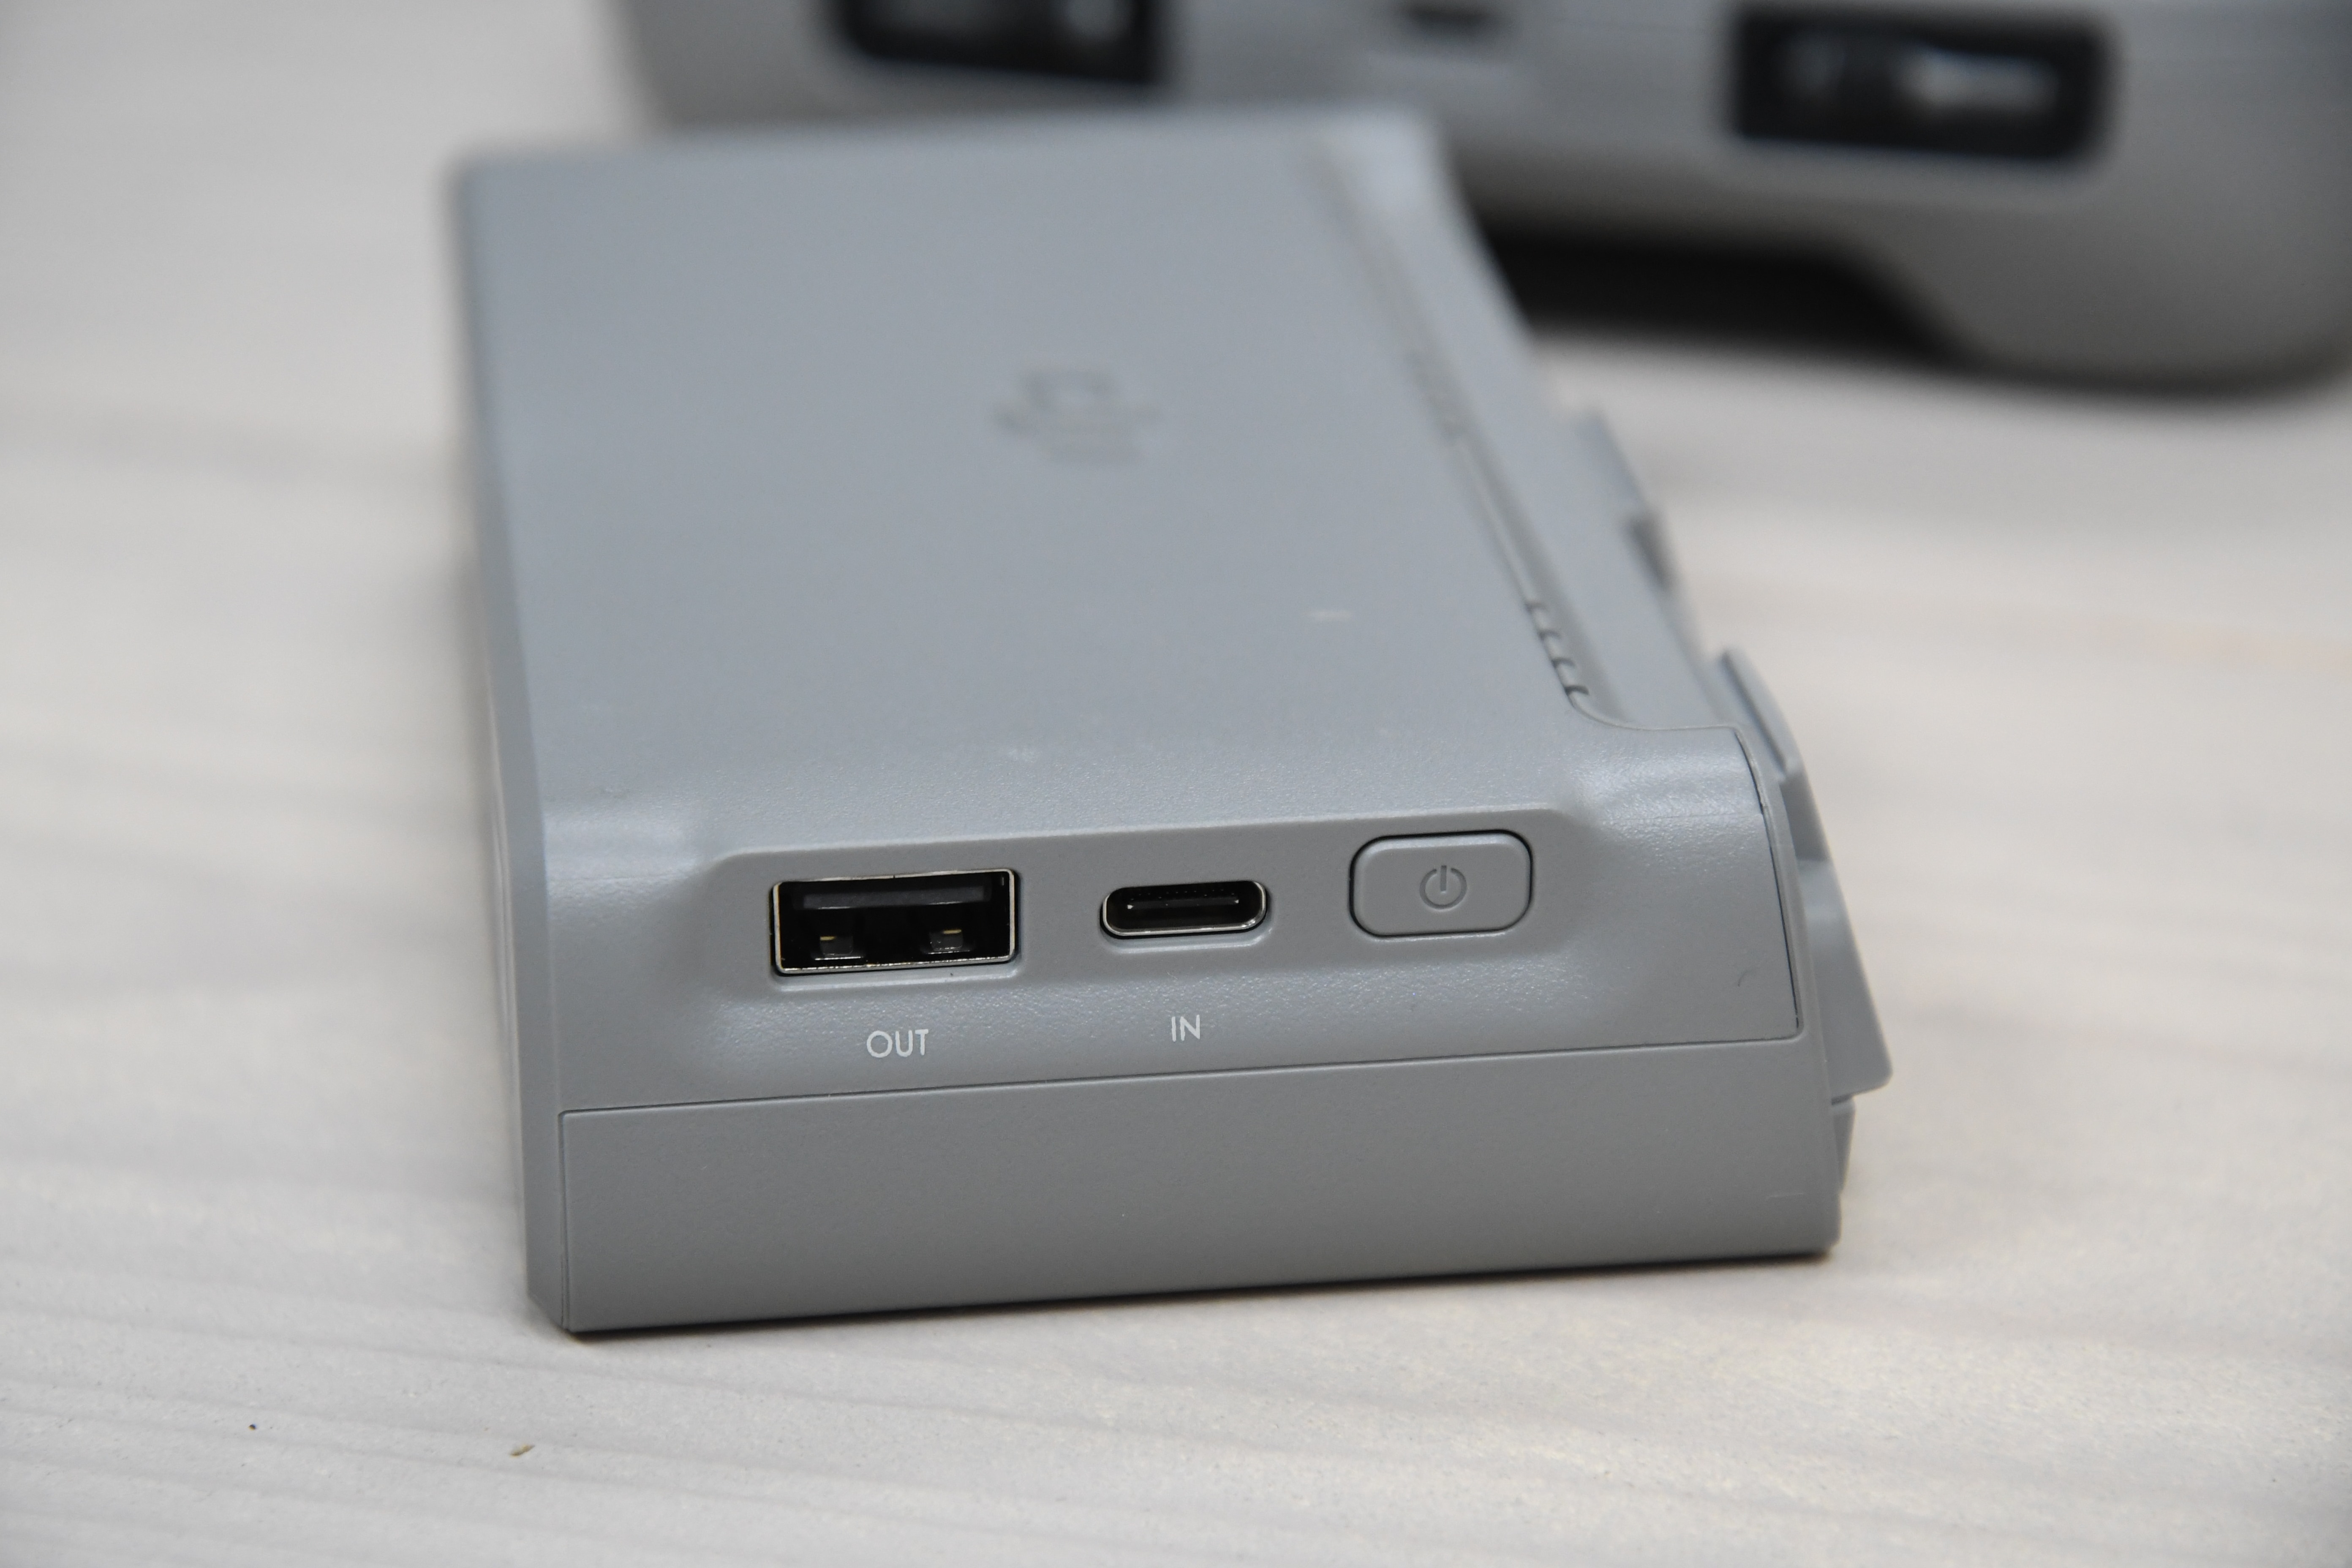
For battery capacity, flight time is claimed at 31 minutes, exactly 1 minute longer than previous. Here’s a look at the battery charging hub, which will charge batteries sequentially – also via USB-C, as well as a second USB port on it for then charging your remote (or your phone or whatever).
As a reminder, the battery makes up 40% of the system, weighing 99g out of 245g. If you buy the drone in Japan, you’ll get a reduced battery that only weighs 49g. However interestingly, you can purchase the larger 99g “international” battery (aka “the normal one”), and it’ll work just fine. It’ll simply just take you over that Japanese 199g limit.
On the micro-SD card side, it accepts cards up to 256GB. Pretty standard stuff. Note that internally the drone doesn’t have secondary internal storage like some DJI drones do. However, if you forget a card it’ll stream photos and videos in 720p back to your phone. So I suppose all isn’t lost there.
On the bottom of the drone you’ll find two sensors towards the back of the aircraft, these are ground-detection sensors, and essentially detect the ground during landings, as well as hovering near the ground. These are *NOT* obstacle avoidance sensors though.
For example, if you look at a Mavic Air 2, you’ll see the obstacle avoidance sensors on the front. These help you avoid crashing into trees. While the cutouts are there on the Mini 2, no sensors exist internally. Also, while we’re here – there’s a new LED light above the camera – as seen below:
As I noted with the original Mavic Mini, this is pretty disappointing, because overwhelmingly the people who frankly need obstacle avoidance sensors the most are those getting their first drone – which is generally where the Mini 2 slots in. I’d much rather take a cut on battery to 20-25 minutes and get the sensors added back in. After all, on the Japanese version of the drone the weight is 50g less – which is 1/5th the aircraft, by reducing the battery. That’s far more weight savings than would be needed for the sensors.
Even as one that has probably 20+ drones. While I’d classify myself as a fairly experienced drone pilot, I still find tremendous value in the obstacle avoidance sensors – mainly when you’re trying to get either complicated or hard to judge shots – especially at fast pace. It keeps you out of trouble.
Finally, looking at the props, DJI did actually make a small (and disappointing) change here. See, on drones there are actually two different prop sets installed on each drone. And if you mix them up, the drone will immediately flip over and crash. So companies tend to make the markings different. And historically DJI has done just that. Two lines versus one line, as seen at left on the original Mavic Mini. However, with the Mini 2 they switched to orange (great for seeing props at high speed), but both props have the same pattern. The only difference is a tiny marking near the screw.
Keep in mind this is also annoying when grabbing spare props before heading out, since you’ve got to triple-check more closely that you grabbed two different sets of props (you’ll always want to travel with spare props, in case the props strike the ground/rock/pebble/bunny while landing and break.)
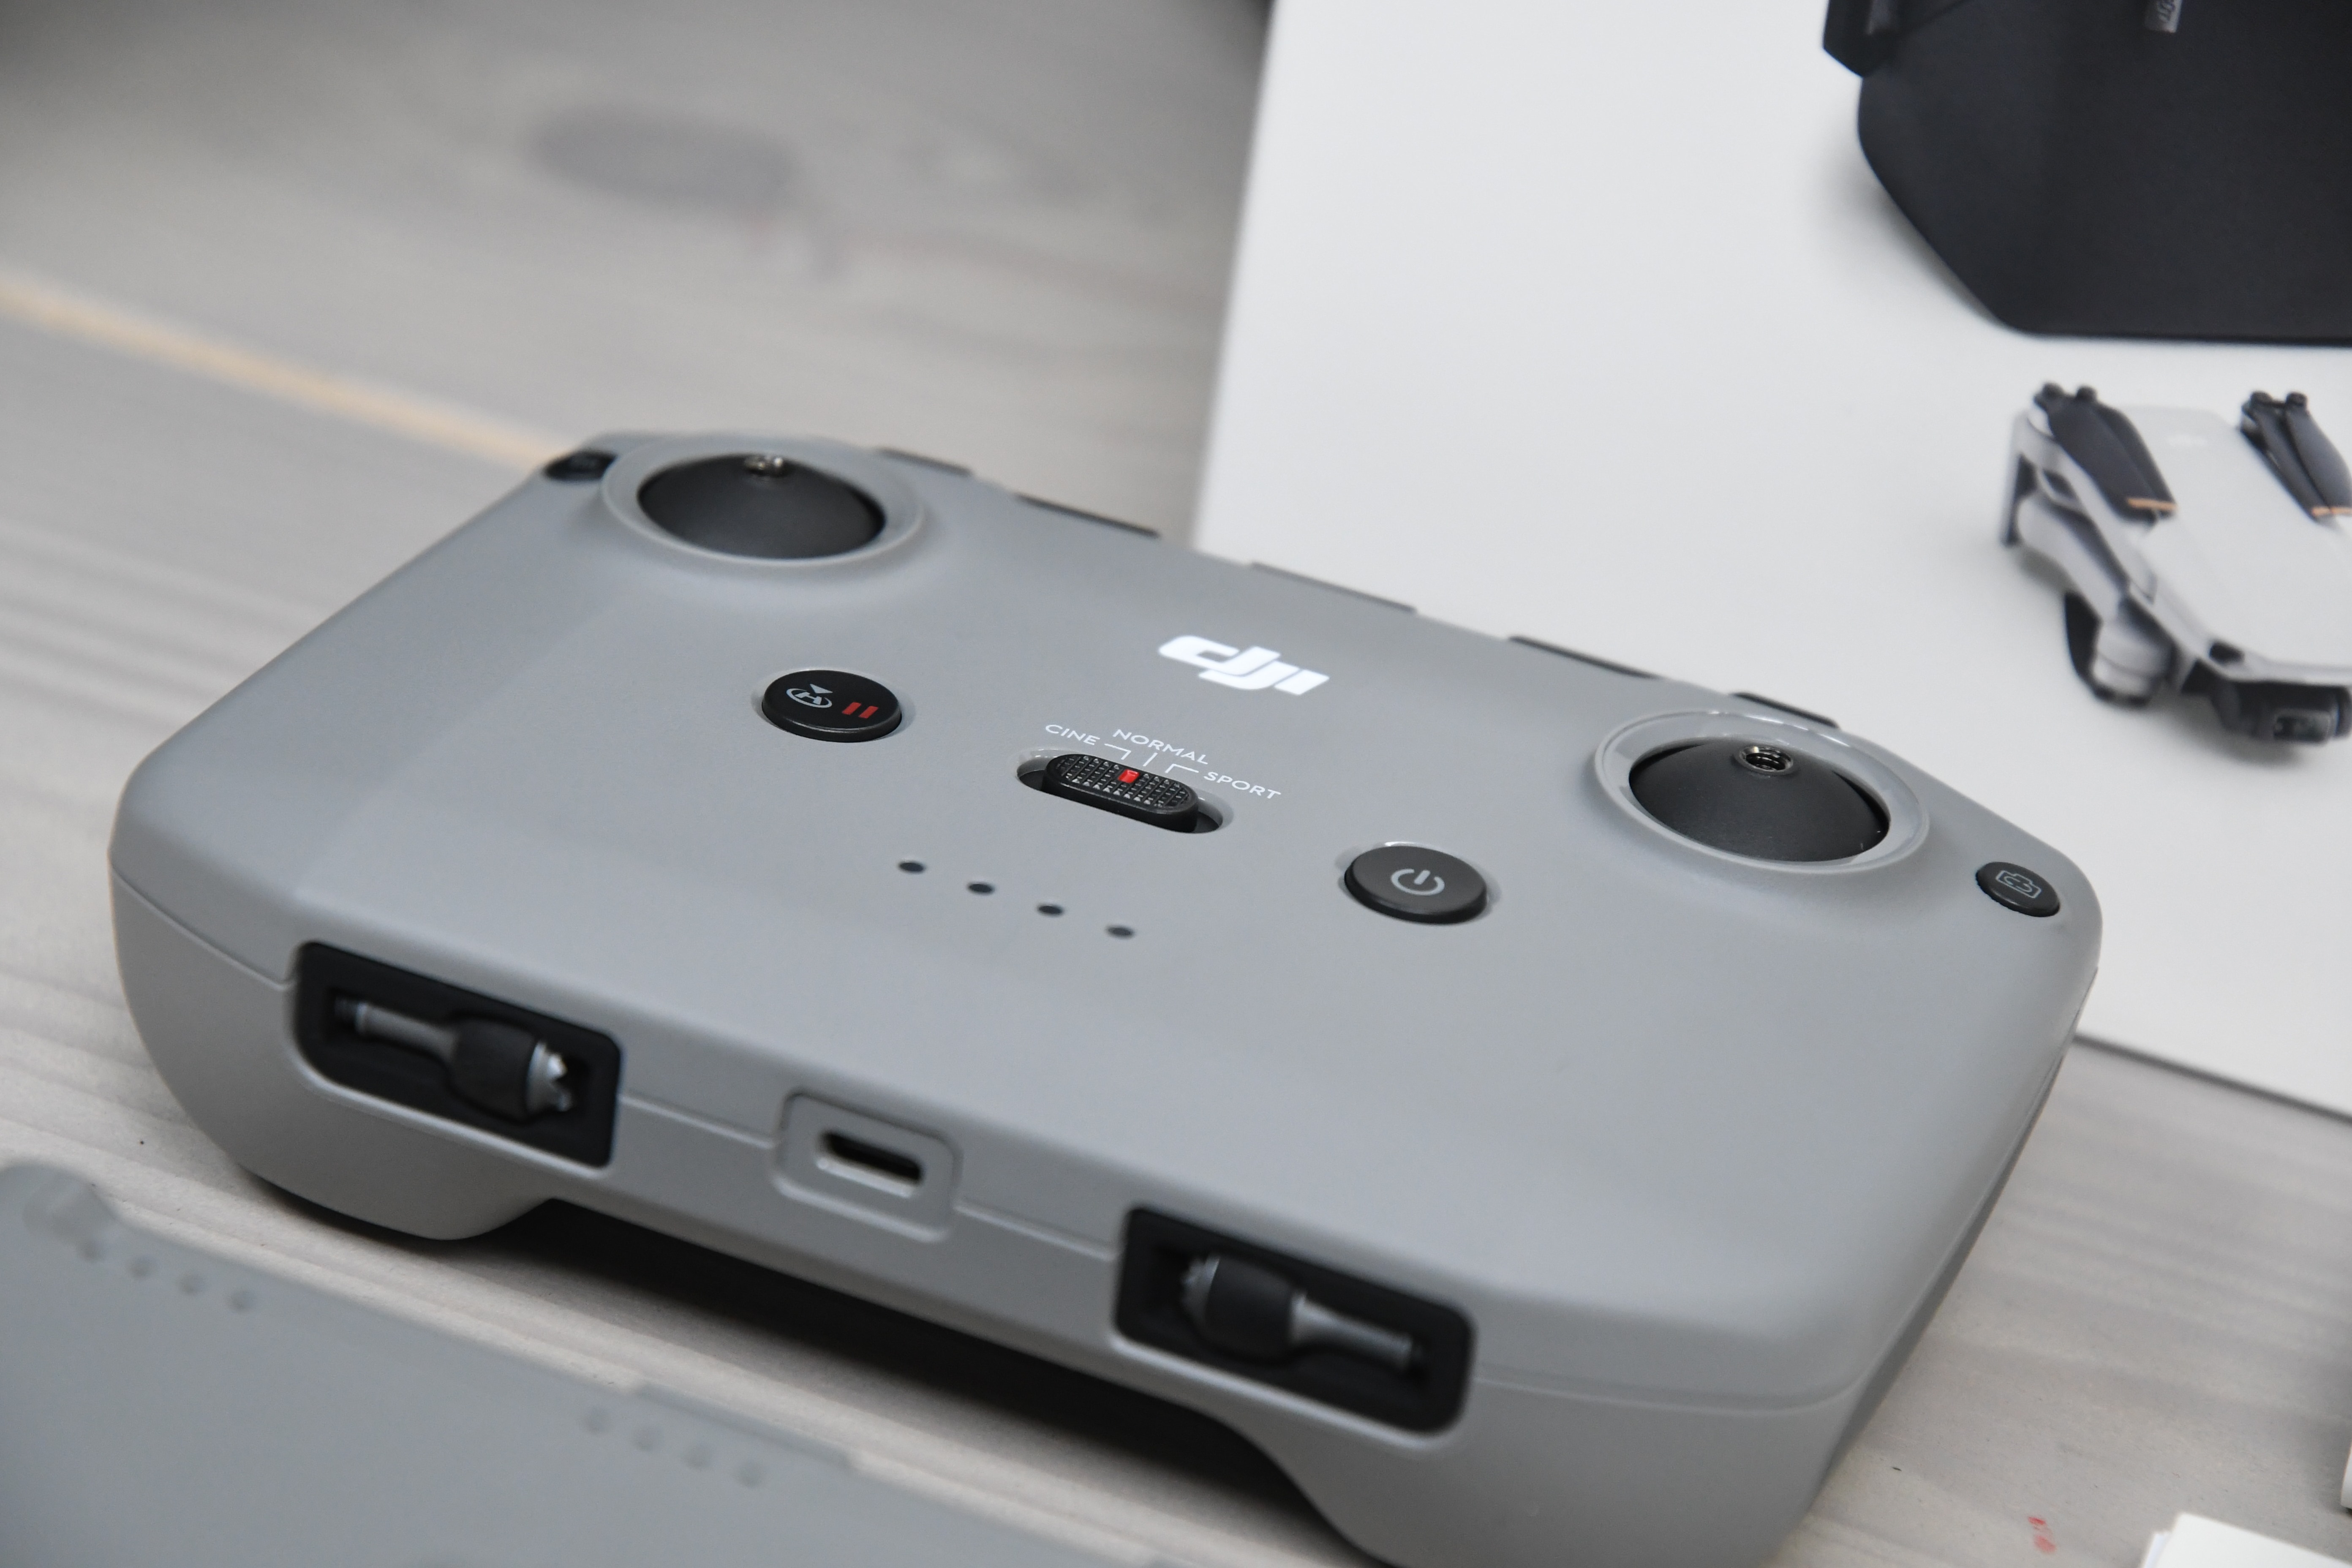
Ok, let’s switch over to the remote. This remote is substantially different than the Mavic Mini 1, and is basically now the same remote as the Mavic Air 2. This remote is a bit easier to use in terms of phone placement, holding, and visually looking at it.
However, the downside is that it’s twice as big. So if you were throwing it in the back of your cycling jersey, or trail running with it – it’s basically the size of the drone itself. But hey, at least it’s charged via USB-C now…woot!
On the front of the remote you’ve got:
– Two removable joysticks
– Automatic return to home button
– Power Button
– Mode button to toggle between photo/video
– Mode switch between Cine/Normal/Sport modes
– Barely customizable photo button
– LED status lights for power of controller
Meanwhile, on the topish-back-edge there’s:
– Record video button (start/stop)/Take camera photo
– Gimbal Control wheel
Along the bottom, you’ll find it includes a second set of joysticks inside. You can simply twist these to remove/install them on the controller, which can be handy to save space while in transit:
You’ll slide your phone into the top. While it works with my iPhone 11 Pro in its Quad Lock case, it’s not a great fit. For riding with it on my handlebars I removed the phone from the case, since it fits more securely (more on that later). By default, it ships with the iPhone connector in there, but the box also contains both a USB-C and Micro-USB controller connector:
Note that you can choose to charge the phone using the massive battery inside the remote (it’s an option in the menu), which lasts many, many flights. For example, even after three flights one afternoon the controller LED indicator was still showing full. I typically do top it off when I charge the drone batteries though, just out of habit.
Drone Flying Basics:
Now it’s time to get it up in the air. First up is unfolding the legs, and then removing that gimbal cover. After that, press the bottom power button, release, and then long hold it for a few seconds. The drone will power on, and the lights will illuminate and stay on.
Meanwhile, on the controller, you’ll first put your phone in, and then connect the cable. After which, you’ll repeat the same button sequence to power on the controller. After which, open up the DJI Fly app, which is what DJI uses for all its recent drones. You’ll notice my joysticks are removed. That’s because I managed to drop one while out doing my wind tests…and forgot to take my spares. #Reality
If you haven’t done so yet, I’d recommend checking for new firmware at home before heading out. Almost all new drones from the DJI factory will require the final firmware be updated on them when they arrive to you. Also, when you travel, I recommend doing the firmware updates before you leave, as well as checking the night before any big trips the next day.
Once that’s ready, tap the ‘Go Fly’ button. Don’t worry, it won’t take off yet.
Assuming everything is connected and paired (and updated), you’ll then see the view of your camera. You’ll also see a full-screen view of the map if you tap in the lower left corner on the mini-map:
The map shows you where you can legally fly, however, it’s not usually exhaustive. Meaning, it’ll usually show big airports, but I find it won’t show other no-fly zones in countless areas I’ve been to. You’ll need to do your own research here with maps/apps for your country (or the country you’re in) to figure it out. Also note that in most countries, the 249g limit doesn’t mean you get a free pass to fly anywhere. It typically only relates to registration or whether you need a license. For example, in Canada it lets you fly without a license. Whereas in the US it means no registration. But in both places you still have to respect no-fly zones.
With everything all ready, you can either press the take-off button on the screen, or you can simply hold the two sticks inwards and downwards towards each other, which starts the power-up sequence and then allows you to take off manually.
Now that the drone is in the air you’ll see status information on the controller – including how high and far it is from you as well as the speed (lower left corner), while the lower right corner is photo settings (exposure compensation and lock). Meanwhile, the upper right shows you signal strength and battery/SD Card durations. Finally, the upper left shows you the current mode (Mode N = Normal, Mode S = Sport, Mode C = Cine).
Along the right side you’ll see the recording button/status, as well as the ability to change settings related to the camera, including playing back of clips. You’ll notice a thin line along the middle-right side, that’s the gimbal pitch (up/down). I’ll get more into the photographic bits in the next section.
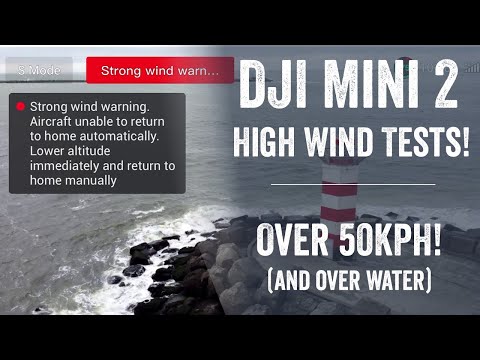
From a handling/flying standpoint it’s pretty much like any other DJI drone – super easy and smooth. Which, is as it should be. I’ve had no issues flying in either smooth/sunny conditions or horrifically windy conditions (57KPH). You can see that in a moment, down below in the video. Ultimately, aircraft are designed to fly at speed, and it doesn’t really matter too much whether that speed is due to the aircraft’s own power or wind. Gimbals however are a different matter, and can sometimes have different tolerances in terms of how they handle wind gusts. However, that wasn’t a problem within the specs here.
Just in case you needed a bit more clarity on that:
There are three basic controllable flying modes with the drone:
Cine Mode: Designed for slow and steady flying, where it basically dampers all your moves Normal mode: Just normal flying/shooting Sports mode: You get extra speed (up to 57KPH), but you can see gimbal stability issues on sharp turns
All these modes act as they claim, and I’ve tried all three. Sport goes as fast as you’d expect, inclusive of the fact that the gimbal is a bit jerky when you make sharp turns, or if gusts are too high – but it’s progressively better than the original Mini 1 or even the Spark. Inversely, cinematic mode simply slows everything down from a movement perspective, kinda like someone putting speed limiters on you, making it easier to get smoother movements. It’s technically not doing anything to the camera, but rather just to the flight controls.
For battery life it’s always a bit tough for me to get an exact gauge unless I just put a unit in the sky steady-state. Most of my tests were with higher winds…because…Netherlands. However, I definitely got flights well over the 20-minute marker. Advertised/claimed spec is 31 mins, and I suspect in the right (warmer/calmer) conditions it’d achieve that. Of course, battery performance goes down on colder days. This day it was about 50°F/10°c. Still, it’s usually more than enough for my purposes. I don’t usually tend to take super-long flights. I tend to do higher quantities of shorter flights in more varied locations to get the shots I need.
When it comes to landing the drone you can always press the ‘Return to home’ button on the outside of the controller, or the same button on the screen to get it back home. At which point it’ll immediately fly back to you at the predefined altitude in the most direct ‘as the bird’ flies manner. Or, you can manually fly it back to you and land. I’d recommend always manually flying it back, merely so you can improve your flying skills but also to avoid any obstacle issues.
When it comes to settings you can configure, you’ve got a handful. This is where you start to see some of the core differences compared to other higher-end DJI products. First is the safety tab, which allows you to set a max altitude and max distance, as well as the Automatic Return to Home (RTH) Altitude. For max altitude I set something well below the max legal limits (so 120m is perfect), and then for the max distance I usually do the same. For the RTH Altitude I actually tend to go a bit higher to 50m when I remember (which I didn’t here). The reason being (especially with the DJI Mini Series given it has no object avoidance) to clear any random obstacles trees/buildings/telephone phones/etc… that might come in its way. Where I am, 50-meters easily covers that.
Next, there’s the control page, which includes the flight modes and units. Other settings include going from Follow (default) to FPV mode (though, I find it pretty poor at replicating FPV movements). As well as changing the joystick modes and unit preferences.
Then you’ve got camera preferences. This is where you can go from 4:3 to 16:9, set the default for JPG or JPG+RAW for photos, as well as add some overlays for histogram, grid lines, tweak the cache, and anti-flicker settings.
Now normally I’m not a huge fan of shooting in 4:3 (versus 16:9), because it means more work in post-production. However, you do actually get a bit more resolution out of the 4:3 because it retains the same field of view (left to right angle), however extends it higher up vertically. So you can crop a bit more in post if need be. Still, I don’t tend to bother there.
Next, there’s the transmission page, which shows you the current frequency and current channels used (and the ability to tweak them). Realistically, 99% of you will never have a need to touch this page.
And finally, lastly there’s the about page which dives into firmware and database versions, as well as serial numbers for the unit.
With that, let’s go a bit deeper on the cinematic side of the house.
Cinematography Details:
It’s funny, a year ago in my original DJI Mavic Mini review I said “I really wish DJI would have considered a ‘Pro’ unlock option – for example for $100 extra via software the ability to unlock 4K/30 (or even 4K/60) along with a handful of other camera settings would be welcomed, and something I’d happily pay. I’m not asking for Log recording here, just for a bit higher resolution that the camera pipeline is more than capable of.”
Turns out, they basically did just that – except, it’s a hardware unlock. The Mini 2 of course costs $50 more than the original Mavic Mini, but we’ve got 4K/30 now. And thankfully, it delivers.
So let’s dive into some of the camera settings. First, before you get it in the air there’s the setting I mentioned earlier within the camera preferences. This is where you can go from 4:3 to 16:9:
Also of note is that when you switch into QuickShot modes for the first time, it’ll default back to 1080p/30, so go back up to the camera settings and switch it to 4K. I suspect this is a bug that’ll be fixed – but just be aware of it.
In those same camera settings is where you can add gridlines, tweak the cache, and anti-flicker settings, as well as overexposure warnings:
Here’s what the gridlines look like in a few different configurations – also, you can combine them if you want:
You can also control gimbal sensitivity settings (Control > Gimbal > Advanced), where you can tweak the pitch and smoothness of the gimbal up and down movements. After that, almost everything else is from the main shooting page.
On the far right side is the giant record button, and above that you can toggle between video and photo mode. When you do that, it’ll switch from recording to taking photo shots. Within that menu you’ll see the different options for filming as well as the other modes. These allow you to toggle into video, photo, and QuickShot modes. QuickShots are where you’ll do short automated flight routines that capture a specific preset cinematic move. In the case of the Mini 2, that’s one of five moves (it gained one over the Mavic Mini). For resolutions and frame rates there is:
There’s no option to change file types or cinematic profiles like on higher-end drones. What you see is what you get here. The only option you’ve got is the ability to change the exposure compensation (EV) in 1/3rd increment stops as well as lock the exposure compensation, both of which are accessed in the lower right corner:
You’ll start and stop recording by either pressing the record button on the display, or by pressing the dedicated record button on the back right side of the controller. On the front side there’s also a dedicated toggle between photo and video mode. So historically DJI has split those out (dedicated buttons for taking photos and another for video), but with the newer controller they blend them together. Which is logical since you can’t use both buttons at the same time anyway.
While recording you’ll get the recording time shown next to the play button. If you want to adjust the gimbal’s orientation (up/down), you can use the small gimbal wheel on the back of the controller, which pitches the gimbal up or down. You can change the sensitivity of this wheel within the settings menu. You can see the degrees of the gimbal shown on the screen when you rotate it:
The Mini 2 adds a zoom function, which allows you to digitally zoom in on the shot. Effectively this is just a crop from the larger 4K sensor. There’s your options:
1080p: 1x (no zoom), 2x (lossless), 4x (lossy) 2.7K: 1x (no zoom), 2x (lossless) 4K: 1x (no zoom), 2x (lossy)
Lossless means that it’s doing a straight crop from the larger sensor size, so there’s no degradation of quality. Whereas lossy means that it’s zooming in beyond the crop factor, and thus is kinda like CSI ‘Digitize’, so it’s not as sharp anymore. You can see this on the screen below with the 1x/2x/4x changing as you go through different resolutions. Within my main video I dive into this in much more detail.
Next, let’s get into QuickShots. These are pre-planned cinematic moves that allow you to get fancy looking shots without knowing how to do much more than tap a green box. Each of these shots is generally about 10-20-seconds in duration. There are four shots in total: Dronie, Rocket, Circle, Helix, and the new one – Boomerang.
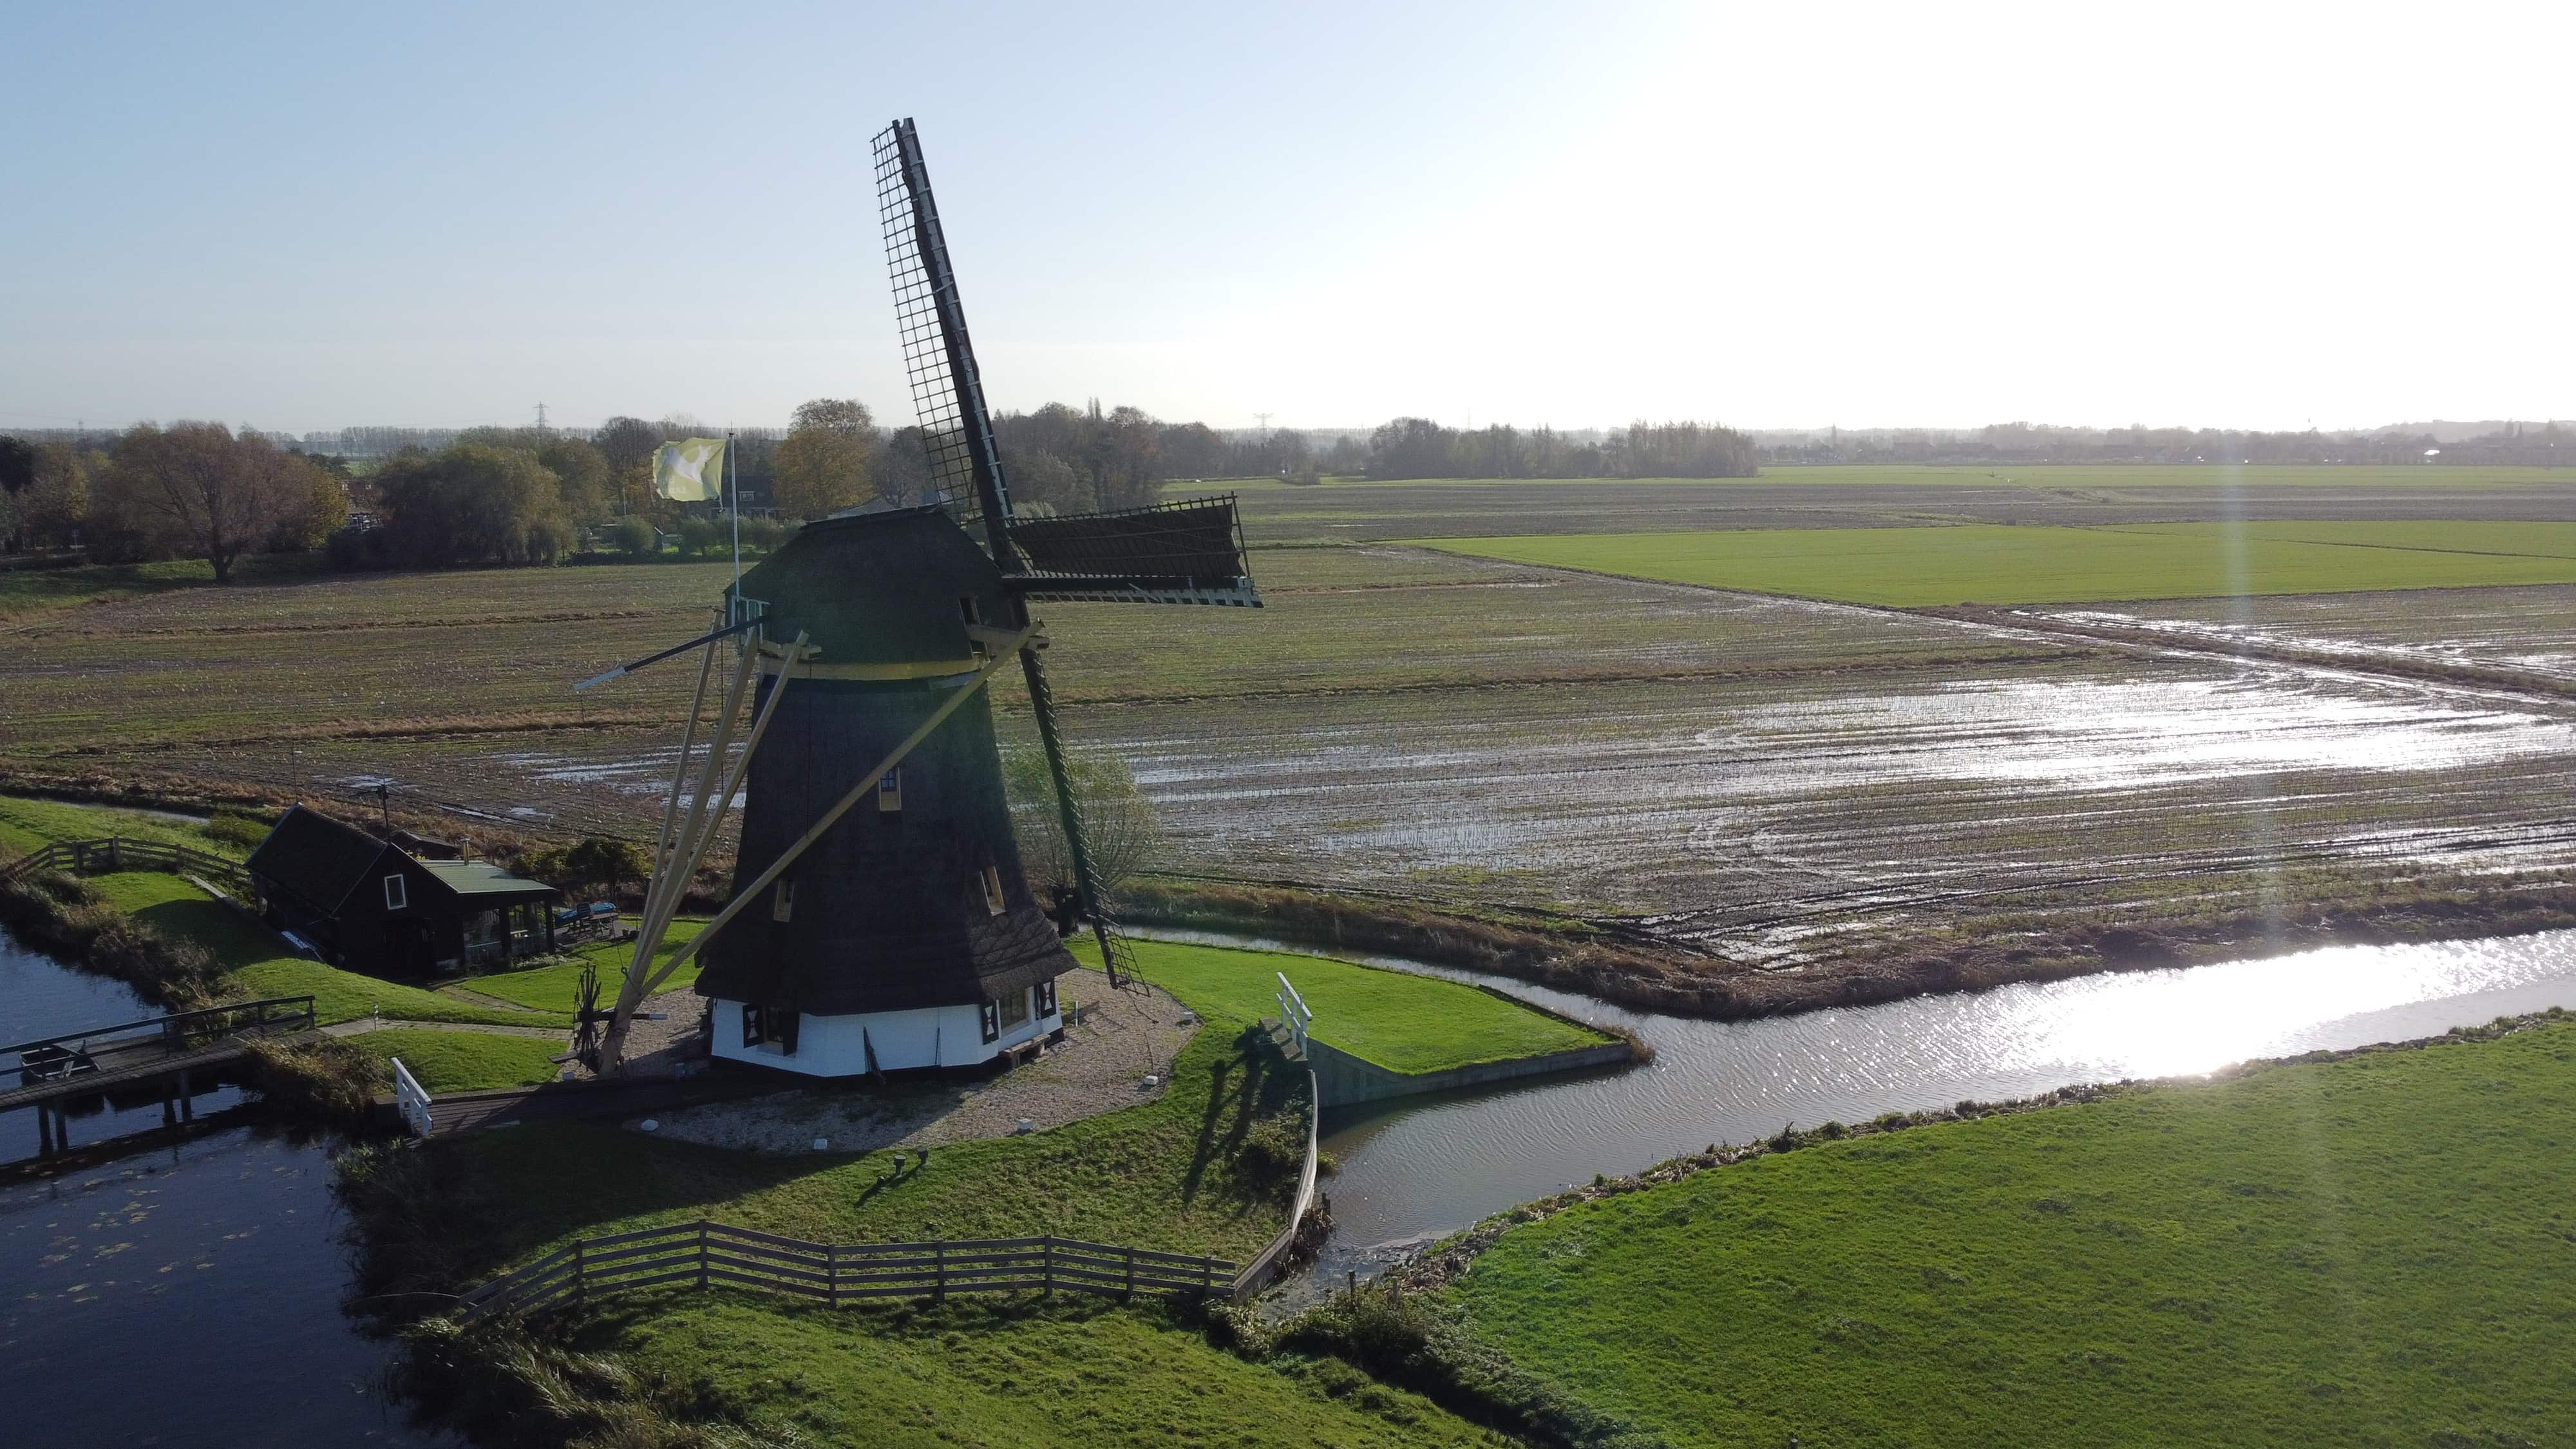
For the Dronie, Rocket, and Helix shots you can configure how far away the drone will go as part of the shot (for the circle it just maintains whatever distance the drone is already at). For example, above you see that the ‘Dronie’ shot will rise to 25 meters. To get started you need to identify the object for the unit to take its fancy shot on. By default the Mini 2 will try and identify some objects within the frame – like people for example. If so it’ll show a green dot above them. Else, you can simply use your finger to draw a green square over someone/something. That’s useful for really big objects like a windmill or building.
Once that’s done it’ll have a rectangle around the object and you can hit start. For some moves (like orbit), you can choose the direction of travel. After hitting start it’ll give a three-second countdown before beginning its movement:
The camera will automatically try and keep that subject in track as the camera works its way through the sequence. Remember again, there’s no obstacle avoidance here. So if you do a circle or dronie and then send the drone off backwards into a tree then there’s nothing stopping it from killing itself. Still, assuming you’ve got a clear area – this is by far the easiest way to get really nice smooth cinematic shots of anything you’d like – even a static option like a tower or such as I showed in my main video. Fear not, I’ve got lots more details on this down in the sports section.
Finally, we’ve got photos. The Mini 2 takes 12MP photos in JPEG format in either 4:3 or 16:9 mode. For 4:3 photos those are 4000×3000px, while for
16:9 they’re at 4000×2250px. Once you toggle into photo mode, you’ll see three options: Single, AEB, and Timed Shot:
Single photo mode means you can trigger a photo manually using either the button on the display, or the dedicated photo button on the controller’s upper right side.
AEB will take three shots in a row, bracketed at under-exposed, over-exposed, and properly exposed. After that, it’ll then compress them into a single cohesive shot. It’s like HDR, but DJI doesn’t call it that.
Meanwhile, timed shots are actually one of my favorites. It allows you to set a repeat timer that simply takes a shot every X seconds, where X can be every 2s, 3s, 5s, 7s, 10s, 15s, 20s, 30s, and 60s apart. However just like that year from a sports standpoint I’ve never understood why DJI can’t simply put 1-second as an option. There’s a vast difference in the sports world between every 1 second and 2 seconds.
In fact, in the Mini 2, both a 2-second and a 3-second option are not offered if you shoot JPG+RAW. Only for JPG do you get those other options.
There is still no time-lapse mode however in the DJI Mini series. Nor is there any HyperLapse feature. Though you could take a bunch of higher resolution photos and create a time-lapse out of it (even netting yourself a 4K time-lapse once you did all the leg work of converting those still images into a video time-lapse).
For fun, here’s a large pile of images I took straight out of the drone, no post-production tweaking at all.
If you’re just getting into drone photography you may be wondering what you’re missing from a cinematic options standpoint, and essentially it comes down to lacking things like advanced camera controls, especially in video mode (like shooting CineD), as well as added color profiles. You’re also looking at less options for frame rates, and a boatload less options for automated camera movements as well as even optical zoom on something like the DJI Mavic 2 Zoom.
Still, for the vast majority of people shooting in that sweet spot of 1080p30 or even 4K30 – and then publishing to social media channels with minimal post-production work (if any), you’re unlikely to notice any difference between a DJI Mini 2 and a DJI Mavic 2 Pro. Most of those differences are instead on features that make it easier to fly (or avoid crashing) and easier to get the shots you want, and then ultimately easier to edit in post production.
Sport & Athletic Uselessness
So, you’re here on a sports-focused site, and want to know how well it handles sports and tracking. The answer?
Well first though – a note that when I’m doing sports stuff with drones, I’m primarily talking about tracking myself. Meaning, a drone following me doing cool stuff. That’s my jam. I don’t typically have someone else piloting a drone following me. I have yet to unlock the paparazzi level. If you do have your own entourage, then honestly you won’t find much downside to the Mini 2, except again lack of ActiveTrack for easier tracking of subjects while you’re flying.
But with that preface out of the way – how does the Mini 2 handle sports? Just as messily as the original Mavic Mini.
That’s because while the Mini series is a great all around cinematography drone, it lacks DJI’s Active Track feature, which is what allows automatic tracking (and following) of a subject. For DJI’s higher-end drones that have that feature, it allows you to track a subject persistently and keep it framed (mostly) properly. It’s hardly perfect, but the most recent iterations of it are pretty solid. Sure, not Skydio crazy, but pretty darn good for the vast majority of non-deep-tree scenarios.
But, since the Mini series lacks obstacle avoidance sensors, DJI didn’t implement Active Track, likely cause you’d just end up crashing into a tree 20 seconds later. So, what do they have instead?
QuickShot modes. QuickShot modes are basically a miniature version of DJI’s Active Track technology built into the confines of a 20-30 second long tracking period. Within QuickShot modes (there are five modes), it’ll follow a semi-predefined flight path (such as an orbit or a boomerang path), while keeping you framed. However, unlike Active Track which can go forever, these QuickShot modes only last 20-30 seconds before returning back to the start. The theory being you’ll have enough foresight to look around and ensure you’re not going to have the drone crash into something. Also, usually they’re for taking videos of static shots.
Thus, for moving shots it gets a bit trickier. I’m not gonna lie – it takes a bit of practice to make it work. Mostly because you’ve only got 20 seconds or so for the shot. So that’s the shot-time you need to go from being still enough to follow you, to tracking you through the shot. Also, you can’t move very fast.
In any case, I wrap it all together in this video:
Or, if you want the quick text, then start here instead.
To demonstrate this, first, you’ll get yourself in as close to position as you want for the shot. Let’s assume you’re cycling (running is easier, since you’re moving slower). Go ahead into the QuickShot menu and select a shot. This works on all shots for the most part, the key is just not starting too close to the drone, but not too far away that it can’t find you. Ideally about 10 meters away is perfect. If you start too close, you’ll quickly out-run the tracking on it.
Now go ahead and identify yourself by tapping the green dot (or creating a green square above you). Then, once you press the start button – begin moving. It’ll already be tracking using its internal ActiveTrack functionality. The only visible difference between this ActiveTrack and the bigger ActiveTrack on other drones is that this ends in 15-20 seconds. It’s like one of those really time-limited freeware apps.
I’ve found that the first three seconds or so you’ll actually want to wait. The Mini 2 seems a bit slower on the uptake than the Mini 1. So count to three before you get going, then start.
Also, there’s the further balance of not outrunning the tracking aspect. It doesn’t seem as fast to respond to speed changes as some of the larger drones. In general, I’ve found that the ‘Dronie’ quick-shot tends to be the most forgiving and where I get the best results during faster movement. The ‘Circle’ is the least forgiving. While the Helix is the most impressive if you manage to nail it (but it’s really tough). The boomerang can be interesting if used to ‘reveal’ a wider landscape.
So – putting it all together, here’s what’s possible with enough finesse:
Now, I’ve got a full video coming up tomorrow on this, with complete details and tons of examples. Stay tuned!
Lastly, there’s the practical issues here with using the Mini 2 for sport: You have to carry more stuff.
With the original DJI Mavic Air & DJI Spark for example, you can control both with your smartphone or the controller. Sure, the smartphone has you limited to roughly 100m of range, but for most sport tracks tracking a human, that’s way more than you need. After all, beyond that range you’re just a meaningless dot anyway. But for the last two years, DJI has ditched smartphone-only WiFi control. The Mini 2 follows the original Mavic Mini and only connects via the remote control, so if you’re cycling or trail running for example, you’ve gotta take both with you now – effectively doubling your volume. Sure, the other drones were heavier, but for most cyclists it’s more about pocket volume than pure weight – especially at the grams we’re talking here.
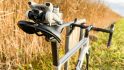
Adding insult to injury is that the Mini 2 remote is basically double the size of the Mini 1 remote. Still, if you’ve got two free pockets, you can stash both in there – as I did numerous times. And while riding, if you want to maintain positive control, I used a few industrial rubber bands on my handlebars to work (with some random pieces of rubber I found lying around placed atop the bars, to keep it from rattling).
The phone sticks out the top. Now, since the Mini 2 does support the smart controller, you could slightly reduce the messiness there and build a custom mount. Or, if your jurisdiction and situation allows it (meaning, you’re in the middle of nowhere), just place the phone/controller on the ground as you start the movement, and since the point of QuickShots is returning back to the starting point, you can go grab it afterwards. The downside there though is that if the drone is headed towards a tree, it’s gonna kerplunk it.
So ultimately, if you’re after a sports-focused drone that can automatically follow you for miles on end – the Mini 2 most definitely isn’t it. However, if you’ve got a focus on the drone’s other features, and just want to take ad hoc social-media sized tidbits of yourself being tracked, you can pull it together with the QuickShots and enough practice/creativity. Plus, that’s part of the fun, right?
Summary:
In many ways, the Mini 2 is a perfect example of DJI showing how refined they’ve become from a business standpoint. They’ve realized that the Mini series is the perfect annual release cycle type product, aimed just ahead of the holidays, and this year’s unit includes just enough new features to keep people interested. And also just enough new features for existing owners that might want 4K support, RAW photos, or better transmission quality to consider upgrading (especially if the 250g max weight limit is important for their region). And it’s almost more impressive because realistically DJI has no meaningful competition here. Sure, there are other companies in the drone space (such as Autel or PowerVision’s PowerEgg or others), but none that 98% of consumers will recognize. So in a sense, DJI’s biggest competitor is themselves.
Still, despite all the goodness in the Mini 2, I feel like the lack of obstacle avoidance sensors is just so strange given the target market for this drone is one that is likely to crash it more so than any other. Not only that, DJI reduced the weight of the Mini 2 down to ~240g in this iteration, proving that there’s more than enough weight space there to stash two sets of forward/backwards sensors without having to take a bit out of battery life. Though, I suppose if I were DJI, that makes for a pretty ideal November 2021 drone.
Until then – if you don’t mind the lack of obstacle avoidance sensors or Active Track, there’s very few downsides to the Mini 2 for folks either needing to fit under weight limits, or that simply don’t want to spend $1,000 on a drone. And realistically, for the vast majority of shots you’ll see on social media or YouTube, you can easily take those shots with this drone just the same as a $1,600 prosumer drone. It’s just a tool, and it’s all in how you use it.
With that – thanks for reading!
Found This Post Useful? Support The Site!
Hopefully you found this review/post useful. At the end of the day, I’m an athlete just like you looking for the most detail possible on a new purchase – so my review is written from the standpoint of how I used the device. The reviews generally take a lot of hours to put together, so it’s a fair bit of work (and labor of love). As you probably noticed by looking below, I also take time to answer all the questions posted in the comments – and there’s quite a bit of detail in there as well.
If you're shopping for the DJI Mini 2 or any other accessory items, please consider using the affiliate links below! As an Amazon Associate I earn from qualifying purchases. It doesn’t cost you anything extra, but your purchases help support this website a lot.
And of course – you can always sign-up to be a DCR Supporter! That gets you an ad-free DCR, access to the DCR Shed Talkin' video series packed with behind the scenes tidbits...and it also makes you awesome. And being awesome is what it’s all about!
Thanks for reading! And as always, feel free to post comments or questions in the comments section below, I’ll be happy to try and answer them as quickly as possible. And lastly, if you felt this review was useful – I always appreciate feedback in the comments below. Thanks!
Good spec upgrades especially the RAW photo, 4k and new motors are awesome!
To bad the controller is even bigger than before, this would be the perfect bikepacking/backpacking drone if u could use it with a smartphone only, I would have used my Mini 1 more if this was the case!
For now I will stay with my Mini 1 as I didn’t have much time to use it this year!
I do hope they will update the Mini 1 with RAW!
weird I assumed the original mini allowed this. If that’s the case then the Air is probably the more portable drone as I often fly that with just my phone
The main issue here is probably weight. It’s amazing they crammed all they did into 249g, adding all the extra sensors/wires/etc.. for obstacle avoidance would come at the cost of something else. We’re talking what, 1/3 the weight of a Skydio?
Nah, weight isn’t the real issue here. Product differentiation is.
Little known fact is that the 249g of the Mini 2 isn’t actually 249g. I clocked it in at 237g, and official specs say (I kid you not – 242g… “roughly”) – somehow there’s quite a variance there. And my figure even includes the microSD card. The original Mini 1 was 249g. Most of the weight savings appear from the battery and changing technologies there.
For the two sets of forward/backwards sensors usually stuck in other DJI drones (ignoring upwards facing sensors). Or even just a single set of forward sensors – you’d likely be looking at a couple grams at worst.
Obstacle avoidance are for noobs really. Fly in line of sight, especially in urban settings. I turned all the object avoidance systems off on my Mavic Pro. It is not fool proof and adds more confusion to flight.
On your old Mavic Pro obstacle avoidance was pretty basic. These days it’s pretty advanced (and even more advanced beyond DJI). And if you’re trying to do any sort of obstacle tracking, it’s basically required for anything other than wide open fields. Nobody is advocating flying in urban settings – the main benefit here is actually out in forests and such.
That’s laughable. Simple as that. Either you fly in an empty field for 7 seconds, or…that’s it.
And that’s before we even call into question the 5,000 value. For fun, if you’ve been flying 10 years, that means you’re making roughly 1.4 flights per day. Not a huge number on a daily basis, but very unlikely at scale of 10 years.
Considering that all of the drone components can be charged via USB-C – is it possible to charge it from a pocketable powerbank (like the ones that Anker makes for Nintendo Switch with high output) or does it still require a more powerful source of energy?
Anker PowerCore+ 26800mAh PD is just fine. 26800mAh is the largest airline legal capacity you can buy and that bank outputs 60Watts via USB-C PowerDelivery.
I don’t use mine for drones but a variety of other high-power stuff. (smartphone, phablet, laptop)
Thanks! It looks like Amazon has a bad ASIN matching going on there, I suspect they’ll fix it behind the scenes (meaning, it doesn’t correctly map US AMZN to UK Amazon).
In the meantime, I just overrode it for the site here. Appreciate the heads up!
Hmm, hard to say – though, I have been semi-impressed in past cold weather tests I’ve done in Canada at well below 0*C in that while there was some loss, it wasn’t massive. Right now though, no plans to travel anywhere. Also, my freezer isn’t quite big enough to get the drone in there actively flying.
It basically crops down the spherical 360 photo resolution to a 4MB image, which is kinda so-so. However, it does at last provide all the original 26 photos in both JPG & DNG, so one can re-stitch to something far higher. I included an example set in the file share linked up above.
Well…that would be because I stupidly dragged up a folder without the raw toggle enabled. Ok, dragging up another folder now with the raw photos. Says 4 mins remaining.
And, it’s actually a better example of potentially using raw photos to correct for what was a non-ideal exposure since I was trying to shoot the castle with the sun behind it.
When shooting 180 pano’s with the Mini 2 can you shoot it in RAW? This would be a BIG plus for me. A fellow on RC Groups told me it only shoots in low res jpg’s.
Yup, you get them for all the pano modes (sphere included) you get a folder full of RAW images. It’s not by default though, so you do need to (once) go into that menu and enable JPEG+RAW to get all future panos to output the dual shots.
Hi Ray, thanks so much for such a speedy reply…amazing! What is “that” folder? I don’t think its in the camera option where you select JPG + RAW as I can’t see it (unless I need better specs lol). Is there a separate menu to turn on JPG + RAW for specialty modes? If you are able to send a screen shot that would be awesome.
Cheers
No prob. It’s the 2nd screenshot in the ‘Cinematography’ section above. But here’s the shortcut to that screenshot: link to media.dcrainmaker.com
Go into that, and toggle that while you’ve got the pano opened. Then, take your pano as normal while flying.
Afterwards, on the SD card you’ll find the PANORAMA folder, and within that you’ll find a folder for each pano you take. Inside that you’ll see two shots for every shot of the pano. So for a 180* pano it’s 9 photos, or 18 shots in my case. Notably (and frankly, annoying IMHO), it won’t put the compiled pano in that folder (it’s off in the main DCIM folder). I really wish it would, it would just make my life easier.
Awesome, thanks! I actually went back and read your who whole article rather than just skimming through it and although an experienced RC/drone pilot I found it to be one of if not the best reviews of the Mini 2 I have read. Very concise, thorough and articulated extremely well. My Mini 2 is coming from Halifax NS and is 1/3 of its way here so very much looking forward to its arrival.
So if you want a sports drone with follow me capability and collision avoidance, is skydio at $1k the only option, or is there a smaller lighter in between model from that and say the mini?
Thanks for the quick reply.
Wow, that should give us a lot of flexibility for image processing and we can avoid that edge enhancement. Very attractive little drone for photography too!
If you examine the DNG files you kindly provided for the windmill pano, you will see the top left quarter of each photo looks normal and the rest has a blue colour cast. Most obvious on the ones with sky in the frame, like the first one. It’s not there on the jpegs. Also, the size in the metadata reports 960 x 720 when they are 4000 x 3000. Both these errors are also happening on my pano DNGs (not single shot). I think it is some sort of remnant of ‘develop’ data from when the drone made the 2000×1500 JPEGs. I have written to DJI but no response yet. It’s very frustrating as these DNG files are unusable for making panoramas and the JPEGs are of much lower resolution and not what I want to use.
Are you using an Adobe product, by any chance? ACR does process upper left quarter with added magenta but dcraw does not show this artifact and there is no such offset in RAW data, I checked with rawtextdump from LibRaw on a dark shot (DJI_0005.DNG from the sample panorama). So you may want to write to Adobe instead ;).
As for 960×720 – maybe that is about thumbnail size, it is indeed 960×720.
This is incredibly helpful. Thank you. Yes, I’m using ACR. I have discovered elsewhere that 960×720 is the preview/thumbnail image and, sure enough, my Mavic Pro DNGs show the same thing.
Thank you for examining RAW data – something I have no clue how to do. I will contact Adobe when they open on Monday!!
Well, after more looking at the problem I decided it had to be down to DJI. We passed a few emails between us and I uploaded an entire SD card for them. In the end, they came back and said they know what the issue is and it will be fixed in the next firmware. Result!
Hi Ray, awesome review! Is there anyway to download the DNG files straight to your phone through DJI Fly app? I know this hasn’t been an option on older drones, Id love to see this feature implemented. Cheers
No, unfortunately no option to. I agree, would be nice.
It’s a good example of where I often find DJI’s apps just a bit…lacking. There’s so much effort put on the firmware side and features, but when it comes to that last mile of getting from device to phone, it falls apart.
That said however, the new direct linking bits are cool (from phone to drone for faster downloads, sans remote).
Awesome review, as usual!!
I bought the Mini2 this weekend, and while sport use would be my priority, my budget limited me from going to higher specs drones, and also the smaller size and weight when putting it in the backpack for long rides.
I think the 20-30 seconds tracking options suits me, as this is probably as long as I would need to extrapolate the few 3-7 second clips to use in my edits. Using quickshot modes for trackin-following, does Cine-Normal-Sport mode affect the speed the of drone?
Any other tricks you have noted since writing this review?
One last question, I got a Xiami 30w fast charger, do you think I can use that for the charging hub?
Your review stated that the Mini 2 was compatible with the Smart Controller, but that seems to contradict everything else that I’ve seen. Did you actually find a way to make that work?
Hello, have you tried the litchi app with the Mini v1 ? Let’s hope the sdk is released before Xmas 2021 by DJI to use the mini 2 with the litchi app link to flylitchi.com
Most in-depth, best illustrated, most comprehensive review I’ve found … and I’ve looked. I got to open mine before Christmas and am really impressed. Someone mentioned the Mini 2 RTH function can be set up to return to the start location OR … the location of the remote control. The point of the latter is for times when you are on a bike or in your boat and a return to your start location is undesirable. You want it to return to where you are NOW. I haven’t found where to make this change … are you familiar with this? Thanks! I’m an enthusiast who likes to advertise my hobbies so I made an iron-on tee shirt tag. Better than what I’ve seen for sale so far.
Typically speaking it’s in the controller settings, under RTH settings. I don’t have a Mini 2 handy at the moment to double-check if they have it enabled there on this unit.
This is the very best in-depth review I’ve found. I’m so grateful. You’ve talked about small things I’ve not read in any other review. Thank you so much!!! I will be buying this soon, my first drone, and I feel like I have a much better idea of what I’m getting now, what it can and can’t do and the biggest issues (lack of obstacle avoidance is huge).
Thanks for this and for all the excellent reviews! I am confused regarding the phone only control functionality. In your review is mentioned that this is not possible, while in other places I have read otherwise. Is it possible to fly the Mini 2 with phone only? And if it is, is it practical for situations like hiking and trail running? Thanks!
Unfortunately those other reviews are definitely wrong. While it does have new faster offloading capabilities for direct WiFi access – it doesn’t have any phone direct control over the aircraft without the remote tethered.
Interestingly, the original Spark did have this feature.
Many thanks! Does Mavic Air 2 has this functionality (phone only control?) And if yes, can active control be used through phone only? I am asking this since if phone only control is possible then having one additional thing to carry (drone only) plays an important role in terms of size for activities like trail running and trekking.
Ik heb veel aan deze review gehad. Ik ben een nieuweling en heb dus veel te leren. Een van de dingen die ik wel mis is het gebruik van de FN toets (customizable button). Verder weet ik nog niet precies hoe de Return Home knop werkt. Soms doet die het wel en soms niet. Na die opdracht zou hij eerste naar een veilige hoogte moeten gaan en dan in rechte lijn terug moeten komen en landen op de startplaats.
Woah, that looks pretty awesome! I wonder how well (if at all), it’d half-way work with other DJI controllers?
I guess it helps that DJI is largely transitioning to using the same stock controller across the board. Tempted to pick it up, and see what else it’ll work with.
Just in case folks find this comment thread down the road, I did follow-up with a review of the accessory Cedric mentioned here: link to dcrainmaker.com
Now . . . the Blades Are Marked very well — but not with paint, which is fine with me. The differentiated props have a molded-in plastic arc near the attachment screw.
I swim, bike and run. Then, I come here and write about my adventures. It’s as simple as that. Most of the time. If you’re new around these parts, here’s the long version of my story.
You'll support the site, and get ad-free DCR! Plus, you'll be more awesome. Click above for all the details. Oh, and you can sign-up for the newsletter here!
Here’s how to save!
Wanna save some cash and support the site? These companies help support the site! With Backcountry.com or Competitive Cyclist with either the coupon code DCRAINMAKER for first time users saving 15% on applicable products.
You can also pick-up tons of gear at REI via these links, which is a long-time supporter as well:
Alternatively, for everything else on the planet, simply buy your goods from Amazon via the link below and I get a tiny bit back as an Amazon Associate. No cost to you, easy as pie!
You can use the above link for any Amazon country and it (should) automatically redirect to your local Amazon site.
While I don't partner with many companies, there's a few that I love, and support the site. Full details!
Want to compare the features of each product, down to the nitty-gritty? No problem, the product comparison data is constantly updated with new products and new features added to old products!
Wanna create comparison chart graphs just like I do for GPS, heart rate, power meters and more? No problem, here's the platform I use - you can too!
Think my written reviews are deep? You should check out my videos. I take things to a whole new level of interactive depth!
Smart Trainers Buyers Guide: Looking at a smart trainer this winter? I cover all the units to buy (and avoid) for indoor training. The good, the bad, and the ugly.
Check out
my weekly podcast - with DesFit, which is packed with both gadget and non-gadget goodness!
Get all your awesome DC Rainmaker gear here!
FAQ’s
I have built an extensive list of my most frequently asked questions. Below are the most popular.
You probably stumbled upon here looking for a review of a sports gadget. If you’re trying to decide which unit to buy – check out my in-depth reviews section. Some reviews are over 60 pages long when printed out, with hundreds of photos! I aim to leave no stone unturned.
I travel a fair bit, both for work and for fun. Here’s a bunch of random trip reports and daily trip-logs that I’ve put together and posted. I’ve sorted it all by world geography, in an attempt to make it easy to figure out where I’ve been.
The most common question I receive outside of the “what’s the best GPS watch for me” variant, are photography-esq based. So in efforts to combat the amount of emails I need to sort through on a daily basis, I’ve complied this “My Photography Gear” post for your curious minds (including drones & action cams!)! It’s a nice break from the day-to-day sports-tech talk, and I hope you get something out of it!
Many readers stumble into my website in search of information on the latest and greatest sports tech products. But at the end of the day, you might just be wondering “What does Ray use when not testing new products?”. So here is the most up to date list of products I like and fit the bill for me and my training needs best! DC Rainmaker 2024 swim, bike, run, and general gear list. But wait, are you a female and feel like these things might not apply to you? If that’s the case (but certainly not saying my choices aren’t good for women), and you just want to see a different gear junkies “picks”, check out The Girl’s Gear Guide too.


Good spec upgrades especially the RAW photo, 4k and new motors are awesome!
To bad the controller is even bigger than before, this would be the perfect bikepacking/backpacking drone if u could use it with a smartphone only, I would have used my Mini 1 more if this was the case!
For now I will stay with my Mini 1 as I didn’t have much time to use it this year!
I do hope they will update the Mini 1 with RAW!
weird I assumed the original mini allowed this. If that’s the case then the Air is probably the more portable drone as I often fly that with just my phone
No obstacle avoidance sensors: DJI, no thanks! I don´t buy it. Bad idea!!!
The main issue here is probably weight. It’s amazing they crammed all they did into 249g, adding all the extra sensors/wires/etc.. for obstacle avoidance would come at the cost of something else. We’re talking what, 1/3 the weight of a Skydio?
Nah, weight isn’t the real issue here. Product differentiation is.
Little known fact is that the 249g of the Mini 2 isn’t actually 249g. I clocked it in at 237g, and official specs say (I kid you not – 242g… “roughly”) – somehow there’s quite a variance there. And my figure even includes the microSD card. The original Mini 1 was 249g. Most of the weight savings appear from the battery and changing technologies there.
For the two sets of forward/backwards sensors usually stuck in other DJI drones (ignoring upwards facing sensors). Or even just a single set of forward sensors – you’d likely be looking at a couple grams at worst.
Obstacle avoidance are for noobs really. Fly in line of sight, especially in urban settings. I turned all the object avoidance systems off on my Mavic Pro. It is not fool proof and adds more confusion to flight.
On your old Mavic Pro obstacle avoidance was pretty basic. These days it’s pretty advanced (and even more advanced beyond DJI). And if you’re trying to do any sort of obstacle tracking, it’s basically required for anything other than wide open fields. Nobody is advocating flying in urban settings – the main benefit here is actually out in forests and such.
only noobs need avoidance, over 5000 flights with DJI not a single crash or hard landing, avoidance is quite simply not needed.
That’s laughable. Simple as that. Either you fly in an empty field for 7 seconds, or…that’s it.
And that’s before we even call into question the 5,000 value. For fun, if you’ve been flying 10 years, that means you’re making roughly 1.4 flights per day. Not a huge number on a daily basis, but very unlikely at scale of 10 years.
Considering that all of the drone components can be charged via USB-C – is it possible to charge it from a pocketable powerbank (like the ones that Anker makes for Nintendo Switch with high output) or does it still require a more powerful source of energy?
Anker PowerCore+ 26800mAh PD is just fine. 26800mAh is the largest airline legal capacity you can buy and that bank outputs 60Watts via USB-C PowerDelivery.
I don’t use mine for drones but a variety of other high-power stuff. (smartphone, phablet, laptop)
Ray the link to purchase the drone from amazon in the UK takes me to a random knock-off copy not the official DJI Mini.
Thanks! It looks like Amazon has a bad ASIN matching going on there, I suspect they’ll fix it behind the scenes (meaning, it doesn’t correctly map US AMZN to UK Amazon).
In the meantime, I just overrode it for the site here. Appreciate the heads up!
Awesome review Ray! Any word on how this drone is (battery) performing in the mountains with below 0 Celsius ( 32F) temperatures?
Hmm, hard to say – though, I have been semi-impressed in past cold weather tests I’ve done in Canada at well below 0*C in that while there was some loss, it wasn’t massive. Right now though, no plans to travel anywhere. Also, my freezer isn’t quite big enough to get the drone in there actively flying.
Thanks Ray
Not exactly drone related but…
Are you planning anything about the new Insta360? After my debacle with GoPro and their horrible service I was looking into it.
Costco in the US has both the Air 2 and the Mini for what look like very good prices.
The best review I’ve seen! Thanks!
Thank you for the review and the samples! Turns out, Mini 2 still cannot make spherical panoramas automatically in full resolution or DNG, right?
It basically crops down the spherical 360 photo resolution to a 4MB image, which is kinda so-so. However, it does at last provide all the original 26 photos in both JPG & DNG, so one can re-stitch to something far higher. I included an example set in the file share linked up above.
Well, I mean there are only 2000×1500 JPEGs in the folder 360-Pano-Original-Files-100_0020 in the file share.
Well…that would be because I stupidly dragged up a folder without the raw toggle enabled. Ok, dragging up another folder now with the raw photos. Says 4 mins remaining.
And, it’s actually a better example of potentially using raw photos to correct for what was a non-ideal exposure since I was trying to shoot the castle with the sun behind it.
Thanks a lot! Looks like I have no excuse to not upgrade from Spark :).
Hi DC,
When shooting 180 pano’s with the Mini 2 can you shoot it in RAW? This would be a BIG plus for me. A fellow on RC Groups told me it only shoots in low res jpg’s.
Thanks
Mike in Canada
Yup, you get them for all the pano modes (sphere included) you get a folder full of RAW images. It’s not by default though, so you do need to (once) go into that menu and enable JPEG+RAW to get all future panos to output the dual shots.
Hi Ray, thanks so much for such a speedy reply…amazing! What is “that” folder? I don’t think its in the camera option where you select JPG + RAW as I can’t see it (unless I need better specs lol). Is there a separate menu to turn on JPG + RAW for specialty modes? If you are able to send a screen shot that would be awesome.
Cheers
No prob. It’s the 2nd screenshot in the ‘Cinematography’ section above. But here’s the shortcut to that screenshot: link to media.dcrainmaker.com
Go into that, and toggle that while you’ve got the pano opened. Then, take your pano as normal while flying.
Afterwards, on the SD card you’ll find the PANORAMA folder, and within that you’ll find a folder for each pano you take. Inside that you’ll see two shots for every shot of the pano. So for a 180* pano it’s 9 photos, or 18 shots in my case. Notably (and frankly, annoying IMHO), it won’t put the compiled pano in that folder (it’s off in the main DCIM folder). I really wish it would, it would just make my life easier.
Awesome, thank you so much Ray I really appreciate your help and have posted your info on RC Groups forum as others have asked the same question :)
Great site and subscribed!
No problem! Also, for fun, I just stuck one of the 180 panos with the dual JPG/RAW files up in the folder. should arrive in about a minute it says.
Awesome, thanks! I actually went back and read your who whole article rather than just skimming through it and although an experienced RC/drone pilot I found it to be one of if not the best reviews of the Mini 2 I have read. Very concise, thorough and articulated extremely well. My Mini 2 is coming from Halifax NS and is 1/3 of its way here so very much looking forward to its arrival.
Cheers and thanks for everything??
Thanks – appreciate it! Enjoy it!
I like the idea and want one for travel, but i will wait for the active track feature in the future model. Thx for the review.
aaah, so pity that it is not the portable version of Skydio :( Dji does’t see their potential customers in trail runners and MTB bikers I guess:-(
So if you want a sports drone with follow me capability and collision avoidance, is skydio at $1k the only option, or is there a smaller lighter in between model from that and say the mini?
What about the Air 2?
Does the Mini 2 save bracketed photos as RAW too or only combined into its kind of HDR?
It saves the original bracketed photos in RAW.
Thanks for the quick reply.
Wow, that should give us a lot of flexibility for image processing and we can avoid that edge enhancement. Very attractive little drone for photography too!
Informative article on DJI Mini 2 In, thank you.
Can the camera (video or still) record the date, time and GPS co-ordinates on the image?
Thanks for the review! Very helpful.
Anyone have any input on this?
Are Quickshots still locked to 30fps? or can you set them to 24,25fps?
If you examine the DNG files you kindly provided for the windmill pano, you will see the top left quarter of each photo looks normal and the rest has a blue colour cast. Most obvious on the ones with sky in the frame, like the first one. It’s not there on the jpegs. Also, the size in the metadata reports 960 x 720 when they are 4000 x 3000. Both these errors are also happening on my pano DNGs (not single shot). I think it is some sort of remnant of ‘develop’ data from when the drone made the 2000×1500 JPEGs. I have written to DJI but no response yet. It’s very frustrating as these DNG files are unusable for making panoramas and the JPEGs are of much lower resolution and not what I want to use.
Are you using an Adobe product, by any chance? ACR does process upper left quarter with added magenta but dcraw does not show this artifact and there is no such offset in RAW data, I checked with rawtextdump from LibRaw on a dark shot (DJI_0005.DNG from the sample panorama). So you may want to write to Adobe instead ;).
As for 960×720 – maybe that is about thumbnail size, it is indeed 960×720.
This is incredibly helpful. Thank you. Yes, I’m using ACR. I have discovered elsewhere that 960×720 is the preview/thumbnail image and, sure enough, my Mavic Pro DNGs show the same thing.
Thank you for examining RAW data – something I have no clue how to do. I will contact Adobe when they open on Monday!!
Well, after more looking at the problem I decided it had to be down to DJI. We passed a few emails between us and I uploaded an entire SD card for them. In the end, they came back and said they know what the issue is and it will be fixed in the next firmware. Result!
Hi Ray, awesome review! Is there anyway to download the DNG files straight to your phone through DJI Fly app? I know this hasn’t been an option on older drones, Id love to see this feature implemented. Cheers
No, unfortunately no option to. I agree, would be nice.
It’s a good example of where I often find DJI’s apps just a bit…lacking. There’s so much effort put on the firmware side and features, but when it comes to that last mile of getting from device to phone, it falls apart.
That said however, the new direct linking bits are cool (from phone to drone for faster downloads, sans remote).
I have a phantom 4 at the moment. But its pretty big! Is this a better option for an occasional user to replace the phantom 4?
Thanks
Awesome review, as usual!!
I bought the Mini2 this weekend, and while sport use would be my priority, my budget limited me from going to higher specs drones, and also the smaller size and weight when putting it in the backpack for long rides.
I think the 20-30 seconds tracking options suits me, as this is probably as long as I would need to extrapolate the few 3-7 second clips to use in my edits. Using quickshot modes for trackin-following, does Cine-Normal-Sport mode affect the speed the of drone?
Any other tricks you have noted since writing this review?
One last question, I got a Xiami 30w fast charger, do you think I can use that for the charging hub?
Cheers from NZ
Your review stated that the Mini 2 was compatible with the Smart Controller, but that seems to contradict everything else that I’ve seen. Did you actually find a way to make that work?
I would like to know why the video randomly stops after 5 – 6 seconds of recording. I am using a 256 GB for high speed recording.
While it could be a hardware error, I’d try and other MicroSD card you’ve got lying around. To me that sounds like a classic case of a bad card.
Hello, have you tried the litchi app with the Mini v1 ? Let’s hope the sdk is released before Xmas 2021 by DJI to use the mini 2 with the litchi app link to flylitchi.com
Most in-depth, best illustrated, most comprehensive review I’ve found … and I’ve looked. I got to open mine before Christmas and am really impressed. Someone mentioned the Mini 2 RTH function can be set up to return to the start location OR … the location of the remote control. The point of the latter is for times when you are on a bike or in your boat and a return to your start location is undesirable. You want it to return to where you are NOW. I haven’t found where to make this change … are you familiar with this? Thanks! I’m an enthusiast who likes to advertise my hobbies so I made an iron-on tee shirt tag. Better than what I’ve seen for sale so far.
The patch looks like this …
Typically speaking it’s in the controller settings, under RTH settings. I don’t have a Mini 2 handy at the moment to double-check if they have it enabled there on this unit.
This is the very best in-depth review I’ve found. I’m so grateful. You’ve talked about small things I’ve not read in any other review. Thank you so much!!! I will be buying this soon, my first drone, and I feel like I have a much better idea of what I’m getting now, what it can and can’t do and the biggest issues (lack of obstacle avoidance is huge).
Thanks for this and for all the excellent reviews! I am confused regarding the phone only control functionality. In your review is mentioned that this is not possible, while in other places I have read otherwise. Is it possible to fly the Mini 2 with phone only? And if it is, is it practical for situations like hiking and trail running? Thanks!
Unfortunately those other reviews are definitely wrong. While it does have new faster offloading capabilities for direct WiFi access – it doesn’t have any phone direct control over the aircraft without the remote tethered.
Interestingly, the original Spark did have this feature.
Many thanks! Does Mavic Air 2 has this functionality (phone only control?) And if yes, can active control be used through phone only? I am asking this since if phone only control is possible then having one additional thing to carry (drone only) plays an important role in terms of size for activities like trail running and trekking.
Sadly the same there too. Its been a few years since DJI launched any drones with allow phone-only control. They seem to be phasing it out.
Only the spark unfortunately
Ik heb veel aan deze review gehad. Ik ben een nieuweling en heb dus veel te leren. Een van de dingen die ik wel mis is het gebruik van de FN toets (customizable button). Verder weet ik nog niet precies hoe de Return Home knop werkt. Soms doet die het wel en soms niet. Na die opdracht zou hij eerste naar een veilige hoogte moeten gaan en dan in rechte lijn terug moeten komen en landen op de startplaats.
Hi Ray, did you try this mount specifically designed to hold the mini 2 controller? link to amazon.fr
Woah, that looks pretty awesome! I wonder how well (if at all), it’d half-way work with other DJI controllers?
I guess it helps that DJI is largely transitioning to using the same stock controller across the board. Tempted to pick it up, and see what else it’ll work with.
Ok, my hesitation did not last long. Ordered!
Great ! I wait your review before order it then :)
Just in case folks find this comment thread down the road, I did follow-up with a review of the accessory Cedric mentioned here: link to dcrainmaker.com
I want to be a normal drone which range minimum 1 km and minimum weight carrying 2kg
Great article! Very helpful! Thank you!
Now . . . the Blades Are Marked very well — but not with paint, which is fine with me. The differentiated props have a molded-in plastic arc near the attachment screw.
Looking forward to hear your Autel Evo Nano review and hopefully comparison with mini 2 and/or any other tracking drone