
Just shy of a year ago GoPro announced initial details around their consumer-oriented 360° action camera, Fusion. But it wouldn’t be until this past November that the company started shipping the $699 dual-lens unit. Since then I’ve been using the camera in a surprising variety of ways. More than I’d thought I would, and for more than just 360° content. In fact, one of GoPro’s biggest pushes with the Fusion camera has been what they call ‘OverCapture’, which basically means you can create a non-360° clip from it, using any angle you want.
Of course, that concept certainly isn’t something GoPro invented, it’s been around a while. But what GoPro has done is bring popularity to it, and with the impressive quality levels on Fusion, it makes it possible to use said camera instead of a flotilla of regular GoPro action cams.
But as I find out – possible doesn’t mean easy. Nor fast or efficient. Which means after more than three months of usage, it’s definitely in-depth review time. The good, the bad, and the ugly – let’s dig into it.
Finally note that I bought the Fusion camera myself, and as such, I won’t be returning it to any entity once this review is complete. If you found this review useful you can hit up the links at the very end of this incredibly long pile of text to help support the site and my continued gadget purchasing (and reviewing) addiction.
What you need to know:
One would be remiss to describe GoPro Fusion as merely ‘a 360 cam’. And I mean that both in a positive…and a negative way. In one manner it’s far more than just another 360° action cam. Things like its ability to make the pole holding the camera disappear through optics tricks are astounding – effectively having the camera float in front of you like a small personal drone.
Yet at the same time, as with most GoPro products, the software is the most challenging piece. It’s nothing like any other 360° camera on the market…and not in a good way. The potential is massive if you have significant quantities of time to invest, but as you see in this post, it’s not yet for everyone.
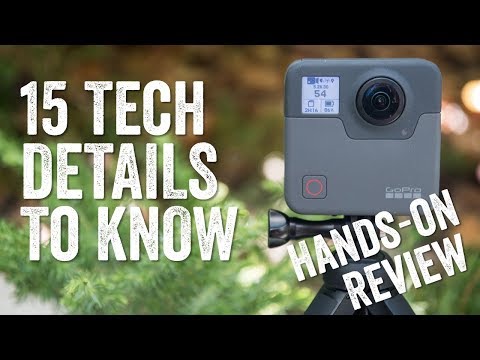
So I ended up putting together this video detailing the most important things you need to know about GoPro Fusion:
Ok, with that, let’s dive into the unboxing.
Unboxing:
Now there are technically two different box variants of the GoPro Fusion camera. One is a more swanky looking box for people who buy directly on GoPro’s site, and the second is a more traditional GoPro box for folks that buy through retail channels. The contents are indeed identical. One makes you feel like James Bond, and the others make you feel like Lindsey Vonn. Obviously, the goal with the retail box is to convince you to buy the product, versus the one from GoPro.com knows you already hit the buy button.
In my case, I bought mine on GoPro.com back when it was first made available for purchase and only available on GoPro.com. These days, of course, you can buy it anywhere. Here’s the GoPro.com box:

And here’s the standard retail box:

The contents between the two are identical. Exactly the same.
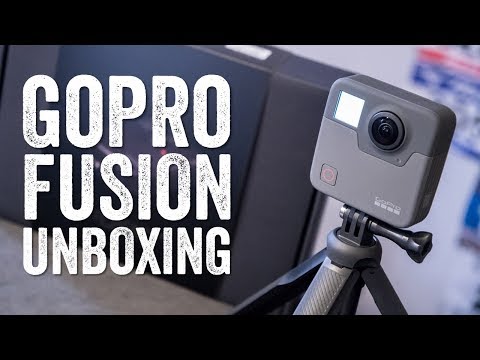
Diving into what’s inside, I give you this complete video – full of tech specs and weighing ins:
Still looking for the parts though? No problem – here’s everything laid out:


Starting up in the upper left corner we’ve got the camera itself, along with its tripod/selfie stick to the left (using a standard GoPro mount).

You’ll also notice the battery sitting there. It’s sorta like two GoPro Hero 5/6 batteries that hooked up together and got permanently stuck together.

Then there’s the nifty carrying case. It’s designed so you can actually leave the camera on the tripod while putting the protective case over it and the mount sticks out the bottom.

Below that are two sticky mounts. One is totally flat, and one is a bit curved. You’d use the curved one on something like a helmet, and the flat one on something like a board or car. I can’t really overstate how beastly these mounts are in real-life.

Next, we’ve got a USB-C cable and a standard GoPro thumb screw. GoPro moved to using USB-C cables for their cameras back in 2016 with the Hero 5 lineup, and they’ve been retained ever since.

Oh, and finally, the manual thingy.

Don’t worry, as always you won’t need it after this.
Oh, and from a size and weight standpoint (I cover this in the video too), the GoPro Fusion comes in at 226g, while for comparison, the Garmin VIRB 360 comes in at 180g.
Meanwhile, comparing sizes, the GoPro Fusion is kinda like a star NBA player – incredibly tall. Whereas the Garmin VIRB 360 is a bit more…normal-human sized. Next to it is the Rylo camera. Note that in the video I show comparisons to the Hero 5/Hero 6 cameras.

Of course, like a star NBA player, there’s good reason why GoPro’s camera is so much bigger…so more on that in the next section.
The Basics:
In many ways, the GoPro Fusion when being used day today isn’t much different than a regular GoPro. At least from a shooting standpoint. It’s got a record and mode button for configuration settings, and a GoPro mount on the bottom to attach it to things. Still, the most obvious difference is that it has two lenses. Each of these two lenses shoots 4K footage, which through the magic of pixel/resolution math, gives you 5.2K (actually, it gives you 5.7K, but GoPro only renders it at 5.2K).

You’ll also notice the lenses are very slightly offset. It’s this offset aspect that allows GoPro to make the pole holding the camera disappear once stitched.

Speaking of that pole, it’s part tripod, part selfie stick. You can see it both ways here (in the tripod mode, it can also extend upwards):


The pole attaches using a standard GoPro mount to the bottom of Fusion, meaning that you can also use other poles/holding devices for Fusion. However, the pole’s length though is actually really important, since it’s the precise distance whereby when stitched in post-production, the exact full length of the pole will disappear, except the handle.
However, if you slightly tilt the camera so it’s not perfectly in-line with the pole, then you’ll see a portion of the pole – such as below, where the frame shows a bit of the pole about half-way to me. This was because the camera was a bit tilted.

But there’s a catch – you need to ensure the pole is directly below the unit. If you hold it outwards and tip the unit towards you like the below photo, then you’ll see the pole since it’s no longer ‘in-between’ two lenses:

If you check out this short clip I did cycling where the pole is perfectly aligned, you can see exactly what it can look like at its best:
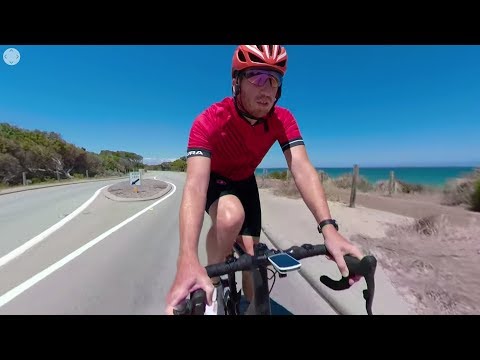
Obviously the Fusion pole makes a prettier and more perfect shot. Speaking of that mount, it’s actually removable. It sits on a small sliding metal track. The reason you’d remove it is that otherwise the camera can’t sit upright by itself. It’ll fall over since it’s not flat on the bottom.


When it comes to mounting it on your body, things get a little bit…awkward. There’s no two ways about it – mounting it to your head just makes you look stupid:

It’s really better to try and get a bit of vertical off your head or slightly out in front of it – so that the stitch lines aren’t as obvious. Handlebars is another option – but it too gets some weird stitch lines on the bars itself.

Internally there’s the battery that we already discussed in the unboxing section. It’s under this same door that you’ll find the two SD card slots:

The entire unit is waterproofed to 16ft (~5m), assuming you close both the battery door, as well as the USB-C charging port door on the opposite side:

With all that out of the way, we’ll go ahead and power it up. To do so you can either tap the recording button once (which will start the camera and immediately start recording). Or you can hold down the mode button to power on and then record when it suits your moment.

On one side you’ll see a small screen, this is the front side. In general, try and start your recordings with this side facing the most interesting thing. That’ll save you some steps in post-production for 360° videos, primarily because it means you won’t need to re-orient stuff. This small screen allows you to see what settings you have, and tweak them.

It’s basically just like other past GoPro screens. Note though that there is no preview screen like on a GoPro Hero 5/6 Black camera. Given it’s capturing everything everywhere, there’s really no need to preview things.

Once you’re ready to start recording, just hit the record button – or use GoPro’s voice control to tell the camera to start recording. I find that’s the best way for the Fusion specifically, because it keeps my hands out of the shot. To stop recording, you can use voice control again, or also again the button.
At that point, that’s really all there is to know on the basics front – so let’s go a bit deeper on the video and audio aspects.
Video & Audio Details:
The first thing to understand about GoPro’s video files is that for every video you shoot you’re getting a multitude of video files. In fact, one set of files goes from the front lens to SD card #1, while another set goes from the back lens to SD card #2. Each SD card records specifically from a single specified lens. You can see the resultant of this if you load either of the SD cards into a computer, or if you plug the unit in via USB you can see the two cards too:

In addition to video files, you also get .WAV (audio), .LRV (Low Resolution Files), and a .THM file.
This is a bit different than most of their competitors, which output a single 4K 360° stitched file by default (which you can immediately upload to YouTube, or immediately edit with 3rd party apps). Of course, competitors can also output dual-video raw files too (such as Garmin’s VIRB 360 at 5.7K). In an ideal world GoPro would enable both, so in cases where you wanted higher quality you could leverage it, but for cases that were less important you could save the processing time.
When it comes to resolution specs of the video files, the Fusion camera is surprisingly limited. Not in the sense that it shoots bad video, but rather, that there are precisely two modes you can shoot in:
– 5.2K at 30/25FPS (5228x2624px)
– 3K at 60/50 FPS (3000x1504px)
I say limited, because if you look at most competitive cameras they can usually shoot in a few different modes, including using either of the individual lenses as forward or back facing action cameras.
Now of course, GoPro can do this in post-production with the Fusion Studio software, using OverCapture. But there are obviously situations where you know from the get-go that you’re not going to use the 360° footage portion, or even the range of the field of view. So being able to save a bunch of time/energy in post is preferable.
All of this is captured in standard MP4 (H.264), which is somewhat interesting because for the GoPro Hero 6 Black, they transitioned to H.265 for the higher end footage types (I.e. 4K/60FPS), which saves significantly on size. At launch of the Hero 6 Black this was a bit of a challenge though, due to most legacy apps/platforms not supporting it. But here in 2018 that’s no longer really an issue. All of the major editing suites and operating systems (mobile and desktop) now support it just fine.
Now, being GoPro you still get access to ProTune on the camera, which gives you more flexibility in post-production, especially so since you have to run the footage through Fusion Studio for the stitching anyway. With ProTune enabled you can tweak settings on the camera, such as ISO and exposure. To do so you can use the mobile app, or the camera settings buttons.

Finally, on the video front, you can also shoot video time-lapse. This means it’ll shoot a 5.2K/30FPS video using time-lapse mode. This is ideal for things like moving clouds and such. Note this isn’t a photo time-lapse mode (where you end up with separate photos), but rather a video time-lapse mode where you end up with video files at the end.
You’ll specify the interval, which dictates how frequently it captures a shot. In the below instance, I’m at half a second. In general, it’s better to lean towards more frequent than less frequent – as you can always speed up the video in post (whereas if you don’t have enough shots, it’ll look jerky).

I want to briefly cover audio – because the spatial aspects of GoPro Fusion’s audio are incredible. In short, it’ll remap the audio when viewed on 360° video formats (like in YouTube) to the direction you’re looking at. The easiest way to demonstrate this is the below video I shot. Note carefully that the camera is initially facing me – and as such that’s the primary voice you hear. But as the church bells of Notre Dame start ringing they’ll sound like they’re coming from behind you. And if you turn the camera view to face them – then the audio will be spatially correct as well. Here, give it a watch:

Super cool, huh?
As for photos, the camera shoots 15MP (5376×2688). I did shoot some 360° photos, but don’t tend to find a huge use for them by themselves. Instead, I found it more useful to shoot 360° video and then pull individual stills out of that.
Now, in the next sections I dive into the details on the editing workflow, so let’s get started on that.
GoPro Fusion Studio & Mobile App:
When it comes to apps, there’s basically two ways to deal with GoPro Fusion footage. The first is the desktop apps for Windows and Mac, and the second is the mobile app for Android and iOS. We’ll start with the desktop app first, called GoPro Fusion Studio. This app allows you to import footage from the camera and then stitch the two recorded files together. It’s NOT a video editing suite. GoPro has no such video editing software for their Fusion camera (which, could be viewed as a sorta big omission).

Once connected you’ll go ahead and tap to browse the camera media. You can also copy this media from both SD cards separately to your computer, which will greatly increase the speed of processing (see the previous section for how to do that). But for now we’ll just keep things simple and let it prepare our media:

The ‘preparing media’ (and then subsequent “preparing previews”) steps will take more and more time the longer you have the camera, because likely your SD cards will become more full. Each time it does this step it re-indexes everything on the cards, which takes forever. This is a key difference to their competitors which keep an index in the app, so it doesn’t have to do this long-ass step each time. In my case, it’s about 15-20 minutes or so each time I connect my camera.
Once done, you’ll see a listing of all the footage you’ve taken. Part of the process it did was to stitch the low-resolution thumbnail preview files together. This is why if you copied over the media to your hard drive, you have to copy not just the two main video files, but all the little files too. You’ll see all your files listed on the left-hand side:

Whereas on the right side is the current file you’ve selected. It’s here that you can change things like pitch/yaw/roll, which help to re-center the image on the subject (for 360° footage). You can also tweak color as well:

You’ll select the portions of the clip (or the entire clip) that you want to stitch. Remember, what you’re seeing is the small preview variant, not the full high-resolution version. So that still needs to be stitched. Once you tap ‘Add to the render queue’, it’ll prompt you for the specific output variant you want.

However, you can also dive into a similar menu from the render queue itself, but this one gives you more control over the specific video codecs:

Just be prepared that when stitching/rendering something in 5K using CineForm or ProRes, you’re talking serious file sizes. For reference you’re looking at about 4.5GB per minute of stitched footage for ProRes.
Then from there, you tap ‘’Render Selected’ and simply wait. A really long time. In general we’re talking like 15-45 minutes for a couple minute clip, depending on your computer.
In my case, I end up queueing a bunch of files to export at once, and then leaving the computer for the night. I also chatted with GoPro’s engineers a bit on how best to handle things from a workflow standpoint. They offered a few insights, first, on how to speed up the rendering process:
“Rendering 5.2K / CineForm needs a lot of processing power. 4K in MP4 will be much faster and more convenient for most users. Also, you can save some time by copying the contents of the SD cards directly on your computer (just drag and drop both folders 100GBACK + 100GFRNT including all THM, LRV and WAV files into a new single folder) and use the local files in Fusion studio. When plugging Fusion into your computer and working with theses files that are physically stored on the SD cards you have to take into account that rendering a file actually means:
1. Copying that file from the camera to the computer through USB
2. Stitching
3. Color correction
4. Rendering the output
Having the footage stored on your computes speeds up the whole process. Stabilization by the way doesn’t need much processing power, it uses the metadata and is not performing visual analysis.”
Which then got into workflow recommendations, and here’s what they recommend for professional users (which more or less applies to everyone with this camera). Note, the below section is an exact quote from GoPro:
- Copy the contents of the SD cards in a new single folder on your HDD. This includes 100GBACK + 100GFRNT folders from both of the SD cards. Please don’t remove any of the THM, LRV and WAV files.
- Drag and drop that (newly created) folder including 100BACK and 100FRNT on the start screen of Fusion Studio or use the “Add Media” button.
- For your first renders, choose “YouTube” or “Facebook” / 4K. This will render mp4 files that are much smaller, easier to handle and most importantly faster to render.
- Select your best shots or moments for your edit.
- If needed, re-render only those best moments in 5.2K / CineForm or ProRes by adjusting the in and out points for rendering in the preview (blue cursors below the preview).
Make sense?
Of course, part of the problem with Fusion studio is just how buggy it is. It crashes frequently for me on both Mac and PC (and has since Day 1). And even when it’s not crashing, it’s slow to react as well as of course process – even on reasonably well-equipped machines. I can deal with the slowness in rendering, because I can plan around that (letting things run overnight). But it’s the crashes that are hard to predict and tough to deal with.


Finally, a brief note about the mobile app. I say brief, because while the mobile app is functional, it’s not super functional. For example, you can’t do OverCapture clips within the mobile app unless you download the full resolution files first, which means you’re likely transferring some 3-7GB to your phone. Alternatively, you can export out 360° snippets, and you can’t specify much in the way of resolution settings.


The app does however make it really easy to get both the video and photo snippets from the video footage, which is handy. Below you can see me grabbing some video snippets:

And then this next one is grabbing a photo from the video:

Other minor things to be aware of is that while the mobile app connects to your Fusion via WiFi, Fusion itself doesn’t use WiFi like the GoPro Hero 5/6 cameras in that it can’t connect to regular WiFi routers to upload to GoPro Plus. I suppose the logic here is that the footage isn’t useful on GoPro Plus (or that it’s too big). And in some ways I agree with that, but in others it means GoPro isn’t thinking outside the box.
For those with fast internet connections, it’d likely be far faster to upload footage to a cloud-based service and have it render and complete the 360° stitching there, versus doing it offline. If only GoPro owned a company that already does cloud-based stitching services. Oh, that’s right…they do.
Finally, for lack of anywhere else to plop it – your recorded video file size is roughly 500MB per minute per lens. So 1GB per minute total for the files, and then another 20-30% atop that for the two preview files (LRV), and 5% more for the audio file (WAV). Put another way, a 1-minute clip is 1.30-1.35GB (1GB for main video files, 200MB for preview file, 150MB for audio file). A 30-minute set would cost you ~40GB. And that’s before stitching! A stitched ProRes version (highest resolution) will set you back about 9GB per 2 minutes.
Non-GoPro Editing Options:
Since GoPro doesn’t have a video editing app for their Fusion camera, you’re gonna need something else. For most people, that’s likely Final Cut Pro (Mac) or Adobe Premier & After Effects (PC/Mac). Obviously, there are others out there, but like iOS and Android, once you get beyond those two core ones, that captures almost the entire video editing suite market for this camera.
In the case of Premier, GoPro has made a plug-in for it that allows you to change the perspective of the camera, either for 360° video work or for standard format videos (using OverCapture). You can download these plugins from GoPro’s site, and then they’ll show up in Premier.

The usefulness is pretty significant, since it allows reframing directly within Premier for both 360° and non-360°* content. It also enables things like panning through a shot using keyframes to, in effect, seem like a camera operator is controlling the view.

It’s clear that GoPro has invested much of the time on the Premier plugins, and far less so (none actually) on Final Cut Pro. Likely because GoPro’s own editors prefer Premier for much of their work.
The other piece is that with Final Cut Pro 10.4 (released in December), you can do the vast majority of what GoPro’s VR plug-ins do, directly within Final Cut Pro without any plug-ins at all. 360° support is native and fairly functional. I can re-orient items via tilt/pan/roll, as well as see what a viewer on YouTube would see. Title overlays and such are also easily possible.

Except, there are some catches. For example, at present you can’t zoom into/out of tiny planet using Final Cut Pro. That’s a fairly popular sequence to include within a non-360° video, and the inability to do so is definitely a let-down. Same goes for the smooth transition function, which you can kinda recreate with lots of key frames, but not as easily as that feature. GoPro has talked a little bit about potentially looking at FCPX plugins, but so far nothing has happened there.
Of course, it should be pointed out you don’t have to use either of these apps or plugins to work with the stitched footage. In fact, you can use any compatible video editing app, especially if you’re talking just OverCapture footage, since that’s standard 1080p files. Whereas the 360° files while technically standard, you really want a video editor that supports 360° content to be able to edit more easily.
For me personally, I don’t have a problem editing the 360° content within FCPX, but if I’m doing non-360° content and want to use the tiny planet effect, I’m more likely to render those sequences in Premier and then pull them back into FCPX for usage in the larger edit. Unfortunately, as of about two weeks ago, GoPro says they don’t have any Final Cut Pro plugins in development.
Market Competitors:

It’d be easy to assume that all 360° cameras are competitors to the GoPro Fusion…but that’d be a misunderstanding of the product and the market. In reality, there’s actually only a few competitors to the Fusion. Specifically, I really only see the Garmin VIRB 360 and Rylo Cam as competitors – despite each being slightly different.
The most direct competitor is without question the VIRB 360. The specs are somewhat similar, and the price is somewhat similar. They were even announced at somewhat similar timeframes. And of course, both are truly focused on the action cam market (whereas many 360° cameras are more general/non-action in nature).
Whereas Rylo, while not really viewed as a viable 360° content competitor, is competing for the same consumer dollars. Especially once you consider OverCapture-like cutouts, as that’s what Rylo does really well. It blows away both Garmin and GoPro’s software options for ease of use. Check out this video I did here using Rylo cam. It took me perhaps 2 minutes to edit that, and about the same amount of time to transfer/render it. An in-depth review of that is coming up shortly.
I’m going to distill the two camera’s differences (along with a side of Rylo, since there’s been a fair bit of interest there). Here’s what’s unique about each one:
Things GoPro Fusion has that Garmin VIRB 360 doesn’t:
– A better tripod/selfie stick (and this actually pretty important for stitching)
– I’d argue slightly better stitching/quality in general (mostly due to the stick’s placement)
– Post-production color correction settings in desktop app available
– 18MP vs 15MP photos on VIRB 360
– GoPro has an Adobe Premier/After Effects Plug-in
Things Garmin VIRB 360 has that GoPro Fusion doesn’t:
– Can connect to data sensors (heart rate, power, cadence, etc…)
– Can overlay speed/track data from GPS (Fusion can’t natively at this point, other GoPro cameras can)
– Has a full editing app for 360° content, GoPro has nothing
– 5.7K video versus 5.2K on GoPro Fusion
– Direct 4K 360° stitching in-camera (meaning no post-prod stitching required)
– Can use front/back cameras individually
Both cameras are:
– Fully waterproof (Garmin to 10-meters, GoPro to 5-meters)
– Can upload to YouTube from their respective Apps
– Both can take flat-1080p snippets from 360° footage (Called OverCapture on GoPro, HyperFrame on Garmin)
– Respond to voice commands
– Can use the footage in 3rd party apps once stitched
As for Rylo: Its specialty is really more of producing flat 1080p content using their 4K lenses. And it’s really good at that, the content looks stunning and it’s silly easy and super quick. If your only desire is to capture everything and then produce flat 1080p videos – then I’d seriously consider Rylo. Your editing process will be significantly faster and easier. But it’s also a fair bit more of a closed system. I’ll be publishing that in-depth review next week (thankfully, it’s far easier/quicker to write than this one).
But what things are less tech-spec focused that are important to talk about?
Probably the editing piece. After all, for either of these cameras the most important part is getting the content out of the camera and onto some platform the world can see. More than likely YouTube, but the actual platform doesn’t really matter. It’s the process of getting it there that matters.
The Stitching: To start with one of the most visible pieces – stitching, I think it’s fair to say GoPro does a better job here in most scenarios. This, in part, is probably because they include a selfie stick/pole that’s the perfect length for the stitching distance. Versus Garmin includes a much shorter tripod thingy that more easily exposes the stitch lines for near-field items. If you put the Garmin unit on the GoPro pole, things become very close in quality.
The Apps: Next is the native software apps. In this category there’s zero competition: Garmin easily blows away GoPro here. GoPro’s apps are clunky at best, and that’s the least of the problems. They’re incredibly slow to process. So trying to get footage to an end-state location is a slow and cumbersome process. This is compounded because unlike the VIRB 360, GoPro doesn’t offer any pre-stitched files. In Garmin’s case, the default is a pre-stitched (on camera) 4K file. Only when you want 5.7K raw do you have to use software. In GoPro’s case though, all resolutions require using the apps to stitch.
3rd Party Support: But GoPro does have a leg up in one important area: 3rd party app plug-ins, specifically (and only) a Premier CC plug-in for that enormously popular editing platform. In the case of Final Cut Pro users like myself, you can do some of the functions natively in FCPX 10.4, however not all of the functionality is there like it is in Premier (since GoPro hasn’t released an FCPX plug-in). One specific example is you can’t zoom in/out to the ‘little earth’ view in one sweeping shot via OverCapture. Which is unfortunate because that’s such an iconic shot of the GoPro Fusion lineup.
Data Overlays: Finally, when we look at aspects like data metric overlays – there’s also no competition here. GoPro doesn’t allow any data overlays within their 360° suite (they have minimal overlays in their regular GoPro camera apps). Whereas, of course, for the VIRB 360 – it’s all about the data overlays. There’s boatloads of options there natively in Garmin’s app which make it silly simple.
Ultimately, choosing which camera you want is very much like it was back in the Hero 5 Black vs VIRB Ultra 30 days. It’s going to depend on what you plan to do with the footage, as well as how and where you plan to capture it.
Summary:

As with virtually all GoPro products, the company tends to make incredibly well designed and impressive hardware (as long as it doesn’t fly). But it’s the software that tends to let it down. CEO Nick Woodman has said so in various interviews himself over the years. And that’s kinda how I feel about Fusion. Despite looking like a Teletubby when mounted in certain spots, the camera shoots absolutely stunning footage – no matter the output type. And the little touches of making the perfect Fusion pole companion shouldn’t be overlooked. It’s easy to shoot the footage, and it does what you expect it to out on your adventure.
But it’s once I get back that I just groan at the road ahead. No part of that is fast, even if it is relatively straightforward. My MacBook Pro (less than a year old), struggles to stitch the files. It doesn’t struggle anywhere near as much with slightly higher resolution 5.7K Garmin VIRB 360 footage. And the app is prone to crashes or weird bugs. Even as I sit here writing this paragraph, I can’t dismiss a warning dialog in the PC Fusion app, which means I can’t get to portions of the menu that are kinda important. And unfortunately, in GoPro style, software updates are few and far between.
For better or worse, there is no GoPro video editing app for Fusion. On the downside that means you need to use something else, likely not for free. On the upside, that means you don’t have to use GoPro software. GoPro put together plugins for Adobe Premiere (and After Effects), which work well, and with a bit of creativity, you can do stunning things with them. I just wish they’d fill the gaps in Final Cut Pro too. Of course, no matter your editing platform, you still must stitch in Fusion Studio first.
Still, despite these quirks – I’ll continue to use it in scenarios where it makes sense. For example, I won’t take it running, but I will take it skiing and occasionally cycling, as well as other sports where I can get unique angles that don’t mind the extra weight and bulk. My only hope is that GoPro remains committed to Fusion, versus it becoming another Karma. Despite some opinions on whether 360° video has a viable medium-term future, I have no question that the other content types coming out of Fusion definitely do, especially if GoPro can shrink the unit a bit in future iterations.
With that – thanks for reading!
Found this review useful? Wanna support the site? Here’s how:
Hopefully you found this review useful. At the end of the day, I’m an athlete just like you looking for the most detail possible on a new purchase – so my review is written from the standpoint of how I used the device. The reviews generally take a lot of hours to put together, so it’s a fair bit of work (and labor of love). As you probably noticed by looking below, I also take time to answer all the questions posted in the comments – and there’s quite a bit of detail in there as well.I’ve partnered with Clever Training to offer all DC Rainmaker readers exclusive benefits on all products purchased. By joining the Clever Training VIP Program, you will earn 10% points on this item and 10% off (instantly) on thousands of other fitness products and accessories. Points can be used on your very next purchase at Clever Training for anything site-wide. You can read more about the details here. By joining, you not only support the site (and all the work I do here) – but you also get to enjoy the significant partnership benefits that are just for DC Rainmaker readers. And, since this item is more than $75, you get free 3-day (or less) US shipping as well.
GoPro Fusion Package – Use VIP to get 10% of your purchase price in points back
Additionally, you can also use Amazon to purchase the GoPro units (though, no discount). Or, anything else you pickup on Amazon helps support the site as well (socks, laundry detergent, cowbells). If you’re outside the US, I’ve got links to all of the major individual country Amazon stores on the sidebar towards the top.
Thanks for reading!


Hi Ray, have you considered benchmarking on PCs as well? Since GPUs have more to do with rendering speed than CPUs (one hopes!), the speed multiplier for a decent GPU-enriched PC might be significant…
There’s actually a Facebook Page for Fusion Owners with a massive thread where they post benchmarking stats for different computers. Pretty cool.
Generally speaking from what I’ve seen and GoPro has said when i quizzed them on it, GPU actually isn’t leveraged, purely cores.
The really slow bit seems to be the stitching, whilst Virb Edit does use GPU to render video it does not use GPUs to stitch files (at the moment at least). I would guess that the Fusion is probably the same.
Not really related to this particular product as such but I’m never quite sure what the point of 360deg footage is – I’ve never seen anything shot using it which isn’t distorted and essentially pointless.
This isn’t to say such footage doesn’t exist but if someone could highlight what a 360deg camera is good for then that’d be great!
When used like a traditional camera, yep, it’s a pretty poor experience. Nobody wants to see the mess behind the shot/scene. When used in the right context, I think it’s a pretty cool evolution/option. Standard framed shots are like a shop window… 360 places you in the shop. There are still limitations with the interaction… and it’s up to the content creator to ensure they’re not taking that control away from the viewer. I’ve been tinkering with a few 360 videos in interesting places. So if you’re not interested in what I’m talking about you can spin around and enjoy the view. :)
I’d check out Jon Olson’s recent ski vlogs in Japan. Specifically this one, starting about 1:15 in. link to youtube.com
That kinda shot without the pole is completely impossible with traditional action cams, and looks incredible. Later in the video there’s shots from a backpack too from behind that are just unreal.
As a cycling safety camera it is great. Rather than having 3 cameras on my bike I can just have 1 that captures everything and makes sure that I don’t miss anything when I looked the other way. (although I still have a handlebar mounted camera “just in case” – mostly because the battery on my 360 doesn’t last for my whole ride).
In this video for example:
link to youtube.com
it would be difficult to capture the guy falling down to the side initially and the 3 falling over behind (although the helmet mounting position should be adjusted slightly to avoid losing footage behind when looking down)
Think it would be great in the Running of the Bulls, just run for your life, then review all the cool, flips and turns later :)
How about this on a Karma Grip and associated Extension pole, will it work ok?
There’s no adapter for GoPro Karma for Fusion. Meaning, there’s no way of hooking the two together.
“Despite some opinions on whether 360° video has a viable medium-term future, I have no question that the other content types coming out of Fusion definitely do, especially if GoPro can shrink the unit a bit in future iterations.”
I wonder if the most common use for 360 cams will be OverShot/HyperFrame, where the camera captures everything, but most of the viewing is still done on traditional flat/rectangular video end products. 360 video is cool tech, but for most applications I think well edited normal videos are more compelling, and also somewhat more manageable for people who don’t have the latest viewing hardware.
I think it’ll be for the foreseeable near to medium term future.
If they can shrink the size and speed up the stiching process – they could have a winner
Use a different stitching software. exa: VideoStitch
At a cost of $295…
If GoPro wants to make Fusion success, it absolutely has to address stitching speed. It’s the single biggest barrier to me using it daily. Every time I think about using it in video projects, I cringe knowing how long and potentially repetitive (due to crashes) it’ll be.
Heck, this review was supposed to be up about 12 hours earlier, but I kept getting crashes in the app for the footage I needed to include. And that was only a 60 second footage snippet (used two ways) I was trying to do. And I was even rendering on two different computers (one Mac and one PC). Both crashed at various points.
About the phone app: you can do overcapture and it’s super easy (and fun). You just have to do download and then edit the local file. They just released a new version this morning which is even easier to handle.
Thanks…figures it’s always the morning after. :-/
Some sample videos from the mobile app: link to sftwins.com
Nice, you’re Golden Gate run one is pretty well edited (and hopefully the newfound stabilization features on the app should help in some of the wobbly areas). Like you, I really wish there was a FCP plug-in.
Ray sez: “GoPro doesn’t allow any data overlays within their 360° suite (they have minimal overlays in their regular GoPro camera apps).”
Aren’t these the guys that bought Dashware and all of their expertise about integrating sensors with video? What have they done with that intellectual capital or was the purchase done as Intel seems to do: buy a company and then destroy it through neglect before shutting it down as ‘non-viable’?
Indeed, it’s really been a letdown in the Dashware integration. They had the cards in their hand to basically dominate this realm. But it’s been nothing but a flop (leveraging that tech).
Great review as ever Ray and pretty much mirrors my experience so far. I take it everywhere and use it far more than the Hero6. However now I have a shed load of footage, but the workflow to do something with it – even with a MacPro – is ball achingly slow. I tried a VideoStitch trial – everything worked and was more responsive than Fusion Studio – until the render stage when nothing happened…
My jury is still out on the stablisation/levelling(?) features – I shot a bunch of footage while inline skating assuming when it rendered with stabilisation on the fusion would be able to keep the world level (in a gimble like way) irrespective of camera angle/orientation/position/etc, not so it seems. I was left with a vomit inducing clip which tilted and yawed all over the place…
That’s odd on stabilization, it’s been awesome for me across even cobbles and such. I even saw someone put it on a pottery wheel on YouTube and it stabilized it.
(For fun, I actually hung a VIRB 360 using fishing line below a drone and it was spinning a crazy number of times per second, and Garmin VIRB Edit stabilized it pretty impressively.)
Rylo specialty is really more of producing flat 1080p content using their 4K lenses
Correct, but it’s competing for the same money oddly enough. Meaning, a consumer that is evaluating a 360* camera for overcapture-like functionality, would be quite likely looking at Rylo, Fusion, or VIRB 360. If you only plan to do overcapture-like stuff, everything I see in my testing actually says Rylo is probably the best bet.
I’m still testing Rylo and Fusion myself. I have some test footage up from both: link to youtu.be
link to youtu.be
link to youtu.be
One of the issue with Rylo is that many folks area already complaining about scratched lens which something on GoPro’s we rarely see. Rylo’s waterproof case ruins audio and video so that isn’t an option. Fusion when edited in Fusion Studio is like going back to the late 90’s and early 2000’s and each 9 min video needs to render while you sleep. Fusion OverCapture footage edited on iOS is clean but the stabilization on iOS seems to make the the footage “wavy” for lack of a better term. Plus on Fusion Studio you can select “Anti-Shake” which will keep the 1080p frame on the same orientation but on iOS you can’t you only get “full Stabilization” . I’ve reached out to GoPro for advice on iOS features for Fusion.
Yeah, both sides of my Rylo cam have scratched lenses. Neither of my lenses do on GoPro. I’ve treated them both equally (mostly poorly).
Would you even consider purchasing a Rylo now at the deeply discounted price since they were sold and won’t be manufacturing anymore cameras?
No, not at this point. I’m strongly not in the camp of buying tech from companies that have announced they have no plans to further develop or long-term support the tech.
Thanks! Any recommendations for a 360 camera for a beginner just looking to use it for family adventures?
The Garmin Virb 360 has user replaceable lenses. I would add that to the section comparing the two as I think it’s a major advantage for the Garmin. Thanks for the detailed review.
How do you make a time lapse video with this camera? And how long can I record for if it is plugged into a wall charger?
Yup, you can simply use the timelapse mode option. In theory you can record for as big as MicroSD card set as you’ve got when plugged in. In practice though (I talk about this a bit above) the limitation may be overheating.
Hi, Great reviews. When do you expect to publish your Rylo review? I have a vacation planned in a few weeks and on the fence between the Rylo and Fusion. I wish Rylo had the video quality of the Fusion and wish the fusion has the software of the Rylo. :)
I had planned it for this week, and then I found out the unit I was using wasn’t getting firmware updates anymore because…well…who knows why (they said it was a production unit, but then backtracked and said it was a preprod unit). Without those January firmware updates it’s missing key features. Figuring out next steps. Will probably get unit swapped out by them, but that takes time in Australia.
Clayton hit is on the mark. The Rylo software and stability is amazing. Yes you can only edit on iOS and not your Mac but for those of us just trying to capture fun and not being a pro YouTube’er that is ok. But the footage on Rylo is often with muted colors if it isn’t a bright sunny day. Rylo hardware design seems aimed at the SnapChat crew not the I ride a bike and risk damage all day crew like a GoPro is. Rylo’s lightening to micro USB cable is amazing and I am blown away that GoPro didn’t do this years ago. yes I wish Rylo had wifi for those times I dont have the cable but the cable is so much faster than Hero 6 or Fusion to transfer data to device. Fusion has hardware quality and amazing color like all GoPro’s but their software is almost like 0.5 and not ready for primetime unless I’m using it wrong.
I agree, the cable is awesome. At first I thought it was the stupidest thing ever. But use it just once and it’s like “Holy crap, that’s brilliant”. Sure, GoPro has the little SD card dongle, but that’s nowhere near the same, one more thing to forget to not put back in the camera.
Of note: As of today Rylo rolled out Android support.
Hi Ray. Did the exchenge got messed up or what is the outlook on that in-depth Rylo review? :)
I bought a new one back in April actually. Just keeps falling off the radar.
At this point I believe I will get the fusion due to video image quality.
I will gamble that they will add the same editing features you see in a Rylo and Insta360 to their app and fusion software. At the very least I will have captured the content and the quality for future editing.
My use case is very basic in capturing family travel and the occasional adventure
As far as I know since oct 2017 Garmin Virb does stitching of RAW 5.7K in the cam automatically, there is no longer need for post stitching in the editing software!
Now I have to decide which 360° cam will be mine: Virb oder Rylo. I prefer post processing/editing in my PC and what I will mainly use is the hyperframe function, not the real 360° video.
If you had to choose under the aspect of best video quality…..
As far as I know, that’s wrong. Since Oct 2017 (and within the last month on macOS) you’ve been able to stitch 5.7k video on a computer, not in the camera. The camera stitches 4k video on board, but doesn’t have the power for 5.7k.
As for comparisons, there’s a guy on YouTube, “the 360 Guy” who I subscribe to that does side by side comparisons. You might want to take a look. The Rylo can’t do the things the 360 can do, but it costs a lot less.
So, bottom line:
Fusion or Virb 360?
:)
Between the Virb 360 and the Fusion…
My wife is a teacher and wants to create virtual tours of places her students usually wouldn’t get to go, and experience things they normally wouldn’t. Subjects would be indoor, outdoor, and action type activities like bikecamping, kayaking, etc.
We aren’t dummies, but we haven’t been immersed in this sort of thing…. we are totally new to editing and this type of project. We just bought the Fusion, but now I’m wondering if the experience might be more enjoyable with the Virb.
So… from your perspective, given the info I’ve provided… should we stay with the Fusion or return it and buy the Virb? Thanks a ton and let me know if you need more Info.
Hi thanks for your great reviews.
I had one question : did it make sense to stitch in the gopro iOS app and export the 360 to Final cut? Is this faster? As i understand you can edit via gopro ios app
Thanks for clarifying
Michael
This camera looks incredible, I’m excited to see what kind of shots people take with it!
Best 360 photos and videos from a sub $1,000 camera
Awesome review, as per usual.
Any plans to review the Insta360 One X?
^Deciding between GoPro 7 Black, Insta360, and Fusion. Each, of course, have their own upsides and shortcomings…
Is there an option to turn off the auto panning option? For example say I’m recording an hour worth of stuff without moving the camera , I noticed the view is panning on it’s on from left to right. Is there a way to disable what ever option that’s causing this please ?