

Garmin has just launched their newest smart bike, the Tacx NEO Bike Plus. This new model is a modest update to the previous edition, but does significantly overhaul the handlebar shifters, making them virtually identical to real road bike shifters. With this, they allow you to configure them as Shimano, SRAM, or Campagnolo shifting styles. As well as keeping the existing ability to simulate different chainring/cassette configurations.
The new bike also increases the USB port output power, making it easier to sustain more power-hungry tablets, while also making a slew of minor internal changes from the previous version. In fact, some of those were made over the past couple of years since the initial release, like the new crankset design. And finally, like everything else these days, the price has gone up – with the new list price being $3,999 – the same price Wahoo increased to for their also-minor-update KICKR Bike V2.
With that, I’ve been putting a media loaner Tacx NEO Bike Plus through its paces across a variety of platforms and workout types to see how it handles. As usual, it’ll go back to them afterwards. If you found this review useful, feel free to hit up the links at the end of the site, or consider becoming a DCR Supporter. With that – let’s begin!
What’s New:

As with Wahoo’s updated indoor bike, the changes to the TACX NEO Bike Plus are fairly minor. Generally speaking, in Garmin parlance, when they use the ‘Plus’ identifier on a product, it’s sorta considered an ‘in-between’ model. Meaning it has updates, yes, but it’s not considered a major version. In this case, many of the updates here are internal, both to the product itself and the manufacturing of it. You’ll remember that the previous Tacx NEO Bike V1 was launched under the Tacx brand, and with significant teething pains. While this technically launched after Garmin had announced the acquisition – practically speaking, nothing had been done quite yet. Ultimately, Garmin/Tacx had to clearance out a slew of cosmetically damaged units (albeit, at fantastically great prices).
Much of the past few years has been spent on not just revamping the Tacx NEO Bike to Garmin hardware and manufacturing standards, but also doing that for the entire Tacx product line. In addition to building a new factory. And dealing with the massive trainer spike during COVID, then the impacts of COVID closures, and so on. Point being, this product version is less about a massive new product, and more about normalizing it.
Anyways, here are the differences:
– Totally revamped handlebar & shifters design (basically like a real bike handlebar setup)
– Added ability to customize shifters to replicate Shimano, SRAM, and Campagnolo feeling/shifting
– Changed crank length to five different crank lengths (this was also a running change in the Tacx Bike V1 a year or so ago, but only with 3 options then)
– Increased USB port power to 12W for one of the two ports
– Changed from proprietary ANT+ FE-C via Bluetooth Smart to official FTMS, which temporarily breaks road feel on Zwift via Bluetooth Smart (e.g. cobblestones if using Apple TV)
– Tweaked seatpost to be a bit thinner, minimizing thigh/leg rub
– Increased price to $3,999
Now, what’s certainly debatable is whether or not Garmin should have waited to a future time. But again, that goes back a bit to Garmin history on the ‘Plus’ naming. That’s usually reserved for when they really want to upgrade an existing in-market model with minor competitive upgrades, but aren’t quite ready yet to throw-down with a fully new model.
In terms of differences, the quantity of differences on the Wahoo KICKR Bike V2 is pretty similar to what Tacx is doing here. Wahoo basically added WiFi, and physical Direct Connect Ethernet accessory, along with a slate of internal updates. Meanwhile, Tacx basically added the new handlebars and a slate of internal upgrades. Both increased their prices to $3,999.
Before we move on, just a quick hit-list of specs, so we’re all on the same page:
– Ability to be used without being plugged in (self-power generating)
– Power Accuracy claim of +/- 1%
– Zero-calibration software algorithm
– Dual ANT+/Bluetooth Smart support, including ANT+ FE-C & FTMS, plus power/speed/cadence broadcasting
– Can simulate Shimano/SRAM/Campagnolo shifting
– Can simulate double/triple/compact/semi-compact chainring/cassette setups
– Has dual upper fans built-in
– Has small data metrics display built-in
– Can simulate road feel like cobblestones, dirt, or wooden bridges
– Max 25% incline
– Max 2,200w supported resistance (at 40KPH)
– Has adjustability of saddle position/fore/aft, handlebar height, seatpost height, handlebar fore/aft position
– Has five crank length position support (165/167.5/170/172.5/175)
Got all that? Good.
(Side note: I had thought I’d have the Wahoo KICKR Bike V2 In-Depth Review done just ahead of this embargo date/time, but alas, not exactly. However, you should see that review in the next 24-48 hours. The TLDR version of that upcoming review is that it’s also very minor updates, with the addition of WiFi being the main selling point. I’ll do more compare/contrasting between smart bikes as part of that review. Though, as fine as V2 may be (assuming no accuracy issues), it’s very hard to ignore the $2,279 deal for KICKR Bike V1 that it’s been at the last few weeks – given the relatively minor V2 updates. Albeit at the moment it’s showing $2,999. Heck, I’m even tempted to finally pick up a V1 at the lower price, perhaps on Black Friday we’ll see something.)
Unboxing:
First up is getting the box up your Dutch staircase. The box is heavy. I don’t know entirely how heavy because I forgot to weigh it, but I’d say it’s definitely squishable heavy. Squishable heavy is defined as something that would very much squish me if I lost my footing.
The good news is that I’ve perfected the relocation of indoor smart bikes up these stairs via slowly rolling it like a Gouda cheese wheel. Except for the Stages Bike. That’s just too big to roll. Instead, I use the DIY lift seen to the left there. However, that’s frankly more risky than just going up the stairs.
In any case, here’s the box:

There’s some instructions on the side explaining how to cut it open and use two people to push/pull it out.

Once it’s out, you’ll be looking at this situation:

Followed by making it pretty like this:

In case you’re wondering, those two heavy-duty black plastic pieces seen there are purely for shipping protective purposes. I wasn’t sure at this point in the unboxing process, so I included them just in case. Here’s some zoomed in sots you can click on for a better look at things.


With that, let’s get it set up.
Putting it Together:

When I asked Garmin/Tacx how long it’d take to put together the NEO Bike Plus, they said about 30 minutes, in a tight environment with minimal space. That turned out to be relatively close to what it took me (solo) while also trying to photograph/video everything. I’m gonna guess most people in a more open space with two people could do it in 15-20 minutes.
First up is attaching the legs. None of these steps are difficult, they’re all straightforward. However, attaching the legs would certainly be better done with two people (as the manual and Garmin peeps recommend). It’s mostly just a simple balancing act, rather than something requiring strength.

As you can see, there are basically two sets of legs, each with two gigantic bolts in them.

Next, it’s time to put your pedals on. The bike has a new bear claw crankarm design, similar to what we saw on both Wahoo and Stages bikes. Basically this means that you just pick the right holes for the crank length you want (165, 167.5, 170, 172.5, 175mm), and you’re done. This solves plenty of issues with the previous Tacx design, though Tacx actually made this change a few years ago as a running change to the Tacx Bike:

You’ll install the pedals like any other bike once you pick the right hole. And I actually very slightly prefer the crank arm design here versus the Wahoo one, merely because you don’t need to use spacers, since the surface is uniform, and thick enough to not have the pedal spindles poke out the back side and hit the bike frame:

After that, it’s time for the all-important water bottle holder install:

At this point you’re moving on to the important stuff. First up, we’ve got installation of the seat rail system. It’s just an easy removal of one bolt and swapping in a handle:

Followed by the exact same process for the front handlebar system:

Now at that point you’ve got a choice to make: Fans or no fan? Are you fanboy or fangirl? Well, if so, then attach them:

As I’ll talk about later, the fans aren’t exactly amazing. They’re just…meh. They help a bit if you forgot to plug in your Wahoo KICKR Headwind fan and now can’t turn it on remotely from your phone, 7 seconds after that Zwift race started. The only downside to them is I find I’m constantly clipping them while trying to get out of the small space in front of my bike – but that’s really more of a ‘me-placement’ issue I think.
In any case, assuming you’re going to use this as your Only Fans, then you’ll have those attached and plugged in on the back. Note that you can increase the power in the app, and set them for full speed, versus the lower default speeds.
Next, you can add in the upper tablet mount thingy. This industrial strength band basically pulls down onto the top of a tablet, holding it nicely in place.

While this seems less swanky than some of the other tablet holders that use tightening screws, I prefer it because I think it actually holds it better (since the pressure is more constant versus hopeful), and further, it makes for 2-second removal, versus undoing a bunch of screws when I want to take my iPad somewhere else.
Finally, we’ll go ahead and plug the bike in. But before we do that, Garmin hasn’t gone off and labeled their power supply. Normally I use a sticker if the box includes one (Wahoo does), or I make my own (everyone else). In this case I just cut the bottom of the free Tacx App leaflet thingy in the box, and then taped it to my power supply:


I do apologize greatly for the color mismatch. I am somehow out of black electrical tape, and have this awesome red stuff. Except, the red stuff is clearly not color-coordinated in this situation. Also, it’s as I look closely at the above picture that I realize that dude is on a Tacx NEO 2T, not a Tacx NEO Bike, and the power output is substantially higher with this block than the Tacx NEO trainer one. Sigh…I’ll re-do the tape job with something else.
As always, here’s the back of the power block, in case yours gets mixed up in the wrong part of the garage during a move, and you’re not sure which is which:

Of course, the above photo is mostly just for my own notetaking purposes, so I can figure this out again down the road. With that, let’s dive into the basic usage.
The Basics:

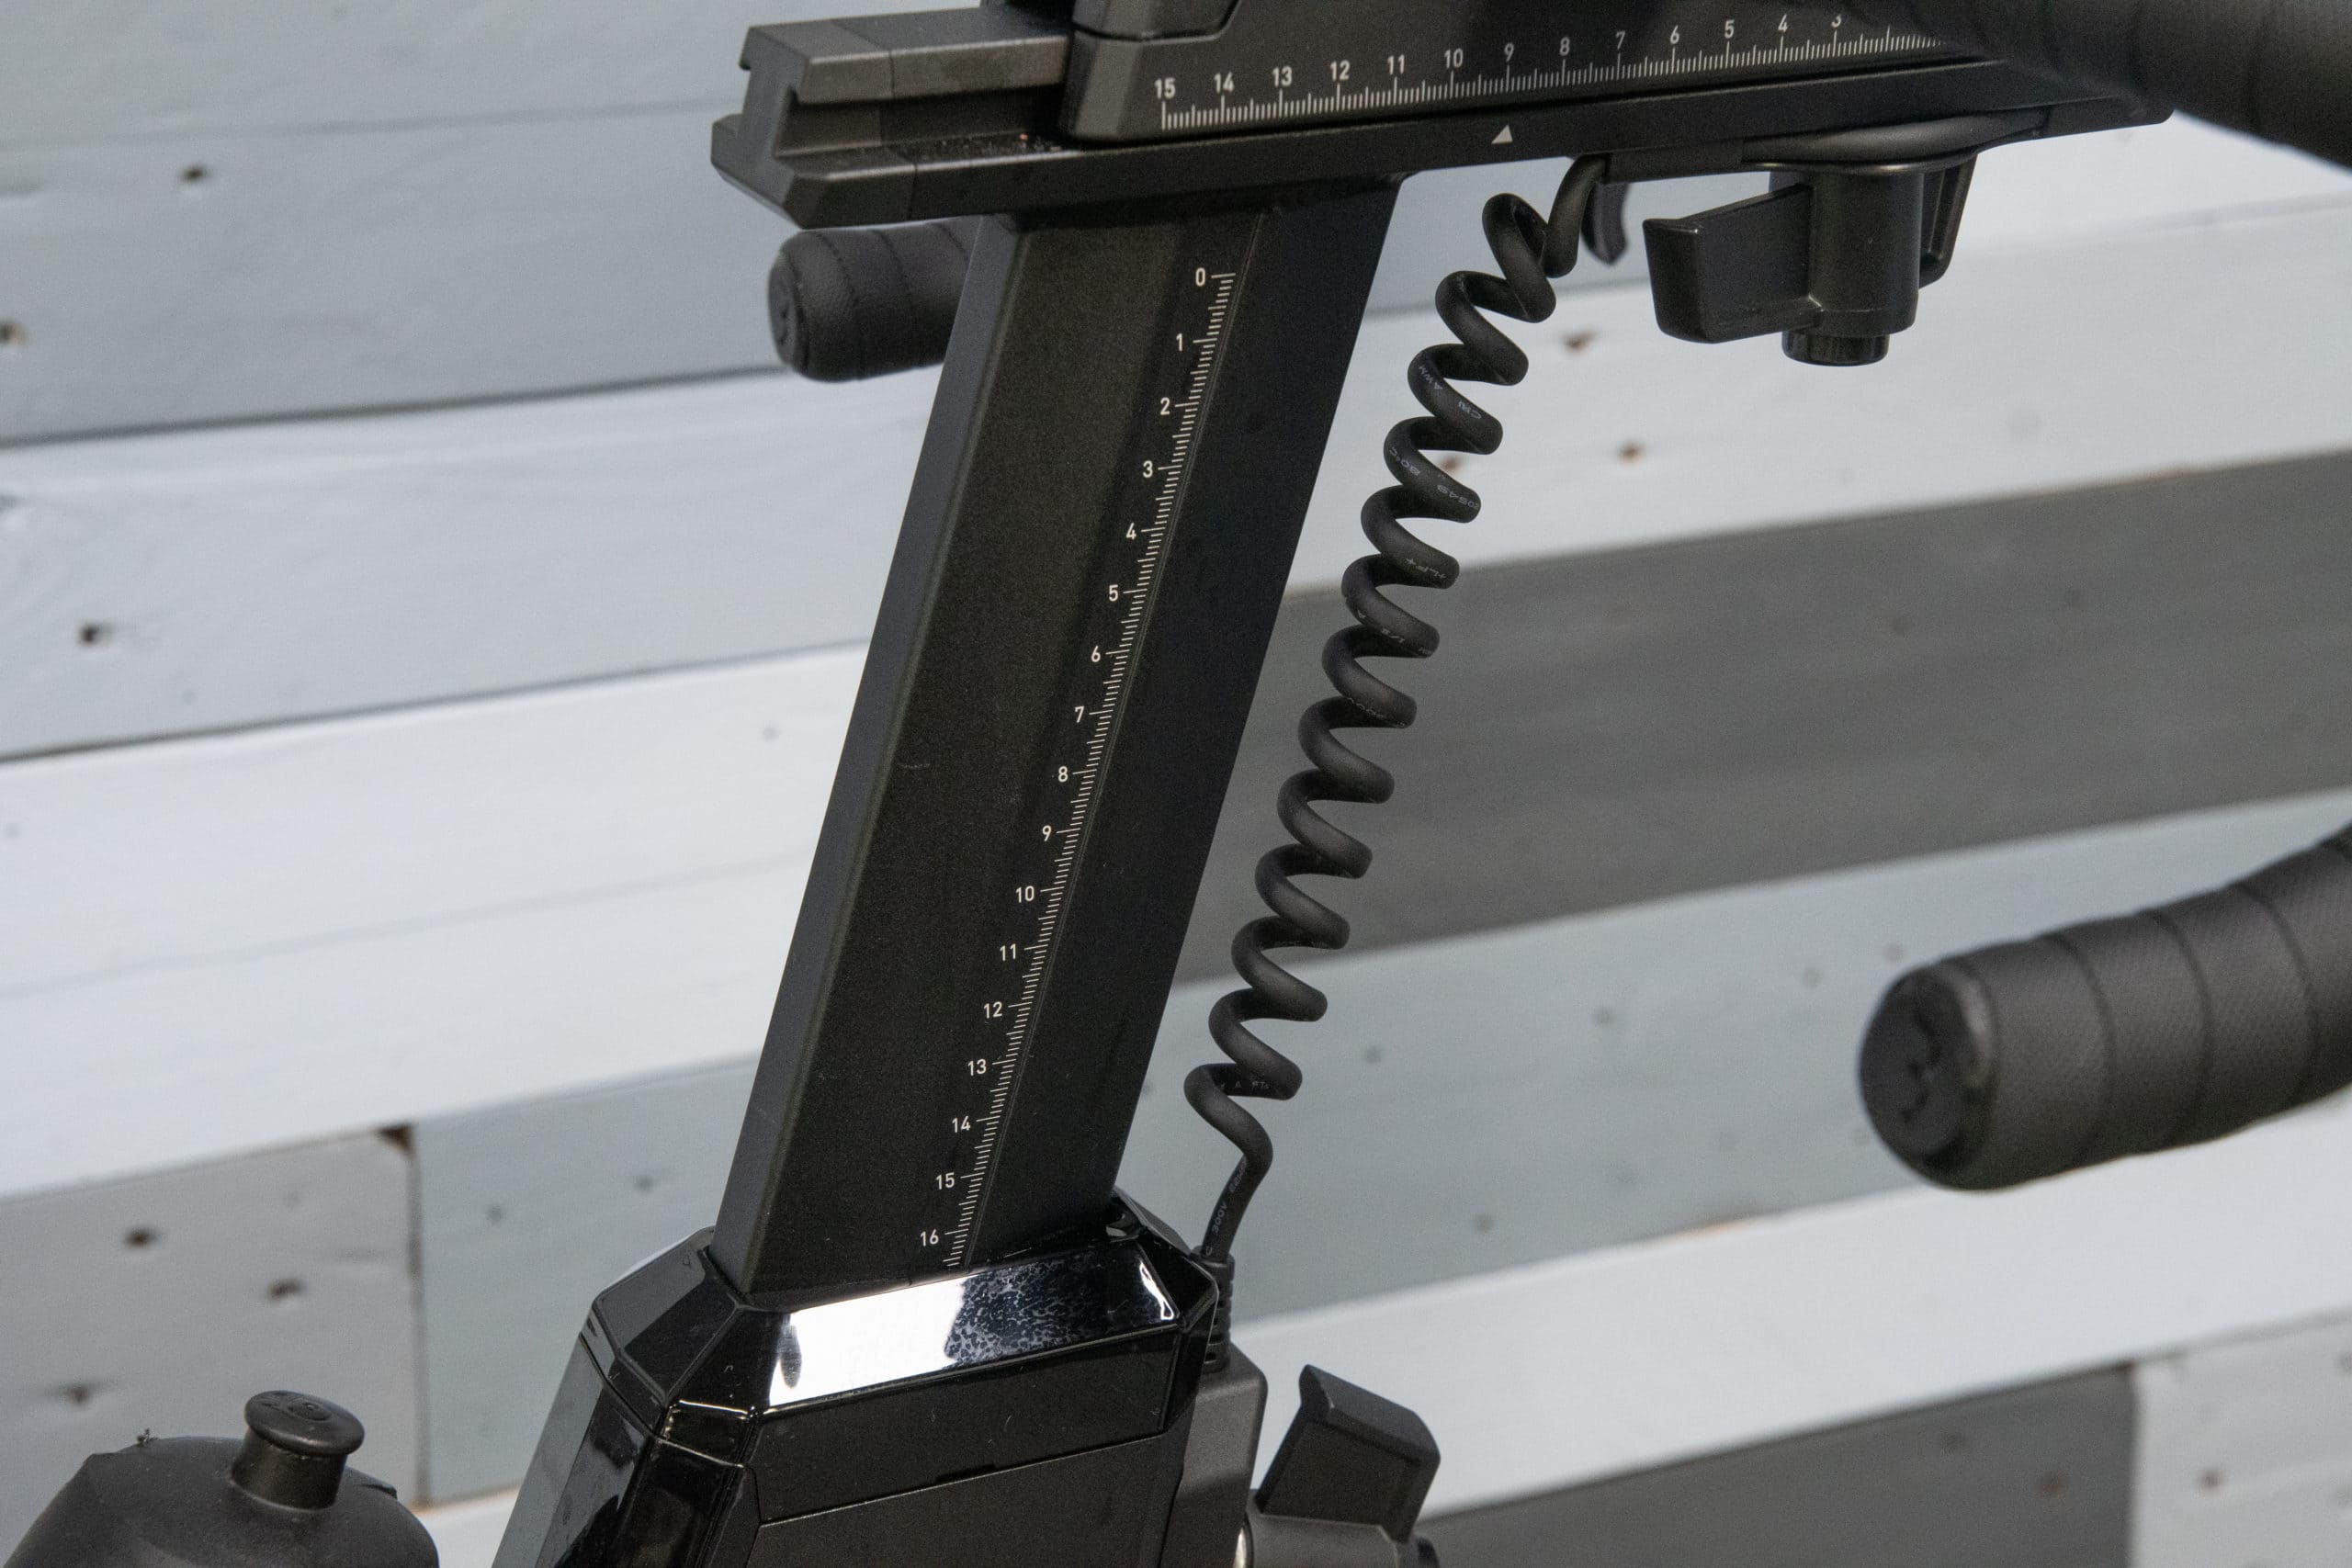
So first thing’s first, which is adjusting the bike to fit you. You’ve got six different adjustability points on the TACX NEO Bike Plus:
– Saddle tilt angle (standard saddle rails, but also secondary tilt adjustment)
– Saddle forward/back movement on marked slider
– Saddle height up/down movement on marked slider
– Handlebars/display height up/down movement on marked slider
– Handlebars/display forward/back movement on marked slider
– Crank Length (per the previous section)
Each of these areas include a marked ruler on them with numbers, so you can quickly adjust things between users if need be. I also appreciate that the numbers are on both sides. Wahoo only puts numbers on one side, which is fine (and potentially prettier cosmetically), but it just makes it easier if your bike is in a specific dark corner to see it on both sides.
Now when it comes to adjusting sizing, you actually have two options. As part of the setup process you were able to install handles, but the default is actually simply bolts. This is for people that don’t share their bikes, and simply want it to be exactly one fit forever – cleaning up the look of the bike by removing the handles. This is for all four handle positions.

The handles have a pop-out function that lets you tighten them up, and then re-position them to be mostly-straight with whatever thing it’s lined up against. I’m sure there’s a fancy technical way of describing that from industry handle experts. But I don’t know a handle expert to consult with. The handles here are slightly improved over the very original/initial Tacx Bike handles, which had less ‘positional snaps’ than these ones do. I believe that was a running change made at some point over the last few years.
Next, one of the challenges with the Tacx Bike is that it’s got a bit thicker of a frame. However, they did actually reduce the thickness down by about 9mm, at the highest portion of the seatpost. Previously, the lower 60mm section extended all the way up:


Either way, this can be an issue for some people where their thighs rub. But that’s going to depend heavily on exactly where your saddle is positioned. If your saddle is positioned a bit more back on the rail, then thunder-thighs people like myself will rub. Whereas, if my saddle is positioned a bit more forward on the rails, it clears no problem. Obviously, I can’t predict where your things are gonna touch.


In my case, by mostly dumb luck, the position I chose doesn’t touch. I don’t know if I were to get a proper bike fit if it would touch (or if I’d gain even more bike clearance). In fact, now’s a good time to point out that the Tacx Bike doesn’t have any sort of fit assistance in their app, something that Wahoo and others do (but especially Wahoo, who even does phone photo automated fit bits). So you’re more or less on your own here, Garmin has a few paragraphs in their manual mentioning that you should probably get a fit or something, but it’s pretty slim.
As for how that compares to the other major bikes, here ya go. Note that Wahoo, which also has thigh-rub issues with their frame design (in fact, arguably worse issues because it’s far higher up where your legs are closer together), didn’t change their design at all with the V2 edition.


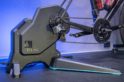
Ok, moving on from fit stuff, let’s talk some other non-handlebar basics. First up is that it changes color. More specifically, the flywheel (big silver spinny thing) and then it also illuminates the space between your legs on the floor:

The coloring here has long been a thing on the Tacx NEO series trainers (and bikes), and essentially aligns to your power output. Blue is the lowest, then a purple shade, before you work your way through orange up to red. You can’t customize these in any way, but it’s kinda fun to see nonetheless.
When it comes to sound, the Tacx Bike makes no meaningful amount of sound. There’s some small computer-like fans in there, but it’s essentially silent – in fact even more silent than a Tacx NEO trainer because there is no mechanical drivetrain of your bike interfacing with it. We’ll talk more about the ride feel itself in the ‘App Compatibility’ section, because in this rare scenario, the ride feel is actually controlled by the apps, due to the Tacx Road Feel feature.
Shifting & Handlebars:

Next up, we’ve got the shifting and everything to do with the handlebars. The change in handlebars is unquestionably the biggest update here. It’s a massive step up from the previous edition, which was bulky, with shifters that didn’t feel like a real bike – but rather kinda toy-like. Now however, the shifters feel just like real shifting.
Of course, the shifters are only one component of this entire front situation. The second piece is the display console, as well as fans, tablet holder, and USB ports. All of which is up here. While some people might like the Wahoo KICKR Bike feel of just a regular bike (with no storage location), I really do prefer a place to store things. In this case, I can put my phone there, remote controls there, etc…

Or, to hold that coffee cup for that early morning…err…late afternoon, ride:
![clip_image001[17]](https://media.dcrainmaker.com/images/2022/11/clip_image00117.jpg "clip_image001[17]")
The bottom is a removable rubber mat, so when it gets all sketchy of gels or something, you can easily just remove it and wash it.

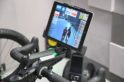
The display itself will show stats about the bike in real time. The refresh rate is faster than 1-second, so you actually see the numbers spin up really fast when you sprint/surge. It’ll show gearing information as well as power, heart rate, cadence, incline, and more. The exact information it displays depends a bit on the app, and apparently a bit on which protocol. For example, using Zwift over Bluetooth Smart, I wasn’t getting any incline information.
Meanwhile, the heart rate information comes from nearby HR straps, where it automatically connects over ANT+ (most straps are dual these days anyways). But it’s the gearing information that’s most useful. With most apps still not showing gearing information in-app, it’s handy to be able to quickly see what gearing you’re in. When on a real bike, you can always look down and double-check, but with a smart bike, you have no idea because the gearing is virtual. Sure, once you’ve established where you are in the chainring/cassette, then you’re mentally good – but it’s still establishing that, that can be tricky without some sort of display, which is where the small display here is helpful.

Above the display is a tablet holder. You can use the band portions to ensure the tablet stays put. Also, I pre-apologize for pulling out a very old iPad to demonstrate this. Turns out I left my regular (this decade) iPad at home today. I’ll update this picture with some technologically appropriate props shortly.

It works well, and I have no complaints there. Then down below the display are two USB ports. One of the USB ports has been upgraded to 12.5w, which makes for better charging of tablets. Whereas the other is 2.5w. It’s nice having two ports there, especially when you might need to have the tablet charged for an app like Zwift/TrainerRoad, but are also at the end of the day and your phone is down to single-digit battery levels. Note however that the USB ports only (disappointingly) power your devices when the bike is actively in use. So if you leave your tablet there charging and come back 4 hours later, it won’t be full.

So, now shifting directions to those shifters. The two inner paddles allow inward movements just like normal Shimano shifters do. It’s maybe a couple of millimeters shy of Di2 or SRAM eTAP ones, but it feels pretty good. So much better than before, and perhaps a smidge bit more clicky than Wahoo’s shifters. But I don’t have a great way to scientifically measure clickiness. Either way, both are great.

In terms of shift feel and responsiveness, I’m super happy here. They feel great, and respond quickly. Of course, all the shifts are totally electronic, but they feel good. There’s still a button on the inside of the shifter as well, for apps to leverage:

You can customize the shifters to be SRAM, Shimano, or Campagnolo in the app, which in turn basically lets you adopt to one of those core shift styles. However, I don’t see any place to dig further into shifting customization with that.
![clip_image001[8]](https://media.dcrainmaker.com/images/2022/11/clip_image0018-2.png "clip_image001[8]")
And then, with that, you can customize the virtual gearing too, specifying exactly what chainrings and cassettes you want. This is done via the Tacx App, but you don’t need a subscription to do so (I don’t have one, just hit ‘Skip’ in the upper right corner).

![clip_image001[6]](https://media.dcrainmaker.com/images/2022/11/clip_image0016-1.png "clip_image001[6]")
There aren’t multi-user profiles though, like there is for the Wahoo KICKR Bike, so it’s a bit messier here in that each person has to open up the app and manually change it.
Lastly, sadly, Garmin/Tacx says they don’t have any current plans for letting folks buy/upgrade to the new handlebar/shifter arrangement. I’d really like to see them figure that out. Looking at the design, I don’t see any obvious blockers or compatibility issues. It’s just simply a different handlebar. In fact, the entire original design of the Tacx NEO Bike was to allow for swapping of handlebars down the road, and this seems identical from that interface perspective. Of course, there may be some other dependencies around power draw since the USB ports that are part of the display were upgraded. Either way, Garmin didn’t say it was a hard-no, they just said there wasn’t anything planned at the moment. I feel like for what was a $3,200 bike, that there should be offerings to customers for upgrading hardware down the road when things allow. And this appears to allow it.
App Compatibility:
![clip_image001[13]](https://media.dcrainmaker.com/images/2022/11/clip_image00113.jpg "clip_image001[13]")
The Tacx NEO Bike Plus follows most of the industry app compatibility standards as previous Tacx products, and essentially follows the industry norms as you’d expect from a high-end trainer or smart bike. As you probably know, apps like Zwift, TrainerRoad, Sufferfest, Rouvy, SYSTM, and many more all support most of these industry standards, making it easy to use whatever app you’d like. If trainers or apps don’t support these standards, then it makes it far more difficult for you as the end user.
In the case of the NEO Bike Plus, it adheres to all these standards, though, there are some minor quirks due to extra features that Tacx has – specifically, road feel. First though, the main ones:
ANT+ FE-C Control: This is for controlling the trainer via ANT+ from apps and head units (with cadence/power data). Read tons about it here.
ANT+ Power Meter Profile: This broadcasts as a standard ANT+ power meter, with cadence and speed data
ANT+ Advanced Power Meter Metrics: This includes pedal smoothness and left/right balance.
ANT+ Speed/Cadence Profile: This broadcasts your speed and cadence as a standard ANT+ Speed/Cadence combo sensor
Bluetooth Smart FTMS: This is for controlling the trainer over Bluetooth Smart from a variety of apps
Bluetooth Smart Power Meter Profile: This broadcasts as a standard BLE power meter, with cadence data
Bluetooth Smart Speed/Cadence Profile: This broadcasts your speed and cadence as a standard BLE combo Speed/Cadence sensor
In the above, you’ll note there’s cadence data baked into the various streams. That’s handy if you’re connecting to Zwift on an Apple TV, due to Apple TV’s two concurrent Bluetooth Smart sensor limitation (plus the Apple TV remote). This means you can pair the trainer and get power/cadence/control, while also pairing up a heart rate strap. However, Tacx does not send the HR data that they collect to apps, like the new Zwift Hub does. Given that Tacx already pairs direct to your HR sensor, this would seem to be a silly easy thing for them to do – and would save a Bluetooth Smart channel (since all data bundled from the same device only counts as one channel).
For me, in my testing, I used Zwift and TrainerRoad as my two main apps (which are the two main apps I use personally). In the case of Zwift, I used it in regular riding mode as well as ERG mode (structured workout mode). Whereas in the case of TrainerRoad, I used it in a structured workout mode (ERG mode). I dig into the nuances of these both within the power accuracy section.
Starting with Zwift, you’ll see it listed as both a controllable trainer and a power source, as well as cadence in the pairing screen. The HR side you’ll need to handle manually:
![clip_image001[10]](https://media.dcrainmaker.com/images/2022/11/clip_image00110-2.jpg "clip_image001[10]")
Once in Zwift, it’ll control the Tacx Bike’s resistance levels automatically. So for example, if in SIM mode, it’ll change the incline of the bike to match what’s on the screen. So if going up a 10% grade, it’ll feel like 10%. Of course, that does assume you’ve changed the default Zwift ‘Trainer Difficulty’ level from 50% to 100%. Else, all those values will feel halved.
Additionally, in Zwift (via firmware update in summer 2023), you can now do steering within Zwift using the buttons on the inside of the handlebars. I won’t rehash how steering works in Zwift, that’s been around for years now, in a variety of other devices/bikes/etc… The key thing here is now the Tacx NEO Bike Plus can steer too, using the two small buttons on the inside of the handlebars (right side seen above, next to my thumb). To pair it up, you’ll add it as a steering device within Zwift:
![clip_image001[4]](https://media.dcrainmaker.com/images/2023/09/clip_image0014.jpg "clip_image001[4]")
And then from there, you simply steer left/right across the lane like any other Zwift steering-compatible device. Press the left button to go left, press the right button to go right. Easy-peasy. You’ll notice the little steering icon in blue (below) above my name. Also, for the record, I did come back and take the green jersey not once, but twice on subsequent sprints.

Responsiveness and tactile feel was good here, it required a seemingly normal amount of force (some buttons on some devices can feel a bit hard, but this was good).
Next, if in ERG mode, then it’ll automatically control the wattage that the structured workout has specified. So it’ll change from 150w to 350w automatically, or whatever is set in your workout:
![clip_image001[8]](https://media.dcrainmaker.com/images/2022/11/clip_image0018.jpg "clip_image001[8]")
Interestingly, in ERG mode you are allowed to change gearing. Some smart bikes don’t allow it, but you can with the Tacx NEO Bike Plus. The responsiveness to change gears is basically in line with expectations, at about 3 seconds. But I’ll show you some of that responsiveness data in the accuracy section.
However first, I need to mention one marquee feature of the Tacx NEO Series, which is simulated road feel. This will automatically simulate certain terrain types, like cobblestones, gravel, pavement, concrete slabs, wooden plank bridges, etc… Thus, as you’re riding along in Zwift (and certain other apps), you’ll feel like you’re going over the wooden bridge planks. It’s a really cool feature that I quite like.
![clip_image001[15]](https://media.dcrainmaker.com/images/2022/11/clip_image00115.jpg "clip_image001[15]")
However, unfortunately, as of this writing, it’s no longer enabled on the Bluetooth Smart connectivity side for Zwift. Garmin/Tacx has changed from their previous semi-custom Bluetooth Smart protocol that the Tacx Bike used, to the more open FTMS. In that data stream Garmin is still sending the road feel information, but Zwift isn’t recognizing it yet. When I asked Garmin, the explanation was a bit fuzzy, and it sounded like for competitive reasons they were hesitant to notify Zwift before announcement of the product (given that Zwift now sells their own hardware). While I can understand this, I struggle to see why this had to be tied to the release of the Tacx Neo Bike Plus, versus any other firmware update. So it’s not clear to me how quickly this will be resolved. Some Zwift software things get resolved quickly, and some take years.
Either way, what it is demonstrative of though is just how fractured the smart trainer standards industry is. Here’s arguably the two of the three biggest companies in it, and getting agreement on how a feature that was rolled out 6 years ago still isn’t standardized. And the same thing happened when the first Tacx NEO Bike announced, whereby Road Feel didn’t work over Bluetooth Smart for about 3 months.
Now, as far as the more general ‘road feel’ such as the inertia elements, the NEO Bike is solid there, just as existing NEO units have always been. The inertial feel of both acceleration and deceleration is good. The NEO Bike also simulates downhills too, and will ‘drive forward’ the flywheel so that it feels like you’re going downhill with a faster spinning flywheel.
In any case, moving on from Zwift, we’ve got TrainerRoad. It connected just fine there as a controllable trainer:
![clip_image001[10]](https://media.dcrainmaker.com/images/2022/11/clip_image00110-2.png "clip_image001[10]")
And then controlled my power as well. I did have some missed commands in TrainerRoad, where it simply didn’t change resistance levels occasionally, like it fell asleep. But in talking with TrainerRoad, this sounds like it’s actually a TrainerRoad issue with the latest beta version of their app. That’s supported by the fact that I’m seeing the same issue on the new Wahoo KICKR Bike V2, and further supported by the fact that TrainerRoad believes this is a known bug they’re working through. Either way, it doesn’t affect accuracy or anything – it simply gave me a few more seconds of recovery. :)
![clip_image001[12]](https://media.dcrainmaker.com/images/2022/11/clip_image00112-2.png "clip_image001[12]")
Next, while I didn’t use the Tacx App for any training sessions, I did use it to configure the NEO Bike shifting-related settings per the earlier sections. Also, in this app you can update the firmware levels, for when new firmware comes out – as well as simply check basic connectivity:
![clip_image001[14]](https://media.dcrainmaker.com/images/2022/11/clip_image00114-2.png "clip_image001[14]")
![clip_image001[16]](https://media.dcrainmaker.com/images/2022/11/clip_image00116.png "clip_image001[16]")
![clip_image001[18]](https://media.dcrainmaker.com/images/2022/11/clip_image00118-1.png "clip_image001[18]")
Finally, because the NEO Bike Plus supports connectivity over ANT+ & Bluetooth Smart standards, you can also pair it up to any bike computer or watch out there. In my case, I paired it up to a Garmin watch as an ANT+ power meter, and recorded a second copy of the data there, notably including left/right balance as well as pedal smoothness levels:

Though, I did find it notable that unlike when you pair any other Garmin sensor (such as a Garmin HR Strap, Garmin pedals, RD pod, etc…), it doesn’t list the Tacx Bike as a paired sensor in Garmin Connect, like it does for other things. Perhaps down the road we’ll see that. It’s a very minor trivial thing, but also somewhat an example of where the overall Tacx/Garmin integration stands. In the same way that the Tacx NEO Bike Plus doesn’t support multi-channel Bluetooth Smart connectivity, which is something that all other Garmin sensors made in the last 3 or so years do support.
But again, that all kinda goes back to the realm of this being a ‘Plus’ model product, versus an entirely new version.
Power Accuracy:

As usual, I put the NEO Bike Plus up against a number of power meters to see how well it handled everything from resistance control accuracy, to speed of change, to any other weird quirks along the way. I’ll be adding in more data sets over the coming days, though at this point I’m pretty comfortable with the good and bad – so I expect any further data sets to simply concrete those observations.
For these data sets, I’ve compared it against the Wahoo POWERLINK power meter pedals. I used them simply because I trust them pretty well, and they’ve continued to perform well in my accuracy testing. Unfortunately, because it’s a smart bike, I can’t swap out for additional cranksets or rear hubs to provide secondary comparison points. Though, I may swap to another set of power meter pedals for future data sets, just for the fun of it.
In any case, for data testing I’m using: Zwift (Apple TV) & TrainerRoad (iPhone), combined with recording secondary data streams to watches and bike computers. The actual apps don’t typically much matter, but rather the use cases are different. In Zwift with simulation mode, you get variability by having the road incline change and by being able to instantly sprint. This reaction time and accuracy are both tested here. Whereas in TrainerRoad in ERG mode, I’m looking at its ability to hold a specific wattage very precisely, and to then change wattages instantly in a repeatable way. There’s no better test of that than 30×30 repeats (30-seconds at a high resistance, followed by 30-seconds at an easy resistance). However, I also did an ERG workout in Zwift as well.
Let’s start with the Zwift SIM mode first, and in this case – I did a race to begin with. Races (or pace groups) are great ways to test responsiveness in SIM mode on trainers, because you’re constantly doing small surges, combined with a few FML big surges/sprints. This entire ride then included another 10-minutes of mostly cool-down after it, which you can see when things go from crazy-pants to serene:
")
So looking at the crazy pants section, you’ll see it’s just a lot of ups and downs. And at a high level (above), things probably look OK. And they mostly are. Except, you can see that it’s missing some of the higher points as we zoom in. It appears that there’s a bit too much smoothing involved here, and thus, it cuts off a bit of the peaks as I move through the pack. This would of course mean I’m putting out less power, though inversely, it’s also not seeing the valleys as deep – so in this case, it gives me extra credit. Overall this is probably a wash, but I’m not sure ‘a wash’ is good enough for $4,000.
")
And here’s another less crazy, but still wobbly section:
")
Looking at the two 800w sprints, the Tacx NEO Bike Plus undercut those as well. Though, that’s not that uncommon for trainers and smart bikes. Getting exactly the same peak sprint power is very challenging, and we usually see undercuts to varying degrees. Here it looks like about 35-50w on 800w. I see a bit of undercutting as well on the KICKR Bike V2, but slightly differently. It’s a bit short of the top peak value, but more notably, is short on both sides too (going up and coming down). Again, more in that review. Below though is the Tacx bike:
")
Looking at the cadence side of the equation, you’ll see things are basically spot-on here:
")
Next, we’ve got the 30×30 test on TrainerRoad. Note, these graphs are not smoothed (none of mine here are).
")
Now as you can immediately see, we’ve got a spike problem. Specifically, the Wahoo pedals report a significant spike in power at the start of each ERG interval, whereas the NEO Bike doesn’t. Given we’ve already established in the previous data set that the Tacx NEO Bike Plus over-smooths the data, I have no doubt that the Wahoo pedals are correct here. Plus, I can simply feel it in my legs. There’s a big difference with an extra 100w for those couple seconds.
")
Once it gets beyond that, then it’s pretty steady. I don’t see any meaningful oscillations of the data here – it’s quite nice, no more than any other trainer in just normal human pedaling behavior.
Anyways, back on the Tacx NEO Bike Plus, looking at the cadence values, no problems at all:
")
However, everything above is looking at the power accuracy, what about the responsiveness? How long did it take to make those power shifts and stabilize? Well, that’s just as important, especially for short interval bits like 30×30’s. I generally measure this as the moment it starts shifting power, till the moment it stabilizes. And typically the ideal timeframe is 2-4 seconds. Any faster and it’s like hitting a brick wall, and any slower and you lose the point of the interval.
")
We can see here that while it gets from the ~150w to ~450w in about 3 seconds, it then overshoots that significantly, up to nearly 600w. It takes another couple of seconds to settle down, so that the final arrival time is about 5 seconds (5:05, since the interval started at 5:00):
")
That’s simply too long – especially once you include the fact that TrainerRoad actually sent it one second early here (you can see the green line), as well as the fact that what you don’t see in the above blueness is how much it overshot (because that’s smoothed in the reported power).
Finally, we’ve got this Zwift ERG mode test. This honestly isn’t any different than TrainerRoad, except simply a different ride with a different construct. Now you may notice that there’s a bit of a difference initially, and then it slowly pulls in. This was after installing this particular set of pedals on this, which then seems to show some standard settling-in that you see for virtually all power meter pedals. Subsequent rides all showed spot-on from second zero.
")
In this structured workout, with the power jumps only being from 150w to 300w (versus 450w above), we don’t see the massive spikes, but we still do see spikes for each one. However, interestingly, we also see a bit more variation here – a lot of wobble, if you will. I’m not clear why I’ve got more wobble on this workout compared to later ones (like my 30×30’s), which don’t show this much wobble:
")
As with before, Tacx is artificially smoothing some of this out, so it pretends it doesn’t exist. But in reality, it does. Your legs are still doing that work. I’m curious to go back and to this exact same 30-minute workout again, now some rides later, to see if I can see why this Zwift one is wobbly, but the TrainerRoad one isn’t wobbly. From an ERG set point standpoint, there should be no difference…but hey, I’ve long learned “should be” isn’t always reality.
As for cadence, that was good as usual here:
")
Ultimately, general power accuracy is good and spot-on, as is cadence consistency/accuracy. I also didn’t have any issue with ERG mode in terms of holding a given power – once it stabilized it was happy. However, it appears Tacx is doing two things that are rather problematic. First, they’re over-smoothing a bit, which is noticeable in that it undercuts surges and slightly overshoots dips. It also undercuts sprints a bit (though, not much different than their competition). And that appears to be to solve some fluctuations they have in some ERG mode scenarios (but not all my scenarios).
The second piece is that it can’t quite control its ERG mode setpoint on big jumps. This is exactly the same problem that happened on the Tacx NEO 2T, and even the Tacx Bike V1 when it first released, before a few firmware updates later when it was resolved. I’m kinda confused as to how it could be returning to happen here. Of course, if looking at just the Tacx data this is covered up by the smoothing they apply, but that doesn’t change the fact that your legs are still doing the extra watts, and thus from a physiological standpoint, it’s not doing the workout you’re supposed to be doing. Hopefully these issues can be solved (again) via firmware update.
Update – September 7th, 2023: Below is an update of where power accuracy stands after firmware updates over the past few months. This is as of today, with the most current firmware. I’ve left the above sections in the review for historical purposes. Here’s the longer post about it.
After updating the firmware to the most recent version, I did a few test rides to validate the power meter pedals were ‘bedded’ in on this crankset (basically, you do a bunch of sprints), as well as temperature had stabilized. I was using the Wahoo POWRLINK Zero pedals. I mix and match which pedals I use on different reviews/bikes, but find that I can generally trust the Garmin Rally pedals, Favero Assioma DUO Pedals, and Wahoo POWRLINK Zero pedals. All of them have their minor quirks, but those three are data trustable for power accuracy testing.
First up, I wanted to look at the surge behavior’s. As a reminder, last year (power accuracy section here), basically anytime there was a surge, the Tacx NEO Bike Plus would undercut those surges – often by 50-75w. While there’s always a balance between how responsive a trainer power is (due to flywheel considerations), I think it’s fair to say 50-75w is too much.
In any case, here’s how things look now:

You an see while it’s still a little bit lower than the pedals on the slight surges, it’s closer to 25w or so – which is essentially the same ballpark as others.. This doesn’t impact things too much.
Meanwhile, on the sprint side, we see really nice alignment there as well. Previously it would undercut in the 50-75w range, and now it’s nearly identical, save a little bit of differences in recording timing.

So next, was the bigger issue I saw, which was huge spikes in ERG mode – especially when changing wattages. This was most easily see in 30×30 type efforts (30 seconds on at high wattage, 30 seconds recovery at easy wattage), but also visible in countless other workouts. It was overshooting the wattage by 100w in some cases previously, a massive amount (especially on already high wattage intervals). So, I went back to my tried and true 30×30 trainer test to see how things handled. And it’s much closer now:

(The random blip in that warm-up section was me changing to the camera app, and apparently that upset the TrainerRoad app…it recovered a few seconds later when I got back to the TrainerRoad app.)
The differences we see there are inline with most other high-end trainers/smart bikes on the market. You’ll notice that the overshooting at the beginning varies slightly each time, which is more a function of me than it. Basically, how ready for that interval was I, and did I potentially respond to aggressively to it. Whereas before, no matter how ‘gentle’ I tried to be, it basically spikes very high. You can see the first interval is really solid, where I wasn’t quite yet tired.

There’s still some fluctuating going on in terms of differences between the Tacx NEO Bike Plus and the Wahoo pedals. This can be a hard one to track down, as many smart bikes/trainers do smoothing a bit in this area, which is likely why we see the pedals a bit more ‘reactive’ than the trainer is. But these fluctuations are very small in comparison to where they were before (a 100w+).
All in all, I’m happy with these changes now. Good job.
(Note: All of the charts in these accuracy portions were created using the DCR Analyzer tool. It allows you to compare power meters/trainers, heart rate, cadence, speed/pace, GPS tracks, and plenty more. You can use it as well for your own gadget comparisons, more details here.)
Wrap-Up:

The Tacx NEO Bike Plus is a relatively minor and incremental upgrade, at least from an end-consumer standpoint. The main purpose of this bike is to streamline all of the internal changes made to it, under a new product name – while also adding in the new handlebar design. Many of the internal changes had been made as so-called ‘running/inline’ manufacturing changes already over the last few years (such as the bear-claw style crank arm). However, by releasing a new model, it allows Garmin/Tacx to hit a bit of a reset button when people are looking at reviews of this model compared to the previous model. Which is pretty much what Wahoo did with their bike as well this September.
The shifters are a welcome and massive improvement over the previous iteration. The previous edition shifters were almost universally disliked, especially once Wahoo & Stages came on board with their handlebar designs. But the new NEO Bike Plus handlebar design is solid – I’m happy with it, and have no complaints there at all. I also appreciate the increased wattage USB port, the geeky part of me enjoys that. And, just as back then, I do appreciate a place to stash remote controls or such in the little holding tray.
On the downside, I was really hoping for some movement up/down like we have with the Wahoo KICKR Bike (or Elite trainers in Rizer). Given the price is the same as the KICKR Bike V2 at $3,999, it’s a bit tougher to justify the cost lacking that. [Update Sept 2023: This accuracy issue has been fixed via firmware update.] Further, it’s disappointing to see the ERG mode spikes when shifting wattage, and in some workouts, wobbles. Same goes for the undercutting on sprints/surges. I’m surprised to see an issue like that slip through – especially since it’s the same issue that appeared on the Tacx NEO Bike V1 during the initial few months until it was solved during a firmware update. Additionally, it’s still single-channel Bluetooth Smart, which may be a limiting move for some people long-term (when all other Garmin & Wahoo sensor stuff has gone multi-channel).
Overall, setting aside what I presume will be a minor firmware update to fix the ERG spikes, this seems like the modest upgrade that you’d expect with the ‘Plus’ naming. I wouldn’t expect any existing Tacx NEO Bike owners to upgrade to this, but the nicely executed handlebar design might be enough of a change to appeal to new buyers when comparing models. Though, hopefully we’ll see Garmin/Tacx reconsider and offer that as an upgrade to existing V1 owners
With that – thanks for reading!
Found This Post Useful? Support The Site!
Hopefully you found this review useful. At the end of the day, I’m an athlete just like you looking for the most detail possible on a new purchase – so my review is written from the standpoint of how I used the device. The reviews generally take a lot of hours to put together, so it’s a fair bit of work (and labor of love). As you probably noticed by looking below, I also take time to answer all the questions posted in the comments – and there’s quite a bit of detail in there as well.
If you're shopping for the Tacx NEO Bike Plus or any other accessory items, please consider using the affiliate links below! As an Amazon Associate I earn from qualifying purchases. It doesn’t cost you anything extra, but your purchases help support this website a lot. Even more, if you shop with TPC (The Pro's Closet), you'll save $40 on purchases over $200 with coupon code DCRAIN40! The Pro's Closet has been a long-time partner of the site here - including sponsoring videos like my cargo bike race, as well as just being an awesome Colorado-based company full of good humans. Check them out with the links below and the DCRAIN40 coupon!
And finally, here’s a handy list of smart bike accessories that most folks getting a smart bike for the first time might not have already:
There's no better bang for your buck in getting Zwift (or FulGaz/etc) on your big screen TV than Apple TV - it's the primary way I Zwift. Even if you don't have a 4K TV, the 4K version has more powerful graphics than the base, worth the extra $30.
Basic Trainer Mat
This is a super basic trainer mat, which is exactly what you'll see me use. All it does is stop sweat for getting places it shouldn't (it also helps with vibrations too).
I use Apple TV for Zwift the vast majority of the time, but also just for watching YouTube/Netflix/etc on the trainer. The Apple TV remote sucks though. This $8 case fixes that, it's a silicone strap that makes it easy to grab, but also has a strap to easily place on the edge of your handlebars. Boom! Note: Not compatible with 2021 Apple TV Edition.
Honeywell HT-900 Fan
I've got three of these $12 fans floating around the DCR Cave, and I frequently use them on rides. They work just fine. Sure, they're not as powerful as a Wahoo Headwind, but I could literally buy 20 of them for the same price.
Lasko High Velocity Pro-Performance Fan (U15617)
One of the most popular trainer fans out there, rivaling the Wahoo Headwind fan in strength but at a fraction of the price. It doesn't have smartphone/ANT+/Bluetooth integration, but it does have secondary outlets. I've been using it, and a similiar European version lately with great success (exact EU variant I use is automatically linked at left).
This desk is both a knock-off of the original KICKR Desk, but yet also better than it. First, it's got wheel locks (so the darn thing stays put), and second, it has two water bottle holders (also useful for putting other things like remotes). I've been using it as my main trainer desk for a long time now and love it. Cheaper is better apparently. Note: Branding varies by country, exact same desk.
This is by far the best value in trainer desks, at only $59, but with most of the features of the higher end features. It's got multi-tier tablet slots, water bottle holders, non-stick surface, adjustable height and more. I'm loving it!
And of course – you can always sign-up to be a DCR Supporter! That gets you an ad-free DCR, access to the DCR Quarantine Corner video series packed with behind the scenes tidbits...and it also makes you awesome. And being awesome is what it’s all about!
Thanks for reading! And as always, feel free to post comments or questions in the comments section below, I’ll be happy to try and answer them as quickly as possible. And lastly, if you felt this review was useful – I always appreciate feedback in the comments below. Thanks!