Today Polar has announced the Vantage V2, a touch bit over two years since they announced the initial Polar Vantage V & M series watches. Since that time those units have gotten numerous firmware updates (and even a Titanium version). However, earlier this year Polar signaled that it was the end of the line for the original Vantage V & M units in terms of new features.
That played out with the Polar Grit X watch this past April, essentially taking a Vantage series watch and adding more hiking/outdoors related features, as well as new nutrition and energy source related metrics. Thus, this brings us to the Vantage V2, which essentially takes all those new Grit X features and adds a couple more related to performance testing. Also, music controls and new watch faces. It is by all definitions a modest update, both in terms of software – but also hardware, with only slight changes to the watch’s exterior design – albeit a significant reduction of weight.
I’ve been using it for a bit now, and I’ve got a pretty good idea on how well it works. Also, it helps that it’s virtually identical to the Polar Grit X in terms of underlying hardware and software – a watch I often throw into comparison lineups (such as over most of my workouts in the last few months).
Once I’m done with this media loaner Vantage V2 I’ll get it sent back to Polar, like all the previous ones. Just the way I roll. If you found this review useful, you can hit up the links at the end to help support the site, or you can become a DCR Supporter!
What’s New:

First things first, unlike last time Polar announced the original Vantage series, there’s not two versions at this point. Last time there was the higher end Vantage V, and then the mid-range Vantage M (with less features, lesser materials). This time, it’s just the Vantage V2 at the higher price point. The slightly less expensive Polar Grit X doesn’t (in my opinion) really replace the much cheaper Vantage M. But more on that later.
To begin, let’s talk about what’s changed between the Vantage V and the new Vantage V2:
– Added Running Performance Test: Determines your VO2Max using an increasing RAMP-test variant for running
– Added Cycling FTP Test: Standard 20/30/40 minute cycling FTP test added
– Added Leg Recovery Test: Designed to determine whether or not your legs are recovered
– Added New Test Hub in Polar Flow: Consolidates test results online
– Added New Dashboard View to show weekly training totals
– Added Ability to customize which dashboard views you see (dashboard views are the watch widgets)
– Added Music Controls for Phone: Controls music on your phone (there’s no music storage on Vantage V2)
– Added Hill Splitter: Counts your hill ascents/descents automatically mid-workout and in app afterwards
– Added FuelWise: Gives nutrition alerts mid-workout for carbs and hydration (separately)
– Added Energy Sources: Shows breakdown of carbs/fats/protein usage post-workout on watch/app
– Added Weather: This is a widget of sorts that shows current weather on the watch
– Added 100-hour GPS tracking mode: This power-saving mode reduces track points to increase activity length
– Added Komoot route integration: Officially ‘turn by turn’ navigation, though the definition of that is a bit loose
– Increased waterproof spec from 50m to 100m, to match the Grit X
– Changed the optical HR sensor: Notably changing the colored LED types it uses, matches Grit X
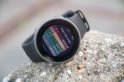
– Changed display to that of the Grit X, so it’s a tiny bit sharper and crisper, with deeper blacks
Phew, got all that? Good. Now, Polar did say the following are coming before the end of the year:
– Power-based training workouts on Polar Flow (to transfer to the watch)
– Zone Pointer for power/speed zone-based workouts
Ok, now, let’s start using it.
The Basics:

While you’re likely buying the Vantage V2 for its sports prowess, we’ll start off here with some of the basics of the watch. Things like activity tracking, sleep tracking, the new music control, as well as other usage bits.
The watch has both a touchscreen and five dedicated buttons. The buttons on this follow the same elongated look as the original Vantage series, which is a bit of a bummer as I really preferred the better grip texturing on the edges of the Grit X. In any event, there’s also a slight vibration each time you press a button.


In addition to navigating with the buttons, you can also use the touchscreen to move around the menus. I find the touchscreen acceptable, but hardly the pinnacle of touch screen technology on a wearable. It does often decide to go and set alarms and airplane mode when I’m in the shower, but I haven’t had issues beyond that (despite the never-ending rain here in the Netherlands). Perhaps my shower is just more shower-power-full.

The Vantage V2 uses a propriety strap design, which unfortunately means that unlike the Polar Grit X, you can’t just swap it out for any old strap you want (the Grit X uses standard 22mm straps). While Polar is offering a few replacement colors with the Vantage V2 series, it’s a bit peculiar to not just switch to the same standardized design as the Grit X.

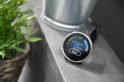
On the backside of the Vantage V2 you’ll find the new optical HR sensor. This arrangement is identical to that of the Grit X, and is seen as an evolution of the original Vantage V Precision Prime sensor arrangement. With the original Vantage V there were 9 LED’s (5 green, 4 red, + 1 unused yellow). But in the V2 there’s now 10 LED’s used (5 red, 4 orange/yellow, 1 green).
Typically speaking, the different color LED’s handle different skin colors better. Also, some colors tend to go deeper than others which are better at more shallow depths. Polar has long toyed with different LED’s to try and increase accuracy, slightly more so than most companies do. Unfortunately, as we’ll see later on, I’ve seen a regression in accuracy with both the Vantage V2 and Grit X sensors compared to past Polar sensors.
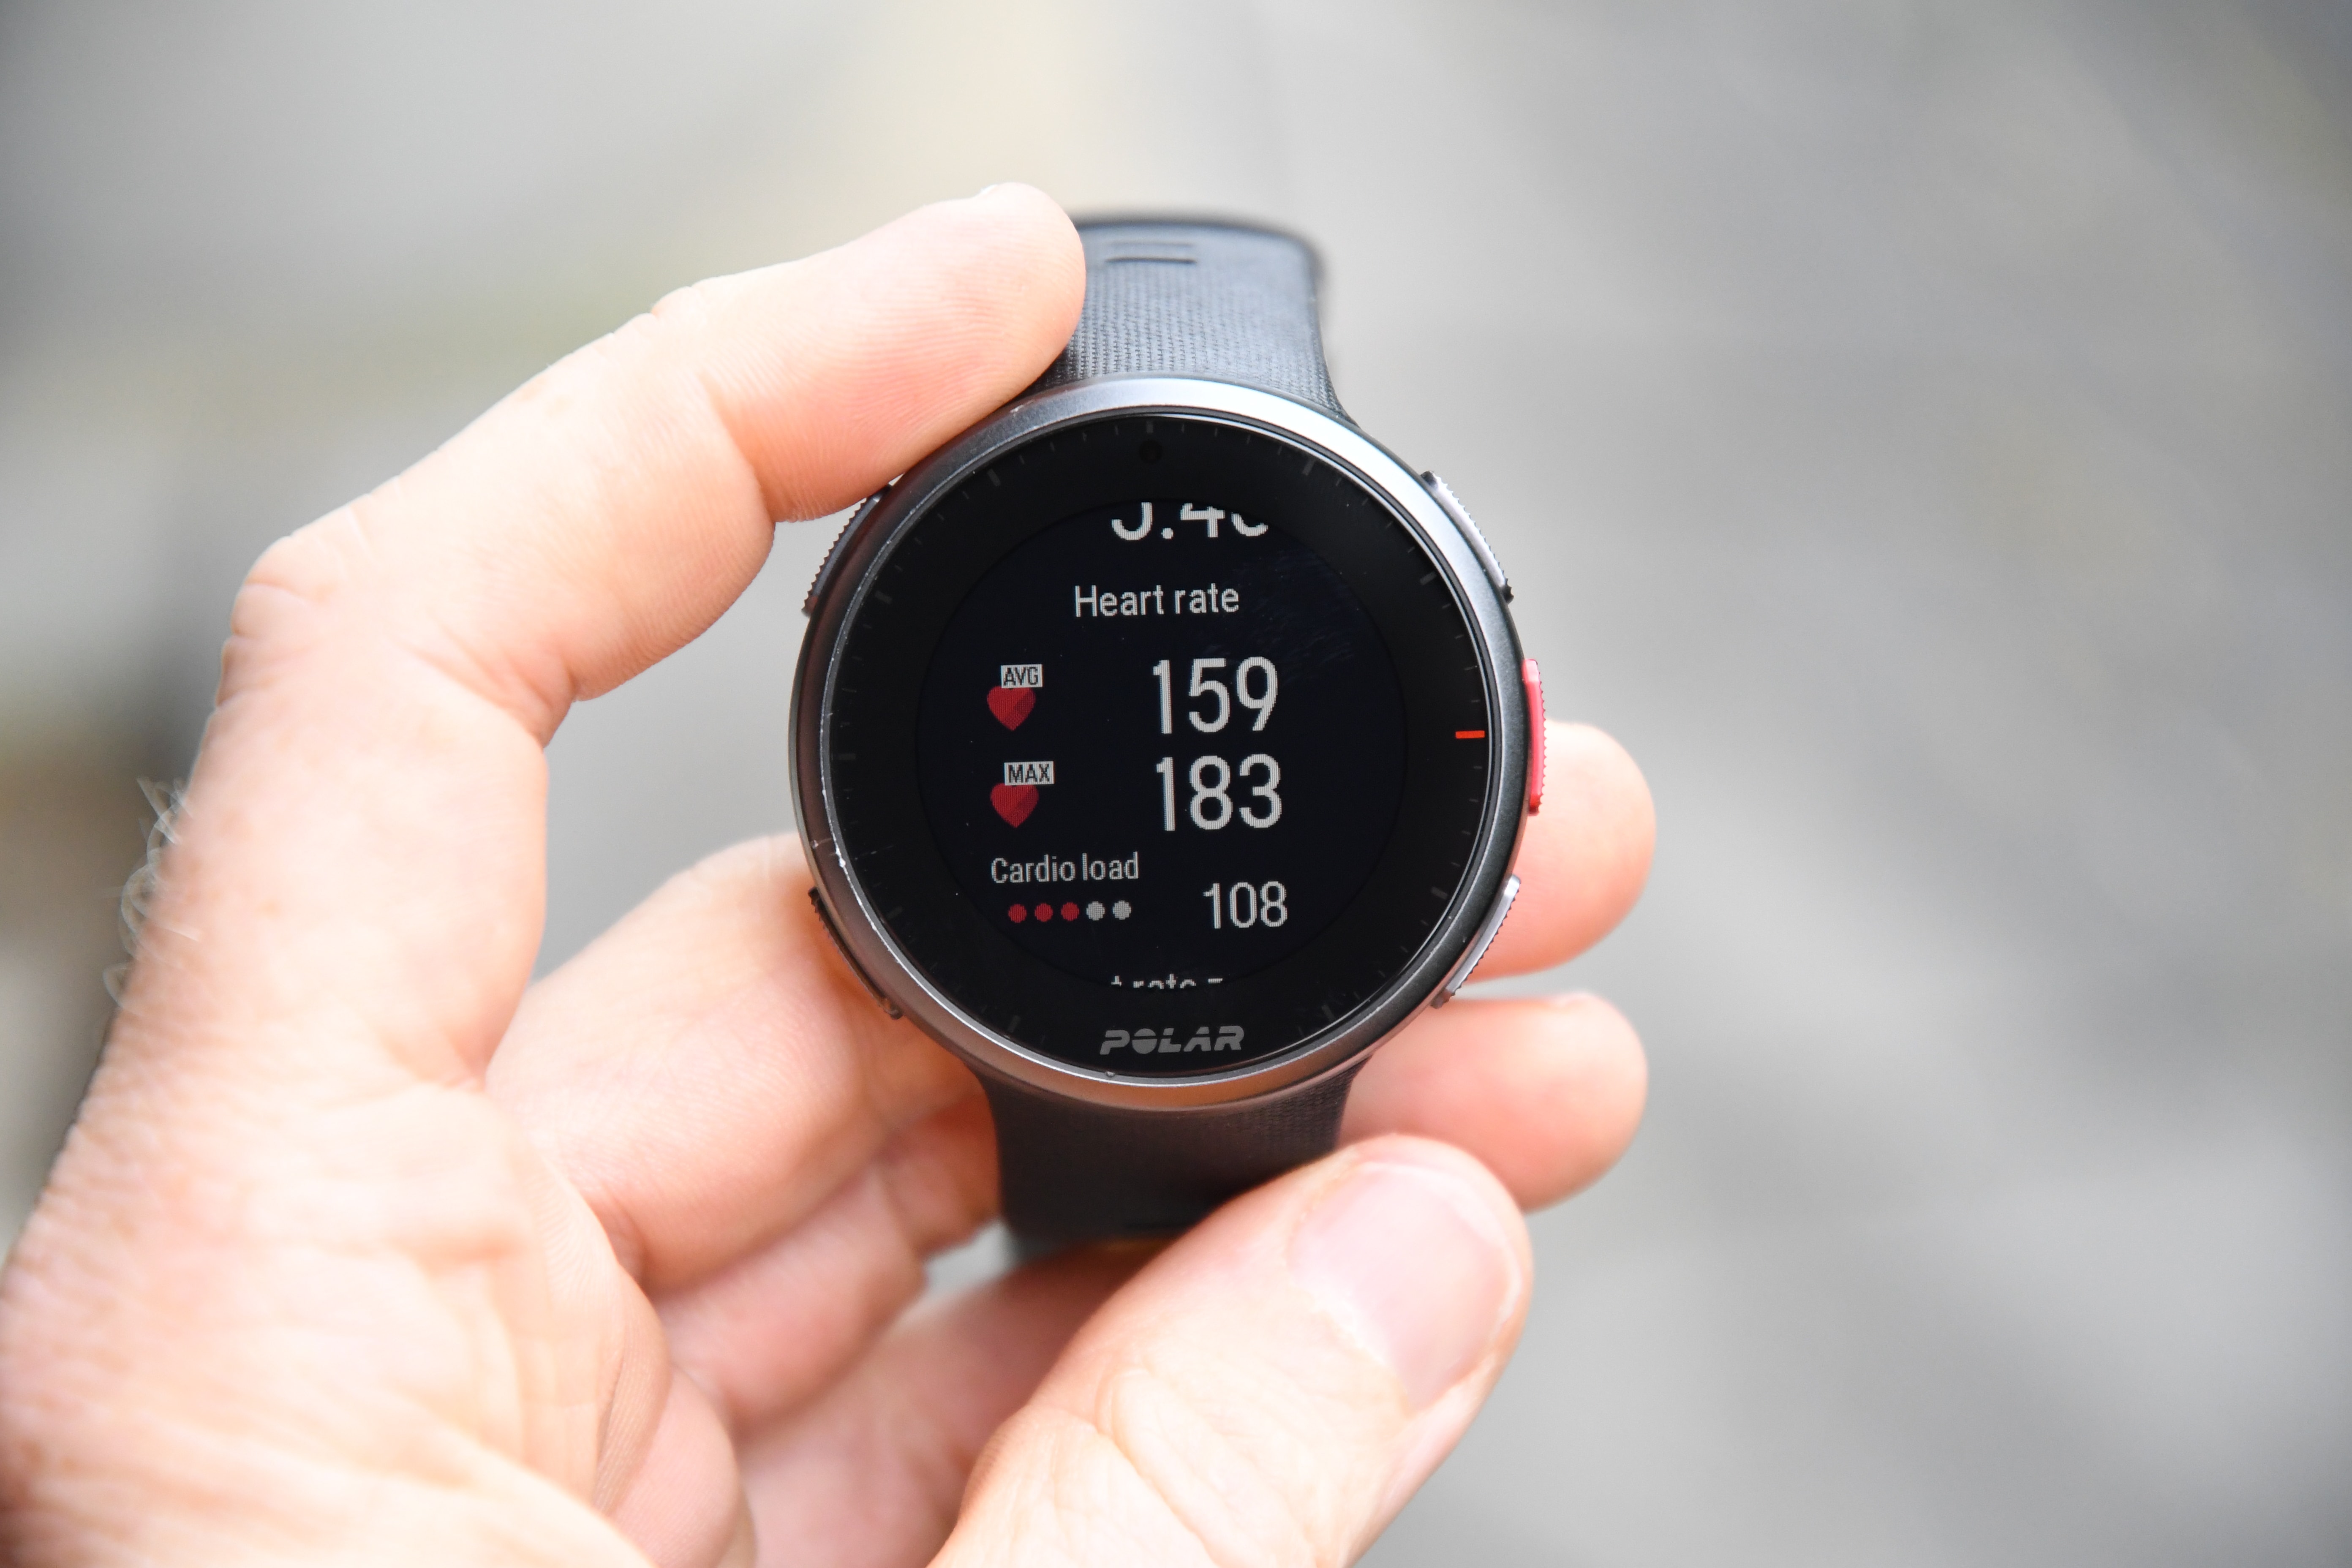
Meanwhile, the Vantage V2 introduces tweakable dashboard pages. These pages are often called widgets by other companies, but basically allow you to get consolidated information in other areas such as sleep, steps, or workout history. And Polar has introduced a few new pages here, as well as the aforementioned ability to select which pages you actually want displayed. Starting in no particular order, here’s the heart rate one:

This will show the time, as well as your current heart rate. You can then tap it to get more details about your heart rate for the day:

Your heart rate is recorded 24×7 as well to Polar Flow, so you can dive into a given day and look at the stats there:

There’s then the sleep one. Which apparently thinks my sleep was compromised. Kinda odd since I slept mostly OK, and then doubled down on that by going back to sleep with a nap for three hours after I got the kids to school.

Again, you can tap to get more details there:

And again, you can dive into sleep metrics from within the Polar Flow app as well:


Generally, with the exception of today, I do find Polar’s sleep data pretty consistent with how I’m feeling on any given day, as well as consistent with the actual times I went to sleep and woke up. Unfortunately, like Garmin, Fitbit, and others, Polar does not support tracking of naps (and today being the ultra-rare occasion I managed to get one).
Next, there’s FitSpark, which basically offers you daily suggested workouts to keep your current fitness level. There’s different types of workouts such as strength, cardio, and supportive (typically flexibility-focused). And it’s smart enough to generally first offer a cardio or strength workout, and then after you’ve done that, it’ll give you a supportive workout. But more on this later in the Sports section.

Next, there’s the weather page, which consistently tells me how terrible the weather is in Amsterdam. Today was no exception:

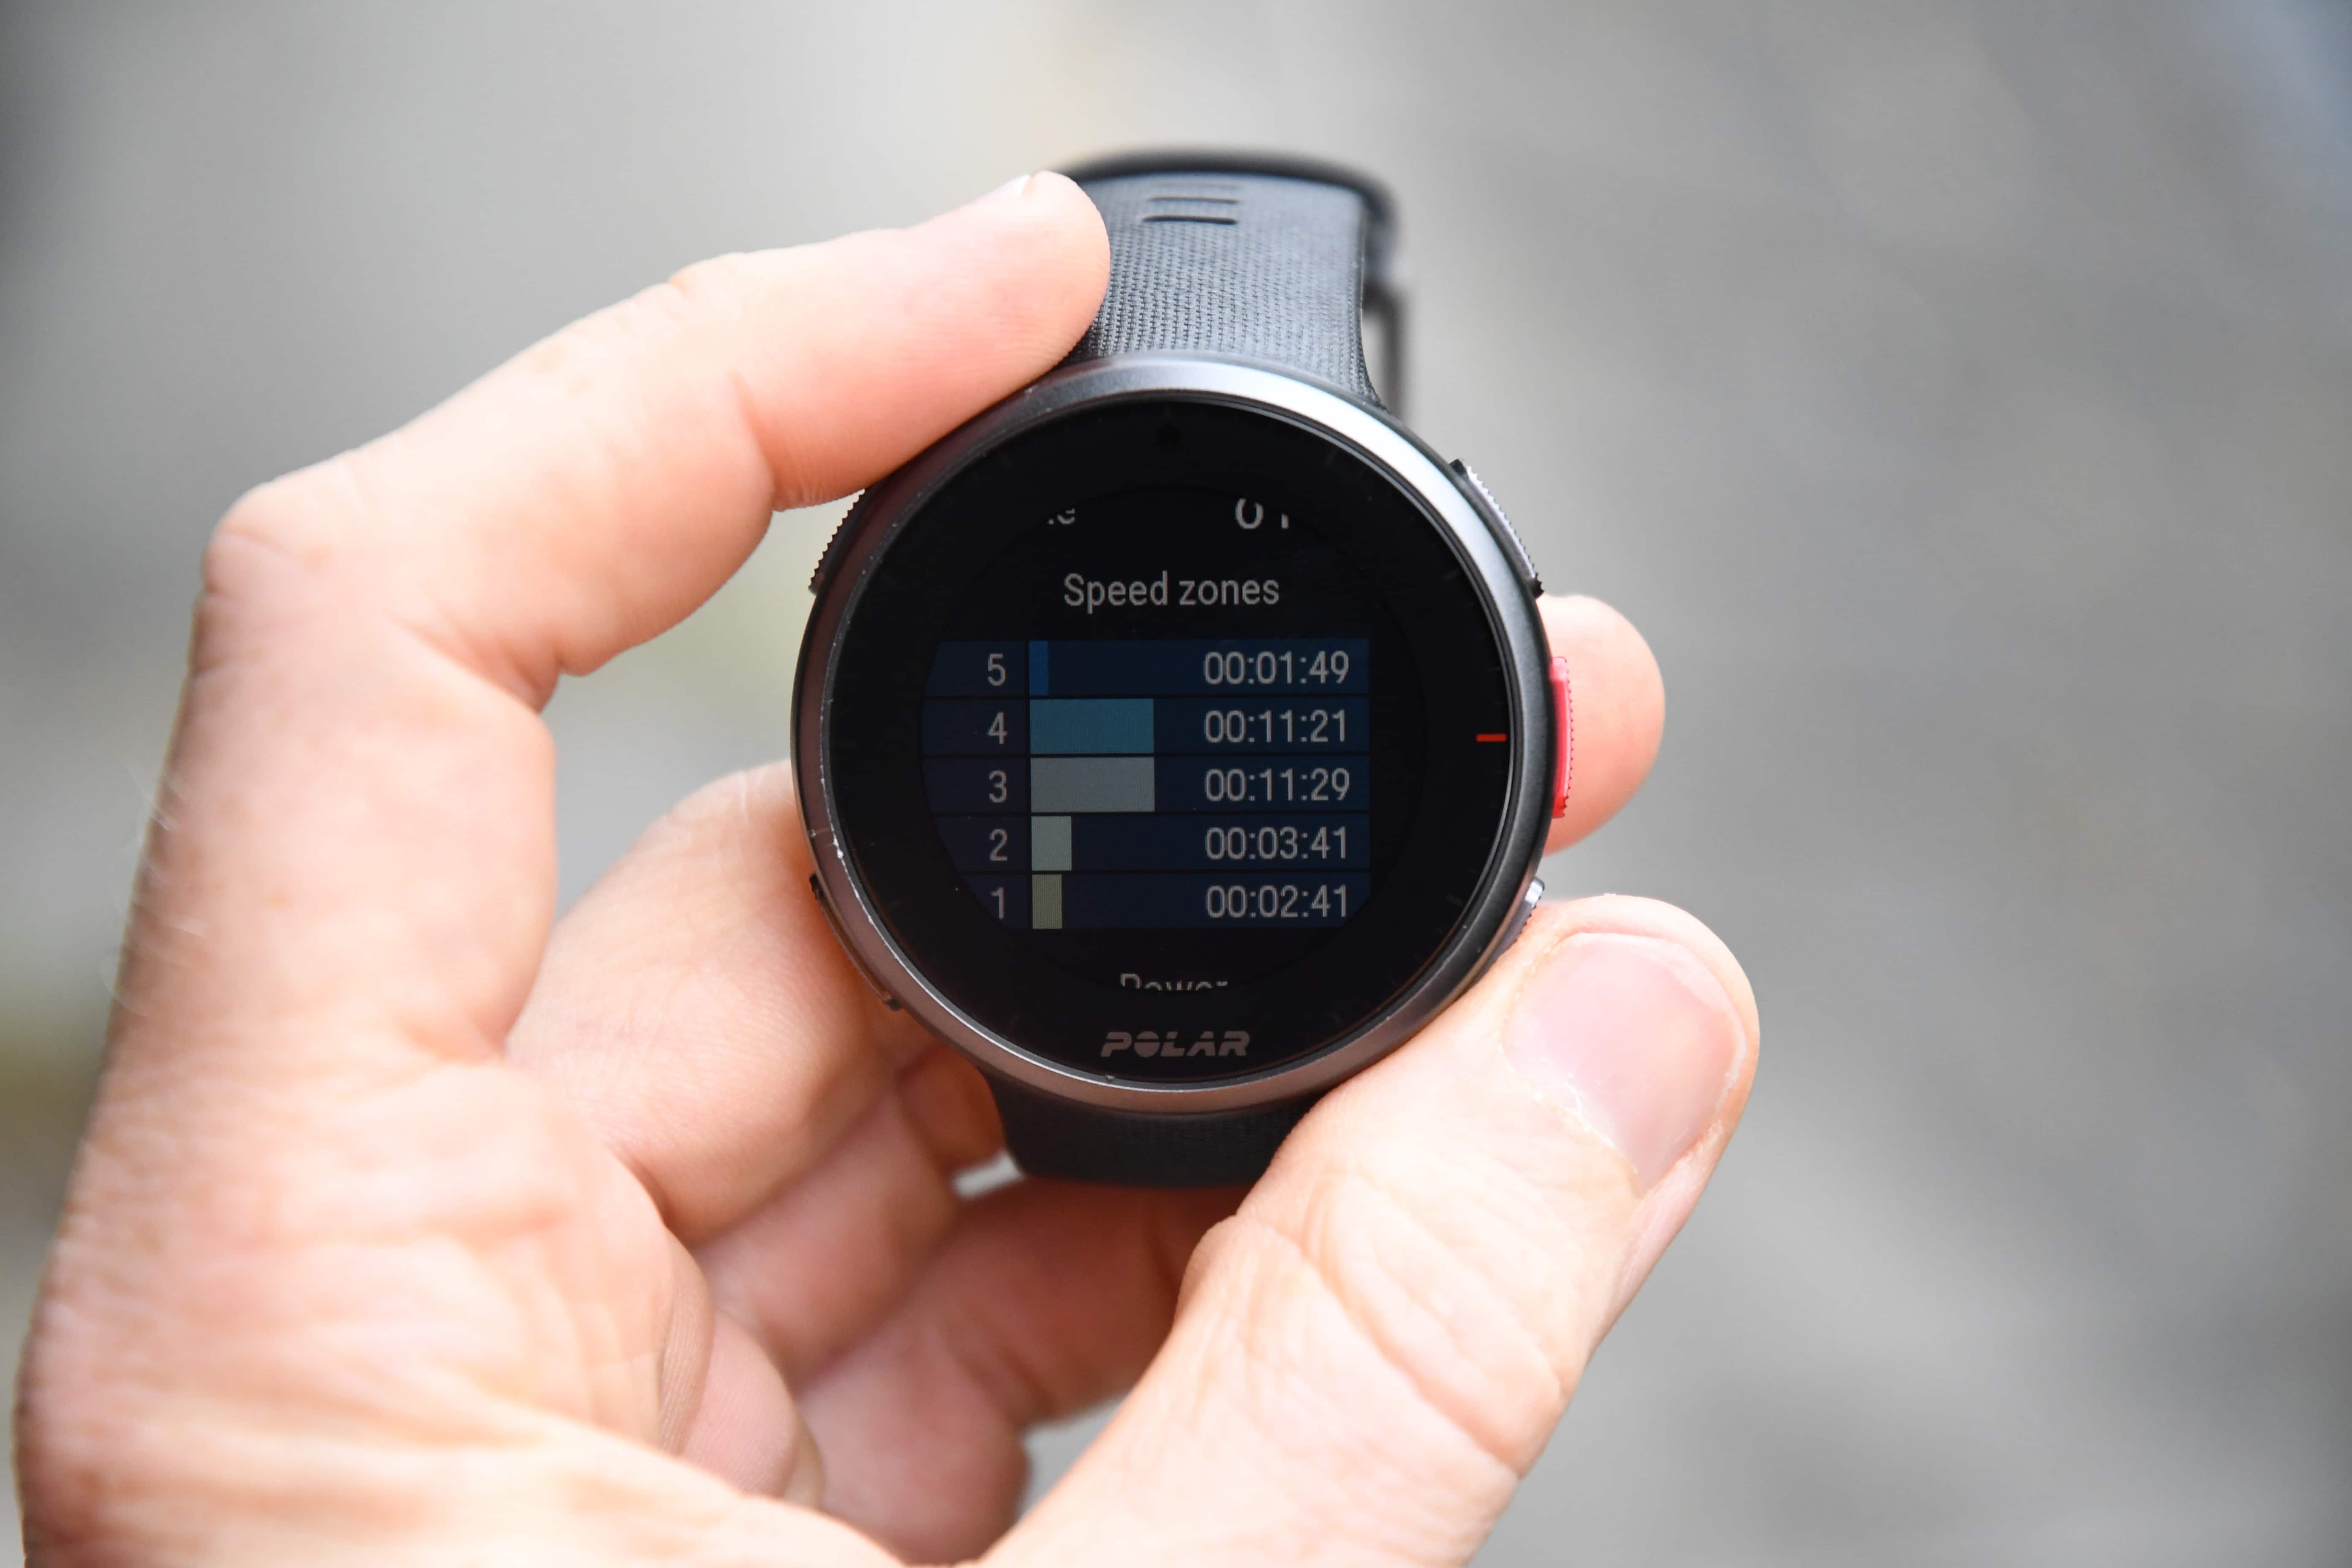
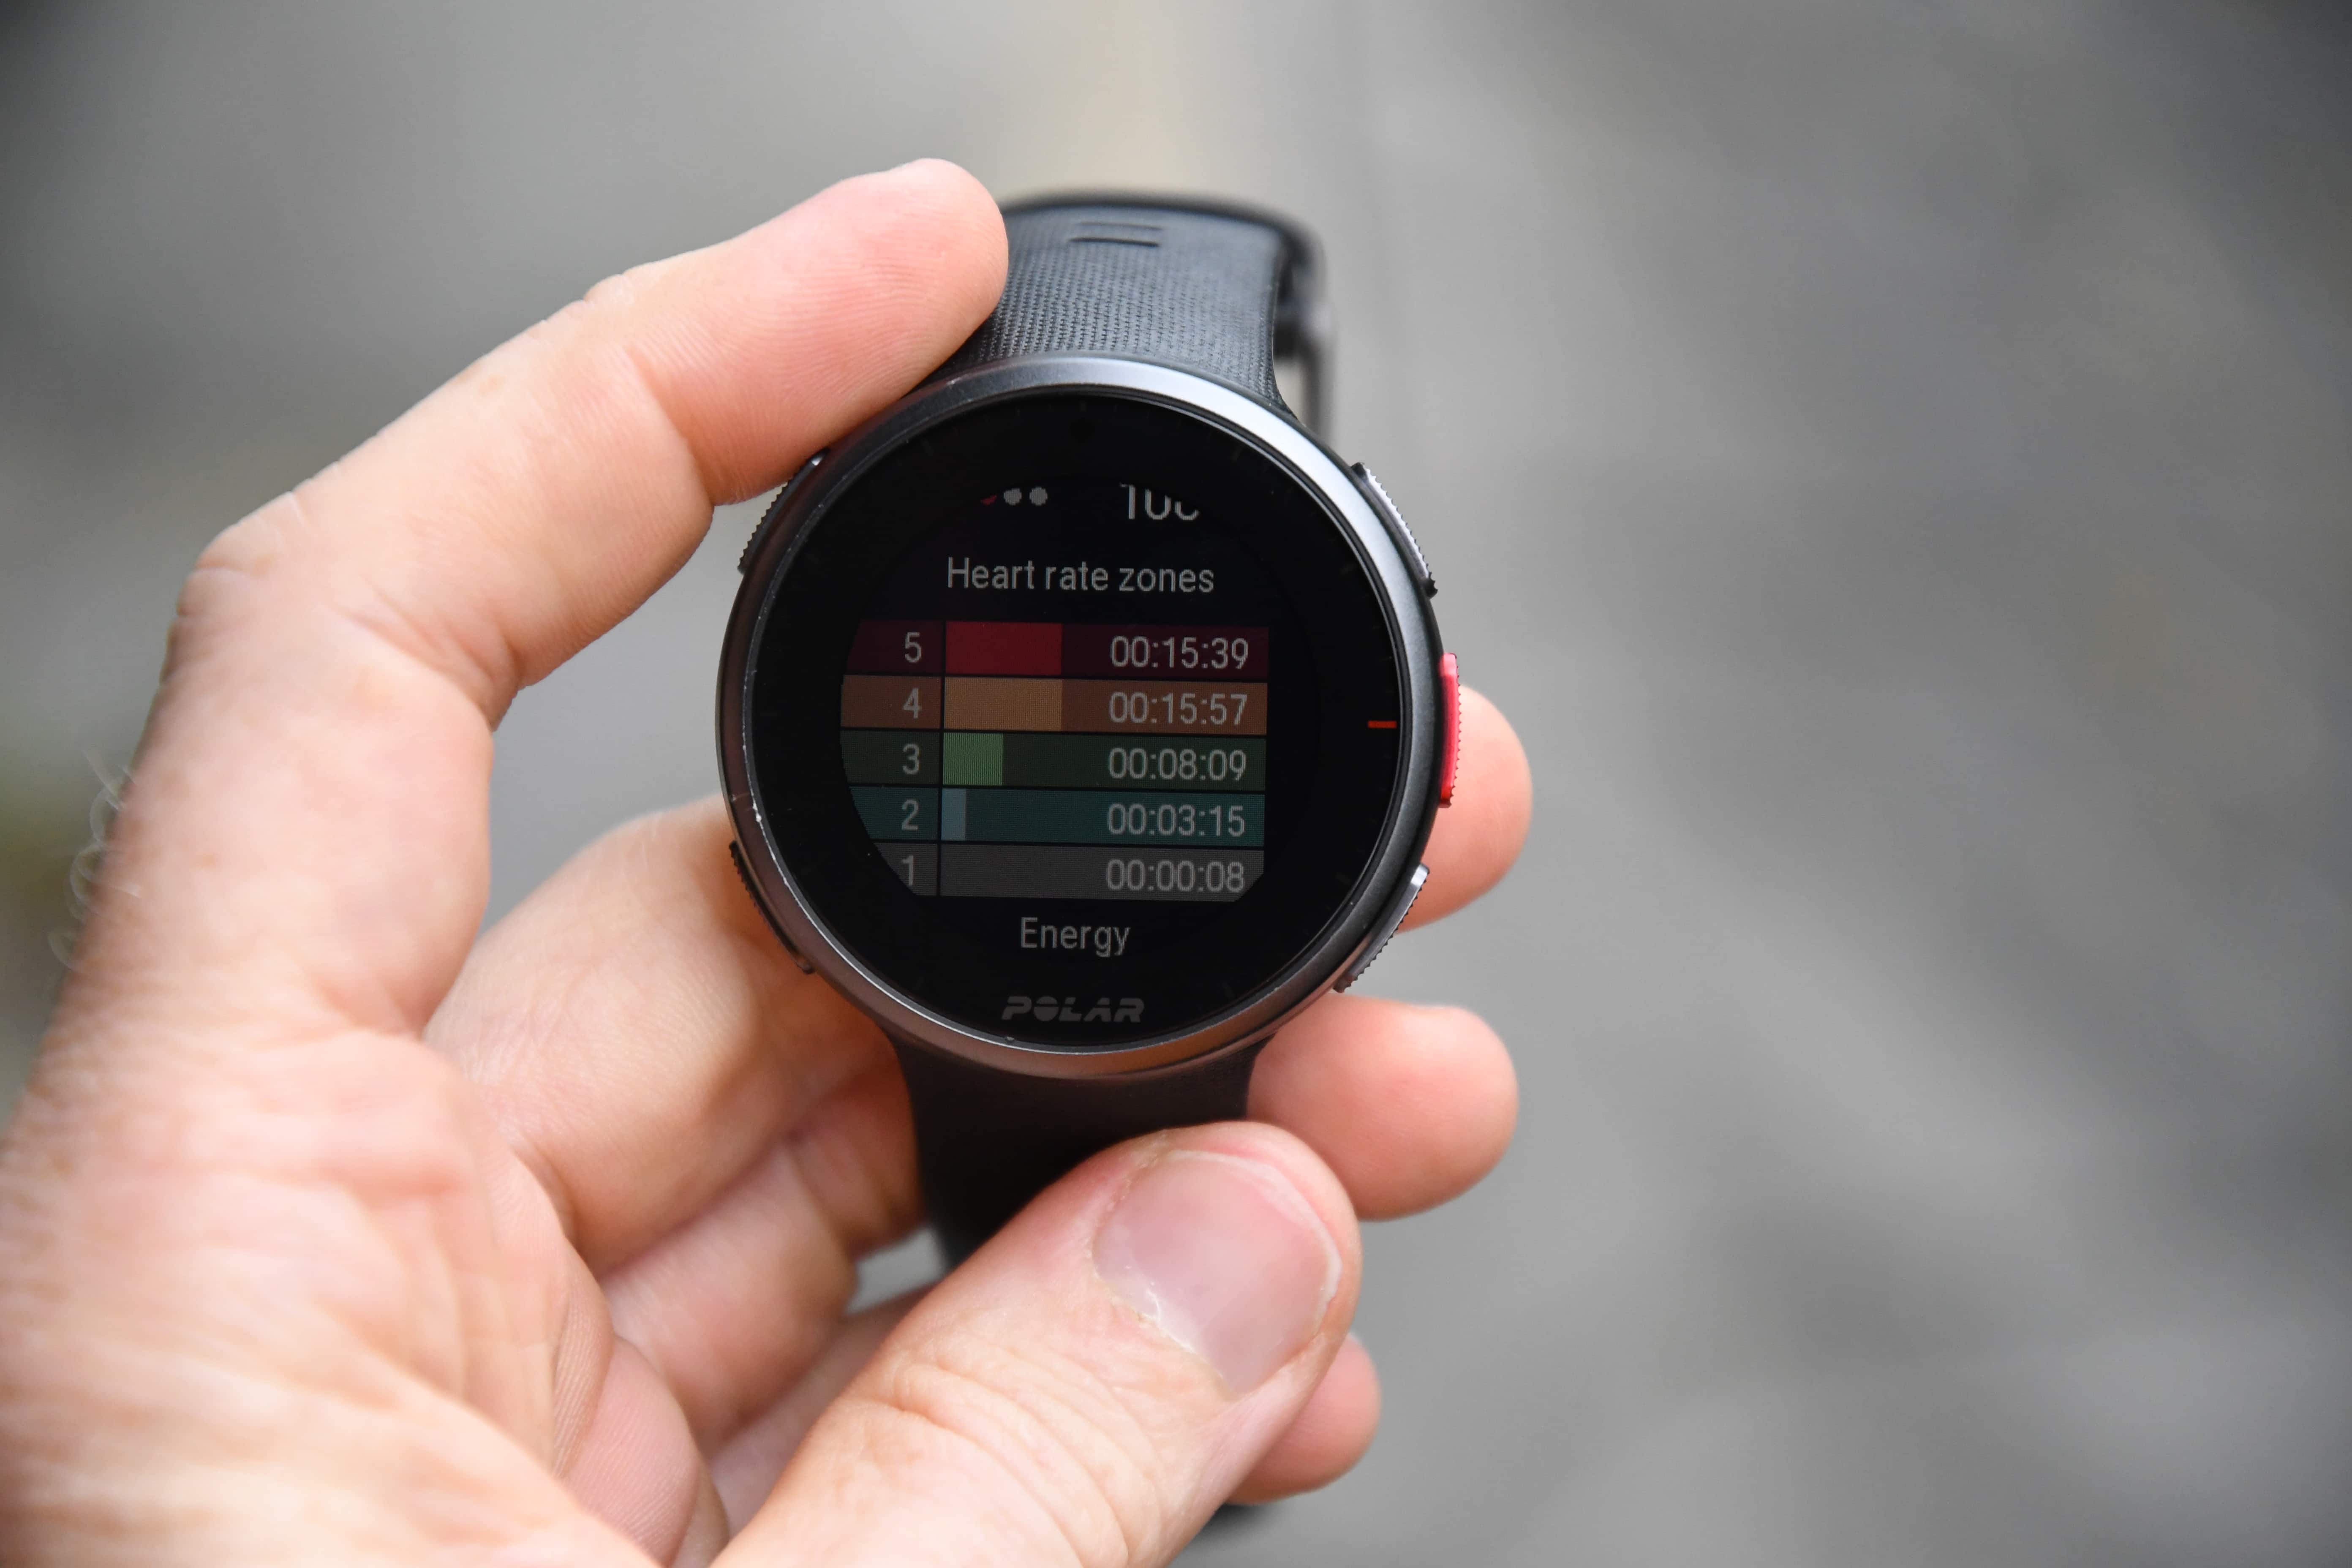
After that, we’ve got the new weekly training summary page, which specifies training time per HR zone. In this case you can see it towards the end of my week:

Or here, at the beginning of the next week:

You can tap this to then get more details on the zones, distances, calories, and activities, allowing you to see each activity that contributed to that weekly total.

Next we’ve got steps. This is pretty straightforward, and shows your steps against the daily goal, as well as once you dive into it, your active time for the day.

Then finally, there’s the training status page. During new watch release season (as it is right now), this stays pegged on ‘Overreaching’. Once things settle down it’ll slide back to productive or some other less-appealing status.

You can tap to open it and get more on the strain and tolerance aspects (which I’ll also talk about later in the sports section).
Now, shifting back out of the widgets, if you press the bottom left button it takes you to a menu to go through starting a new workout, Serene (breathing exercises), Fueling, Timers, Watch Face Views, Tests, and Settings.

Starting backwards, Settings is where we can tweak things like pairing of sensors, the changing from Nightly Recharge to Recovery Pro (more on that in sports section), as well as a slew of general watch settings.


One of the new Vantage V2 options is the ability to choose your dashboards (or, watch face views as its called here).

This allows you to deselect items you don’t care about.

Then there’s the Serene guided breathing functionality, which gives you permission to sit on the couch and do nothing. This should realistically be my most favored feature of the watch.

You’ll configure the overall duration as well as the inhale/exhale lengths, and it’ll walk you through each step.
Rounding towards home in the basics section is smartphone notifications. These non-interactive alerts will be sent from your iOS/Android phone whenever apps that you’ve configured on your phone send a notification. They could be Strava, Twitter, Facebook, Tinder….anything. You can’t reply to them though, so it’s just one-way in nature.
Last but not least is the new music control feature. This allows you to control music on your phone. You’ll access this by swiping up from the bottom of the screen. You’ll need to have a music app open on your phone for this to work. The Vantage V2 does *NOT* have any music storage on it. So it’s *ONLY* controlling music already on your phone.

Somewhat neat though is that it does pull the correct icon for the app it’s controlling, so you can see the Spotify icon shown there – a nice touch. I can skip/rewind/pause/play on the main screen, as well as tap the volume icon to increase volume:

There’s no other options beyond that, such as selecting songs or such. It’s just iterating through what you have – pretty similar to what buttons on a pair of headphones would do.
Finally, just for the sake of clarity, there’s no NFC payments on the Polar Vantage V2 currently. I say ‘currently’, because somewhat interestingly that’s the very specific wording that Polar’s PR team used when discussing it – specifically saying (an exact quote) “No, there are currently no payment solutions included in Polar Vantage V2.”, whereas on other music storage related questions, it was a much more definitive ‘No’.
Still, it’d be incredibly difficult for them to implement contactless payments without having a partner of some sort doing the leg work, and I’m not aware of any mainstream/widespread partners that aren’t already tied up in exclusivity agreements with other wearable companies.
Sports Features:

When it comes to the sports and workout aspects of the watch, the Vantage V2 is the culmination of everything in the original Vantage V series, combined with the new features of the Polar Grit X. That means you’re gaining previously Grit X only features like Hill Splitter & Fuelwise, but you’ll retain the Vantage V series specific features like Recovery Pro, which aren’t in the Grit X.
For this section I’m going to focus mainly on the core workout/training load/recovery tracking features. Whereas for the new performance testing type features, that’s in the next section. Meanwhile, for the features that were introduced with the Grit X, I’ll briefly cover them here, but I dive into things like FuelWise & Hill Splitter in far more detail in the Grit X post. Nothing has changed with the Vantage V2 in that respect.
To begin a workout you’ll either single-press the lower left button, or long-hold the middle right button. No matter your route, you’ll eventually get yourself to this page that shows one of many sport modes (and the current sensor/satellite status).

The Polar Vantage V2 can store up to 20 sport profiles in it, each with its own set of customizations – things like your data pages or data fields.

The customization of sports covers everything from the exact data fields and pages you want shown, or the frequency of update rates. You can also change zone limits for pace, power, and heart rate. As well as automatic laps and more. These can be changed on both Polar Flow online, or via your smartphone app:

For example, it’s in here that you can tweak the data field shown on your watch, or following that the GPS & Altitude settings.


These changes are synced to your watch anytime you sync your watch, which can be done via Bluetooth Smart to your phone, or cable to your computer. Usually the sync process takes about 20-40 seconds via computer, or about 30-60 seconds via Bluetooth Smart. It does tend to take longer though if you haven’t synced in a while and it needs to sync GPS cache information, firmware updates, or Haribo stockage levels.
Back on the watch, once you’ve selected a sport mode, it’ll go off and find GPS (if an outdoor sport), as well as lock optical HR (if using the optical HR sensor).

The Polar Vantage V2 supports the same sensor types as the Vantage series. These are:
– Bluetooth Smart Heart Rate Straps
– Bluetooth Smart Cycling Power Meters
– Bluetooth Smart Cycling Cadence & Speed Sensors
– Bluetooth Smart Running Footpods
– Bluetooth Smart Running Power Meters (it also includes a built-in one)
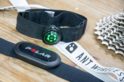
From a power meter standpoint, I tested a few different ones. I had (mostly) success with both a Quarq DZero power meter & Elite Tuo trainer, but oddly was unable to pair to a PowerTap P2 pedal set. A Tacx NEO 2 was fiddly, and it wouldn’t find a Wahoo KICKR 2018. Polar has a list of guaranteed power meters, but realistically that list is far less extensive than their competitors. There’s no support for ANT+.
You can however pair multiple types of sensors to the watch easily via the sensors menu. So you can effectively save multiple bikes’ sensor configurations, or multiple heart rate straps, etc…
If you press the upper-right button while on the sport screen you’ll get a mini-settings menu of sorts. This is where you can select routes, do back to start navigation, add countdown/interval timers, or load structured workouts. It’s also where you can configure power-saving settings to get the longer 100 hours of GPS battery life.

Back at the main sport menu though you’ve got the sensor status menus, which will turn to green when it locks optical heart rate and satellite, as well as any paired sensors will also change color too (such as a paired HR strap or power meters). Above the time it’ll show how much GPS time is remaining on the current battery charge and settings.

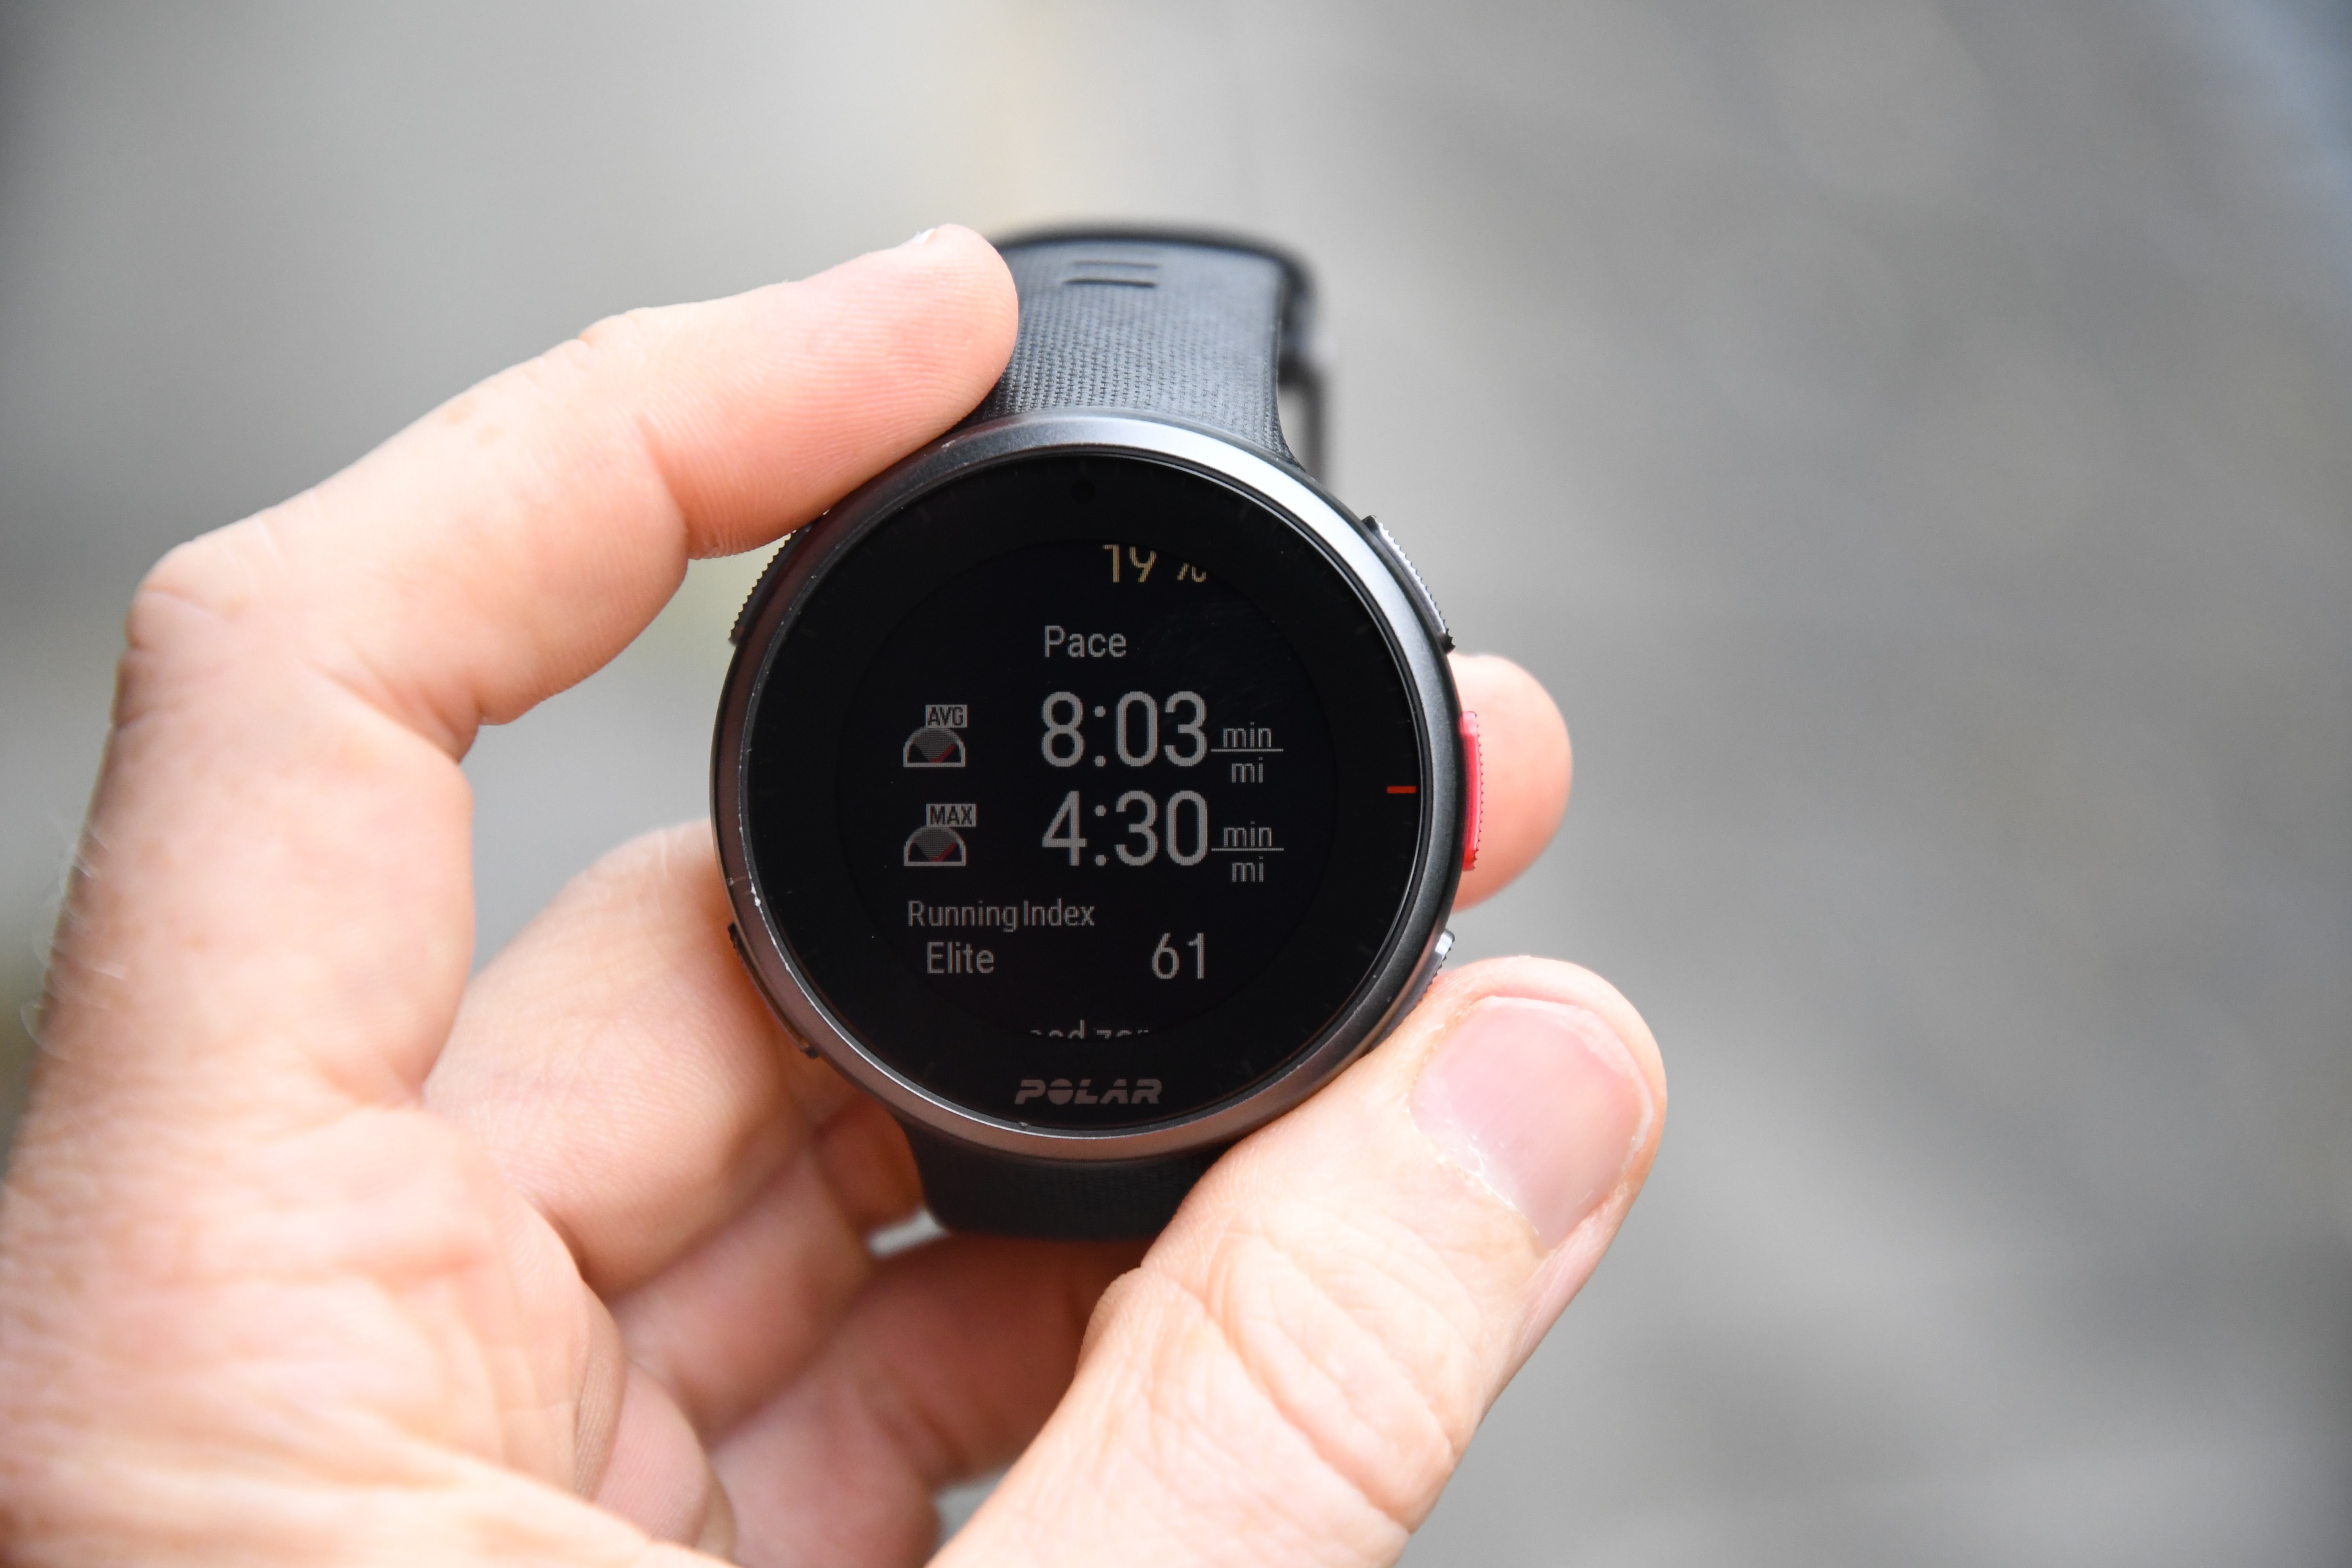
To begin recording, tap the center right button. At this juncture you can now iterate through your data fields to see various metrics from whatever workout it is you’re doing. So if you’re outside you’ll see things like speed/pace, distance, etc… More or less all the usual goodness you’d expect from a GPS watch.


Now with the Vantage V2 you’ll get running power natively from the wrist, just as with the original Vantage V series (and the Grit X). It uses the accelerometer in the watch on your wrist to make those calculations. That has its pros and cons as I’ve outlined previously. So that’ll show up automatically as a data field, as well as later in your workout data files (shown as wattage below – 522w in one of my track workout intervals):

Now if on a run where there’s hills involved, you can use Hill Splitter to track each rep of the hills. The way Hill Splitter works is that it automatically detects when you’re ascending or descending a hill and will give you the time ascending/descending, as well as length of the climb/descent. It’ll also count each ascent/descent. You’ll see that on the screen each time you go up/down, as well as summarized afterwards on the watch and then on the app. If you’re on flat ground (as I am for 99.99% of my runs here), this is what it looks like:

This page is non-customizable, but can be added to your watch. As you start going up a climb, once you hit around the 8-10m of elevation gain marker, it’ll trigger an ascent, and the screen changes to the below screen which shows how far you’ve run/ridden/hiked up that climb as well as the duration. And of course you see which number hill this is (e.g. 1st ascent). Note that Hill Splitter does NOT reference any saved course/route data. It’s purely off the cuff style hill counting. That has its pros and cons. It’s great for impromptu weeknight training sessions where you just pick a hill and start doing repeats without creating/loading a course. Inversely, it’s not terribly useful in the Alps or something where you’ve got massive climbs and want to know how much ascent is left – it won’t tell you that.
Now, I dive into all the pros and cons and nuances of Hill Splitter here in my Polar Grit X review with an entire dedicated section to it.
Speaking of routes however, you can transfer routes into the Polar Vantage V2. These can be created on Polar Flow itself, or, via Komoot. Though do note with Komoot you’ll need to have that region activated in Komoot (the point where the route starts), which might involve paying Komoot depending on if you’ve activated any other regions already.
Assuming you sort all that out, here’s what the routes look like in Polar Flow using the sync option, you can see the Komoot ones with the icons in the middle, and then on the right which ones are synced to my watch:

Note: The Strava icon you see above is for Strava Live Segments, and regrettably not Strava Routes. Though, if you scroll down, you can see those Segments synced:

In total you can sync 100 ‘things’ to the Vantage V2. That could be a combination of Segments, Routes, or Workouts.
To access Routes or Workouts (called ‘Favorites’ in the Polar watch menus), you’ll crack open a sport mode, and then hit the settings icon:

You’ll then see the listing above of Routes (or Favorites), and can choose one. After selected, it’ll show up on the left side of the sport mode screen:

For routes, they show up as breadcrumb trail data. There’s no mapping, or terrain data shown within the Polar Vantage V2 for routes, just the line of your track. As you approach a turn you’ll get an arrow indicating that a turn is coming up, and the direction of the turn. And if you go off trail you’ll get a notice of that too.
Now, once you’re done with all your heavy breathing and finish your workout you’ll get a summary screen of data, and in the case of this particular running workout – that includes running power too from the wrist:


You’ll also note the new Energy bits that came in from the Polar Grit X, which show the breakdown of energy consumption during this workout:


If you then work backwards into things, you can use the Fueling functions (also added from the Polar Grit X) that give you either smart or manual carb alerts, as well as drink reminders:


For example, with Smart Carb alerts you’ll specify the duration of the workout, and the gel packet details, and it’ll figure out and remind you how often you should be taking it:

I dive into the FuelWise & Energy sources in far more detail here in this post section.
In any case, all of the workout data is loaded to Polar Flow online (both smartphone and online website):

Further, it’ll automatically be synced to various Polar Flow partners, like Strava or TrainingPeaks, depending on how you’ve got your account configured.
Next, let’s say you can’t decide what workout you want to do – Polar’s got FitSpark for that. Basically, the idea behind this is to keep you doing something. First it’ll skew towards Cardio or Strength workouts, and then after that it’ll finish up with a Supportive workout (which is core/stretching typically). You’ll see this on your home watch face dashboards:

And when you open it up it’ll give you different options to suffer through. Now, these aren’t tied to any specific training plan. It’s just a variant of ‘Workout of the Day’, with the singular goal to keep you moving, but ideally doing so in a way that doesn’t get you injured.

Depending on the type of workout you choose it’ll give you the specific steps and guidance in the watch itself. There are cardio-focused running workouts with different intensities. And then there are core type workouts too, and for those, it’ll give you the specific moves to do, along with animations and text for each one:


Again, keep in mind the goal of this function isn’t to be an endurance trail running coach. It’ll suck at that. Instead, the goal is actually more applicable to date: To keep you fit and push you slightly with mostly varied workouts across disciplines (such as flexibility and strength).
However, if you want the endurance side of things you’ll want to look at the training load bits. You’ll remember earlier on we saw the new weekly training summary, right?

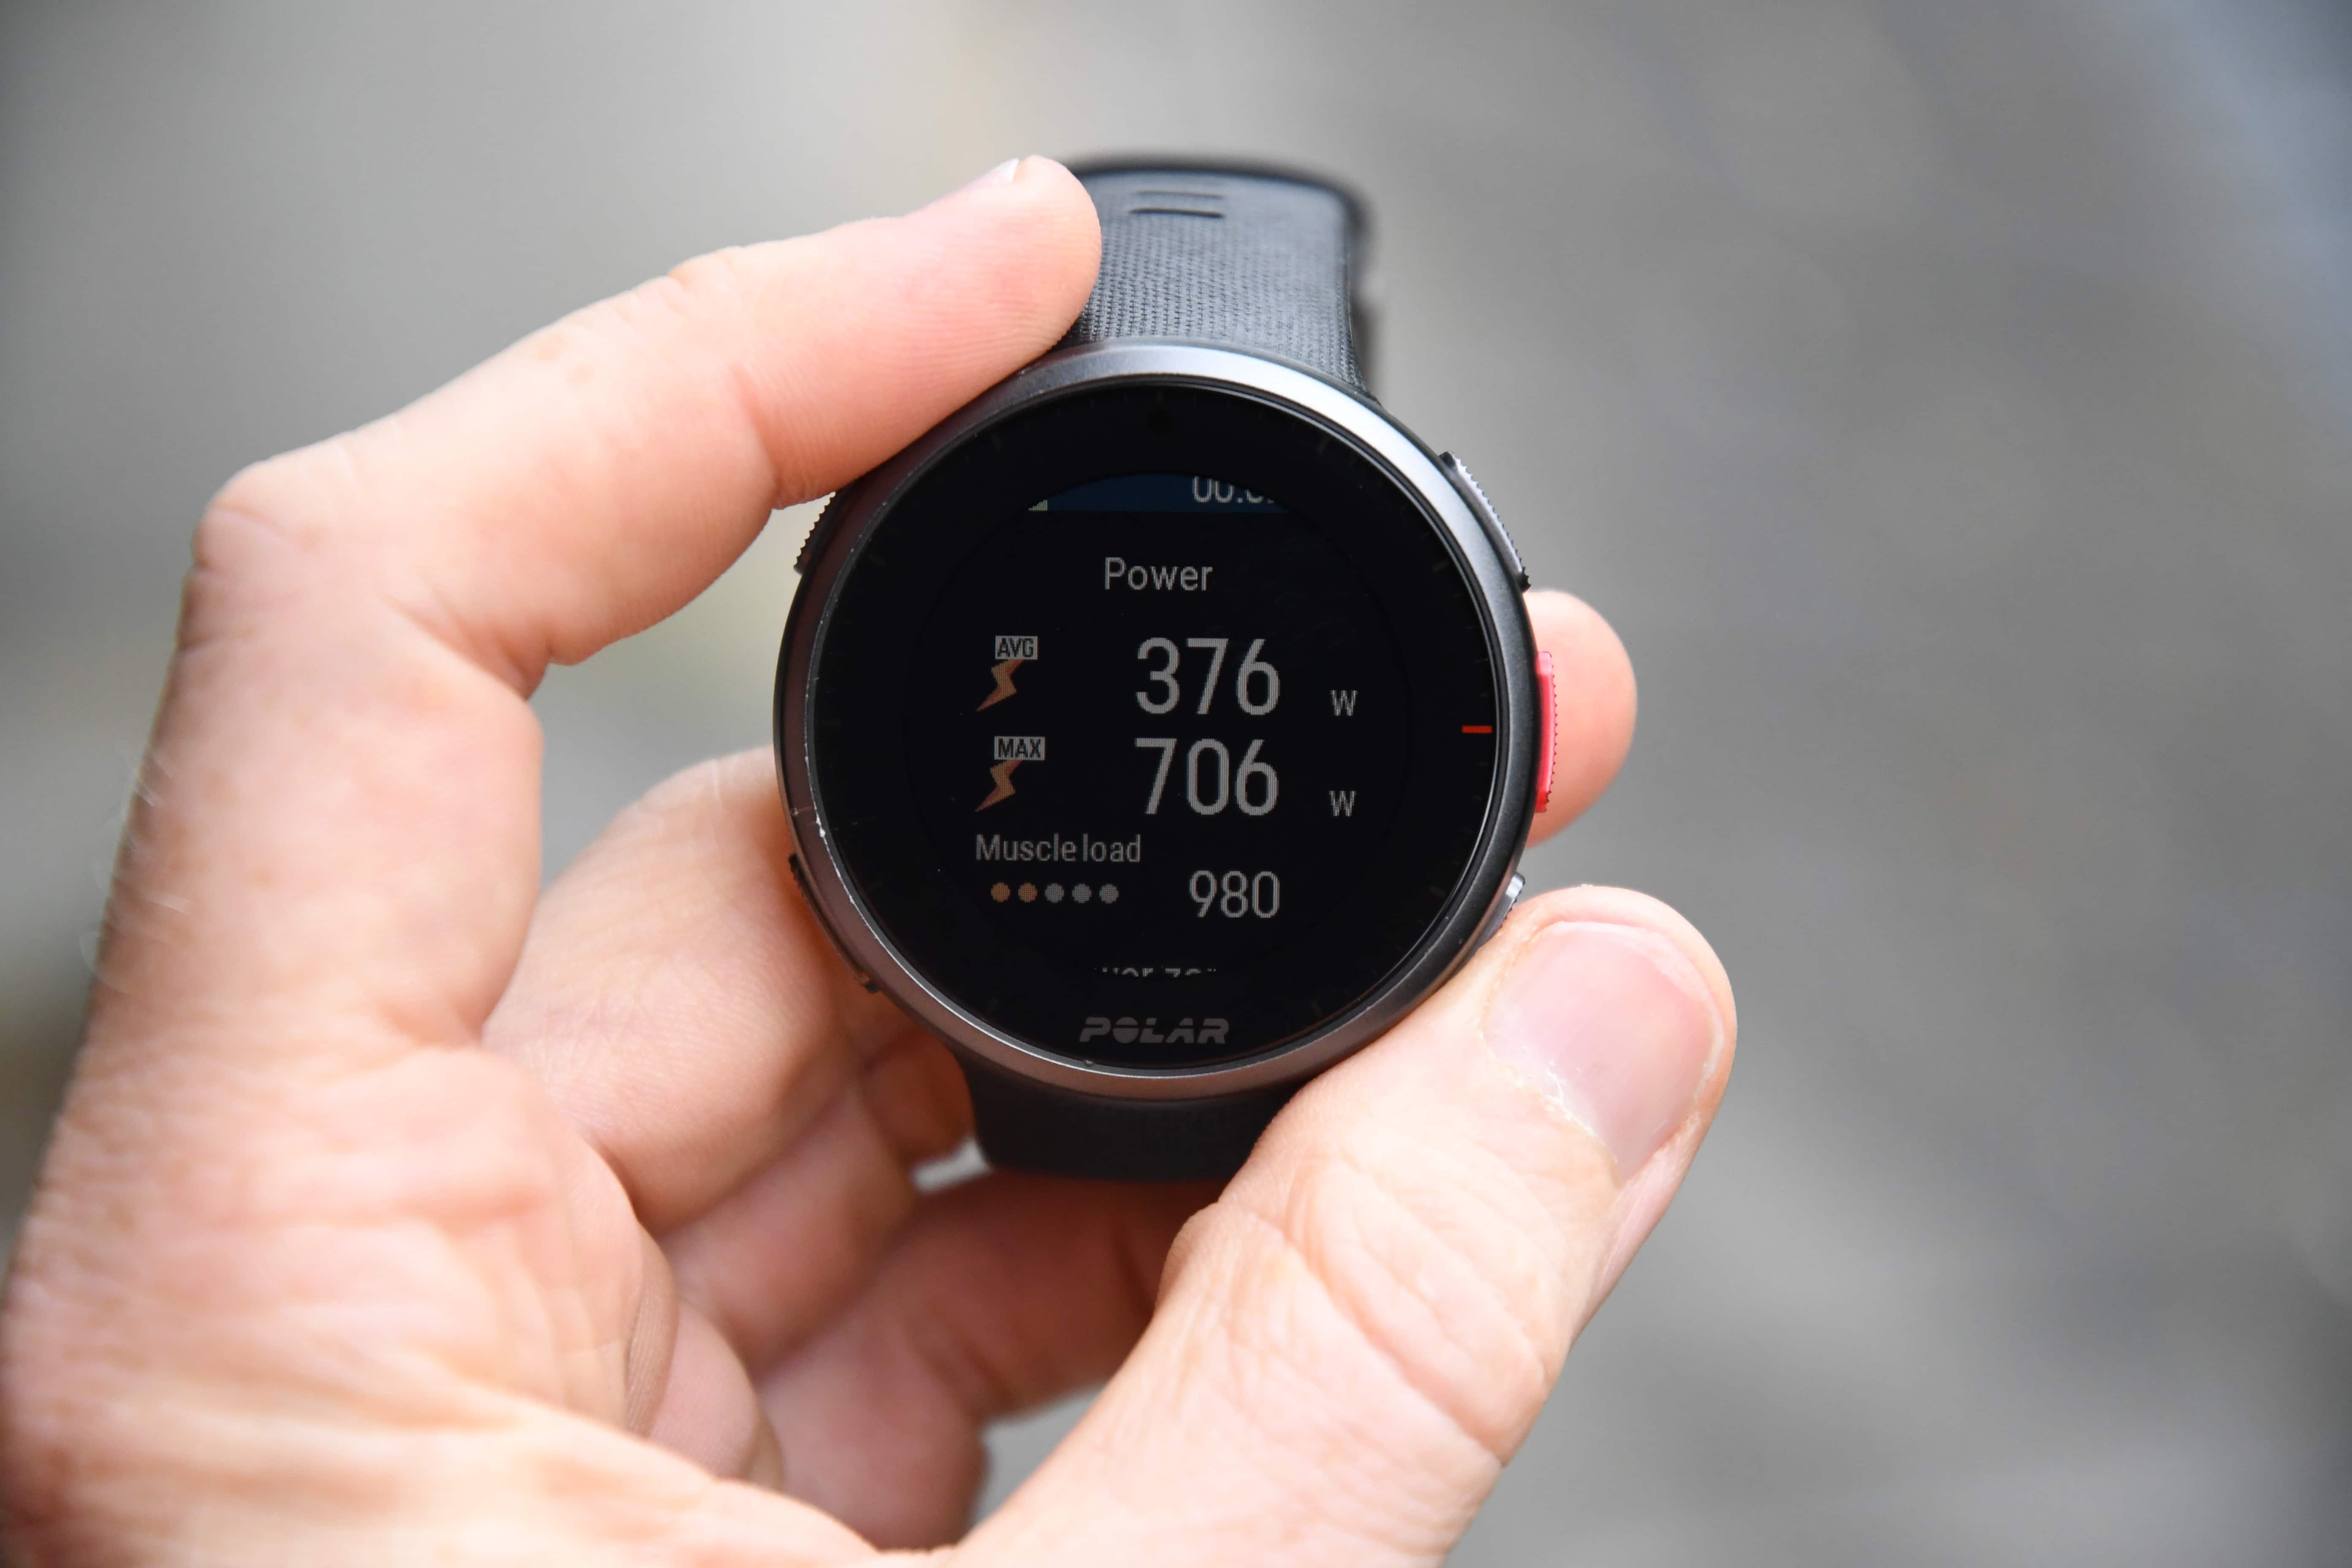
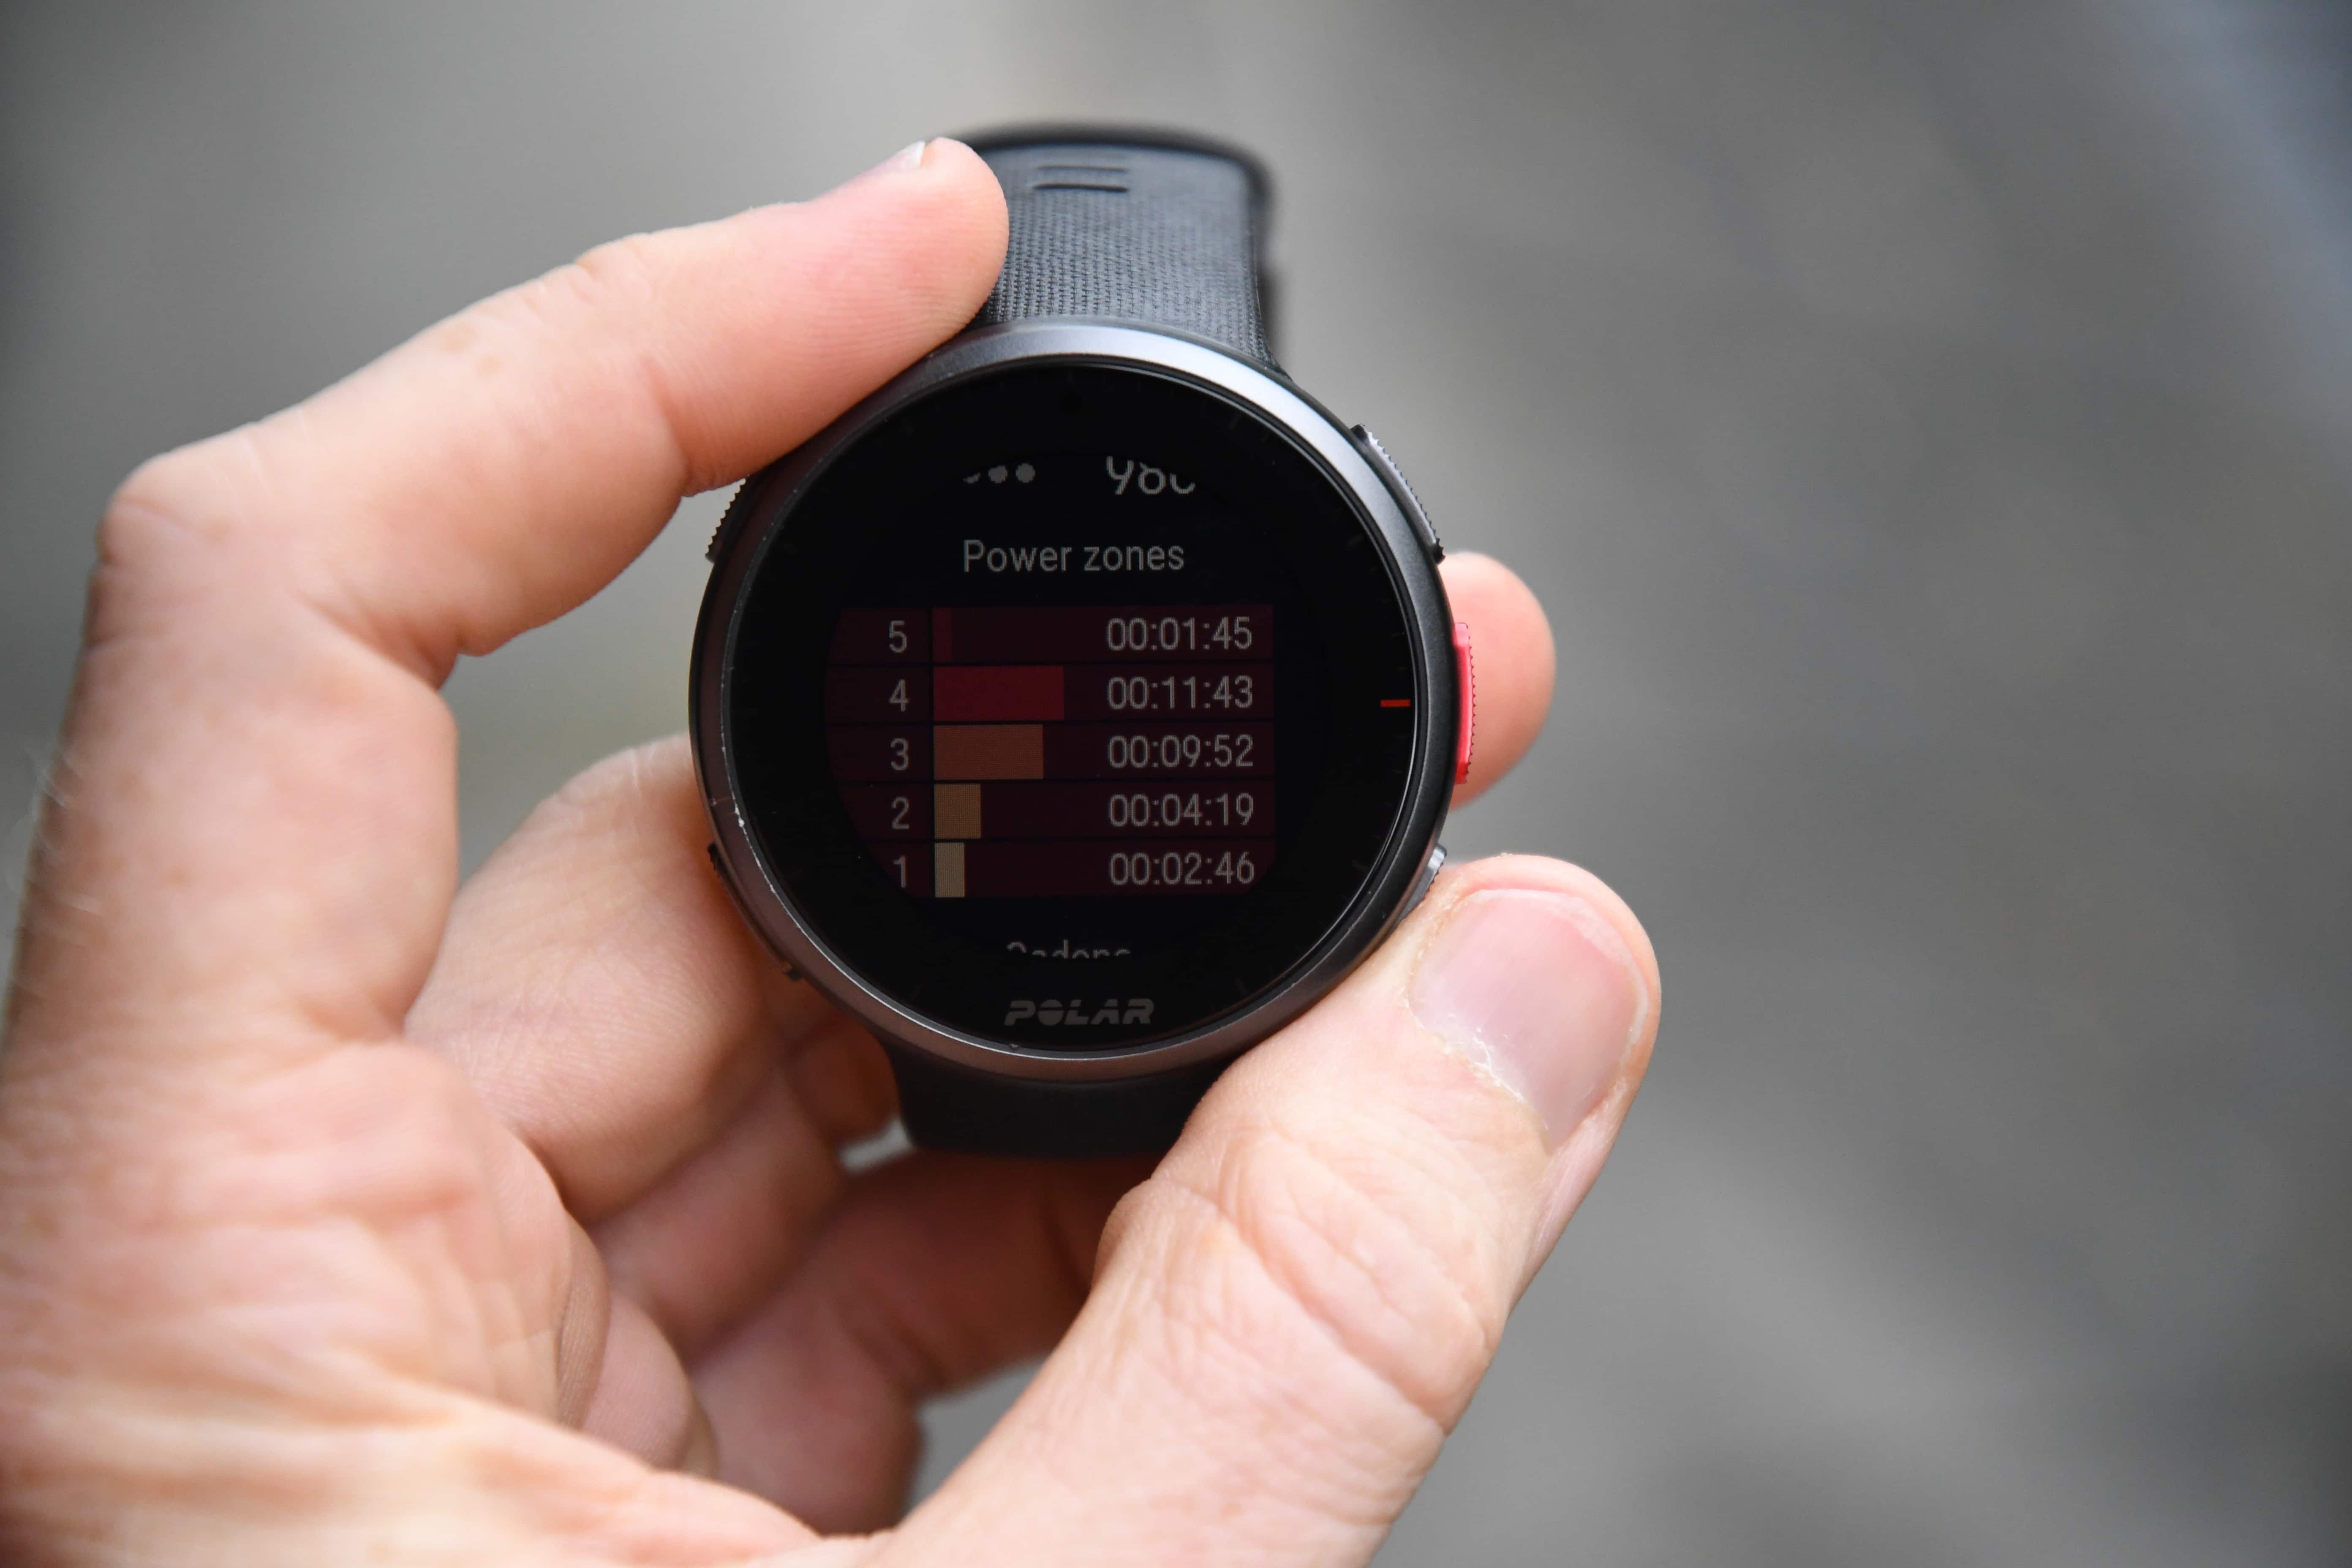
Well, atop that there’s the Polar Training Load Pro. There’s basically three components to this: Training Load, Cardio Load, and Muscle Load.
Starting with Cardio Load Status, which shows you whether you’ve got too much or too little load. You can see this from the watch face, and then dive into it to get more details:


Strain is a metric showing the average daily load from the past 7 days. Whereas Tolerance shows your average daily load from the past 28 days. So basically you can look at those two values and see the ratio as part of the number above it, such that it keeps things in check. Go too high, and you’re prone to injury. Too low, and you’re not going to make gains. In the middle, and life is grand.
You can also view this on the Polar Flow app:


Now, when it comes to Recovery Tracking, you’ve got a binary choice between using ‘Nightly Recharge’, which is mostly focused on sleep tracking, or using Recovery Pro. You have to select one. By default it’s Nightly Recharge, but you can change it in the settings:

However, selecting Recovery Pro means that you’ll need to break out that chest strap at least three mornings per week and do the Orthostatic test. The chest strap is required for more accurate HRV related data that’s used for making the recovery determinations.
Somewhat handily, you can even specify exactly which mornings it’ll prompt you to do this:

In my case, I just used the Nightly Recharge function – though that too will require at least three days of activity before it starts giving you results. So just keep that in mind. I showed those bits up in the basics section.
Ok – with all of the core sports functionality covered, let’s talk about the new performance related tests.
New Performance Testing Tools:
With the Vantage V2, there are three new performance tests included, and one new platform to consolidate all the tests Polar offers. The new tests are:
– Running Performance Test
– Cycling Performance Test
– Leg Recovery Test
This is in addition to the previously existing tests of:
– Orthostatic Test
– Fitness Test
We’ll just dive right into them, with the Running Performance Test. This test technically has two components to it, but both are geared towards determining more accurately your VO2Max. While previously (and still currently), Polar has the Running Index score it gives you after each run, this is apparently a bit more accurate.
To begin the test you’ll want a flat place that’s ideally without any obstacles/obstructions/stoplights/etc… In other words, you don’t want to stop, and, as I noticed during my test – you really want to avoid any sharp angles, as it’ll impact GPS accuracy a bit which in turn could cause issues in the test. To select the test you’ll open the ‘Test’ menu, and then choose the Running Performance test”


The test begins with a 10-minute warm-up. While Polar specifies Zone 1-3 on the screen, in reality the app is only programmed to work for Zone 1, so it alerts you constantly that you’re annoyingly out of zone during the warm-up because you’re not still in Zone 1.

Then, you’ll start the main portion of the test, where basically it ever so slowly makes you go faster and faster. This section should last about 10-20 minutes, but needs to last a minimum of 6 minutes. You can adjust the starting pace for this portion of the test, otherwise it starts you off pretty slow (16:00/mile – basically a fast walk).
On the upper portion of the screen you’ll see the current target pace, below that your current actual pace, and your heart rate in the lower left. In the lower right are the current sub-maximal and Max HR targets.

The thing simply keeps marching faster and faster until you break. Remember, it’s less about the pace (or that point in time pace), but about your heart rate for that pace, and the build into that pace. So while my test yesterday ended at 5:48/mile, that’s because at that point I’d been running at an ever-increasing pace for 12 minutes. You can see the warm-up (WU) and test portions below, with the cool-down after that – and the build into it.

Afterwards it’ll give your running VO2Max score:

And some additional data related to that:


Now, a few things notable here. First, on my other runs last week using the Running Index scoring system I scored 63 for my VO2Max scores:


So, that’s quite a drop (way more than would normally be seen). Of course, 63 is higher than my highest ever actual lab tested value. Meanwhile, at the same time as I ran the VO2Max test with the Polar Vantage V2 (score 58), I also had a Garmin FR745 tracking my run. And it gave me a score of 57, without having to do any fancy test. That’s pretty consistent with what it gives me each workout (sometimes 58).
I’d say both values are in-line with my current fitness levels, maybe 1 or 2 below how I’d do on a well rested day (which, as you saw earlier in this post, this day was apparently not well rested according to the Vantage V2).
Next, there’s the Cycling Performance Test. Which, is basically an FTP test, and requires a power meter. In this case you can pick your poison of 20/30/40/60 minutes for the core test portion. Like any other FTP test, if you select a lower time, it’ll use an algorithm to extrapolate that to the full 1-hour timeframe.
And like the running test, it starts off with a warm-up period, although this one is 20 minutes. And also like the running test, while it says in the descriptive text you should build intensity and do some sprints, it never actually gives you any guidance for that.

Eventually you’ll get to the core of the test – the part that matters. Note that with both the running and cycling test, this won’t automatically start until you press to begin this section. That’s handy if you’re trying to get to a clean spot sans traffic lights or distractions. Once ready, you begin:

It’ll give your current power, as well as the average power for the time.
And unfortunately, this is as much as I can show you.
I’ve now taken the FTP twice in the last few days, and both times it failed. It, not me. The first time I paired it to a Tacx NEO 2 trainer, and as I started the main portion of the test dropouts occurred via Bluetooth Smart, and eventually it ended the test due to lack of data. Other units I was using weren’t seeing dropouts (via ANT+).
So on Monday I tried the test again. This time at the office (as opposed to home, in case wireless issues were a problem), and with a different bike on a different trainer. This time I paired it to the Quarq DZero power meter (which is on the approved list), and began. I completed the warm-up and began the main chunk of the test without issue:
Then, some 13 minutes into the painful part of the test, the connection dropped out, and the test also forcibly failed.

This sucked, because FTP tests are no fun – and further, you’ve set aside time for doing it, time away from a normally scheduled workout (including the lead-up to it).
Maybe this was a one-off, I don’t know. Polar says they haven’t had any reports of this happening elsewhere, and they’re digging into it. So, for the purposes of discussion – let’s just set that aside. Let’s say it’s a ‘me’ problem. Ok.
But here’s the thing: In 2020, both for this and the running test, most platforms are moving away from doing frequent one-off testing. Most platforms are moving towards leveraging your actual workout/training data to do that analytics for you, so you don’t need to take off time in your schedule for a test. We’ve seen Xert doing that, Today’s Plan doing that, and Polar’s watch/bike computer competitors just giving you those values in real-time as you complete workouts.
Sure, others like TrainerRoad do include a monthly test scheduled within most of their plans – but even that is a RAMP test, which is far more common these days than setting aside 60 minutes as per the Polar routine (20 mins warm-up, 20 mins core test, 20 mins cool-down). The RAMP test is over in 20 minutes total.
The other somewhat silly challenge I realized here is that I still need *another* non-Polar device to actually do the test on a trainer (which, is what Polar and everyone else recommends for FTP tests). That’s because the Polar Vantage V2 won’t control your trainer’s resistance. So in my case I had to use a Garmin Edge device to control the trainer and set the target wattages. And that gets even more complex if you’re using your trainer as your power meter for the Polar device, since all but the Wahoo KICKR only allow for a single concurrent Bluetooth Smart connection (and the Vantage V2 doesn’t connect via ANT+).

In any case, moving on to the last item, the new Leg Recovery Test. This test is designed to help you determine if your legs are fatigued, by performing three standing jumps in a row.


These three jumps are then measured to centimeter accuracy by the unit and compared against a rolling baseline for the last 28 days. If the deviation is more than 7% lower, it’s determined that your legs aren’t fully recovered. Interestingly, that data is actually fed into FitSpark, for deciding on which workouts will be given. So that’s a good example of using the data to drive decisions.
Finally, Polar has started rolling out a new Test Dashboard on Polar Flow, which consolidates all your tests into one spot:

You’ll see all the testing types, as well as drop-down filters for each type. Now, given this feature has only rolled out, and I’ve only got a few jump tests and a successful running test (my failed cycling tests interestingly don’t show up here), the data is kinda slim. Still, long term I like the dashboard look:

Ok, wrapping things up – as I said earlier, I think the tests are useful to some, but in general it’s not the direction the industry is trending. Also, for cycling, I’d really have preferred they’d included a RAMP test in there. But hey, I suppose there’s always room for improvement.
For the jump tests related to leg recovery, those are indeed quick and easy tests to do that take a few seconds and can easily be done each day without impacting your normal training load/recovery, so those actually make quite a bit of tests.
GPS & HR Accuracy:
There’s likely no topic that stirs as much discussion and passion as GPS accuracy. A watch could fall apart and give you dire electrical shocks while doing so, but if it shows you on the wrong side of the road? Oh hell no, bring on the fury of the internet!
GPS accuracy can be looked at in a number of different ways, but I prefer to look at it using a number of devices in real-world scenarios across a vast number of activities. I use 2-6 other devices at once, trying to get a clear picture of how a given set of devices handles conditions on a certain day. Conditions include everything from tree/building cover to weather.
Over the years, I’ve continued to tweak my GPS testing methodology. For example, I don’t place two units next to each other on my wrists, as that can impact signal. If I do so, I’ll put a thin fabric spacer of about 1”/3cm between them (I didn’t do that on any of my Polar Vantage V2 activities however, all workouts only had a single device per wrist). But often I’ll simply carry other units by the straps, or attach them to the shoulder straps of my hydration backpack. Plus, wearing multiple watches on the same wrist is well known to impact optical HR accuracy.
Meanwhile, for HR accuracy testing I’m typically wearing a chest strap (usually the Garmin HRM-DUAL or newer HRM-PRO, but also the Polar H10, but or Polar H9) as well as another optical HR sensor watch on the bicep (lately the Whoop band and/or Polar OH1 Plus). Note that the numbers you see in the upper right corner are *not* the averages, but rather just the exact point my mouse is sitting over. Note all this data is analyzed using the DCR Analyzer, details here.
To begin, we’re actually going to go with my Running Performance Test from yesterday, taking a look at both HR accuracy and GPS accuracy. For GPS accuracy, the test started off mostly in the trees for the warm-up, since GPS accuracy was less important at that point in the test. This is compared against a Garmin FR745 and a Fitbit Versa 3. Here’s that data:

At a high level we see some slight differences. So zooming into a few spots during the warm-up we see some slight variances from all three. In general the FR745 is on the path the most, with the Vantage V2 close behind, and the Fitbit Versa 3 a bit more variable.

As we hit the straightaway (but under tree cover), the Polar and Garmin are pretty much a wash, whereas the Fitbit is generally off deeper in the trees picking mushrooms or something.

Making a 90° turn, the Polar nailed this one, with the Garmin & Fitbit devices undercutting the turn. Interestingly however, despite taking this turn at speed (and that it then goes downhill slightly), the actual pace displayed on the Vantage V2 did noticeably drop, which was of particular note given it was in the middle of the VO2Max test and started giving ‘behind pace’ type alerts.

However, after that point in the wide open bike path with nothing on either side, the Polar was off by quite a bit – more than a two-lane roadway away, the Garmin spot-on, and the Fitbit just very slightly off:

Meanwhile, taking a look at the HR accuracy during that run tells an oddly similar story. Here’s the Polar Vantage V2 vs Polar OH1 Plus (optical arm band) vs Fitbit Versa 3, and then the HRM-RUN chest strap.

As you can see, the HRM-PRO had the most correct and gradual build-up of data at the beginning, but the optical HR sensors were too far behind. The Polar Vantage V2 stuttered at the 2-minute marker for a bit. The slight stutter from purple line of the HRM-PRO was simply me adjusting it at the 3-minute marker. It’s been interesting to see how much more visible the adjustments of the strap is on the HRM-PRO than other chest straps.

We see that for the most part for the first 10 minutes the units are fairly close, though around the 8-9 minute marker during one of the sprints I did as part of the warm-up that it caused the Fitbit to struggle, and then slightly caught the Polar Vantage V2 off-guard. The Polar OH1 and HRM-PRO were basically identical there.
While the Fitbit is mostly a mess as the intensity gets higher, the Polar Vantage V2 isn’t perfect either. In fact, you can see numerous spikes throughout, something I’ve consistently seen on the Polar Grit X since launch (I frequently use it in testing):

And just before the VO2Max test ends, we see the biggest difference here, with the Vantage V2 overestimating me at 194bpm, versus the chest strap at 182 and the OH1 at 187. Meanwhile, the Fitbit Versa 3 is at 169.

So overall on that one, it’s not terribly good, in particular at the height of the VO2Max test, which might impact my results for that test actually. While the HR got back into line just as the test ended, did that incorrect spike impact things? I don’t know.
Next, let’s look at a track workout. Cause everyone likes a track workout for both GPS testing. This time against the Apple Watch Series 6, Garmin FR745, and Fitbit Versa 3. In this case, I was using the Vantage V2 with the Polar OH1 Plus for the heart rate portion, so we won’t be evaluating that aspect as part of this set.

As the test began, all units correctly managed to mostly plot the route down the middle of the tree lined path:

And they all kinda-sorta made it out of the massive pile of bridges/tunnels/overpasses without any massive incidents. Not perfect by any means, but the Apple Watch was definitely the winner here.

Meanwhile, over at the track things were actually pretty good. You’ll see a single red line across the infield – that’s my fault. After one of the intervals I hit the pause instead of lap button, and then realized it about a 100m later. But everyone actually stayed roughly in the track, which is good.

The FR745 was in running track mode, so it’s even scarier how close it is. It only shows the exists/entrances, as I was curious if I could start it off-track (the answer is yes, but you just can’t quite get too close to the track on the arrival, or it snaps in like it does below).

But overall, the Polar Vantage V2 did pretty good here – no complaints. Also, for fun, while I wasn’t using the Vantage V2’s optical HR sensor, I was using the Polar OH1 Plus sensor paired to it. No drop-outs or such. And just in case there was any doubt on accuracy (or, lack thereof in one unit’s case):

Moving along again, this time to an easier run. I don’t really need to re-hash all the details on this one, it’s pretty obvious that the units are fairly close, except the Vantage V2 does suffer briefly around the 3 minute marker. While the Fitbit Versa 3 spikes a few times around the 21 and 26 minute markers, both times after stopping at lights/etc and resuming running again.

From a GPS accuracy standpoint, all units were actually pretty good on this city run. With only the Fitbit Versa 3 struggling occasionally (although, not hugely):

They all correctly managed to plot their way through the Rijksmuseum building underpass, though the Fitbit and and Polar units did hose up slightly a turn shortly thereafter back into the park – both of them going off into the water and buildings.

Changing scenery again, what about an outdoors ride? Well, that’s a hot mess. So, I made the Polar Vantage V2 hot pink to illustrate that. Note the sections between the two lines are when I realized I had a conference call, so I stopped to take it on the side of the road.

I could analyze all these sections, but you can see pretty clearly it’s bad. Really bad. Which, is basically what I saw with the Polar Grit X as well.
On the right side, GPS accuracy was perfectly fine:

For this route I was over at an outdoor cycling track, that loops around and around. So it’s a good test of repeatability, and things were spot-on then.
Finally, as for an indoor cycling workout – heart-rate wise that handled much better:

Ok, with that – wrapping things up a bit, I’d say that HR accuracy was basically what we saw with the Grit X, which makes sense as it’s the same sensor there, though, unfortunately that means I don’t get as good of accuracy as the original Polar Vantage series sensor.
For GPS accuracy, things are pretty much par for the course with what I see from most GPS watches these days, no major outliers (good or bad) in any of the data sets, nor in any of my daily commutes I recorded here and there either (mostly through the city). So all good and acceptable there.
(Note: All of the charts in these accuracy sections were created using the DCR Analyzer tool. It allows you to compare power meters/trainers, heart rate, cadence, speed/pace, GPS tracks and plenty more. You can use it as well for your own gadget comparisons, more details here.)
Summary:

Overall, the Polar Vantage V2 is a modest upgrade to the original Vantage V unit, incorporating the largely software-driven updates of the Grit X from this past spring, with weight reductions and changes to the optical HR sensor. The new performance testing features may be useful to those that are looking to chart more specifically their progress in cycling or running, or perhaps figure out if their legs are recovered in the gym.
I think the Vantage V2 may be challenged in that it doesn’t really have a ton of features that are going to draw existing Vantage V owners to it. Sure, some will – especially those that may have held out on buying the Grit X, despite wanting those new features. So for that crowd, this helps basically give people what they want in terms of the extra training/recovery focused elements.
But, I don’t know if those new testing components are enough to draw away new sales from competitors – that’s a much tougher pitch, especially when compared against both what COROS has at a substantially lower price point, or Garmin has at the exact same price point. It puts Polar in a bit of a tough bind with this offering, in that the COROS Pace 2 is priced to attract a beginner, whereas the Garmin FR745 feature set (including music) and identical price as the Vantage V2 somehow make the FR745 price seem reasonable now.
Still, Polar has committed to more firmware updates throughout the remainder of the year, and then perhaps we’ll see additional feature upgrades beyond that, just as we did with the Vantage Series for the first 18 months or so.
With that – thanks for reading!
Found This Post Useful? Support The Site!
Hopefully you found this review useful. At the end of the day, I’m an athlete just like you looking for the most detail possible on a new purchase – so my review is written from the standpoint of how I used the device. The reviews generally take a lot of hours to put together, so it’s a fair bit of work (and labor of love). As you probably noticed by looking below, I also take time to answer all the questions posted in the comments – and there’s quite a bit of detail in there as well.
If you're shopping for the Polar Vantage V2 or any other accessory items, please consider using the affiliate links below! As an Amazon Associate I earn from qualifying purchases. It doesn’t cost you anything extra, but your purchases help support this website a lot. Even more, if you shop with TPC (The Pro's Closet), you'll save $40 on purchases over $200 with coupon code DCRAIN40! The Pro's Closet has been a long-time partner of the site here - including sponsoring videos like my cargo bike race, as well as just being an awesome Colorado-based company full of good humans. Check them out with the links below and the DCRAIN40 coupon!
Here's a few other variants or sibling products that are worth considering:
And finally, here’s a handy list of accessories that work well with this unit (and some that I showed in the review). Given the unit pairs with just about any Bluetooth Smart sport sensors, you can use just about anything though.
Wahoo RPM Sensor
This dual ANT+/Bluetooth Smart sensor will transmit cadence not only to your bike computer/watch, but also 3rd party apps like Zwift, TrainerRoad, and more.
Wahoo SPEED Sensor
Speed sensors are primarily useful for offroad usage. I don't find much of a need for one while road-cycling, but for mountain bike trails they can help alleviate speed/distance issues with poor GPS reception in dense trees.
This is a strap I often use in testing/comparisons. It's dual ANT+/Bluetooth Smart, but it also supports the 5kHz analog heart rate transmission for older gym equipment. Also, it has workout storage/recording in it and supports two Bluetooth connections.
This is a great strap, especially if you're going to the gym. It's dual ANT+/Bluetooth Smart, but it also supports the 5kHz analog heart rate transmission for older gym equipment. Note that it only accepts a single Bluetooth connection, versus dual-connections for the Polar H10.
I'd argue the Polar OH1 Plus is the best optical HR sensor out there. So while it might seem odd to get this when your watch also has a optical HR sensor, this one is just better most of the time. Plus, it also has workout recording storage. Dual ANT+/Bluetooth.
The Polar Verity Sense is the newer variant of the Polar OH1 Plus. And while it might seem odd to get this when your watch also has a optical HR sensor, this one is just better most of the time. Plus, it also has workout recording storage. Dual ANT+/Bluetooth.
And of course – you can always sign-up to be a DCR Supporter! That gets you an ad-free DCR, access to the DCR Quarantine Corner video series packed with behind the scenes tidbits...and it also makes you awesome. And being awesome is what it’s all about!
Thanks for reading! And as always, feel free to post comments or questions in the comments section below, I’ll be happy to try and answer them as quickly as possible. And lastly, if you felt this review was useful – I always appreciate feedback in the comments below. Thanks!