So, you just got a new gadget under the tree (or, perhaps for some other holiday – or random sale – in the last while). Congrats! Now, you’ve gotta figure out how to channel your inner sports geekdom to get the most out of that device.
This year I’ve refreshed this annual tradition of a post with all the latest tips – packed full of everything you need to know to get started with your new device.
Let’s dive into it!
All Gadgets:
This first category applies to all gadgets – at least of the wearable/bike computer type ones. Though the ‘get it updated’ definitely applies to GoPro/Trainers/Drones/Power Meters as well!
1) Get it updated: Most devices are updated frequently – often many times since the device itself was manufactured. For example, the Garmin FR945 had updates just last week, so did the FR245. As did Apple Watch exactly two weeks ago today, and countless others. This is especially important for brand new devices out of the box, as sometimes (like a DJI Action Cam), it might not even have the first non-beta software release on it. Definitely get them updated!
2) Enable Strava/TrainingPeaks/etc automatic synchronization: If you’ve got a gadget, and you’re on this site – it’s pretty darn likely that you’ve also got a Strava account, or a TrainingPeaks or other 3rd party platform account. Every wearables/bike computer company below worth their beans has automatic synchronization to Strava and other platforms (ok, except one, but I cover that below). You’ll usually find this free sync option within your account profile and settings
3) Add music: Many wearables these days support music on it. Unfortunately, that’s not a fast process for any of them. It often takes a long time, so it’s best to let your device do that on a quiet day, like when you’re sitting around drinking eggnog. Most will leverage WiFi, so you’ll need to have that handy. And most of them support streaming services of some sort (like Spotify, iHeartRadio, Deezer, and Pandora). You can usually get free trials of these services too.
4) Customize your data pages/fields: Like syncing music, it’s best to do this while seated (rather than standing outside in the cold). For Garmin devices, you’ll change your data fields on the device itself. Whereas for Suunto/Apple/Fitbit/Wahoo/Polar devices you’ll use the smartphone app and/or website. I just posted last week on how I configured my data fields here.
5) Understanding how courses are measured: About now you might be wondering what this has to do with your device. The answer? Everything. By understanding how courses are measured, you’ll understand how to race with a GPS device so you can get your fastest time.
Garmin:
I think there used to be a Christmas jingle about getting a Garmin. Perhaps there still is. And perhaps you’ve had a Garmin all along and didn’t realize some of these tips. However you got your boat in this situation is beside the point. Here’s some tips to get you started.
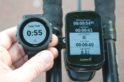
1) Enable 1-second recording: By default, Garmin devices don’t record data every 1-second. Instead, they use what’s called ‘Smart Recording’, which means they record data usually every 4-7 seconds. This means that sometimes you miss data you care about, or even cut corners. It takes a few seconds within the settings to enable 1-Second Recording rates. It doesn’t impact battery life, rather, only files take a tiny bit more space (but seriously, on most Garmin devices you could store thousands of hours of workouts before you ran out of space).
2) Poke around at Connect IQ: This is Garmin’s app store, which includes watch faces. While the list can be a bit overwhelming, if you focus on some of the most popular apps and watch faces, you’ll likely find something that helps you customize your device a bit. On the watch face side, ActiFace is by far the most popular (with over 1.25 million downloads), and dwMap is another strong one for routing related bits. But there’s also apps from well-known companies like Uber and Komoot.
3) Enable Physio TrueUp: Got more than one Garmin device? Then definitely go and enable the Physio True-Up option. This means that it’ll keep the training load/recovery/activities/last sport and more between those devices all the same. Mostly. It’s a bit of a confusing system but by and large it does actually work to keep most Garmin devices all showing the same stats…most of the time. Note that technically calories and such is part of the regular Garmin True-Up system, but if you enable Physio True-Up it takes care of everything.
4) Get free maps: Got an Edge cycling computer or perhaps Fenix 6 Pro, FR945, or Edge device that doesn’t have the maps that you want on it (especially while travelling)? No problem, you can use this page for wearables and this page for Garmin Edge devices to easily and freely download all the maps you want. It’s the same mapset that Garmin puts on the devices, just for other regions.
5) Scored both a Garmin watch and Edge GPS? You can actually make the two talk together in real-time, primarily for triathlon-uses. Here’s my complete write-up on that, which is definitely something to try before race-day to know if it’s right for you.
6) Got a running watch? Then definitely check out how PacePro works. It’s super cool stuff that’s probably the best feature Garmin implemented in 2019. Save for ClimbPro on the Edge series, which is also worthy to understand. For ClimbPro, I detail how that works in each of the in-depth reviews. So simply pick out the appropriate review below and hit up the ClimbPro section.
You’ll find all of my Garmin reviews here, which dive into all sorts of tips and tricks more deeply for each model.
Suunto:

Suunto has two main series these days – the slightly older Suunto Spartan series that you probably didn’t buy, and then the newer Suunto 3/5/9 devices. The good news is that for the most part they’re similar under the covers from a software standpoint, so you can use these tips interchangeably.
1) Enable sleep tracking: By default, the Suunto devices don’t enable sleep tracking. You’ll need to enable it. To do so simply go to Settings > Sleep > Sleep Tracking and enable it. Here’s how those metrics work.
2) Enable 24×7 HR tracking: Like Polar, 24×7 HR tracking isn’t enabled by default on the Suunto units. Suunto calls this ‘Daily HR Tracking’. To do so go to Settings under Activity view, and then enable the option there. This will take a heart rate reading once every 10 minutes, allowing you to do some basic trending on the watch itself. It doesn’t transmit this to the app/site though.
3) Check out their heatmaps: One of my favorite features of Suunto’s website/platform is their heat maps. While Strava has heat maps, I find the granularity of Suunto’s far better, since it can be sport-specific beyond just running/cycling. It’s great for finding hiking trails especially, but also even openwater swim spots since you can just skim over nearby lakes/beaches/ponds/rivers and find places people are doing activities marked as openwater swims.
Check out my full Suunto 9, Suunto 5, and Suunto 3 In-Depth reviews for plenty more tips and tricks into getting the most out of those two devices. Or, all my Suunto reviews here.
Polar:
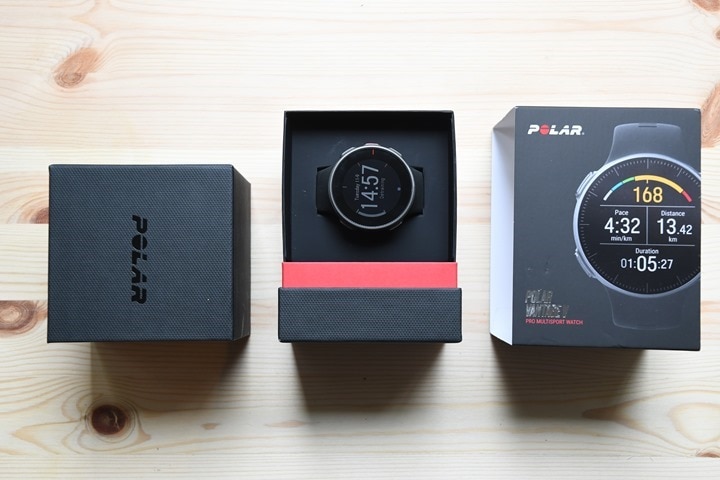
1) Get it updated: I know I talked about this in the ‘baseline’ section above, but it’s especially important for the Vantage V & M series watches, which received a huge pile of updates recently, primarily almost all of the features from the Polar Ignite series watches. A handful of remaining features were supposed to ship this month, but just got pushed out into January instead (namely, FitSpark). Still, make it Priority #1 to get your watch updated.
2) Turn-on continuous HR: By default, Polar devices like the new Vantage V and Vantage M series, don’t have continuous heart rate enabled. This means that you won’t get your full-time heart rate data unless you go to Settings >General Settings and turn on Continuous HR Tracking.
3) Grab your HR strap for recovery data: The Polar Vantage V is best used with a chest strap for added HRV data. Specifically, within their orthostatic test you can add in recovery data. The test takes 4 minutes, two lying down staring at the ceiling and two standing up looking awkward doing nothing. Do it for a few days in a row and Polar will start to give you detailed recovery data.
4) Understand how training load works on the Vantage: One of the main reasons you probably bought the Vantage series is for the training load features. As such, spend about 4 minutes and 30 seconds to understand how it works. They’ve actually got a reasonably good video on it here.
You can find my Polar Vantage V In-Depth Review here, Vantage M here, and Ignite GPS watch here, as well as all my past Polar reviews here.
Fitbit:
1) Find your friends: While certainly the other platforms have social aspects, no fitness platform rivals the social aspects of Fitbit. As part of some data that Fitbit released during a launch event last year they noted that by simply adding your Fitbit toting friends on the platform, on average you’ll increase activity by 700 more steps per day (and a challenge will usually result in 2,000 more steps per day). And it makes sense, your friends will see your numbers, and thus you’re less likely to slack off come January or February.
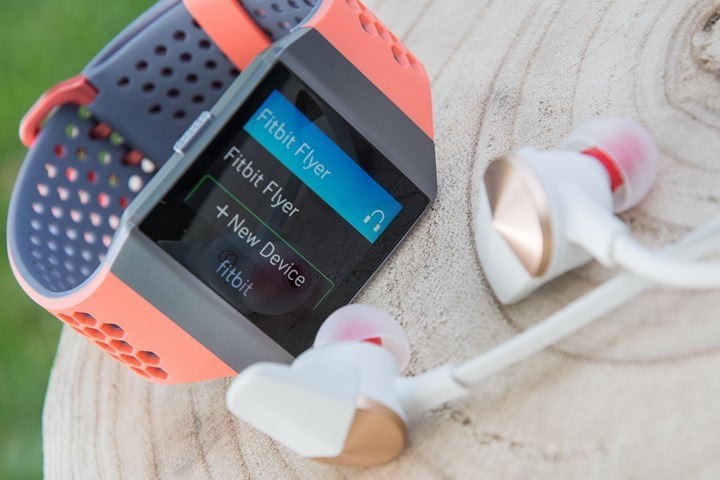
2) Install some apps: While in general I find the Fitbit apps a bit more limited than other platforms, there’s a chance you’ll find something useful there – especially within the watch faces (aka Clock Faces) side of the house.
3) Setup Fitbit Pay: If you’ve got a Fitbit Ionic, Versa 2, or Versa Special Edition, you can add your credit/bank cards to it. While the list of banks was fairly limited in the early days, it’s much improved now. Of course, if your bank is missing…well…I guess you’ll still have to carry around your wallet.
My Fitbit Ionic review is here, Versa 2 here, and my Fitbit Versa review is here. And my Inspire HR Review here, as well as Fitbit Charge 3 deep-dive is here.
Apple Watch:
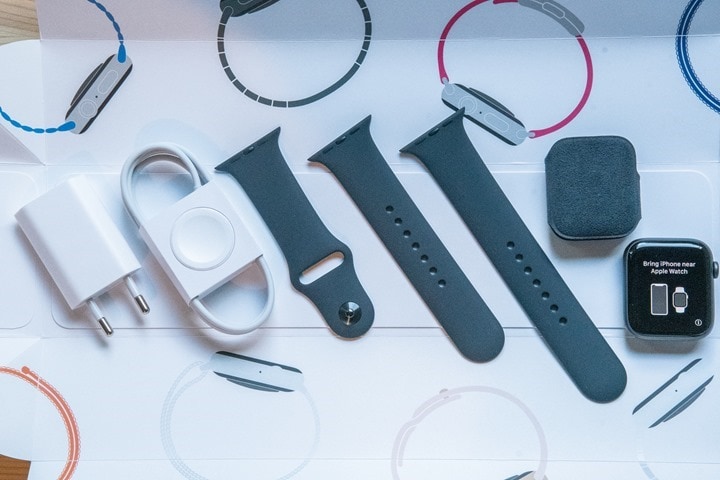
1) Check out the watch companion apps already on your phone: You probably didn’t know it, but every time you choose and download an app for your phone, it almost always has a companion app for your Apple Watch. These probably won’t be installed to your Apple Watch by default, but you can find them to install by looking for the ‘Watch’ app on your phone, and then scrolling down to a crapton to ‘Available Apps’, which shows you apps you have on your phone but not yet installed the watches companion app for.
2) Challenge someone: A month or so ago I made the mistake of doing an Apple Watch activity challenge with someone who kicked off the challenge by going out and doing a 5-hour ride. But I learned something in doing so: The activity challenge ‘points’ are capped each day. So while it’s a 7-day challenge, and while those points are cumulative – a massive activity day won’t kill your chances (or help you if on the other end of that equation). Of course, don’t forget to taunt using the watch as well.
3) Sync to Strava/TrainingPeaks/Others: Apple is the only watch that doesn’t have native syncing to 3rd party platforms like Strava. Instead, you’ll need a 3rd party app to in turn sync your runs and rides and swims to 3rd party platforms. I still use HealthFit, but there are others as well out there. As soon as I complete/save my workout it syncs it off to Strava, TrainingPeaks, and Dropbox. Perfect!
My full Apple Watch Series 5 In-Depth Review is here, and my Series 4 and Series 3 Reviews are here, which includes some other app recommendations as well.
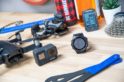
GoPro & DJI:

There’s no category where it’s more important to update your firmware than GoPro and DJI products. Both of these products will often have very old firmware on them from initial manufacturing, and for both of them the firmware updates can be a legit big deal. So do that first.
1) GoPro – Ensure HyperSmooth Boost is enabled: With the new GoPro Hero 8 Black, ensure that whatever mode you’re shooting in, you’ve got HyperSmooth Boost enabled. Or, failing that, just regular HyperSmooth enabled. HyperSmooth Boost is a little icon on the front right corner of the camera that looks like a shaking icon that illuminates blue. Always boost, all the time.
2) Decide resolution and framing: Next, decide what resolution and framing you want. While I shoot everything in 4K, that means it’s in a ‘Wide’ framing, so it has that GoPro fisheye look. But with the Hero 8 for all resolutions you can now enable ‘Linear’ mode, which gets rid of that look and makes it look like a normal camera/phone would. If you don’t plan to upload in 4K footage, you can save a boatload of space and choose either 1080p or 2.7K. Go with 60FPS for either as your default for action. For non-action you’ll be good with 30FPS.
3) Make sure you’ve got a MicroSD card: Most DJI products don’t come with a card, while some holiday GoPro bundles will come with a card. Cards are silly cheap – usually $10-$30. I recommend going with a larger size card – like a 64GB or 128GB one, since that means you don’t have to worry mid-vacation when you fill up that silly-small 16GB card it came with. Here’s the card I use in all my GoPro’s and drones (available in 32/64/128GB sizes).
4) Pick up some accessories: The best part of a GoPro (or most other action cameras brands too) is that they use a standard GoPro mounting system. There’s tons of accessories out there that don’t cost the crazy amounts that the GoPro branded ones do. Check out my accessories post for my Top 6 accessories that I (still) use daily. I have an update for this list with newer ones, but honestly, I still use exactly those same six…virtually every day.
5) Drones – understand the rules: Find your country’s rules and understand the basics of them. Specifically how far away you can fly, and how high you can fly. And don’t fly near airports. If you know the first two, you can configure it within the drone settings to automatically keep you out of trouble (and DJI will automatically warn you of airports too). If you read no other part of the manual, ensure you understand how the ‘return to home’ bit works, as it’ll ensure your drone gets back to you in case of a failboat situation.
Finally, if you’ve picked up a GoPro, check out my GoPro in-depth reviews for tons more tips. Same goes for my drone reviews, which also covers the new Skydio 2 drone.
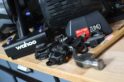
Indoor Cycling Trainers:
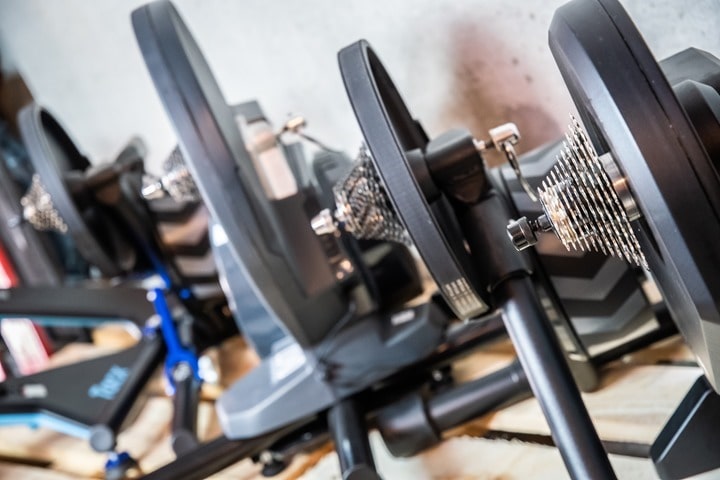
No matter the brand, don’t forget to update your trainer’s firmware. You’ll need to grab the smartphone app for your trainer and it should only take a few minutes. This is especially important for trainers this fall, which have had a pretty darn rough season in terms of things working the way they should. All of them fall into this camp.
1) Play the app field: While the biggest apps out there in terms of subscribers are Zwift and TrainerRoad, there are more than 20 trainer apps out there with tons of different options. Some of the other popular ones are Rouvy, RGT (Road Grand Tours), FulGaz, KinoMap, and The SufferFest. As well as ones like Xert that are tied into larger training platforms. Most have free trial programs such that you can try them out before subscribing.
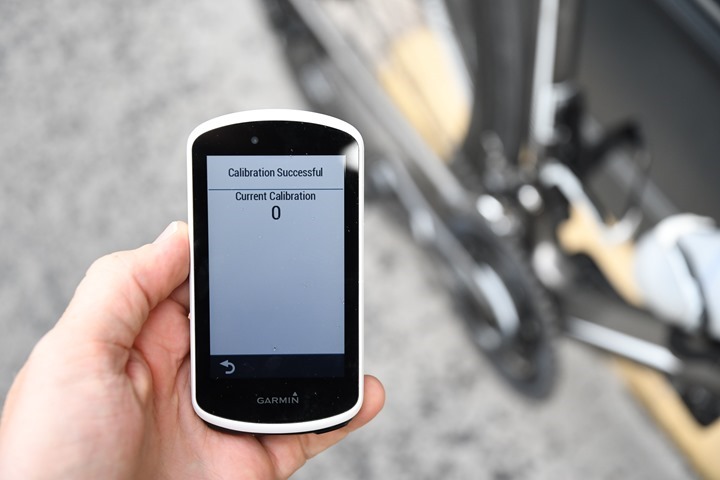
2) Get it calibrated: One of the most important things you can do on your new trainer is to do a short warm-up of about 10-15 minutes and then do a calibration. For wheel-on trainers (where your wheel remains on your bike), it’s also important to pump up your tires to a normal pressure level and try and keep that pressure the same each time you ride the trainer. For direct drive trainers (where you remove the wheel), try and do a calibration about once a week or so after a short warm-up.
3) Remember Bluetooth pairing rules: All trainers on the market today have a limitation of one concurrent Bluetooth Smart connection to each sensor, except the KICKR 18 & KICKR Core (assuming you updated your firmware). That means if you connect TrainerRoad on iOS to your new Tacx NEO (for example, it’s the same for all trainers), you can’t also connect your Polar watch to record power as well (as that’d be two connections). This is also applicable if you happen to have the Tacx app open connected to the NEO and then try and connect to Zwift on Apple TV or your iPad, it won’t find it, as your phone is holding open that connection. Said differently: If you can’t figure out why an app or device can’t find your new trainer over Bluetooth Smart, turn on airplane mode on other devices (ensuring Bluetooth gets turned off) and then try again.
4) Apple TV Zwift Sensor Limitation Workaround: Using Zwift on Apple TV? That means you’ll be limited to two Bluetooth Smart sensors connected at once to Apple TV. So that could be your trainer, and then one other sensor (like a heart rate strap). However, if you need to connect something like a cadence sensor – then you can use the Zwift Companion app on your smartphone to get that sensor data to Zwift. Sometimes it’s a little bit slow to see sensors, or even a bit flakey. But, it’s ultimately your only other option.
5) Found a Peloton under your tree? Great, get ready to discover how much it’ll change you. After that, if you’ve also got an Apple Watch you can actually use that for heart rate using their just-released Apple Watch app. Simply install it from the Watch app on your iPhone, and then it’ll allow you to get your heart rate in real-time funneled into the main Peloton platform. Super cool.
6) Didn’t get all the right parts? No worries, we can’t entirely fault your significant other for their trainer completeness fail. Here’s the likely list of things you might be missing from your trainer. All of which are likely available next day. Or, you can just use it as a quick guide to bring to your local bike shop. If you’ve got a Wahoo KICKR, Elite Suito, or potentially a Kinetic R1 – then you’ve got a cassette already. For everyone else, you’ll need one.
| Product | Amazon | Note | |
|---|---|---|---|
| Apple TV 4K 64GB WiFi (2022) | Amazon | There's no better bang for your buck in getting Zwift (or FulGaz/etc) on your big screen TV than Apple TV - it's the primary way I Zwift. | |
| Basic Trainer Mat | Amazon | This is a super basic trainer mat, which is exactly what you'll see me use. All it does is stop sweat for getting places it shouldn't (it also helps with vibrations too). | |
| Cassette Installation/Removal Tools | Amazon | There are *many* variations of cassette removal tools, this is the best bang for your buck. Don't overthink this. You'll likely only use this tool once every 2-3 years. | |
| Front Wheel Riser Block | Amazon | Here's the thing, some people like front wheel blocks, some don't. I'm one of the ones that do. I like my front wheel to stay put and not aimlessly wiggle around. For $8, this solves that problem. Note some trainers do come with them. Also note, I use a riser block with *every* trainer. | |
| Honeywell HT-900 Fan | Amazon | I've got three of these $12 fans floating around the DCR Cave, and I frequently use them on rides. They work just fine. Sure, they're not as powerful as a Wahoo Headwind, but I could literally buy 20 of them for the same price. | |
| Indoor Cycle Trainer Desk (RAD/CXWXC/Vinsetto/Conquer/etc...) | Amazon | This desk is both a knock-off of the original KICKR Desk, but yet also better than it. First, it's got wheel locks (so the darn thing stays put), and second, it has two water bottle holders (also useful for putting other things like remotes). I've been using it as my main trainer desk for a long time now and love it. Cheaper is better apparently. Note: Branding varies by country, exact same desk. | |
| KOM Cycling Trainer Desk | Amazon | This is by far the best value in trainer desks, at only $59, but with most of the features of the higher end features. It's got multi-tier tablet slots, water bottle holders, non-stick surface, adjustable height and more. I'm loving it! | |
| Lasko High Velocity Pro-Performance Fan (U15617) | Amazon | One of the most popular trainer fans out there, rivaling the Wahoo Headwind fan in strength but at a fraction of the price. It doesn't have smartphone/ANT+/Bluetooth integration, but it does have secondary outlets. I've been using it, and a similiar European version lately with great success (exact EU variant I use is automatically linked at left). | |
| Shimano R7000 105 Cassette (11-speed) | Amazon | This is a Shimano 105 cassette (thus, slightly more budget compared to the Ultegra), in most cases, you probably won't notice the difference. Ensure that the number of speeds matches your bike (e.g. 11-speed, 10-speed, 9-speed, etc...). | |
| Shimano R8000 Ultegra Cassette (11-speed) | Amazon | This is a Ultegra cassette, you can save about $10-$15 by picking up a Shimano 105 instead. Ensure that the number of speeds matches your bike (e.g. 11-speed, 10-speed, 9-speed, etc...). | |
| Tacx Tablet Bike Mount | Amazon | I've had this for years, and use it in places where I don't have a big screen or desk, but just an iPad or tablet on my road bike bars. |
Here’s a link to all my trainer reviews, where you can find tips about your specific trainer.
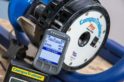
Cycling Power Meters:
Remember again to ensure your firmware is updated, especially for pedal-based power meters as they seem to have a bunch of firmware updates that are pretty important.
1) Do a few sprints, calibrate it: Most power meters need a solid whack to the side of the head before they think straight. Except not with a hammer, but instead your legs. Do about 2-4 nice hard sprints of 5-10 seconds. Then go ahead and calibrate it (called a zero offset). Ensure that you don’t apply any weight or touch your pedals when you do this. Also, try to do this zero offset before each ride. Note that some power meters may still take 1-3 rides before the numbers settle out after initial installation.
2) First power meter? Just ride it: If this is your first power meter you may be tempted to immediately go out and do an FTP test or some other power-based programs. Dare I say – just chill a bit and ride it. First, because per the previous item, it may need a bit of time to settle. And second, if you’ve never used power before it’s best to just observe a bit. Figure out what a typical sprint looks like wattage-wise, and then what steady-state riding looks like. See how you fatigue a bit over a longer ride.
3) Then look to apply a training program: After you’ve got a grasp on your power numbers, then consider applying a training plan or some structured training around it. Many of the trainer apps have training plans or power workouts, including Zwift, TrainerRoad, and SufferFest. These are great for keeping you focused. But they also have the benefit of gathering power data in a fairly structured way that allows you to see gains week over week more easily.
Here’s all my power meter reviews, as well as my power meter buyers guide from last year (seriously, nothing changed this year – it was a dud). While it might seem silly to read a buyers guide after purchasing a unit, there’s a ton of tips there on power meter usage. And if you’re trying to do some trainer or power meter accuracy testing, hit up this post.
—
With that – thanks for reading! If you want more tips, check out my older post from the last time I did this type of thing– which includes a pile of related ‘how to’ type posts. Enjoy!
And have fun using your new toy important training device!