


CycleOps…err…now Saris is getting a bit ahead of the Eurobike show announcement flood by starting early. Today they’ve announced three new products. First, is this post – the Saris H3 (Hammer 3) trainer. This trainer gets a bit quieter while also getting a bit more accurate. Atop that they’ve announced their $1,199 MP1 motion platform that they previewed last year at Eurobike. And finally, they’ve announced their $329 TD1 trainer desk.
For now though, I’ve been rockin’ the H3 trainer over the last few weeks and have a pretty good grasp of things. I’ve been putting it through the ringer of apps including Zwift, TrainerRoad, and Rouvy. And of course, have a good idea of where it sits competitively today. By and large the Saris H3 isn’t a dramatic upgrade over the H2. But it does feature a new drive mechanism with a new belt as well, that’s resulted in a reduction of noise – though it’s not silent. They’ve also addressed, via firmware, issues related to power spikes in sprints seen on the H1/H2 trainers (those trainers also got the update a few weeks back). Additionally, they’ve added some internal cooling bits to keep it from overheating. And finally, price-wise they’ve undercut most of their higher-end competitors with a new $999 price point.
Note that as usual, I’ve got a media loaner to give a whirl. After I’m done I’ll have them pick it up and return it back to Madison, Wisconsin where it was built. Just the way I roll.
(Clarification on the whole CycleOps/Saris thing: After selling off PowerTap earlier this spring, the Saris Cycling Group has decided to further consolidate naming. As such, effective now, the trainer brand is shifting from CycleOps to Saris. Thus, the Saris H3, not the CycleOps H3.)
What’s in the box:

We’ll get right into things by getting out of the box. Above you’ll find the naked cardboard and black color scheme. I like it. Open it up like a jewelry box and you’ll find the H3 lying on its side ready for your rescue:

Once you remove it from the box you’ve got the trainer still wrapped in a spare garbage bag like a dead body.

Get it away from its packaging and you’ll find yourself a power cord package, some paper stuffs, and the trainer. Also, there’s thru-axle adapters. Oddly though, no quick-release skewer. I get that there are plenty of thru-axle folks out there, but not including a quick release skewer just seems cheap, given how many $80 trainers include it.

The power cord does include a secondary bendy piece, allowing you to add that into the chain to give it a bit more flexibility.

There’s even a small card with the ANT+ ID as well as the squiggly mark of the person to yell at if your trainer ever breaks. Which, to Saris’s credit, they’ve managed to avoid the numerous build/QC issues that others have stumbled into over the last 12-18 months. Perhaps others should do nifty QC cards too.

The front wheel stand is hiding out underneath the H3 itself. It’s got a little cubby hole for it. We’ll dig it out later. For now, let’s move right into setup.
The Basics:

Like many trainers, in order to get things started on the Saris H3, we need to get a cassette installed on the back of it. The H3 doesn’t include one, though, we are seeing a slight shift in companies starting to include them – such as Elite with the Suito at $799. In any case, a typical cassette will cost you about $50, plus about $10-$20 for the tools if you don’t have them.
Note that while SARIS has an XD/XDR adapter for the Hammer 3, that adapter is not 12-speed compatible. As such, if you’ve got a SRAM AXS or Force AXS equipped bike, you’ll need to look at other trainer options at this time (fwiw, Wahoo just released an adapter in August).

I typically buy Shimano Ultegra cassettes for my trainers (mostly for sound-testing consistency across videos), but I’ve also done a few SRAM ones and whatever else happens to be on sale from the bike shop. It generally doesn’t matter, except sometimes you’ll find some of the lower end cassettes (like a Shimano 105) don’t quite sound as quiet as mid to higher-end ones.
In any case, with a cassette, you’ll need two tools. A lockring tool (or lockring + a wrench, in my case), and a chain whip. In this case, you need the chainwhip since you can’t get a good grasp on the flywheel.

Once installed you’re ready to get cooking. First, go ahead and plug in the trainer. You can use the little extra cable bendy piece or not – your choice (you probably should, unless you’re living on the wild side).

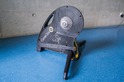
Then plug the other side into the wall. It’s a 100-240v power brick, so it can sway whichever way your voltage brings you electricity. There’s a glowing status light on the backside of the H3. The kind of status light that makes you feel warm and fuzzy, somehow.

In case you didn’t already and are living life dangerously, now’s a good time to unfold the legs as well. The unit has locks on both legs that allow it to fold in/out and then lock in place.

There’s also small adjustable feet on the bottom in case your floor is as uneven as a lumpy scone.

And, while you’re down there fishing things out, go ahead and grab that front wheel plate and throw it towards the front of your trainer mat.


Next, mount your bike. Well, I mean, mount your bike to the trainer. You can mount yourself to the bike if you want as well.

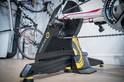
Here’s roughly what that’ll look like once complete. Though, this is the Wahoo KICKR desk, since I don’t yet have the Saris TD1 desk to complete the postcard:

So while we’ll get to apps and compatibility and such, let’s first start with road feel first. Like I always say – for me personally, it’s hard to separate the fact that I’m riding indoors from outdoors. It’s still a trainer, and I’m still looking at a wall in front of me. My brain can only turn off so much of that. Still, much of the road-like feel is driven by the flywheel, and be it physical or virtual, flywheel sizes tend to be measured in weight. This impacts inertia and how it feels – primarily when you accelerate or otherwise change acceleration (such as briefly coasting).
That caveat said – it feels pretty good. One of the better options for sure on the market, though I’m not quite sure it’s the best. I’d say it’s very close between it and the Wahoo KICKR 2018. I would say the road-feel is better on the H3 than the Tacx NEO/NEO 2 though.

Next, there’s the sound aspect. As noted, this isn’t a silent trainer in the same way that Wahoo talks about silence for their CORE/KICKR lineup. But it’s also not hideously loud like the CycleOps H2 was. It’s sorta middle-ground. More specifically, it’s sub-fan levels. Meaning, your fan is louder than it. To demonstrate that in the most efficient way possible, here’s a very simple video of me getting on the trainer (while it was still spinning down a bit, which is what you hear initially), and then doing a short sprint and stopping. Saris says that the unit is “5X quieter than the H2”, and honestly, I believe that:
As you can hear, it’s mostly drivetrain that you’re listening too – not trainer. The freehub is fairly loud when I stop pedaling, but that’s the case of the KICKR as well. The solution there is obvious: Don’t stop pedaling. Ever.
Now given the H3 is a smart trainer, it’ll change resistance automatically in a few different ways, primarily driven by different applications/methods. But most of this all boils down to two core methods:
ERG Mode: Setting a specific power level – i.e., 230w. In this mode, no matter what gearing you use, the trainer will simply stay at 230w (or whatever you set it to).
Simulation Mode: Simulating a specific outdoor grade – i.e., 8% incline. In this mode, it’s just like outdoors in that you can change your gearing to make it easier or harder. Wattage is not hard-set, only incline levels.
In the case of simulation (aka slope) mode, the Hammer 3 can simulate from 0% to 20% incline – which is so-so for this price point (some go upwards of 24-25%).
The second mode the trainer has is ERG mode. In that case, the company claims up to 2,000w of resistance at 40KPH. Although, realistically, you don’t care about that. I can only barely break 1,000w for a second or two, and even most front of the non-pro pack cyclists aren’t going to top 1,800w. The pros would only be just a bit beyond that. Said differently: Peak numbers don’t matter. Instead, what matters is actually a harder metric to make clear – which is the ability to simulate high grades and lower speeds (especially if you’re a heavier cyclist).
One core test I do with all trainers though is responsiveness: How quickly does it respond to ERG mode changes? I typically do that with my 30×30 test via TrainerRoad, though it doesn’t really matter what method you use as long as you’re looking at big shifts in wattage:

And the H3 easily passed this test. In fact, it did it really well. The control exhibited by the trainer in maintaining the wattage set-point was easily the best I’ve tested this season, including things not yet announced. It’s really strong. I remember talking with one of the leads at TrainerRoad a year or so ago, and he mentioned how for his personal use he really preferred the CycleOps Hammer because of how precise it was in ERG mode. There’s no doubt that tradition has carried through to the Saris H3 as well.
App Compatibility:

The H3 follows the industry norms as you’d expect from most trainers these days. As you probably know, apps like Zwift, TrainerRoad, SufferFest, Rouvy, FulGaz, Kinomap and many more all support most of these industry standards, making it easy to use whatever app you’d like. If trainers or apps don’t support these standards, then it makes it far more difficult for you as the end user. The H3 includes all the same goodness as the H2 did, including cadence transmission over Bluetooth Smart and ANT+ (something Wahoo still omits – Update, now, as of Sept 5th, 2019 they’ve added it).
The H3 transmits data on both ANT+ & Bluetooth Smart as well, allowing interactive resistance control across both ANT+ & Bluetooth Smart. By applying resistance control, apps can simulate climbs as well as set specific wattage targets.
In any case, the H3 mirrors past protocol support and includes the following protocol transmission standards:
ANT+ FE-C Control: This is for controlling the trainer via ANT+ from apps and head units. Read tons about it here.
ANT+ Power Meter Profile: This broadcasts as a standard ANT+ power meter, with speed and cadence baked in as well.
Bluetooth Smart FTMS Trainer Control: This broadcasts as a standard Bluetooth Smart FTMS trainer (which is the Bluetooth version of the ANT+ FE-C protocol).
Bluetooth Smart Power Meter Profile: This broadcasts as a standard BLE power meter with speed as well as cadence.
The key takeaway from this is that it not only supports everything you’d need from any apps you’d need – but also transmits cadence within the signals, making it easy to pair up to an Apple TV. Tacx, Elite, and Kinetic also do this – but Wahoo remains the odd man out that doesn’t include cadence transmission.
Baked in cadence data is handy if you’re connecting to Zwift on an Apple TV, due to Apple TV’s two concurrent Bluetooth Smart sensor limitation (plus the Apple TV remote). This means you can pair the trainer and get power/cadence/control, while also pairing up a heart rate strap. Whereas on a Wahoo trainer you don’t get cadence with the data stream from the trainer, so you need to choose between heart or cadence as your second sensor type. Sure, you can technically use the Zwift companion app to bring in 3rd or more sensors – but I find that’s finicky as heck and rarely works well (if at all).

It’s these same standards that also allow you to connect via head units too. For example the Wahoo ELEMNT/BOLT/ROAM as well as Garmin Edge series support ANT+ FE-C for trainer control, so you can re-ride outdoor rides straight from your bike head unit to your trainer. For example, for my accuracy testing section, I recorded the data on a Garmin Edge 530 as well as the trainer apps themselves. From there I’m able to save the file and upload it to whatever platform I like. I also recorded it on a Garmin Forerunner 945 too on one ride:

For me, in my testing, I used Zwift and TrainerRoad as my two main apps (which are the two main apps I use personally), with a side dish of Rouvy for one test as well. In the case of Zwift, I used it in regular riding mode (non-workout mode), whereas in the case of TrainerRoad I used it in a structured workout mode. For Rouvy it was in power meter transmission mode. I dig into the nuances of the TrainerRoad and Zwift data within the power accuracy section. Here you can see the H3 paired up with Zwift though on Apple TV:

You’ll notice that I’ve got all the sensor types from the trainer included without issue.
And here in TrainerRoad using Bluetooth Smart on an iPad:


And here it is within Rouvy on Apple TV:

As with many trainers, I’d recommend doing an occasional calibration – especially after you move it, or after the temperatures have shifted significantly.
Saris does have an app that’s set to be released shortly, but it’s not yet functional with the H3 trainer. That’ll allow you to do both calibration and firmware updates from both Android and iOS. In the meantime, for calibration, you can use any number of 3rd party apps to do so. For example, here’s me using TrainerRoad on my iPad. Once you reach that speed you can stop pedaling, after a number of seconds if you give a spindown time. At which point the calibration is complete.


You can also perform this calibration from within Zwift too:

In my testing I didn’t find this necessary every time – things seemed to be surprisingly consistent for me (I only did it once). Still, again my general recommendation here would be that anytime you move the trainer, or if there’s significant shifts in temperature in the spot you’re operating it in (such as in a cold wintery garage), to do a calibration about 10-15 minutes in, just to be sure. That’s pretty consistent with what I’d recommend for any trainer except the Tacx Neo 1/2, which require no calibration (and don’t even have the option to do so).
Finally, some will ask about Wahoo KICKR CLIMB compatibility. No, the unit is not compatible with the Wahoo CLIMB, and it doesn’t sound like there’s any plans to make that happen (from either the Wahoo or Saris side). Instead, Saris would have you look at their new MP1 movement platform – albeit at twice the price of the KICKR CLIMB, some $1,199 versus $599. But to each their own.
Power Accuracy Analysis:

As usual, I put the trainer up against a number of power meters to see how well it handled everything from resistance control accuracy, to speed of change, to any other weird quirks along the way.
In my case I used one primary bike setup as follows in two configurations:
Canyon Bike Setup #1: Garmin Vector 3 pedals (dual-sided), 4iiii Precision Podium (dual-sided)
Canyon Bike Setup #2: Garmin Vector 3 pedals (dual-sided), Quarq DZero
This is all in addition to the trainer itself. Note that because you remove the rear wheel I can’t use something like a PowerTap hub to compare as well (which I would use in power meter testing normally).
In my case, I was looking to see how it reacted in two core apps: Zwift and TrainerRoad (Bluetooth Smart on Apple TV and iPad), but I also did some work on Rouvy in beta on Apple TV – so there’s that for you. The actual apps don’t typically much matter, but rather the use cases are different. In Zwift you get variability by having the road incline change and by being able to instantly sprint. This reaction time and accuracy are both tested here. Whereas in TrainerRoad I’m looking at its ability to hold a specific wattage very precisely, and to then change wattages instantly in a repeatable way. There’s no better test of that than 30×30 repeats (30-seconds at a high resistance, followed by 30-seconds at an easy resistance).
There’s two ways to look at this. First is how quickly it responds to the commands of the application. So for that, we need to actually look at the overlay from TrainerRoad showing when it sent the command followed by when the H3 achieved that level. Here’s the levels being sent (the super hard to read green line) by TrainerRoad (in this case via Bluetooth Smart on iPad) and how quickly the H3 responded to it:

Just beautiful. Reaction time on virtually all of the steps was sub-3 seconds, and it nailed and held the wattage very close. The reason there’s a yellow line on the 8th interval is that’s exactly when I took this screenshot – it’s not done yet! In any case, again, the cleanest resistance hold in ERG mode I’ve tested this year. A clear winner.
But what about accuracy? I’ve tested some trainers that can hold a number really well – but it’s just the wrong number. Thankfully, that wasn’t the case here. In this first accuracy chart we see it plotted against the Garmin Vector 3 pedals and the 4iiii Precision Podium dual-sided units. All are within a few watts the majority of the time. Here’s that data set:

You know what I like about this chart? It’s correct.
Seriously. This has been the summer of testing trainers with crappy accuracy, and it’s nice to just see a darn trainer that does what it’s told. The secondary benefit to that is that I get to type less.
However, I did see one itty bitty blip after the last 30-second interval that you see above, wherein the H3 seemed to drop communications for a second or two. It didn’t impact accuracy or holding the resistance level. And I haven’t seen it on any other rides.
Next, let’s switch over to Zwift, and in particular the new Titans Grove course. I’ve been using this for testing all new trainers since it came out earlier this summer, and it’s been great for two reasons. First, I start off on the desert side on the flats, so I can test some stability there. And then after that it’s non-stop rollers as you climb up into the mountains a bit. It finishes back on the desert flats where you can throw down on the sprint again. Here’s those data files:

Again – what do you notice? They’re all the same. Or, within a few watts (and even in the proper order). First, let’s check out my first warm-up sprint more closely:

So here you see a few minor things. First, there’s a very slight bit of delay/lag in the above on the H3 – about 1-2 seconds that you can see. Not the end of the world, but it is visible, primarily in sprints it appears. I suspect this is tied to their new algorithms to get rid of the ‘bonus’ Hammer sprint spikes previously seen on other units.
If I look into the rolling hills section, it’s very close to others, but we see again about 1-2 seconds of variance between the various units. That could however be attributed to multiple recording devices. Maybe. Still, we’re nitpicking at best.

A look at my final sprint finds things very very close for the peak power. I’m happy with that:

And looking at the Mean-Max power curve, things are very good there too:

But there is one catch though: The built-in cadence number:

That’s hot garbage. I mean, it’s fine when you’re at steady-state intensity, but those drop-outs that you see above are tied to sprints in most cases, or surges in power. It’s here that things have troubles.
Let’s see if we see that elsewhere. So let’s switch over to Rouvy and give that a whirl there. Note I’ve swapped out the 4iiii crankset for a Quarq DZero.

Overall not too shabby here. I was surging the power a bit here and there on this augmented reality course, but things were pretty close together. Perhaps a couple watts high in some sections, such as this:

But the graph might make things look worse than it is – if you look at the exact values listed up there, we’re talking +/- 5w off the centerline power device here. Super-duper close.
Though, on this longer sustained 3-minute or so section at 350-400w – we see a bit of overcommit there compared to both Vector 3 and the Quarq DZero unit. This could be a gearing-specific thing, as that’s sometimes the case on certain trainers.

In terms of cadence on this ride – things were good, save three specific dropouts – so better than on Zwift, though the apps have nothing to do with this (I record the data outside the apps). It’s more than likely just the exact shifts in power that trigger the cadence drops (like on the Zwift Titans Grove rollers):

Overall though – things are very good accuracy wise in my data sets from a power standpoint. It’s very fast to respond on ERG mode, and just as accurate along the way. The only downside from an accuracy standpoint is really the cadence – which seems to struggle with large shifts in power.
(Note: All of the charts in these accuracy portions were created using the DCR Analyzer tool. It allows you to compare power meters/trainers, heart rate, cadence, speed/pace, GPS tracks and plenty more. You can use it as well for your own gadget comparisons, more details here.)
Trainer Comparisons:
I’ve added the Hammer 3 into the product comparison database. This allows you to compare it against other trainers I’ve reviewed. For today I’ve compared it against the Wahoo KICKR 2018, Tacx NEO2, and Elite Drivo II…and the slightly less expensive KICKR CORE (but spec-wise competes very well). But given next week is Eurobike and plenty of announcements are expected, look for me to revamp this default listing in the coming week with other comparisons as new models come out.
| Function/Feature | Saris H3 | Tacx NEO 2 Smart | Wahoo Fitness KICKR CORE | Wahoo KICKR V4/2018 | Elite Drivo II |
|---|---|---|---|---|---|
| Copyright DC Rainmaker - Updated November 13th, 2023 @ 9:39 am New Window | |||||
| Price for trainer | $1,099 | $999 | $899 | $1,198 | $1,199 |
| Trainer Type | Direct Drive (no wheel) | Direct Drive (no wheel) | Direct Drive (No Wheel) | Direct Drive (No Wheel) | Direct Drive (no wheel) |
| Available today (for sale) | Yes | Yes | Yes | Yes | Yes |
| Availability regions | Global | Global | Global | Global | Global |
| Wired or Wireless data transmission/control | Wireless | Wireless | Wireless | Wireless | Wireless |
| Power cord required | Yes | No | Yes | Yes | Yes for broadcast, no for general use |
| Flywheel weight | 20lb/9kg | Simulated/Virtual 125KG | 12.0lbs/5.44kgs | 16lbs/7.25kgs | 13.2lbs/6kg |
| Includes cassette | No | No | No | Yes (11 Speed SRAM/Shimano) | No | Resistance | Saris H3 | Tacx NEO 2 Smart | Wahoo Fitness KICKR CORE | Wahoo KICKR V4/2018 | Elite Drivo II |
| Can electronically control resistance (i.e. 200w) | Yes | Yes | Yes | Yes | Yes |
| Includes motor to drive speed (simulate downhill) | No | Yes | No | No | No |
| Maximum wattage capability | 2,000w | 2,200w @ 40KPH | 1800w | 2,200w @ 40KPH | 2,296w @ 40KPH / 3,600w @ 60KPH |
| Maximum simulated hill incline | 20% | 25% | 16% | 20% | 24% | Features | Saris H3 | Tacx NEO 2 Smart | Wahoo Fitness KICKR CORE | Wahoo KICKR V4/2018 | Elite Drivo II |
| Ability to update unit firmware | Yes | Yes | Yes | Yes | Yes |
| Measures/Estimates Left/Right Power | No | Yes | No | No | 9EUR one-time fee |
| Can directionally steer trainer (left/right) | No | With accessory | No | No | No |
| Can simulate road patterns/shaking (i.e. cobblestones) | No | Yes | No | No | No | Motion | Saris H3 | Tacx NEO 2 Smart | Wahoo Fitness KICKR CORE | Wahoo KICKR V4/2018 | Elite Drivo II |
| Whole-bike physical gradient simulation | No | No | With KICKR CLIMB accessory | With KICKR CLIMB accessory | No |
| Can slide forward/back with movement | With Tacx NEO Motion Plate (Accessory) | ||||
| Can rock/tilt side to side (significantly) | No | No | No | No | No | Accuracy | Saris H3 | Tacx NEO 2 Smart | Wahoo Fitness KICKR CORE | Wahoo KICKR V4/2018 | Elite Drivo II |
| Includes temperature compensation | Yes | N/A | Yes | Yes | N/A |
| Support rolldown procedure (for wheel based) | Yes | N/A | Yes | Yes | Yes |
| Supported accuracy level | +/- 2% | +/- 1% | +/- 2% | +/- 2% | +/- 0.5% | Trainer Control | Saris H3 | Tacx NEO 2 Smart | Wahoo Fitness KICKR CORE | Wahoo KICKR V4/2018 | Elite Drivo II |
| Allows 3rd party trainer control | Yes | Yes | Yes | Yes | Yes |
| Supports ANT+ FE-C (Trainer Control Standard) | Yes | Yes | YEs | YEs | Yes |
| Supports Bluetooth Smart FTMS (Trainer Control Standard) | Yes | Yes | YEs | No, but supports most apps | Yes |
| WiFi or Ethernet | No | Data Broadcast | Saris H3 | Tacx NEO 2 Smart | Wahoo Fitness KICKR CORE | Wahoo KICKR V4/2018 | Elite Drivo II |
| Transmits power via ANT+ | Yes | Yes | Yes | Yes | Yes |
| Transmits power via Bluetooth Smart | Yes | Yes | Yes | Yes | Yes |
| Supports Multiple Concurrent Bluetooth connections | No, just one | No, just one | Yes, 3 Concurrent | Yes, 3 Concurrent | No, just one |
| Transmits cadence data | Yes | Yes | Yes | Yes | Yes |
| Bridging or re-transmission | No | No | Purchase | Saris H3 | Tacx NEO 2 Smart | Wahoo Fitness KICKR CORE | Wahoo KICKR V4/2018 | Elite Drivo II |
| Amazon | Link | Link | Link | Link | |
| Backcountry.com | Link | Link | |||
| Competitive Cyclist | Link | Link | |||
| REI | Link | Link | Link | Link | |
| TPC | Link | DCRainmaker | Saris H3 | Tacx NEO 2 Smart | Wahoo Fitness KICKR CORE | Wahoo KICKR V4/2018 | Elite Drivo II |
| Review Link | Link | Link | Link | Link | Link |
Don’t forget you can mix and match your own trainer product comparison tables using the database here.
Summary:

Prior to riding the H3, I was skeptical that Saris ‘gets it’ in terms of offering a competitive trainer for the 2019 season. But after riding it, and looking at the data, and looking at their competitors – I think they may be in a better situation than one might think at first glance. The ERG mode responsiveness is the best I’ve seen on a trainer this year. If we account for last year, I’d say the Elite Drivo II gives it a run for its money for sure. And on regular SIM (e.g. normal Zwift) mode accuracy, it’s fairly good as well. Happy there.
The only two downsides are the cadence algorithms need work any time significant power shifts are applied to it. And secondly, it’s still not as silent as the Wahoo CORE/KICKR or Tacx Neo/2. But it is quieter than most other trainers, so I think for now it’ll hold it’s own.
And I think the $999 price point does a good job at undercutting the higher end Wahoo/Tacx trainers, though it does struggle a bit to compete with the slightly less powerful but also slightly cheaper options from Tacx and Elite – especially when you look at ones including cassettes (like the Elite Suito). On the flip-side, if you’re living in a TrainerRoad world (or any other ERG mode app), there’s no better trainer than this for nailing ERG workouts best I see at this point. Those trainers simply don’t perform as well as the H3 does in ERG mode.
With that – thanks for reading, and stay tuned for plenty more to come from Eurobike!
Found This Post Useful? Support The Site!
Hopefully you found this review useful. At the end of the day, I’m an athlete just like you looking for the most detail possible on a new purchase – so my review is written from the standpoint of how I used the device. The reviews generally take a lot of hours to put together, so it’s a fair bit of work (and labor of love). As you probably noticed by looking below, I also take time to answer all the questions posted in the comments – and there’s quite a bit of detail in there as well.
If you're shopping for the Saris H3 or any other accessory items, please consider using the affiliate links below! As an Amazon Associate I earn from qualifying purchases. It doesn’t cost you anything extra, but your purchases help support this website a lot. Even more, if you shop with TPC (The Pro's Closet), you'll save $40 on purchases over $200 with coupon code DCRAIN40! The Pro's Closet has been a long-time partner of the site here - including sponsoring videos like my cargo bike race, as well as just being an awesome Colorado-based company full of good humans. Check them out with the links below and the DCRAIN40 coupon!
Here's a few other variants or sibling products that are worth considering:
Saris H3 Bundle
And finally, here’s a handy list of trainer accessories that most folks getting a smart trainer for the first time might not have already:
There's no better bang for your buck in getting Zwift (or FulGaz/etc) on your big screen TV than Apple TV - it's the primary way I Zwift.
Basic Trainer Mat
This is a super basic trainer mat, which is exactly what you'll see me use. All it does is stop sweat for getting places it shouldn't (it also helps with vibrations too).
Cassette Installation/Removal Tools
There are *many* variations of cassette removal tools, this is the best bang for your buck. Don't overthink this. You'll likely only use this tool once every 2-3 years.
Front Wheel Riser Block
Here's the thing, some people like front wheel blocks, some don't. I'm one of the ones that do. I like my front wheel to stay put and not aimlessly wiggle around. For $8, this solves that problem. Note some trainers do come with them. Also note, I use a riser block with *every* trainer.
Honeywell HT-900 Fan
I've got three of these $12 fans floating around the DCR Cave, and I frequently use them on rides. They work just fine. Sure, they're not as powerful as a Wahoo Headwind, but I could literally buy 20 of them for the same price.
This desk is both a knock-off of the original KICKR Desk, but yet also better than it. First, it's got wheel locks (so the darn thing stays put), and second, it has two water bottle holders (also useful for putting other things like remotes). I've been using it as my main trainer desk for a long time now and love it. Cheaper is better apparently. Note: Branding varies by country, exact same desk.
This is by far the best value in trainer desks, at only $59, but with most of the features of the higher end features. It's got multi-tier tablet slots, water bottle holders, non-stick surface, adjustable height and more. I'm loving it!
Lasko High Velocity Pro-Performance Fan (U15617)
One of the most popular trainer fans out there, rivaling the Wahoo Headwind fan in strength but at a fraction of the price. It doesn't have smartphone/ANT+/Bluetooth integration, but it does have secondary outlets. I've been using it, and a similiar European version lately with great success (exact EU variant I use is automatically linked at left).
Shimano R7000 105 Cassette (11-speed)
This is a Shimano 105 cassette (thus, slightly more budget compared to the Ultegra), in most cases, you probably won't notice the difference. Ensure that the number of speeds matches your bike (e.g. 11-speed, 10-speed, 9-speed, etc...).
Shimano R8000 Ultegra Cassette (11-speed)
This is a Ultegra cassette, you can save about $10-$15 by picking up a Shimano 105 instead. Ensure that the number of speeds matches your bike (e.g. 11-speed, 10-speed, 9-speed, etc...).
I've had this for years, and use it in places where I don't have a big screen or desk, but just an iPad or tablet on my road bike bars.
And of course – you can always sign-up to be a DCR Supporter! That gets you an ad-free DCR, access to the DCR Quarantine Corner video series packed with behind the scenes tidbits...and it also makes you awesome. And being awesome is what it’s all about!
Thanks for reading! And as always, feel free to post comments or questions in the comments section below, I’ll be happy to try and answer them as quickly as possible. And lastly, if you felt this review was useful – I always appreciate feedback in the comments below. Thanks!