
Back this past fall I got the chance to spend a day in the Specialized Win Tunnel to test all sorts of gadgets out. Yes, it’s actually called the ‘Win’ Tunnel, not the ‘Wind’ Tunnel. But of course, a wind tunnel is what it is.
I’ve long wanted to test a wide variety of sports tech gadgets to see how they handled from an aerodynamic standpoint. But doing so without a repeatable testing methodology is tricky. I did some of that a while back at the ERO facility using Alphamantis. That worked well for testing positions and components. But it would have been harder for the sheer quantity of items I wanted to test. I needed something that would allow me to exclude all other variables (human or otherwise) and repeat for hours on end, while also being sensitive enough to detect the difference of a GoPro thumb screw. Thus, the need for a true wind tunnel.
The Specialized guys have long posted videos to their YouTube channel with various wind tunnel tests, from the popular shaving of legs to women’s hair-do’s. But in this case, I wanted to cover things they hadn’t done before in their videos. So I spent a full day there with Cam & Chris (of Specialized), and a suitcase full of gadgets to get to the bottom of things.
An Overview of the Tunnel:

First up is a primer on the tunnel itself. The Win Tunnel is located in Morgan Hill, California, as part of the Specialized campus. It’s not in the main building with all the designers, but rather is a separate building a few blocks away. In an ode to skunk works, the otherwise reddish brick was painted a jet black.

When you step into the building you realize the entire building was essentially gutted, leaving just this external shell of a structure. Inside is where they then built the tunnel itself. From a size standpoint, just imagine four double-length city buses stacked (2×2) on top of each other, sitting inside a high school gym. That’s kinda like the Win Tunnel building.

The tunnel basically moves air from front the front to back. Contrary to popular assumption, air is not pushed, but rather pulled. So in the above picture, we’re looking at the front of the tunnel where air would go through (ultimately hitting me on the head on the bike). If we walk closer you see this honeycomb structure. That enables the air to be normalized as it gets pulled into the tunnel section.

The area in front of the tunnel (where the air is pulled from) is quite vast, ensuring that there’s enough air to be pulled towards the tunnel as required at various speeds. It also serves as a great spot for makeshift parties and events. The remnants of one from a few days earlier was still present, including Crowie’s Ironman World Championship bike:


You’ll head up a short set of stairs (seen above) to the control room. There’s also a ramp around back too for rolling objects up to it.

The control room is a quieter area that allows them to control the wind tunnel, but it also acts as a classroom and staging area. Be it for teams, test setups, or so on. Across the way there’s another room that’s designed for storing secret stuff.

Before talking about the insides of the tunnel, let’s circle around the back. This is where you’ll find the giant fans that pull the air through the tunnel. You can see the wall to the left (below) is angled to re-distribute air back towards the front of the building.


The design of the tunnel is distinctly different from a typical automotive wind tunnel in that it’s designed to be low-speed (for cycling). With most automotive focused tunnels (or even ones for aviation), the speeds are far higher. This makes it tricky to get down to various speed thresholds that are more common to cyclists. Said differently: It’s not as useful to test at 80KPH, if you’re actually racing at 40-50KPH.
Heading back into the tunnel we’ve got a slightly raised platform that air can pass both above and below.

The bike is situated forward in the tunnel, and then there is a projector in the ceiling that projects real-time information down onto the ground:

The bike is fitted to a modified trainer to ensure you are pedaling. It’s technically a Wahoo KICKR below the paneling, albeit somewhat torn apart. You can see it here once the panels are removed.
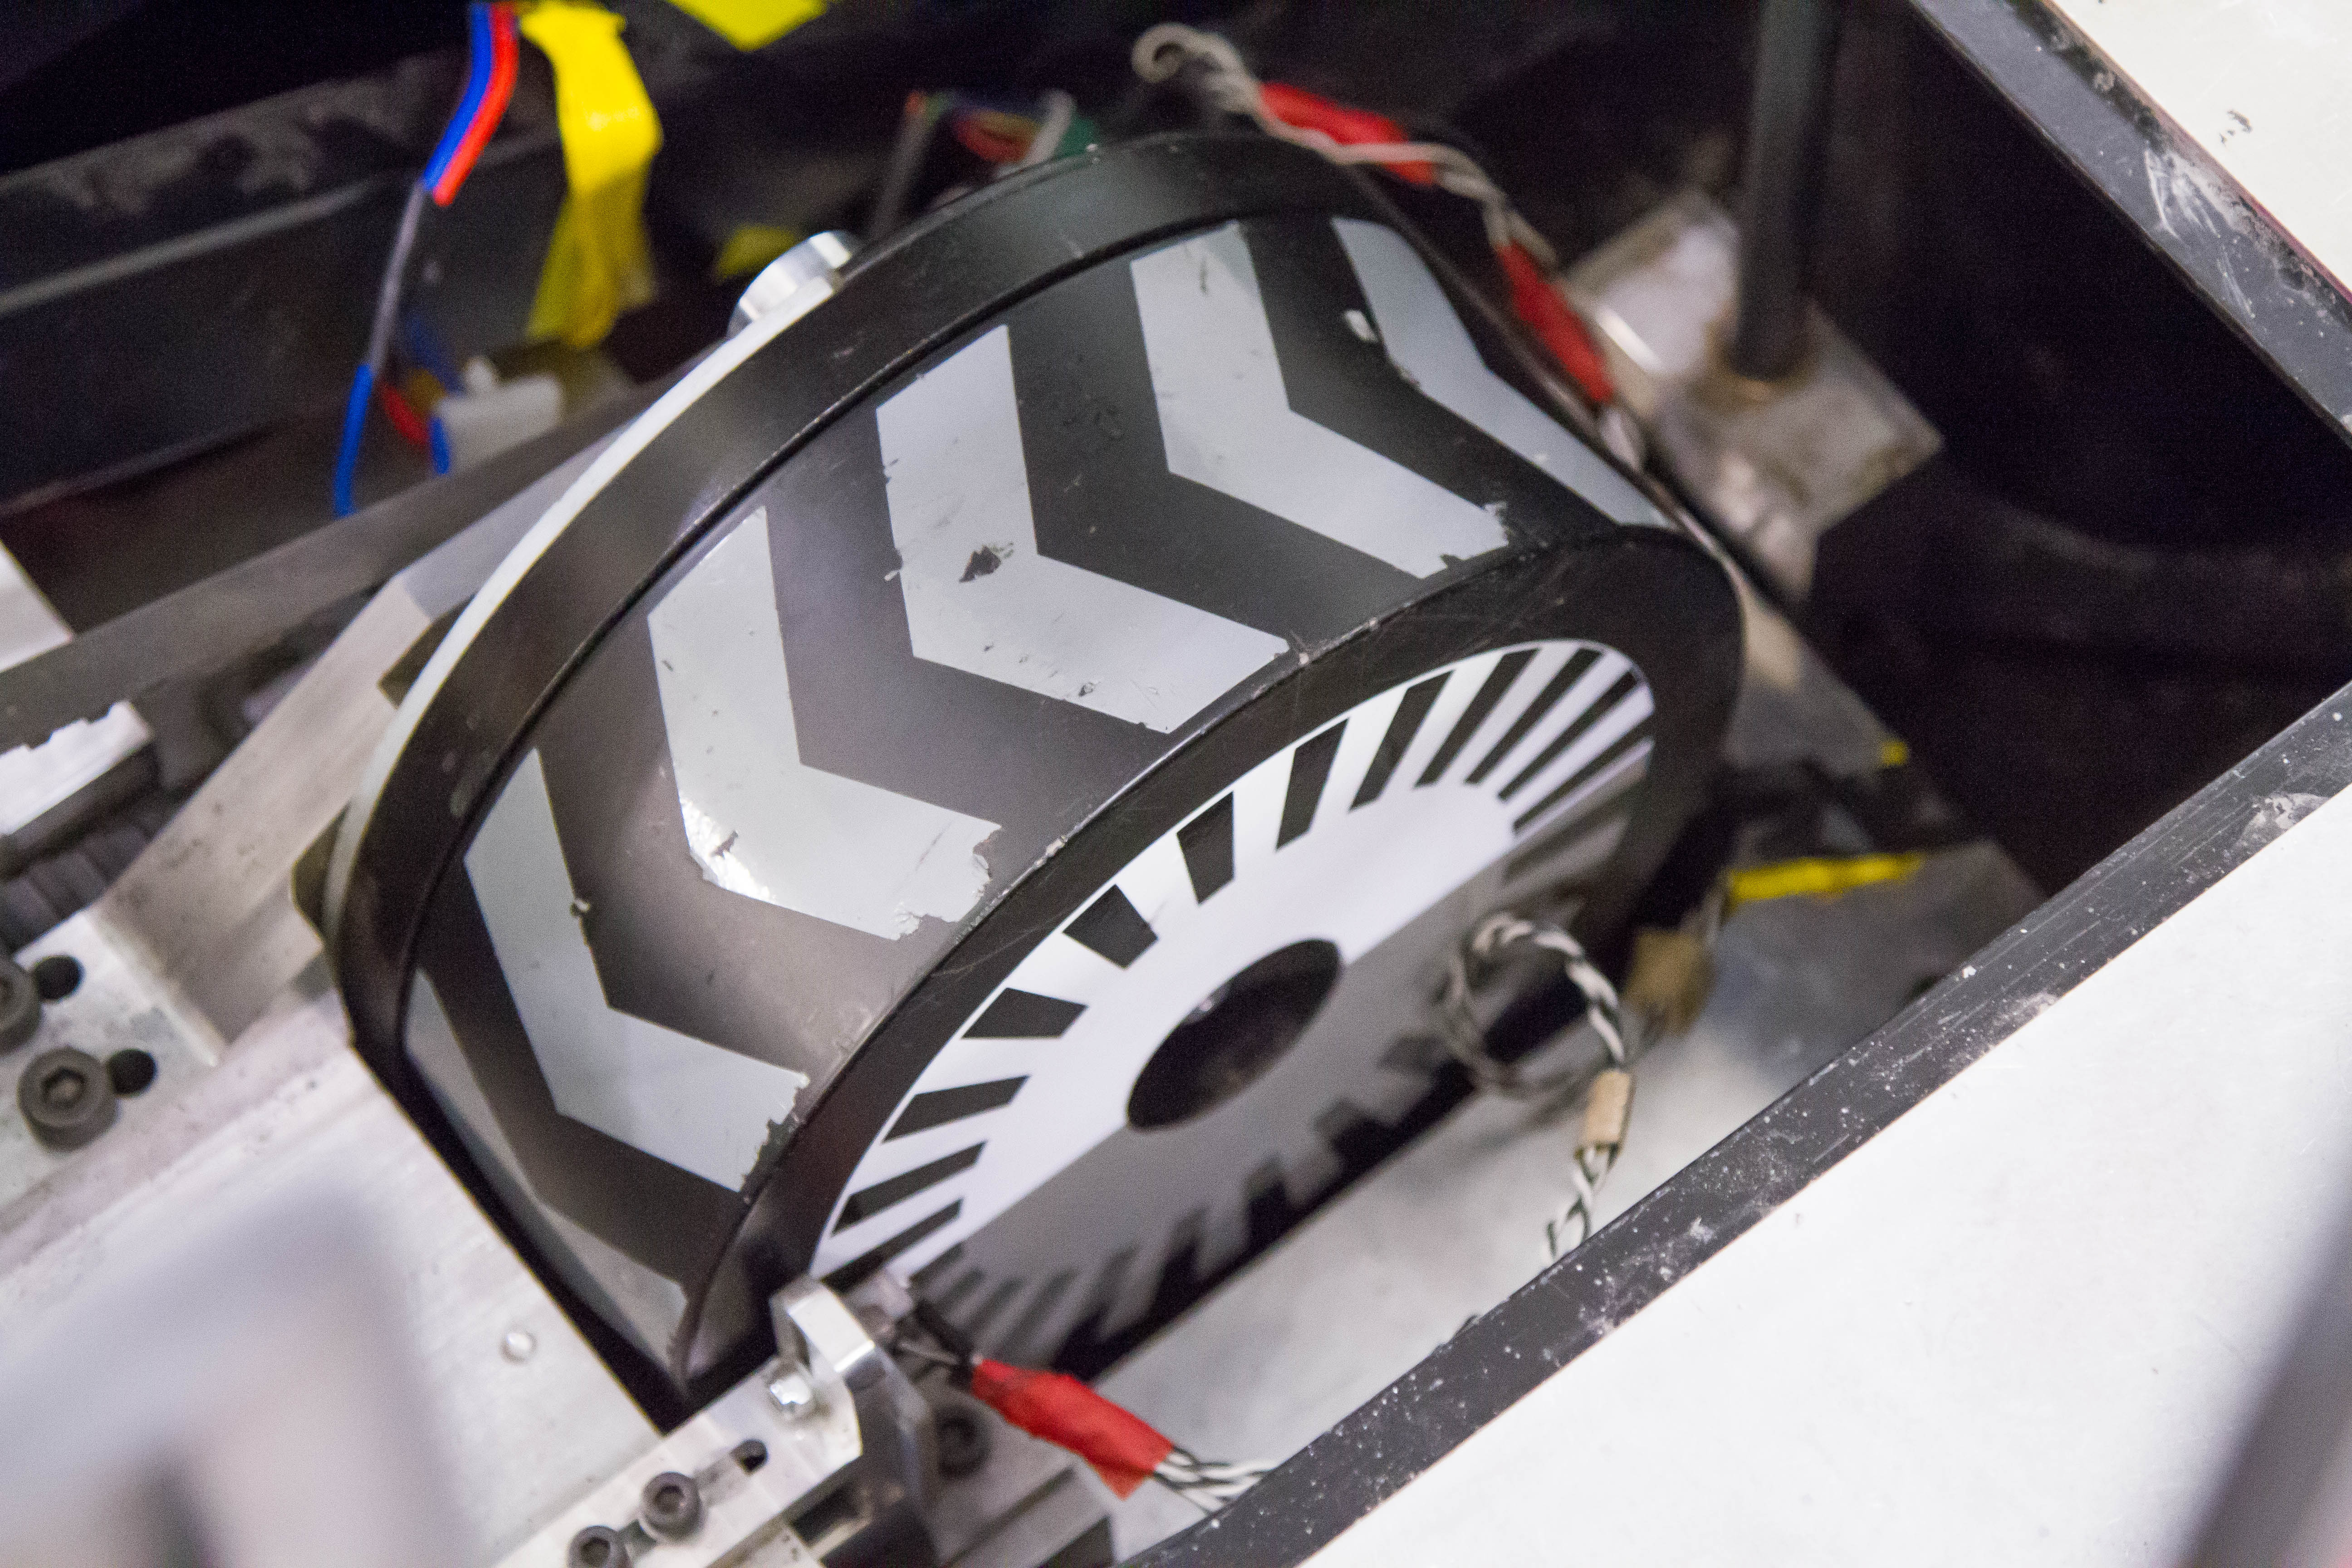
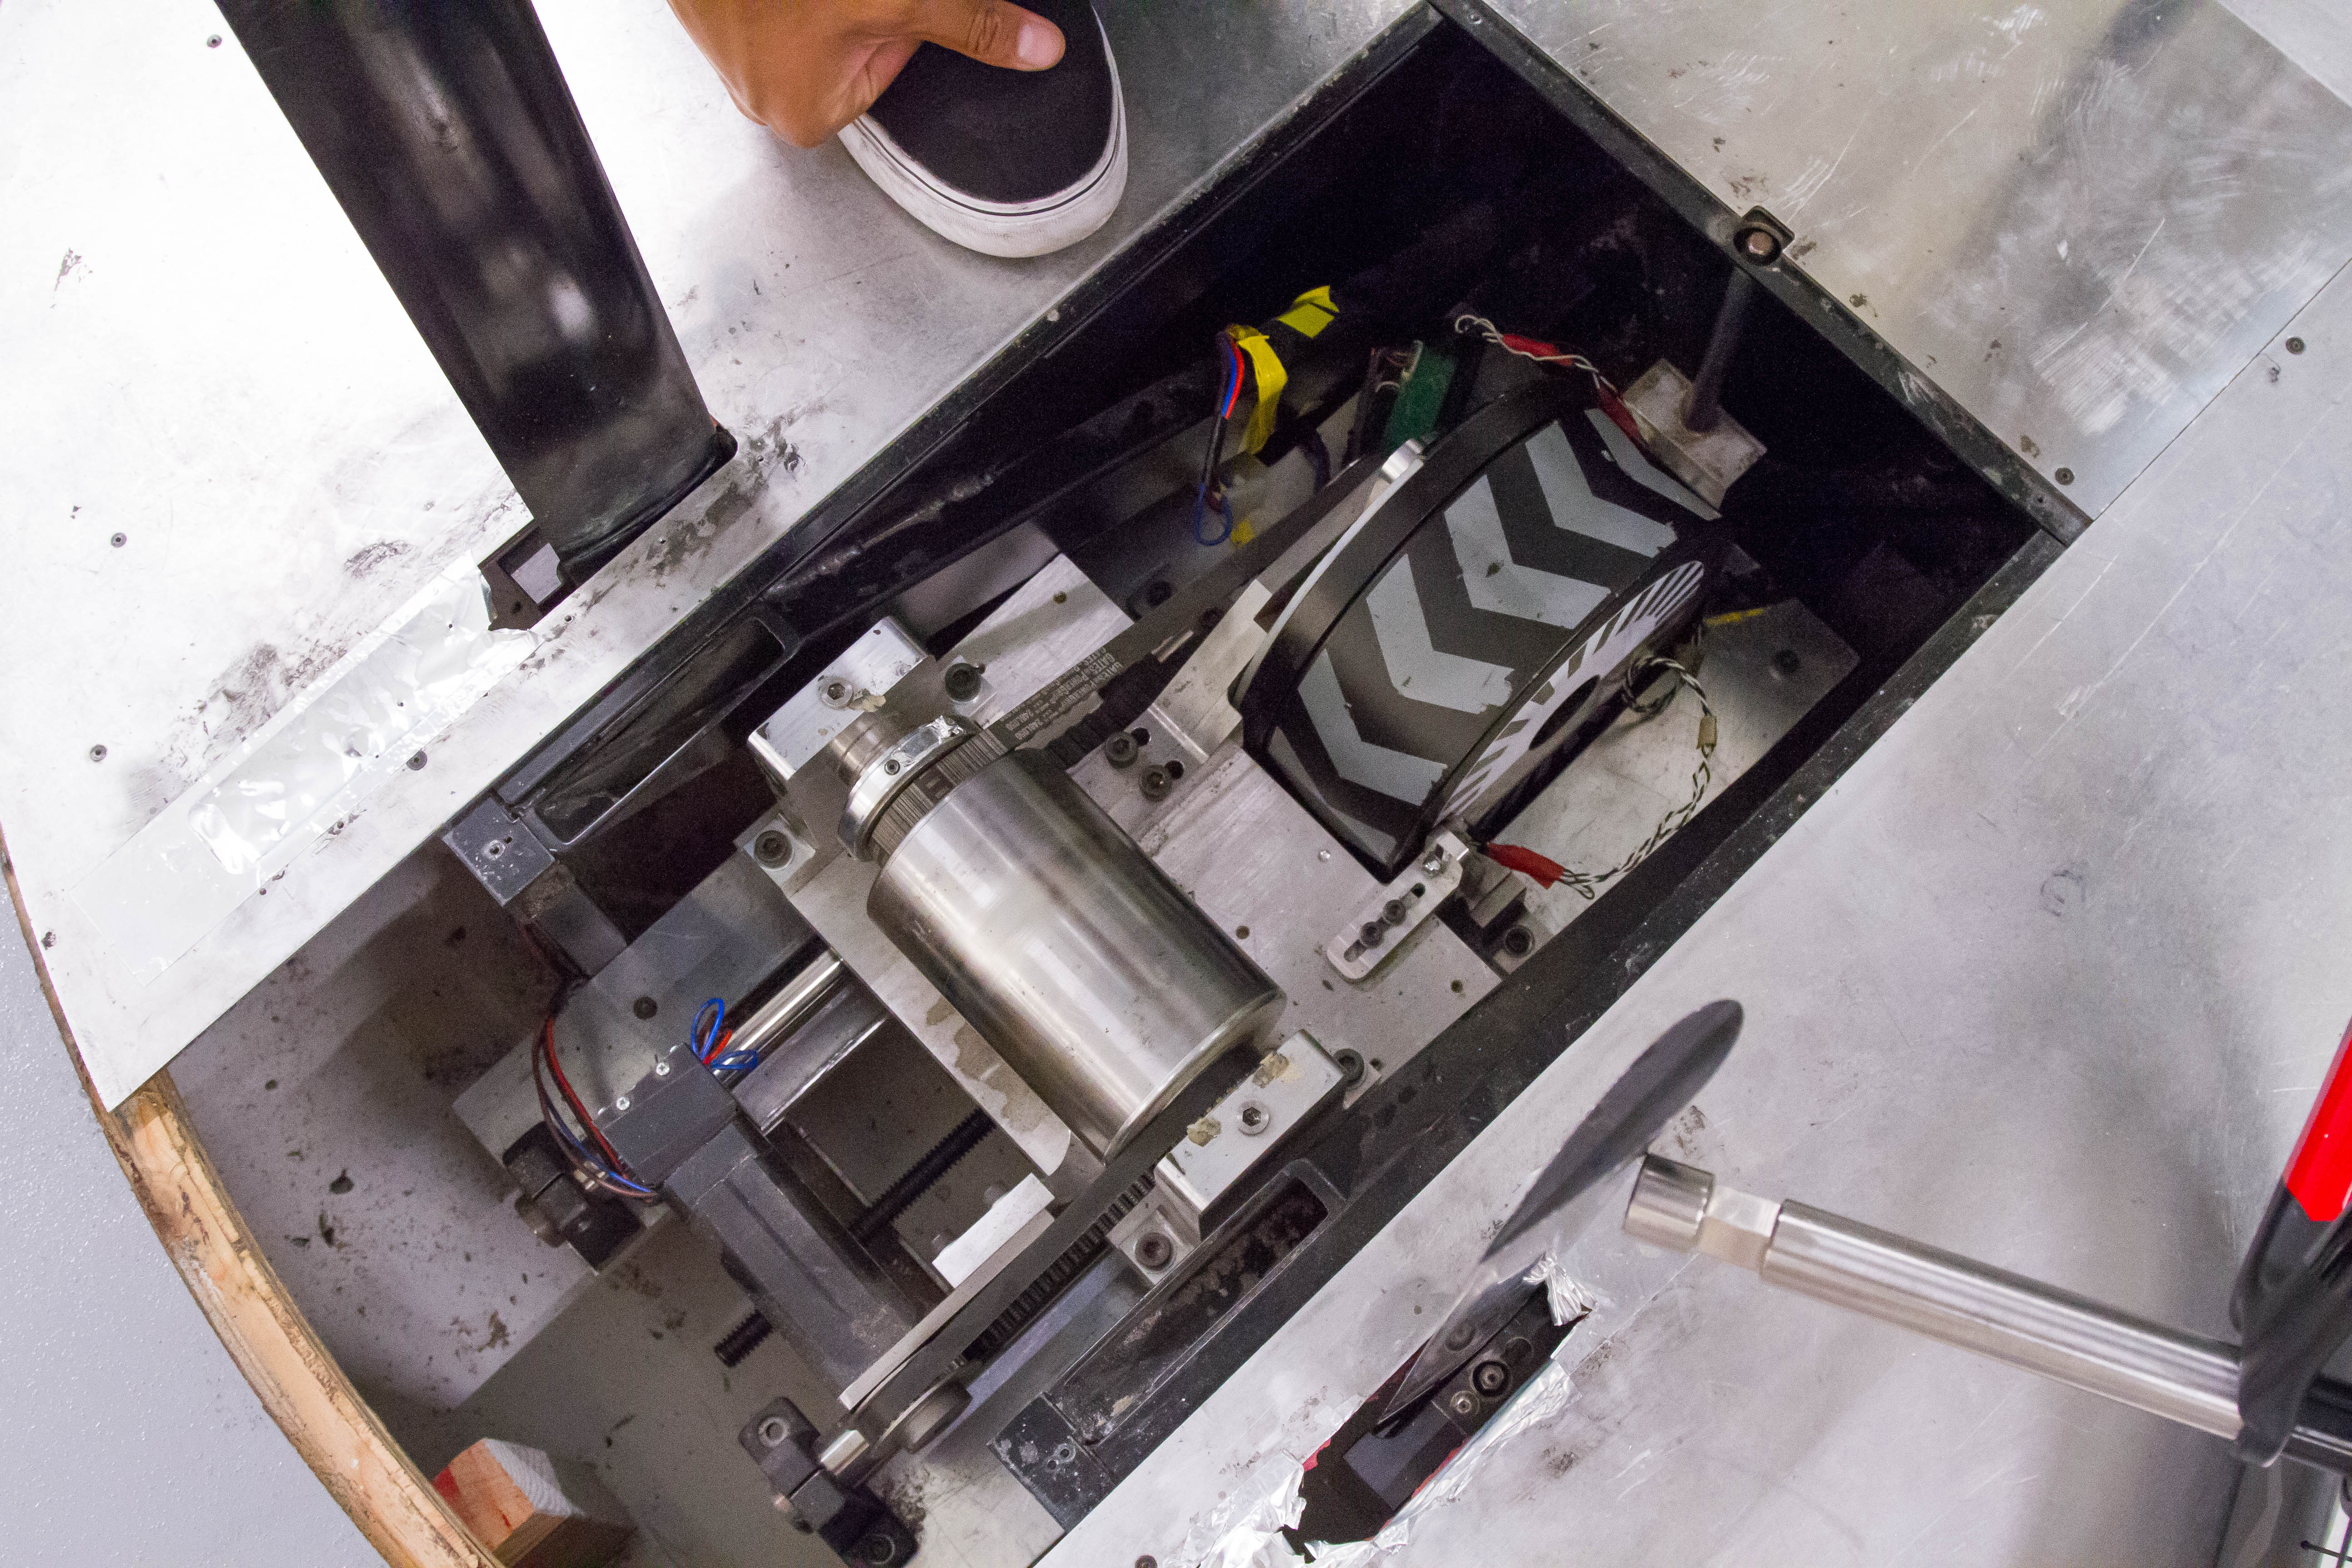
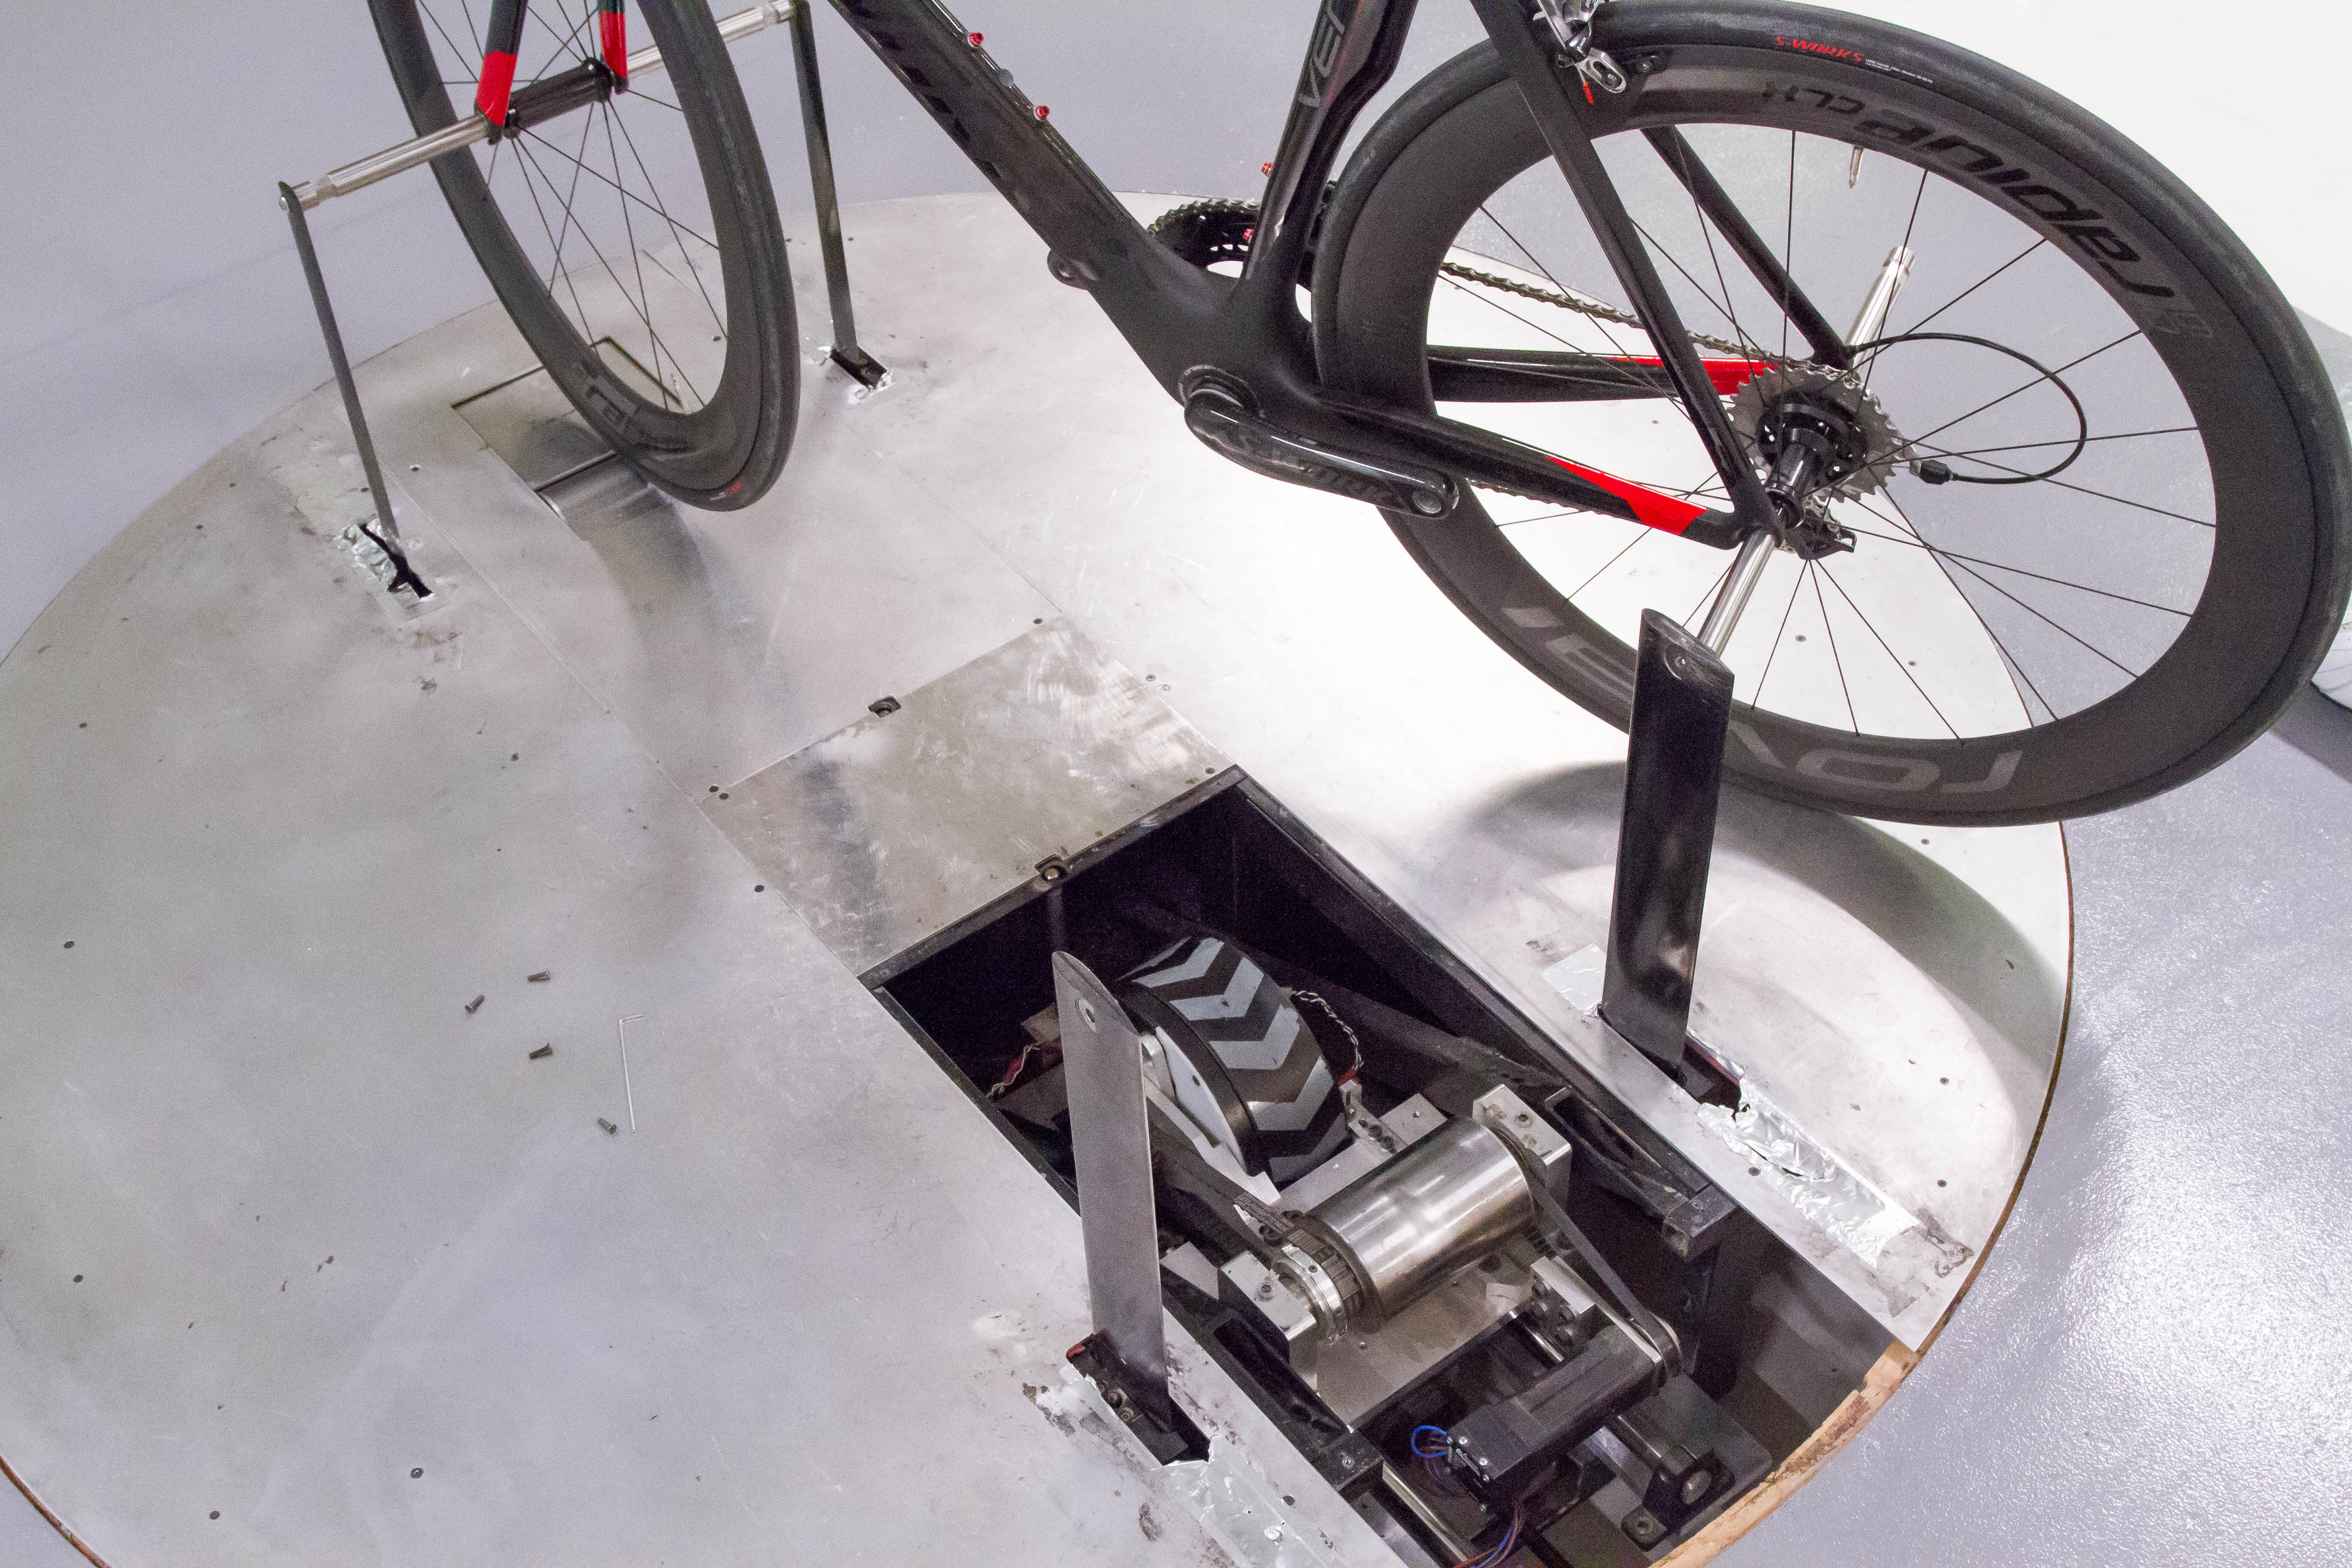
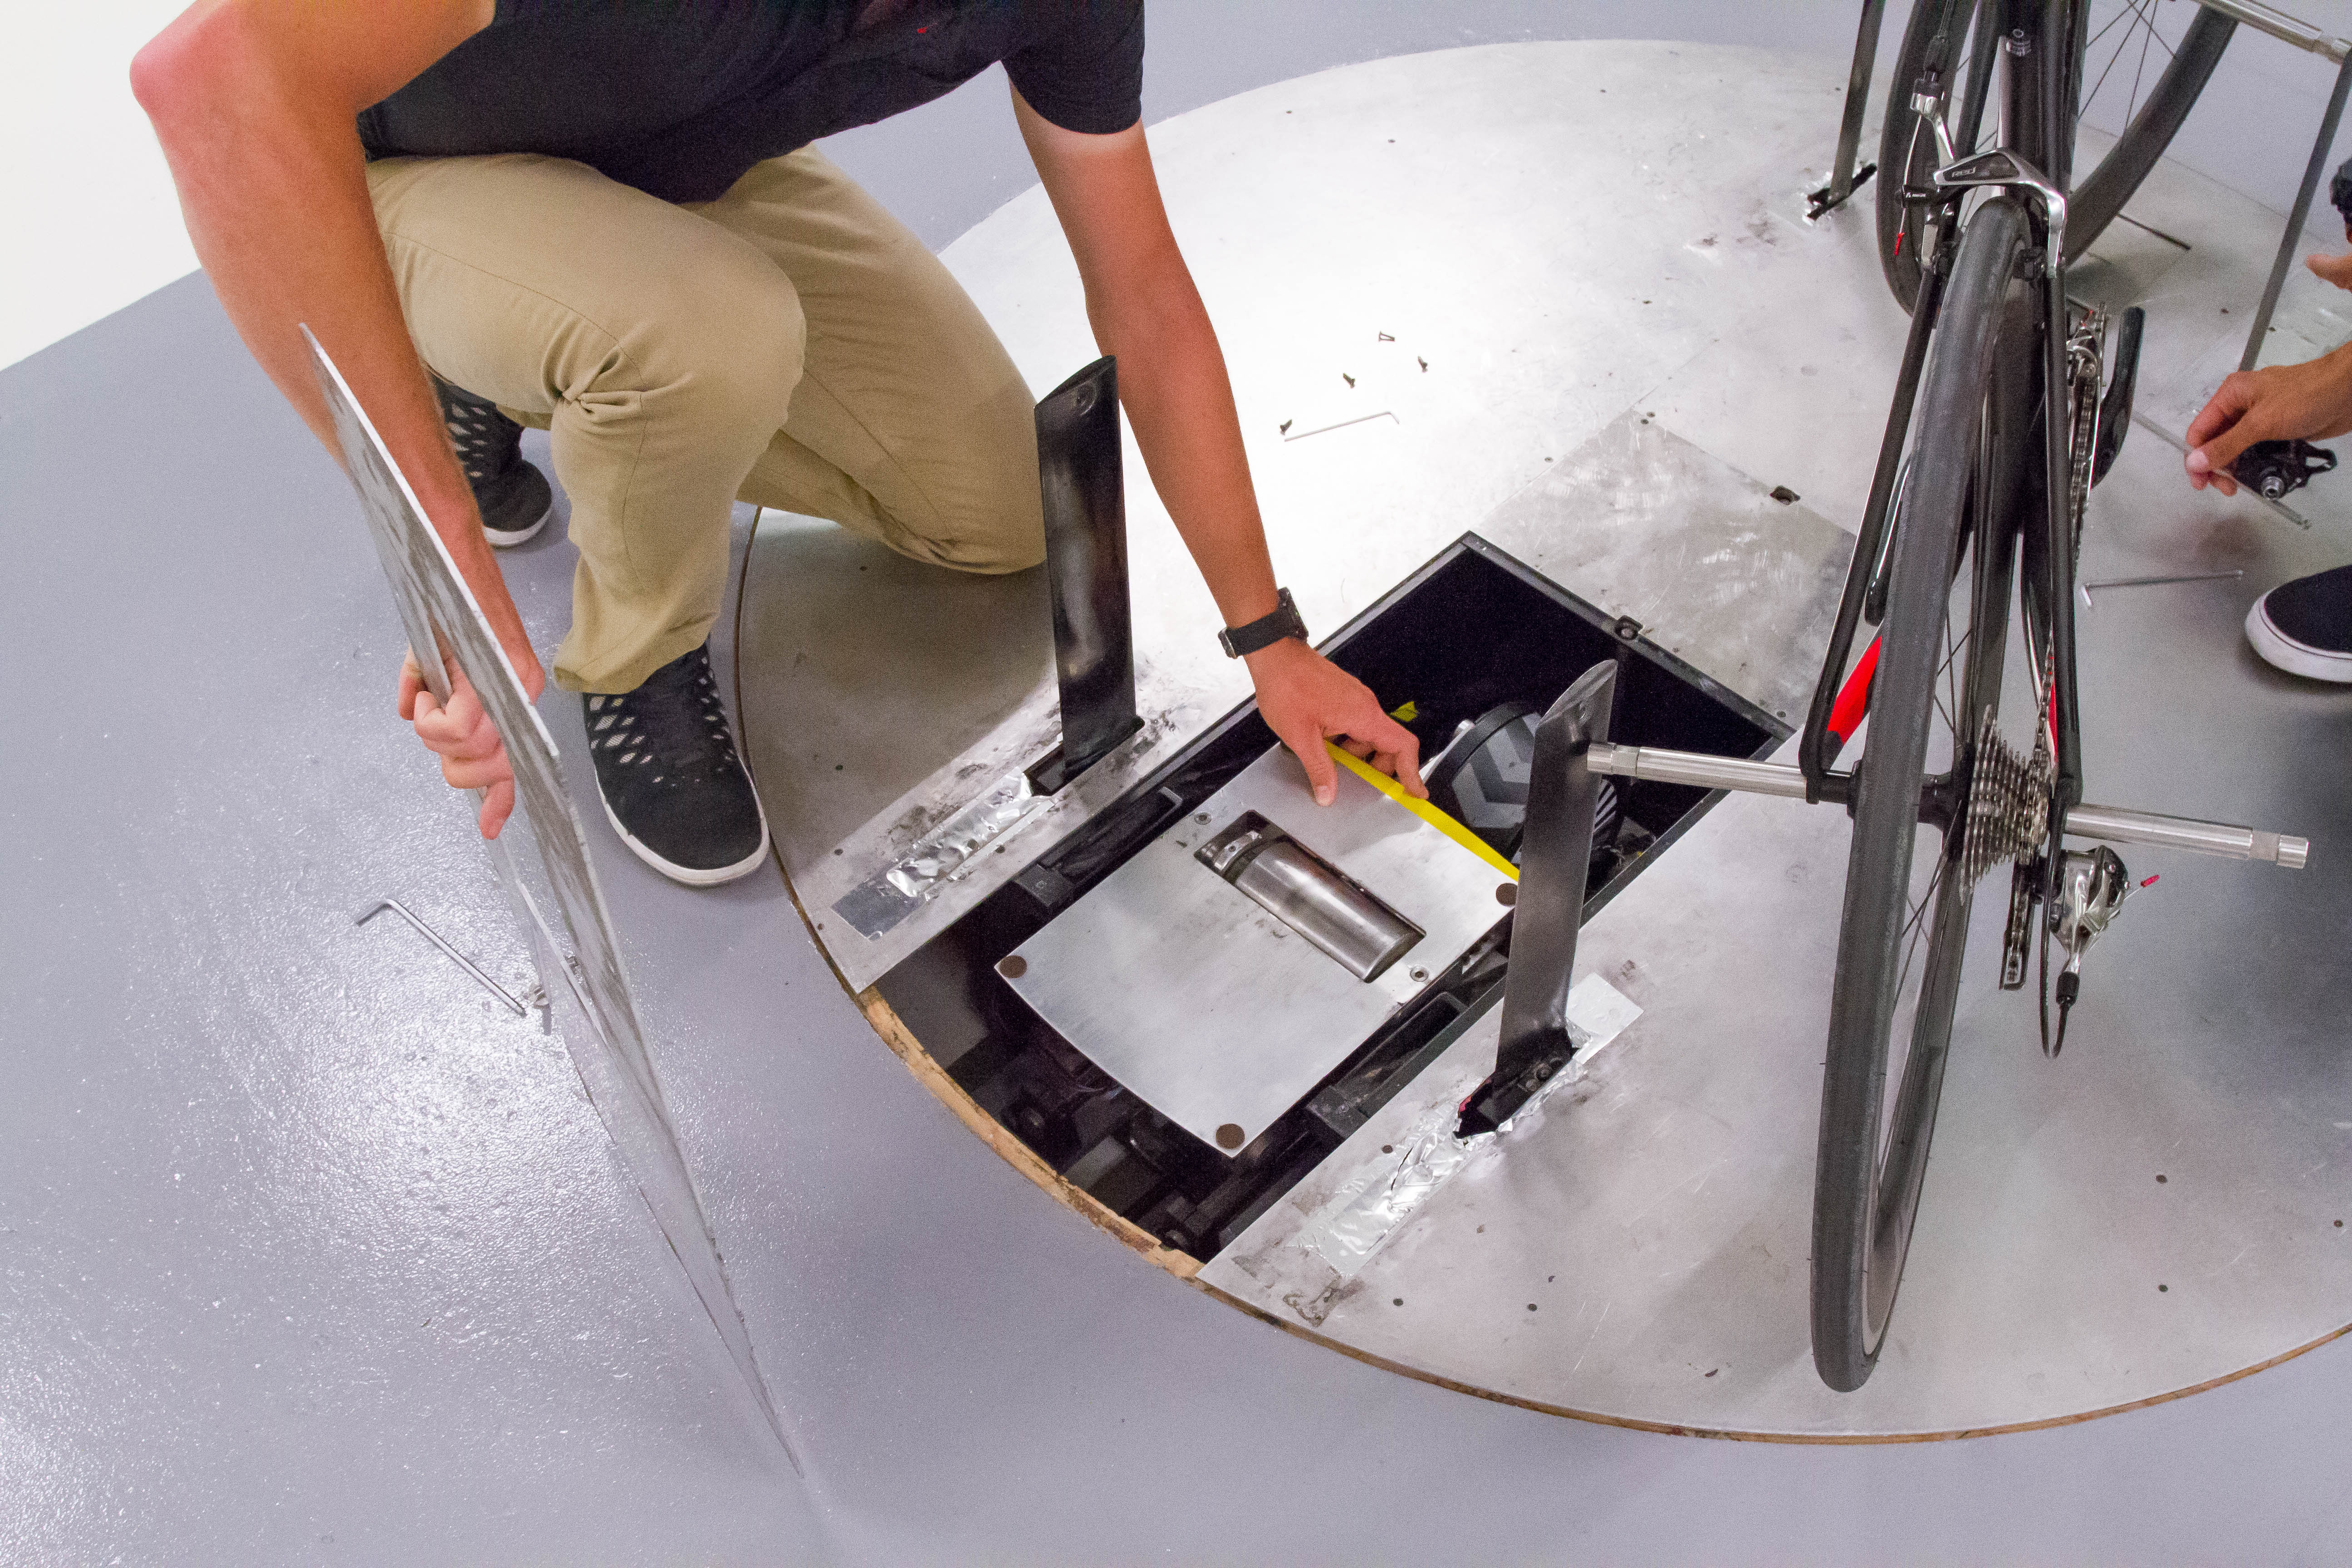
The mechanical components under the paneled portion drive both the front and rear wheels, allowing a specified speed to be set (i.e. a ground speed that may or may not match the wind speed).


Even cooler though, is that the entire circle paneled portion actually rotates like a giant merry-go-round.

This enables them to test different angles to the wind, for example a wind hitting at 10° to the front (yaw). Everything is automated too, so that each test is done at various yaw angles. Here’s a quick video showing a bike (and me) on it, as well as a bike rotating autonomously on the platform.

However, the real key here is that those metal plates act kinda like a giant power meter sensor for wind. Essentially changes to pressure is what’s being measured. It’s not the wind directly. There is no colored streams of wind here, or any other fancy stuff somewhere in the fans. Instead, it’s the changes in pressure on the plate that determine how aerodynamic something is.

So if you were to hold up your hands like the YMCA song, it’d create more drag which in turn creates more pressure pushing down onto the plates (through your bike). Thus, less aerodynamic. Obviously, the entire plate system is incredibly sensitive.

All of this is then recorded in real-time into the control room and exported onto spreadsheets and data plots for deeper analysis. Additionally, the software stores photos of all the setups from multiple angles too.

The tunnel is big enough that they can (and have) done lineups of multiple riders, trying to figure out the best possible scenarios for team trials and lead-outs. Numerous pro teams and pro riders have visited the tunnel for testing. On the flip side, you can also do much smaller scale testing, of say just a tire, as done by Tom Anhalt lately.
Which brings us around to what I was testing…
What We Tested:

Like the last time I did aerodynamic testing, this wasn’t really about testing me or my position. In fact, I didn’t even bring my bike this time. Rather, they supplied a bike (the Venge). I just brought a suitcase full of gadgets and accessories, and an entire day of free time.
The goal here was to test a few categories of items:
A) Bike computers
B) Action cams
C) Bike computer mounts
D) Heads up display (HUD)
The last category was sorta a dumb-luck type of thing, since I happened to have it in my bag and there was some curiosity as to whether it’d be more or less aerodynamic than juts having a normal bike computer.
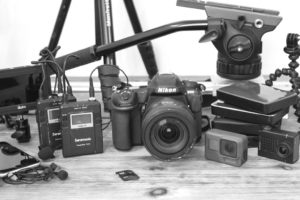
Here’s the exact lineup:
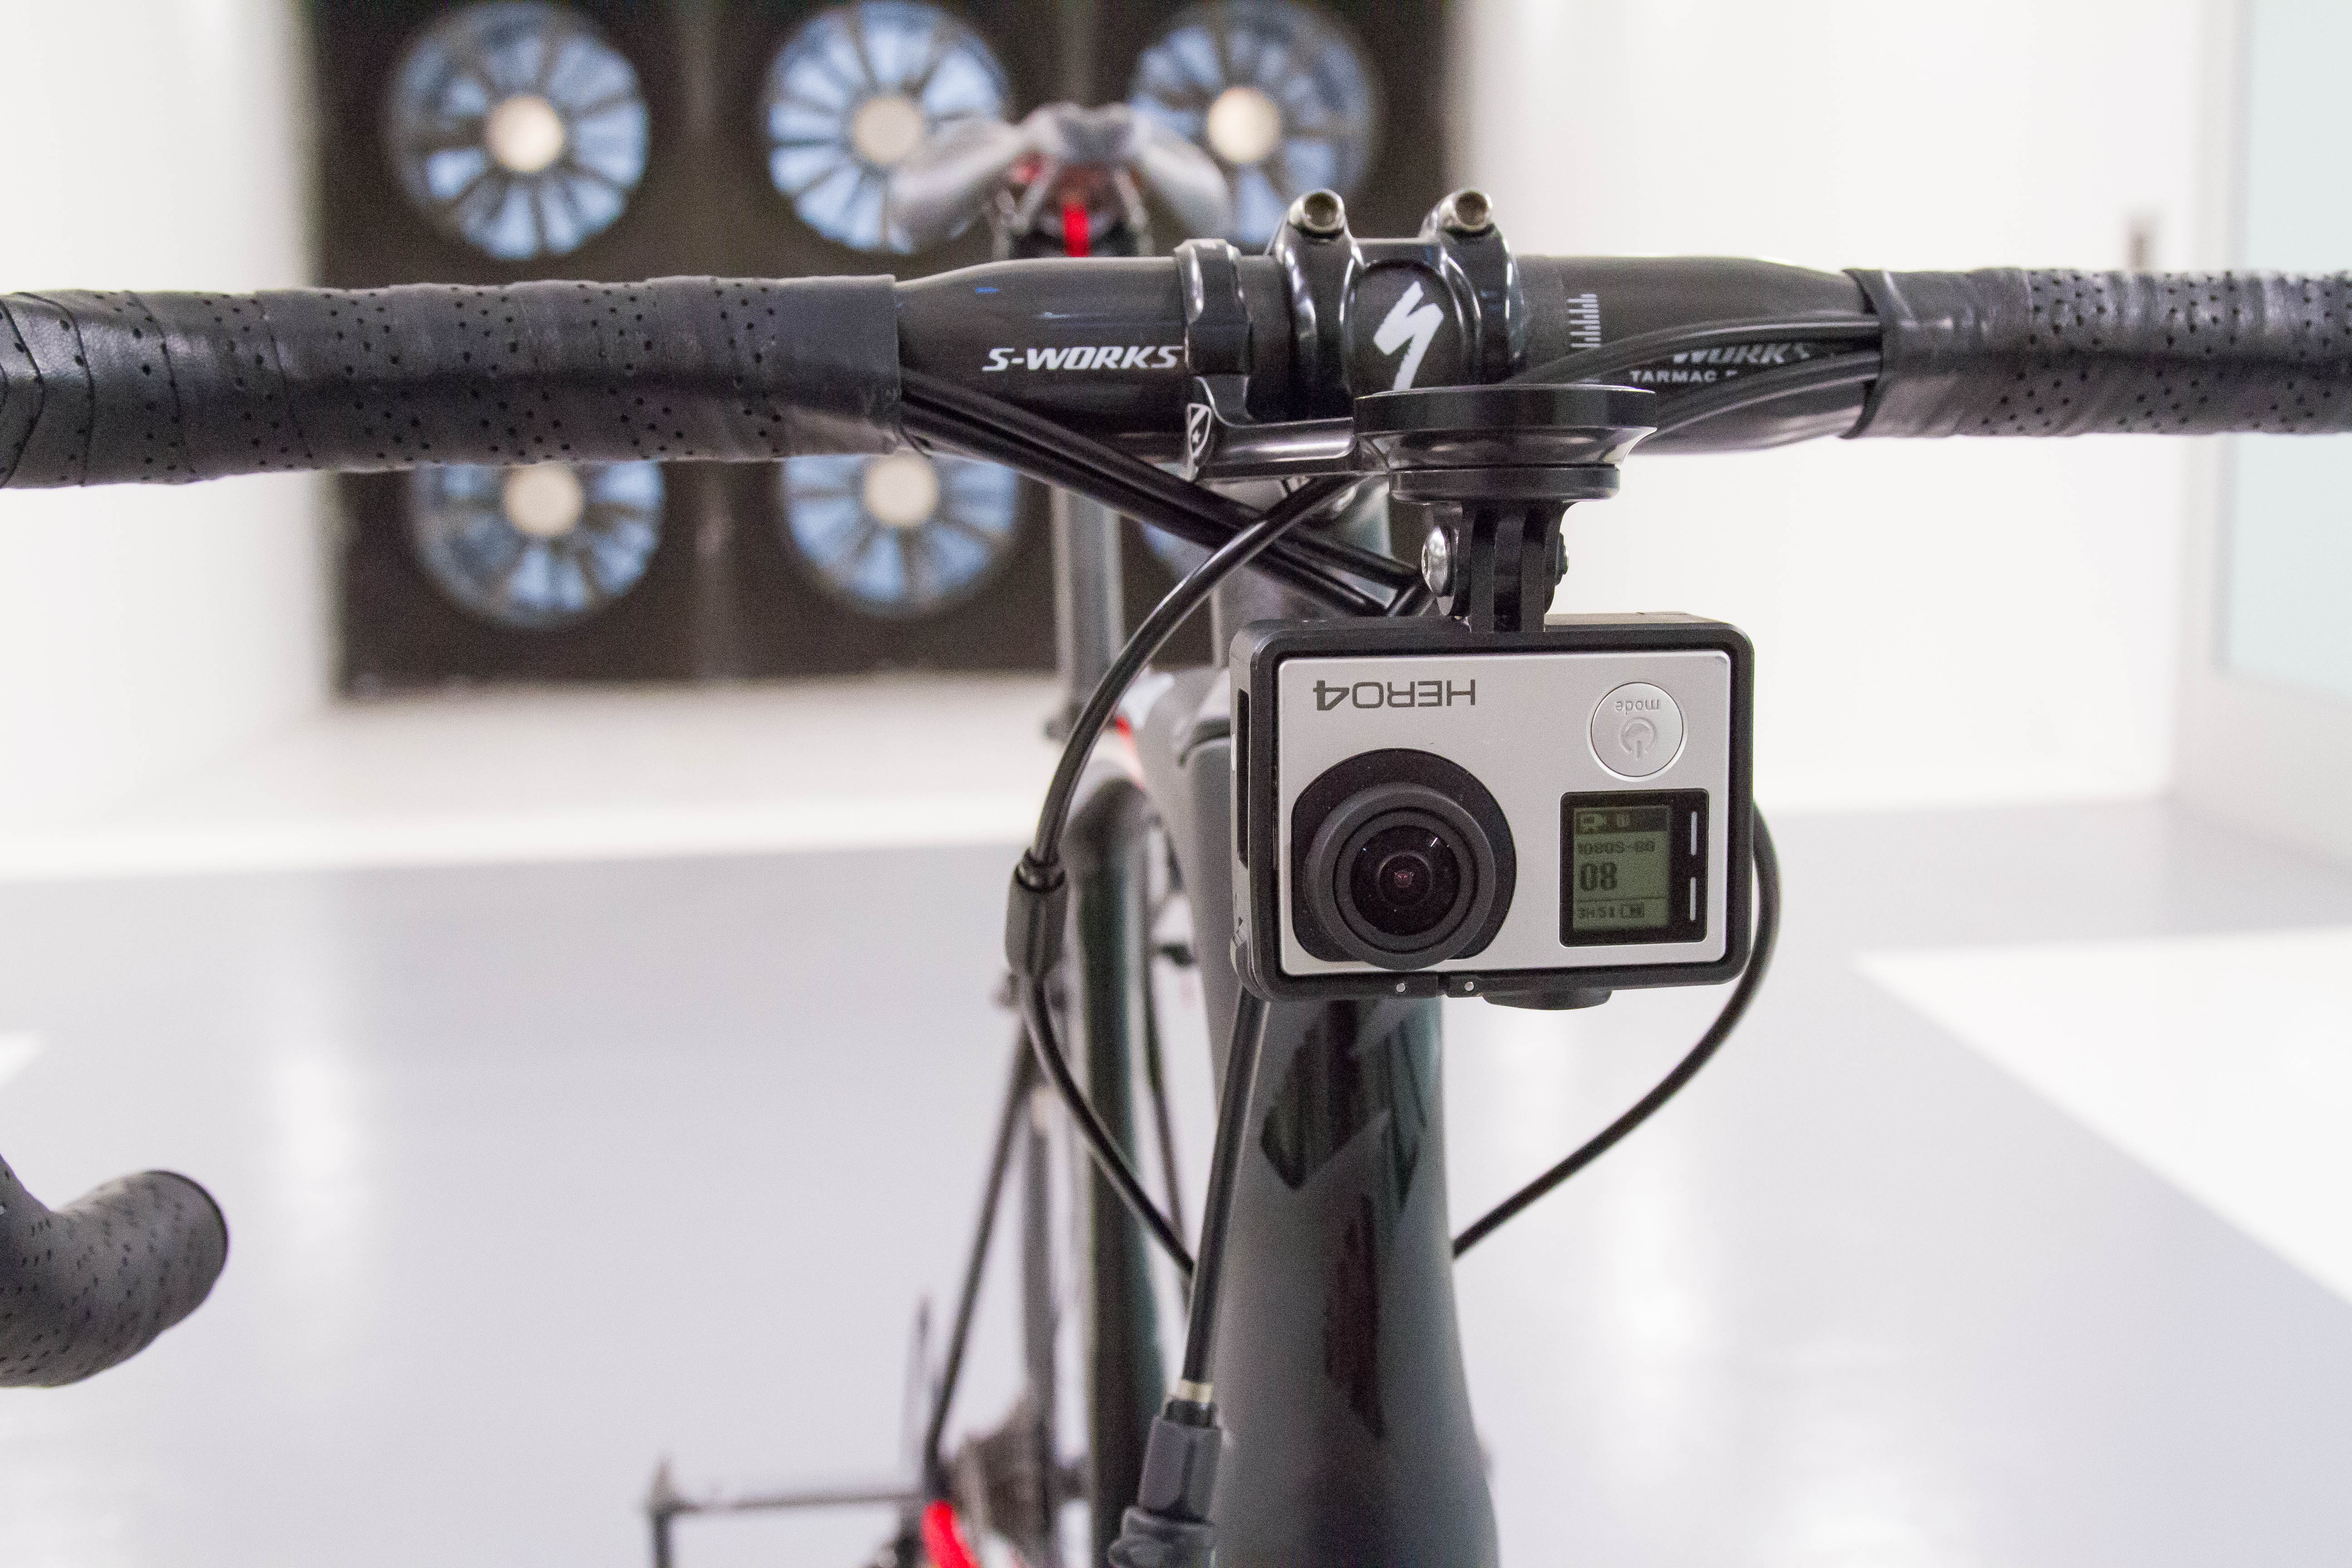
1) [Action Cam] GoPro Hero4 Silver with waterproof case
2) [Action Cam] GoPro Hero4 Silver with just frame case
3) [Action Cam] GoPro Hero4 Session
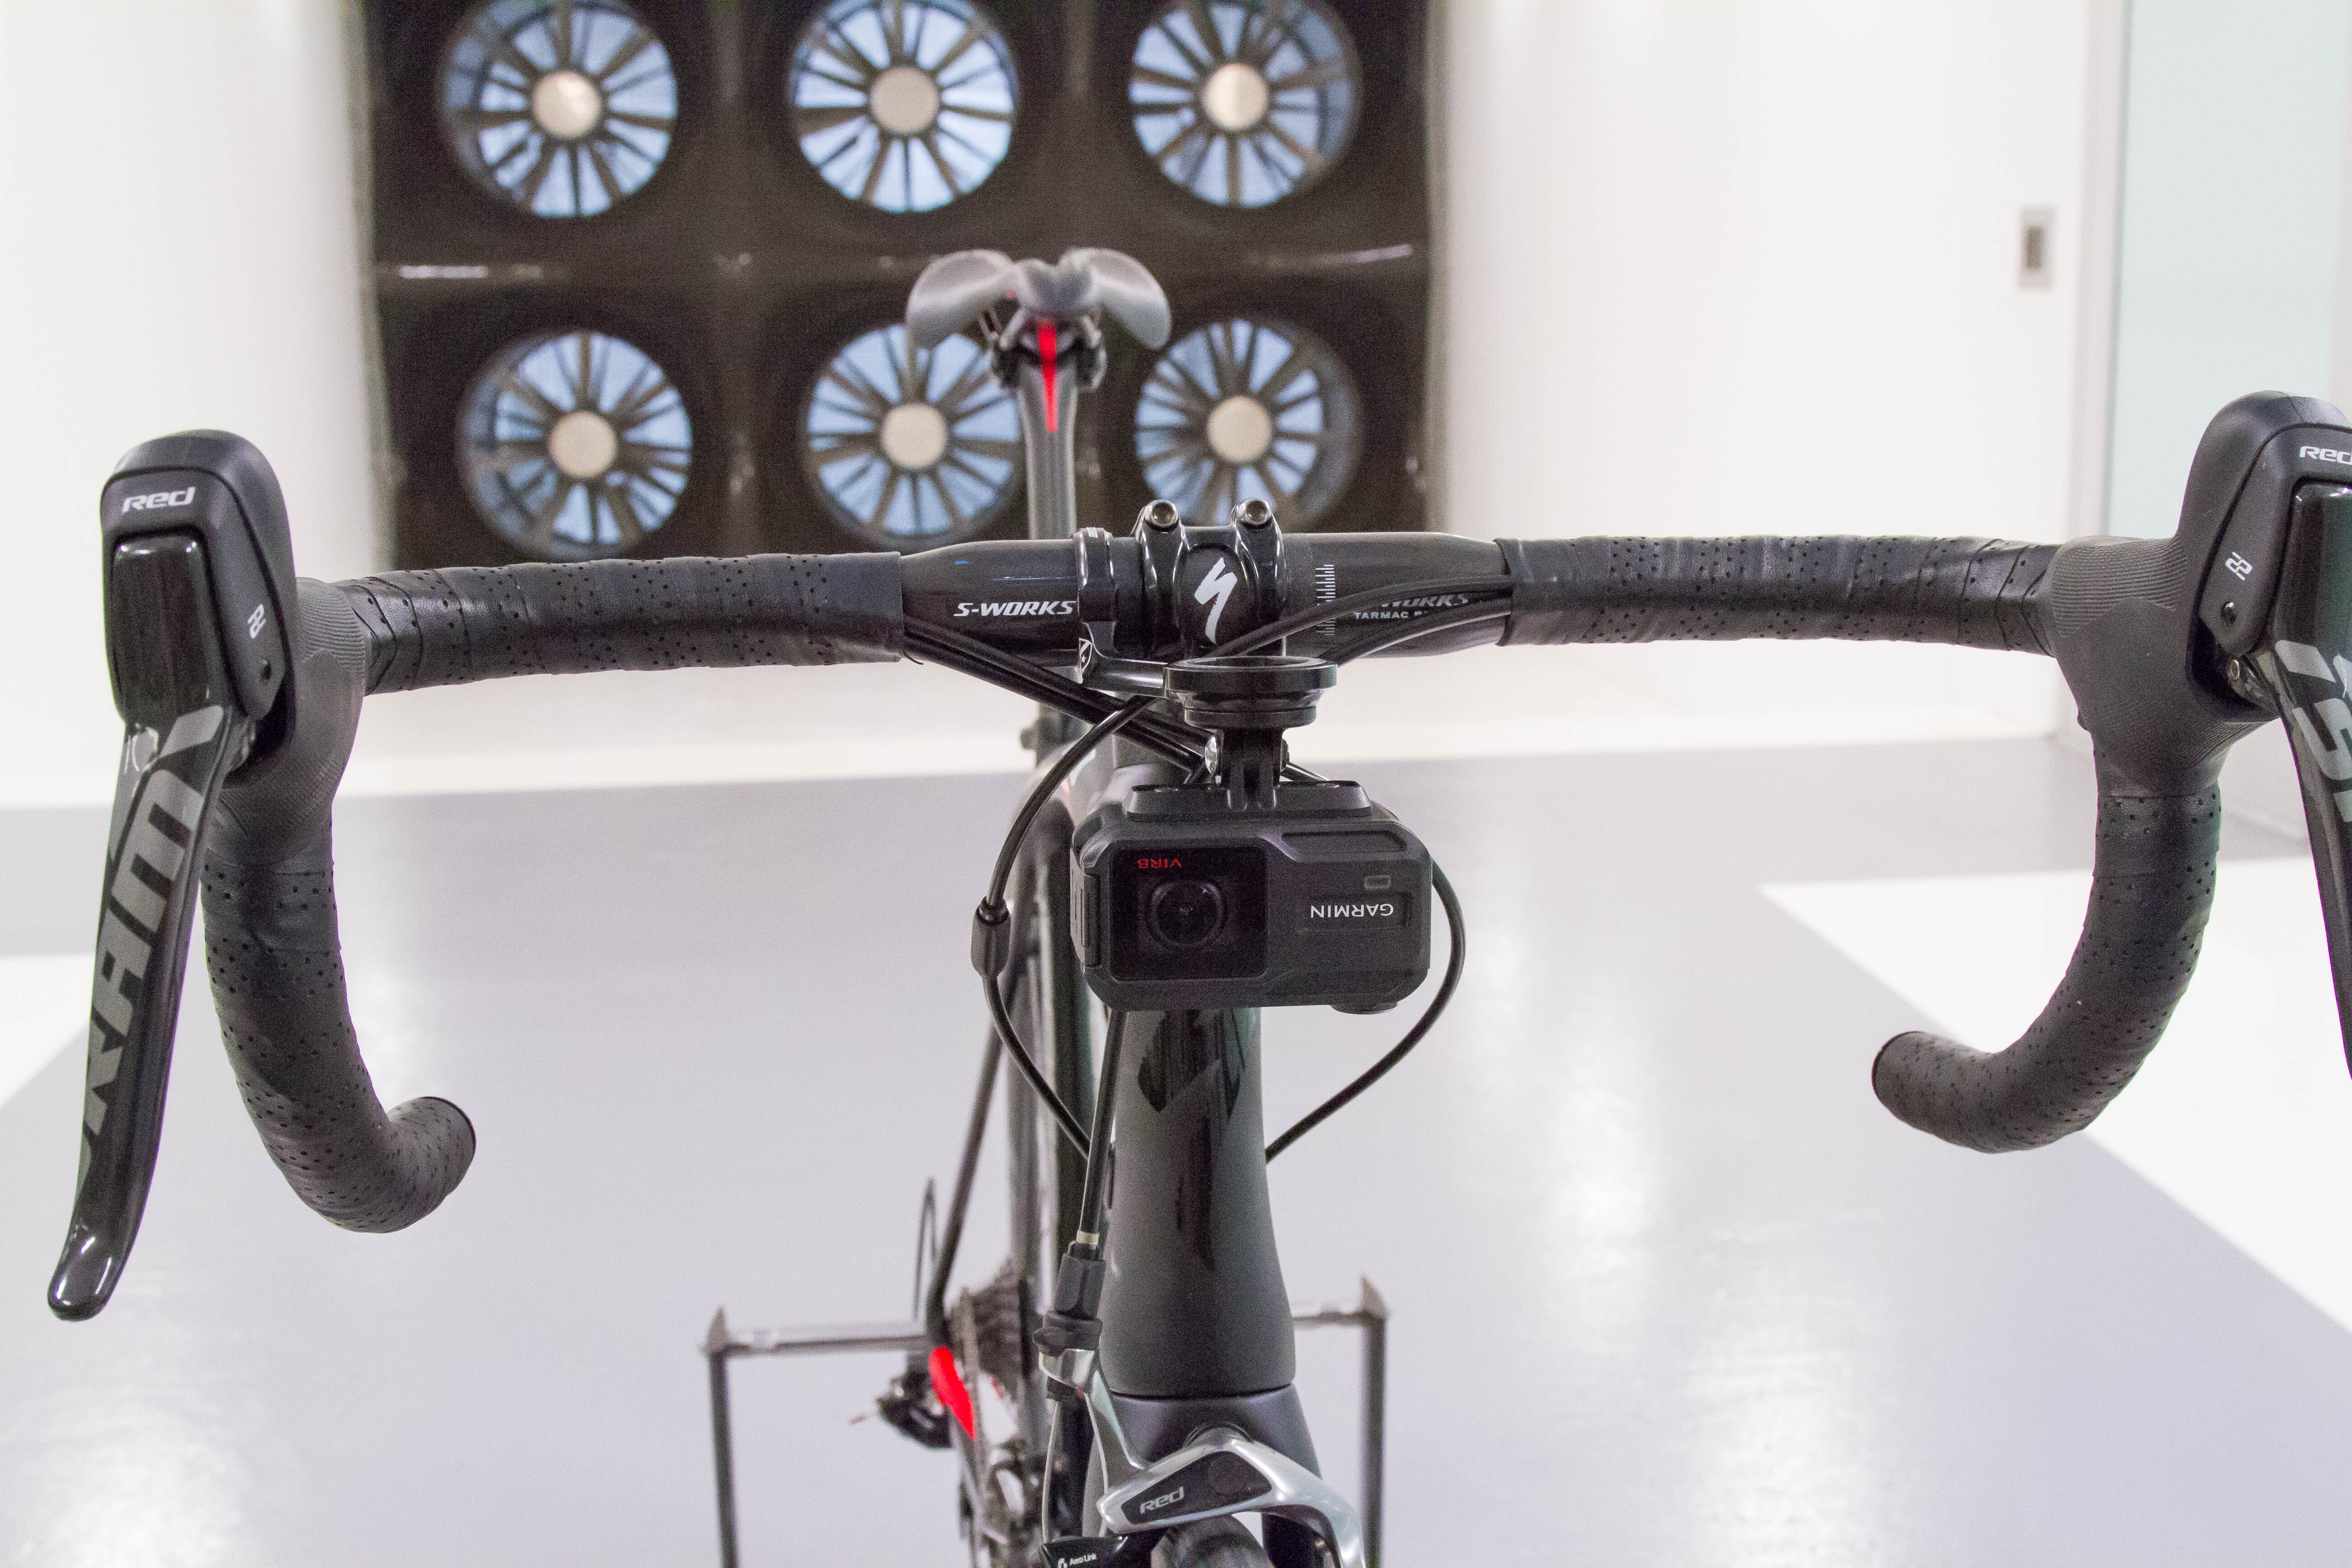
4) [Action Cam] Garmin VIRB XE
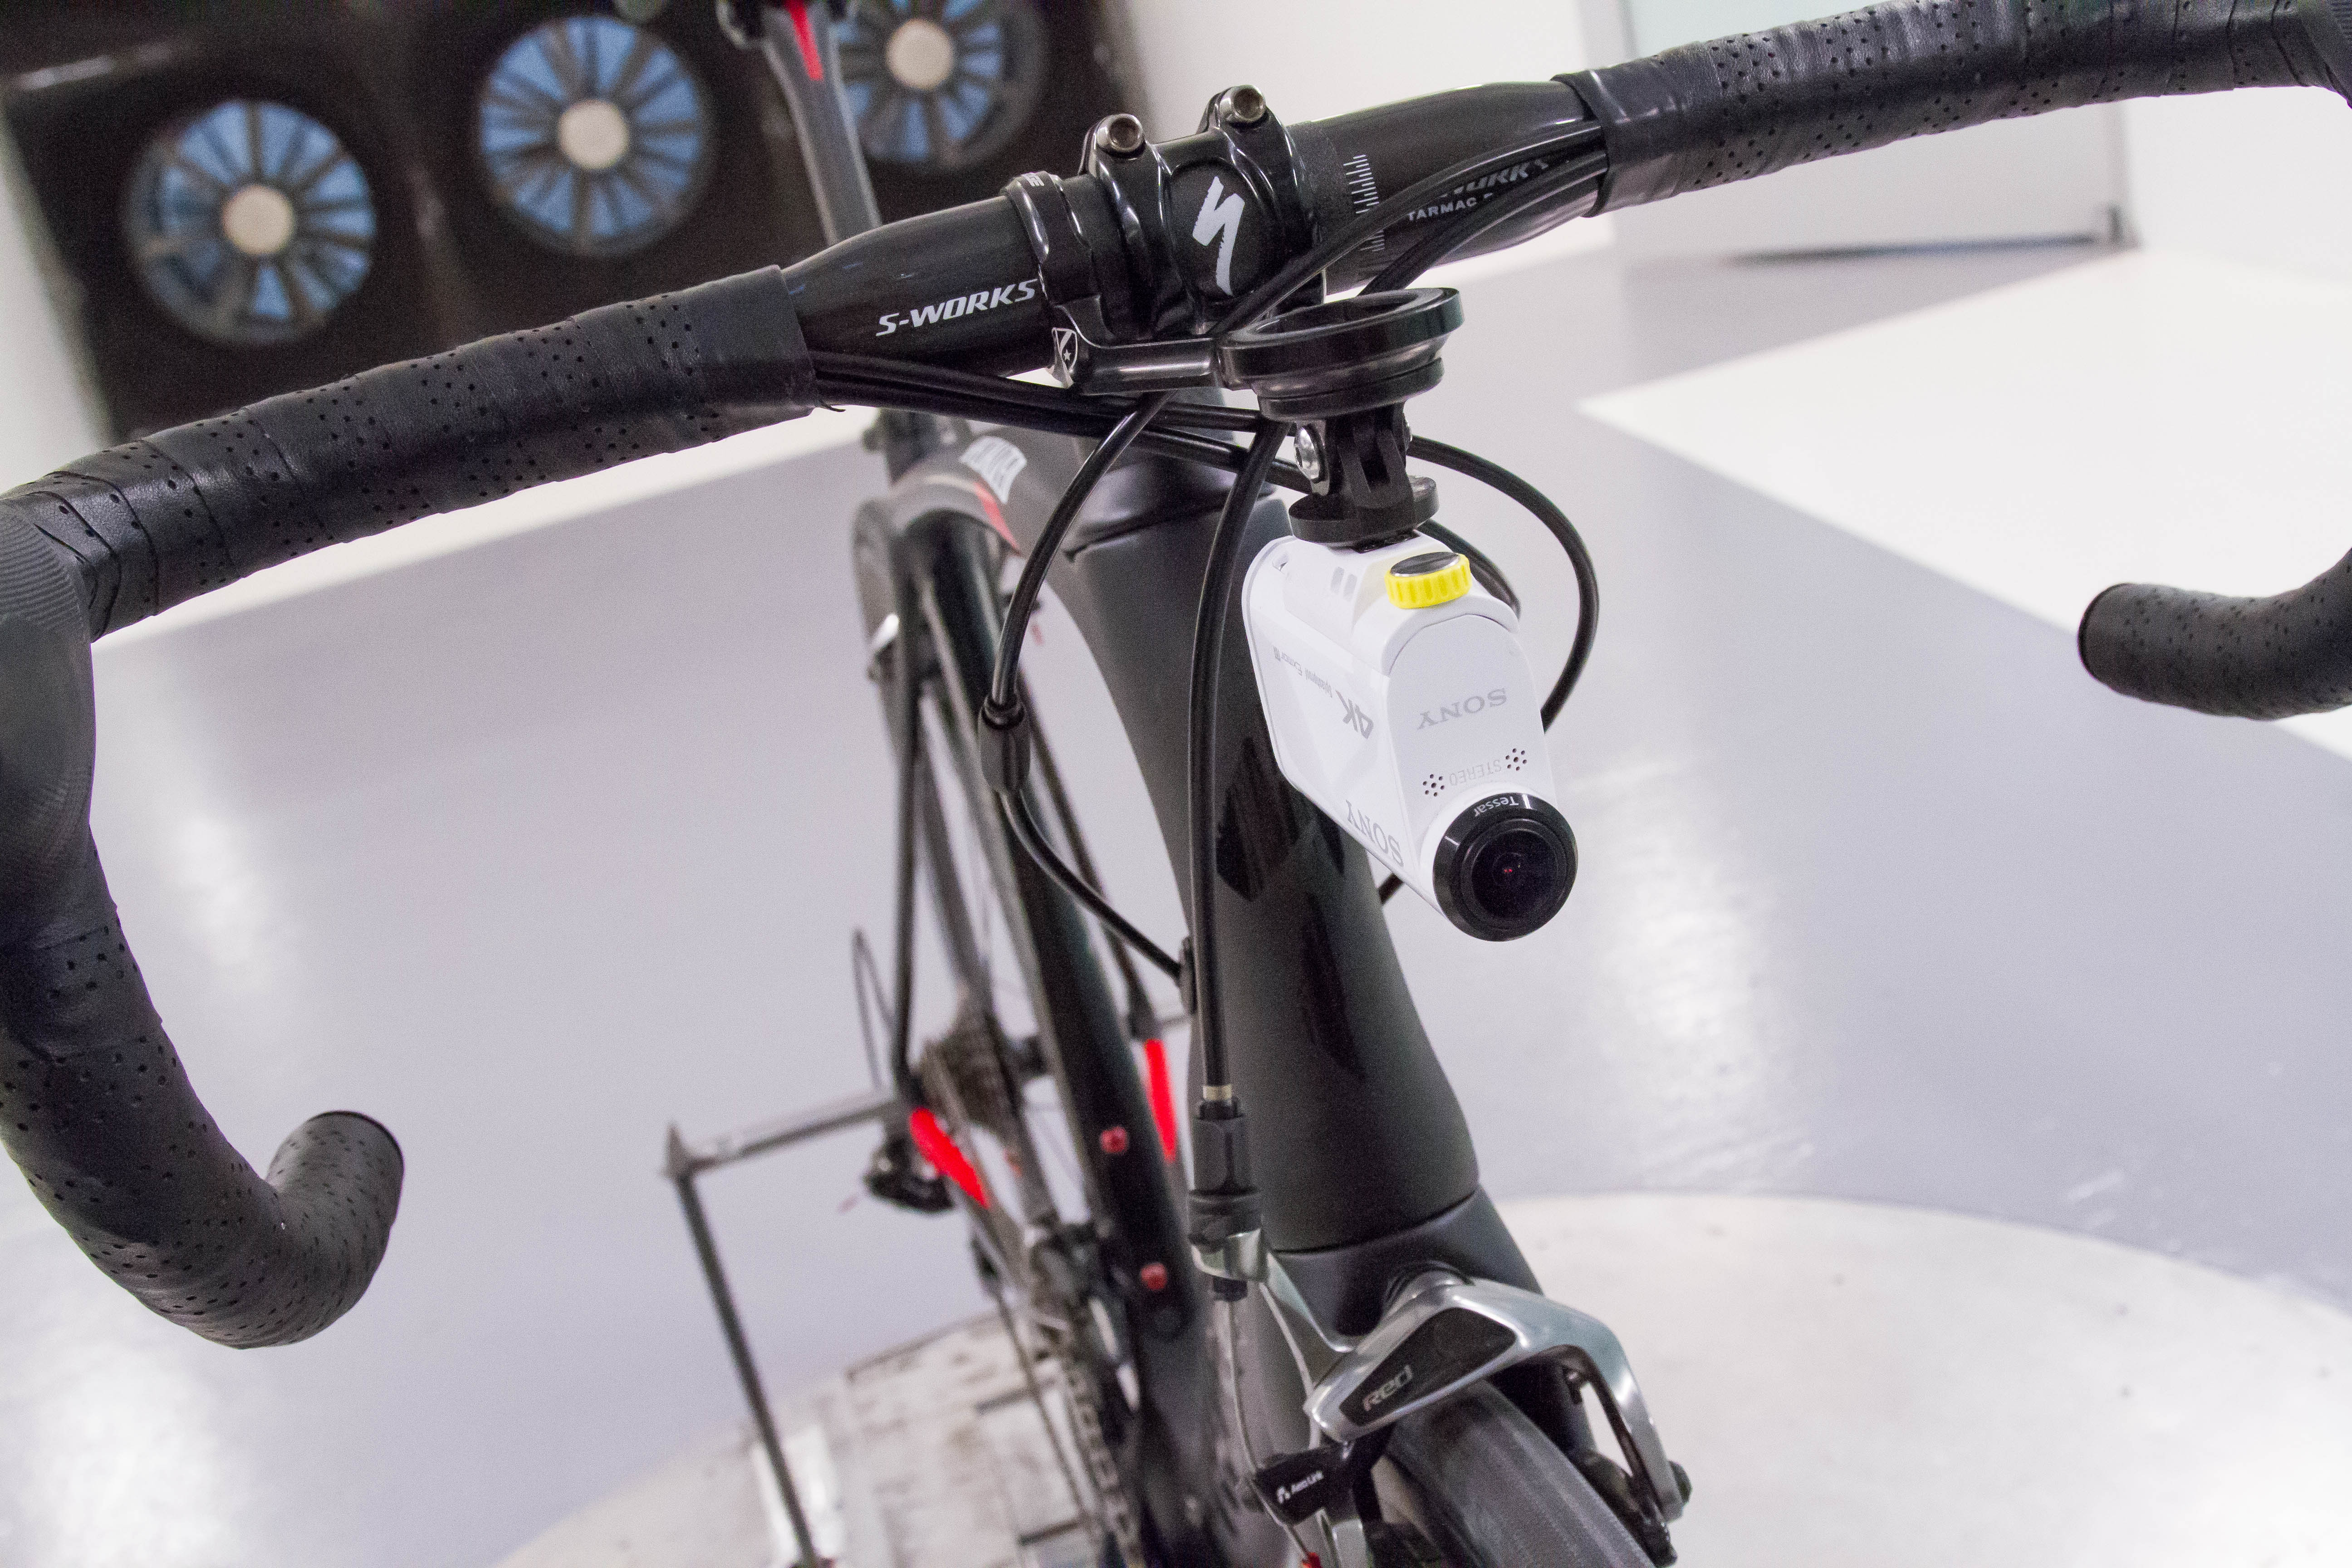
5) [Action Cam] Sony 1000V with waterproof case
6) [Action Cam] Sony 1000V without waterproof case
7) [GPS] Garmin Edge 520
8) [GPS] Garmin Edge 1000
9) [GPS] Garmin Edge 810
10) [Mount] K-Edge forward mount (combo Garmin/GoPro) without bike computer
11) [Mount] K-Edge forward mount (combo Garmin/GoPro) with bike computer
12) [Mount] Barfly SLi Mount (combo Garmin/GoPro) without bike computer
13) [Mount] Barfly SLi Mount (combo Garmin/GoPro) with bike computer
14) [HUD] Recon Jet HUD with full pods
15) [HUD]Recon Jet HUD without pods (just glasses)
16) [DCR] A typical DCR test bike setup (multiple GPS/cams/etc…)
As for why I didn’t test other items…well, it’s just what I figured there would be the most interest in. We did this back in September, so some things now seen weren’t available then of course, but in general I thought the above was probably the most likely items to be of interest to the most cyclists.
The bike used was a 58cm S-Works Venge 10R frame with CLX60 wheels, 24mm S-Works Turbo Tires, and a SRAM RED group set. Obviously and most importantly, it was also painted black. Because black is faster (duh).

For the testing it was generally without a rider (except the Recon Jet HUD and DCR setups). The reason is that in this case everything we were testing was forward of the human, and forward of the bars. So the human aspect wouldn’t be likely to influence test results.
Whereas if we were testing helmets, shoes, or apparel, you’d definitely want a human involved. With helmets for example, they are incredible person specific. What may be a faster helmet on Jane Doe, is a slower helmet on John Doe. But in my case, everything being forward on the bike it wasn’t an issue.
Further, with 6-8 hours of testing gadgets, it’d be a lot for any person to hold the same precise position over and over again. So this ensured that we got very repeatable results each time.

For each of the tests the automated system went through a yaw sweep of –10° (cross-wind) to 0° to +10°, in 5° increments. Each increment was held for 30 seconds of data collection. All of this was automated. The speed of the tunnel for tests was set at 50KPH (31MPH), and the wheels were also spun up to 50KPH for each test.
For the tests involving me (the Recon JET tests), the same protocol was followed, except that I was in the tunnel on the bike.
Action Cam Results:
Ok, let’s dig into some goodness. Now that I’ve explained all the basics, we’ll dive immediately into the results by category. Note that Cam also put together a full PDF report of the day too – which you can download here for a bit more detail.
And now – the results!
In this case, I was most curious if there would be any difference between the smaller Hero4 Session, and the larger Hero4 Silver/Black (identical external shell). Also, whether or not the larger waterproof case impacted aerodynamics. After that, I wanted to see how the Garmin VIRB X/XE performed (also identical external shells), and the Sony 1000V.

So what you see above is a graph plotting the drag at different yaw angles (from left to right). The lower the value, the better. For the action cam tests, we used the K-Edge Mount as the baseline for everything. It was our constant.

The results showed us that:
– The Hero4 Session was the fastest overall setup: Of course, the Hero4 Session doesn’t have the highest quality settings, so it’s a bit of a trade-off between speed and quality. This being fast wasn’t a big surprise to me (or the Specialized guys). After all, you’ll remember the Hero4 Session was released last year at the Tour de France and numerous pro teams had it rigged on the bikes as part of a partnership with Velon. Some testing had indeed been done around aerodynamics prior to mounting it on the bikes.
– Hero4 Silver/Black was only 2-4 seconds slower over 40KM: While it’s a tiny bit slower, the quality differences are pretty big here with the Hero4 Silver & Black. So unless you really think that 2-4 seconds is make or break, I’d still go for the Hero4 Silver. Of course, if you’re in the Olympics or racing elsewhere at the absolute front of the pack, then 2-4 seconds per 40KM could indeed be a deciding factor.
– Waterproof housing made no aerodynamic difference: Interestingly, the waterproof housing made no difference compared to the frame housing I often use. Of course, the real reason to use the frame housing is that you can improve image quality (by removing another layer of glass in front of the lens). Also, I just like the smaller look of it. The waterproof housing does spike a little bit more though at 10° yaw however.
– Sony Action Cam about the same as the GoPro Hero4 Silver/Black: While it looks more aerodynamic than the square GoPro’s, it turns out the Sony 1000V is actually about the same. And, even more interesting is that it doesn’t matter whether you use the waterproof case, it’s roughly the same there too.
– Garmin VIRB XE was the slowest: The Garmin VIRB X/XE was the slowest action cam we tested of the group, being 4 seconds slower at baseline 0° yaw. Though it was slightly more middle of the pack at cross-winds. These results won’t come as a surprise to many, after all, the thing looks like a sideways brick with its somewhat larger rectangular design. On the flip side, it has data metrics built-in, so again, if 4 seconds doesn’t matter to your use case – then go forth and enjoy the additional data. YouTube videos with data are more fun to watch anyway.
I know there are other action cams on the market not covered here, but again this is what I had handy and was able to test. I’d point out that having a GoPro compatible mount solution was a key factor in terms of ensuring all tests kept the constant while using the K-Edge mounting system.

We also did a test between a GoPro thumb screw vs a smaller screw as found on/with the K-Edge & Barfly mounts. However, we think there might have been some slippage there – so they believe there’s likely no difference but we’d have to re-test that down the road to be 100% sure.
Finally, I didn’t really want to duplicate tests that Specialized had already done. For example, they did a test around different action cam positions. You can see their video on that here.
Bike Computer Results:

Next up was testing three bike computers. In this case they were mounted to the K-Edge mount as seen above. The mount did include an empty GoPro mount on the bottom of the K-Edge combo mount.
We tested the: Edge 520, Edge 810, and Edge 1000.
Going into this test we somewhat knew that the variances between these units are super-small. They had done a bit of testing previously in this area. And indeed, you see in the results that at 0° yaw, we’re talking less .001 (m^2) shift in CdA – or roughly about a second over 40KM.

What you see here is that the Edge 520 was the fastest across all yaw angles, and the Edge 810 was definitely slower. However, we aren’t quite sure 100% on the Edge 1000. We believe the mount might have shifted slightly in this test – thus causing a small increase. If per the test, it was 4-8 seconds slower over 40KM.

But that’s because analysis of the imagery afterwards show a very slight increase upwards in the mount. Which, is actually a great learning point. If your out-front mount isn’t flat, it’s like having a parachute up there. So in this case, if I mounted it just a degree or two non-flat, it’s quite substantial in terms of aerodynamics. This is barely notable to the human eye, the photo above is actually what was tested, and isn’t truly perfectly flat.
Next up was the individual mounts. We had tested both the K-Edge Garmin/GoPro combo out-front mount, as well as the Barfly SLi Garmin/GoPro out-front mount.

Without a bike computer, we saw the K-Edge being the fastest, and with a bike computer, it was equal or the fastest as well at most yaw angles. The challenge was that we think the Barfly may have been raised slightly upwards as noted above. So you don’t notice it much without a bike computer, but once we tossed on the Edge 1000 it spiked. It was only while analyzing the photos/data later on that the Specialized guys noticed the slight difference.
In their prior testing of these mounts, they found them pretty close to the same.
So this one might have to go back to another round of testing sometime in the future. However, the very clear message there: Keep your mounts flat/horizontal to the ground!
Recon JET & DCR Test Setup:

Last up I had in my bag the Recon JET Heads Up Display. This unit includes GPS in the pods, as well as can connect to ANT+ or Bluetooth Smart sensors, projecting your metrics on a small screen attached to the glasses.
The way the Recon JET works is that you can remove the pods and just use them as sunglasses (no tech at that point), or, with the pods they are the full HUD experience. So we tried both. Additionally, we tested out the entire DCR testing config, just for the fun of it. But more on that in a moment.


As you can see above, the Recon Jet in a normal (pod-inclusive) configuration was quite a bit slower. Some 19 seconds over 40KM, pretty significant actually.

For the DCR setup, this was the last item we tested before I sprinted to the airport. It was just sorta a ‘for fun’ test to see how bad an aero penalty I take when going out and doing various testing, mostly power meter or action cam testing (training, not racing). In this case I had mounted:
– Four Garmin units: 2xEdge 1000’s on the handlebars, 1xEdge 810 on the stem, and 1xEdge520 on an out-front mount.
– Two GoPro cams: 1xHero4 Session, and 1xHero4 Silver.
– Recon Jet: Just because.
Overall, this was some 33 seconds slower over 40KM.

I don’t know how much slower it would have been if I didn’t have the Recon Jet on. Also, Specialized measured my rider repeatability as +/- 8 seconds over 40KM. Basically, how precisely I could replicate my position each time I ‘reset’ for a new test.
Final Odds & Ends:

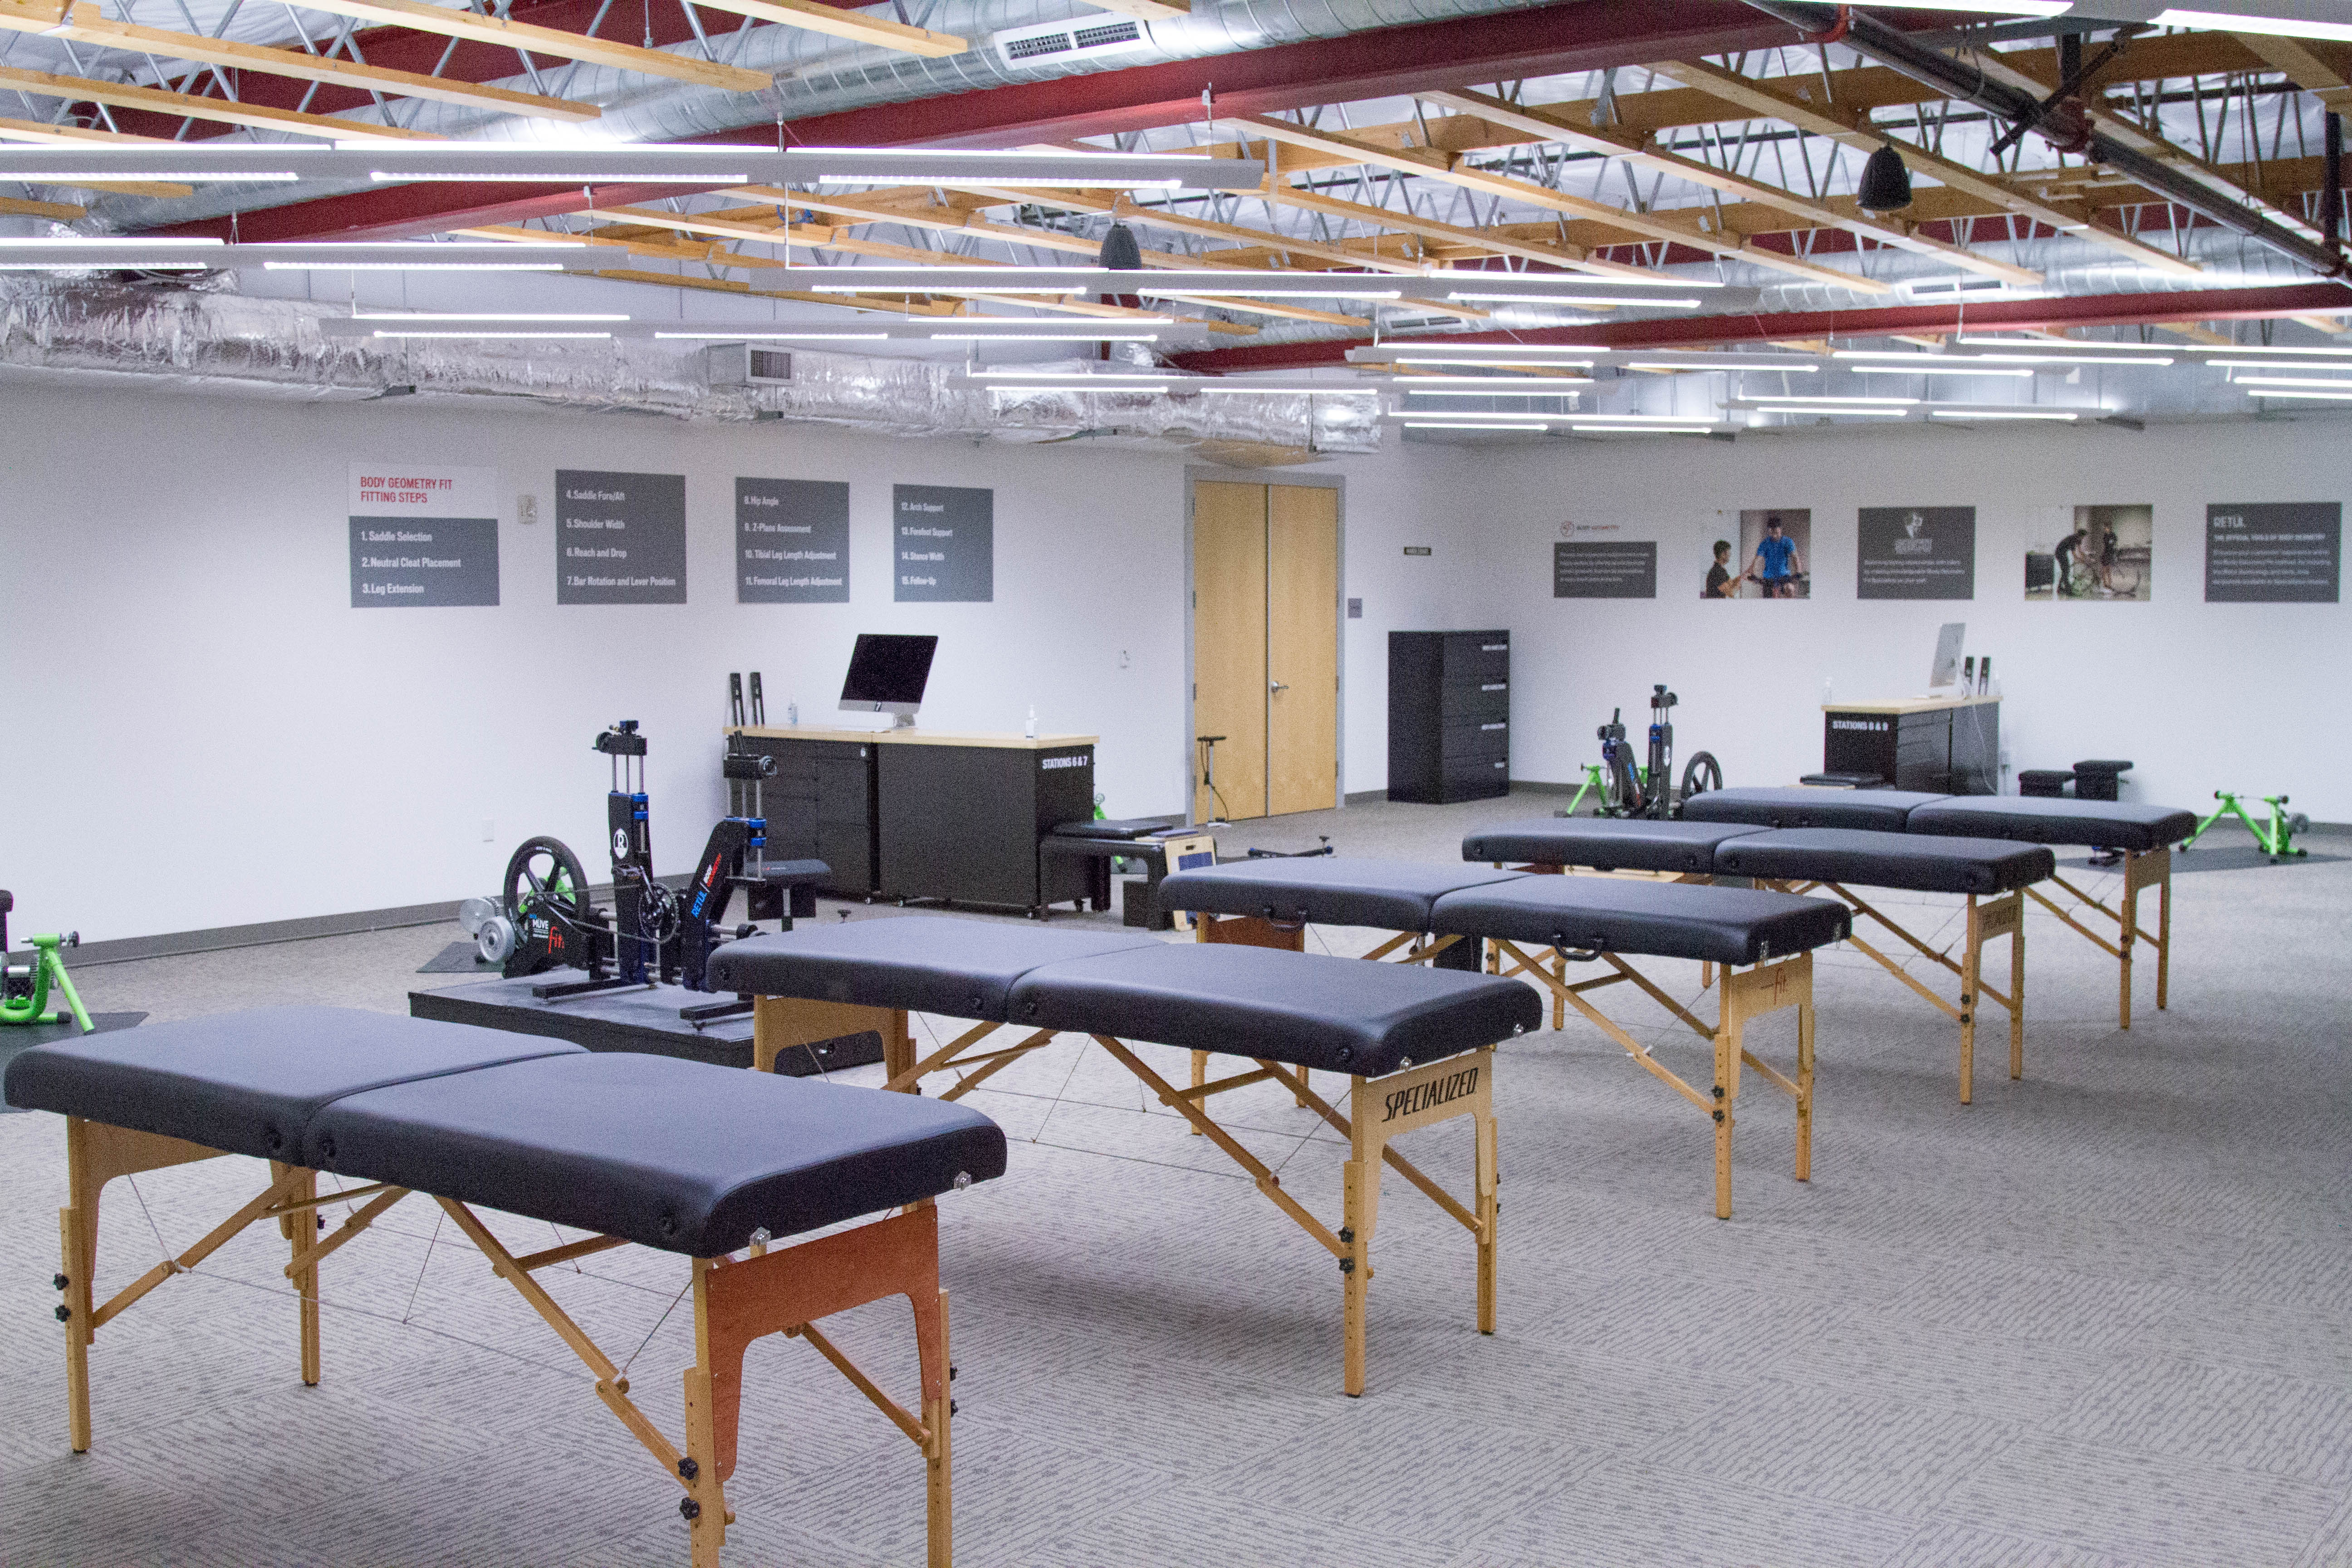
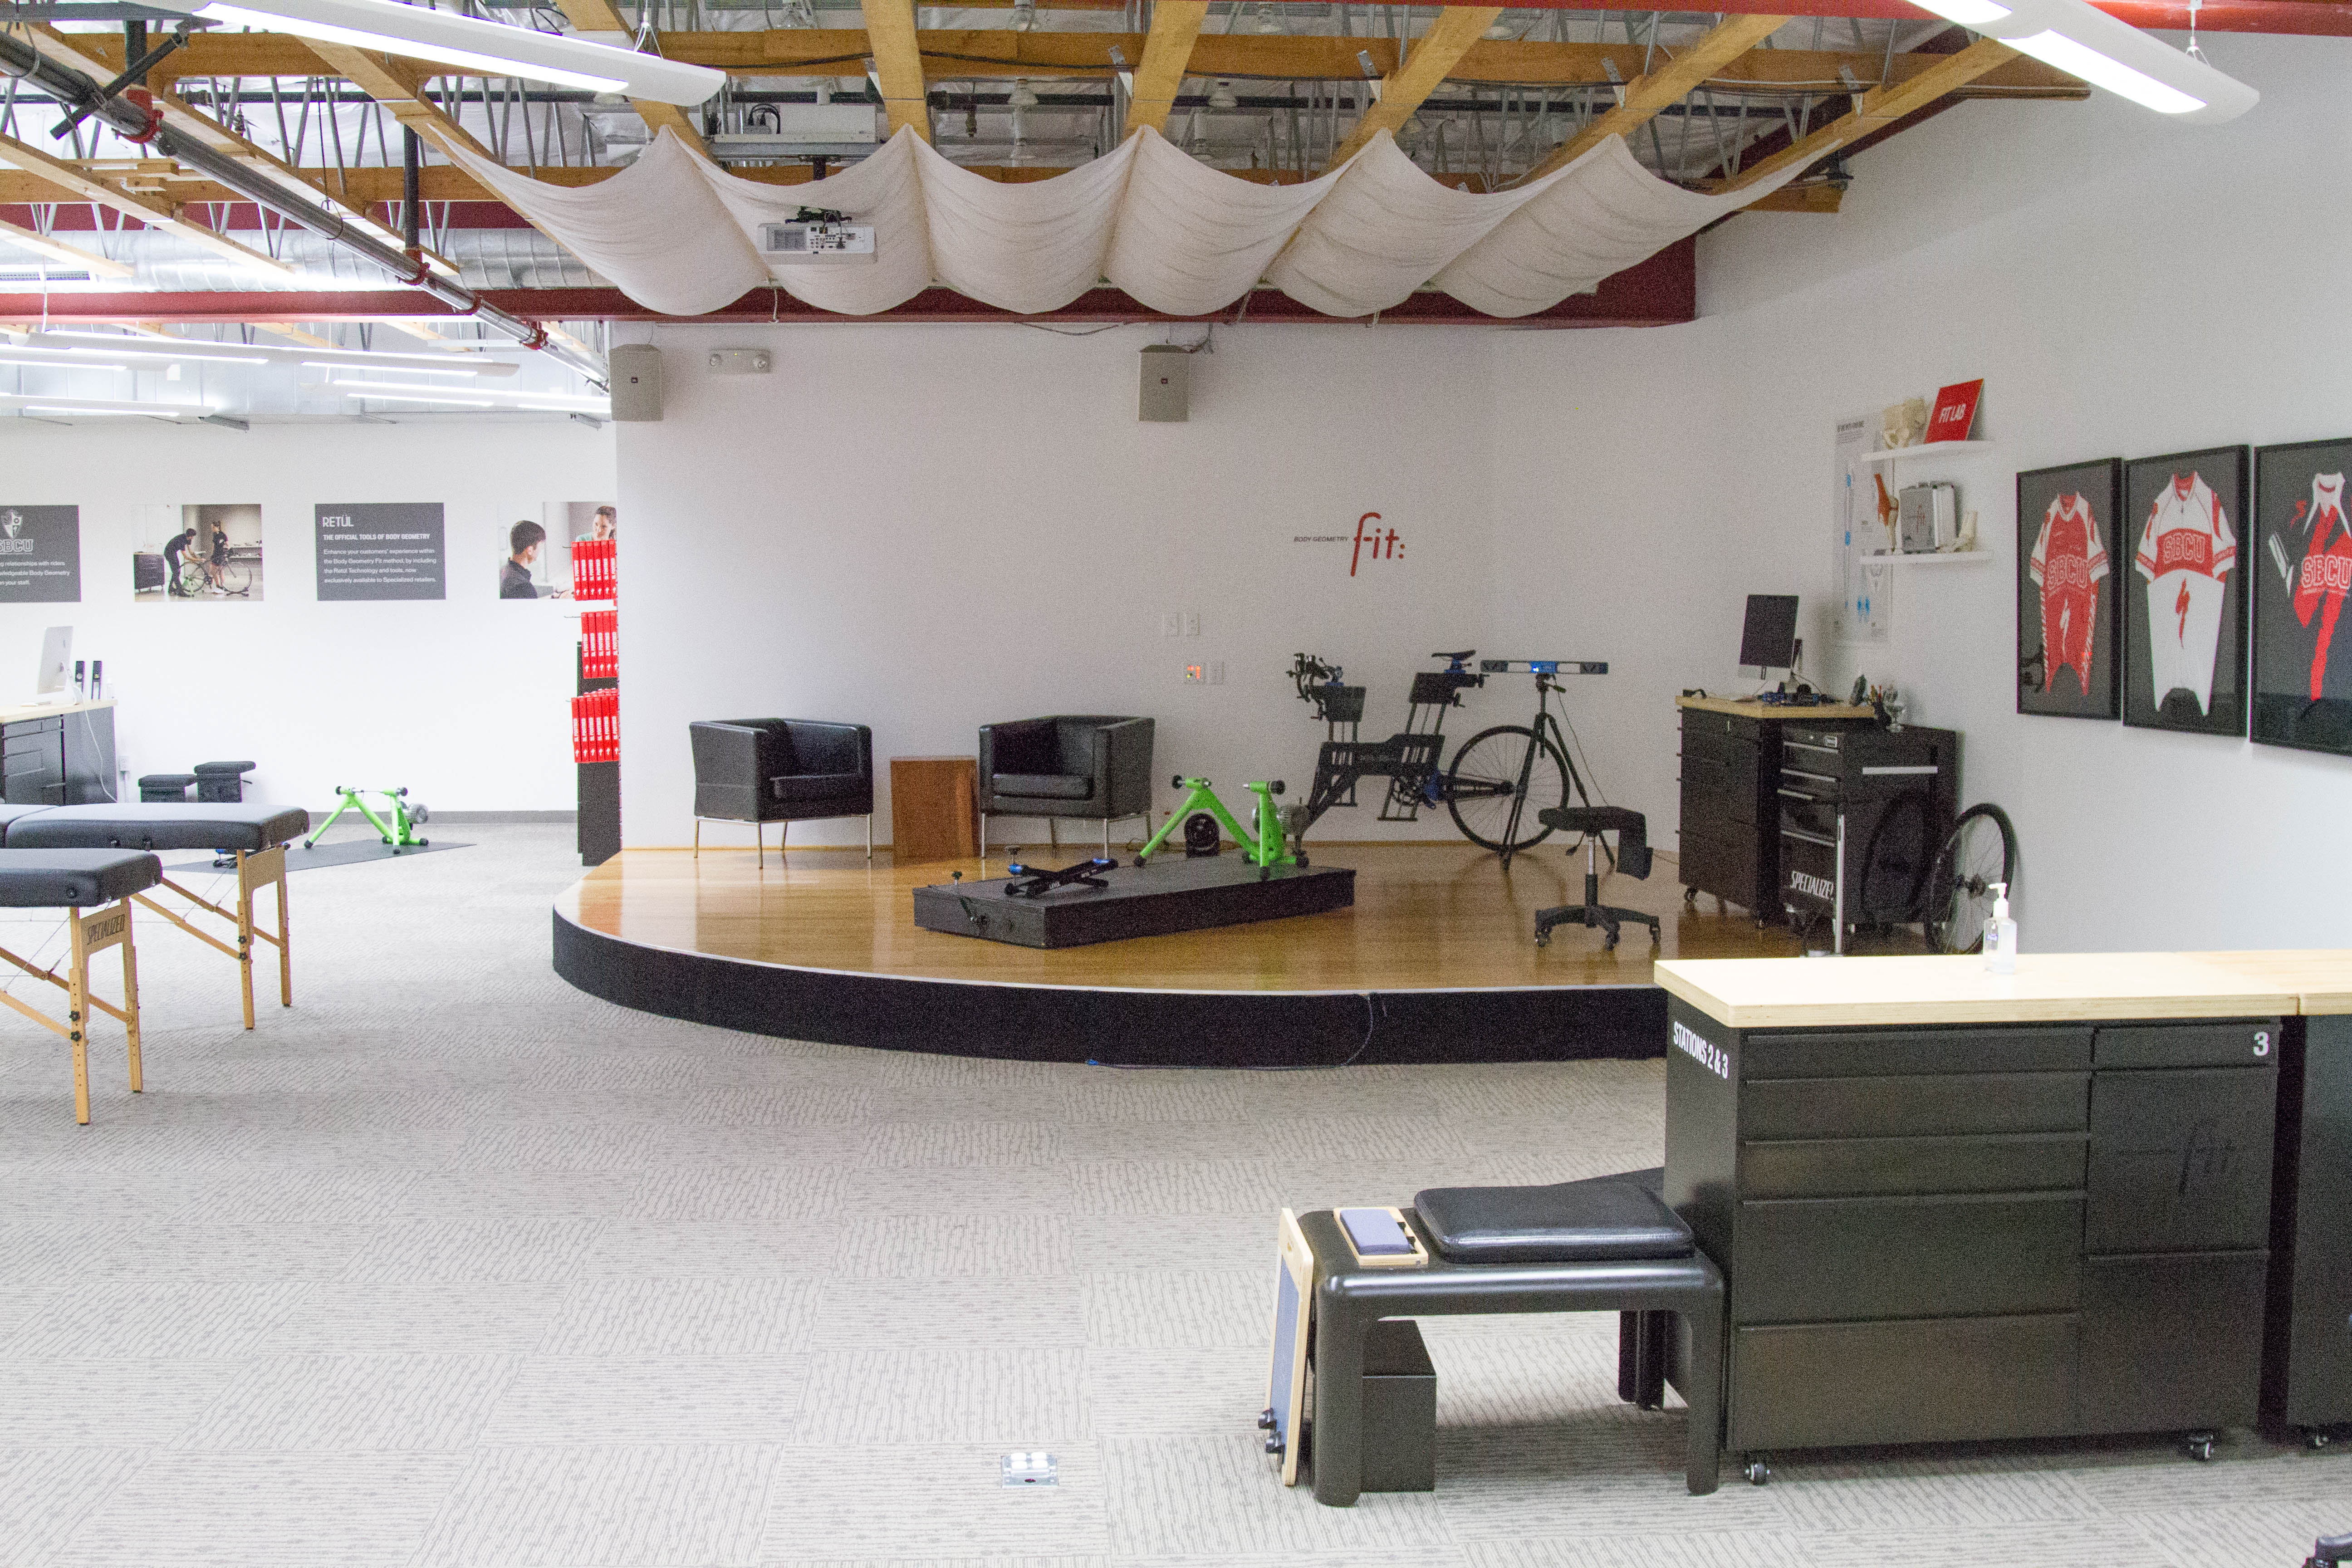
Since I was there, I got a bit of a tour around the place. It’s fairly impressive. A large portion of the building is dedicated to museum space, classrooms, and related Specialized University areas. They’ve got numerous fit rooms setup to demonstrate and complete bike fits to dealers.
There are also conference rooms named and modeled after individual sponsored athletes.

For example Sam Hill:


Or, this one for Mario Cipollini, which is decorated in a much more opulent style reflective of Mario’s tastes.


A massive number of employees ride to work each day, or, go on the daily lunchtime rides. You can see the bike storage in the hallways here:

I went on one of the lunchtime rides, which would best be described as ‘rather brisk’ (but a blast). It’s definitely a very fit crew there, and they’ve got beautiful roads in their backyard to go out and ride on.
The main building even has a bike maintenance shop area at the back:

And of course, a pool table and lounge area:

There are two museums of sorts, one upstairs and one downstairs, covering both actual retail bikes, as well as some designs that never quite made it to retail.


And there’s even a fireman’s pole to connect to the two floors (also known as an exotic dancing pole for rowdy company parties). Stairs (or supreme fitness on the pole) are required for the ascent back to the 2nd floor.

Beyond these areas, it’s largely just normal office space of cubes. Water coolers and all, pretty much like most other offices. Except with sports pictures of sponsored athletes (or, once sponsored) instead of lame motivational sayings.

Actually, when you arrive they give you a water bottle instead of using paper cups. So you can refill that anywhere on campus. That does tie-in quite a bit to the Specialized Purist water bottles that the company makes onsite.
Wrap-up:

No doubt Specialized benefits from building out their own wind tunnel in terms of product testing, sponsored athlete testing, and of course marketing. But I think it’s these sorts of fun little tests that are the most useful to athletes day to day. Sure, the difference between the GoPro Hero4 Session and Hero4 Silver may not be a deal breaker for everyone. But at the same time, you’ve gotta start somewhere with aerodynamics. Be it shaving your legs, putting your hair in a braid, or using the right mount.
Every second does matter somewhere. Or at least that’s what I tell myself as I mindlessly sprint the last 50 meters of a triathlon for that extra 2-4 seconds. This post might just save me that sprinting (or, get me another few seconds back).
I’m sure down the road I’ll head back to the Win Tunnel to test out new gadgets as it makes sense (especially because it’s a blast). So if there are things folks would like to see tested, definitely drop them in the comments below.
And finally, a huge thanks to Cam Piper & Chris Yu (of Specialized) for spending the day in the tunnel playing around with sports tech.
Thanks for reading!
FOUND THIS POST USEFUL? SUPPORT THE SITE!
Hopefully, you found this post useful. The website is really a labor of love, so please consider becoming a DC RAINMAKER Supporter. This gets you an ad-free experience, and access to our (mostly) bi-monthly behind-the-scenes video series of “Shed Talkin’”.
Support DCRainMaker - Shop on Amazon
Otherwise, perhaps consider using the below link if shopping on Amazon. As an Amazon Associate, I earn from qualifying purchases. It doesn’t cost you anything extra, but your purchases help support this website a lot. It could simply be buying toilet paper, or this pizza oven we use and love.


Awesome stuff, Ray!
Interesting read, never really given the angle of the computer mount much thoughts.
Am I reading the graph for the Action Cam’s wrong, it looks like the bike with the Hero4 Session mounted is more aerodynamical than the bare bike, at 0 and -5 yaw?
I thought exactly the same, it seems that the GoPro Hero4 Session makes you faster than not using it…
Probably within the margin of error for the tunnel. It’s not like the leading edge of that little block is shaped for aerodynamics, but it’s small enough that I’d bet the difference between it at bike alone is negligible. As, honestly, most of these differences are.
Maybe legibility at 0 deg angle should be a new test you do for GPSes!
I’m pretty sure I’ve always angled them up a bit…
It would also be interesting to see what effect the rider’s change of position required to read a totally flat (0 degree angled) screen has on overall aero performance – I’d imagine it would be much greater than the effect of a few degrees of tilt so the screen can be read from a normal riding position (at least on a road bike – with aerobars and a barfly I suspect you can position the computer to be more easily seen from your aero position whilst it remains flat?)
Yeah, would definitely be fun to try it at 0*, 2*, 5*, and so on (or whatever looked logical).
I would have liked to see tunnel results for the Garmin mount on the stem (not an out front mount)
I agree, I currently mount my Garmin on the stem. Would be really interesting to see if an Edge 20 makes any noticeable difference, or if different aerobar positions (on top of water bottle, between the bars, etc.) make a big difference.
Although I’ll defer to the experts on this, and I totally see why you did it this way, I would think that having a rider behind what you are testing would be important. The air that gets diverted by the OUT (object under test) also has to get around the person behind it. So the real world difference is probably even smaller than what you guys measured.
You lost me when you said “the human aspect wouldn’t be likely to influence test results.” Wouldn’t this be very important to any real meaning since both the items tested and human occupy the same portion of wind profile from front to back. I would guess the mounts and gadgets are in the knee to hip area of the rider, breaking the wind before it hits the rider. That would seem much different than the alternative of the wind just passing over a smooth frame.
The human has a big impact, but ahead of the bars things can be heavily impacted that the human won’t really help.
For example there’s a significant impact on having a ‘clean’ cockpit in terms of cabling and such up front. It’s surprisingly massive. I think they did a video on that, but it’s also something when I’ve talked to the ERO guys (track testing) that they see as well.
Right. If there is a massive or significant difference with just clean cabling in front of the rider you’ve got to think the GoPro/garmin/mount is going to have at least as much impact. Hard to guess at the impact between rider and gadgets but without the rider not sure what can really be said about the test. I think they have a dummy for such long tests also.
This was also what I found very interesting. For aircraft at speed (even scaled down for wind tunnel models), I would definitely expect something the surface area of a rider relative to the bike to create a bow wave effect that could really influence the results. However, I have no experience with bike speeds and Specialized, well, specializes in this niche so I’d also defer to their judgment on it. Great post, Ray!
I’ll see if I can get Cam or Chris to detail a bit more in this area.
Since these guys live in the tunnel pretty much daily doing tests all day long, I deferred to them being the experts on getting the most valid aerodynamic testing from our day (as well as what impacts what).
Clearly since we’re subsonic there will be an effect. The pressure waves saying “get out of the way” to the air ahead of the rider will reach the handlebars before the body of the rider reaches that air; air flow will not be the same without the rider as with. The question is how much of an effect will it have, and my hydro is rusty enough that I wouldn’t even venture to guess. (If we all rode fully faired bikes, we wouldn’t have to worry about it.)
That’s along the lines of my thoughts. The only question is whether at bike speeds the bow wave extends far enough forward of the rider to have any measurable impact. If, for example, the wave only extends an inch forward of the rider, I can certainly see ignoring it being completely reasonable. Hope Ray can get some insights from Cam or Chris. To the rest of the readers…apologies for the aero geek-out session!
“if your out-front mount isn’t flat, it’s like having a parachute up there. ”
something that always interested me: the same wind that meets the computer is about to meet me in a few milliseconds, so why should I care that it (when there’s a bigger parachute right behind it)?
*about it
I sent the section about the Session vs GoPro4 to my friend and explained that is why he’s faster than me on flats.
Yep. That’s the only reason.
Is it just me or are others also having the problem that none of the photos are loading on this page?
Typical!… – after I posted they loaded!
Yeah, they loaded really really slow.
Looks like Ray uses picturefill.js to load the images after page rendering (which explains all the “data:” placeholders). jquery.exif is loading some of them too- unsure why.
Yeah, I noticed some oddities today as well. In theory Lazy Loading is only on for mobile clients. But definitely something going on. Will hit up dev folks tomorrow.
Hi Ray,
Did you also perform a “base”-measurement, i.e. measurement without any equipment on the bike? Would be nice if you could add that to the graphs, so we can see if riding without any camera saves us a massive amount of time (or not).
Yup, it’s actually on the graphs in the ‘Action Cam’ section.
They Won me with the re-engineered Kickr. Honestly, it is information like this that makes me rethink any piece of gear before attaching it to the bike.
The Powertap P1 – does the bulk of it add rotational weight and drag compared to other pedals (especially Vectors)? The power meter market is growing, may be we can factor aerodynamics in the selection process?
Ray,
Great article, thanks for posting!
A test for next time: which power meter gives you the smallest aero penalty?
Will you put the Powerpod thru the test? Would be interesting relative to a crank based power meter.
you missed one test: with and without beard 🙂
Actually, they did just that test already: link to youtube.com
That was a fun read Ray. Would you expect a similar drag penalty with the upcoming Garmin Varia Vision device?
I don’t know. In talking with the Specialized guys about it, they thought that it was the larger bulge of the LCD screen thingy (versus the side pods) that was causing the drag.
With Varia Vision, it’s a smaller pod design, but it’s also a different style. It’d definitely be interesting to test though.
Next up: test child bike seats, and running strollers.
Wow. I think you just found a way to take your PM Buyers Guide to the next level.
Actually, that does raise another question. Do they have a way to turn the crank arms (I.e. pedal) while a riderless bike is being measured? I guess they’d need to engage in some mechanical doping. 😉
You had me at Venge. But then still went on and read the rest of the good stuff. I would be curious of the impact of a light and head unit combo, like Cycliq Fly12 and Edge 1000. Most lights seem like putting a brick out front, yet it is hard to gauge how much of an impact there might be.
Awesome read !! Never expected them to use a Kickr.
In the bike rack area, did you see any non Specialized bikes ??
Not enough to notice any at a quick glance.
Surely that would be a sackable offence – plus think of the product discount employees must get!
Have you heard of subsonic upstream disturbance?
Basically while you are cycling along you are pushing air in front of you that has a measurable effect like 2-3m away.
There are several articles on this, and how it makes you faster if you are *being* drafted (Alex Simmonds has one..)
If your body is pushing enough air to make someone riding in front of you more aero, then surely it is also pushing enough air to make your handlebars and whatever is attached to them more aero.
Your 4 seconds difference on a bare bicycle, is probably closer to half that when there is a person’s body disturbing (read: reducing) the flow over the handlebars.
Why do you think that other bike companies do all their testing with a dummy on the bike ?
“Your 4 seconds difference on a bare bicycle, is probably closer to half that when there is a person’s body disturbing (read: reducing) the flow over the handlebars.”
Do you have anything to back that up? Or just a guess.
At this point, I’d wager that Chris & Cam have more wind tunnel time with cycling than anyone else in the industry (by a long shot). Obviously, they have the advantage of having one to work in day in and day out on-prem, whereas everyone else has to rent time from another company (which is super expensive). So if they export data with a given savings (and knew a variable sans-rider), I’ve got no reason not to believe it.
Alex’s recent work is using Alphamantis tech, which is cool stuff too. But it doesn’t exclude or discount the above numbers (nor does it say anywhere it would cut these sorts of savings by 50%). I did a previous post on Alphamantis (and have used it and talk to those guys regularly). It too showed how tiny things make a huge difference – especially up front and especially in front of the rider. I think Alphamantis is great for doing positional tests as well as things that would be impacted by a rider. But like any wind aerodynamics test it has a higher margin of error when you’re looking at having a human on a bike, especially for hours on end. Maintaining precisely the same position down to the millimeter for even a small bit of time is tough. Then trying to measure something that may save only a couple of seconds at best (like a thumb screw difference) – even more so difficult.
Just my two cents…
Don’t get me wrong its a fun study to do, I appreciate the sprit of testing things that people aren’t usually interested in testing
I should have said 10 – 50% reduction, I would be more specific but I don’t have off-campus access to the Journal.
Its not about `doing your job correctly’ in the wind tunnel i.e. calculating blockage ratio, tare-ing the drag before fitting the bike, compensating for humidity/air density.
I assume that the guys at Specialised did all that correctly.
Its about your body changing the actual flow.
I can’t re-find the velocity plot but there is a pressure plot at the bottom of this site.
(link to urbanphysics.net)
(more pressure gradient \approx higher velocities)
I guess that the conversion from `grams of drag’ to `seconds in 40km’ is pretty approximate (and non-linear) so maybe its not such a big deal to worry about the actual seconds, and the relative distances will probably be preserved
Mark C. probably has Win tunnel seniority over Cam still.
Wonder if CFD runs are as easy to snatch as actual tunnel time. If so, you could ask for a CFD run of the gear you bring the next time, and then see how the data compares to tunnel runs. Geek out.
It started with: It’s not as useful to test at 80KPH, if you’re actually racing at 40-50KPH.
Perfect i thought, it’s useless to measure at speeds one couldn’t keep for long.
But then: The speed of the tunnel for tests was set at 50KPH ??
Why would you take 50KPH (and finally calculate it back to a distance of 40K) and not a more realistic 40KPH
Most will find it difficult to ride a SOLO 40K at 50KPH speed.
However as long as all tests are measured at the same speed it’s easy to compare.
I do miss conversion “formulas/tables” to convert the 50KPH to 40KPH or 30KPH values. It’s not a simple division by 1.25 (50/40) but a logaritmic formula.
Could you add it to your post?
CdA doesn’t change with speed. Chris Y. wrote: “We usually have the fans running at 50km/h to make the measurements as sensitive as possible”.
BW:
Drag force is proportional to (speed)^2.
Aero power loss is proportional to (speed)^3.
This has convinced me! I want to work for Specialised so bad! may need to refuse that Google offer then 😉
What does the prevail and evade arrow on the right side of the chart mean?
Evade is more aero (lower CdA.) “Saves 400 kJ over a 5h stage.” –> more juice left for sprint finish.
S-Works Evade & Prevail – Specialized Bicycles
Very cool stuff.
I don’t see any graphs that include the Recon Jet… am I missing something? Just curious, it’s not exactly influencing my decision to not spend the money on one. 🙂
Wow, totally odd. No idea how I forgot to paste that chart in. It was in the PDF you could download, but just added it to the post (in the Recon Jet section here: link to dcrainmaker.com)
Thanks!
Is it the same win tunnel in this cnn video. link to cnn.com
Yup, same wind tunnel.
That was a cool tour, thanks!
An interesting piece (as usual) i take the point regarding keeping the garmin edge level However i have found on sunny days in the UK (yes we do have them) there is quite a lot of reflection generated from the sky which makes the screen difficult to read and so i have resorted to tilting it up, not as racy but a whole lot easier to read at a glance. Given traffic levels in the UK you really don’t want to be spending a whole lot of time looking down at the screen. So i’ll suffer the aero penalty !!!
You state that the S-Works Venge is FACT 10r in the article, this is not correct. Non S-Works Venges are 10r while S-Work Venge is 11r and McLaren Venge is 12r
Really interesting article – Thanks Ray and Specialized.
I have come away with really wanting to know what the impact is of tilting that Garmin 1000 upwards (with a dummy person on the bike behind), for every 5 degrees raised. Like other people have commented, it is nearly impossible to read it in sunlight if you keep it flat on a road bike (may be easier in TT position?).
Also surprised the Go-Pro (normal shape) doesn’t cause more of an issue. When you have one mounted on your helmet you can feel the wind hitting it.
I agree, definitely something I’d love to dive into more.
Great write up about an amazing facility. Thanks for sharing the odds and ends too. Would be so great to go out on lunch rides with solid riders from work.