[Updated 11/2/2012: Includes 2.90 Fenix Firmware updates that address some of major issues I’ve touched on.]
The Garmin Fenix was announced this summer as Garmin’s first wristband GPS inclusive foray into hiking/adventure and ultra-running products. The unit had an advertised battery life of 50 hours, and thus appealed to mountainous hikers and runners alike. It also fell into the category of ABC watches, which stands for Altimeter, Barometer and Compass. Some even called it a Suunto Ambit killer.
But, would it really be? I’ve spent the past three months with the device – day in and day out, getting to know it. And what I found might surprise you. So sit back, grab a cup of coffee or twelve, and get ready to get detailed.
Because I want to be transparent about my reviews – Garmin sent me two units to try out. One an early prototype, and one a final production unit. Everything written here is based on the final production unit. In the next few weeks I will send both units back to Garmin and then go out and get my own (to be able to support y’all in the comments section down the road). Simple as that. Sorta like hiking in wilderness trails – leave only footprints. If you find my review useful, you can use any of the Amazon or Clever Training links from this page to help support future reviews.
Lastly, at the end of the day keep in mind I’m just like any other regular athlete out there. I write these reviews because I’m inherently a curious person with a technology background, and thus I try and be as complete as I can. But, if I’ve missed something or if you spot something that doesn’t quite jive – just let me know and I’ll be happy to get it all sorted out. Also, because the technology world constantly changes, I try and go back and update these reviews as new features and functionality are added – or if bugs are fixed.
So – with that intro, let’s get into things.
Unboxing:
First up, getting the thing unwrapped. The unit comes in a vey un-Garmin-like box that actually looks kinda pretty:
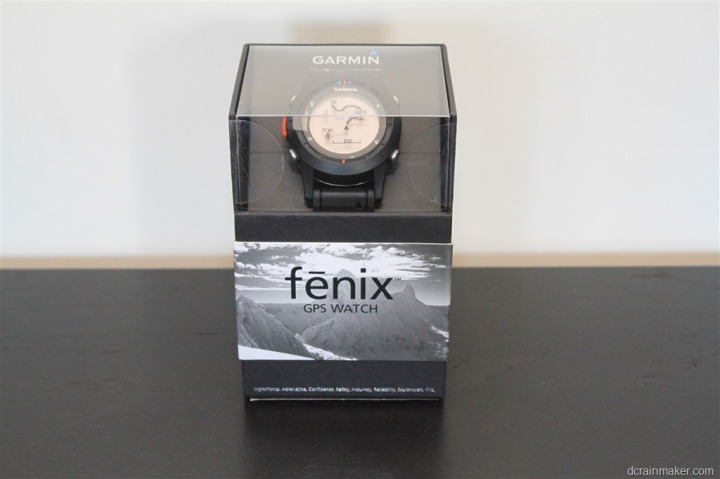
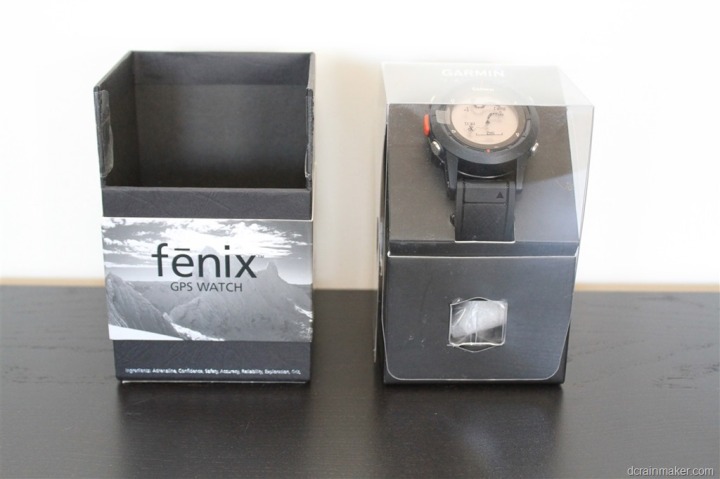
You’ll have to separate the two conjoined twin boxes above, to access the inner box with the watch. From there, you’ll lift up the top to get at all the accessory stuff below and to take off the watch itself.
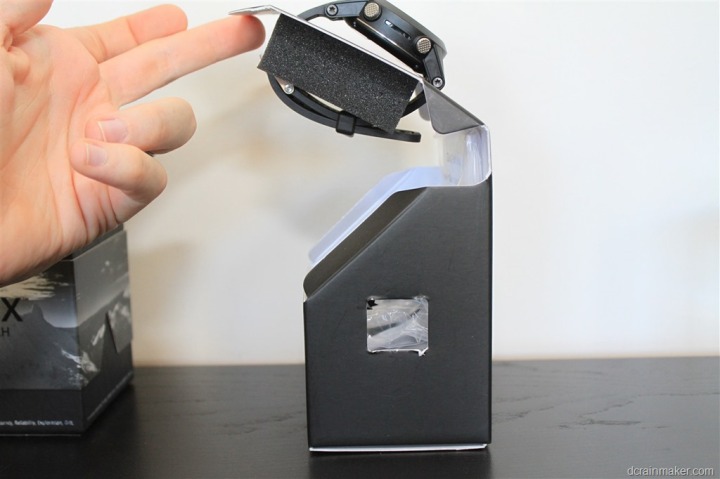
Once that’s done, here’s what all the parts look like spilled out onto a table:
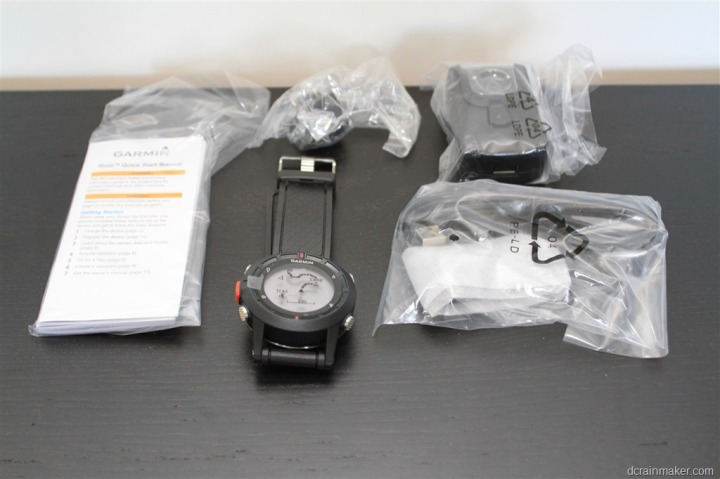
Inside, we’ve got the manual to the left, the Fenix in the middle, the two power parts up top (adapter and wall connector), and the USB charging cable to the right.
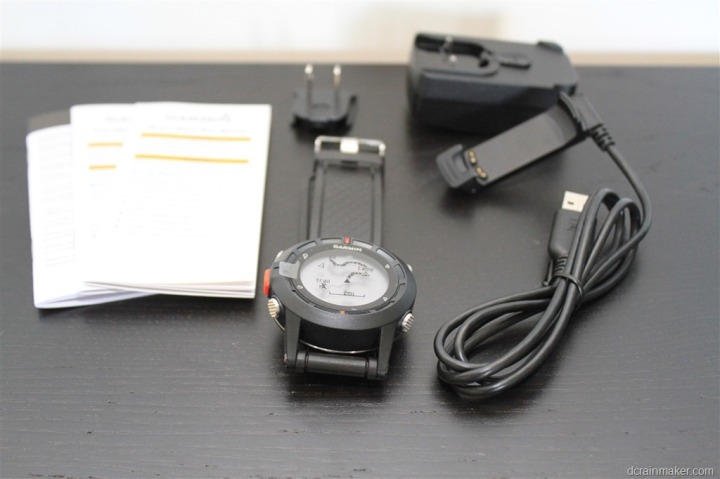
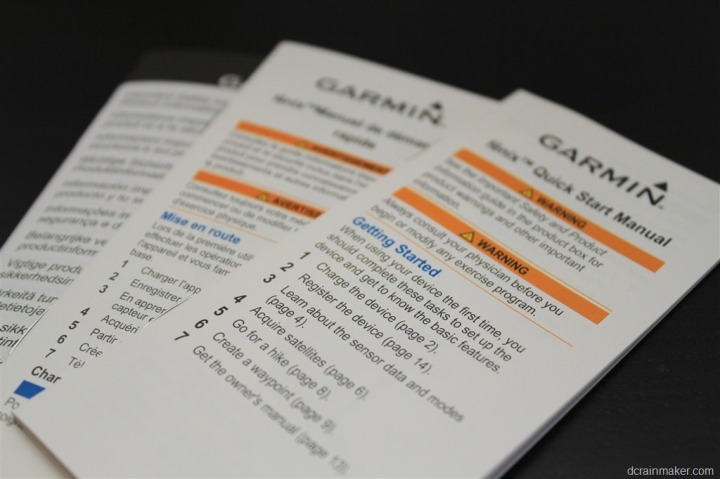
Looking at the pieces individually, here’s the always thrilling paper quick start manual:
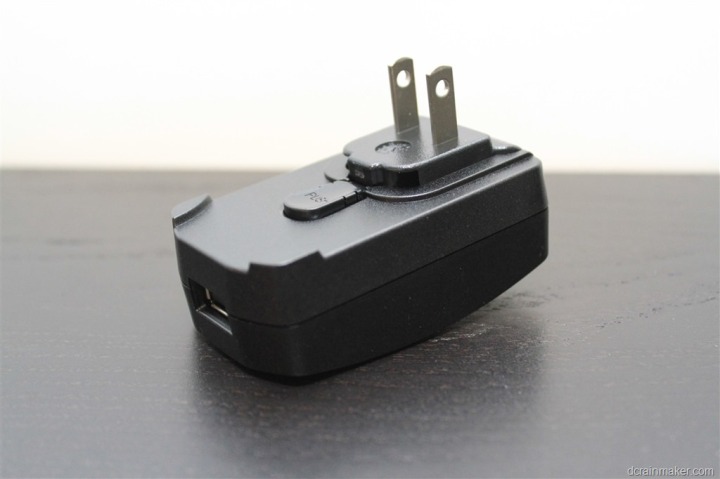
Then the USB wall charger. In this photo I’ve connected the geography specific adapter to the USB block. But depending on where you buy it, you’ll get ones applicable to your country.
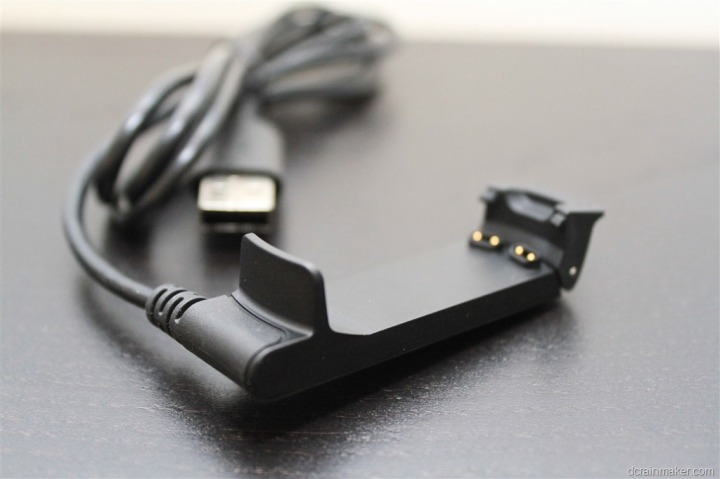
Next is the USB charging clip:
And finally, the watch itself:
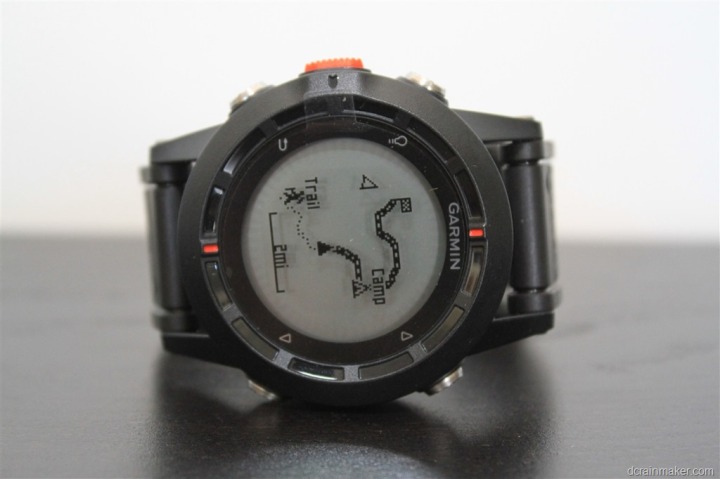
The USB charging clip snaps onto the back with a reassuring click. Once this thing is on properly, there’s no chance it’s falling off. Ever. You could probably use it as a fishing lure.
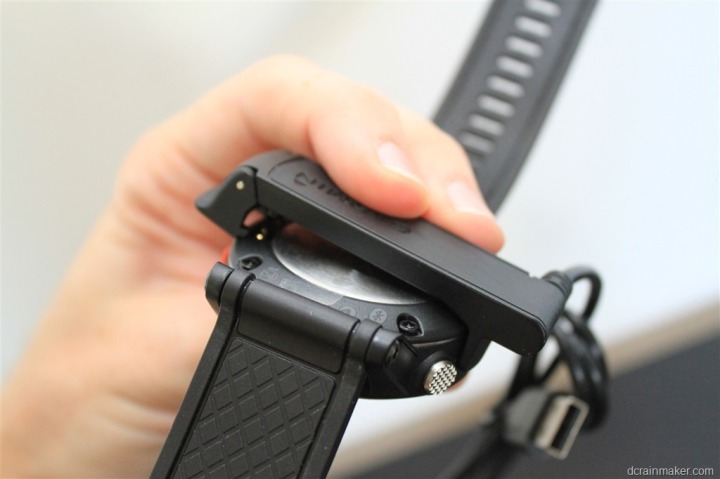
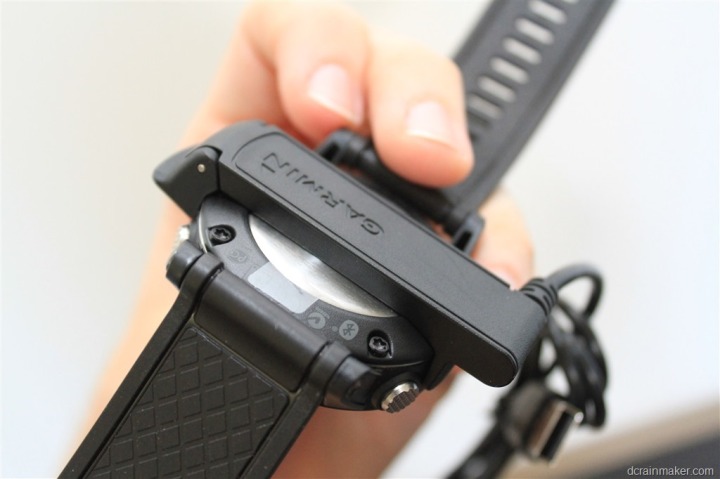
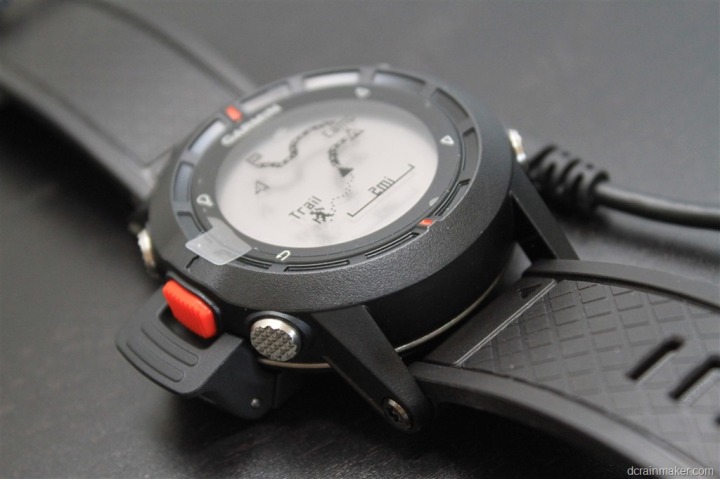
The clip enables you to charge the Fenix, as well as download data. Now is as good a time as any to note that the Fenix is waterproof to 50m deep, plenty of coverage for your average summertime backcountry skinny dipping.
Size Comparisons:
I picked a few competitive units that were at least semi-related to the functionality of the Fenix. But ultimately, only one unit comes close in functionality: The Ambit. The other ones were units I added simply because they had more features than the average bear, or had barometric altimeters.
In the ring we have (from left to right): Garmin FR910XT, Magellan Switch Up, Garmin Fenix, Suunto Ambit, Timex Global Trainer.
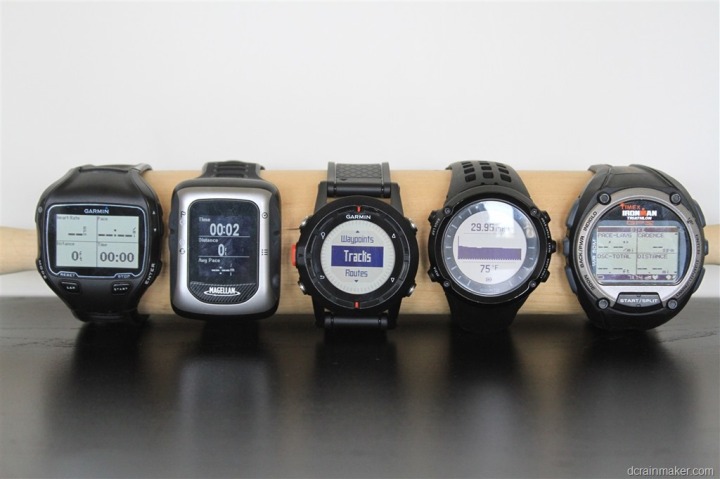
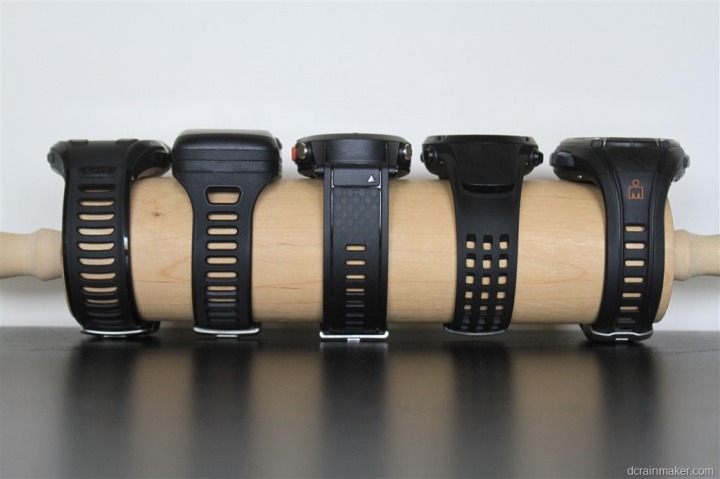
As you can see, they’re all about the same height. Each unit is a bit bulky, but the Ambit and Fenix are roughly the same, and a bit smaller than the Global Trainer, and less bulky than the Switch Up or FR910XT.
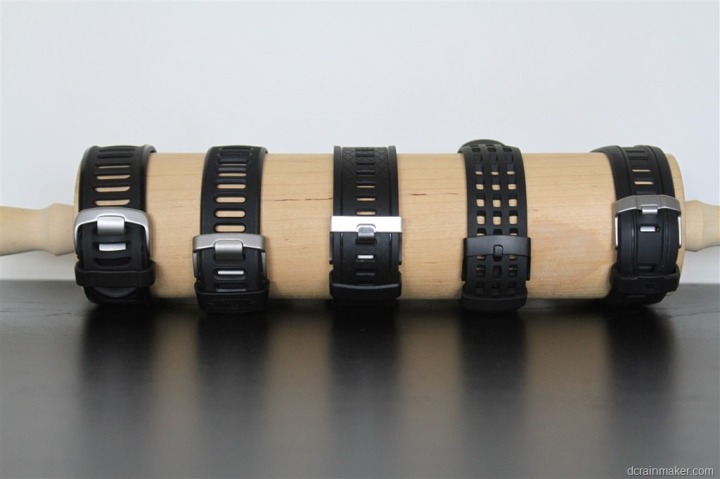
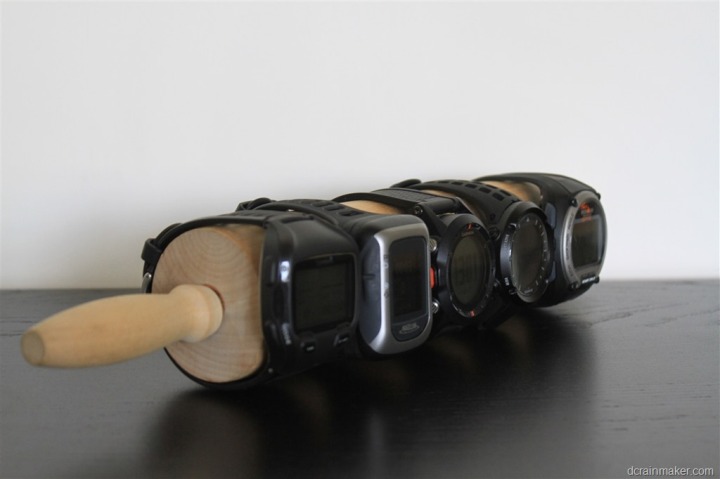
For those that are curious why I didn’t use the big roller, it’s simply that there wasn’t any need to.
(Note: For those reading in RSS, I have to insert a jump/break here, otherwise the length of this post breaks my Feedburner Feed, been there, done that. Sorry! Click on to read the rest!)
Running:
I’m going to initially cover running in this section, and then at the very very very end (about 11,000 words from this point), I’ve got a very important section on the Fenix running capabilities. In fact, if you’re a runner, it’s probably easier to read this whole review backwards.
To start using the Fenix in a running capacity, you’re going to want to change device profiles to the Running profile. You do this via the Profiles menu.
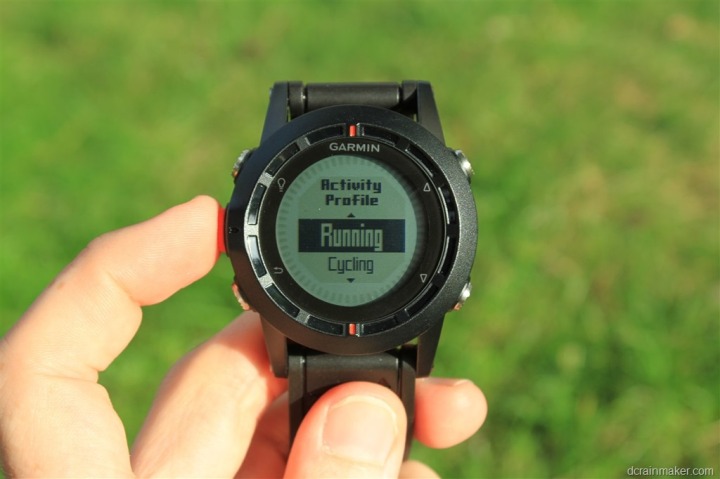
Once that’s done, you’re likely going to want to switch a ton of settings, for example, setting the track interval frequency to ‘Maximum’ and going in and turning on ANT+ sensors like the heart rate strap. It’s too bad that Garmin didn’t create a more realistic running device profile initially.
[Updated 11/2/12: The Garmin folks tell me that they have implemented updates to the out-of-the-box profiles, so this issue should be much better now. I haven’t re-tested, but it’s good to know that they are quickly making improvements.]
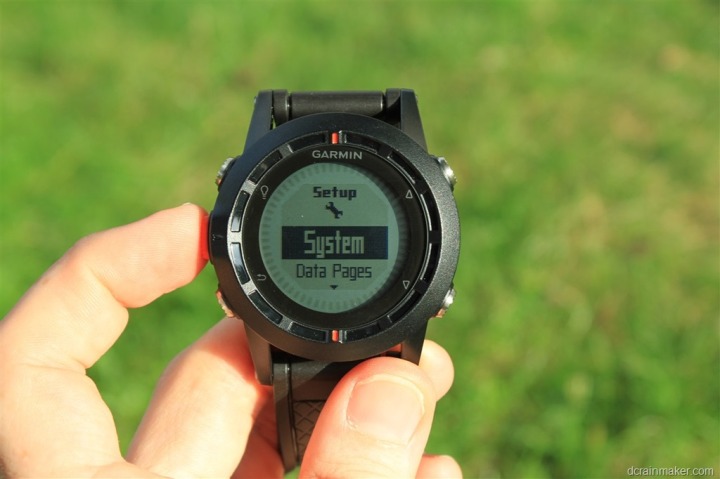
With all those things set, it’s time to actually run. But before we do that, we’ll need to turn on the GPS and let it find satellites. I’ve found satellite search times fairly inconsistent with the Fenix, even when restarting in the same spot. Sometimes, it’ll pickup satellites in 3-4 seconds. And yet other times, it’s 1-2 minutes. Usually I don’t see this much variation.
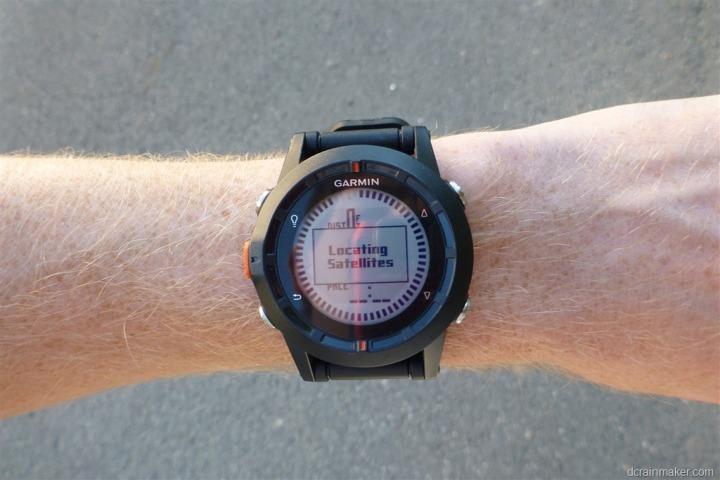
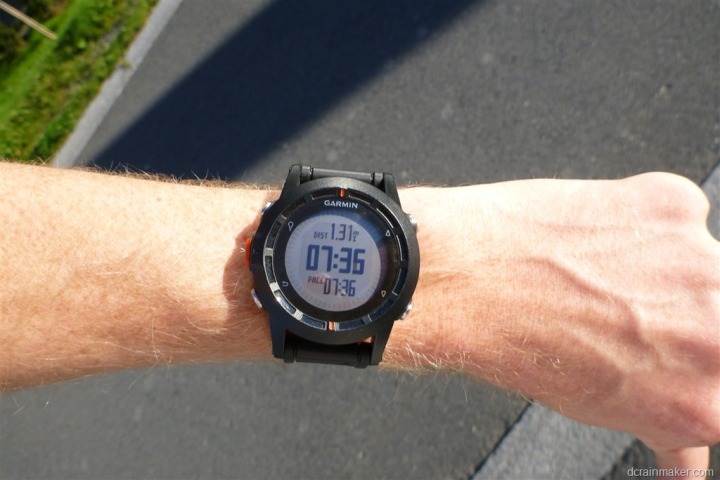
I’ve set my data fields to show my pace and time. In the below photo I was doing comparisons against instant pace and lap pace. Hence the duplicate nature of the data fields.
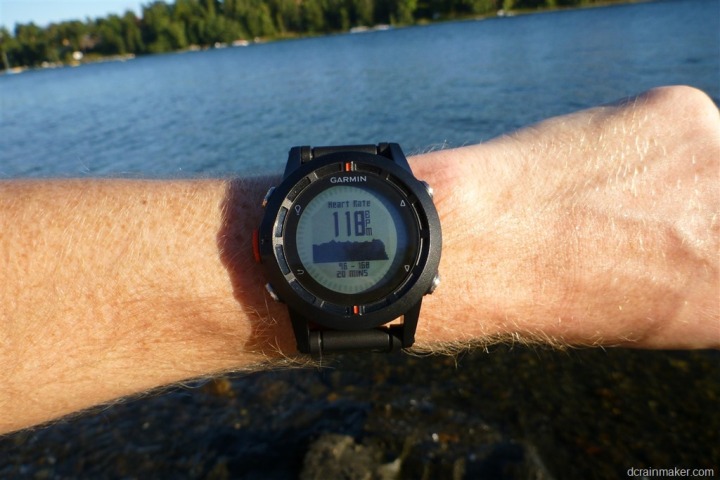
As you run, you can view both textual data as well as graphical data of your run. In the case of the below, I’ve gone ahead and combined the two together to show me my current heart rate, as well as my HR graph over the course of the run.
Additionally, the Fenix will produce a map of your run, which you can zoom/pan in and out of by pressing the red button first, and then the up/down arrows depending on whether you want pan or zoom.
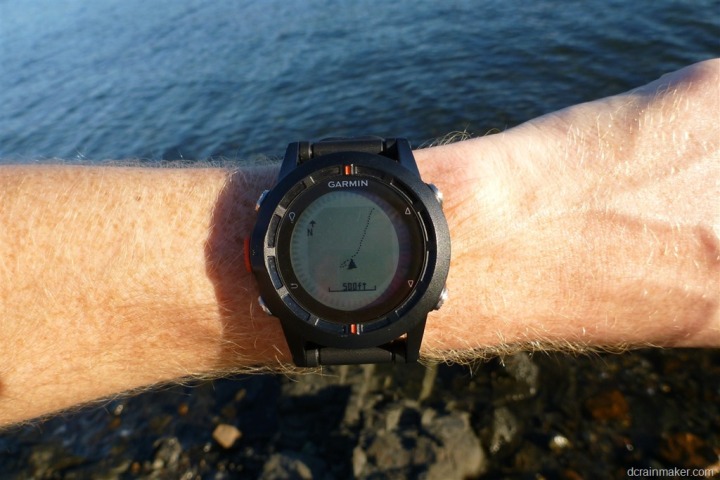
Running functionality with the Fenix is really strictly limited to capturing and displaying data from your run. Time, distance, lap time, etc… It’s not a heavily running focused watch in that it doesn’t have features like Virtual Pacer or intervals or workouts. It does do AutoLap, which is fully distance configurable.
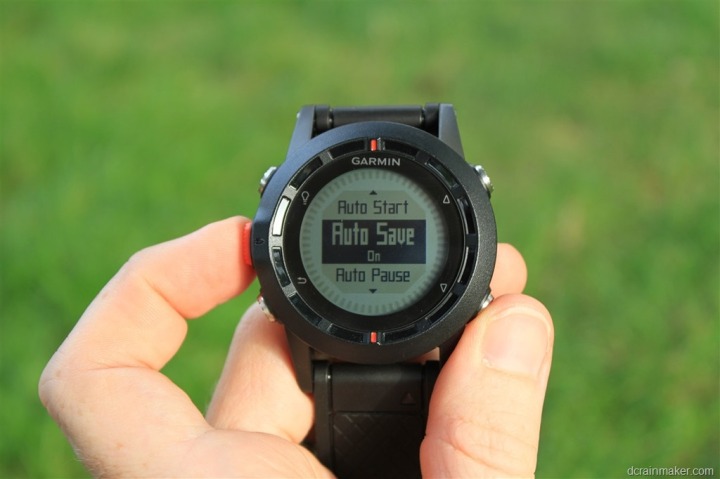
Additionally, you can specify Automatic Starting and Automatic Saving. I highly recommend the AutoSave functionality if you’re coming over from the Forerunner lineup, as things are a bit different and you might end up forgetting to reset your run afterwards.
Speaking of being different, there are little quirks that are different than most other running watches. For example, if you want to set a lap/split marker you’ll need to enable the ‘Hold Keys’ functionality in the menus. Hold Keys enables you to specify an action when you hold either the up or down key (the right side buttons).
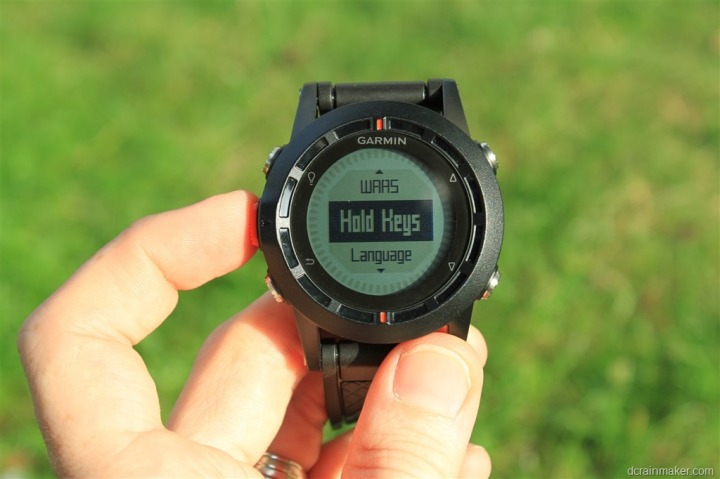
For example, the ability to have the hold up key start the timer. While the hold down key could be set to create a lap marker (my configuration).
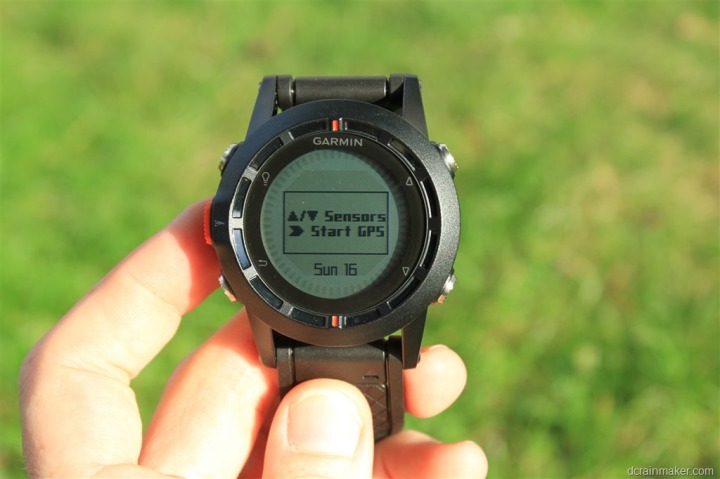
The only challenge with this is that you’ve gotta actually hold the button down for two full seconds before a lap marker is set, which may be odd at first.
[Update 10/4/2012: As of the 2.70 firmware released on 10/4/12, you can now configure the bottom left button – back – as a ‘hot key’, which requires a single tap. Thus, you can now configure that button to act as your lap button. Much better!]
[Updated 11/2/12: Further configuration has been added to allow single press of up/down to start/stop or lap.]
Once your run is complete, you’ll want to save the Track file. In Fenix-parlance they’re called “Tracks”, not activities. Here’s a quick primer for the runners in the crowd:
Track = Activity (your run file, where you went)
Current Track = Current Activity
Save Track = Save/Stop and Reset your current Activity
Start GPS = Find satellites
Stop GPS = Stop looking at the satellites
Activities do NOT automatically start when the GPS finds satellites unless you’ve specified it to
Activities do NOT automatically stop recording when the GPS is turned off, unless you’ve specified it to
Routes = A variant of courses (lots of details about how these aren’t the same later)
Waypoints = A place for you to mark out water fountains and portapotties
Tracks = Your previous activities, saved
As I said above, I’ve got far more written on my thoughts on the running functionality at the end. Beyond what I’ve highlighted above though, most of the functionality is covered in other sections.
Cycling:
Ultimately, the Fenix isn’t really designed for cycling. It can be used in it, but if you’re a cyclist, I’d highly encourage you to simply look at other units. Within the Garmin line, that’d be the Edge series, or, if you’re a triathlete – the FR310XT/FR910XT.
That said, I’m all about trying things out – so off I went!
Outdoor Cycling
I’ve been using it on and off during my road rides, but it’s my recent mountain bike ride that provided the best photos – so we’re going to use that.
When using the unit you have two options for mounting. You can either wear it on your wrist as normal, or you can pickup the cheap $10 Garmin bicycling mount. This mount allows you to simply place it on your handlebars in a location that’s easy to view.
In my case, I didn’t take one with me on the trip, so I just went wrist-style.
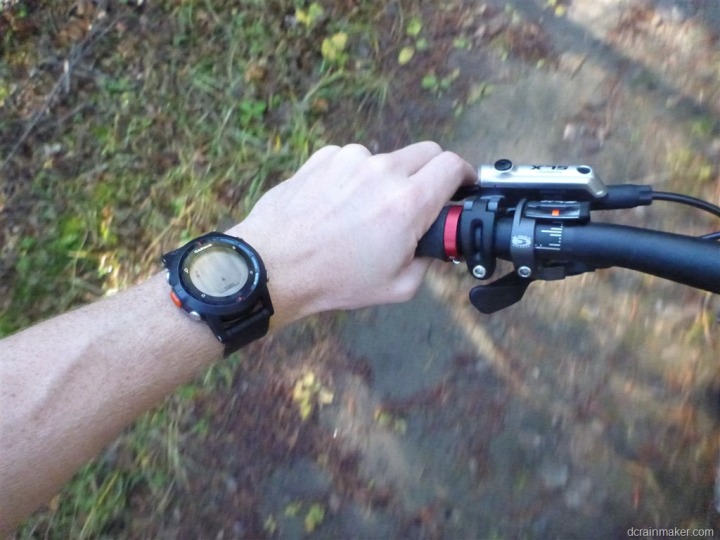
One thing you’ll want to do though is switch the profile over to Cycling, so that it shows speeds in MPH (or Kilometers per hour).
Beyond configuration of the cycling profile, there’s not much specific to cycling in the unit. Like running, there’s no virtual pacer or similiar functionality, nor any of the cycling-specific metrics you might expect if you had a power meter (like TSS/NP/IF).
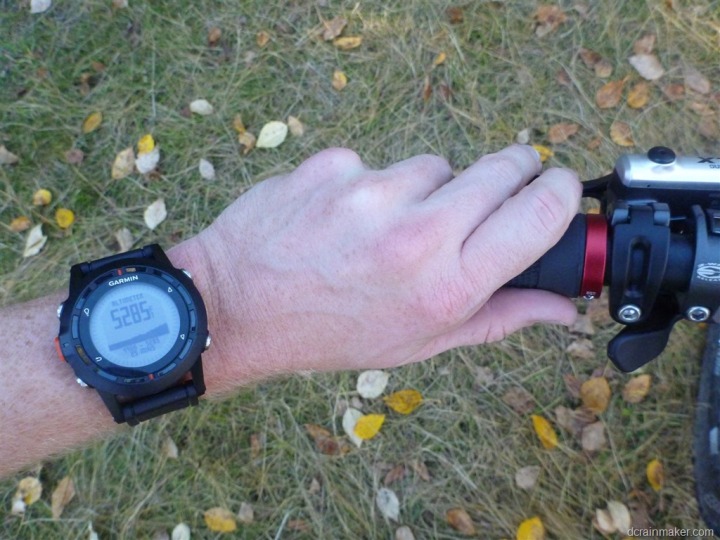
Ultimately, from a cycling standpoint, the device is purely for capture and display of data points. I’ve listed those data fields within the data fields section.
Indoor Cycling
Unfortunately, the Fenix doesn’t make for a very good indoor cycling computer, at least when it comes to gathering speed data.
While the Fenix does pair to an ANT+ speed/cadence sensor, you can only display the cadence portion of that. And there’s no settings to configure wheel size, nor to only do an inside workout without first enabling the GPS.
[Update 10/2/12: The ‘Indoor’ setting is now available under Setup > System > GPS Mode]
Navigation & Routing:
I’m covering navigation in a bunch of different places, so I’m going to focus on the major components here – which is navigating from one point to another, and routes.
First, if navigating on a given course or to a given waypoint, you’ll want to have those created within the Fenix before you get going. You can certainly add them later (especially in the case of adding the current location) – but adding any other location beyond your own is tedious at best. Far easier on the computer or phone.
Once the locations are in there, we’ll be able to navigate to and on them. First, we’re going to start with a route. In this case, I’m picking a short route around the area near me that I created ahead of time.
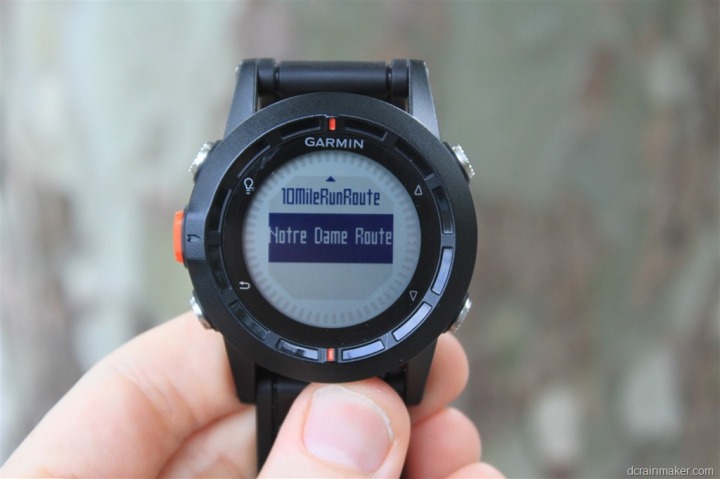
After loading the route, we can view an overview of it, edit it, reverse it, or start it.
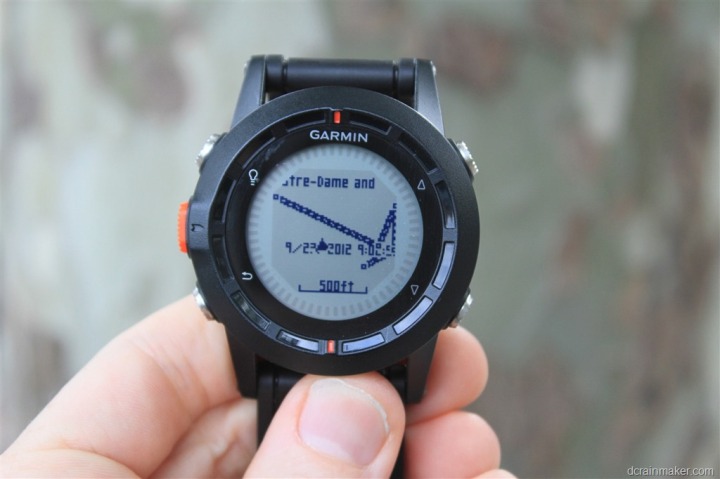
I actually selected to reverse it, since the ending point was closer to me than the starting point. After that, it was time to get going:
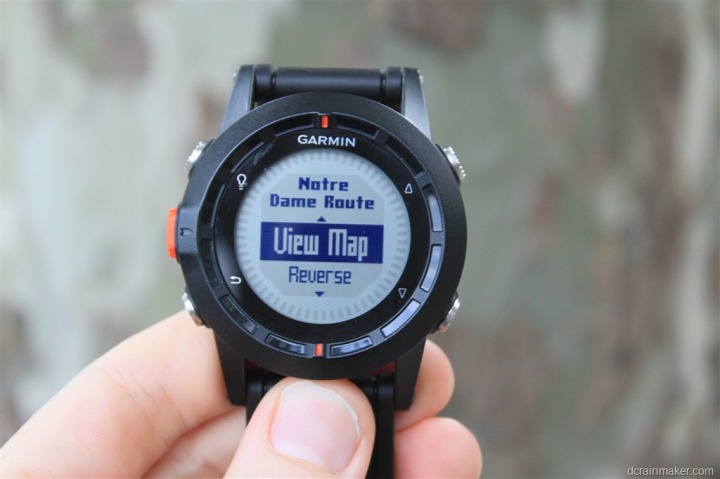
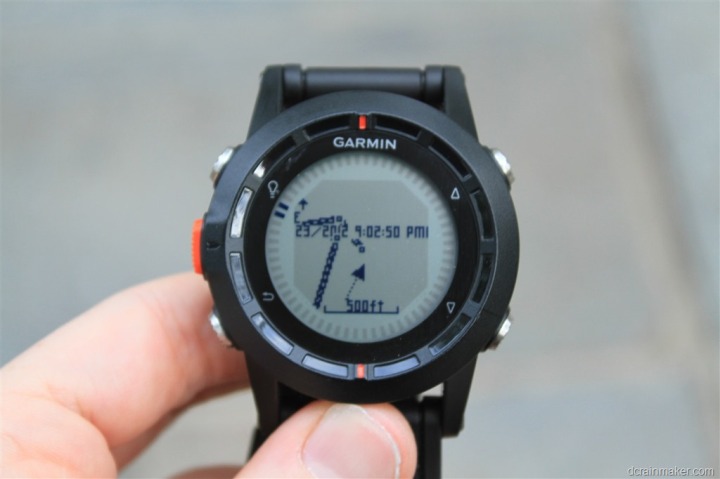
Once the navigation screen comes up, you’ll see the distance to the next waypoint within the track/route, as well as the estimated time to get there.
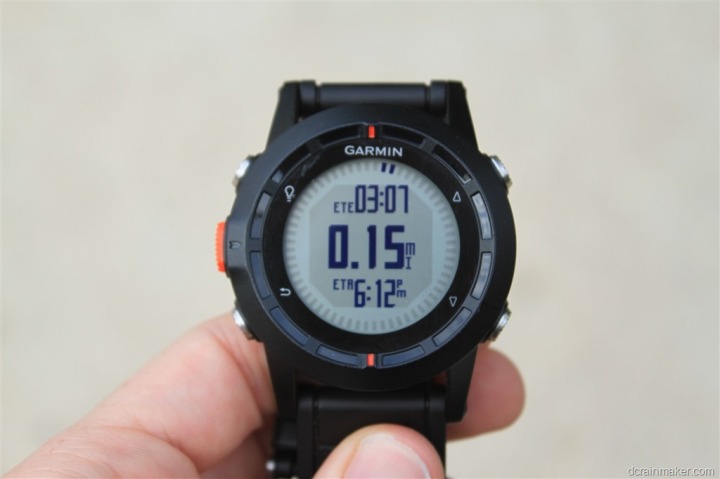
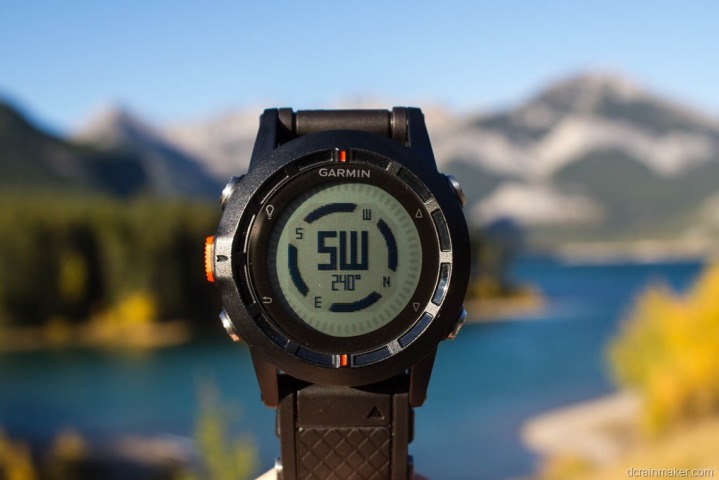
Your assistance in which way to go is driven by a few different data screens, all presenting the same data in multiple methods. First, you can use the outer ring of the watch, which acts as a compass. See the two little slash-dots above? That’s telling me where to go, I simply point myself in the direction of the dots.
Second, is to use a full-blown compass view, which can also be shown with degrees instead of just textual directions:
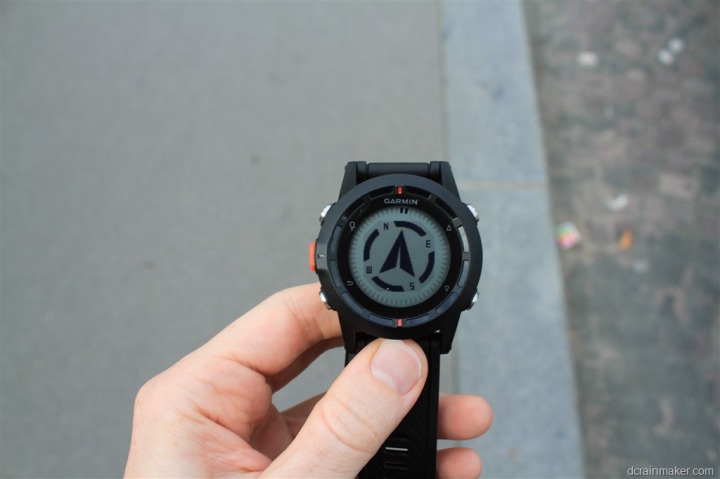
Once I reach that waypoint, it’ll automatically switch to the next waypoint in the track/route.
As noted earlier, you can press the red button while on the map screen to engage zooming and panning:
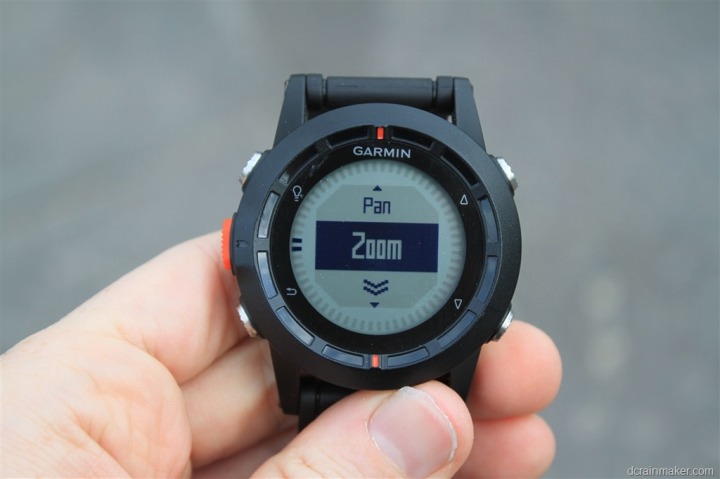
In the case of just navigating to a single waypoint (not part of the track), the story is much the same. After selecting to navigate to it, I follow the same type of directions.
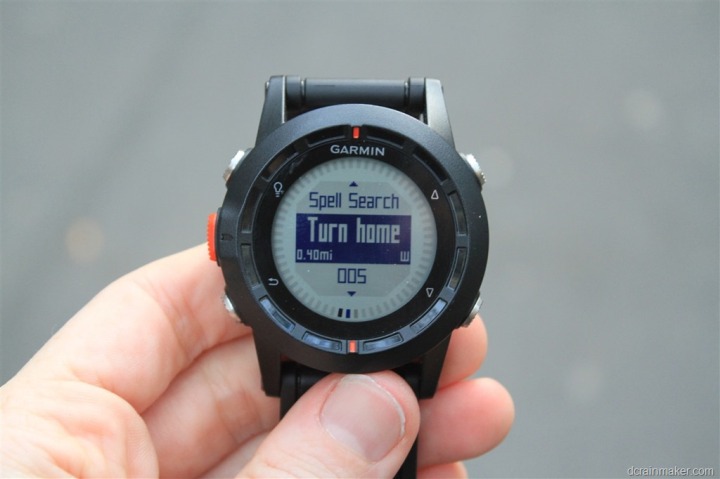
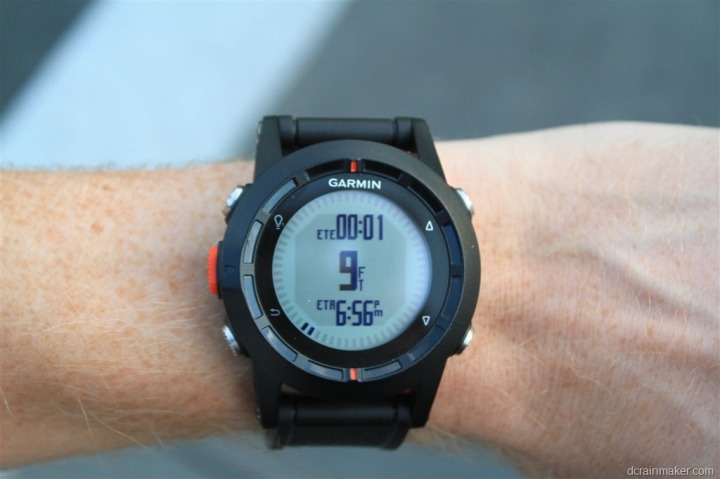
The only notable thing is that once you reach the waypoint in question, there isn’t any sort of ‘you are here’ notification. It’s merely that the display will show a single-digit distance number – in my case about 9 feet left was as close to it as I could get before it would change directions on me.
The Fenix understands point to point navigation, but not any form of routable navigation. For example, take the below photo (note the two slash marks at the top of the watch). My waypoint (a geocache) is actually directly on the other side of the river. In the mind of the Fenix, my fastest path is to walk on water, whereas in reality, I have to walk over that bridge to the right, and then back around again.
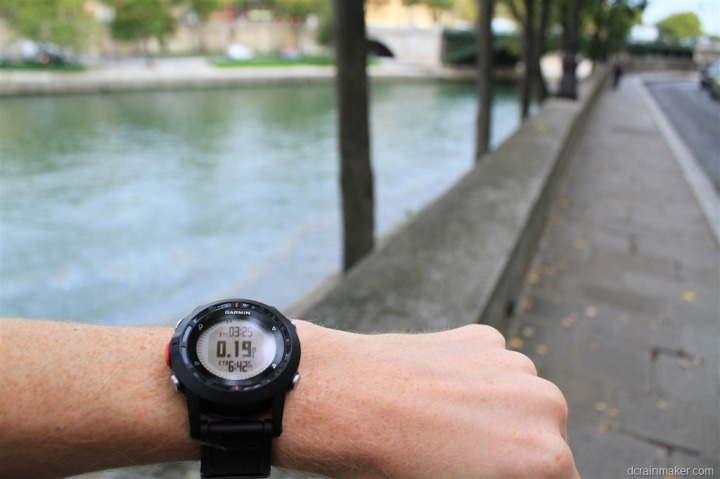
In the cases of tracks or routes, these would ideally include the additional routing information, so you wouldn’t have to swim. But in straight waypoint situations – it’s just point to point.
Additionally, in situations where you want to reverse course, you’ll use the TracBack feature, which effectively inverts the course for you instantly, and gets you back to the same place you started – via the same method you came. This is ideal for trails with out and back routes, but probably less ideal for any other circumstances that may involve a loop or where the stating point is significantly closer than going all the way back.
Garmin Connect Courses:
I wanted to call this out specifically, because of the number of fitness/runner focused folks that read these reviews. The below feature was added on 10/4/12 as part of firmware version 2.70.
Within Garmin Connect, you can both create a course, as well as download other courses. First, course creation. Courses allow you to create what will ultimately be Tracks on the Fenix.
To create a course, we’ll navigate to the courses creation editor within Garmin Connect by going to Plan > Courses > Create Course.
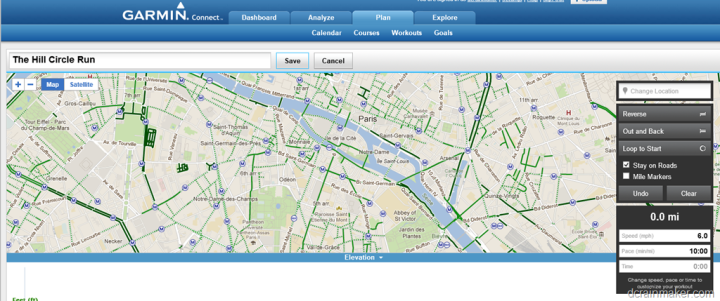
Then you’ll simply drag the route along, just like you would on other popular fitness map creation sites. As you do that, it’ll give you your route totals on the sidebar, as well as elevation along the bottom.
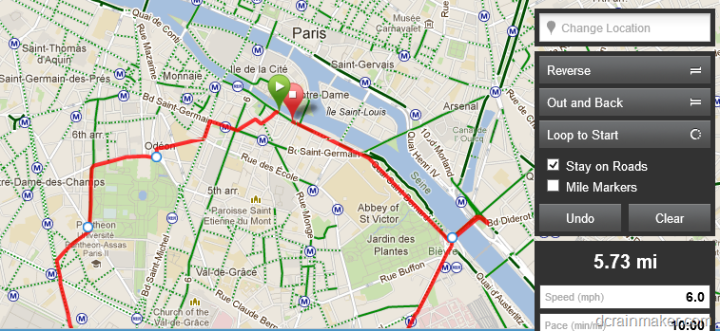
Once completed, it’ll look something like this:
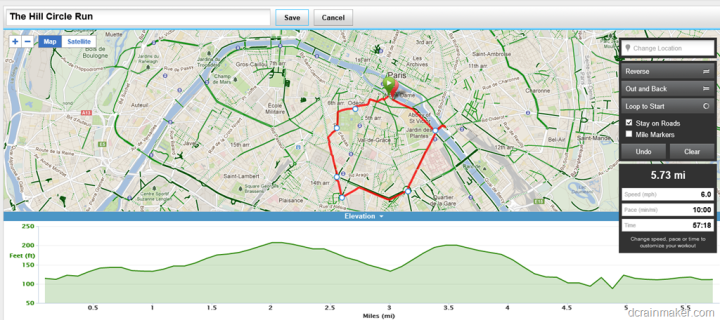
Next, you’ll want to ensure you save the course by pressing the Save button. Once you do that, a new set of controls will open up, including the ‘Send to Device’ option.
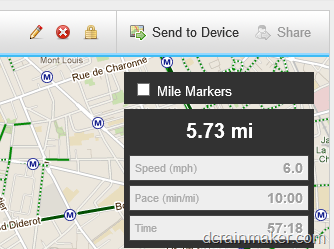
From here, you’ll be able to select the Garmin Fenix. Note that you’ll need to have Garmin Communicator installed.
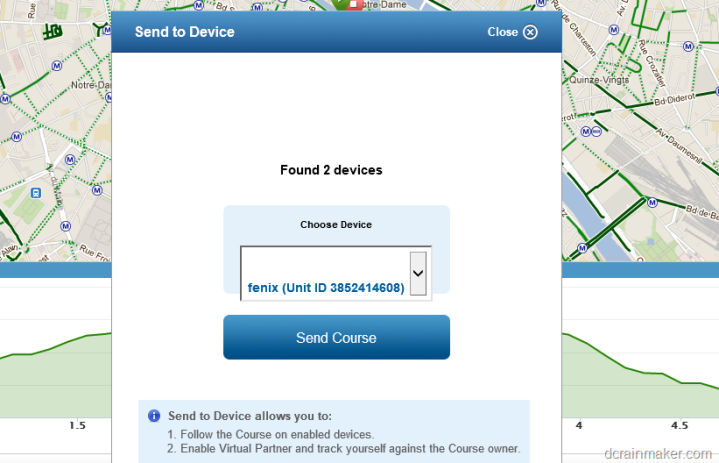
Once you press ‘Send Course’, it’ll shoot it right over.
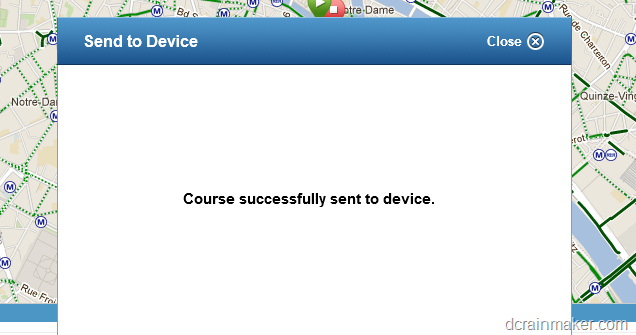
At first, it didn’t send it over and gave an error. I unplugged the USB cable and tried again – so give that a shot if you run into any issues.
Once your course is on your Fenix, it’ll show up within the Tracks area of the unit. In fact, when you first turn it on after importing a course, you’ll see it’ll say that it’s first importing the courses into the tracks.
Mapping:
The Fenix includes a very basic map set within it – as in, identify the country map set. You can see a few examples below, showing the country of Norway:
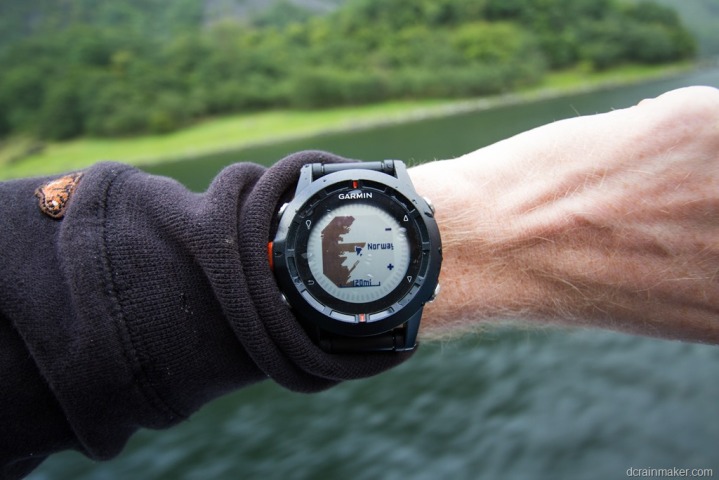
Ultimately, this information isn’t really useful at all, as I usually know which country I’m in.
Today, Garmin hasn’t made available any further mapping functionality within the Fenix. I suspect in due time they certainly will as part of an upsell.
However, there are some ways around that lack of formal solution in the meantime. You can use some of the Garmin tools to download various smaller maps onto the Fenix. Unfortunately, the Fenix only has about 20MB of free memory, so space is pretty tight for maps that might otherwise run GB’s in size.
There’s more information on how to do this via this post here.
Geocaching:
The Fenix supports geocaching through one of two methods. The first is by downloading caches via their Opencaching site straight to the Fenix. It uses the Garmin Communicator plugin to place the caches on the device. It works really well from a sync standpoint.
First, you go ahead and search for Caches in your nearby area:

You can see them above on the screen with the little marker bubbles. I zoomed into one a few blocks away:
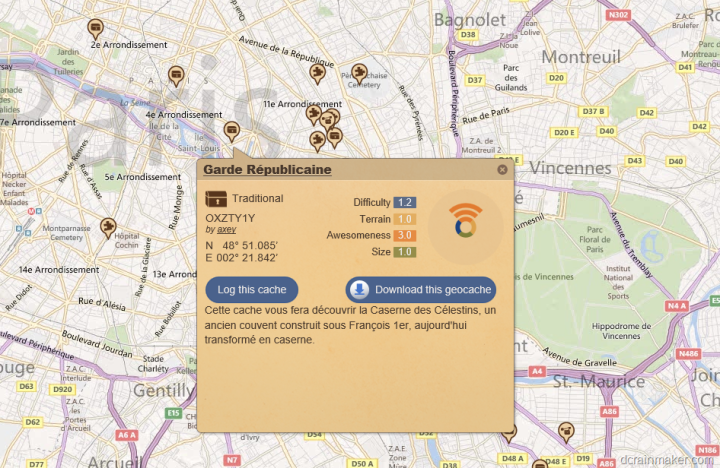
From there I can choose what to download to the Fenix. When I click to download the geocache, I get a prompted list of options:
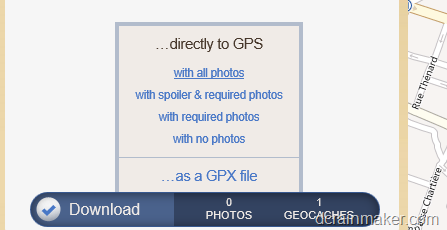
After that, the cache is located on my device for looking at later on. I can see all the caches on my device at any time by using the menus at the top.
Now that we’ve got them on my device, we’ll head outdoors.
The first thing you’ll notice is that anytime you’re in the map view you’ll see the geocaches on the screen (even in activities such as running). I noticed this on one of my runs the other day when I realized I was running right by one.
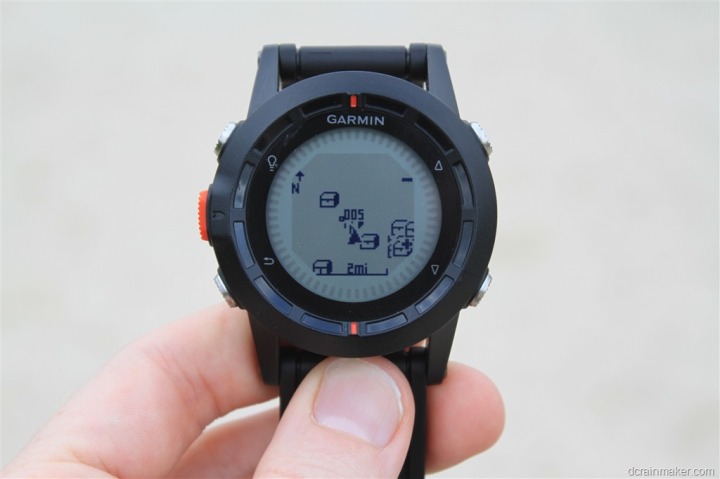
With that, it’s time to navigate to one. In my case, I picked one roughly half a mile away. To do so, you’ll dive into the GPS Tools option within the watch. The GPS Tools is effectively the ‘leftover box’ when it comes to features. All of them are cool features, it’s just that it seems they couldn’t put them into a different category in the menus. When in doubt, look in the ‘GPS Tools’ category.
From there, I’ll scroll down past ‘Man Overboard’, past ‘Sighting’, and past a bunch of other things to find ‘Geocaches’.
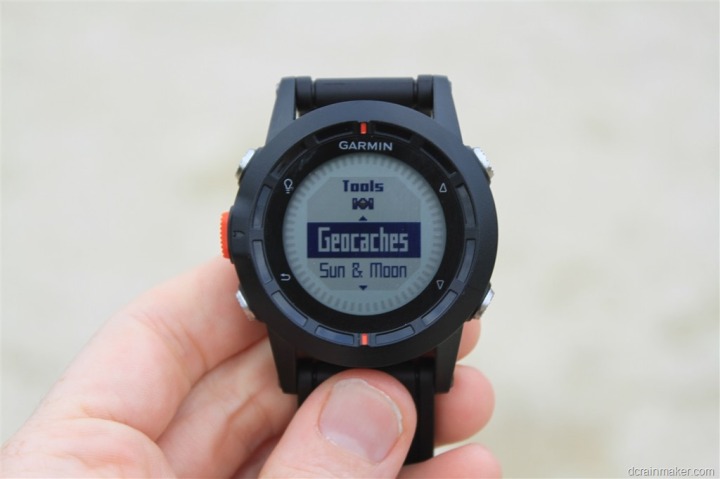
Within that, I can select a cache. I can also search for a given cache (ideal if you have a lot of them).
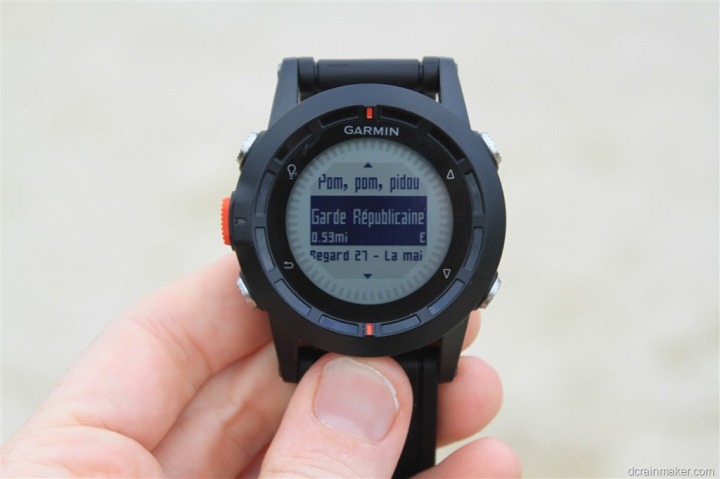
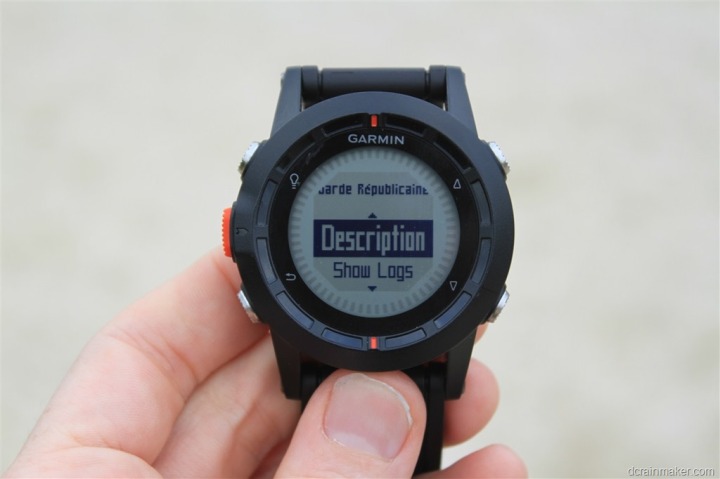
Once selected, I’m off to the races. Like everything else on the watch, you don’t have to record a track if you just want to navigate. Though, I always like recording tracks.
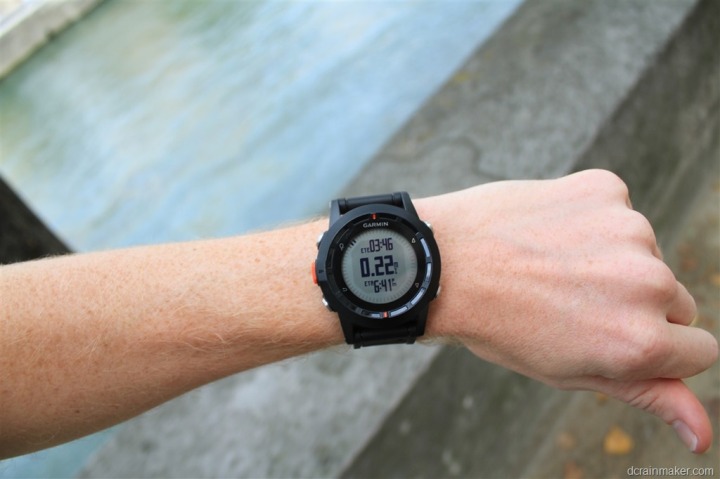
At this point, you navigate like normal as described in the routing/navigating section.
Eventually, you’ll be able to reach your location and find the specific cache. In my case however, the cache I choose was actually behind a locked gate. On certain days/hours you can go in, but this was not one of those times/days.
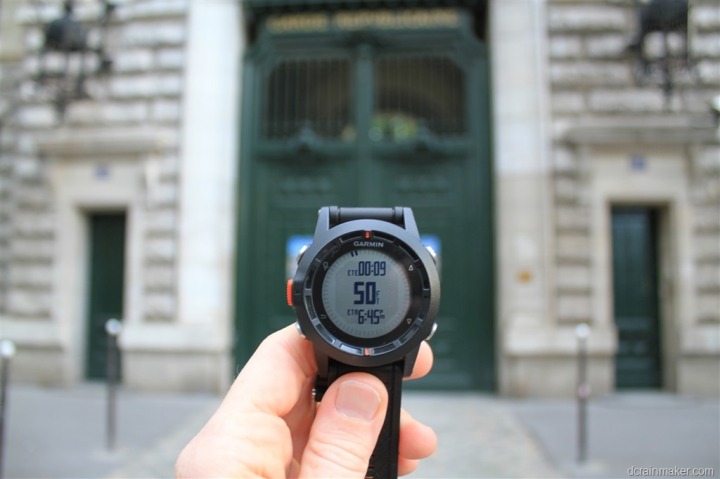
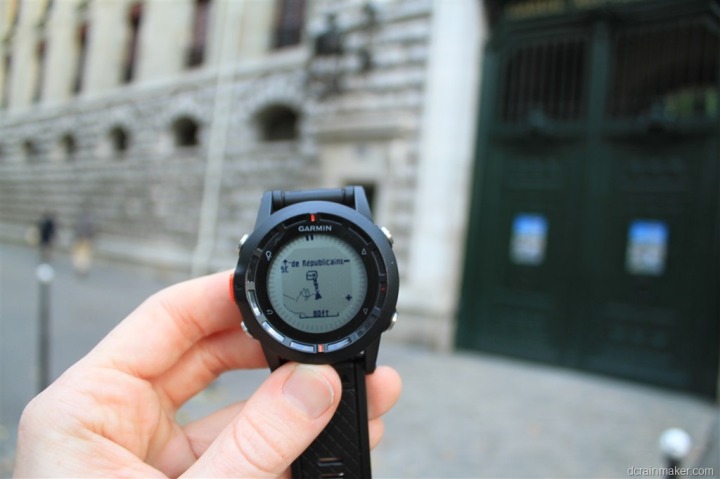
In addition to manual caches, you can can also utilize the Garmin Chirp (I’ve talked about that in more depth here). You’ll go into the menu and turn on the ability to auto-search for Chirps.
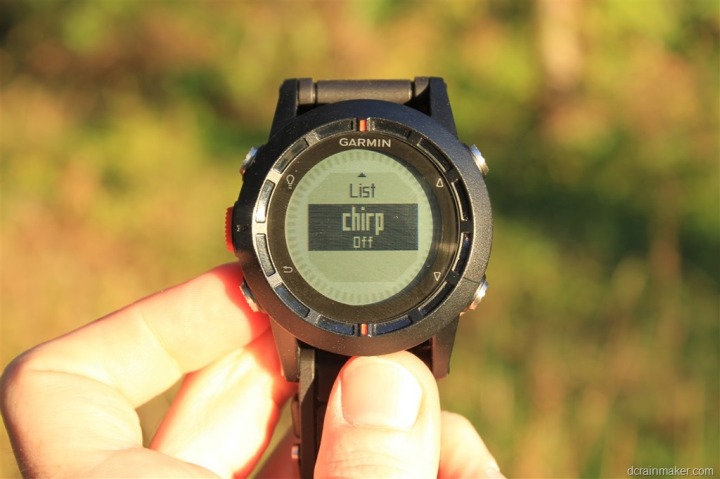
Once that’s enabled, and it finds a Chirp nearby, it’ll automatically notify you, and provide any details that were included within the electronic Chirp.
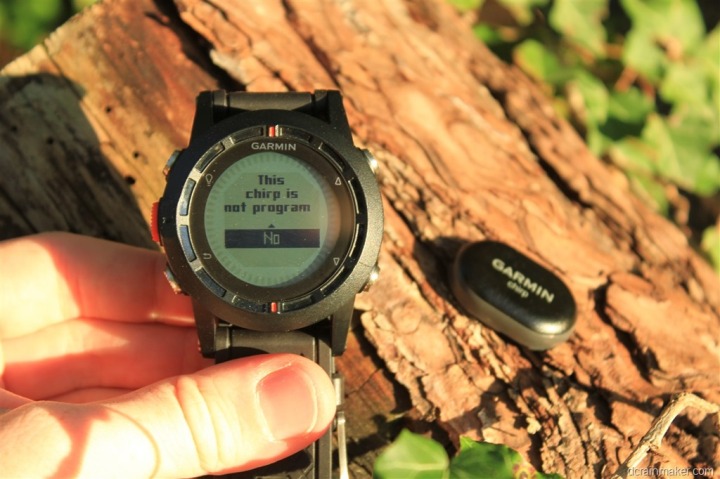
In my case though, on both Chirps I have, finding a Chirp was akin to killing the Fenix. Chirp, Chirp, dead. Within seconds of finding the Chirps (and those photos above), the unit would hard power off. The only way to turn it back on was to hold down the power button for 30 seconds, while connecting to a USB power cable.
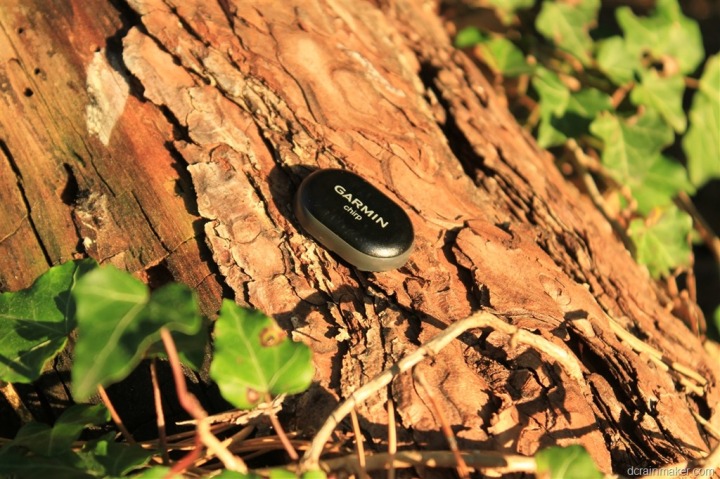
Garmin isn’t quite clear on why this is happening, though it’s happening on two different Chirps obtained 1+ years apart, with two different Fenix units.
[Update: As of 10/4/2012, I’ve been told my Chirp-Chirp-Dead issue has been fixed in just released 2.70 firmware update]
Many of the outdoor Garmin units (non-fitness) include a basic and simple table of hunting and fishing times, as well as sunset/sunrise times.
First, we’ll start with hunting and fishing. These times are based on the Solunar Theory (read up on it here, it’s actually interesting) which essentially states that the ability for you to increase your catch is tied to factors such as the sun, moon and tidal patterns. By understanding those factors you can develop patterns – just like moon phases – that can be easily followed.
The Fenix simply displays those patterns in the form of recommendations. For example, here’s a few days worth of hunting and fishing recommendations. You can scroll up/down to change the day.
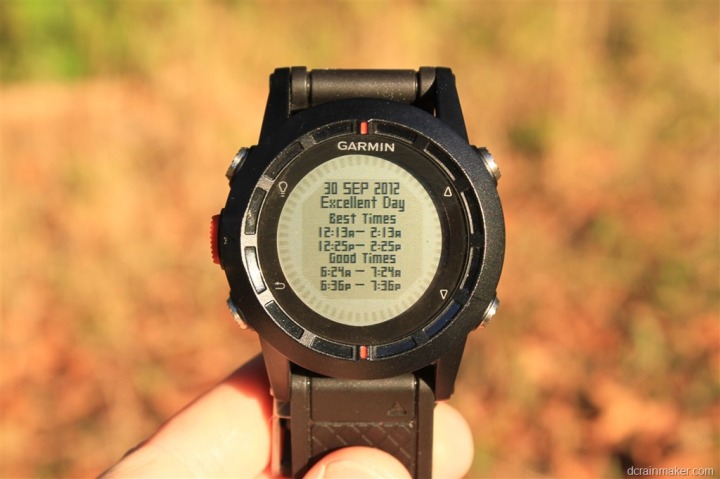
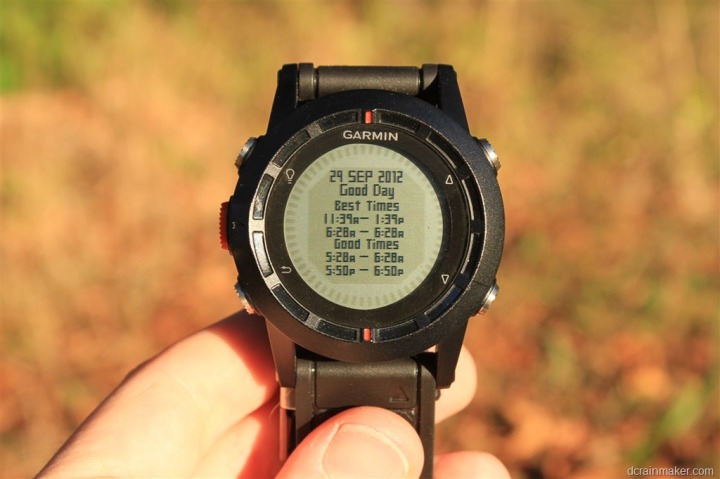
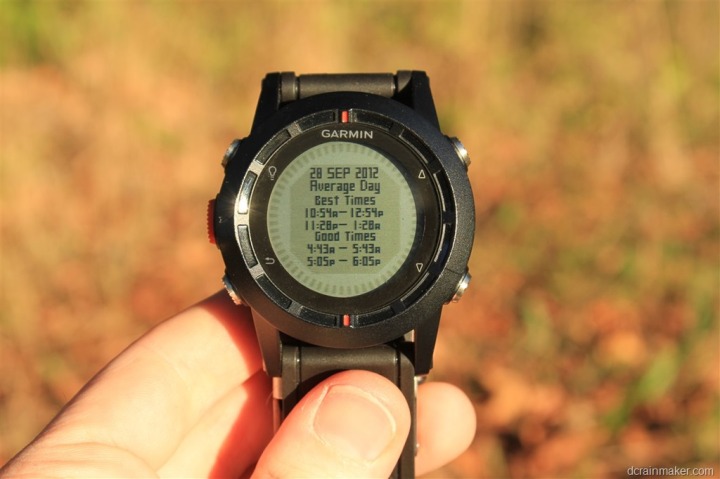
Meanwhile, on Sunrise/Sunset, the unit will display the information in much the same way – allowing you to easily scroll up/down to change the day and see yesterday/tomorrow, etc…
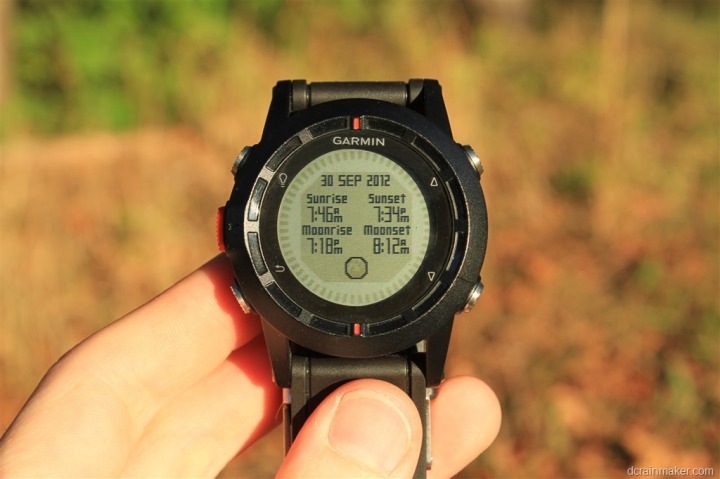
This is handy when you’re out hiking and want to know how much longer you have till the lights turn out.
Sensors and Capabilities
Internal Sensors – Barometric Altimeter:
The unit includes a barometric altimeter, which generally enables you to get better elevation and altitude information. Many GPS units utilize only GPS based altimeters, which aren’t terribly reliable. Though, in recent years most sites now include elevation correction afterwards – so if you aren’t looking at the data on the watch during the activity it tends not to matter much.
But for hiking and mountain focused activities, accurate elevation is fairly important, hence the inclusion of the barometric altimeter.
The altimeter is accessible through a slew of data fields, including your current elevation as well as ascent and descent. You’ll want to check out the data fields chart later on to get the full listing of fields.
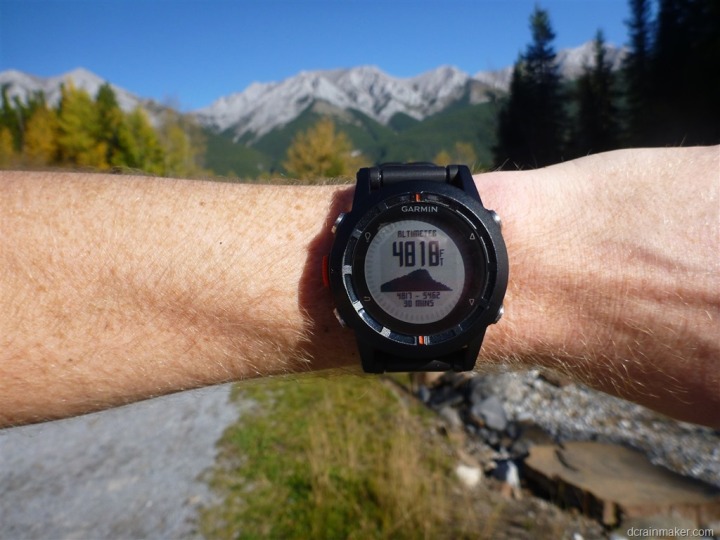
You can see that above I can display both the value, as well as the elevation graph showing you where I’ve been (not where I’m going).
In addition, you can customize how the data is gathered and what is displayed. First, if you’ve got a known elevation value, you can override the unit and use that to calibrate it.
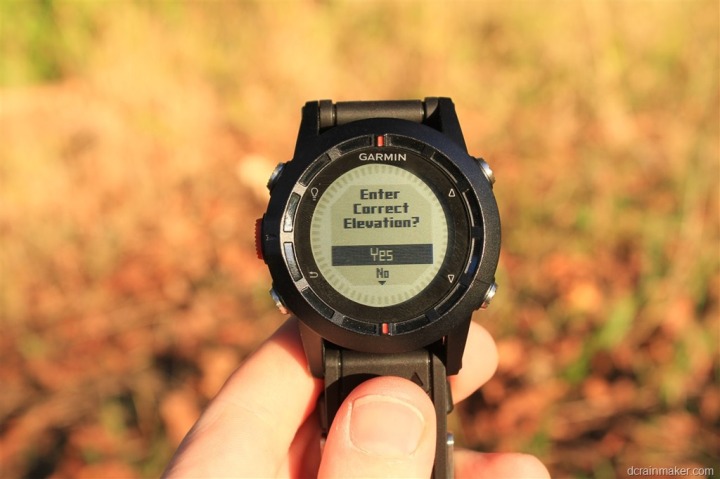
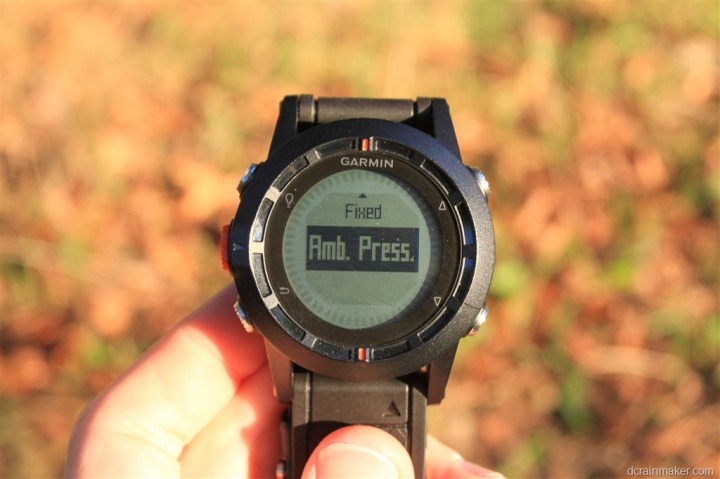
Then, you can display the Barometric Plot as: Variable, Fixed, or Ambient pressure
And for the elevation plot, you can choose to display it with a baseline of either time or distance.
I’ve been doing some elevation tests. They tend to fall into one of two camps: Tests against other units and tests against itself.
In the first case (against other units), I present a run from the other night. In this case, it includes a fair bit of ups and downs. I ensured that when I departed, each unit displayed within two feet of each other (the Ambit two feet higher), and then I ensured to return to the same spot once complete. The goal here to ensure that both units matched elevation gains and losses. The course was not an out and back however. The Fenix has firmware 2.60 (latest), and the Ambit had 1.8 (also latest).
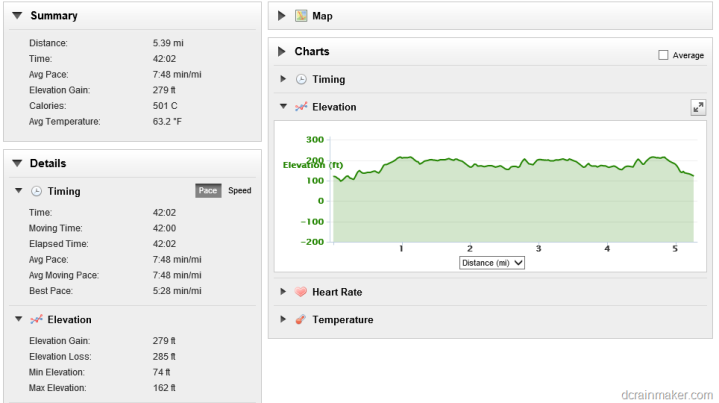
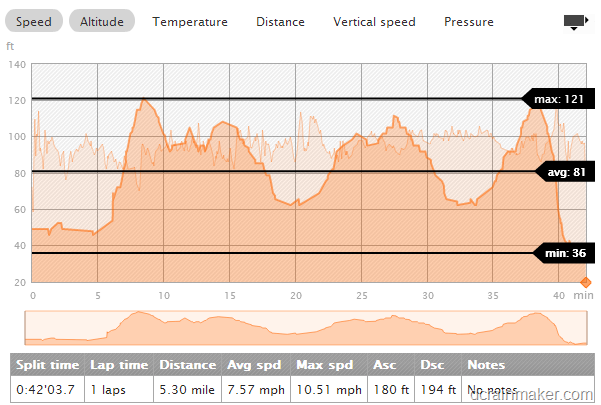
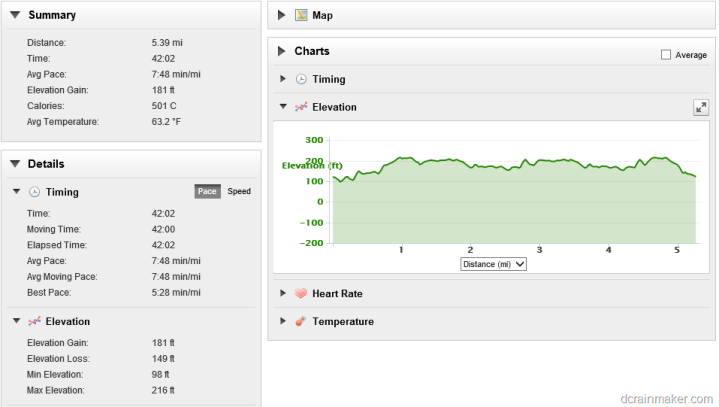
In the above case, the Fenix saw 279ft of Elevation Gain, while the Ambit saw 180ft of elevation gain. The Fenix saw 285 feet of elevation loss, while the Ambit saw 194ft. Interestingly, I noticed the Ambit ended about 10 feet lower than it started. This may have been due to the manual calibration required at the beginning. The Ambit said it started at 49 feet, and then said it ended at 39 feet. The Fenix meanwhile said 120 (start) and 123 (end). What’s most interesting to me about this is that I very clearly ensured that both were within three feet of each other at the start (50 feet). Yet, afterwards, the data looks entirely different on Fenix.
For those curious, using Garmin Connect’s elevation correction option, it says the following:
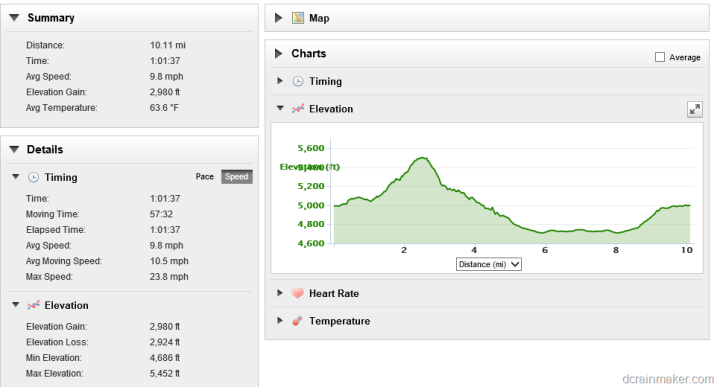
In the second case (tests against itself), there’s a ride from this past weekend. In this case, I was ensuring that after going up quite a distance, and back down, with variable temperature changes – that it came back (again) to the same place. Surprisingly, it came almost spot-on back 4,994ft (start) to 4,999ft (ending). However, the ascent/descent is a bit different by about 55 feet.
At this point, it appears to me the data from the production units is in the ballpark, but I’m not yet convinced how precise that ballpark is. However, I’d say the same for the Ambit too. For the mountain biking above – I actually had an Ambit with me, but I couldn’t get it to correctly stay calibrated on the right altitude (it wanted to be 1,500ft lower). Thus I’m not terribly happy with the ‘it just works’ factor of either yet.
Earlier this summer I had published some data from an early beta unit – which many folks spent considerable time analyzing. It was never 100% clear which unit (Fenix or Ambit) was most accurate in that case. However, that test is somewhat irrelevant now for a bunch of reasons. First is that the Fenix actually had a hardware modification after this unit specifically to address altitude issues. And second, is that’s been about 20+ beta firmware revisions later.
As we head into the winter, I’m looking forward to getting up into the Alps and getting some solid elevation data with well marked altitude points (the ski areas are good about that).
Internal Sensors – Magnetic Compass:
The Fenix includes a magnetic compass, which means that it doesn’t depend on GPS nor active travel to tell you which way you are pointing.
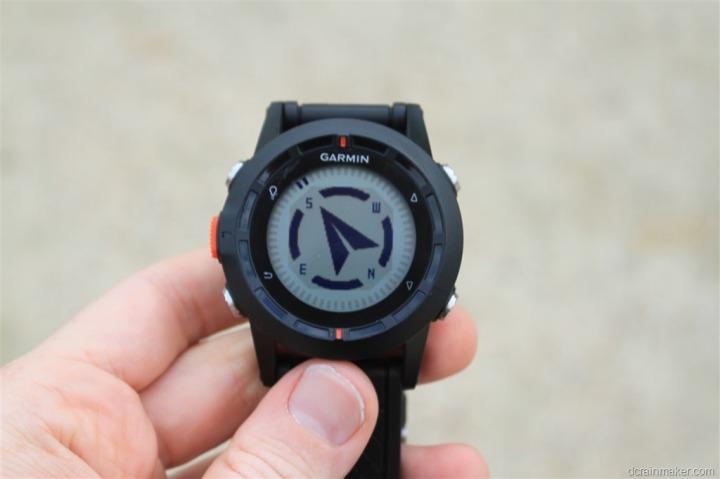
In order to illustrate this, video is easiest. First, I’ll rotate the unit on its axis, which shows that it will change which direction it’s pointing – without me changing location. Then as I walk forward, you can see the compass continues to stay the course, until I make a turn.
Garmin Fenix Magnetic Compass
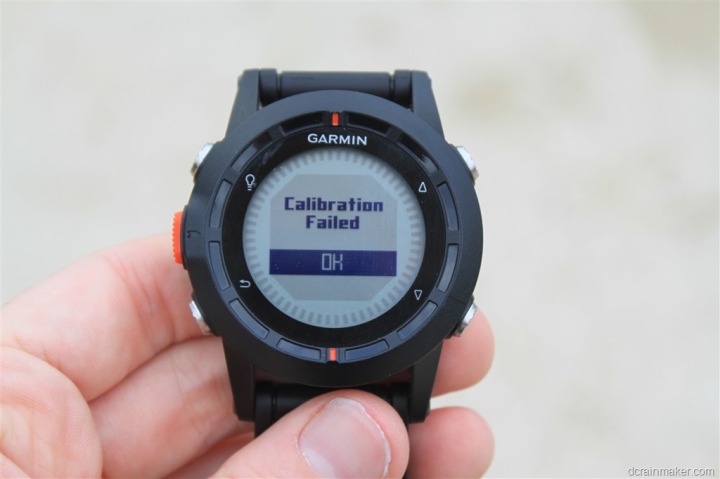
You can calibrate the compass manually should you wish to. However, in my tests – that’s been nearly impossible. The unit walks you through a series of steps designed to first rotate, then roll, then flip the unit. If you do any of the steps wrong, it’ll beep at you and have you start over:
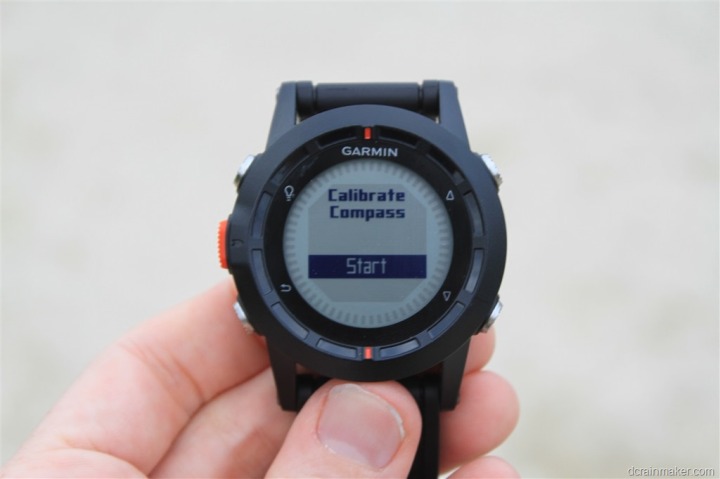
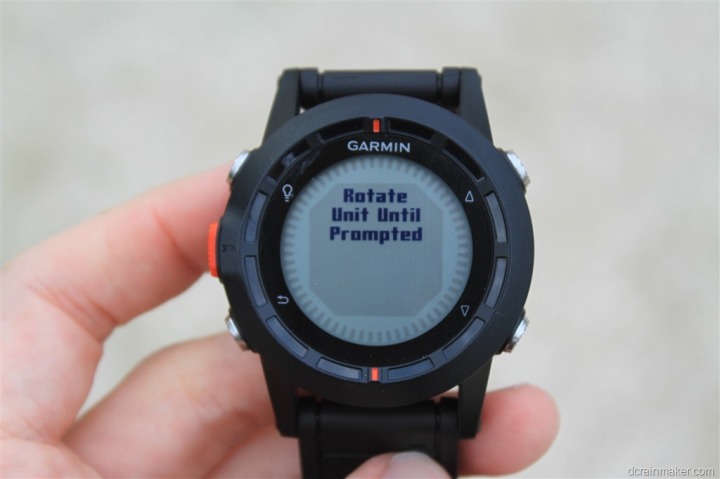
However, despite attempting numerous times I was unable to get the undocumented procedure to recalibrate correctly. In comparison, the Suunto Ambit calibration is far easier and more intuitive (includes directional arrows). The Fenix calibration includes no arrows, or even any help in the manual either.
In addition to calibration, you can also specify how to display the data, which includes the following options:
Letters/Degrees, Letters/Mils, Degrees, Mils
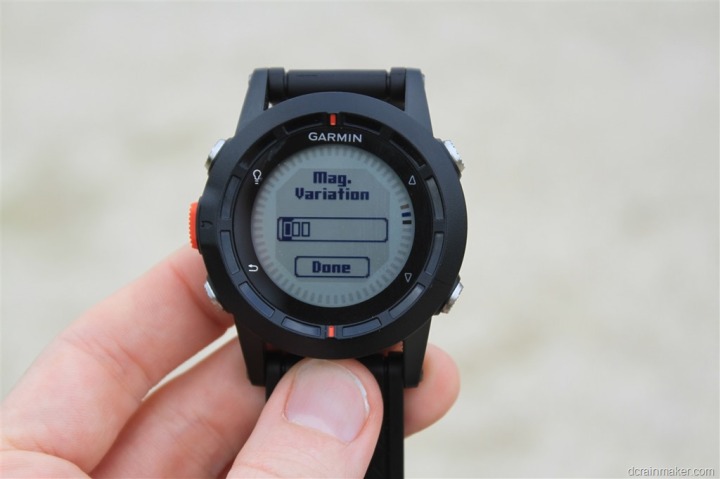
Further, you can specify whether or not you want to use North Reference as True, Magnetic or Grid. And, for those that need it, you can also override the magnetic variation and specify a custom value:
I talk to more data display options a bit later as well.
Internal Sensors – Temperature:
The Fenix can record temperature using its internal sensor, in addition to using the external temperature sensor, Tempe, which I’ll talk about in a second. The internal sensor is useful if you’re looking to get a rough approximation of temperature data, but due to the closeness with the skin, it’s likely that affects the temperature data a small bit.
Further, the internal temperature sensor updates at a less frequent interval than the external sensor, thus, you don’t tend to see the trending as cleanly.
In order to depict both items, I decided that the freezer would be best. In this case, I have two Fenix units. One recording temperature using the Tempe external pod, and the other Fenix was recording internal temperature. I stuck the Tempe pod, and the one with the internal recording enabled both into the freezer at the same time, and on top of a spaghetti box so that no unit was touching the bare freezer surface. Then I let them do their thing for about 40 minutes to stabilize. Interestingly, the Tempe unit recorded a lower temperature than the non-Tempe unit.
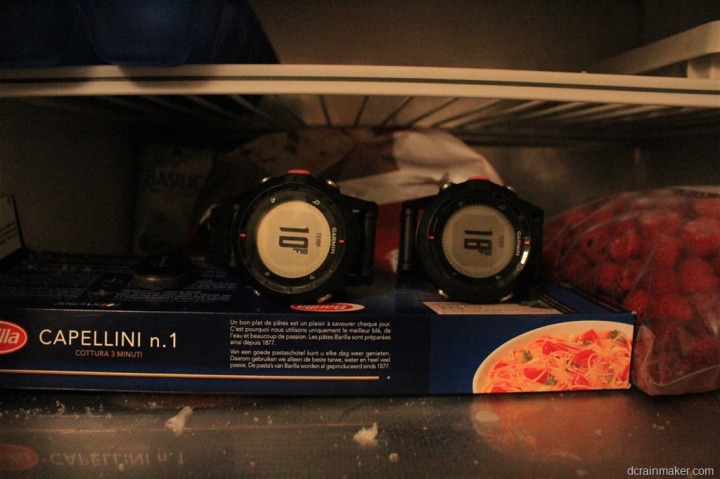
Now, I had planned to have two cool charts – but what I’m seeing is that if I don’t have a satellite lock, then I don’t actually get any data. It’ll start the timer/recording, but not write anything (which explains what I saw on the airplane too). That said, the little temperature chart tells the story.
[Updated 11/2/12: The Garmin folks tell me that they have fixed this issue.]
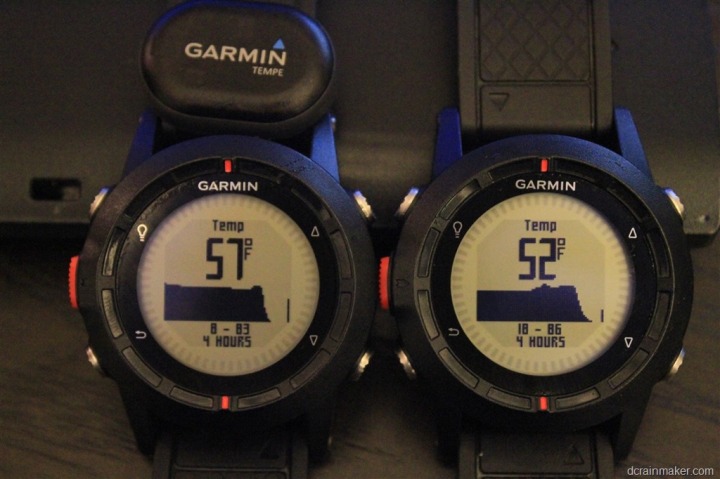
As you can see, the Tempe did seem to drop a bit quicker than the one without it, and the same goes for when I took it back out again. But I don’t think the real value here is actually how fast it responds. Instead, I think the value is in the fact that you can remove the pod from yourself.
External Sensor – Tempe (wireless temperature):
I think at times, I may be more excited about the ANT+ Tempe temperature pod than I am about Fenix. This little temperature pod enables a host of interesting scenarios, of which the Fenix watch only opens up a small number of them. By default, the Fenix can connect to it and gather temperature readings at an interval of once per second.
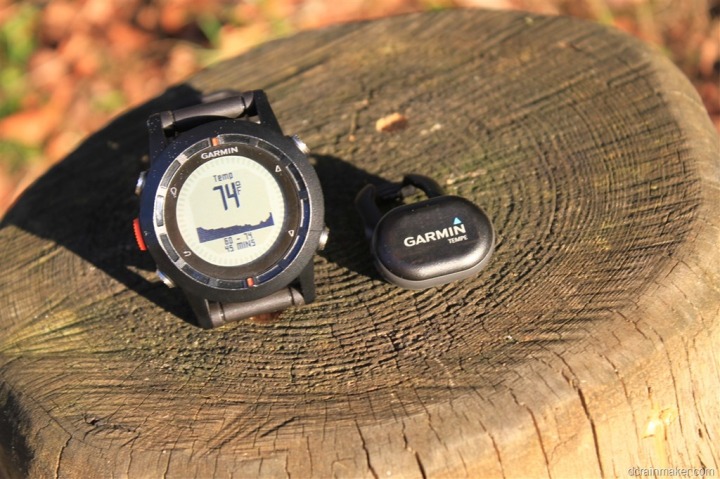
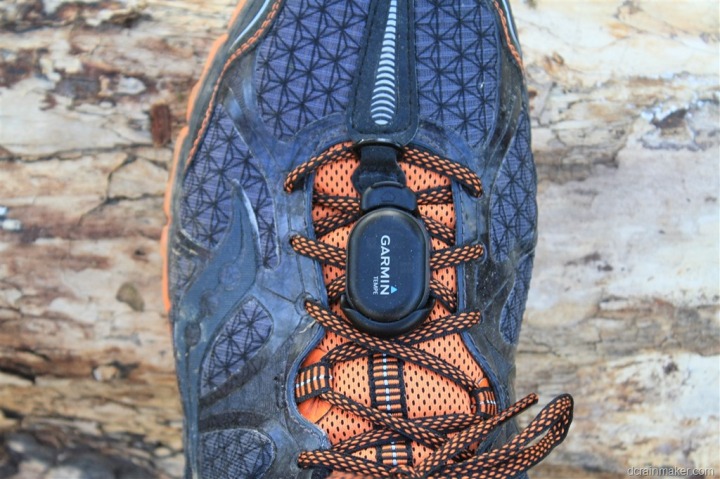
The unit can be affixed to your shoe using the included mount, though, it’s not terribly clear how much that impacts temperature readings.
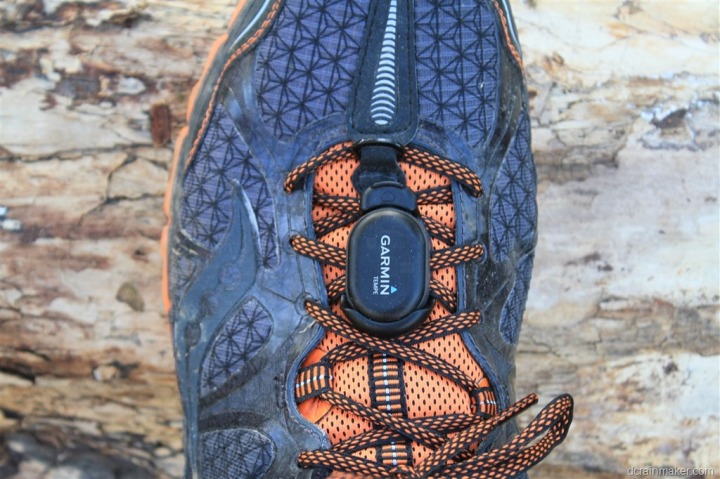
Instead, you could clip it further away from your body, such as the back of a backpack – sufficient distance I’d think.
Note that on the Fenix, you can selectively choose to display temperature readings in either Celsius or Fahrenheit. I say selectively, because you can choose to display distance in a different format. Kinda a cool option.
The Tempe pod fits the same footpod mount that both the Garmin Chirp and other ANT+ running footpods have. It also uses a standard CR2032 battery.
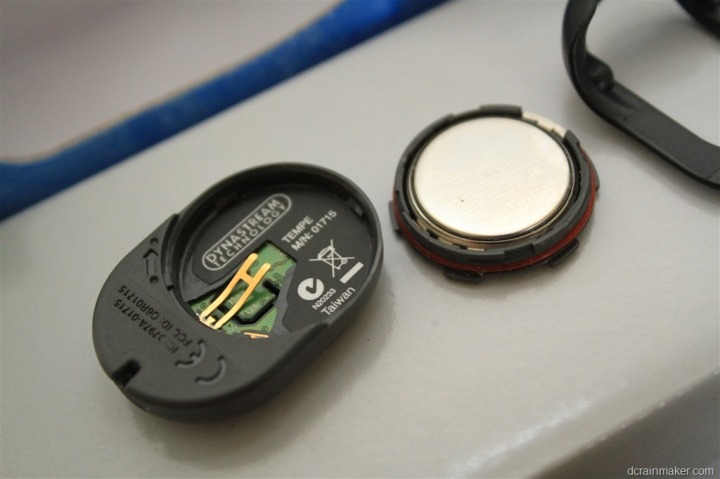
With that battery, the unit will get about a year of life on it. After which, you’ll need to plunk out the $3-5 for a new battery, typically available at your drugstore or grocery store. Or online for a heck of a lot cheaper.
When I look at scenarios that could be opened up here, the Tempe sensor supports the ability to store temperature data for prolonged periods of time. It can store min/max data for up to a year, and do 20-minute interval temperature data for up to two weeks at a time. For example, you could attach it out in the wilderness and take temperature readings every few weeks (again, not with today’s firmware, but down the road):


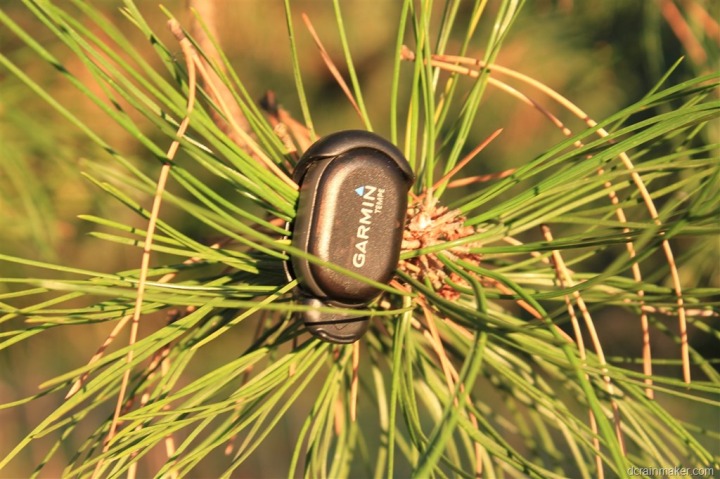
Today, neither scenario is supported by Fenix, but it’s something that could be down the road. It’d be sweet to be able to just leave a few of these around and pick up the data when your watch goes nearby. However, while the Fenix doesn’t support it, there’s nothing stopping an app developer from writing a quick app to pick up the data, as the Tempe is merely an ANT+ device that follows the temperature device profile standards. So anyone could leverage it in the same way you can interact with other ANT+ devices, such as an app with a Wahoo iPhone adapter.
The price of the Tempe sensor is actually pretty reasonable, at about $30.
Data Fields:
The Fenix supports an absolute ton of data fields and even more customization. I’d go as far as saying it’s the most customizable watch Garmin’s ever made.
When selecting data fields, you’ve got a few things to keep in mind. First, you’ve got data pages. Data pages contain data fields. A page is merely a single screen on a Garmin, which can contain upwards of three data fields. There is no limit of data pages that I can seem to find (really cool).
For data fields, there’s a limitation of three fields per page. Further, some fields can be shown in graphical format, while other fields are more textual based.
For example, here’s a simple three-field graphical format:
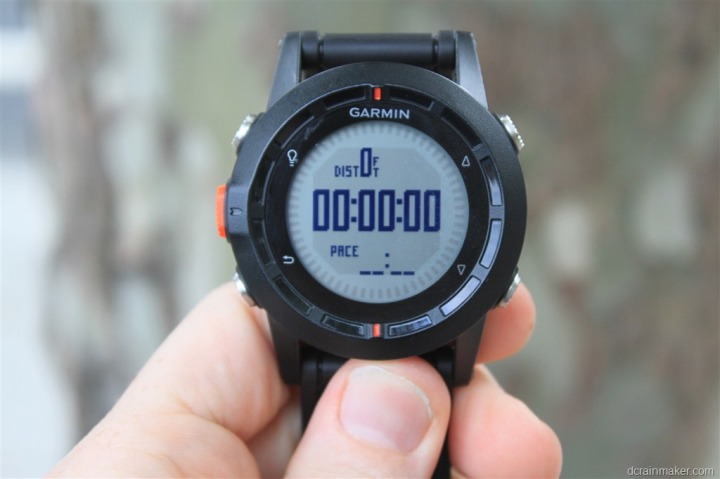
And then, a two fielder:
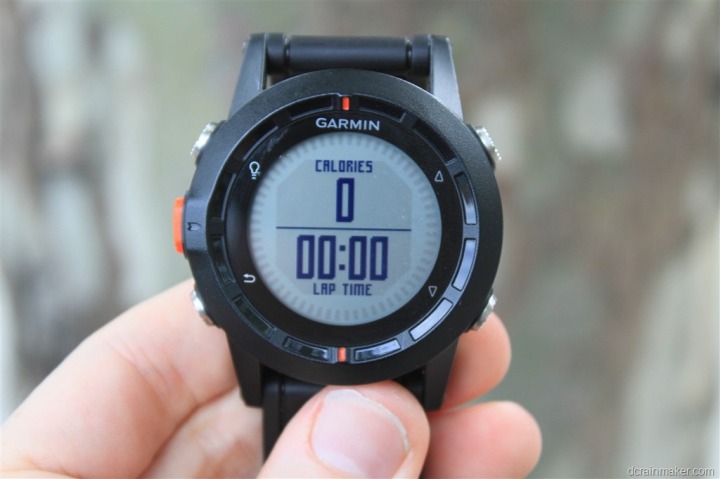
And finally, the single field display:
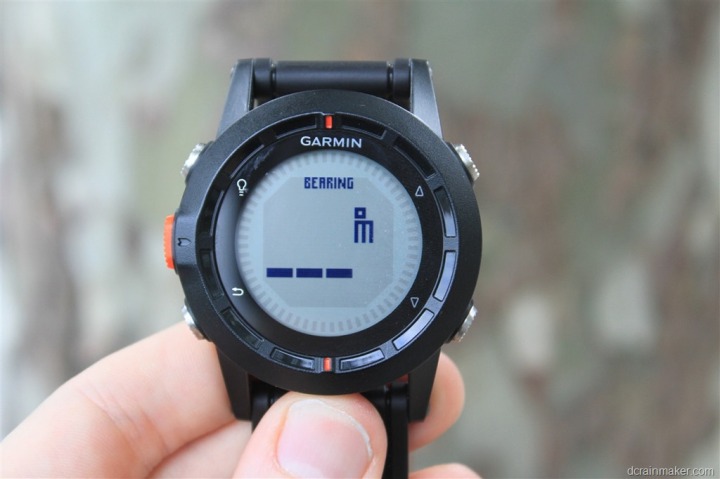
But then we have the graphical formats. For example, temperature:
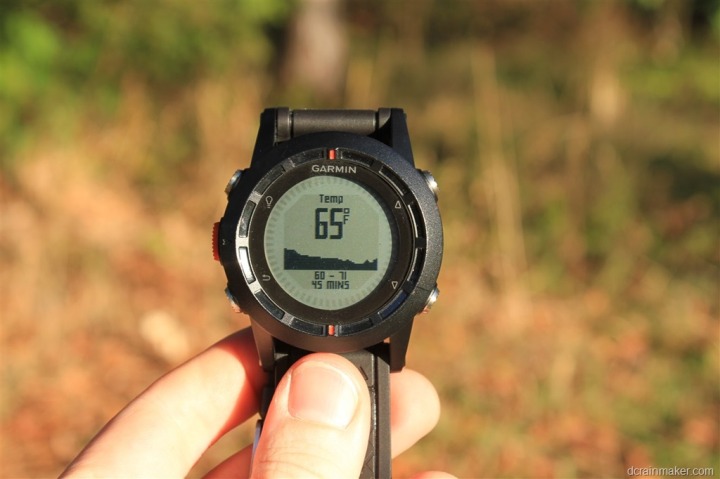
Pretty cool, huh?
Of the graphical fields, you have the following options:
Cadence, Heart Rate, Map, Compass, Temperature, Barometer, and Altimeter.
And, for the textual fields, you’ve got the following table. Now, these are broken out in the same format they are presented within the unit. Some of them seem like they could be better grouped. For example, why is ‘Lap Time’ only considered a fitness field and not a time field? Nonetheless, it’s cool to have so much flexibility, especially across segments (like aviation). Oh, and click to zoom and see it bigger. And yes, I typed this all out manually.

[Updated 11/2/12: The Garmin team tells me that have since added a couple additional fields: HR %MAX, AVG HR %, LAP HR %, and STEPS.]
In addition to specifying the data fields, you can customize how each data unit displays from a formatting standpoint. Meaning, do you want speed to be in Miles per Hour (MPH) or Kilometers per Hour (KPH)? Or, do you want speed displayed in metric, but temperature displayed in Fahrenheit? Yup, all quite customizable. Really cool little feature when you look at the flexibility of it. For example, for me living in France – having the distance in kilometers is useful – but I like the temperature still displayed in Fahrenheit as opposed to Celsius.
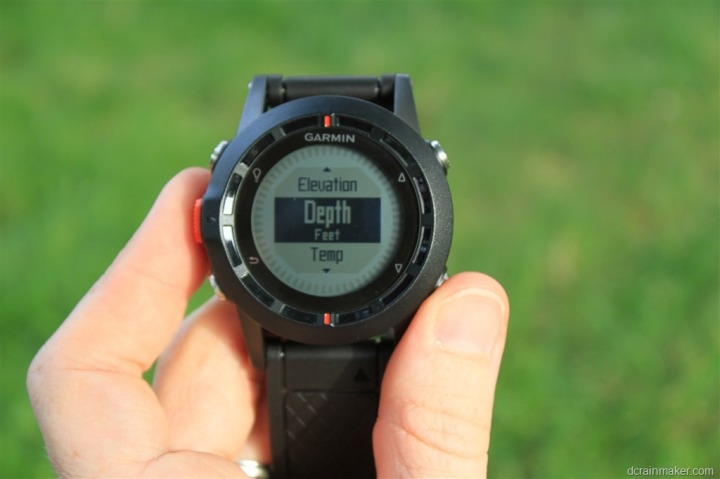
Finally note that you can create unique data pages with data fields per profiles, and, you can have (seemingly) unlimited profiles, and create your own profiles. Which, is a nice segue into that category…
Device Profiles:
Profiles are ways to create buckets for all your watch settings. For example, you’d have separate settings while running than you would while geocaching. You might have different data fields, or even different settings for data recording.
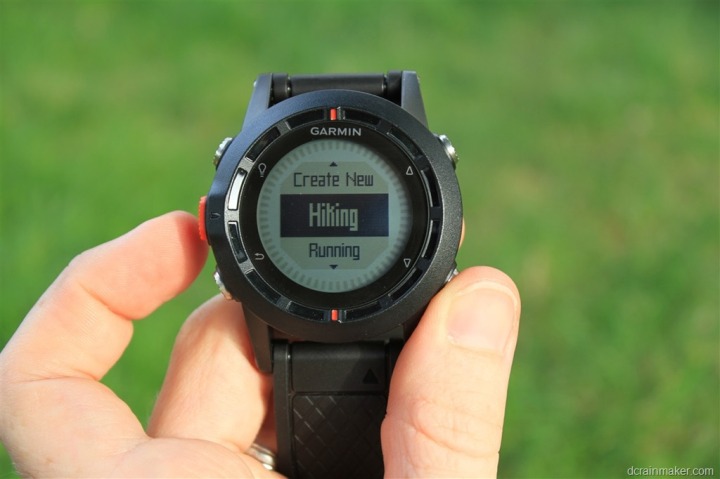
Out of the box, the Fenix comes with the following device profiles:
Running, Cycling, Geocaching, Fishing, Sailing, Aviation, Mountaineering.
However, you can customize any given profile, or create your own. To start, I’ll cover customizing an existing one. In this case, I’m choosing the Running Profile. In doing so I simply select it to activate it. Any changes I make from there on out apply to that profile:
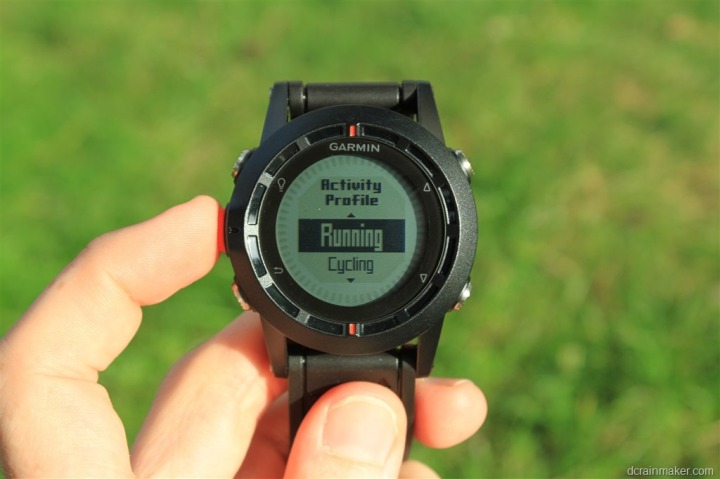
Next, I’m going to go in and modify the recording type to be GPX/FIT – which will ensure that I spit out both a .FIT file and a .GPX file for every running activity:
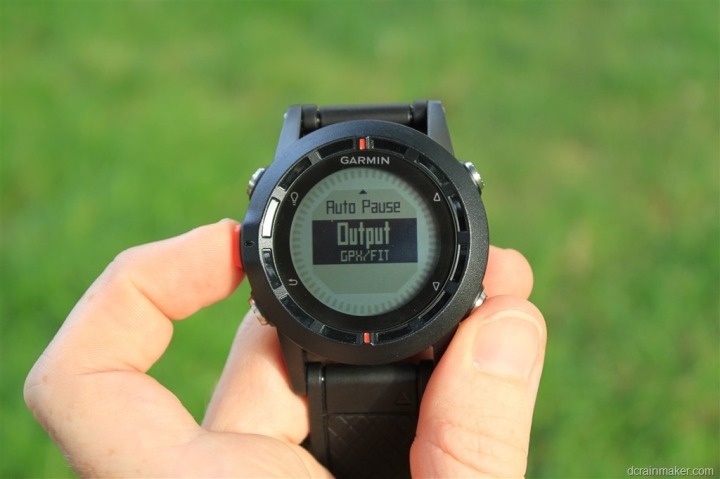
This change is now applicable for the running profile. I could go from here and modify many other settings within the watch for this profile – most commonly the data fields/pages I discussed in the previous section.
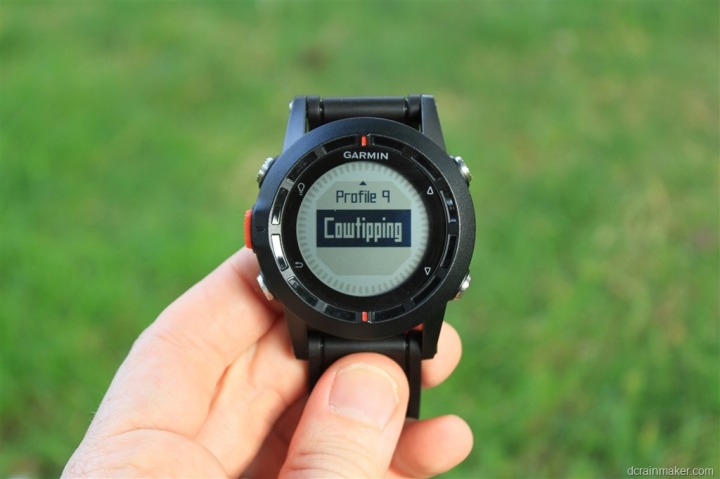
In addition to modifying a device profile, I can also go in and create a new one. In my case, I decided to create the Cowtipping profile.
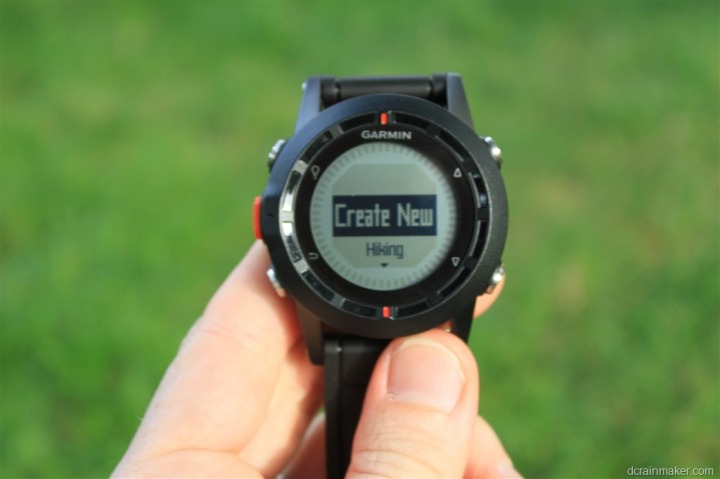
Once I’ve created the profile, I can then assign settings as specified above. All pretty straight forward.
In fact, the device profiles are just really big XML files. I’d expect that in time we’ll see folks simply trading the XML files around with the ‘perfect’ settings for a given activity type (i.e. data fields specified, etc…).
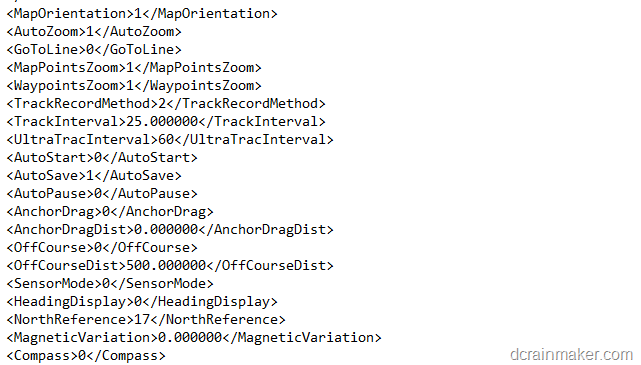
Garmin themselves could go a step further and use this flexibility to allow you to create device profiles (with data screens/pages/settings) online in something like Garmin Connect and then simply push the XML file to your device. That’d be something I’ve been asking for, for years. Oh, and Timex does this today.
Day to day watch:
The first (and probably coolest) day to day feature is the multiple time zone option. This enables you to simply hit one button and view the time across any number of countries. In my case, I decided to add the cities I’m travelling to over the next three weeks. Though, in retrospect, turns out two of them are in the same time zone as me. Go figure.
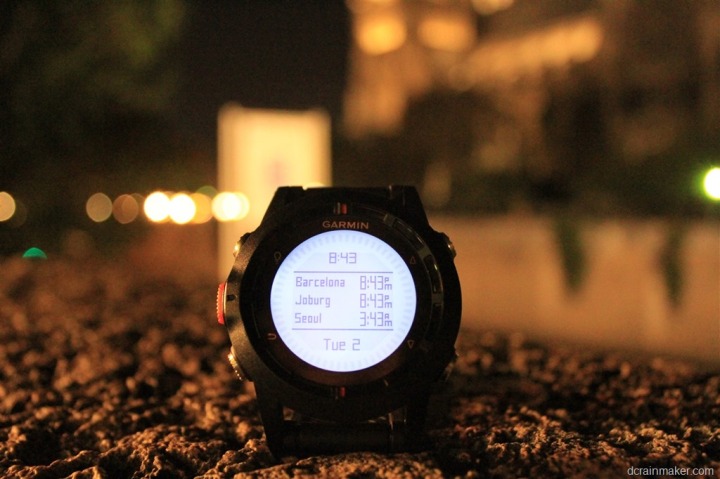
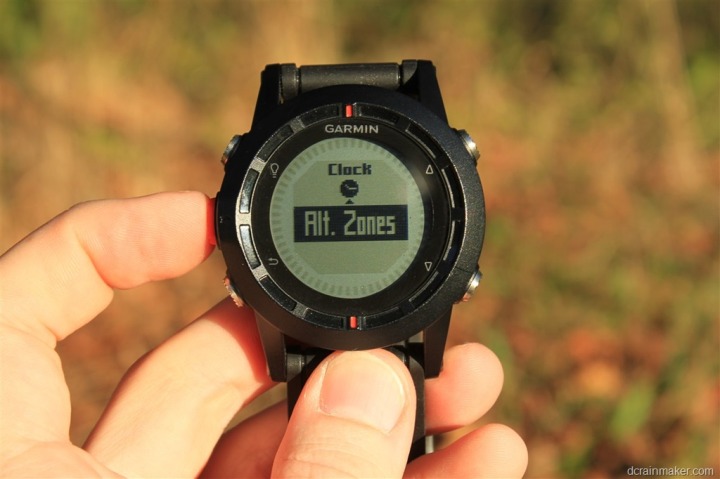
You can customize this through the ‘Clock’ page, and then the Alternate Time Zones option.
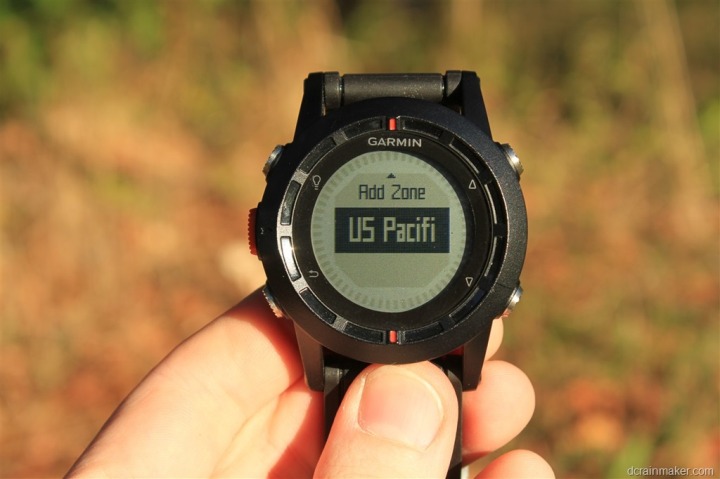
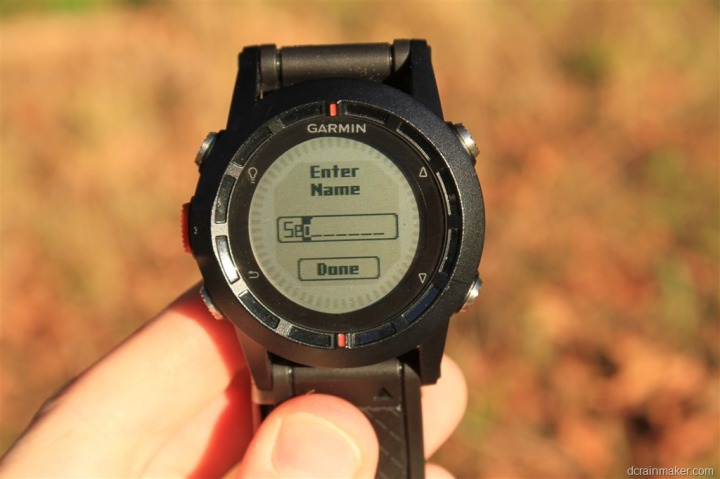
You do have to know which time zones your cities are in, but it’ll take care of the time zone to offset portion.
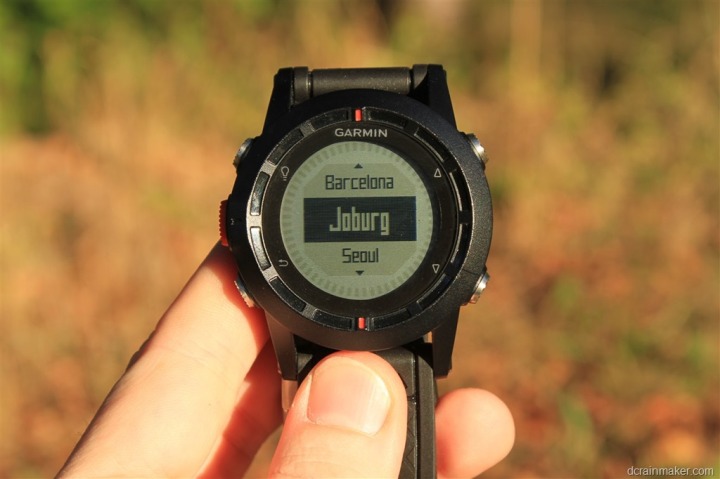
As is common with most GPS units, the Fenix will update the displayed time based on your time zone if you turn on the GPS. However, what I did not expect is that it will do this mid-activity as well, which is kinda cool. Meaning, if you cross over time zones while recording, it’ll show you the correct time zone based on exactly where you are. In other words, don’t re-adjust your watch manually when you fly somewhere – just let it take care of itself after enabling the GPS.
The Fenix also enables you to create multiple alarms via the same ‘Clock’ submenu.
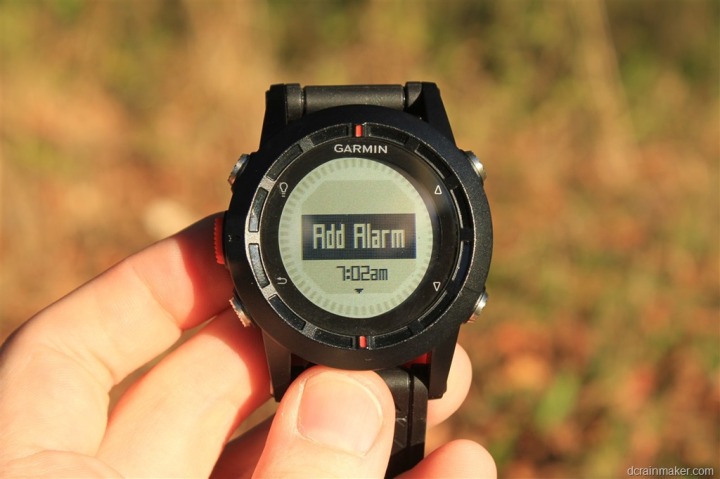
The alarms can be configured for a given time of day, type of alerting (tone or vibration, or both), as well as whether it will be daily or weekdays only, or just once.
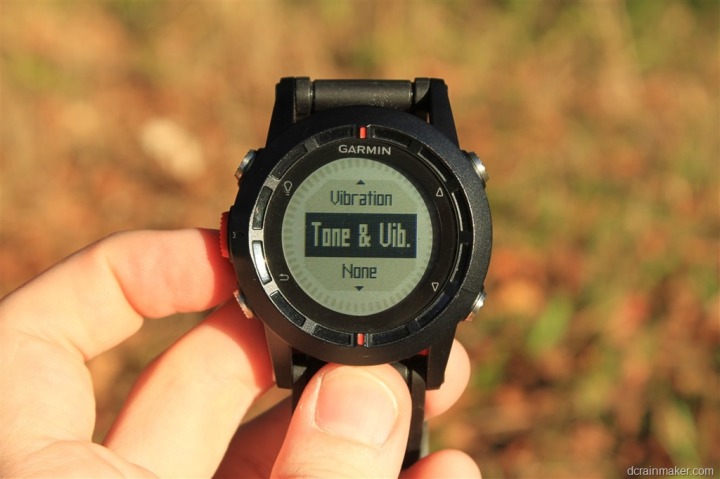
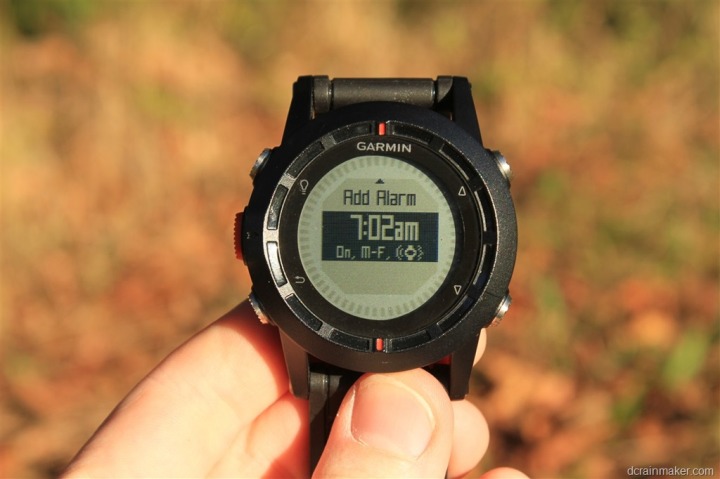
Within the same ‘Clock’ submenu is also the Stopwatch and basic Timer. The Time enables you to also specify the notification method (Tone/Alert) as well.
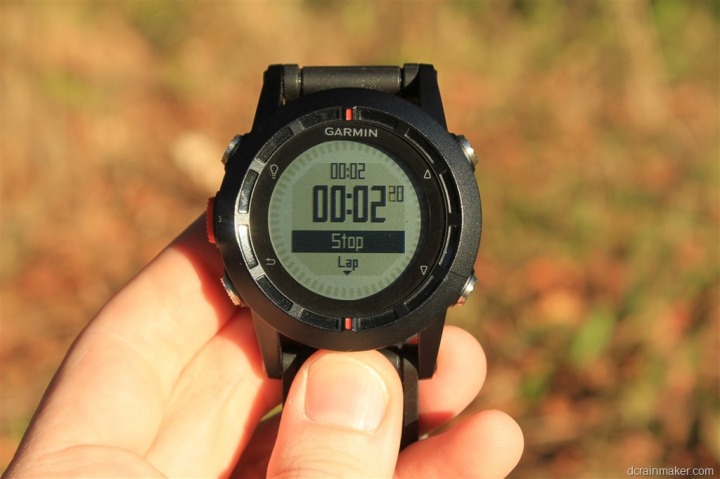
Fenix includes a fairly bright backlight, one bright enough that there’s actually an option to use it as a flashlight within the menu for holding down a button (Hold Keys).
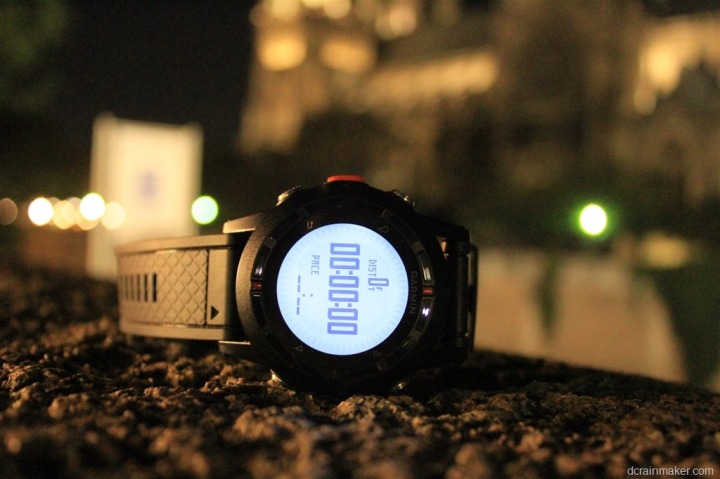
The unit allows you to specify a backlight illumination time of: 15 seconds, 30 seconds, 1 minute, 2 minutes, or ‘Always’. Always simply means that once you turn on the light with the upper left button, it’ll stay on until you press it again.
In addition, you can adjust the brightness level in 10% increments. The default is 30% – and I thought that was substantially bright. From there, it just gets crazy brighter.
And finally, you can modify the contrast in the same method as well.
Battery Life:
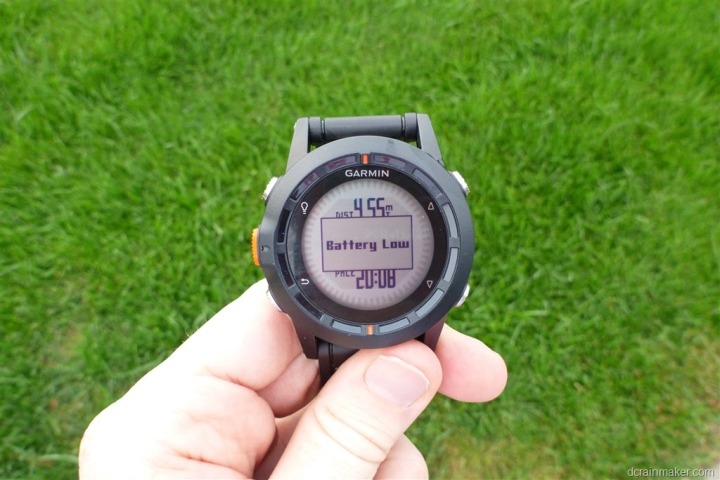
The Garmin Fenix lists an active battery life of 50 hours. But does it actually achieve it?
Battery life is one of those things that’s about as easy and enjoyable to measure as stepping on spit out chewing gum on the sidewalk. The challenge is, it’s actually extremely difficult to measure due to the significant number of variables – especially with a watch as complex as the Fenix.
For the last 2+ months I’ve been trying to get a solid handle on battery life with the Fenix, and quite frankly – I can’t. Not for lack of trying. Some days I manage to really go the distance – close to 24+ hours in continuous tracking. Yet other days, I can barely get 8 hours of tracking. Virtually every day I’m trying different battery life experiments, and if there’s a clear-cut pattern – it’s not terribly obvious to me.
Over those two months I’ve averaged taking international flights from the US to Europe (or the opposite direction) at least once every other week. In doing so, I’ve had a lot of time to try and figure out battery life on the unit for longer tracking periods. But, I’ve also found it highly variable – even when using the exact same settings each time.
Ultimately, the challenge is there are just so many settings on Fenix that impact battery life, for example, here’s a handful:
– Tracking mode: Regular or UltraTrac
– Recording Interval Setting: From 1 second to far less frequent
– Internal Sensors used: Altimeter, Barometer, Compass
– Internal Sensor frequency type: On Demand, or Always
– External Sensors used: Tempe, Heart Rate, Cycling Speed/Cadence
– GPS enablement or disablement
– Visibility of satellites seems to have an impact as well.
And that’s not to mention the more obvious things like backlight, use of buttons/display, etc… That all said, here’s a few data points to ponder.
The longest I’ve been able to get the watch to go while in GPS tracking mode was just under 20 hours. With that, I had the default UltraTrac settings enabled, which specify on-demand internal sensor usage, GPS data points updating every minute on the display, and other ANT+ sensors types updating constantly (HR and Tempe). This would be in line with that you’d want as an ultra runner, as any less frequency on data sensors like heart rate would be pretty useless.
I achieved this on a trip last week from Kananaskis, Alberta to Calgary, to Chicago, to Paris, and to my home. All in, that trip included only 326 data points recorded, despite continuous HR and temperature streaming that should have recorded, but often didn’t. No doubt the GPS recordings are wonky in the air, but I’m fine with that. It’s the other readings that are problematic.
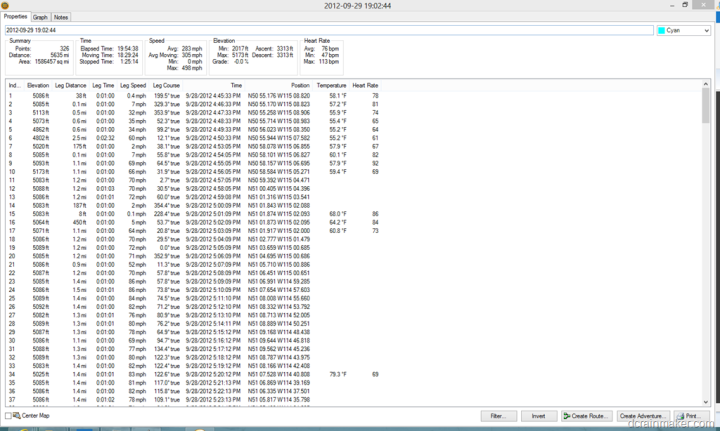
Yet, on shorter trips in regular tracking mode (frequency 1-second), I’m barely getting 8 hours of tracking – far less than most of the Garmin Forerunner or Edge lineup. From all I can gather, this is purely from having just the right combination of settings.
Ultimately, I’d like to see Garmin publish a clear-cut table of battery life in the same way that Polar has for their RCX3 around memory usage. Polar’s chart is beautiful in that breaks down how each accessory or setting impacts usage capacity. It’s so simple to understand. And while I realize that this may be difficult for Garmin due to the complexities I outlined above, I think it’s only reasonable that if they list a 55 hour battery life – they explain the tradeoffs we have to make to actually get that battery life.
Smartphone Connectivity (BaseCamp App):
In mid-September, Garmin released their Fenix companion app Basecamp onto the Apple App Store. The app is designed to download tracks from your Fenix, via Bluetooth Smart. As such, the app requires that you have the iPhone 4s or higher (iPhone 4s or iPhone 5), as that’s the only Apple phone that includes Bluetooth 4.0. You could also utilize one of the newer iPads as well, as those share Bluetooth 4.0 functionality.
In order to grab data from your Fenix, you’ll need to navigate in the Fenix menu to Sharing (press the Red Button, then scroll down to ‘Share Data’, then select ‘Basecamp’). Once you’ve done so, it’ll show this little symbol, which means it’s hanging out ready to talk to a Bluetooth 4.0 device:
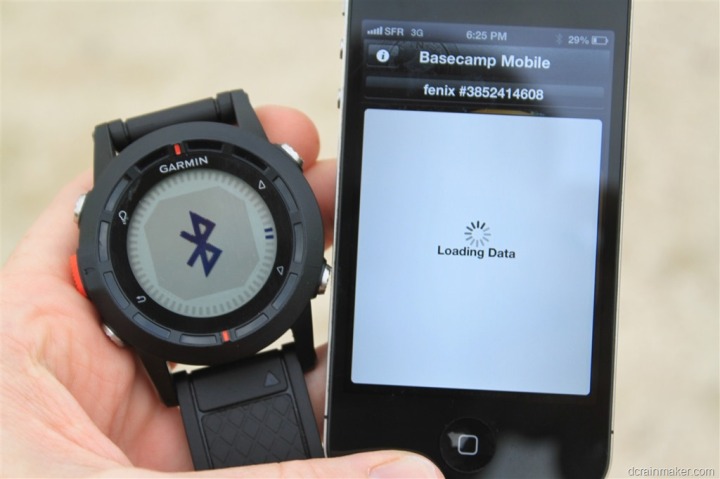
Now, on your iPhone, launch the free Basecamp app. When you do so, you’ll see an option to search for Garmin Fenix devices. Go ahead and and press this button.
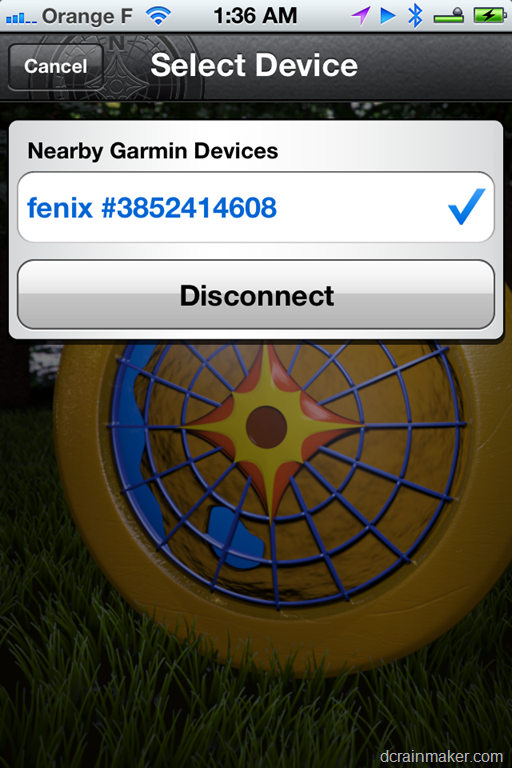
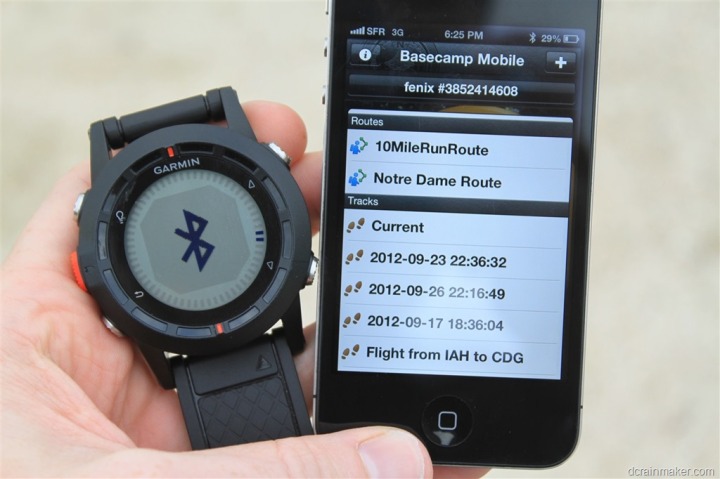
It’ll find your Fenix, and you can go ahead and connect to it. Once you’ve done that, you’ll see a listing of all completed activities/tracks on that Fenix device:
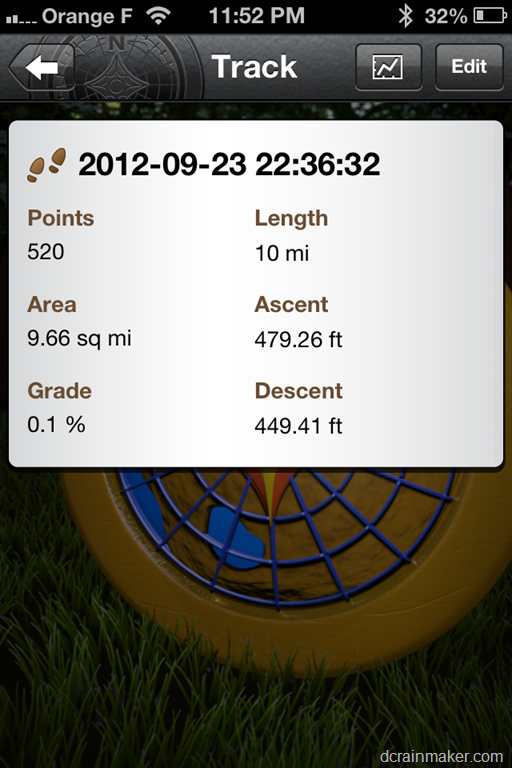
From here you can open up one of your activities and view basic information about it:
And you can dive into a small handful of charts and graphs as well:
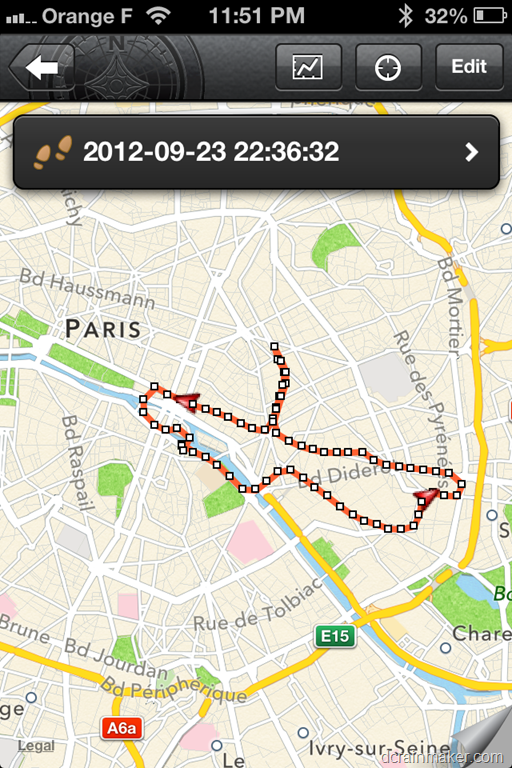
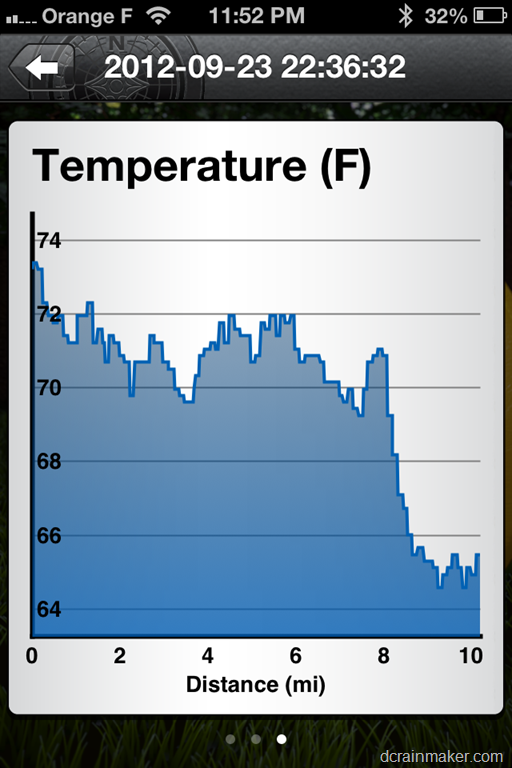
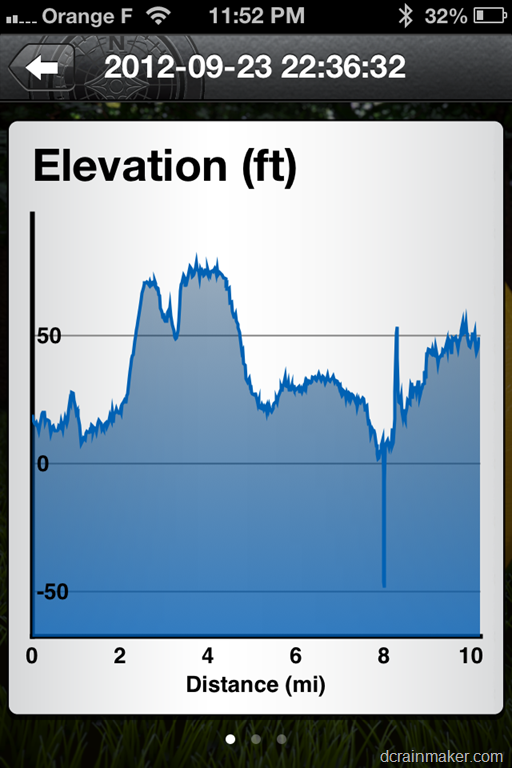
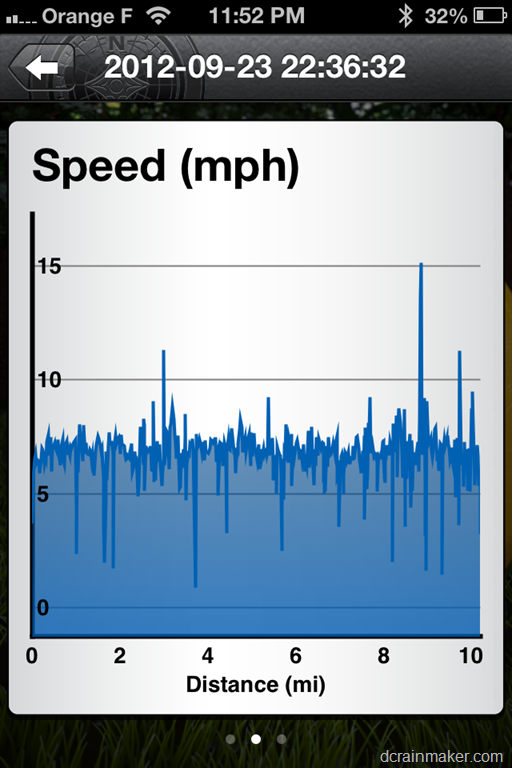
If you had HR enabled on an activity, you’ll see that too.
In addition to viewing your tracks, you can also create waypoints. This is pretty cool in that it’s far easier to do on the phone than on the unit itself (in fact, it’s actually even easier to do on the phone than on the Basecamp app). That’s because the phone pulls down Google Maps data (well, Apple Maps data on iOS6), which means that you can actually see where you’re placing the marker.
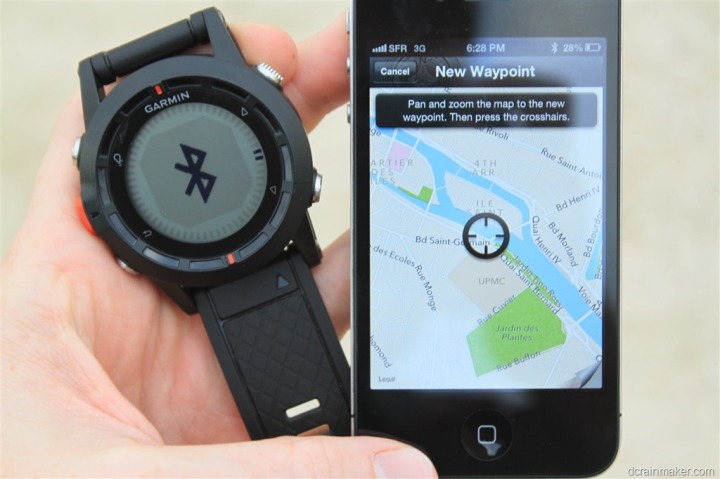
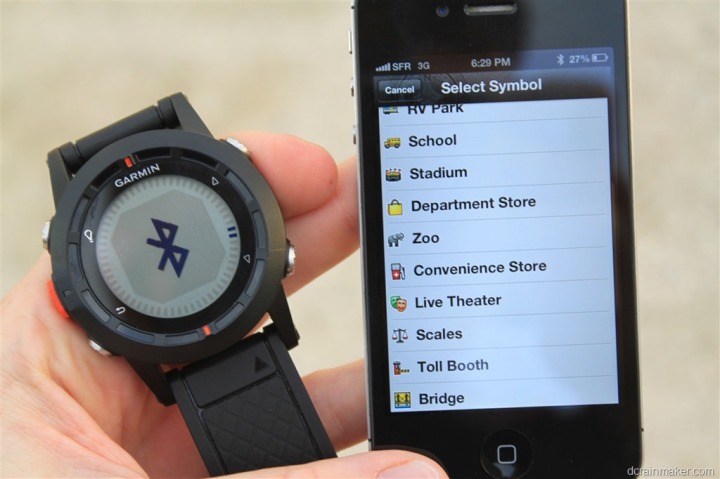
Within the app, you can then specify a name and description, as well as choose from what has to be hundreds of icons.
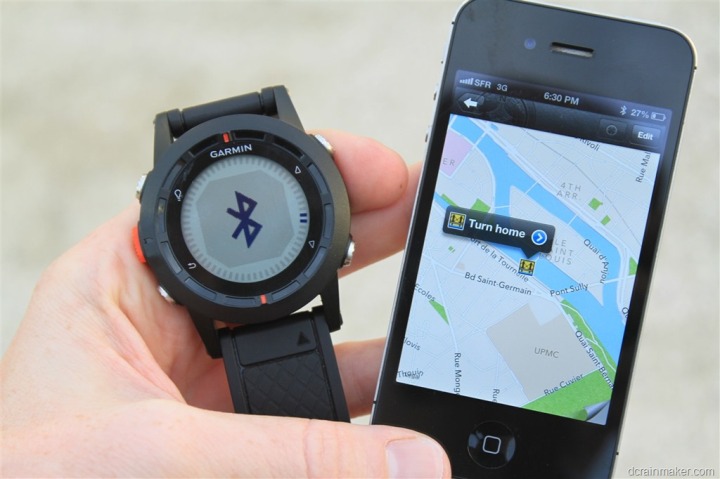
After that, it’s automatically sent to the Fenix watch, where you can easily navigate to it.
However, from here, that’s about it in the App. As of today, you can’t upload this data anywhere, or do anything else with it. You can modify the name of the activity, and that’s updated on the Garmin Fenix – which is actually kinda useful, because by default the Garmin Fenix file names have these god-awful long date/timestamp name with spaces and colons, which is made even worse trying to modify on the Fenix itself. Using your phone to modify them is a million times easier.
Ultimately though, I’d like to be able to upload data to Garmin Connect from here (or gasp, something like Strava or other service), as well as search for courses and routes on Garmin Connect and download it to the unit.
No doubt, this is just a first release of the app, and as such, there’s probably a lot of functionality planned.
One little FYI for those users that bought their Fenix units somewhat recently and may be having crashing issues when trying to scan for the watch within the App (as of October 2nd, 2012). The app will currently crash if there’s any files created on there prior to firmware version 2.60 (which was also mid-September). Hence why my screenshot above is all files since then. Kinda a pain in the butt and a bit sloppy, but the easy fix is to simply remove the .FIT files while plugged into the computer (just move them somewhere else). Thanks to this Garmin Forum post for figuring it out. Garmin let me know that there is a fix in the approval queue from Apple – but I haven’t quite yet seen it show up as an available update.
[Updated 11/2/12: The app update has now been released.]
Sharing data with other Fenix units wirelessly:
In addition to viewing your tracks with the phone app, and uploading them to your computer – you can also share between two Fenix users. The unit allows you to specify routes, tracks, waypoints and geocaches as valid transferrable activities.
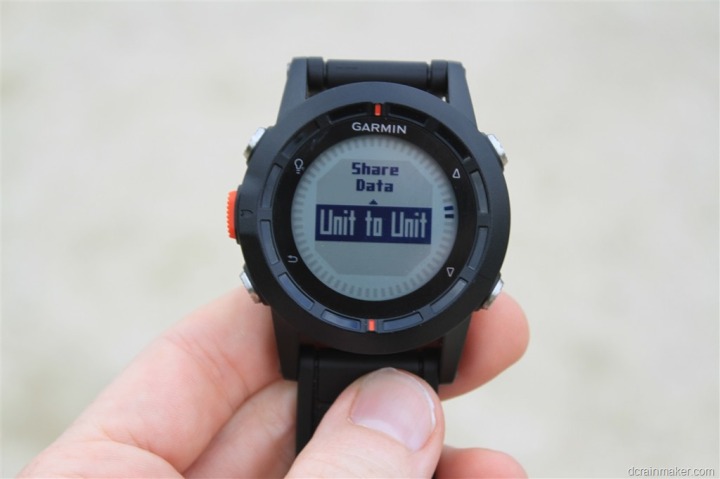
You’ll go into the ‘Share Data’ option within the Fenix, and then tell it you’re sharing between two Fenix units. Once there, you’ll set each Fenix to their appropriate role (giver, or receiver). Following which, what type of information you’re sharing.
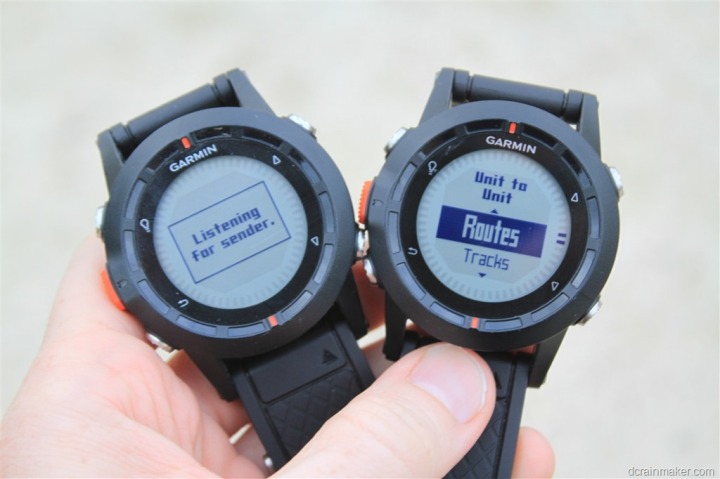
After which, on the sending unit you’ll specify what you’re sending:
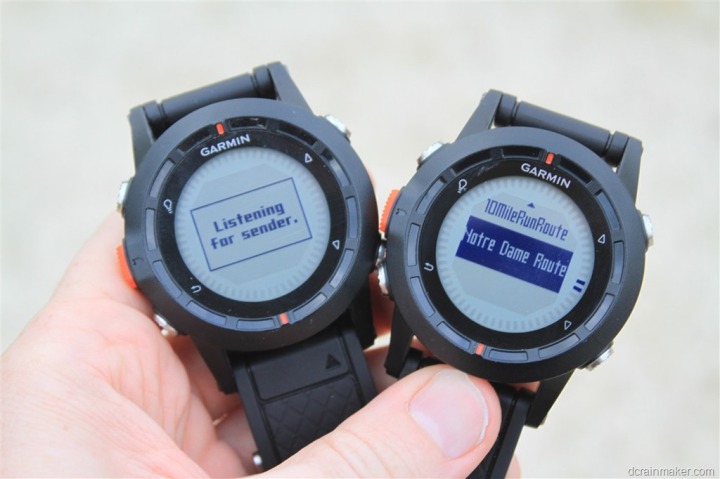
From there, the two units will copulate and life will be grand.
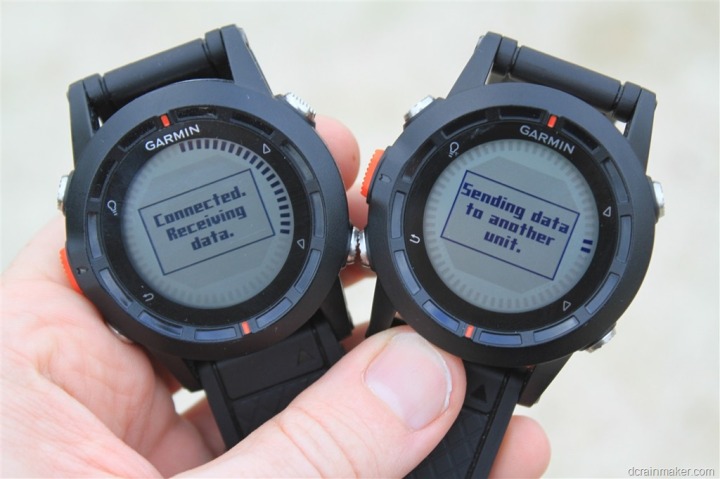
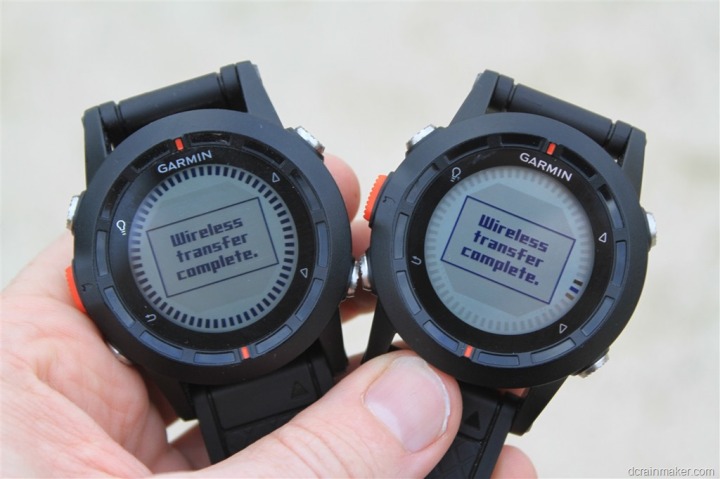
Well, mostly grand. I’ve found that even while next to each other, it only seems to succeed about 50% of the time for me. It does have an auto-retry mechanism built-in, which might be due to the lackluster performance of the transmission. So the 50% does account for the fact that half of the time it still ultimately fails.
Nonetheless, it’s a cool feature – and the flexibility is pretty neat when you consider tying it in with creating waypoints on the phone. This would allow one person to create it on the phone, and then quickly share it with others.
Software and Uploading:
I’m going to walk through how to get the data off your watch, and then some of the options you have once you decide which program you’re going to use.
Connecting to computer:
Once you’re ready to upload you’ll go ahead and connect the device to your computer. There’s really not much to hose up here. USB cable goes into your computer, and the other end clips onto the Fenix. Just ensure it’s actually clipped flush against the back of the unit (it’ll be obvious if it isn’t).
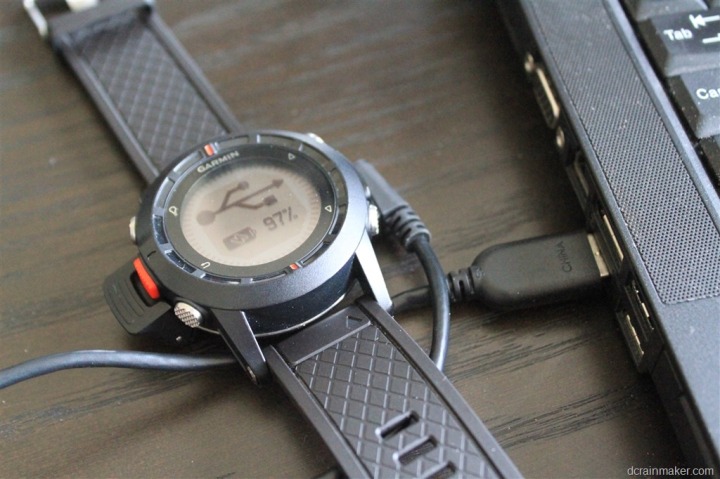
Now, interestingly, there’s actually two modes here. One is a generic mass storage device mode – and the other is a mode that enumerates the device as a Garmin unit. By default, it’s in Mass Storage mode, which is what you’ll use day to day – so I see little reason to stick into ‘Garmin’ mode for normal use. These settings are accessed via the Setup > System > USB Mode menu. The Garmin mode is primarily there for updating the firmware.
Garmin Basecamp:
Basecamp will likely be your primary venue to get data off of the watch and onto your computer.
Basecamp is Garmin’s one-stop shop application for handhelds and any device that has anything to do with mapping. It’s historically been for devices like the Oregon and Rino series, but it’s flirted with the Edge 800 (allowing you to put Birdseye imagery onto it).
Ultimately, Basecamp is where you manage routes, waypoints, tracks, and Garmin Adventures.
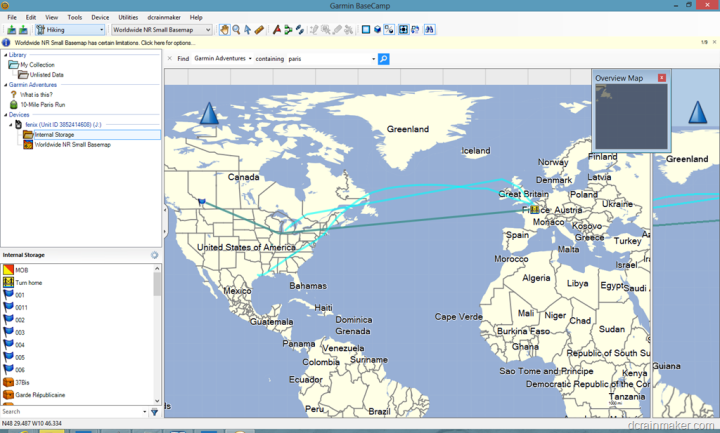
After connecting your Garmin Fenix, you’ll see it listed on the sidebar of Basecamp:
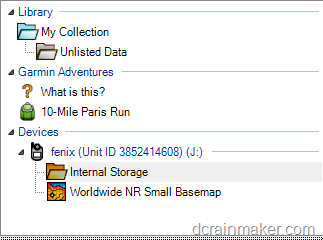
From there, you can open up a given track or route on the left side under the Fenix:
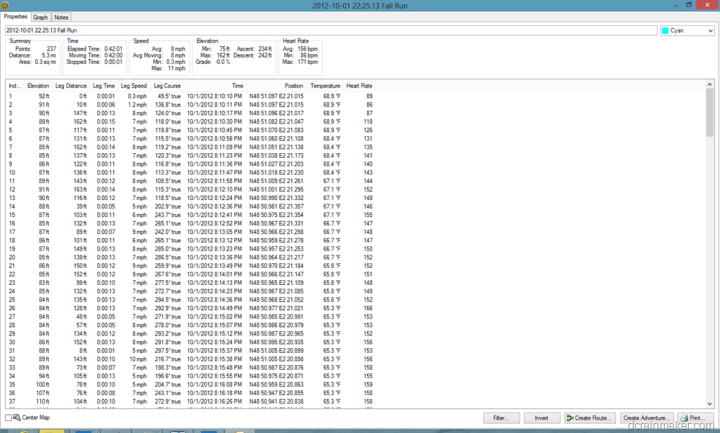
In doing so, you can then dive into details about that track file. This includes individual track points, as well as graphs for heart rate, speed and other ANT+ properties:
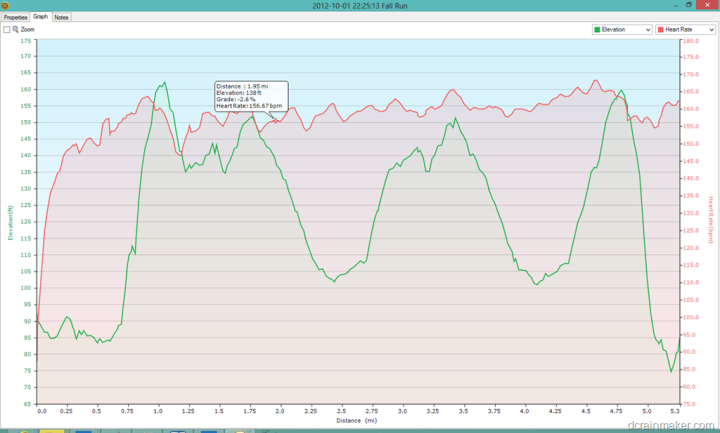
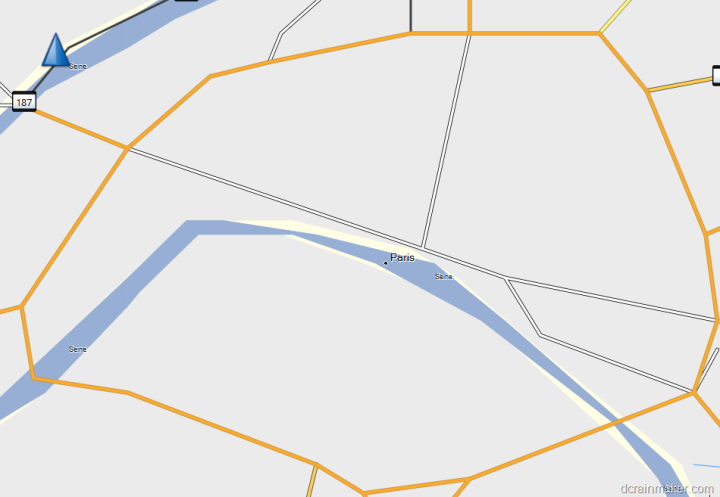
The challenge with Basecamp though continues to be the lack of mapping provided in it, it only provides a ‘basemap’, which has essentially no useful road/mapping data. For example, it’ll provide exactly one road across all of the city I live in (Paris).
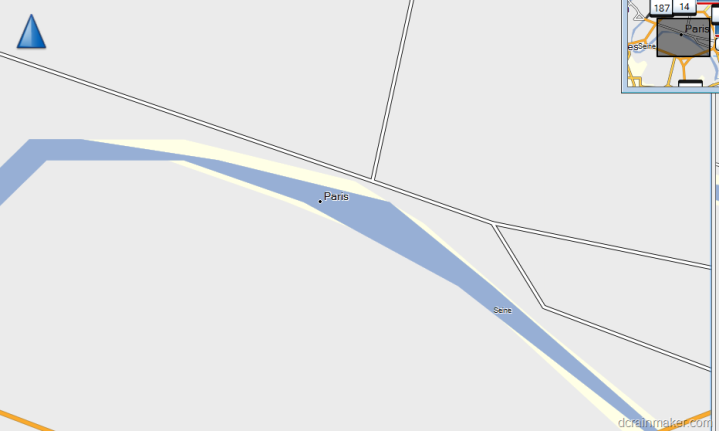
Ok, so there’s three roads. Four if you count the split.
Where this becomes problematic though is planning. See, you use Basecamp to create Waypoints, plan routes, and see information about tracks. Try doing that on the above map.
So, you’ve got to purchase a map – generally about a $100 per area/region.
So, I did that and now it’s time to dig into creating some waypoints.
To do so, I click the waypoint button in the task bar, and then drop a waypoint anywhere I’d like. This is automatically synchronized to the Garmin Fenix.
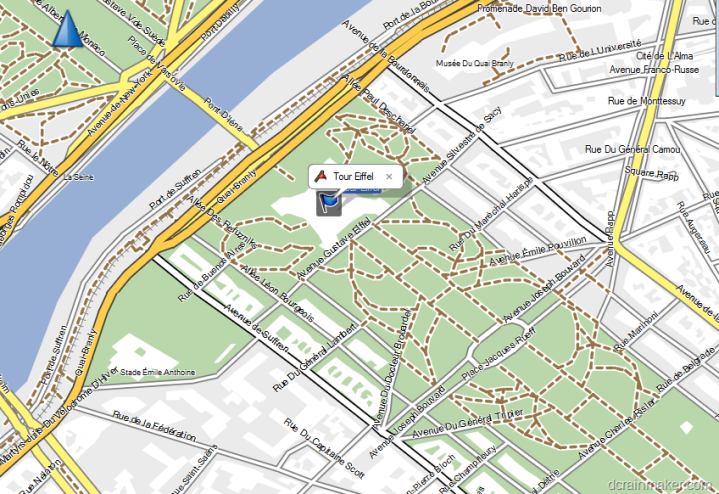
I create a route in much the same way, merely linking together points along a track:
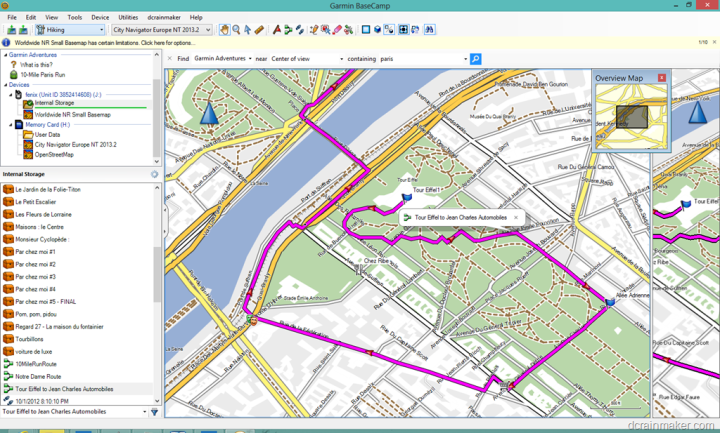
You’ll notice it’ll automatically stick to trails/paths versus going onto the highway of sorts that’s along the river.
From here I can name these routes and then access them later from the Fenix to follow.
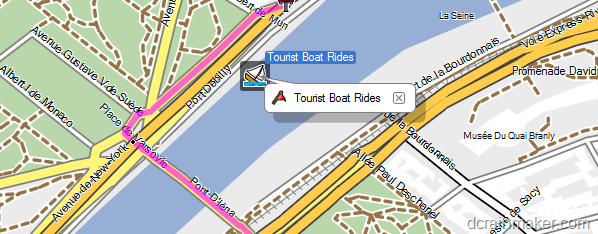
It should be noted that waypoints are probably the most important piece here, as it allows you to create icon-specific and named items on your maps that will later show up at all times on the Fenix. For example, if I was out in the trails I could mark a portapotty or water stop, and then later edit that on Basecamp and mark it as such. Same goes for boat rides:
Garmin Adventures:
Garmin Adventures is new to the Garmin family. This site/service enables you to take your GPS tracks and merge them with photos. There have been many entrants to this category in the past, some successful – most not. The reason for most failed attempts was that they didn’t have the GPS integration aspect figured out. The picture piece is easy, but getting the GPS data off of hundreds of different unknown devices is where it gets tricky for software developers.
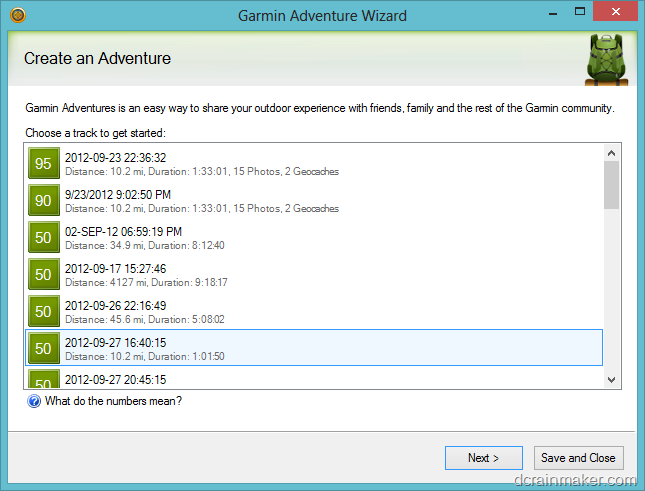
In Garmin’s case, they’re using Basecamp to drive that integration. I first start with taking a given activity in my Basecamp listing (this is all done within Basecamp). In my case, I’m going to choose a ride from last week up in the Canadian mountains:
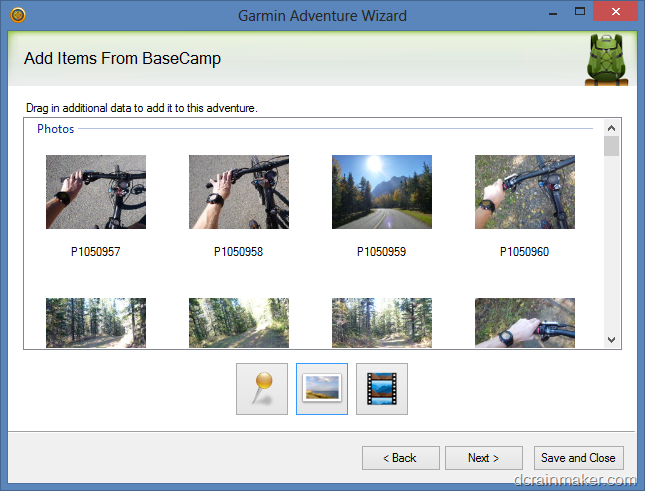
Then on the next page, I added a bunch of photos from the ride to it:
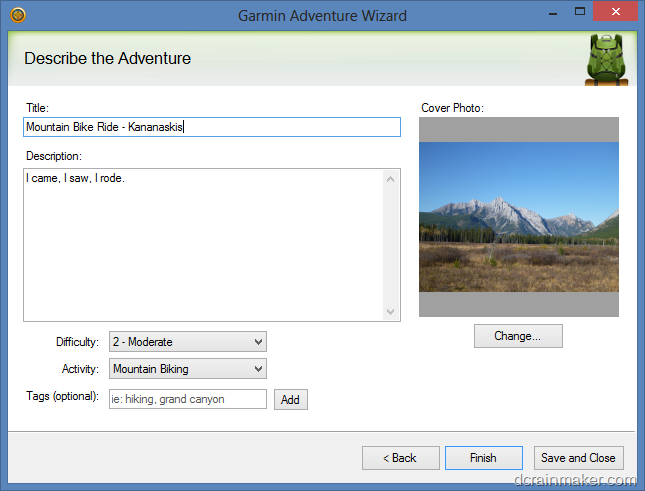
I then added some descriptive information to it, and clicked Finish:
From there, you can go ahead and publish them to the whole world wide web:
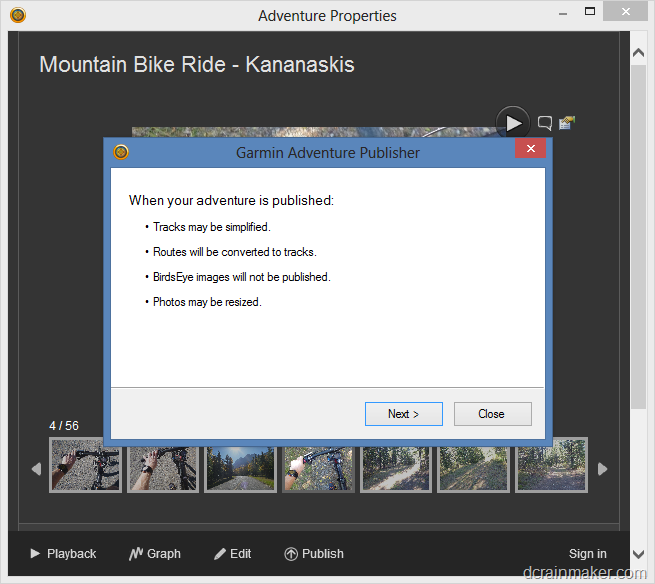
[Update: Previously, I had problems publishing. However, since my initial review Garmin found and resolved a backend issues that in turn resolved my issue. I’ve updated the next little bit accordingly.]
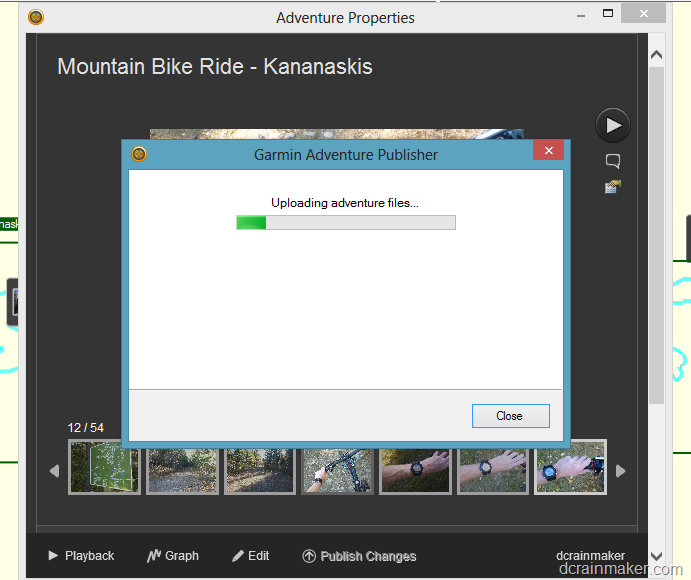
Once it finishes publishing, you’ll notice you’ve gained the ability to archive it – which hides it from view.
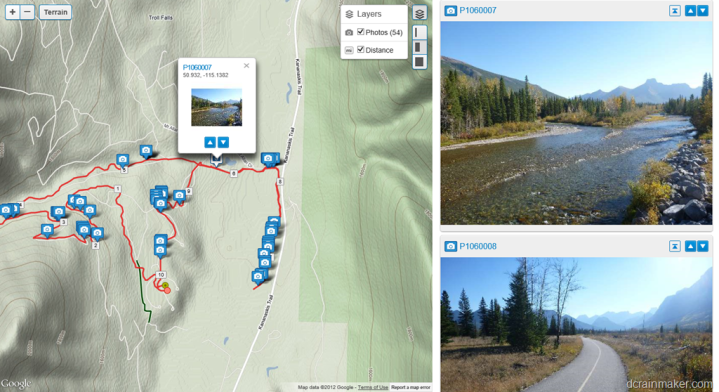
From here, you can browse the whole ride online (right click the name of the adventure in the sidebar of Garmin Basecamp, and select to view online). Because it’s easier to allow you to view mine online, I’ve published it here.
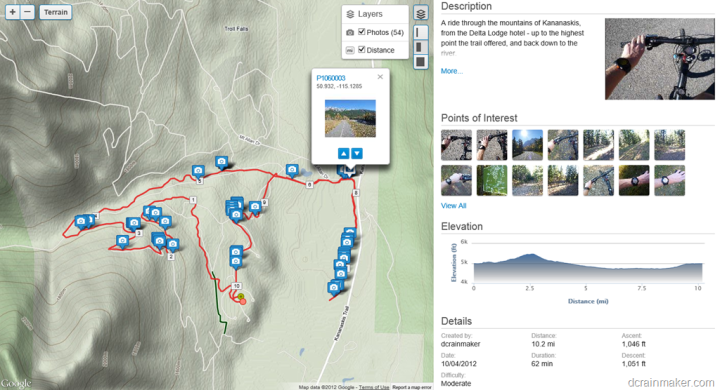
In my case, the timeline isn’t quite perfectly lined up – perhaps off by about 15 minutes. This speaks to some of my comments around aligning timestamps being fairly messy without some sort of ‘preview’ feature.
Nonetheless, it’s actually pretty cool once published, and merges together the different data streams well.
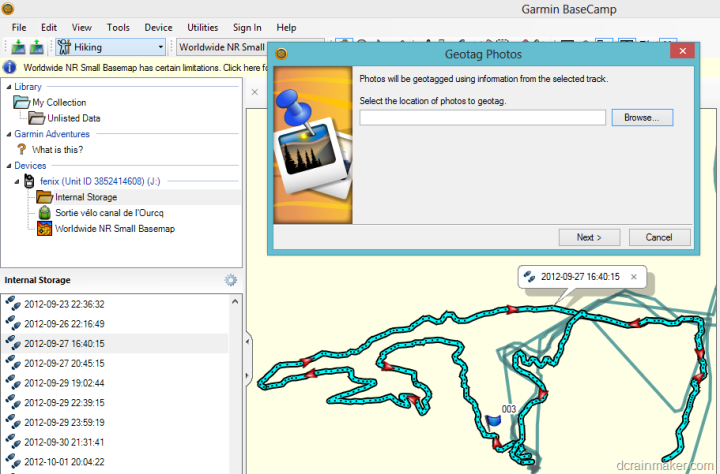
On a side note, you can also geotag photos in the application (Basecamp). I decided to try this instead, figuring at least I’d get somewhere. To start, you go ahead and select a given activity/track.
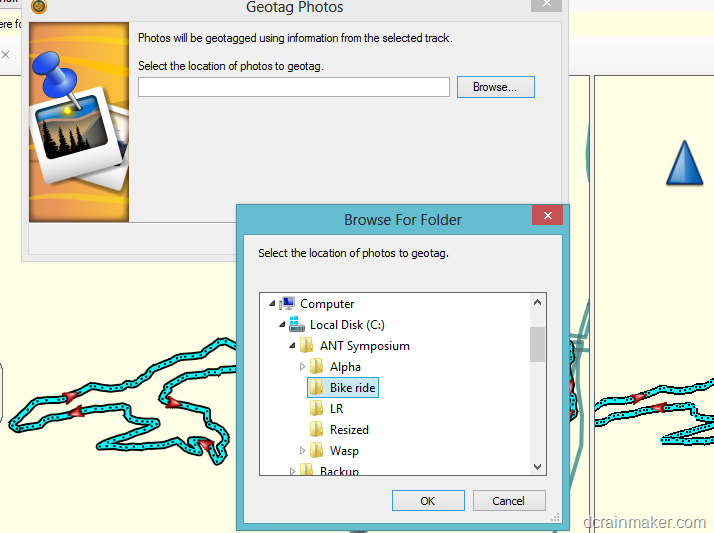
Then I’m prompted for the location of all the photos. To make life easy, I placed them all in a single folder.
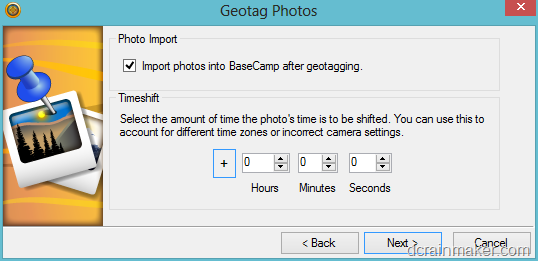
From there I’m presented with a dialog box to allow me to shift the photos based on a known time variance. For example, let’s say my camera was still on East Coast time, and the GPS is in Mountain time. I’d shift by two hours. In my case, I left things as-is and hoped for the best.
Turns out, taking my chances wasn’t such a good option:
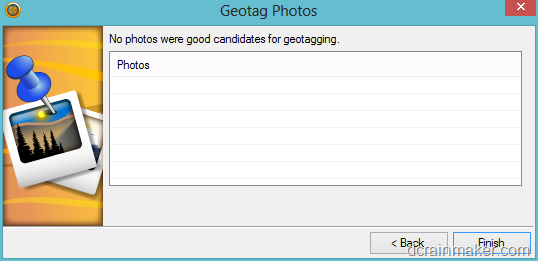
So, I went back and started fidgeting with it. With other programs I’ve used to do this in the past, they typically show the photos on a timeline, with the timeline in turn overlaid against the GPS track. Thus, at least you’re making an educated guess. At this point, there’s no education involved.
After messing around for 15 minutes trying to figure out, I gave up on my Canadian ride. I suspect a combination of time zones and time shifting was contributing. I did the math manually, and everything was still failing.
So I did something simpler – with a run in the same time zone as me, my laptop, my camera, and everything else. It still required a 6 hours adjustment, but at least it worked:
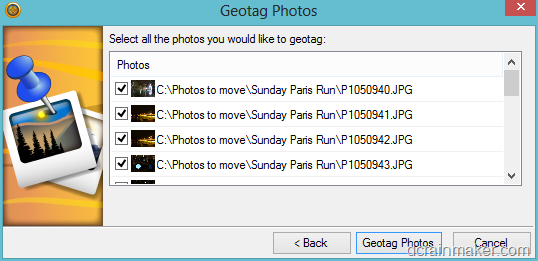
In doing so, I got all my Paris Run photos into the app – though, all that did was overlay them around the city. Which, is kinda cool:

Ultimately, you’d want to take these images and plunk them down into one of your Garmin Adventures.
Garmin Connect:
Garmin Connect is Garmin’s fitness focused web platform, which many years ago was Motionbased.com before being bought out. Today, the platform handles a mind-bogglingly high 60,000+ activities a day. Every time someone swims/bikes/runs with a Garmin device, it’s likely going to end up here.
However, within Garmin Connect your Fenix integration options are fairly limited. Garmin Connect leverages the Garmin Communicator browser plug-in to access your Fenix device. Alternatively, you can always just manually upload files one at a time by selecting them.
But, for the purposes of this, we’ll go with the plugin. After connecting your device, you’ll go within the Garmin Connect platform and select upload in the upper right corner. Upon doing so, the Communicator Plugin will connect to the Fenix device and offer you two choices:
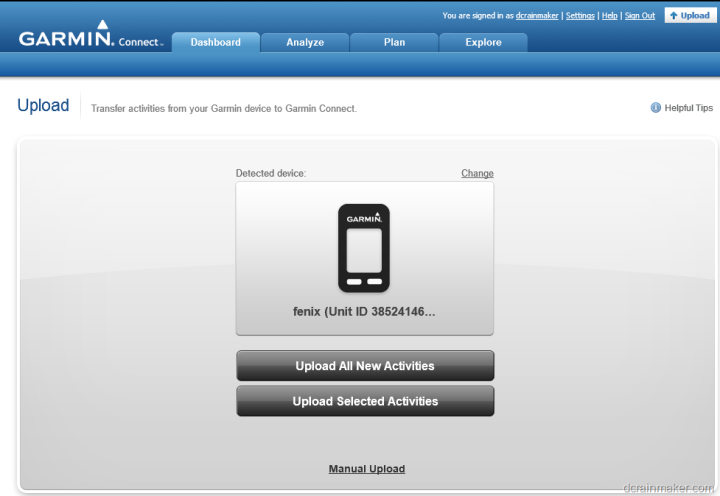
Ok, so technically there are three choices if you include manual upload – but we won’t. That option just allows you to pick a specific file and upload it.
Instead, I’m going with automagic upload and selecting ‘Upload All New Activities’.
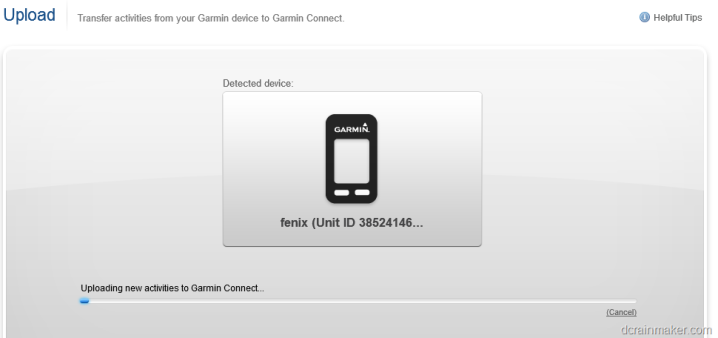
Once it’s done, you’ll have a listing of all new activities that you haven’t previously uploaded or processed:
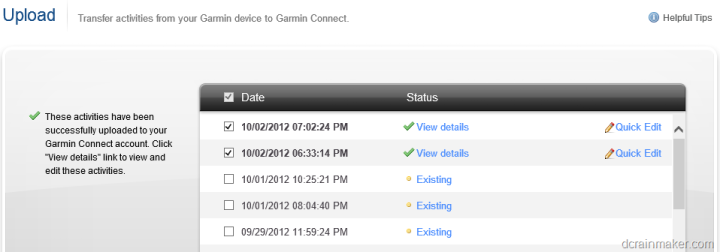
I’m going to go ahead and dive into a run from last night, to show you around a bit. To do so, you’ll click either ‘View details’ or ‘Existing’. Once you do that, you’ll be brought to the below page. Note that I’ve changed the name of the run, and the type. Interestingly, Garmin Connect does not correctly parse the activity type (Running/Cycling/etc) from the Fenix. Likely though, the fault is on Fenix for not correctly providing that. I suspect that has to do with the Fenix Device Profiles being semi-nonstandard (meaning, I can create a Cowtipping profile). That said, for running and cycling, they just need to make that work.
[Updated 11/2/12: The Garmin folks tell me that they have implemented updates to the out-of-the-box profiles for running and cycling whereby you can manually change the setting under Setup>Fitness>FIT Activity]
At any rate, the below:
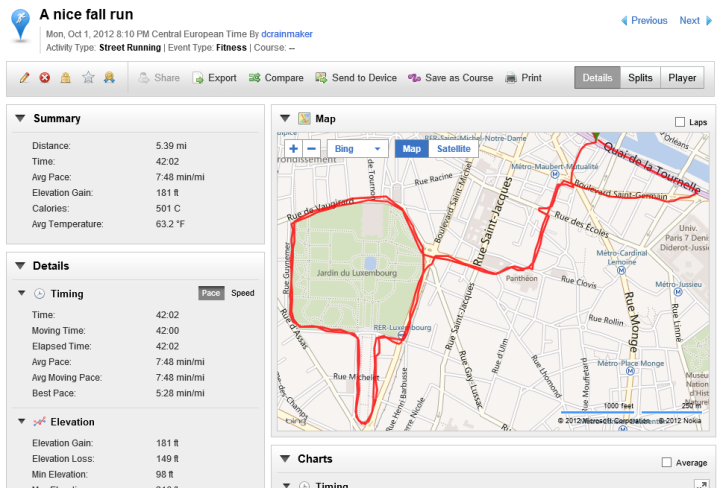
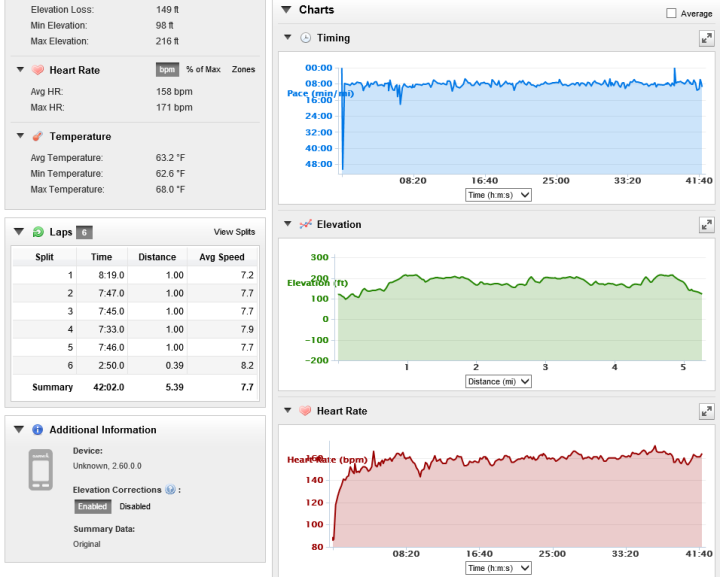
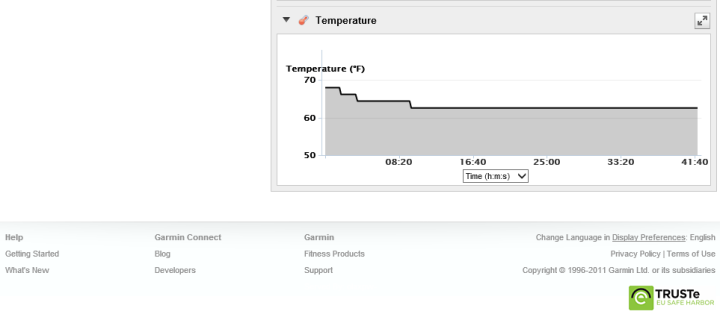
Within the detail view, you can see the the summary information displayed on the left side, while the main sensor data (elevation/heart rate/temperature) are displayed along the right side (along with pace, via the timing chart). Additionally, on the left side you’ll see I had AutoLap enabled, so it created a lap every mile.
You can see another bug though, where it shows ‘Average speed’ instead of ‘Pace’ for my laps – despite everything else being in pace. Additionally, the device shows as ‘Unknown’, as opposed to “Fenix’. Further, since the elevation data is barometric based, Garmin Connect should automatically disable elevation corrections – but as you can see, it doesn’t. You don’t even want me to start on what things look like if you upload the .TCX file instead of the .FIT file (it’s uglier).
[Updated 11/2/12: Again, Garmin says this is all now addressed if using the correct FIT Activity.]
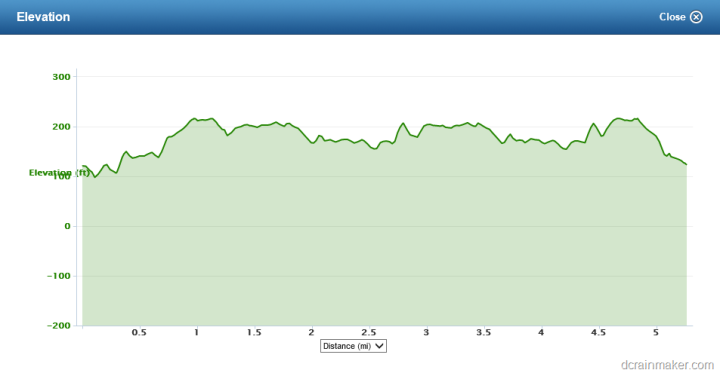
Moving beyond the bugs, within Garmin Connect I can expand out any of those graphs and get a closer look at them, as well as zoom in on the data:
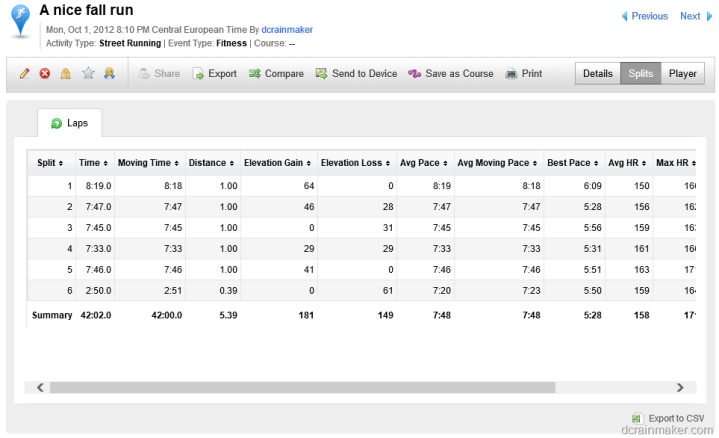
If you go ahead and change tabs to the Splits tab, you can see all of your split data, with various stats for each of your splits (laps). Things like elevation gain, heart rate, pace and others.
Garmin Connect as a platform is fairly large. Though, most of the higher end analysis you may want to do as a runner or cyclist tends to fall to other platforms like TrainingPeaks or Strava. But for the mainstream, Garmin Connect does offer a pretty good starting point. If only Fenix integration with it was better.
At present, the Fenix platform integration is confusing as hell. Coming from the running side, I’m used to hanging out in Garmin Connect. But now I’ve got Basecamp to play with (I’ve used that occasionally with my Edge 800). Plus, there’s Garmin Adventures, and don’t forget Opencaching.com too. Really, way too many different properties.
In my mind, they need to pull it all under one roof (except Opencaching, which I’ll get to a second). All three (GC/Basecamp/GA) are all cool in their own right, and no doubt, serve different purposes. But ultimately, it’s confusing, and they aren’t leveraging the best aspects of each product. Separate silos unto themselves.
For example, on Garmin Connect I can use the route creator to plan my routes and then send them to almost all Garmin devices (except Fenix Added on 10/4/12). It’s cool, it leverages the strengths of both Google and Bing maps, and allows me to actually see what I’m routing around. Yet the Fenix – arguably the one watch that really needs this functionality the most is stuck with base maps less detailed than Christopher Columbus had. Yet the kicker is, I can do the route creation on the iPhone with real maps and send it back down to the Fenix – again, a great feature, but why can’t I have feature parity in Basecamp?
Well, the answer is because Garmin wants to make money off of maps – which is fine and dandy. But when I’m paying $400+ for a device for route/waypoint creation, you can at least allow the basic tools to see more than four roads in the entire city. Remember, this is what the Basecamp’s base mapset looks like for Paris (or any other city in the world):
And here’s what it looks like when I switch to the paid version ($90) – same exact view, just switched on that map set:

And of course, I can zoom in a ton more:

Oh, here’s what the free Garmin Connect version looks like (with mapping provider choice, and satellite imagery). And the free iPhone Basecamp app as well offers equivalent parity.
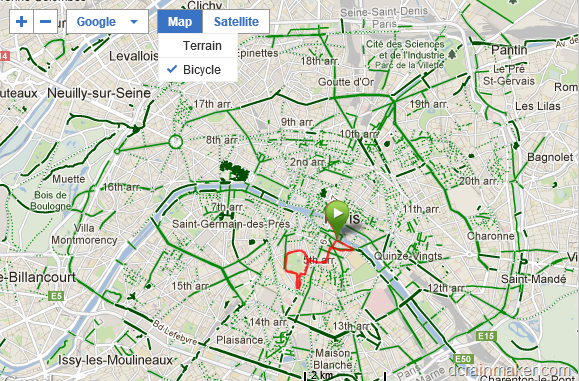
I don’t have a problem with charging for maps, but I think that if both your web property (Garmin Connect & Garmin Adventures) and the free iPhone app provide Google Mapping (satellite and street maps), then Basecamp should at least allow you to view and plan your activities with something visually useful. Yes, it costs Garmin money for Google Maps API Calls, but nowhere near what it costs them for API calls on the web platform and those 60,000 activities a day.
Then we’ve got Garmin Adventures. Cool idea – take your tracks and merge them with photos. Love it. But it requires Basecamp to get kick started. And, now to think about it – far more people likely take photos while out riding their bikes, why isn’t this in/on/integrated with Garmin Connect?
There’s no doubt a need for a thick client like Basecamp, and this isn’t a slight to the Basecamp team, as I think the app is cool. But it should fully integrate with Garmin Connect. At present there’s more feature gaps between the two products than a microplane grater (the big kind that makes the chocolate curls). Why can’t I send activities to Garmin Connect but I can to Garmin Adventures? And why can’t I pull from Garmin Connect? Why are maps freely available for planning in one but not the other? I can create courses on a usable map for a $135 FR305 watch, but not a $400 watch? And I can upload data from the $89 FR60/FR70 to a web platform, but again, not the most expensive watch makes?
This is the area that just boggles my mind. At some point someone in Garmin needs to realize that Garmin Connect IS their gold mine. It’s the one asset that nobody else has: A massive growing database of 60,000+ new runs/bikes/hikes/walks/everything’s per day. Nobody has that, and yet, the one company that does have it chooses to completely ignore it.
I don’t get it. But again, maybe that’s why I don’t work in software. Well, actually, I do, so nevermind.
Oh, as for Opencaching, I think that actually should remain separate – purely if they’re trying to maintain some open community aspect to it. But, integration should absolutely be increased with both Basecamp and Garmin Connect. There’s no reason basic integration can’t occur (searching/importing caches, etc…).
General Standards Support (3rd party compatibility):
Today, the Fenix exports data out as both .FIT and .GPX files (either or both). As such, that allows compatibility with the greatest number of applications out there, as those are the most common file formats supported (aside from .TCX). Virtually every sport application will support either of those two files.
In my testing though – results were mixed. While Strava uploaded the .FIT file just fine, TrainingPeaks had problems with it. It’s not clear to me who the blame lies with at this time.
[Updated 11/2/12: The issues with TrainingPeaks compatibility have been addressed]
GPS Device & Display Formats and GPS Tools:
This is just a quick section to cover a bunch of things that weren’t covered elsewhere.
First, various formatting options. They are as follows:
Distance/Speed: Nautical (ft), Nautical (m), Statute, Metric, Yards
Elevation: Feet, Meters
Depth: Feet, Fathoms, Meters
Temperature: Celsius, Fahrenheit
Pressure: Inches (Hg), mmHg, Millibars, Hectopascals
Vertical Speed: Feet/Min, Meters/Min, Meters/Sec, Meters/Hr
All of these settings are set independently. Thus you can have one format for depth and another for elevation.
Position formats are as follows, they are all typed exactly as the unit writes it:
Format: hddd*mm.mmm’, hddd.ddddd*, hddd*mm’ss.s’’, Austrian Grid, Borneo RSO, British Grid, Dutch Grid, E0V Hungarian, Estonian Grid, Finnish Grid, German Grid, Icelandic Grid, Indonesian Equat., Indonesian Irian, Indonesian South., India Zone 0/IA/IB/IIA/IIB/IIIA/IIB/IVA/IVB, Irish (ITM), Irish (IG), Latvian TM, Loran TD, Maidenhead, MGRS, New Zealand, New Zealand TM, QNG Grid, RT 90, Swedish Grid, SWEREF 99 TM, South Africa, Swiss Grid, Taiwan Grid, US National, UTM UPS, W Malayan RSO, User Grid
Datum: Adindan, Afgooye, AIN EL ABD ’70, Anna 1 Ast ’65, ARC 1950, ARC 1960, Ascnsn Isld ’58, Astr Dos 71/4, Astro B4 Soral, Astro Bcn “E”, Astro Stn ’52, Aus Geod ’66, Aus Geod ’84, Austria, Bellevue (IGN), Bermuda 1957, Bogota Observ, Campo Ichspe, Canton Ast ’66, Cape, Cape Canavrl, Carthage, CH-1903, Chatham 1971, Chua Astro, Corrego Alegr, Croatia, D jakarta, Dos 1968, Dutch, Easter Isld 67, European 1950, European 1979, Finland Hayfrd, Gandajika Base, GDA 94, Geod Datm ’49, Guam 1963, Gux 1 Astro, H jorsey 1955, Hong Kong ’63, Hu-Tzu-Shan, Indian Bngldsh, Indian Thailand, Indonesia 74, Ireland 1965, ISTS 073 Astro, Johnston Island, Kandawala, Kergueln Islnd, Kertau 1948, L.C. 5 Astro, Liberia 1964, LK592, Luzon Mindanao, Luzon Philippine, Mahe 1971, Marco Astro, Massawa, Merchich, Midway Ast ’61, Minna, NAD27 Alaska, NAD27 Bahamas, NAD27 Canada, NAD27 Canal Zn, NAD27 Caribbn, NAD27 Central, NAD27 CONUS, NAD27 Cuba, NAD27 Grnland, NAD27 Mexico, NAD27 San Sal, NAD83, Naparima BWI, Nhrwin Masirah, Nhrwin Saudi A, Nhrwn United A, Obsrvtoria ’66, Old Egyptian, Old Hawaiian, Oman, Ord Srvy GB, Pico De Las Nv, Potsdam, Prov S Am ’56, Prov S Chln ’63, Ptcairn Ast ’67, Puerto Rico, Qatar National, Qornoq, Reunion, Rome 1940, RT 90, Santo (Dos), Sao Braz, Sapper Hill ’43, Schwarzeck, SE Base, South Asia, Sth Amrcn ’69, SW Base, Taiwan, Timbalai 1948, Tokyo, Tristan Ast ’68, Viti Levu 1916, Wake-Eniwetok, WGS 72, WGS 84, Zanderij, None, User
Spheroid: Tied to Datum (matches it)
Next, within GPS Tools we have the ‘leftovers’. These are things that Garmin didn’t put into a major category bucket. As such, there’s:
Satellite: This enables you to look at the current accuracy levels, which satellites you’re connected to, and whether or not WAAS is currently enabled and within range (only in North America).
Sight ‘N Go: This enables you to lock on a heading and then hold that lock.
Coordinates: This allows you to specify coordinates and then navigate to those coordinates.
POI’s: Points of Interest. If you have downloaded Points of Interests to the device, you can navigate to them. In my case, it merely identified the entire city of Paris as a point of interest.
Sun and Moon, Hunt and Fish, and Geocaching: I covered all these above in bigger sections.
Area Calculator: This allows you to determine the area of a mass of land by walking/running/riding the perimeter.
MOB (Man Overboard): Drop someone off the boat, and then mark their position. That way you don’t forget where they are. Or, more specifically, you can rescue them. Also useful for drug running in the Caribbean.
Active Route: This simply tells you the currently active route. If you’re not on an active route – it’ll let you know that too.
Accessories:
ANT+ Accessories:
The Fenix is compatible with a number of ANT+ accessories. ANT+ is an industry standard that allows you to pair wireless sensor devices with computers/watches/head units. Each device uses what’s called an ANT Device Profile, which ensures that no matter who makes the device, they know how to talk together.
Below is a list of common ANT+ sensor types, and whether or not they are supported.
ANT+ Garmin Tempe Temperature Sensor:
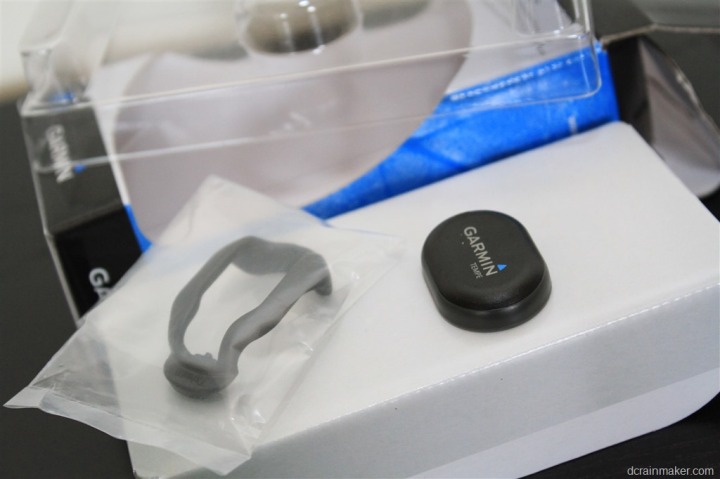
The Garmin Tempe sensor is a temperature sensor that allows you to gather wireless readings from it for approximately 1 year. It runs on a single CR2023 coin cell battery and can be attached to your shoe laces or the tail of a mouse.
I wrote up a pretty detailed section above. The Tempe retails for a fairly reasonable $30.
ANT+ Cycling Speed/Cadence Sensor:
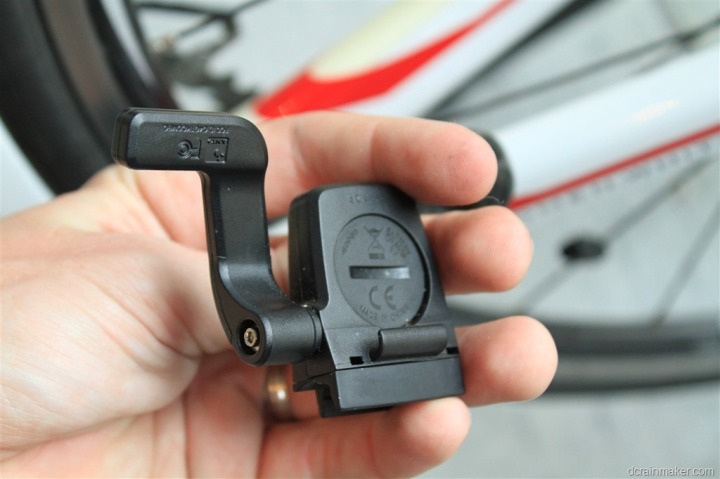
The ANT+ Speed/Cadence Sensor allows one to gather speed and cadence information wirelessly. In the case of the Fenix, that’s only going to use the cadence information, and not the speed information.
A small magnet attaches first to a back wheel spoke, and then a second magnet attaches to your crank arm (that’s the piece that connects to your shoe via the pedal). From there, the above pod sits in between the two and wirelessly transmits the data to the Fenix.
In my case, I prefer the Bontrager quick-release style Speed/Cadence sensor, over the Garmin GSC-10. The GSC-10 is a bit cheaper, but it’s ziptied on, versus the Bontrager one uses industrial rubber bands to enable you to quickly move it from bike to bike.
ANT+ Garmin Chirp Geocache:
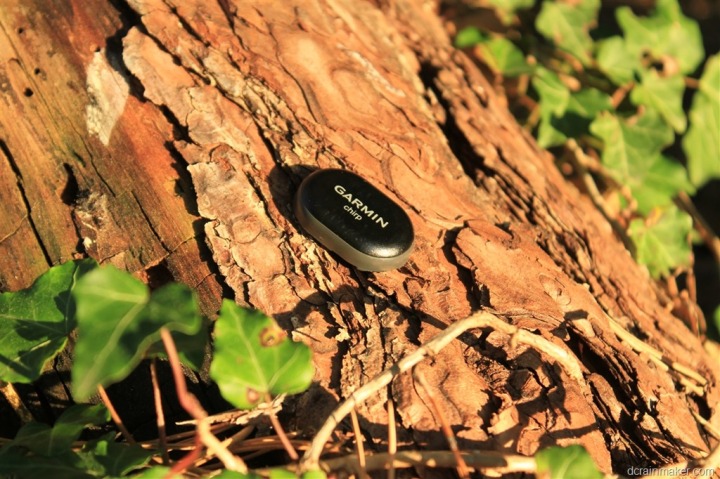
The Garmin Chirp is an ANT+ geocaching sensor that allows you to create an electronic proximity based cache. The cache will alert ANT+ enabled devices /watches when nearby, providing additional detail and name information.
The Chirp is available for $23.
ANT+ Heart Rate Strap:
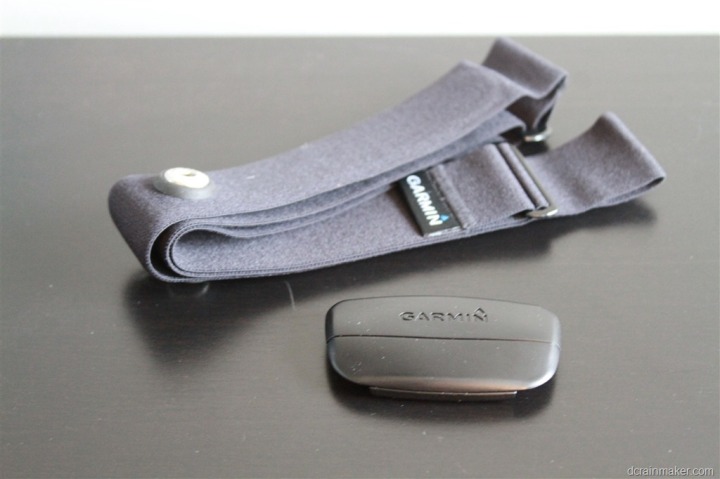
The ANT+ Heart Strap is made by a billion companies, and is cross compatible with the Garmin Fenix no matter which company made your strap. The Heart Rate strap transmits your heart rate data, which the Fenix units pick up without issue. The user-replaceable battery generally lasts about a year.
The cheapest ANT+ enabled heart rate strap is out there for about $40 these days.
ANT+ Running Speed/Cadence Sensor [supported as of Nov 1st, 2012]:
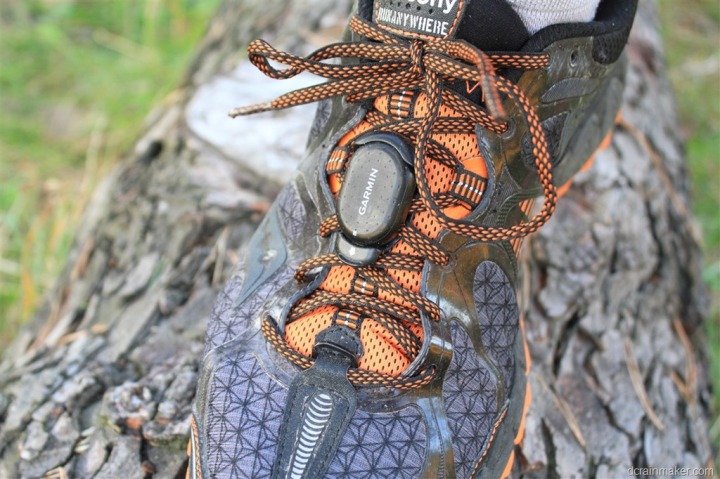
As of November 1st, 2012 – the Fenix now supports the footpod for indoor and outdoor training. While indoors the footpod will provide speed/distance and cadence. And while outdoors it’ll provide cadence information, or can be used to provide more stable speed information.
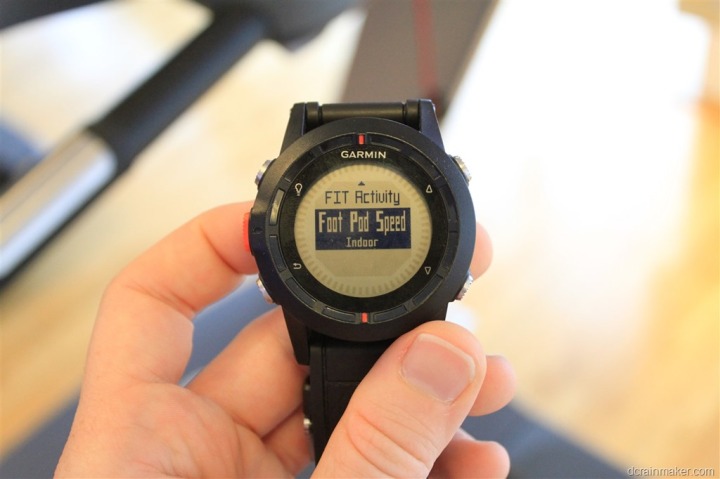
I’ve written a bunch about it here in this post about the update, which came as firmware version 2.90.
ANT+ Power Meters [non-supported]:
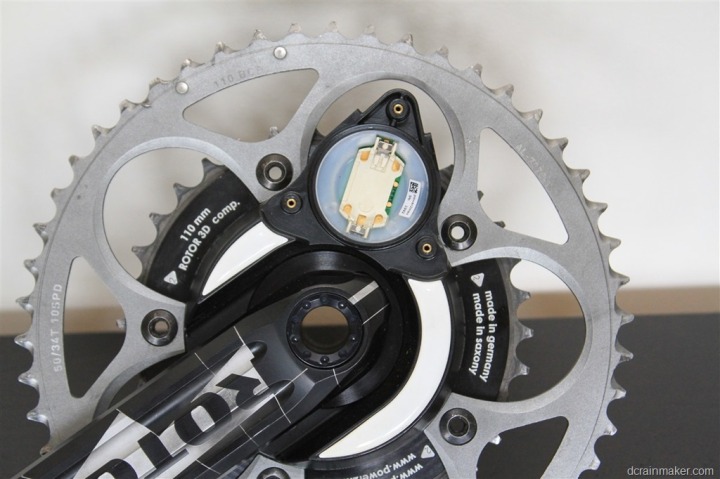
While not a huge surprise, the ANT+ power meter profile is NOT supported on the Fenix. I think there is a niche for this to be included (likely far larger niche than Man-Overboard and many other options). And it would be quite appealing, especially to mountain bikers, and those doing 24-hour mountain biking races.
Nonetheless, it’s not there today.
Bluetooth Low Energy Capabilities (Bluetooth Smart) Accessories:
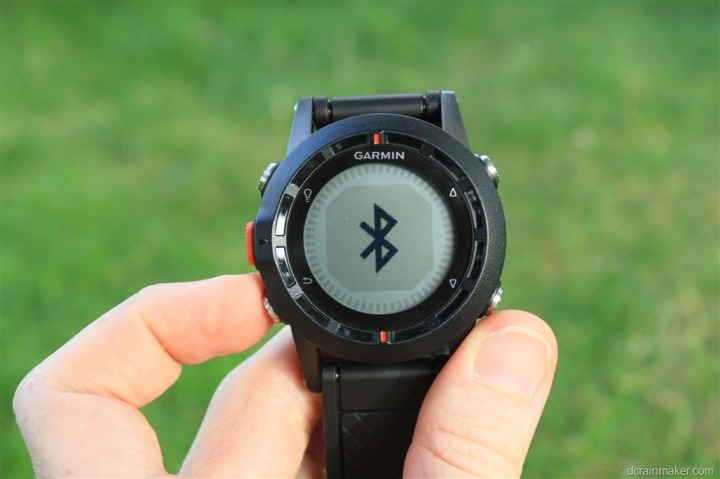
As of this time, the Fenix isn’t compatible with any Bluetooth Smart Sensors. I suspect in time that will change, as it’s only logical to expand compatibility to non-ANT+ sensors as the market conditions change. Today those sensors are largely limited to heart rate, speed/cadence and some upcoming power meters. Down the road, there will no doubt be endless different sensor types.
One thing to keep in mind is that like ANT+, in order for a given Bluetooth Smart sensor to gain mass adoption, it must conform to a published ‘device profile’ specification. This ensure that all devices that support that device profile know how to talk to that given device class. For example, the heart rate monitor device profile enables standards and interoperability between heart rate measurement devices (straps primarily) and watches/units that read that data. Without such standards, compatibility would be a nightmare.
The point of this being that I would expect that if and when Garmin allows one to use other Bluetooth Smart sensors, I’d expect they’d only look at mainstream devices that have official device profiles that are ratified by the Bluetooth SIG, and in particular, the fitness subcommittee on that SIG.
Finally, at present, the only active use of Bluetooth on the Fenix is to share your workouts with your phone via their Basecamp App (talked about in detail above).
Product/Market Comparisons:
Here’s a quick comparison chart, along with some of my thoughts on comparing the unit to the Suunto Ambit – its only real competitor, and then my general thoughts on whether or not the Fenix makes for a good running watch. I added the FR910XT, since so many people ask about how that compares as well. As always, if you spot any errors, please let me know.
Comparison Chart:
| Function/Feature | Garmin Fenix | Garmin Forerunner 165 | Garmin Vivoactive 5 | Apple Watch Series 9 | Garmin Venu 3 |
|---|
| Copyright DC Rainmaker - Updated March 24th, 2024 @ 12:53 pm New Window |
| Price | $299 (on sale) | $249/$299 | $299 | $399/$499 (cellular) | $449 |
| Product Announcement Date | JUL 10, 2012 | Feb 20th, 2024 | Sept 20th, 2023 | Sept 14th, 2023 | August 30th, 2023 |
| Actual Availability/Shipping Date | AUG 2012 | Feb 20th, 2024 | Sept 20th, 2023 | Sept 23rd, 2023 | August 30th, 2023 |
| GPS Recording Functionality | Yes | Yes | Yes | Yes | Yes |
| Data Transfer | USB & Bluetooth Smart | USB, Bluetooth Smart (WiFi on Music Models | USB, BLUETOOTH SMART, WiFi | Bluetooth Smart | USB, BLUETOOTH SMART, WiFi |
| Waterproofing | Yes - 50m | 50 Meters | 50 meters | 50m | 50 meters |
| Dive/Snorkel Feature | | No | No | No | No |
| Battery Life (GPS) | 50 hours | Up to 19 hours | 21 hrs (just GPS) | 12 hours GPS | 26 hrs (just GPS), up to 11hrs GPS+Music |
| Solar Charging | | No | No | No | No |
| Recording Interval | 1s to variable | 1-second, Smart, UltraTrac | 1s or Smart Recording | Varies | 1s or Smart Recording |
| Dual-Frequency GNSS | | Yes | No | No | No |
| Alerts | Vibrate/Sound/Visual | VIBRATE/SOUND/VISUAL | Vibrate/Visual | Vibration/Audio/Visual | Vibrate/Visual/Speaker |
| Display Type | | AMOLED | AMOLED | AMOLED | AMOLED |
| Backlight Greatness | Great | Great | Great | Great | Great |
| Ability to download custom apps to unit/device | No | Yes | Yes | Yes | Yes |
| Acts as daily activity monitor (steps, etc...) | No | Yes | Yes | Yes | Yes |
Voice Integration | Garmin Fenix | Garmin Forerunner 165 | Garmin Vivoactive 5 | Apple Watch Series 9 | Garmin Venu 3 | | Has Mic/Speaker | | No | No | Yes | Yes |
| Can make/receive calls | | No | No | Non-cellular editions with phone/Cellular Editions without phone | With phone's cellular |
| Voice Assistant | | No | No | Apple Siri | Apple Siri, Google Assistant, Samsung Bixby |
Music | Garmin Fenix | Garmin Forerunner 165 | Garmin Vivoactive 5 | Apple Watch Series 9 | Garmin Venu 3 | | Can control phone music | | Yes | Yes | Yes | Yes |
| Has music storage and playback | | Yes (music edition) | Yes | Yes | Yes |
| Streaming Services | | Spotify, Amazon Music, Deezer | Spotify, Amazon Music, Deezer | Apple Music | Spotify, Amazon Music, Deezer |
Payments | Garmin Fenix | Garmin Forerunner 165 | Garmin Vivoactive 5 | Apple Watch Series 9 | Garmin Venu 3 | | Contactless-NFC Payments | | Yes | Yes | Yes | Yes |
Connectivity | Garmin Fenix | Garmin Forerunner 165 | Garmin Vivoactive 5 | Apple Watch Series 9 | Garmin Venu 3 | | Bluetooth Smart to Phone Uploading | Yes | Yes | Yes | Yes | Yes |
| Phone Notifications to unit (i.e. texts/calls/etc...) | Yes | Yes (with connected phone) | Yes | Yes | Yes |
| Live Tracking (streaming location to website) | Yes (as of Feb 2014) | Yes (with connected phone) | Yes | With 3rd party apps | Yes |
| Group tracking | | Yes (with connected phone) | No | No | No |
| Emergency/SOS Message Notification (from watch to contacts) | No | Yes (with connected phone) | Yes | Yes | Yes |
| Built-in cellular chip (no phone required) | No | No | No | Yes (with cellular version) | No |
Cycling | Garmin Fenix | Garmin Forerunner 165 | Garmin Vivoactive 5 | Apple Watch Series 9 | Garmin Venu 3 | | Designed for cycling | Yes | Yes | Yes | Yes | Yes |
| Power Meter Capable | No | No | No | Yes | Yes |
| Power Meter Configuration/Calibration Options | N/A | N/A | N/A | Yes | Yes |
| Power Meter TSS/NP/IF | N/A | N/A | N/A | No | No |
| Speed/Cadence Sensor Capable | Yes (full support added Sept 2013) | Yes | Yes | Yes | Yes |
| Strava segments live on device | | No | No | No | No |
| Crash detection | | Yes | Yes | Yes | Yes |
Running | Garmin Fenix | Garmin Forerunner 165 | Garmin Vivoactive 5 | Apple Watch Series 9 | Garmin Venu 3 | | Designed for running | Yes | Yes | Yes | Yes | Yes |
| Footpod Capable (For treadmills) | Yes | YES (Also has INTERNAL ACCELEROMETER) | Yes | With 3rd party apps | Yes |
| Running Dynamics (vertical oscillation, ground contact time, etc...) | No | Yes | No | Yes | No |
| Running Power | | Yes | WITH 3RD PARTY APPS | Yes | WITH 3RD PARTY APPS |
| VO2Max Estimation | No | Yes | Yes | Yes | Yes |
| Race Predictor | No | Yes | No | No | No |
| Recovery Advisor | No | Yes | Yes | No | Yes |
| Run/Walk Mode | No | Yes | Yes | With 3rd party apps | Yes |
| Track Recognition Mode | | Yes | No | Yes | No |
Swimming | Garmin Fenix | Garmin Forerunner 165 | Garmin Vivoactive 5 | Apple Watch Series 9 | Garmin Venu 3 | | Designed for swimming | No | Yes | Yes | Yes | Yes |
| Openwater swimming mode | N/A | Yes | Yes | YEs | Yes |
| Lap/Indoor Distance Tracking | N/A | Yes | Yes | Yes | Yes |
| Record HR underwater | No | Yes | Yes | Yes | Yes |
| Openwater Metrics (Stroke/etc.) | N/A | Yes | Yes | Basic stroke type only | Yes |
| Indoor Metrics (Stroke/etc.) | N/A | Yes | Yes | Basic stroke type only | Yes |
| Indoor Drill Mode | N/A | Yes | No | No | No |
| Indoor auto-pause feature | N/A | No | No | Yes | No |
| Change pool size | N/A | Yes | Yes | Yes | Yes |
| Indoor Min/Max Pool Lengths | N/A | 14M/15Y TO 150Y/M | 13M/15Y TO 150Y/M | 1y/m to 1,500y/m+ | 13M/15Y TO 150Y/M |
| Ability to customize data fields | N/A | Yes | Yes | Yes | Yes |
| Captures per length data - indoors | N/A | Yes | Yes | Yes | Yes |
| Indoor Alerts | N/A | Yes | Yes | Yes (goals) | Yes |
Triathlon | Garmin Fenix | Garmin Forerunner 165 | Garmin Vivoactive 5 | Apple Watch Series 9 | Garmin Venu 3 | | Designed for triathlon | No | No | No | Not really | No |
| Multisport mode | N/A | No | No | Yes | No |
Workouts | Garmin Fenix | Garmin Forerunner 165 | Garmin Vivoactive 5 | Apple Watch Series 9 | Garmin Venu 3 | | Create/Follow custom workouts | Yes (As of Dec 6, 2013) | Yes | Yes | Yes | Yes |
| On-unit interval Feature | Yes (As of Dec 6, 2013) | Yes | Yes | Yes | Yes |
| Training Calendar Functionality | No | Yes | Yes | With 3rd party apps | Yes |
Functions | Garmin Fenix | Garmin Forerunner 165 | Garmin Vivoactive 5 | Apple Watch Series 9 | Garmin Venu 3 | | Auto Start/Stop | Yes | Yes | Yes | Yes | Yes |
| Virtual Partner Feature | Yes | Yes | No | Yes | No |
| Virtual Racer Feature | No | | No | Yes | No |
| Records PR's - Personal Records (diff than history) | No | Yes | Yes | No | Yes |
| Tidal Tables (Tide Information) | No | No | No | No | No |
| Weather Display (live data) | No | YEs | Yes | Yes | Yes |
Navigate | Garmin Fenix | Garmin Forerunner 165 | Garmin Vivoactive 5 | Apple Watch Series 9 | Garmin Venu 3 | | Follow GPS Track (Courses/Waypoints) | Yes | Yes | No (but some 3rd party apps can) | With 3rd party apps | No (but some 3rd party apps can) |
| Markers/Waypoint Direction | Yes | Yes | No | Yes (Backtrack) | No |
| Routable/Visual Maps (like car GPS) | No | No | No | With 3rd party apps | No |
| Back to start | Yes | Yes | Yes | Yes (Backtrack) | Yes |
| Impromptu Round Trip Route Creation | No | No | No | With 3rd party apps | No |
| Download courses/routes from phone to unit | Yes | Yes | No | With 3rd party apps | No |
Sensors | Garmin Fenix | Garmin Forerunner 165 | Garmin Vivoactive 5 | Apple Watch Series 9 | Garmin Venu 3 | | Altimeter Type | Barometric | Barometric | GPS | Barometric with real-time watch face | Barometric |
| Compass Type | Magnetic | | - | Magnetic | Magnetic |
| Optical Heart Rate Sensor internally | | YEs | Yes | Yes | Yes |
| SpO2 (aka Pulse Oximetry) | | Yes | Yes | Yes | Yes |
| ECG Functionality | | No | No | Yes | Yes |
| HRV Recording | | Yes (nightly and on-demand) | Yes | Yes | Yes |
| Heart Rate Strap Compatible | Yes | Yes | Yes | Yes | Yes |
| ANT+ Heart Rate Strap Capable | Yes | Yes | YEs | No | YEs |
| ANT+ Speed/Cadence Capable | Yes | Yes | Yes | no | Yes |
| ANT+ Footpod Capable | Yes | Yes | Yes | No | Yes |
| ANT+ Power Meter Capable | No | No | No | No | Yes |
| ANT+ Lighting Control | | Yes | Yes | No | Yes |
| ANT+ Bike Radar Integration | | Yes | Yes | No | Yes |
| ANT+ Trainer Control (FE-C) | | No | No | No | Yes |
| ANT+ Remote Control | Yes | No | No | No | No |
| ANT+ eBike Compatibility | No | No | Yes | No | Yes |
| ANT+ Gear Shifting (i.e. SRAM ETAP) | | No | No | No | No |
| Shimano Di2 Shifting | | No | No | No | No |
| Bluetooth Smart HR Strap Capable | No | Yes | YEs | Yes | YEs |
| Bluetooth Smart Speed/Cadence Capable | No | Yes | Yes | Yes | Yes |
| Bluetooth Smart Footpod Capable | No | Yes | Yes | No | Yes |
| Bluetooth Smart Power Meter Capable | No | No | No | Yes | Yes |
| Temp Recording (internal sensor) | Yes | Yes | No | No | No |
| Temp Recording (external sensor) | Yes | YES (TEMPE) | Yes | No | Yes |
Software | Garmin Fenix | Garmin Forerunner 165 | Garmin Vivoactive 5 | Apple Watch Series 9 | Garmin Venu 3 | | PC Application | Basecamp | Garmin Express | Garmin Express | None | Garmin Express |
| Web Application | Garmin Connect | Garmin Connect | Garmin Connect | None | Garmin Connect |
| Phone App | Garmin Basecamp (iOS) | iOS/Android | iOS/Android/Windows | iOS only | iOS/Android/Windows |
| Ability to Export Settings | Yes (profiles XML) | No | No | No | No |
Purchase | Garmin Fenix | Garmin Forerunner 165 | Garmin Vivoactive 5 | Apple Watch Series 9 | Garmin Venu 3 | | Amazon | Link | | Link | Link | Link |
| REI | | Link | Link | | Link |
DCRainmaker | Garmin Fenix | Garmin Forerunner 165 | Garmin Vivoactive 5 | Apple Watch Series 9 | Garmin Venu 3 | | Review Link | Link | Link | Link | Link | Link |
Comparison with the Suunto Ambit:
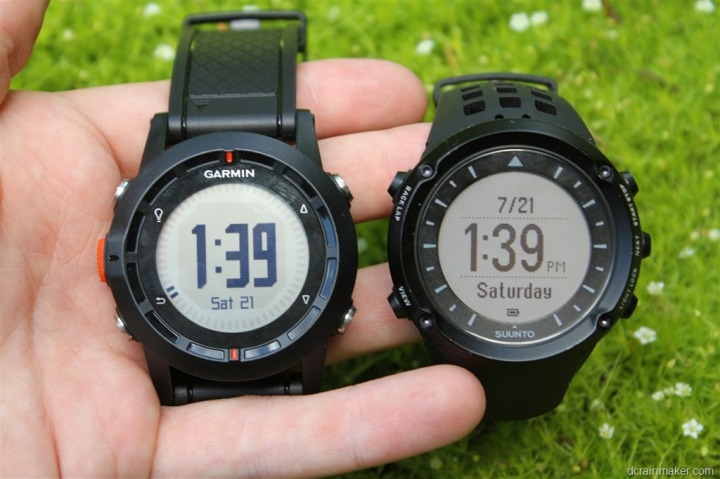
Since the Fenix was announced this past summer, there’s been constant interest in which one is ultimately declared the ‘winner’. From a features and functionality standpoint, it’s actually a rather difficult question.
First, let’s look at raw features – as in the total number of unique things that each watch does. In this case, the Fenix wins in a landslide (like a pro football stadium to high school gym sized landslide). Mostly due to the vast sea of features from the handheld side that was brought into the watch. True, many of them aren’t used by many people, but, they are there. And oftentimes, it’s the little things that matter to people.
However, it’s not all about features. It’s all about stability. In this case, I’d hand it to the Ambit. I simply don’t have crashes or highly visible bugs on my Ambit. Sure, there are some edge case bugs – but nowhere near the quantity of issues I see with the Fenix on a daily basis. Just tons of weird quirks. There’s an entire multi-page thread dedicated to Fenix bugs, and most of those are just since the latest release last week.
Next we look at compatibility. In this case, again, Fenix is a clear winner. They support ANT+ devices today, and more than the Ambit will likely support in November (I doubt we’ll see Suunto add ANT+ Chirp and ANT+ Tempe functionality, though they certainly could since they are standard ANT+ device profiles). Further, the Fenix has Bluetooth Low Energy built into, which means that it can communicate with cell phones and open up a whole host of scenarios over time. The Ambit doesn’t have this, and no amount of software updating will fix that.
Speaking of software updates… The Ambit has published a schedule that specifies when and what they’re adding to the unit. Thus far, they’ve hit all milestones published. And the next milestone adds ANT+ to the Ambit in November, along with more features. Though still, it’s far fewer features than the Fenix. But, at least it’s predictable. Unlike the Fenix, which I have no idea if or when they’ll fix the bugs. Thus far they’ve been releasing frequent updates (good!), but Garmin has a long and storied history of leaving buggy products out in the open.
Finally, the running aspect. Ultimately, the entire running experience is far cleaner and well put together on the Suunto side. From use to uploading and viewing of the data – it’s clear that runners understand the product. I don’t get that clarity with Fenix.
So, is there a right answer? Well, it depends on who you are. Read the above table, read this whole section on comparing with the Ambit. And then read the next running section. If you’re purely a runner, the choice is probably obvious. If you’re not, then the choice gets a bit muddier. And honestly, the choice may be a different watch besides the Fenix or Ambit.
As a running watch:
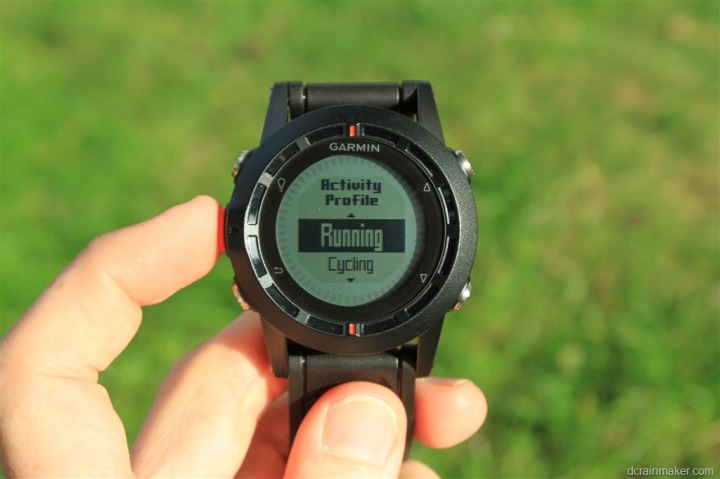
While the Fenix makes for an impressive outdoor and hiking watch, it ultimately makes for a poor running watch. The watch was put together by the ‘Outdoor’ team within Garmin, which is the team that historically has focused on handheld devices such as the Oregon, Montana and similar products. These devices targeted folks hiking and exploring the wilderness – with only barely passing functionality for those taking part in sports with the devices.
The lack of running focus (or cycling for that matter) is apparent across the Fenix. If you’re a previous and/or current Garmin Forerunner user, you’ll likely find the watch frustrating to use while running. For example, here’s a short list of areas that runners will find (or won’t find):
– No interval functionality (i.e. creating interval workouts)
– No workout functionality (either creation, or utilizing existing downloaded workouts)
– No Virtual Pacer support
– No Virtual Racer support
– No Autolap by position functionality (for looping repeats, regular distance autolap is supported)
– No Run/Walk mode
– No ability to use ANT+ running footpod for indoor treadmill use [Added Nov 1, 2012 in 2.90]
– Doesn’t support setting/downloading heart rate zones via Garmin Connect (generates error) [Added/Fixed in 2.80]
– And once you have those zones manually entered, it won’t use the Z#.# convention like other Garmin Fitness units, instead just showing full zone (i.e. Z2 instead of Z2.4) [Added Nov 1, 2012 in 2.90]
– Garmin Connect doesn’t know the type or activity class from uploaded files (i.e. Run/Bike/Hike) [Added Oct 4, 2012 in 2.70]
– Cannot download courses from Garmin Connect to the unit [Added Oct 4, 2012 in 2.70]
– Non-compatible .FIT file formatting (3rd party apps like TrainingPeaks seem to fail on many Fenix .FIT files) [Fixed Oct 4, 2012 in 2.70]
– In order to set a lap, you must actually HOLD the button down for 2 seconds [Added/Fixed Oct 4, 2012 in 2.70]
It’s this last one that while sounding silly, is actually outright annoying. For example, as I’m finishing up a hard interval, I’ve now gotta hold down the metallic button for two seconds with my sweaty hands while I gasp for breath. And of course, it’s now counting those two seconds against me (i.e 1:12 instead of 1:10). Seriously?
[Update: This has been added in 2.70 on Oct 4th, 2012: You can now configure the back button for single-tap lap pressing. Sweet, problem solved!]
And then there’s sport related oddities within device profiles. For example, if I pair a heart rate strap within the running section and then go cycling, I have to remember to re-pair and turn it on the first time I use that profile. No other Garmin product works that way (or any other company I can think of), they all remember the heart rate strap across sports. Now, I suppose the one way you could spin this as a ‘feature’ would be to create different device profiles for different people in your household, and then be able to pair certain heart rate straps for each person.
[Updated 11/2/12: The Garmin staff tells me they do consider this a feature as “it is very likely that a heart rate strap may not be used in all profiles in a device that isn’t solely dedicated to fitness“, and they have addressed things so that now “the initial setup of a heart rate strap logically should follow into another first-time use of a subsequent out-of-box profile like cycling.”]
If you are a cyclist, there’s no power meter support. And while that’s probably logical given the focus of this watch – it’s also a watch that would be awesome for mountain bikers in particular. Power meters in mountain bikes has made steady progress over the last 18 months, and ignoring that segment seems silly in Garmin’s highest end watch. Plus, there’s no support for entering bike settings or setting the wheel circumference (to specify distance). Thus the speed/cadence sensor is useless for indoor training.
Ultimately, it’s acceptable for there to be some feature gaps in a watch that tries to bridge the gap between running and outdoors/hiking. But at present, there are just simply too many gaps. Given the choice between using an older 5+ year old discontinued Garmin FR305, or newer low-budget $120 Garmin FR10 – I’d happily take either of those over the Fenix as a running watch.
Yes, I do realize that the watch has awesome potential battery life, and that’s perfect for ultrarunners. But, at the same time, for most ultrarunners, the 20 hour battery life of the Garmin FR310XT and FR910XT is sufficient. And for those that need that additional battery life, I just don’t believe the battery life of the watch is worth the tradeoff in features at this time. Of course, each person will need to make their own decisions on functionality tradeoffs.
(Again, this section is focused on runners specifically)
The good news, if there’s any here, is that all of these things can be changed with firmware updates (Update note: and, as of November, Garmin has made great progress in that arena). In the same way I was equally as hard on the Suunto Ambit when it first came out due to lack of features given its price point, I’m optimistic that given time Garmin will follow Suunto’s lead and announce the features they plan to incorporate into Fenix going forward (and a timetable) – otherwise, I’d imagine that many runners will simply head elsewhere as they look at the holiday shopping season.
Pros & Cons:
While the unit may not be the best for runners, there are a lot of positive aspects for other user groups. Here’s a list of pros and cons, as consolidated as I can possibly get with a watch whose feature set is so broad:
Pros:
– GPS accuracy is in line with other GPS units, consistent
– Barometric altitude accuracy is also in line with other GPS units
– Huge feature set for a large number of use cases, from geocaching to hiking to navigation
– Battery life, in theory, goes 50 hours
– Incredibly flexible and customizable – far more customization than we’ve ever seen from Garmin
– External temperature sensor (Tempe) is pretty cool
– Bluetooth Low Energy inclusion is huge, can upload to phone, integrate
Cons:
– Running feature set is pretty poor [Nov Update: But getting much better in firmware updates]
– Battery life seems to be all over the map, I can’t get a good handle on it
– Doesn’t support any other Bluetooth Smart sensors, except phone upload
– Tons of bugs, running into oddities constantly
– Software platform inconsistent, disorganized in conjunction with this product
[Note: List updated 11/1/2012 at 7PM Eastern based on the 2.90 firmware release on Nov 1st, 2012]
Summary:
At this point, I’ve said everything I can say – some 13,354 words later. Ultimately, the Fenix shows immense promise, but it’s clear that in order for it to be a winner in the fitness category (as opposed to just hiking/adventures), they need to shack up with someone in the Forerunner running team and figure out how to make it really hum for runners. Today, it borders on frustrating for runners.
Yet for those hiking and otherwise out in the outdoors doing other things, the Fenix has tons of awesome features and performs well. Its accuracy appears good (I’ve done multiple GPS distance tests across a slew of products and they all match), easy to use, and seems like it can take a beating (at least, it has for me for the past three months).
Ultimately, it’s up to you to decide whether it’s the right watch for you. Good luck!
Found This Post Useful? Support The Site!
Hopefully you found this review useful. At the end of the day, I’m an athlete just like you looking for the most detail possible on a new purchase – so my review is written from the standpoint of how I used the device. The reviews generally take a lot of hours to put together, so it’s a fair bit of work (and labor of love). As you probably noticed by looking below, I also take time to answer all the questions posted in the comments – and there’s quite a bit of detail in there as well.
If you're shopping for the Garmin Fenix or any other accessory items, please consider using the affiliate links below! As an Amazon Associate I earn from qualifying purchases. It doesn’t cost you anything extra, but your purchases help support this website a lot. Even more, if you shop with TPC (The Pro's Closet), you'll save $40 on purchases over $200 with coupon code DCRAIN40! The Pro's Closet has been a long-time partner of the site here - including sponsoring videos like my cargo bike race, as well as just being an awesome Colorado-based company full of good humans. Check them out with the links below and the DCRAIN40 coupon!
Since the Garmin Fenix is no longer sold, I recommend looking at
Garmin Fenix 6 Series:
Here's a few other variants or sibling products that are worth considering:
And finally, here’s a handy list of accessories that work well with this unit (and some that I showed in the review). Given the unit pairs with ANT+ & Bluetooth Smart sensors, you can use just about anything though.
This is a dual ANT+/Bluetooth Smart cycling cadence sensor that you strap to your crank arm, but also does dual Bluetooth Smart, so you can pair it both to Zwift and another Bluetooth Smart app at once if you want.
This is one of the top straps I use daily for accuracy comparisons (the others being the Polar H9/H10). It's dual ANT+/Bluetooth Smart, and in fact dual-Bluetooth Smart too, in case you need multiple connectons.
Seriously, this will change your life. $9 for a two-pack of these puck Garmin chargers that stay put and stay connected. One for the office, one for your bedside, another for your bag, and one for your dog's house. Just in case.
This speed sensor is unique in that it can record offline (sans-watch), making it perfect for a commuter bike quietly recording your rides. But it's also a standard ANT+/BLE sensor that pairs to your device. It's become my go-to speed sensor.
This wifi-connected scale will track your weight and related metrics both on the scale display and in Garmin Connect (plus 3rd party apps like TrainingPeaks). It'll also then sync your weight to your watch/bike computer, to ensure accurate calorie data.
The HRM-PRO Plus is Garmin's top-end chest strap. It transmits dual ANT+/Bluetooth Smart, but also transmits Running Dynamics & Running Pace/Distance metrics, stores HR data during a swim, and can be used without a watch for other sports. Also, it can transmit XC Skiing Dynamics as well.
And of course – you can always sign-up to be a DCR Supporter! That gets you an ad-free DCR, access to the DCR Quarantine Corner video series packed with behind the scenes tidbits...and it also makes you awesome. And being awesome is what it’s all about!
Thanks for reading! And as always, feel free to post comments or questions in the comments section below, I’ll be happy to try and answer them as quickly as possible. And lastly, if you felt this review was useful – I always appreciate feedback in the comments below. Thanks!


