Back at CES in January, Magellan announced their entrant into the fitness market – the Switch and Switch Up, two products aimed squarely at triathletes (as well as runners and cyclists). With the products leads of the team moving over from Garmin to Magellan, they carried with them the experience to make a splash with this product on their first version…but could they pull it off?
Like all my reviews, they tend to be pretty in depth (perhaps overly so) – but that’s just my trademark DC Rainmaker way of doing things. Think of them more like reference guides than quick and easy summaries. I try and cover every conceivable thing you might do with the device and then poke at it a bit more. My goal is to leave no stone unturned – both the good and the bad.
Because I want to be transparent about my reviews, this unit was provided by Magellan as a media trial. Once I’m done with it, it heads back to Magellan. Simple as that. Sorta like hiking in wilderness trails – leave only footprints. If you find my review useful, you can use any of the Amazon links from this page to help support future reviews.
Lastly, at the end of the day keep in mind I’m just like any other regular triathlete out there. I write these reviews because I’m inherently a curious person with a technology background (my day job), and thus I try and be as complete as I can. But, if I’ve missed something or if you spot something that doesn’t quite jive – just let me know and I’ll be happy to get it all sorted out. Also, because the technology world constantly changes, I try and go back and update these reviews as new features and functionality are added – or if bugs are fixed.
Note that unless otherwise specifically noted, everything in this review applies to both the regular Switch as well as the Switch Up. There are some differences, which I’ve called out as applicable.
With that, let’s get onto the review!
Unboxing:
Because there are two versions of the Switch (the regular Switch and the Switch Up), I’ll first cover the more advanced bundle (the Switch Up), and then go for a quick rundown of the Switch bundle. Both of the bundles shown here include the heart rate straps. Mmkay?

Here’s the two boxes – with the Switch (the non-quick release one) on the left, and the Switch Up on the right.

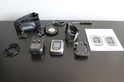
Cracking open the switch box, you’ll find the unit on top, along with the quick release wrist band (left side), and the bike mount kit (right side). This is the bundle with all the mounting goods.

Dumping everything out, you’ve got a small flotilla of parts. In the upper left in the bag is the heart rate strap. Then to the right of that is the USB charging cable. To the right of that is a plastic bag with a small screwdriver. Along the bottom from the left is the rubber bands for the bike mount, then the wall charging block, then the unit itself (Switch Up), followed by the bike mount and finally the manual. Hanging out in the middle of that photo is the wrist mount.


Here’s a closer look at the Magellan heart rate strap. We’ll talk more about it later on, but it’s more or less your standard ANT+ heart rate strap.

Then we’ve got the bike mount kit. Again, we’ll talk more about this in the bike mount section – but the mount is secured to your bike using industrial strength rubber bands, similar to that of other units like the Garmin Edge series.


Next is the ever exciting power block charger. This allows you to plug the USB cable in the bottom and charge the unit. Mine only came with a US adapter clip, but I assume there are other clips when sold in other countries.

And here’s the USB charging clip that plugs into either the power block above, or any functional USB port.

Next up is the quick release wrist strap. This allows you to snap the watch into the wrist strap and wear it like a normal watch.


Here’s the small screwdriver – this is useful if you’d like to remove the quick release plate and simply permanently attach the strap to the watch. This would thin out the watch a little bit and make it appear more like the slightly thinner Switch (non-Up).

And finally – here’s the unit itself:


Now that we’ve covered what’s in the Switch Up bundle, let’s dive into the regular Switch bundle. The easiest way to visibly tell the two watches apart is that the Switch is blue, compared to the switch up being silver.

You’ll notice that this box doesn’t include either the quick release strap nor the bike mount:

Looking inside at the goods, from left to right we’ve got the manual, then the watch itself (attached to a band), then the USB charger, the wall power block and US outlet connector, and finally the heart rate strap itself.

Here’s another look at all the parts:

And, the unit itself:

Looking at the charging cradle, it works the same for both the Switch and the Switch Up. You can see the four small metal prongs (two on each side of the upper half). These in turn connect to little connectors on the back of the watch. I’ve found the charging cradle a bit finicky at times. Once you get it settled and leave it alone – it’s fine. But it’s usually not strong enough to hang there if the wall outlet is too high above the ground.
I wish there was a bit of a clip/snap to it, similar to the actual battery pack or any of the mounts.

With everything unboxed, let’s dive into some quick comparison shots.
(Note: Due to the length of this review, I’ve had to force it to break in RSS feeds since it’s larger than Feedburner allows, just click the Read More link (or title of the post) to read more, sorry!)
Comparison Shots:
I’ve only got so much room on my little rolling pin (my bike rolling pin is too thick for most watches – a poor purchasing decision), so I had to limit the selection to the major units on the market today in the triathlon world.
On the rolling pin this time, from left to right: the Polar RCX5, The Magellan Switch, the Garmin FR910XT, the Garmin FR310XT, and the Timex Global Trainer. Pretty much all the main/current triathlon-focused watches out there. Essentially, units that support some form of multisport mode.

Here’s the same units, this time from the a side profile view. Note the order is flipped however (reversed view).

And, the back clips, to get a better view of the clips as well as the watch bands themselves.

Finally, another view from the front:

Next, I decided to show how it compares to some cycling computers out there – since for the most part the Magellan Switch Up is a very viable competitor to most cycling computers out there (don’t worry, we’ll dive into that more).

From left to right we have: the Garmin Edge 705, the Edge 800, the Timex Cycle Trainer 2.0, Garmin Edge 500, and the Magellan Switch Up

With that, let’s start using it!
Swimming (Openwater):
I’m going to walk through the unit in the same order as a regular triathlon – starting with the swim. Thus far I’ve had the chance to race one event with the Switch Up: The Escape from Alcatraz. Now, I knew going into the event that the unit wasn’t designed to measure distance accurately on your wrist (or stoke information). In many ways, it’s like when the Forerunner 310XT first came out – it lacked any ability for open water swim, though, a semi-accurate update was eventually added for it.
So while I could have easily have just worn it in my swim cap like I generally recommend (for the most accurate distance measurement) – I decided to see what it was like swimming with it on my wrist for the swim portion of the event.
In addition to observing the accuracy of the track, I was also interested in the ‘prettiness’ of the track. Anyone who’s ever strapped a GPS unit on their wrist that wasn’t designed for swimming knows how ugly the GPS tracks can be in the water – often with points off hundreds of yards from reality.
In this case though, the track actually turned out pretty darn well:

The actual course (for those not familiar) drops you off near the island, and then you swim to shore. The line is fairly straight – much like my swim.
However, the distance was off a fair bit. The race puts it at 1.5 Miles, and while my swimming line wasn’t perfect, it was probably in the ballpark of the race distance. The Switch Up measured it at 2.58 miles. Now, note that the Garmin FR910XT I had on my other wrist measured it at 2.27 miles, so it wasn’t like either was super-accurate in this case.
The key extra distance is more noticeable when you zoom in and see all the little back and forths within the map view:

Of more interest to many though is simply that it didn’t fall off.

That’s a semi-common problem for Garmin FR305 and FR310XT owners, though I have heard of two cases where it’s also affected FR910XT owners. In this case, the unit stayed on the entire time. Here’s my exiting transition, with the unit on my right wrist (the FR910XT is on my left wrist).

Which, did prove to be a heck of a challenge come time to remove my wetsuit. In fact, having the Switch Up on made it nearly impossible to remove my wetsuit. See, the blockyness caught my wetsuit and I simply couldn’t get it over the top of it. In fact, I had a burly wetsuit stripper that was trying to pull it off as well – no love. Eventually I just removed the unit off the quick release and was on my way.
As a result, in talking with the Switch team, they recommended simply using the aforementioned swim cap method instead. Both because it’ll give you more accurate distance information – but also because you’ll be able to get your wetsuit off. And finally, it does at least reduce the likelihood of loss due to the rough/violent nature of mass triathlon swim starts.
Swimming (Lap/Pool):
I do want to briefly call out that while the unit does record time related information while indoors – it can’t record either distance or stroke information. The unit does not contain any form of internal accelerometer, which is what most pool lap counters use these days.

Note that one fun thing you can do however if you have say an indoor triathlon, or just want to classify your workouts accordingly, is to create a new sport for indoor swimming. That’s what I did (I called it POOL)– and it then allows the watch to remember the settings for just that sport.

Once in this mode, the unit effectively just becomes a really expensive stopwatch. But, it does at least allow you to download all the data afterwards – including any splits you may have taken.
Cycling:
The Switch and Switch Up both have a cycling mode – in fact, they have a multitude of cycling modes, depending on whether we’re talking road or mountain bike. In order to engage the cycling mode, you’ll switch Activity Profiles:

Once in cycling mode, the unit will now display speed information as MPH or KPH, depending on how you’ve configured it. Note that you can mix and match and have some data fields shown in Statue (US) or in Metric (everyone else).
Within the cycling mode, aside from the key difference of seeing speed as MPH instead of pace, you’ve also got the ability to pair to cycling specific sensors – such as speed/cadence sensors and power meters. I’ll talk about both of those later on though in much more detail.

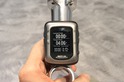
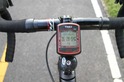
While cycling with the unit, you can select to either leave it on your wrist, or mount it to the bike mount. If you’ve got the regular Switch, you’ll probably leave it on your wrist since it doesn’t come with a quick release system:

But if you’ve got the Switch Up, you’ll probably end up mounting it to your bike via the bike mount, which I talk about in more detail later on.

Regardless of how you mount it though, the data recorded and displayed is largely the same. One area that is different though depending on which model you bought is the altimeter. With the Switch Up, you’ve got a barometric altimeter, whereas with the Switch you have just a GPS based altimeter. The barometric altimeter is generally a bit more accurate. But, see the section later for more detail on the altimeter piece.
While riding, you’ll get to choose from a ton of data fields, but the most common ones are typically speed, distance and the ANT+ data sensors such as heart rate, cadence, and power. But, if you’re doing a fair bit of climbing, you may also choose to add data fields that pertain more to climbing and ascent/descent:

Once you’ve completed your ride, you’ll be able to view it in full detail on Magellan Active. I’ve got a big ole section on that though, so let’s not get ahead of ourselves.
Road Running:
I typically run the most on the road, and thus, over the last two months the majority of my running time has been spent with the Switch and Switch Up out on the tarmac.

While road running you’ve got many of the same common data fields available that were seen in cycling mode, such as distance and pace (instead of speed). These data fields are customizable depending on how you’d like the data displayed.
While running (and cycling for that matter), you can choose to enable features such as Auto Pause or Auto Lap.
Auto Lap means that the unit will automatically demark a split/lap/interval based on a predefined distance – such as every one mile. This is an easy way to have splits for the entire length of your training/race. Personally, I only enable this for long runs, as I prefer to split up my training activities based on the varying intensities within each workout.

Auto Pause is useful when running (or riding) in cities or places with frequent stops. This will automatically pause the watch when you slow below a certain threshold. This is useful for hitting a stoplight, where you don’t have to touch the watch – it’ll simply do it for you.
One issue I have seen though repeatedly (as recently as tonight) is when I first start a run, the unit reports that it’s ready with satellite acquisition, but the first few seconds of the run end up being some distance away. Thus results in a chunk of extra distance being added, which skews my run paces. I’ve interestingly only had this happen in places with buildings nearby, but where I had (in theory) a good satellite lock. You can see it below on the map:

Ultimately, that causes data display like the below – where it shows me running slightly longer than I really do, and thus my pace is skewed a fair bit:

Trail Running:
This marks the first time I’ve actually included a specific trail running component to my product reviews. Which, is likely because this is the first time I’ve spent significant time with a product on legit trails enough to really have a good understanding of its performance in the trees.

In general, the Switch Up performs on par with other GPS units in the trees. In every run I’ve been on, I’ve had at least one, if not two other GPS units with me – and in all cases the units were within a reasonable amount of each other (1-3%). There wasn’t actually a consistent pattern as to one unit being higher or lower (which is actually most often the case with new releases).

The one area I did see issues with though was pre-mature display of satellite notifications. Meaning that over the course of an hour trail run, I might get 5-10 notifications of loss of satellite, even if just for a second. This is an area where the Magellan team has done some work over the past two months to remove these notifications unless the unit loses it for slightly longer (which is what most companies do).

I still get them from time to time though while crossing under slightly longer tunnels/bridges, where I usually don’t from other companies. In the end though, it hasn’t affected distance recorded, since it essentially just estimates between the two points (last known and first picked back up) – which is identical to what every other company does.
Multisport mode:
The Switch Up supports triathlon multisport mode, which enables you to quickly switch from sport to sport, just as you would in a normal triathlon race. As you switch, the data fields associated with each sport switch as well.
To setup multisport mode, you’ll head into the Activity Profiles area of Settings, and create/add sports as required until you build out your event. Meaning, that for a typical triathlon you’d start an openwater swim, then a road bike, and then a road run. If it were a duathlon, you might just have a swim and bike. And so on.
At the bottom after selecting Multi, you’ll have the ability to add and track transitions – which I recommend.

With everything set, you’ll be ready to start your event.
As you finish each leg, you’ll simply tap the little flag button (Lap button) to change to the next sport. As you move to each sport it’ll remind you which sport you’re in, so no worries there. Additionally, each sport you’ve setup you can specify and define the data pages and fields for it, as well as the recording preferences for it.
Once your activity has been completed and you’ve uploaded to Magellan Active, you’ll see the full triathlon event shown:

You’ll notice though that down below are the individual legs (each sport) of the triathlon. Magellan calls these sessions, and then you can open up each of the sessions to get the same detail that you’d get about any full activity. For example, here I click on my bike ride. Note the top left where it says “Session 3”, which is the third chunk in this multisport activity.

You can also see the transition data as well, for example, the famously long run from the swim to the bike at the Escape from Alcatraz event:

In my case, with this particular event, the Switch froze up on me shortly after the main (non-T1/T2) run started – hence why it showed only 355 feet. I was unable to restart the unit during the race (despite trying!), though, at least the data wasn’t lost.
Ultimately, I find the way that Magellan displays the multisport data very clean and a bit easier to read than most other training platforms.
Activity Pacer (and estimated arrival time!):
I really wanted to call out this feature separately, because it’s really just darn cool. At first, you may think to yourself “Oh, I’ve seen this feature on Garmin devices for years”. But just hang with me a second – you’ll see that there’s actually two features here, and it’s the second one what’s unique and cool.
The first part of the activity pacer is not unlike any most virtual partner type features. You first set the distance of your run (training or racing), and the time you’d like to hit it in.

You can do this by specifying the distance + time, or even just specify a distance or time. Or, a specific pace (i.e. 7:30/mile).

Once you’ve done that, and started running, you’ll see a new screen added (assuming you enabled it), that shows you how far ahead or behind you are against your target pace. It also specifies how much distance is left. So far, this is all pretty common in the competitive watch landscape today.

But, it’s this next part that’s unique. In addition to the first page, you also get a second page that tells you your ETA (Estimated Time of Arrival) in actual clock time (as in, 8:34:11PM). And, if you stop, this still keeps on counting. Meaning that if you stop to go to the bathroom, this will let you know that those three minutes mean you’ll be arriving three minutes later.

And, it’s taking your current pace into account.
This is awesome if you’re out on a long ride or run and are trying to get back at a certain time. I’m often against time limits – i.e. – must be back by 8AM – and this is great in that I can judge the impact of stoplights (or stopping for breakfast burritos).
Now, I have seen the Estimated Total Time fluctuating quite a bit, often needlessly. It seems like it’s basing itself on instant pace, which as you’ll see in two sections, is pretty rough. Thankfully, the ETA data field seems much cleaner and smoother, and that’s the piece I actually care about.
Data Fields and customization:
The Switch data fields can be customized far more than any other unit by any other company on the market today, hands down. You can mix and match display formats (for example, showing kilometers and miles on the same data page, and all their various formats). You can create near endless data pages, each with up to 6 pieces of information (data fields) per page. Plus, you can customize those per sport, and create your own customized sports (even with your own names). It’s fairly impressive.
Here’s the full listing of data fields that you can add as you see fit:

Satellite Accuracy and Pace Fluctuations:
Satellite accuracy is the one area I maintain a beef with the Switch on. And, it’s not so much the satellite accuracy per se (usually), but rather the lack of functional instaneous pace. I’ve tested the unit everywhere from wide-open runs with no tree cover in any direction, to city runs, to trail running. In all of those, it faired pretty well with the actual distance displayed compared to other units. As is always the case, one unit is a bit higher than the other, or vice versa – but realistically there’s no saying who is right or wrong (using something like Google Maps or MapMyRun just isn’t accurate enough to draw valid comparisons).
At some point either this summer, or early in the fall, I’ll do another full-scale satellite accuracy tests comparison of units like I usually do. But for now, my observations will have to suffice.
My first issue has been with starts in city/building areas, where the first chunk of the run shows as being off by a bit – perhaps up to a quarter mile, thus skewing my pace and distance for the remainder of the run. In all cases (as recent as tonight here in DC), my unit said it was fully ready with good GPS connectivity, but in reality – it wasn’t:

As I noted elsewhere, of particular concern is the fluctuations seen while using instant-pace as a data field. Essentially, the same problem that some Garmin FR910XT owners saw (or still see) at certain paces, where the pace fluctuates such that even if you’re running in a straight line at exactly 7:30/mile, it shows everything from 6:00/mile to 9:00/mile. In the case of the Garmin, it was a narrower (but still big) range, but in the case of the Switch, it’s quite a wide range. So much so, that’d at present with current firmware the instant pace is entirely useless.
To demonstrate this, I took a small video that shows the pace fluctuations. In this video, I’m running fairly spot-on the same pace (low 7’s) on a relatively straight sidewalk with only an occasional short tree. I’ve added lap average pace to the bottom, which I reset just before starting the video. The instant pace (top) fluctuates between the upper-mid 6’s to the lower 9’s. That’s a lot (oh, and sorry for any shake):
Magellan Switch Pace Fluctuations
In talking with the Magellan team – they have admitted that getting pace smoothing right is a tough nut to crack (something seen by most GPS companies). They are continuing to try and address this, but don’t have a specific timetable for when an update might fix it.
Now, as many people will point out – for most, using lap average may be a better way to pace. Up until last fall I was more of an instant-pace kinda guy, but I’ve slowly transitioned into using Lap Averages instead, and setting them according to my workout sets. If I’m on a long run, I just go with 1-mile auto-laps (meaning, it’ll automatically create and show laps every mile, along with the averages in that lap).
It’s certainly an alternative.
On the accuracy side of things, as noted above – they aren’t too bad beyond the initial satellite lock issues. I do/did see a fair number of dropout issues below trees and bridges, however, that has mostly been resolved with newer firmware updates that reduce the notification alert if the satellite drop is less than a second or so, which is commonplace in the industry and how virtually everyone does it.
Treadmill Running:
The Switch supports use of an ANT+ foot pod to gather pace and distance data while indoors on a treadmill (or simply if you want the GPS unit off while outdoors). At present, Magellan doesn’t make their own ANT+ foot pod, which is fine, because honestly there’s 1,538 ANT+ foot pods on the market today anyway, and they’re all made by the same company in the same factory, just painted with a different logo.
So, all you need to do is pickup any of the ANT+ foot pods. They’re usually around $45-60, and run on a single CR2032 battery (always included). The battery lasts about a year before you swap out the battery. For all the details you’d ever want on foot pods, see this post: Garmin ANT+ Foot Pods- Everything you ever wanted to know

Once you’ve got the foot pod, you’ll want to remember to pair it to the watch. This will enable you to use the foot pod for speed or distance.

One item of note is that as of today there isn’t a calibration option for the foot pod while using the Switch. Most of the other watches do include this, so I’m a bit surprised to see it lacking. I suspect it’s something we’ll eventually see added in the future.
A calibration option would allow you to complete a run test (either on a treadmill with a known distance), or outside with GPS, or on a track, and then calibrate the foot pod to your stride. Typically you’d run about .25 miles to .50 miles – with longer being better.
Bicycle Trainer (indoors):
Similar to using the Switch on a treadmill, the Switch also allows you to use it indoors on a trainer through the use of the ANT+ speed/cadence sensor. The speed/cadence sensor enables you to determine speed and thus distance. Of course, in almost all cases, distance and speed on a trainer are non-meaningful values since resistance is the controller of work. On a trainer I can easily change my speed from 8MPH to 30MPH without actually changing my resistance, by instead just changing my gearing.
So one has to be somewhat careful about how they utilize these numbers in training (note, some trainers that dynamically control resistance, or are wind based tend to be slightly different).
At any rate – when indoors you’ll simply choose to disable the GPS. You’d want to do this to ensure that the device doesn’t try and use the GPS to calculate speed, but rather instead just uses the speed/cadence sensor. Alternatively, you can simply tell it to use the ANT+ sensor as the speed source, over GPS. And, you can also specify which ANT+ sensor type to use instead of GPS (speed sensor or power meter with integrated speed sensor).

While indoors with the GPS off, you’ll notice that once you upload activities to Magellan Active, it won’t show a map, but will still show your relevant speed/distance data.
The ANT+ speed/cadence sensor is similar to the ANT+ foot pod, in that Magellan doesn’t sell one themselves. Though, like the sensor, a million other companies sell rebranded ones – with the vast majority of them coming from the same manufacturing company – just rebranded for each company.
Check out my post: Cadence Sensor- Everything you ever wanted to know for more details on this.
Power Meter Support:
The Switch and Switch Up both support ANT+ power meters, so I wanted to take a moment to cover the depth of power meter support, and the options you’ll have.
A power meter measures the force you exert while pedaling (either directly at the crank, or elsewhere on the bike). These forces are typically displayed to a user as wattage (or watts). See my previous power meter primer post on how power meters work, the different types out there, and which ones I recommend.

Virtually every power meter made today except one (the Polar/Look Keo Power Meter) is ANT+ compatible, and thus, all of them work with the Switch. Before you start collecting data from it, you’ll need to pair it in the ANT+ accessories section. In the below photo, I have it paired with a CycleOps PowerTap (whereas above, paired with a Quarq Cinqo):

Once that’s done, you’ll be able to gather and display power meter information. First though, you do have one setting that allows you to configure whether or not you’d like zeros to be included in your power meter information. Virtually everyone in the power industry agrees that you should include zeros in your data files. By ‘zero’s, I mean that if you coast down a hill and don’t pedal, you’d have a wattage of zero watts recorded. If you selected to exclude zeros, then while coasting you’d have null values, which means it wouldn’t reduce your overall power average.

The same option is also available for cadence (to include zeros or not). In addition, you can also specify while indoors (or outside) whether to use the speed gathered from a hub-based power meter instead of GPS or instead of another speed/cadence sensor (separate settings). A hub based power meter would be the CycleOps PowerTap, while a crank based unit would be something like a Quarq or an SRM.

Here’s a quick look at what it looks like while on the bike:

In addition, you can also set power zones on the unit itself, which can then be used as part of data fields:


Note that the unit will record all data at 1-second recording rates, which is ideal for power meter data. What isn’t as ideal however is the inability to configure a power meter display mode that smooths the data (for display only), such as 3-second or 5-second smoothing, which is pretty common these days. Otherwise, the data is just too jumpy at 1-second mode in my opinion. Hopefully we’ll see a firmware update to have this added (like many other companies have done after release).
After your ride, you’ll be able to display your power information on Magellan Active, which is the web based training program.

Quick Release System (Bike and Run):
The Switch Up features a quick release system that allows you to quickly change from a wrist strap to a bike mount all in a few seconds. Additionally, this same quick release system enables you to connect in the external/extra battery pack (and even stack a battery pack inside either of the other two quick release platforms: bike or run).

In order to mount the watch to the quick release system, you merely orient it correctly (upwards) and then pop it into place. It won’t go in if you go upside-down.

Once in place, to remove it, you’ll go ahead and squeeze the watch itself just near/below the upper bottoms on either side. At the same time, pull up on the unit.

Over the last two months I’ve had ZERO problems with the system bouncing out on bike rides, or falling off during swims or runs.
I have though found it somewhat difficult to pop off at times. Specifically on the bike.

Meaning that I’m somewhat concerned that if I wasn’t more careful, during the bike leg of a bike if I were to not quite have a perfect grip on the button press, I could accidentally rip the entire bike mount kit off the bike. This is because every time I’ve removed the unit from the bike quick release, the quick release has lifted off the bar a bit. Now, this may be because on a triathlon bike the quick release kit isn’t quite as snug as on a road bike bar – but nonetheless, it’s the reality of triathlon.
Overall, the quick release system works, though, I think it’s a bit of a v1 design and could use a little bit of tweaking.
Extra Battery Pack:
One of the biggest challenges for users wanting to run ultra events (ones usually lasting a day or more) with any GPS watch has been battery life. No mainstream GPS watches that I’m aware of today (or heck, even non-mainstream ones) have a removable battery. Thus, when it comes to going longer than the default battery allowance, you had to resort to some pretty creative options, like solar charging, tying a small USB battery pack on the back, etc…
However, the Magellan is the first unit that addresses those concerns head on. The entire lineup (watch, straps, mounts) has been designed with the ability to add an ancillary battery onto the unit as needed. You can thus has a whole flotilla of extra batteries with you as necessary.

The $40 battery pack clips right onto the back of the watch, just as if it were a mount. And in fact, the battery packs becomes the mount. Further, the already existing mount accessories then mount directly onto it. It’s like Legos.
The battery pack is charged using the exact same clip that you charge the watch in. Which means that if you really need to go doubly long on battery, you could use any of the aforementioned solar/USB battery charges to create a bit of a charging loop – always charging a spare battery just in case. Most ultra runners tend to have a CamelBak of some sorts, so this could just slide in there. Here’s one I use, though, in the photo below I have it connected to the watch itself, rather than the battery. But same concept, just swap out the watch.

Note of course that since the battery isn’t invisible, it does add a bit of extra bulk. But for most folks, that tiny bit of extra depth on the watch is definitely better than no data at all.
Night Mode (light):
The Switch includes a backlight function of sorts. I say ‘of sorts’, because it’s not like a normal backlight per say since the background is black, but it does get the job done by making the white lettering more visible:

You can also specify whether the backlight stays on permanently, or for 15 or 30 seconds.
Temperature Sensor (Switch-Up only):
The Switch Up (but not the regular Switch) includes a temperature sensor. This allows you to display the current temperature on the unit as a data field.

Additionally, you can also display data fields regarding other temperature metrics, such as Max Temperature and Average Temperature. And, you can change whether it’s shown in Celsius and Fahrenheit:

This information is recorded for later viewing online as well:

The reason for the temperature sensor primarily comes from being part of the barometric altimeter, hence why units that typically include a barometric altimeter also include the temperature information.
Barometric Altimeter (Switch-Up only):
The Switch Up (but not the regular Switch) includes a barometric altimeter, which enables potentially more accurate elevation information. I say potentially because in most cases using the barometric altimeter will produce more accurate elevation readings over a GPS based altimeter, but it’s not perfect.
Determining whether elevation information is truly accurate is actually incredibly difficult to do. Even with using post-processing elevation correction – the level of potential error is still fairly high (due to the way elevation correction data is gathered). It’s of course much better than GPS elevation measurement, but it’s still not 100%.
That said, I find out and back courses are amongst the easiest way to validate altimeters (barometric or otherwise). Here’s my Escape from Alcatraz bike, from that race. It’s almost a perfect out and back, but there’s a small little loop at the outward (middle) end, hence why it looks just a tiny bit different there. But the rest of the graph does look fairly close to being a mirror image of the first half.

Also note that the summary view displays more information from an elevation perspective. That max negative would likely be higher since it’s speed based, so a simply based on the fact that my max speed on that route was about 37MPH, thus my ability to quickly descend down a mountain makes that value higher than going up a mountain.

Connecting and downloading to your computer:
To upload data, you’ll simply connect your Switch device to your computer using the included USB charging/upload cable:

Once that’s done, you’ll head over to the free Magellan Active site and create an account – it only takes a second.

After logging in, you’ll be able to click an upload button, which triggers an upload dialog that displays data from your unit. One key item to note here is that there is no desktop client to install.

By default, it’ll only select files that haven’t yet been uploaded to Magellan Active, and shows them as ‘New’ along the right side.
After the files have been uploaded you can choose to delete files off the device (I generally wait to delete), as well as download satellite data. The satellite data option is pretty cool and unique to the Switch, which allows you to grab hot fix data to quicken your satellite lookup times while standing around outside waiting to run.
And finally, you’ll see that you can mark them as either private or public.

As an aside, note that once you plug-in your device, it just shows up as a standard USB mass storage device, and the files are all standard .FIT files – meaning you can easily see them and use them in other applications.

With your activity files now uploaded into Magellan Active, let’s dive into the training log a bit.
Magellan Active online training log (included):
Included with the Switch is the ability to use the Magellan Active online training log, which is the primary method for viewing your activities after downloading them to the computer.
Once uploaded per the previous section, you’ll be presented a list of your activities:

From here, you can click on a given activity to view it in more detail. In this case, I’m going to click on a bike ride. I’ve set this particular ride as public, so you can go ahead and poke around it as well.
Once you’ve opened it up, it’ll appear on the main summary page:

From here you can expand out the activity summary to get more details, by clicking “View all stats”:

This was for a ride I did up on Skyline Drive in Shenandoah National Park, which is all climbing and descending (no flats). If you scroll down below the stats, you’ll see the map view, as well as the laps:

In my case, I manually specified these laps, as they corresponded to specific workout portions for that day.
On the graph and map you see above, you can go ahead and expand out that view and get more detail. To do this, you’ll click Maximize View.

On the graph view, I can go ahead and select or deselect which data points I want to view, as well as change the axis to be based on distance or elapsed time. In the below screenshot, I’ve gone ahead and selected to show just HR and speed:

On the mapping front, the maps are Open Source via OSM – which means that they aren’t using Google Maps or Bing Maps (or another provider). In theory, this may be nice, but in reality…I’ll be blunt: It sucks.
For example, there’s no satellite map option – which means if you go to my Escape from Alcatraz Swim, here’s what you see:

See those green sections? that’s not actually land. Instead, that’s park boundaries. So, it looks like Alcatraz is huge, and that I swam over land. Neither are true.

But because I have no way to show satellite data on the site itself, I can’t show you what it really looks like. Instead, I zipped over to Garmin Connect, and used their site to pull up the satellite view of the swim:


Much better!
Finally, for every activity you can also export the data, which is great for situations like this.

And, with a social networking bar, you can let all your friends know about it:

Within the Magellan Active Settings options, you can tweak a view things such as date and metric formats, and make a publically follow-able page. In general, not a ton of options:

Overall, the site is a good first attempt at a training log. Do keep in mind that these are the same guys that built the Garmin Connect site before leaving Garmin – so they do understand what it takes to build a site of that scale. But, it’s also going to simply take time to get through what I suspect is an enormous list of items that still need to be added to make it more competitive with other training logs. A year from now, I think we’ll be talking about an entirely different set of functionality and features.
3rd Party Support:
I started talking with Magellan nearly two years ago when they were first developing a product. At the time, I didn’t know much about what they were doing – but they were primarily just asking my feedback on what you wanted. One item I really pressed on – and they completely agreed with – was to use an existing file format standard. Thankfully, they did. They selected to use the .FIT file format, which is the same format that the Garmin devices use. This means that as far as I’ve seen thus far – if it works with the newer Garmin units (anything in the last two years), it’ll work with the Switch.
Personally, I’ve tried Training Peaks, Sport Tracks and heck, even Garmin Connect – they all work. Though, in Sport Tracks it seems to only import the first lap. Here’s a simple Switch Up .FIT file uploaded successfully to Garmin Connect (which, gets you Google/Bing satellite maps):

ANT+ Compatible Accessories:
The Switch Up supports all of the major triathlon focused ANT+ accessories, which means that it can easily go indoors or out from a recording standpoint. Here’s a rundown of the types it supports:
ANT+ Heart Rate Strap:
The Switch Up includes a heart rate strap in some of the bundles – but if you already have a Garmin or Timex unit, then you may already have an ANT+ heart rate strap. In which case, there’s no need to pay extra for a new one (unless you’ve somehow killed yours). All ANT+ heart rate straps work with all ANT+ devices that support the ANT+ heart rate strap profile..which is pretty much everyone (Magellan included).

While running or riding, or even just hanging out at the gym, the heart rate strap will transmit your heart rate information to the watch, which then displays it in either BPM (beats per minute), or one of the many other heart rate metrics that it can display (such as % of max).
Ultimately, this information is recorded and can be recalled later on while online.
If you decided to purchase the ANT+ heart rate strap later, you can always do so. Most ANT+ straps cost between $30 and $45, depending on tidal fluctuations and moon phases. Ultimately, they’re all pretty much made in the same factory in Asia, so they tend to all be roughly the same. Some of the newer straps, like the one that’s included in the Switch/Switch Up – do tend to have less spikes or heart rate dropouts.
In fact, I never saw any heart rate spikes or dropouts during my time with the Magellan branded Strap (even using it on other units).
ANT+ Speed/Cadence Sensor:
The Switch Up is compatible with any ANT+ Speed/Cadence combo sensor, as well as any ANT+ Speed-only or ANT+ Cadence-only sensor. This is an important distinction, since some units out there only some the combo sensor.
At this time Magellan isn’t making their own ANT+ speed/cadence sensor – which is fine, since they’re all just rebranded versions of the same sensors from the same factory. Ultimately, the best ANT+ speed/cadence sensor out there tends to simply be the good old trusty Garmin GSC-10, which has been around for years.

I’ve been using the new quick release versions from Bontrager, Motorola and others, and have found that sometimes some units are a bit finicky when it comes to positioning, compared to the GSC-10.
The GSC-10 (or any ANT+ speed/cadence sensor) will give you both speed information (while indoors or outdoors if you choose), as well as cadence information.
Note that you can indeed select to choose whether you use the speed sensor or GPS for outdoor recording, the default is GPS. Also, if you have a power meter that includes speed (such as the CycleOps PowerTap), then you can also choose which one to use for speed while indoors. Same goes for cadence selection:

Also, like the heart rate information, this is all recorded and displayed later on in the Magellan Active site.
As noted, Magellan doesn’t make an ANT+ speed/cadence sensor themselves, so I recommend picking up the $35 GSC-10. You can also check out my bike post on all the other speed/cadence sensors out there, including the Bontrager Duotrap system for compatible Trek bikes (really cool), which is different than the Bontrager quick release style one.
ANT+ Running Foot pod:
I covered this a bit in the indoor treadmill section – but in short, the Switch supports the ANT+ foot pod. This allows you to gather not only distance and pace information while indoors, but also gather running cadence information (both indoors and outdoors).

Further, you can select whether to use GPS or the foot pod while running (outdoors).
Once you’ve uploaded to your computer, you’ll be able to see pace/distance from indoor workouts, as well as cadence from any workout.
Like the ANT+ Speed/Cadence sensor, Magellan didn’t re-invent the wheel and add yet another identical foot pod sensor onto the market, thus, if you want one, you’ll need to pickup one from Garmin, Timex or another company out there. All speed/cadence sensors on the market today are made directly by Dynastream (subsidiary of Garmin), and then just rebranded for various companies. In other words, buy whatever is cheapest that day. Here’s link to the Garmin one, which is the cheapest and smallest.

One minor challenge is that at this time you can’t actually calibrate the ANT+ foot pod, which is fairly common – so that might mean that your pace/distance isn’t terribly accurate. Hopefully that’ll change in the future.
Also, see this post: Garmin ANT+ Foot Pods- Everything you ever wanted to know
ANT+ Power Meters:
Just prior to this ANT+ Accessories section, I dove pretty deep on power meters, so by now you know that they are definitely compatible. See that earlier section for all the detail.
Market Comparisons and Chart:
Here’s the mother of all comparison charts – of all modern multisport GPS units currently being made and on the market today. Note, you’ll definitely want to click on it to zoom in:
| Function/Feature | Magellan Switch & Switch Up | Polar Ignite 3 | Garmin Forerunner 55 | Polar Ignite 2 | Polar Unite | ||||||||||||||||||||||||||||||
|---|---|---|---|---|---|---|---|---|---|---|---|---|---|---|---|---|---|---|---|---|---|---|---|---|---|---|---|---|---|---|---|---|---|---|---|
| Copyright DC Rainmaker - Updated March 24th, 2024 @ 12:36 pm New Window | |||||||||||||||||||||||||||||||||||
| Price | $129-149 | $329 | $199 | $229 | $149 | ||||||||||||||||||||||||||||||
| Product Announcement Date | Jan 8, 2012 | Nov 8th, 2022 | June 2nd, 2021 | Mar 24th, 2021 | June 30th, 2020 | ||||||||||||||||||||||||||||||
| Actual Availability/Shipping Date | Feb 8, 2012 | Nov 8th, 2022 | June 2nd, 2021 | Mar 2021 | July 2020 | ||||||||||||||||||||||||||||||
| GPS Recording Functionality | Yes | Yes | Yes | Yes | Only via Phone Connected GPS | ||||||||||||||||||||||||||||||
| Data Transfer | USB | USB, BLUETOOTH SMART | USB, Bluetooth Smart | USB, BLUETOOTH SMART | USB, BLUETOOTH SMART | ||||||||||||||||||||||||||||||
| Waterproofing | 50 Meters | Yes - 30m | 50 meters | Yes - 30m | Yes - 30m | ||||||||||||||||||||||||||||||
| Dive/Snorkel Feature | No | ||||||||||||||||||||||||||||||||||
| Battery Life (GPS) | 8 Hours | Up to 30 hours | 20 hours | Up to 20 hours | Up to 50hrs with phone GPS (4 days standby) | ||||||||||||||||||||||||||||||
| Solar Charging | No | ||||||||||||||||||||||||||||||||||
| Recording Interval | 1-second | 1s | 1s/Smart | 1s | 1s | ||||||||||||||||||||||||||||||
| Dual-Frequency GNSS | Yes | ||||||||||||||||||||||||||||||||||
| Alerts | Audio/Visual; Vibrate for Up | Vibrate/Visual | Sound/Visual/Vibrate | Vibrate/Visual | Vibrate/Visual | ||||||||||||||||||||||||||||||
| Display Type | AMOLED | ||||||||||||||||||||||||||||||||||
| Backlight Greatness | Good | Great | Great | Great | Great | ||||||||||||||||||||||||||||||
| Ability to download custom apps to unit/device | No | No | Yes (all Connect IQ Apps) | No | No | ||||||||||||||||||||||||||||||
| Acts as daily activity monitor (steps, etc...) | No | Yes | Yes | Yes | Yes | Voice Integration | Magellan Switch & Switch Up | Polar Ignite 3 | Garmin Forerunner 55 | Polar Ignite 2 | Polar Unite | ||||||||||||||||||||||||
| Has Mic/Speaker | No | ||||||||||||||||||||||||||||||||||
| Can make/receive calls | No | ||||||||||||||||||||||||||||||||||
| Voice Assistant | No | Music | Magellan Switch & Switch Up | Polar Ignite 3 | Garmin Forerunner 55 | Polar Ignite 2 | Polar Unite | ||||||||||||||||||||||||||||
| Can control phone music | Yes | Yes | Yes | No | |||||||||||||||||||||||||||||||
| Has music storage and playback | No | No | No | No | |||||||||||||||||||||||||||||||
| Streaming Services | No | No | No | No | Payments | Magellan Switch & Switch Up | Polar Ignite 3 | Garmin Forerunner 55 | Polar Ignite 2 | Polar Unite | |||||||||||||||||||||||||
| Contactless-NFC Payments | No | No | No | No | Connectivity | Magellan Switch & Switch Up | Polar Ignite 3 | Garmin Forerunner 55 | Polar Ignite 2 | Polar Unite | |||||||||||||||||||||||||
| Bluetooth Smart to Phone Uploading | No | Yes | Yes | Yes | Yes | ||||||||||||||||||||||||||||||
| Phone Notifications to unit (i.e. texts/calls/etc...) | No | Yes | Yes | Yes | Yes | ||||||||||||||||||||||||||||||
| Live Tracking (streaming location to website) | No | No | Yes | No | No | ||||||||||||||||||||||||||||||
| Group tracking | No | No | No | No | |||||||||||||||||||||||||||||||
| Emergency/SOS Message Notification (from watch to contacts) | No | No | Yes (via phone) | No | No | ||||||||||||||||||||||||||||||
| Built-in cellular chip (no phone required) | No | No | No | No | No | Cycling | Magellan Switch & Switch Up | Polar Ignite 3 | Garmin Forerunner 55 | Polar Ignite 2 | Polar Unite | ||||||||||||||||||||||||
| Designed for cycling | Yes | Yes | Yes | Yes | Yes | ||||||||||||||||||||||||||||||
| Power Meter Capable | Yes | No | No | No | No | ||||||||||||||||||||||||||||||
| Power Meter Configuration/Calibration Options | Yes | N/A | N/A | N/A | N/A | ||||||||||||||||||||||||||||||
| Power Meter TSS/NP/IF | No | N/A | N/A | N/A | N/A | ||||||||||||||||||||||||||||||
| Speed/Cadence Sensor Capable | Yes | No | Yes | No | No | ||||||||||||||||||||||||||||||
| Strava segments live on device | No | No | No | No | |||||||||||||||||||||||||||||||
| Crash detection | No | Yes | No | No | Running | Magellan Switch & Switch Up | Polar Ignite 3 | Garmin Forerunner 55 | Polar Ignite 2 | Polar Unite | |||||||||||||||||||||||||
| Designed for running | Yes | Yes | Yes | Yes | Yes | ||||||||||||||||||||||||||||||
| Footpod Capable (For treadmills) | Yes | No | YES (ALSO HAS INTERNAL ACCELEROMETER) | No | No (but has accelerometer for indoor running) | ||||||||||||||||||||||||||||||
| Running Dynamics (vertical oscillation, ground contact time, etc...) | No | No | No | No | No | ||||||||||||||||||||||||||||||
| Running Power | No | No | No | No | |||||||||||||||||||||||||||||||
| VO2Max Estimation | No | Yes | Yes | Yes | Yes | ||||||||||||||||||||||||||||||
| Race Predictor | No | No | Yes | No | No | ||||||||||||||||||||||||||||||
| Recovery Advisor | No | No | Yes | No | No | ||||||||||||||||||||||||||||||
| Run/Walk Mode | No | No | Yes | No | No | ||||||||||||||||||||||||||||||
| Track Recognition Mode | No | Yes | No | Swimming | Magellan Switch & Switch Up | Polar Ignite 3 | Garmin Forerunner 55 | Polar Ignite 2 | Polar Unite | ||||||||||||||||||||||||||
| Designed for swimming | Basic support | Yes | Yes | Yes | Sorta (waterproof but HR only tracking) | ||||||||||||||||||||||||||||||
| Openwater swimming mode | No (Swimcap only) | Yes | N/A | Yes | No | ||||||||||||||||||||||||||||||
| Lap/Indoor Distance Tracking | N/A | Yes | Yes | Yes | No | ||||||||||||||||||||||||||||||
| Record HR underwater | No | Yes | Yes | Yes | Yes | ||||||||||||||||||||||||||||||
| Openwater Metrics (Stroke/etc.) | N/A | Yes | N/A | Yes | No | ||||||||||||||||||||||||||||||
| Indoor Metrics (Stroke/etc.) | N/A | Yes | Yes | Yes | No | ||||||||||||||||||||||||||||||
| Indoor Drill Mode | N/A | No | No | No | |||||||||||||||||||||||||||||||
| Indoor auto-pause feature | N/A | Yes | Yes | No | |||||||||||||||||||||||||||||||
| Change pool size | N/A | Yes | Yes | Yes | No | ||||||||||||||||||||||||||||||
| Indoor Min/Max Pool Lengths | N/A | 20M/Y to 250 m/y | 20M/Y to 250 m/y | N/A | |||||||||||||||||||||||||||||||
| Ability to customize data fields | N/A | Yes | Yes | Yes | Yes | ||||||||||||||||||||||||||||||
| Captures per length data - indoors | N/A | Yes | Yes | Yes | No | Triathlon | Magellan Switch & Switch Up | Polar Ignite 3 | Garmin Forerunner 55 | Polar Ignite 2 | Polar Unite | ||||||||||||||||||||||||
| Designed for triathlon | Yes | No | No | No | No | ||||||||||||||||||||||||||||||
| Multisport mode | Yes | No | No | No | No | Workouts | Magellan Switch & Switch Up | Polar Ignite 3 | Garmin Forerunner 55 | Polar Ignite 2 | Polar Unite | ||||||||||||||||||||||||
| Create/Follow custom workouts | No | Yes | Yes | Yes | Yes | ||||||||||||||||||||||||||||||
| On-unit interval Feature | No | Sorta (offers structured workouts) | Yes | Sorta (offers structured workouts) | Sorta (offers structured workouts) | ||||||||||||||||||||||||||||||
| Training Calendar Functionality | No | Has daily suggested workouts | Yes | Has daily suggested workouts | Sorta (offers daily workouts) | Functions | Magellan Switch & Switch Up | Polar Ignite 3 | Garmin Forerunner 55 | Polar Ignite 2 | Polar Unite | ||||||||||||||||||||||||
| Auto Start/Stop | Yes | No | Yes | ||||||||||||||||||||||||||||||||
| Virtual Partner Feature | Yes | No (but can give out of zone information) | Virtual Pacer | No (but can give out of zone information) | No (but can give out of zone information) | ||||||||||||||||||||||||||||||
| Virtual Racer Feature | Yes | Yes (Race Pace) | No | No | No | ||||||||||||||||||||||||||||||
| Records PR's - Personal Records (diff than history) | No | No | Yes | No | No | ||||||||||||||||||||||||||||||
| Tidal Tables (Tide Information) | No | No | No | No | No | ||||||||||||||||||||||||||||||
| Weather Display (live data) | No | Yes | Yes | Yes | No | Navigate | Magellan Switch & Switch Up | Polar Ignite 3 | Garmin Forerunner 55 | Polar Ignite 2 | Polar Unite | ||||||||||||||||||||||||
| Follow GPS Track (Courses/Waypoints) | Yes | No | No | No | No | ||||||||||||||||||||||||||||||
| Markers/Waypoint Direction | Yes | No | No | No | No | ||||||||||||||||||||||||||||||
| Routable/Visual Maps (like car GPS) | No | No | No | No | No | ||||||||||||||||||||||||||||||
| Back to start | Yes | No | No | No | No | ||||||||||||||||||||||||||||||
| Impromptu Round Trip Route Creation | No | No | No | No | No | ||||||||||||||||||||||||||||||
| Download courses/routes from phone to unit | No | No | No | No | No | Sensors | Magellan Switch & Switch Up | Polar Ignite 3 | Garmin Forerunner 55 | Polar Ignite 2 | Polar Unite | ||||||||||||||||||||||||
| Altimeter Type | GPS, Barometric for Up | GPS | No | GPS | None | ||||||||||||||||||||||||||||||
| Compass Type | N/A | N/A | None | N/A | N/A | ||||||||||||||||||||||||||||||
| Optical Heart Rate Sensor internally | Yes | Yes | Yes | Yes | |||||||||||||||||||||||||||||||
| SpO2 (aka Pulse Oximetry) | No | No | No | No | |||||||||||||||||||||||||||||||
| ECG Functionality | NO | No | NO | ||||||||||||||||||||||||||||||||
| Heart Rate Strap Compatible | Yes | Yes | Yes | Yes | Yes | ||||||||||||||||||||||||||||||
| ANT+ Heart Rate Strap Capable | Yes | No | Yes | No | No | ||||||||||||||||||||||||||||||
| ANT+ Speed/Cadence Capable | Yes | No | Yes | No | No | ||||||||||||||||||||||||||||||
| ANT+ Footpod Capable | Yes | No | Yes | No | No | ||||||||||||||||||||||||||||||
| ANT+ Power Meter Capable | Yes | No | No | No | No | ||||||||||||||||||||||||||||||
| ANT+ Lighting Control | No | No | No | No | |||||||||||||||||||||||||||||||
| ANT+ Bike Radar Integration | No | No | No | No | |||||||||||||||||||||||||||||||
| ANT+ Trainer Control (FE-C) | No | No | No | No | |||||||||||||||||||||||||||||||
| ANT+ Remote Control | No | No | No | No | No | ||||||||||||||||||||||||||||||
| ANT+ eBike Compatibility | No | No | No | No | No | ||||||||||||||||||||||||||||||
| ANT+ Gear Shifting (i.e. SRAM ETAP) | No | No | No | No | |||||||||||||||||||||||||||||||
| Shimano Di2 Shifting | No | No | No | No | |||||||||||||||||||||||||||||||
| Bluetooth Smart HR Strap Capable | No | Yes | No | Yes | Yes | ||||||||||||||||||||||||||||||
| Bluetooth Smart Speed/Cadence Capable | No | No | No | No | No | ||||||||||||||||||||||||||||||
| Bluetooth Smart Footpod Capable | No | No | No | No | No | ||||||||||||||||||||||||||||||
| Bluetooth Smart Power Meter Capable | No | No | No | No | No | ||||||||||||||||||||||||||||||
| Temp Recording (internal sensor) | Up Only | No | No | No | No | ||||||||||||||||||||||||||||||
| Temp Recording (external sensor) | No | No | No | No | No | Software | Magellan Switch & Switch Up | Polar Ignite 3 | Garmin Forerunner 55 | Polar Ignite 2 | Polar Unite | ||||||||||||||||||||||||
| PC Application | None | Polar Flowsync - Windows/Mac | Garmin Express (PC/Mac) | Polar Flowsync - Windows/Mac | Polar Flowsync - Windows/Mac | ||||||||||||||||||||||||||||||
| Web Application | Magellen Active | Polar Flow | Garmin Connect | Polar Flow | Polar Flow | ||||||||||||||||||||||||||||||
| Phone App | None | iOS/Android | iOS/Android | iOS/Android | iOS/Android | ||||||||||||||||||||||||||||||
| Ability to Export Settings | No | No | No | No | No | Purchase | Magellan Switch & Switch Up | Polar Ignite 3 | Garmin Forerunner 55 | Polar Ignite 2 | Polar Unite | ||||||||||||||||||||||||
| Amazon | Link | Link | Link | Link | Link | ||||||||||||||||||||||||||||||
| Backcountry.com | Link | ||||||||||||||||||||||||||||||||||
| REI | Link | DCRainmaker | Magellan Switch & Switch Up | Polar Ignite 3 | Garmin Forerunner 55 | Polar Ignite 2 | Polar Unite | ||||||||||||||||||||||||||||
| Review Link | Link | Link | Link | Link | Link | ||||||||||||||||||||||||||||||
Summary:
Overall, I’ve found the Switch to be a good first entrant into the market. It’s priced a bit lower than the top end Garmin units in the market, and thus it’s lower price reflects the reality from a feature standpoint. It’s up to each individual person to decide if the feature differences are important to them, or if the cash is important to them.
Here’s a quick pros and cons table, highlighting the noteworthy areas:
Pros:
– Easily allows you to record your activities
– Less expensive than comparable Garmin units
– Extra battery pack awesome for ultra uses
– Unit works well for trail running, ultras
– Uses standard .FIT file format – making it compatible with most industry software training logs
– Works with ANT+ accessories
Cons:
– Satellite and instant pace issues not yet addressed
– No workout/interval creation
– Can’t be used as day watch (but many other competitive units can’t either)
– Power meter smoothing isn’t available
– Online mapping is pretty ugly
There are two base models of the Switch, the regular Switch and the Switch Up. The regular Switch starts at $229, whereas the Switch Up starts at $299. You can add $50 to both to get the heart rate strap included.
Ultimately, I think many of the cons can and will be addressed in time with firmware updates for the unit, and software on the website will undoubtedly be updated as well in time. I think that if we were to fast forward to later this fall, we may have a much different product than today. Overall, I’m excited about the direction the product is going, and the competition it can and will likely offer in the next 6-12 months.
Found this review useful? Here’s the super easy no-pain way you can help support future reviews! Read on…
Hopefully you found this review useful. At the end of the day, I’m an athlete just like you looking for the most detail possible on a new purchase – so my review is written from the standpoint of how I used the device.The reviews generally take a lot of hours to put together, so it’s a fair bit of work (and labor of love). As you probably noticed by looking below, I also take time to answer all the questions posted in the comments – and there’s quite a bit of detail in there as well. If you found this review helpful in your purchasing decision, you can support future reviews like this by using any of the Amazon links. If you’re overseas, I’ve got links to all of the major individual country Amazon stores on the sidebar towards the top.
Thanks for reading! And as always, feel free to post comments or questions in the comments section below, I’ll be happy to try and answer them as quickly as possible. Further, you can always e-mail me at the address on the sidebar. And lastly, if you felt this review was useful – I always appreciate feedback in the comments below. Thanks!
Finally, I’ve written up a ton of helpful guides around using most of the major fitness devices, which you may find useful. These guides are all listed on this page here.