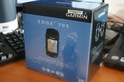
When the Garmin Edge 500 was first announced earlier this fall at Interbike, the message around its purpose in life was clear: A full featured GPS based cycling computer that’s lean and mean, aimed at keeping a low profile on the bike for high profile races. Garmin’s made numerous mentions to the fact that much of this cycling computer was based on feedback directly from Team Garmin, the professional cycling team that Garmin sponsors for headliner events like the Tour de France. While in the past you would see the Edge 705 on their handlebars in races, it was clear that many on the team (as well as many others) wanted a much smaller bike computer. And thus…the Edge 500.
Like all my reviews, they tend to be pretty in depth (perhaps overly so) – but that’s just my trademark DC Rainmaker way of doing things. Think of them more like reference guides than quick and easy summaries. I try and cover every conceivable thing you might do with the device and then poke at it a bit more. My goal is to leave no stone unturned – both the good and the bad.
Because I want to be transparent about my reviews, as I mentioned when I first got the device – Garmin sent me this Edge 500 for a period of 60 days as a trial unit. Once that period has elapsed, I send the whole messed up box back to the folks in Kansas. Simple as that. Sorta like hiking in wilderness trails – leave only footprints. If you find my review useful, you can use any of the Clever Training or Amazon links from this page to help support future reviews.
Lastly, at the end of the day keep in mind I’m just like any other regular triathlete out there. I write these reviews because I’m inherently a curious person with a technology background (my day job), and thus I try and be as complete as I can. But, if I’ve missed something or if you spot something that doesn’t quite jive – just let me know and I’ll be happy to get it all sorted out. Also, because the technology world constantly changes, I try and go back and update these reviews as new features and functionality are added – or if bugs are fixed.
While Garmin Edge 500 is the latest and most advanced GPS cycling computer available, how does it stand up to real world pounding? For that…onto the review…
Packaging/Unboxing:
The unit arrived in a self contained box about the same size as the Garmin Forerunner 310XT box. Looking at the little device you may wonder why such a big box was required.
Well, once you get it all out on the table, it becomes a bit more clear. Santa’s elves do a fine job of packing in all the stuff. I’ve since tried to repack it all back together again…and I’ve failed miserably – when this thing goes back to Garmin, it’s doing so in a grocery bag from Safeway.
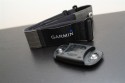
After removing approximately 26 yards of plastic baggies, I finally got down to the real goods:
If you differentiate out the parts into little groups, they are divided as such:
The power supply group: This group contains a typical USB wall charger, with three different power adapters. This means you can hop across the pond and still get the Garmin hook-up. Of course, the bonus to these wall chargers is that you can charge any USB device – such as an iPod, Zune, and even some cell phones. And you can simply take the USB cable and plug it into your computer as a charging method as well.
Next up is the HR monitor strap: We’ll get into the HR strap a bit more later in the accessories section. But the key thing to note here is that Garmin decided to include the old-school style HR strap and not the new premium HR strap. Personally I think this is a bit lame. Also, keep in mind that if you buy the cheaper edition ($100 cheaper) without a HR strap and cadence/speed sensor – then you won’t have any HR strap in your box.
The Cadence and Speed sensor group: Many cyclists use cadence (which is how many pedal revolutions you do in a minute) to cycle more efficiently. For example, you may try and maintain a high cadence to save your legs on longer journeys. Included within the box is a cadence attachment and wheel sensor that goes on your wheel. Again, we’ll talk about this in more detail later on in the accessories section. Do note however that like the HR strap, if you buy the cheaper version of the Edge 500, this won’t be in the box.
The mount stuffs: This massive pile of rubber bands and rubber mounts is how the Edge 500 connects to your bike. Now – here’s the REALLY cool part – they include TWO bike mounts. Yes folks – TWO! One for your big wheels, and one for your little tricycle. As for the beginnings of a well sized rubber band ball, we’ll talk about that in a second. Oh, and just be clear, you only use two bands per mount – they give you a lot in case you need to start a rubber band fight.
Paper and CD junk: It’s one thing to include a paper manual – that makes sense. And it’s another thing to include a CD with stuff on it. That also makes sense. But what doesn’t make sense is including a CD with no actual software on it (just the PDF manual). Just a CD of the manual. Especially given you’ll likely want to download Garmin Training Center (or something) to view the data. Sure we have Garmin Connect, but given you can’t create workouts with Garmin Connect – you need GTC . Thus, it strikes me as odd they didn’t include it. Anyway…
(Update August 2011: Garmin Connect added the ability to create workouts!)
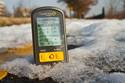
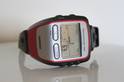
Finally…the goods – the Edge 500: And the moment you’ve all been waiting for – the actual unit itself. We’ll go into detail on that in a second.
Weight & Size:
By far the biggest draw of the Edge 500 over other Garmin Edge computers is its size. According to the manual it weights in at just 2oz.
But – is that accurate? Let’s see…time to break out my trusty kitchen scale.
Good news – it’s damn accurate. Now, it may be hard for most of us to figure out what two ounces actually is. Turns out, it’s slightly less than a standard ‘Large’ egg.
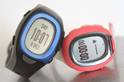
And just for comparison – what does the Edge 705 weigh in at? (3.85oz…or an egg and a half).
Now how about size? Well, again – we return to the egg:
How does it compare spatially to the Edge 705? Here’s a few shots:
And then what if you stack them up against all the other current Garmins out there? Well, it’s not as small when you stick it next to the Forerunner 310XT – in fact, it’s actually a hair bit larger.
And finally – what about size compared to a standard cheap old $25 bike computer from your nearby bike store?
So, from a size perspective, it pretty much delivers on the super small form factor. Though, it’s really not much different than the 310XT when you remove the wrist strap (as you would using the quick release kit for a bike).
Connecting it to your bike:
When you empty out the contents of your Edge 500 box, the most striking thing will be that a small army of rubber bands will come parading out towards you. The potential to start shooting them at your significant other is high – but that’s not actually the purpose for them.
See, the new Edge 500 uses a quick release quarter-turn mount system – similar to the Garmin 310XT in fact. The exception is that instead of using zip-ties to connect it to your bike, you instead use two industrial strength rubber bands. I believe the goal here is two fold – one being that there were some complaints that the old Edge 705 mount system was prone to having the computer pop-off mid-ride, so by using rubber bands you afford the system a bit of flex. Secondly, using rubber bands means it takes about 5 seconds to transfer it to a different bike. Which is kinda cool. Especially when you consider that many folks buying the Edge 500 probably have a small flotilla of bikes. I was curious though as to why Garmin made the switch, and here’s what they had to say:
“The design engineers determined that the quarter-turn mount was easier to engage and had less parts than the older Edge mount. This meant that there were less items to potentially have problems. The band method allows a user to switch the mounts between bicycles if necessary as they would not have to clip the zip ties. So these items contributed to using a new mount system.”
So, back to the rubber bands…you get 14 of them, in two sizes – small and large. I found the small ones work best on most handlebars, whereas the larger ones work best on places like stems and even the bike frame itself.
Then you’ve got the two mounts themselves. The mounts are simply plastic and a removable rubber backing that’s designed to form to the bar it’s attached to.
As noted the mounts use a quarter-turn system to remove the device. This means there’s no more popping off if you hit a big pot hole (or go mountain biking). This is the same mount system used within the Garmin Forerunner 310XT system – though it seems that they loosened the resistance a touch to make it cleaner to pop-off.
(The Edge 500 mount parts are on your left, the 310XT quick release kits are on your right).
Here’s a super-short video I put together showing you how it clips in and out:
And, the really cool thing is that these mounts are fully interchangeable with the 310XT. So if you already have one of those on your bike, you can easily swap this into that spot. Or – interestingly, you can actually use the Garmin Forerunner 310XT quick release strap to run with the thing. Though, it won’t display pace as ‘Minutes/Mile’, but rather MPH/KPM. So not entirely ideal – but functional in a pinch if you’re primarily a cyclist and want to simply run every once in a while with it.
As I mentioned earlier – one last cool thing is you get TWO bike mounts in the package. So you can arm two of your bikes right out of the box.
Let’s get them hooked onto some bikes. First up – the road bike…
Road bike: In this case I first used the main handlebar area, and used two smaller rubber bands to hook it on:
I then decided to try the stem as well:
No issues in either location.
Triathlon Bike:
Next up was my tri bike. First was the obvious stem location – pretty cut and dry:
Then I tried up on the aero bars. Of course, the primary issues with this is that usually you have some sort of aero bottle there for hydration:
I then stuck it off on the main handlebars, off to the side:
And finally, for fun – I placed it down on the frame itself:
Mountain Bike:
Last up was my trusty mountain bike. It (the bike) may not be pretty – but it’s functional. I first put it up on the handlebars trying to use the small bands, but ultimately decided on the larger bands:
This worked pretty well, and without any issues – so I simply left it there.
As you can see, the mount system is much improved over past systems – though I do hold judgment on the whole rubber band thing long term. I’m curious how they will hold up to constant pounding and weather such as dry heat. The other bit of good news here is that I’ve found it works basically just fine with just a single band – so if you lose it mid-ride, you aren’t hosed (kinda like modern jetliners, they can still fly on one engine). Also, they give you a crap-ton of them. So you don’t have to pay some absurd price that many companies charge you for tiny parts. But if you do manage to lose them all, a whole bag of 14 of them is only about $10 – including two extra mounts.
Functionality and Features:
GPS Performance:
Given that most folks are familiar with GPS-based sports devices and how they work, I’ll keep this section quick and simple. The Edge 500 has a tiny GPS receiver in it which allows it to both display location information, as well as record information about where you’ve been. This enables it to determine things like speed and distance without any additional hardware required (such as a speed sensor on the wheel).
Once you’ve done an activity it can produce pretty cool maps, such as the below:
One interesting new feature of the Edge 500 is its improved GPS receiver which allows for quicker acquisition (I’ve found it picks up in half the time of the Edge 705, which I thought was already pretty darn quick) – but it also uses new and improved software logic to remember last known locations and satellite fixes – further increasing the speed of readiness.
Courses:
One pretty cool feature that I used a fair bit this past fall on the Edge 705 (a cousin to the Edge 500) is the ‘Course’ functionality. This feature allows you to pre-create a course (kinda like a map, but with details like elevation in it), and then download it to your Edge 500 for ‘riding’. When you ride the course it will tell you if you’re off course, as well as the upcoming terrain.
Finally, it will also tell you how far until the end of the course. I’ve used this function on some pretty long rides at about 120 miles, and it works fairly well once you get the hang of it. The reason it’s slightly different than your average car GPS is that it uses a breadcrumb type trail system of little points, and you’re simply connecting the dots. So unlike the Edge 705, it won’t tell you ‘Turn right on Main Street’, but it will show you a map, compass and direction of travel.
Barometric Altimeter (Elevation sensor):
If you’ve ever used any of the Forerunner series of watches (305/310/405/etc…) you’ve probably wondered why the elevation data is always a bit questionable. That’s because that series of watches uses GPS to determine elevation – which is not a true altimeter based on barometric pressure. While GPS-based altimeters used in aviation and military applications are far more accurate – those used in consumer applications tend to be sketchy.
The good news here is that the Edge 500 (like the Edge 705) uses a barometric altimeter instead, so the elevation readings are generally very very accurate. This data is recorded within every track (activity), and presented in virtually all sports applications out there:
(A screenshot in Garmin Connect – now interestingly in the above, it took the device a bit of time to adjust to the correct elevation, as you’ll note that it shows me at 120 below sea level. I’m actually at about 60-80ft above sea level. You can see the barometric altimeter in effect adjusting to the outside barometric pressure – hence the change in altitude.)
A new feature added is the ability to set known altitude location points. For example, if I knew the altitude of my house, I could set a elevation point for this coordinate, which the Edge 500 can use as a basis for determining other elevations.
One tiny word of warning…the little holes on the back of the device are critical to accurate elevation data. If those get clogged, covered or otherwise having airflow blocked, elevation data will be skewed. I learned this lesson when I tried to reduce the volume level of the alerts on the Edge 705 this past fall via electrical tape, and the elevation data came out all whacky.
Thermometer (Temperature sensor):
One feature not previously found on either the Edge or Forerunner lines but now present in the Edge 500 is its thermometer. You can add the temperature data field to display the outside temperature. Now, in the manual it warns you that this thermometer isn’t like the instant-read ones you stick in your turkey to check if it’s done.
This one contemplates life a bit while adjusting to temperature. When I first took it outside mountain biking I noticed that it never really got to the correct temperature (just above freezing) and that it took a heck of a long time to settle down. So I mentally marked this to do a bit more testing a few days later when I was in a blizzard in Nebraska. What better place to check how it handles extreme temps? My first test was simply leaving it outside while I went and did some errands at a store for about 20 minutes. When I came back outside the device was reporting about 10*F higher than the car’s temperature sensor (the edge was reporting 22*F, versus the real 12*F).
So a day later I went out for a run I took the Edge 500 along for the journey and then eventually left it hanging outside along the route for about 30 minutes by itself. The outside temperature was well established at about between 0 and 5*F – just on the outside edge of the Edge 500’s documented range of 5*F-140*F.
At these temperatures the watch was pretty slow to react to much of anything – and the temperature still wasn’t right. It was still showing about 10*F too warm. Perhaps though I was pushing it a bit too much.
After returning back to weather above 5*F (Washington DC), I continued to see how the thermometer would react. And time and time again I found it takes about 10-12 minutes for things to settle out, depending on the temperature outside. Though I did find the temperatures still seemed a bit high in almost all cases (night or day).
So the manual is correct – it takes a bit of time. But I think that’s fine since once you get outside the fluctuations are minimal. Now the bigger issue here might be that I can’t seemingly depend on it since it never seems accurate.
Of course, the counterpoint to that is ‘So what?’. Meaning – does having a temperature reading EVER have any effect on my workout once I’ve started it? Sure knowing the weather is great prior to the workout – but once I’m on the bike either I’m hot, cold or good. I don’t need a computer to tell me that.
Oh – as for recording temperature data – here’s what it looks like:
You’ll notice the slow drop in temperature over the first 10-15 minutes, and then it evens out. Same with another one that’s a bit shorter to show the drops in temp:
Again, none of this is a huge deal in my mind as temperature recording to me simply falls in the category of “Oh…interesting.”
Data Field Setup:
When you setup the Edge 500 you have a number of options as to how many data fields you’d like to display, ranging from 1 to 8:
You can display up to three pages of data, with each page containing up to 8 data fields. The less data fields, the larger each field (in visual size).
When on the bike you can scroll through the three pages by simply pressing the lower left hand button. Alternatively, you can setup ‘Auto Scroll’ to automatically scroll through the pages for you:
Screen Readability:
This was one area where I’m not terribly impressed. I’ve tried it out in all different light types and depending on the angle of the sun and the screen it can be difficult to view because of the plastic surface reflecting back at you. The Edge 500 seems to have a different finish on it compared to other Garmin fitness devices, sorta a shiny finish. For example, see the following shot for what I’m talking about (note, that normally this is a camera issue that you can get rid of with a circular polarizer filter – but in this case, this was exactly what my eyes were also seeing…me):
Now, it’s possible this may be because of the low-track of the sun in the winter (when I’m testing it out), but I haven’t seen this is any of the other Garmin’s. To be fair when you’re seated on your bike, it’s not that hard to read. But, I found if I stood up or shifted front/back much then it goes out of the visible zone to the reflective zone.
Though for better or worse, when it’s cloudy or even rainy out – it’s MUCH easier to read.
Start Notice (automatic warning system):
Have you ever started a run or ride and then realize you forgot to start your timer? Or perhaps you stopped at a light and then forgot to resume (record) again until 28 miles down the road. Well, this thing is here to save you. It automatically displays a warning message if you’re moving…and the Garmin isn’t started. And it even works indoors too on a trainer as long as you have the wheel sensor configured.
You can configure the warning message settings as well:
This is perhaps my favorite new feature on the Edge 500. But by the same token, it’s also the one feature I’ve found doesn’t work consistently. I’ve seen on multiple occasions where it won’t warn me the unit isn’t recording. For example just on Sunday during the ride home from a 10K running race – I had stopped briefly to snap a few photos of the water droplets. When I started again I thought I had resumed the timer, but apparently not. I never received a warning message. You can see the massive gap in the track below between the two blue circles:
I’m hoping that some of these bugs will get worked out in future firmware revisions – as this feature is super-cool and has huge promise. I’m also really hoping to see it added to the Forerunner series and other Edge devices.
Auto Lap:
This feature automatically records a lap in the activity based on a set distance. By default the Edge 500 is configured to record a lap every 1 mile. Laps are useful when trying to view data for certain sets of times or distances. For example if you hammered for 1 mile, and then went easy for 1 mile, etc… In this case, the Edge 500 would automatically beep and mark each lap both on the GPS and in the recorded file as well.
You can change the distance for the auto lap feature in the menu system pretty easily:
Laps then show up in almost all sports applications, including Garmin Connect:
Personally I prefer to leave this off as I find I like to manually set the laps myself by simply pressing the lap button. These then better correspond to my actual workout. Also, keep in mind that software applications like Sports Tracks allow you to overlay virtual laps on top of any file. So for example I can tell it to simply overlay a lap every half a mile, and then change it and show it every quarter mile:
By doing it this way I don’t have a bunch of random laps recorded that I don’t know why I recorded them later on.
Auto Pause:
Auto pause is a pretty cool feature if you’re doing a lot of city riding where you frequently stop and start. What it does is automatically pause your recording activity when you stop, and then resume it when you start moving again. This is done by utilizing the GPS (or speed sensor depending on configuration) to determine if you’re actually going anywhere. When you stop, it pauses the timer:
And then when you resume again, it automatically starts the timer again. This ensures that your recorded data track doesn’t get skewed by all the stop and starts. Do note however that for some applications you don’t want this enabled as it will incorrectly skew data results. For example, when utilizing a power meter you’ll want to disable this because it will skew data results for TSS and Mean-Maximal data curves, such as those shown in WKO+ or Training Peaks. Below is an example of a mean-maximal data curve on Training Peaks:
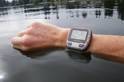
Water Resistance:
Unlike the Forerunner series, the Edge 500 (like the Edge 705) is not exactly waterproof from the standpoint of submerging it. But it is waterproof from the perspective of rain.
The key weak point in the design is the USB port on the back with a small rubber cover.
Now, interestingly the device is actually certified to IPX7 – which does mean full submersion for a specified period of time. In reality, I’m not sure I’d trust that.
There have been reports in the past with the Edge 705, waterproofing and its similar design. The design for the Edge 500 is basically identical. I personally managed to kill my Edge 705 when gel got into the USB port during a race, and while Garmin quickly and easily replaced it (through normal warranty repair), I was hoping to see a change here. I asked them why they stuck with this design instead of moving to a weather/water sealed 310XT design, and here’s the answer:
Rainmaker: “With respect to the USB port, why choose a liquid-susceptible connection (USB port) instead of just using ANT+ and a USB stick like the 310XT and 405?”
Garmin Engineers: “The ANT+ method seems to work better for watch type of devices that the user would continue to wear as they go back to their computer. The Edge bike computers do not have the same scenario as you would generally not bring the bike itself into close proximity to the computer. So the mass storage system seemed a better method for holding the larger files that could be generated from a cycling product.”
Backlight:
The Edge 500 uses an LED backlight to illuminate the screen in darkness. You can adjust both the contrast as well as the brightness using a simple menu system. The Edge 500 is pretty bright by itself, though not quite as bright as the Edge 705:
You also have a few options for how long the backlight stays on when you press the light button.
You can either set a specified time to remain on when you press the button, or you can just keep it on. I prefer to simply keep it on because then I’m not fumbling around trying to turn it on over and over again. The light uses a slightly different hue backlight than the Forerunner 305, instead matching the 310XT and 405 – so it’s a cleaner light that’s easier to read. A nice improvement there.
I also prefer to keep the backlight on when I’m indoors on a trainer, as then it makes the LCD screen really crystal clear to read.
Functionality that’s missing:
Frequent users of any of the either Edge or Forerunner series will notice a few things that are missing from the Edge 500:
– No Virtual Partner: This feature normally helps you pace against a little virtual partner to try and keep a more consistent pace in training or racing. I can see how given the device is primarily targeted at the cycling crowd and how you’d probably uses the virtual partner less there than in running.
– Ability to configure power zones on the unit itself (must be done via software): This feature allows you to set alerts if you fall below or exceed certain pre-specified zones or ranges for heart rate and power. However unlike the other units, you cannot set power or HR zones on the unit itself.
– Cannot utilize “Workouts”: This fairly common feature allows you to download workouts to your device and then combined with alerts it will basically walk you through a workout or race. I use this during races to help pace my by HR’s. For example, in the bike segment of a half-Ironman I usually have certain HR range for different sections. Not having this in the watch is a pretty significant loss for many folks. What’s even stranger here is that Garmin spent the time to update Garmin Training Center (GTC) to allow you to specify power alerts in workouts just two weeks ago on December 2nd. Given they almost never bother updating GTC (it’s old and crunchy) it’s strange to include this but not have workouts. [Update: This feature has been added as of February 23rd, 2010]
I asked Garmin to comment on a few of these as to why they were left out, and here’s what they had to say:
Virtual Partner Functionality (VP):
Garmin: “The VP works well with a course. Most riding does not use a steady state like the VP was designed [for] (except maybe TT’s). So that is the main reason why the VP is not in the device. It was designed to be a simpler device so this also reduces the page count.”
Rainmaker: And in this case, I generally agree with them here. While I’m all about features and functionality, I’d much rather them focus their development efforts on other areas that need attention than this. I’ve never used the VP feature in normal day to day or race situations for the bike (I have used it on the run however in the watches where it’s very useful. Just the simple reality that for most bike races except TT’s (like a triathlon) you’re racing against other people at the same time, instead of against the clock – so pacing via the VP isn’t really useful.
Workouts (missing feature):
Garmin: “This feature is planned for Q1 next year [2010] as a firmware update.”
Rainmaker: Simple enough answer I think. :) [Update: This feature has been added as of February 23rd, 2010]
Riding it on a trainer:
In addition to riding it outside, you can also ride it indoors with the GPS turned off. When combined with the cadence/speed sensor (detailed later on), you’ve got a full indoor trainer setup:
On the fly change of paired ANT+ accessories
One brief little change I want to point out because I think it’s cool is the ability to manually modify the paired accessories. This can be an issue if for some reason you need to re-pair your HRM strap or cadence sensor at the start of a race – where you’re in close proximity to everyone else. The new menu system allows you to manually modify the paired ID number if you know it, kinda a neat touch.
I suspect this issue manifested itself with Team Garmin and the team car, and being able to quickly re-pair power meters and sensors on a slew of closely located bikes without having to manually go through the entire pairing process. You can do this for HR, Cadence/Speed, and Power Meters.
Integration with Power Meter Devices:
Like the Edge 705 – one of the key draws for the cycling crowd is the power meter compatibility with ANT+ power meters. It’s one thing to simply record power data, but it turns out there’s quite a bit more to it than you might expect and having some additional features makes the difference between a ‘functional’ system and a truly usable one.
Here’s what the Edge 500 has with respect to power functionality:
– One second recording (1s): This is absolutely critical to correct interpretation of power data for analysis afterwards. What this does is record a power point every second instead of using any of the Smart Recording options. The Edge 500 automatically turns on 1-second recording when a power meter is connected. But it goes a step further – you can’t change it back to smart recording when a power meter is attached. So in this respect, it functions just like the 310XT where it keeps you from getting incorrect data for calculations like normalized power.
– Zero Averaging options: This option allows you to either include or exclude ‘zeros’ from averages. Say for example you’re coasting down a large hill that’s 5 miles long (like…Skyline Drive), in this case you could theoretically not pedal a single stroke and make it all the way down. In doing so your power output for that section would be zero (0). So if you exerted an average 200w going uphill, and then 0w going downhill, the average would be somewhere under 200w (depending on factors such as length of climb/descent, etc…). But, with zero averaging off the average would be 200w, because the 0w values would be ‘thrown out’. Now – while this may sound great from the standpoint of making your numbers look good – it’s actually really bad from the power analysis standpoint. So leave these options off to ensure you have consistent and usable data.
Do note that one difference here between the Edge 500 and the Edge 705 is that on the Edge 500 you can individually turn off both cadence zero averaging and power zero averaging – whereas on the Edge 705, it’s all or nothing for both. Further, on the Forerunner 310XT, you don’t have such an option at all.
– Calibration of power meters: Within the user interface you can calibrate the power meter using the calibrate button. In my case, I have a Quarq Cinqo (now discontinued) – so for me the easiest way to calibrate is to simply spin backwards a few rotations and I’m good to go. But for some power meters the process is a bit more involved. I tried to get a hold of a PowerTap demo wheel/unit from Saris to show how this works in real life, but they weren’t entirely interested…so you’ll have to go it on your own there.
– 3 second and 30 second display averaging: In my little mind, this is probably the most important function to be able to effectively use a power meter while riding the bike. The reason being that when you’re cycling the actual power output fluctuates quite a bit. One second it will show 202w, and the next it might show 185w, and the next it will show 220w, this is all due to a variety of factors and is entirely normal. What display averaging does is to ‘even it all out’ on the display so you can figure out how you’re actually doing. This was introduced back in August for the Edge 705, and was carried over to the Edge 500. Note that this does NOT affect the recorded data, which is still done at the 1-second interval.
On Garmin Connect, they support a very basic and rudimentary power data output that you can use to quickly look at your overall power profile. However, most serious cyclists will choose to use some other software application to do in depth analysis. Check out the software section above for more details on applications out there. Below is a screen capture from Garmin Connect for a single ride.
Finally, one little tidbit I’d like to point you in the direction of is this cool page put together that covers many different detail type items with respect to Garmin’s fitness line and using them with power meters.
Connecting and downloading data:
Once you’re all done riding it, it’s time to get the data onto your computer. The first step here is simply hooking it up to your computer via a standard USB cable:
After which, you’ll be shown a disk drive that’s labeled Garmin, making it almost identical to plugging in a little USB thumb drive.
Now, here comes the part that shouldn’t matter to most of the population – as you’ll use Garmin Connect or another software application to get the files off (see next section). Once you’ve plugged in the unit, you’re good to go with surfing to Garmin Connect.
But…for those of you that are technically curious – here’s the scoop on the file structure on the drive.
On the storage unit itself, the folder you really care about is the activities one. This one contains a .FIT file for each and every activity.
However…here’s where the goodness kinda stops. Unlike past versions, the Edge 500 doesn’t use TCX files. Instead it uses it’s native .FIT file format, which is an encapsulated file that’s not readable with anything like Notepad, as here’s what you get:
I asked Garmin why they changed over to the .FIT files from the TCX files, and here’s what they had to say:
“The reason was that the .Fit is a more flexible system that allows us to add or remove addition data items in a simple manner. The Edge 500 is a mass storage device so there is no intermediary to do the conversion. If you did it on the device you would end up writing both .fit and tcx which would balloon the space requirements. .Fit is smaller and easier to transfer to GC also. The 310XT does not do the conversion. Garmin Ant Agent is converting the .fit from the 310XT to a tcx format so there would be some existing compatibility with third parties. We like the .fit format and hope more third parties will start processing this format.”
To further prove why the TCX format isn’t the wave of the future, I had asked a question about why when you export from Garmin Connect to TCX, you don’t get the temperature data points:
“This is a limitation of the TCX schema. There was no tag for temperature since we did not have it before. So to add it would mean extending the schema. This is the advantage of .fit. When new data is added the system can handle it. With TCX there would need to be extensions added every time we wanted to change the data.”
I understand where they are going here, and other companies appear to be following them. Training Peaks (which runs the TrainingPeaks.com site and the WKO+ software) are already working to offer .FIT file format compatibility. Now, to be clear, you can still export back to TCX format – which we’ll talk about in a second – in the event you have an application that needs it.
But for native access you’ll have to use an application that can read the .FIT, which takes advantage of Garmin’s Software Development Kit to do so.
Ok, now we’ve got the thing all plugged in, let’s get on with uploading the workouts…
Garmin Connect (GC) is Garmin’s free online activity management site. Introduced around the same time as the Forerunner 405, it’s the successor to the old Motion Based site, and it aims to be the one-stop-shop for anything Garmin.
After connecting your Edge 500 to your computer, you can quickly and easily upload all new activities into the system:
Once you’ve put them in GC you have a ton of options for viewing the data. For example, you can look at your activity view to see which activities you may want to drill down into:
After you’ve selected an exact activity, you’re given this overview:
From there you can utilize the tabs along the bottom to change to different areas of interest – such as elevation, Heart Rate, Power or Cadence – as well as temperature, which is new to the Edge 500.
It’s on this main activity page that you’ll also see the option to export out a TCX file – which can be imported into other legacy programs:
One cool new feature just added earlier today is the ability to now see your routes in Google earth 3D mode – directly within the browser window. Here’s a ride I did past the Jefferson Memorial this weekend:
While Garmin Connect offers a good simplistic view of your activities, it also can help you keep track of your basic day to day health information as well:
Now, what’s really cool here is that if you have one of them new fangled Tanita BC-1000 scales that actually wirelessly integrates with Garmin Connect, you can send a lot of that data wirelessly straight to GC. I reviewed this unit recently – in depth – so you’ll want to check out that review there. Do keep in mind that unlike the 310XT, the Edge 500 will not receive data directly from the BC-1000 scale – so be aware of that. As for the scale itself, I don’t have any experience with it – but the fine folks at Tanita actually called me up just this evening to get a demo unit to me, so before long I’ll update this section with more info on that front.
Last but not least, you can do a fair bit of simple reporting within GC, such as sorting by total activities or types of activities:
As I’ve said in the past, GC is a great solution for a broad set of customers who want easy access to information about their sports activities. While it’s great for that purpose, I generally find it a bit too simplified for my own day to day use, as I prefer to be able to drill down in more detail to different areas of my workouts. That said – given it’s free…you really can’t go wrong.
Garmin Training Center:
This software is the old school version of Garmin Connect that’s installable on your PC. The catch here is that aside from minor updates to ensure compatibility with new products (such as the Edge 500), the software is pretty much a 1990’s era application that should only be used if you absolutely must. Garmin has classified it as ‘end of life’, and it doesn’t even come on the little CD with the Edge 500 (unlike previous versions where it was automatically installed).
In short though it allows you to not only download – but also upload activity information to and from the Edge 500.
Once the information is in GTC, you can view basic details about your ride:
In addition, GTC offers one of the most important options – which is the ability to send a ‘Course’ to your Edge 500. This allows you to then ride the course with information on where to go and what’s upcoming.
The above is actually a course of the Longhorn 70.3 bike course that my Coach created using MapMyRide for me to ride, and then I simply transferred it into the unit. I use the option to export it to the right Garmin format (below), and then from there I can import into GTC and then send it to the device.
One important note – if you do indeed use GTC with the Edge 500 be sure you download the most recent version dated at least December 2nd, 2009. This version includes all the necessary updates to support the Edge 500. So, if you have it already installed from a different Garmin product go ahead and get the quick update. The update does actually add a few itty-bitty tiny non-Edge 500 features such as now showing power information – so it’s worthwhile if you’re a 310XT and Edge 705 user as well. You can grab that version here.
Training Peaks (TP) is the application I use day to day to get workouts from all my various training devices (like the Edge 500) to my coach. Training Peaks has two pieces – the first is the Device Agent, which sits on your local computer. And the second is the website – which is where you do all your data viewing. After starting the device agent (version 3.0) you’ll notice a new drop-down which includes support for the Edge 500:
After that you press ‘Open Files’ to go ahead and let the TP agent software open the files directly from the Garmin disk drive.
After pressing ‘Open’, and then pressing ‘Save’, it will automatically transfer your workout to the Training Peaks website. You can press the ‘Login’ button to simply open up a new browser window and log you into the site.
From there you can go ahead and transfer it to Training Peaks where you can analyze your ride in more depth.
This isn’t quite out yet – but when it does come out, it will support the Edge 500 natively. As of today, WKO+ version 2 doesn’t support the Edge 500 and requires you to do an export to a TCX file.
But just as a bit of background, WKO+ is the installable version of Training Peaks that offers incredibly detailed analysis of workouts. Heavily focused on managing workouts with power meter data, WKO+ is pretty much the gold standard when it comes to detailed power file analysis.
Sport Tracks is hands down my favorite sports management application out there, mostly because it’s free. The only trick is, it doesn’t exactly work natively yet with the Edge 500. This is because the Edge 500 uses the .FIT format (different from the .TCX format of the past), which Sport Tracks doesn’t yet support (quick side note – .FIT is different than .FITLOG, which ST does support).
That said, you can export the TCX files from both Garmin Training Center (GTC) and Garmin Connect (though, ST doesn’t correctly parse the power export from GC). Once you do that, you can quickly and easily import them into Sports Tracks:
Once you’ve imported them into Sport Tracks, you have a TON of options for looking at the details of the ride:
There’s also a TON more you can do with Sports Tracks, check out this post I did a few weeks back on all the cool free plug-ins and extras.
Accessories:
The Edge 500 has a slew of accessories that you interoperate with it. The majority of these are made by Garmin, but one category (power meters) requires you to purchase a 3rd party device. Let’s go through the most common ones first:
Extra Mounts:
In the event you need more bike mounts than the two provided, you can pickup this bike mount kit for a very reasonable $10. It includes another two mounts, and another 14 rubber bands.
Given I wrote a ton about the bike mount kit above earlier, I’ll save you from reading about it again and just refer you to that section.
The Edge 500 comes in two versions – one with a HR monitor and cadence/speed sensor – and one without those two accessories. If you decide to get the one with the HR strap combo, you’ll receive the below strap:
This is the standard old school style strap that Garmin’s been using and/or including with their fitness devices for years. So if you already have one of these straps, you’re good to go. Now, interestingly Garmin did not include the newer Premium Heart Rate strap that came out this past summer, instead opting to include the older ones. For comparison, here’s the premium one next to the older style one:
The major difference between the two is the rubber strap on the older one versus the soft fabric almost all the way around on the newer one. Now, the good news here is that you can still simply buy the new soft premium HR strap separately if you’d like. I just think they should have included that one instead – especially given the premium you pay for the boxed version that includes it. Its retail price is $100 higher (strap + cadence/speed sensor).
If you don’t purchase the regular HR strap as part of the kit, it costs $60 on Garmin’s site, or $30 on Amazon. The premium one costs $70 on Garmin’s site, or $45 on Amazon. As you’ll see in the next section – you could pickup the premium HR strap for $45, plus the cadence sensor for $40 on Amazon and save a bit compared to the bundled version with the old school strap.
Cadence/Speed Meter:
Within the more expensive version of the Edge 500 you’ll find a cadence/speed sensor. The cadence sensor reports back your cadence over the course of a ride, in RPM (revolutions per minute). For example, here’s a simple graph of what one looks like – those drops in the graph is where I stopped pedaling for a second, such a coasting:
In addition to cadence, by using the little wheel magnet that’s included you can get speed and distance while indoors on a trainer. Or if you lose GPS reception such as when in a tunnel. Below is a quick photo outline of the three major pieces of the speed/cadence kit:
The kit is basically three pieces. The first piece is the wireless sensor and transmitter. This sits on the frame near the back wheel using included zip ties and pickups up rotations from both the wheel, and your crank (where your pedal is attached):
Next up is the little wheel magnet – this simply flies past the sensor every rotation, which is then recorded by the Edge 500 and using a mathematical calculation based on wheel circumference, your distance is determined:
Last up is the cadence magnet. This tiny little thing has adhesive backing and zip-ties to your pedal crank to record every time your pedal goes around once – thus producing RPM’s and thereby your cadence. Note that you’ll want to ensure you have this thing well zip-tied to your bike on a clean surface, otherwise it’s susceptible to loss (not that I’d know anything about that…).
This whole setup can be found on Garmin’s site for $60, or Amazon for $39. Personally I think it’s probably the most important accessory you can get for your Garmin system, as it helps you to utilize cadence in training and racing, but also allows you to record all those nice winter trainer rides you’re doing…you are doing them…right?
Power Meter
While Garmin doesn’t make any power meters themselves, they do provide compatibility with any third party companies that create ANT+ power meters. For example, if you have a PowerTap or a Quarq powermeter– you can pair it with the Garmin 500 and get power data displayed on and recorded on the Edge.
See the section above for more detailed info on power recording and display with the Edge 500.
Below is a quick photo of what the Quarq Cinqo looks like. But to understand power meters and how they all work, check out this Power Meters 101 primer post I wrote a few months ago to get a good understanding of their value.
Final Summary
Comparison Chart between models:
If you’re looking at all the options out there on the Garmin line, I put together this handy little chart to try and boil down some of the relevant features from the ‘marketing features’.
It’s really hard to condense down the massive number of features within these products into a simple pro’s and con’s section. But…I’ve tried to highlight some of the key areas here that you’re probably interested in that stand out the most in my mind when I think about this device:
Pro’s:
– Small Form factor: There is simply no other product on the market, or near the market that has all of the features of the Edge 500 packed into it. The next closest thing is the 310XT, though that lacks some of the cycling specific features that serious cyclists will take advantage of.
– Super lightweight: Weighing less than a single egg at 2oz, this unit won’t add much weight to your setup. And, as I always remind myself – if I really need to reduce the overall weight of my bike computer, I can likely find that weight on my rear via a reduction of cupcakes.
– New mount system: I really like the ease and simplicity of the new mount system. I can easily swap it between bikes in a matter of seconds without any tools or zip-ties. Plus, it locks quite securely and hopefully will in the long term keep from any loss of unit issues. As a bonus, the mount is completely compatible with the 310XT mounts and devices, so you can swap things around there a bit.
– Barometer based altimeter, and temperature monitor: Having a barometer based altimeter is much better than a GPS based one, as it’s far more accurate in consumer applications. And the temperature monitor (even if a bit slow) – is a nice add-on.
– Compatibility with ANT+ devices – in particular – power meters. More and more cycling devices and accessories are going the way of ANT+, and this spring will bring a tidal wave of new devices (including newer, cheaper power meters).
Con’s:
– Hard to read screen due to glare: As noted earlier, I’ve had some issues with actually reading the screen depending on your body position and the sun’s glare. With overcast days or indoors it’s not an issue, but on sunny days you have a very limited viewing range.
– Loss of/Missing activity data: I’ve had issues in the past with the Edge 705 that seemed to have been resolved in recent months with new firmware, and I was REALLY hoping this would be a thing of the past. But alas, just five hours before I went to publish this I ran into a single lost workout. After finishing the workout and holding reset as normal to save it, I went ahead and connected it to my computer…and found nothing. The workout was simply gone. I rang up normal Garmin support, but they weren’t able to get it back. Because I also work in the computing field, I tried using some tools to recover lost & deleted files, but that too resulted in no love. Note that a new firmware was also released today (Dec 14th, version 2.10) – so it’s entirely possible this issue has already been addressed in that release.
Conclusion:
In conclusion, I think your decision on whether to purchase the Edge 500 really comes down to your user profile.
For the serious or competitive cyclist the Edge 500 gives you a very lightweight and small platform to record your training or race data in the same form factor that old school bike computers have historically done for decades. The key difference is now you get all the data that up until now have required much larger devices. The lower price point (compared to other Edge and Forerunner units) is also very attractive for anybody with a power meter. There are some other options coming onto the market here shortly, but none of them have the same feature sets for this price point. So for you – I’d say go for it!
For the triathlete the Edge 500 gives you the capability to record and display your bike training and race data on a small form factor device. However, it isn’t a one-size-fits-all device like the Garmin Forerunner 310XT. It’s designed as a uber-low-profile device for cyclists, so while it would make a great addition to your tri bike, you should keep in mind that you may want additional features for those 112 mile long training rides (such as mapping, or the ability to run-off the bike and simply change recording modes) or dozens of miles of running. As such, for a triathlete I’d really recommend looking at the 310XT as your primary device.
Lastly, for the casual cyclist. This is the cheapest GPS based ANT+ recording device out there. While there are a few other products coming to the market shortly, one doesn’t do GPS (Joule) and the other doesn’t actually record data (Bontrager). The third device doesn’t display data while your riding (collecting data only, Qollector). One thing to keep in mind though is that if you’re a casual cyclist it’s unlikely you’d have a power meter, so looking at some of the cheaper options (like the Garmin Forerunner 305 – about half the price of the Edge 500 these days) may make more sense.
Hopefully you found this review useful. At the end of the day, I’m an athlete just like you looking for the most detail possible on a new purchase – so my review is written from the standpoint of how I used the device. Also, I took a lot of pictures over the course of writing this review – 418 of them to be exact. And I know that a lot of folks (like myself) like to see different angles of the product used in different ways. So instead of just leaving them on my hard drive forever, I’ve taken a fair chunk of them and put them up in this little gallery above for you to be able to browse through.
Found this review useful? Or just want a sweet deal?
Hopefully you found this review useful. At the end of the day, I’m an athlete just like you looking for the most detail possible on a new purchase – so my review is written from the standpoint of how I used the device. The reviews generally take a lot of hours to put together, so it’s a fair bit of work (and labor of love). As you probably noticed by looking below, I also take time to answer all the questions posted in the comments – and there’s quite a bit of detail in there as well.
I’ve partnered with Clever Training to offer all DC Rainmaker readers exclusive benefits on all products purchased. You can read more about the benefits of this partnership here. You can pickup the Edge 500 through Clever Training using the link below. By doing so, you not only support the site (and all the work I do here) – but you also get to enjoy the significant partnership benefits that are just for DC Rainmaker readers. And, since this item is more than $75, you get free US shipping as well.
Additionally, you can also use Amazon to purchase the unit or accessories (though, no discount on either from Amazon). Or, anything else you pickup on Amazon helps support the site as well (socks, laundry detergent, cowbells). If you’re outside the US, I’ve got links to all of the major individual country Amazon stores on the sidebar towards the top.
As you’ve seen throughout the review there are numerous compatible accessories for the unit. I’ve consolidated them all into the below chart, with additional information (full posts) available on some of the accessories to the far right. Also, everything here is verified by me – so if it’s on the list, you’ll know it’ll work. And as you can see, I mix and match accessories based on compatibility – so if a compatible accessory is available at a lower price below, you can grab that instead.
Thanks for reading! And as always, feel free to post comments or questions in the comments section below, I’ll be happy to try and answer them as quickly as possible. And lastly, if you felt this review was useful – I always appreciate feedback in the comments below. Thanks!
Finally, I’ve written up a ton of helpful guides around using most of the major fitness devices, which you may find useful in getting started with the devices. These guides are all listed on this page here.
I swim, bike and run. Then, I come here and write about my adventures. It’s as simple as that. Most of the time. If you’re new around these parts, here’s the long version of my story.
You'll support the site, and get ad-free DCR! Plus, you'll be more awesome. Click above for all the details. Oh, and you can sign-up for the newsletter here!
Here’s how to save!
Wanna save some cash and support the site? These companies help support the site! With Backcountry.com or Competitive Cyclist with either the coupon code DCRAINMAKER for first time users saving 15% on applicable products.
You can also pick-up tons of gear at REI via these links, which is a long-time supporter as well:
With TPC (The Pro's Closet), you'll save $40 on purchases over $200 with coupon code DCRAIN40 for tech and non-tech purchases!
Alternatively, for everything else on the planet, simply buy your goods from Amazon via the link below and I get a tiny bit back as an Amazon Associate. No cost to you, easy as pie!
You can use the above link for any Amazon country and it (should) automatically redirect to your local Amazon site.
Want to compare the features of each product, down to the nitty-gritty? No problem, the product comparison data is constantly updated with new products and new features added to old products!
Wanna create comparison chart graphs just like I do for GPS, heart rate, power meters and more? No problem, here's the platform I use - you can too!
Think my written reviews are deep? You should check out my videos. I take things to a whole new level of interactive depth!
Smart Trainers Buyers Guide: Looking at a smart trainer this winter? I cover all the units to buy (and avoid) for indoor training. The good, the bad, and the ugly.
Check out
my weekly podcast - with DesFit, which is packed with both gadget and non-gadget goodness!
Get all your awesome DC Rainmaker gear here!
FAQ’s
I have built an extensive list of my most frequently asked questions. Below are the most popular.
You probably stumbled upon here looking for a review of a sports gadget. If you’re trying to decide which unit to buy – check out my in-depth reviews section. Some reviews are over 60 pages long when printed out, with hundreds of photos! I aim to leave no stone unturned.
I travel a fair bit, both for work and for fun. Here’s a bunch of random trip reports and daily trip-logs that I’ve put together and posted. I’ve sorted it all by world geography, in an attempt to make it easy to figure out where I’ve been.
The most common question I receive outside of the “what’s the best GPS watch for me” variant, are photography-esq based. So in efforts to combat the amount of emails I need to sort through on a daily basis, I’ve complied this “My Photography Gear” post for your curious minds! It’s a nice break from the day to day sports-tech talk, and I hope you get something out of it!
Many readers stumble into my website in search of information on the latest and greatest sports tech products. But at the end of the day, you might just be wondering “What does Ray use when not testing new products?”. So here is the most up to date list of products I like and fit the bill for me and my training needs best! DC Rainmaker 2023 swim, bike, run, and general gear list. But wait, are you a female and feel like these things might not apply to you? If that’s the case (but certainly not saying my choices aren’t good for women), and you just want to see a different gear junkies “picks”, check out The Girl’s Gear Guide too.